HARRIS TR-398-A2 User Manual sofia
HARRIS CORPORATION sofia
UserManual.wiki
>
HARRIS
>
TR 398 A2 User Manual
exhibit 8 user manual
Navigation menu
Upload a User Manual
Namespaces
Wiki Guide
HTML
PDF
Info
Views
User Manual
Discussion / Help
Navigation
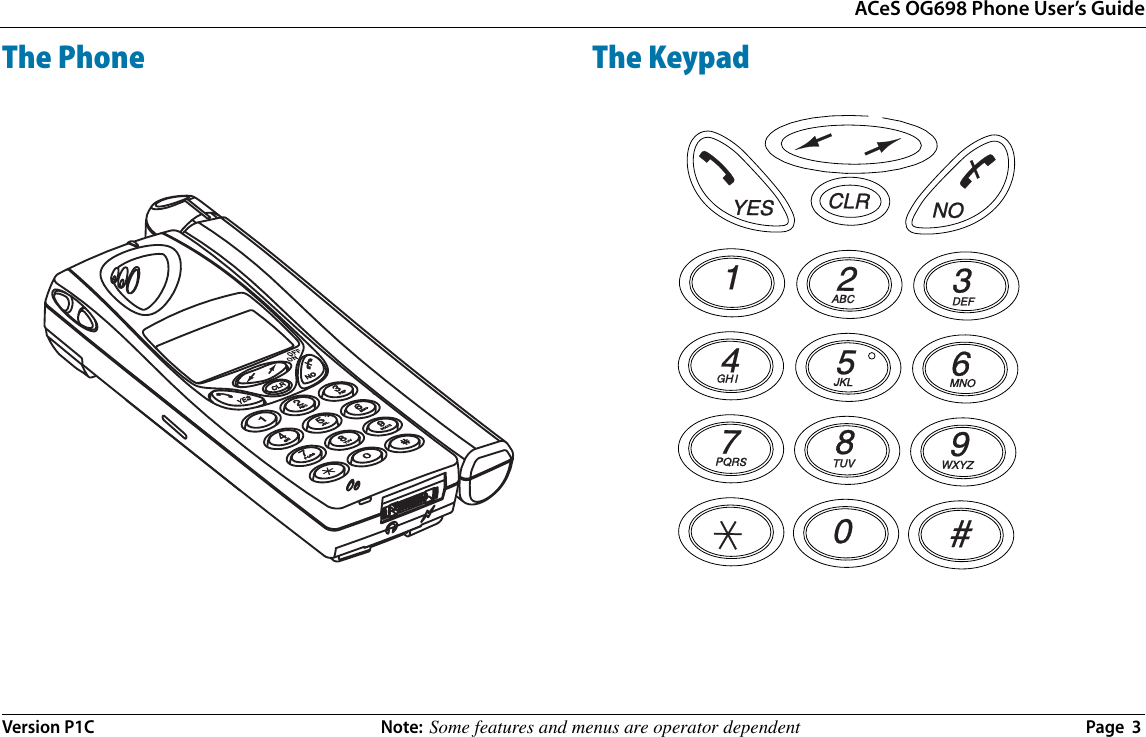
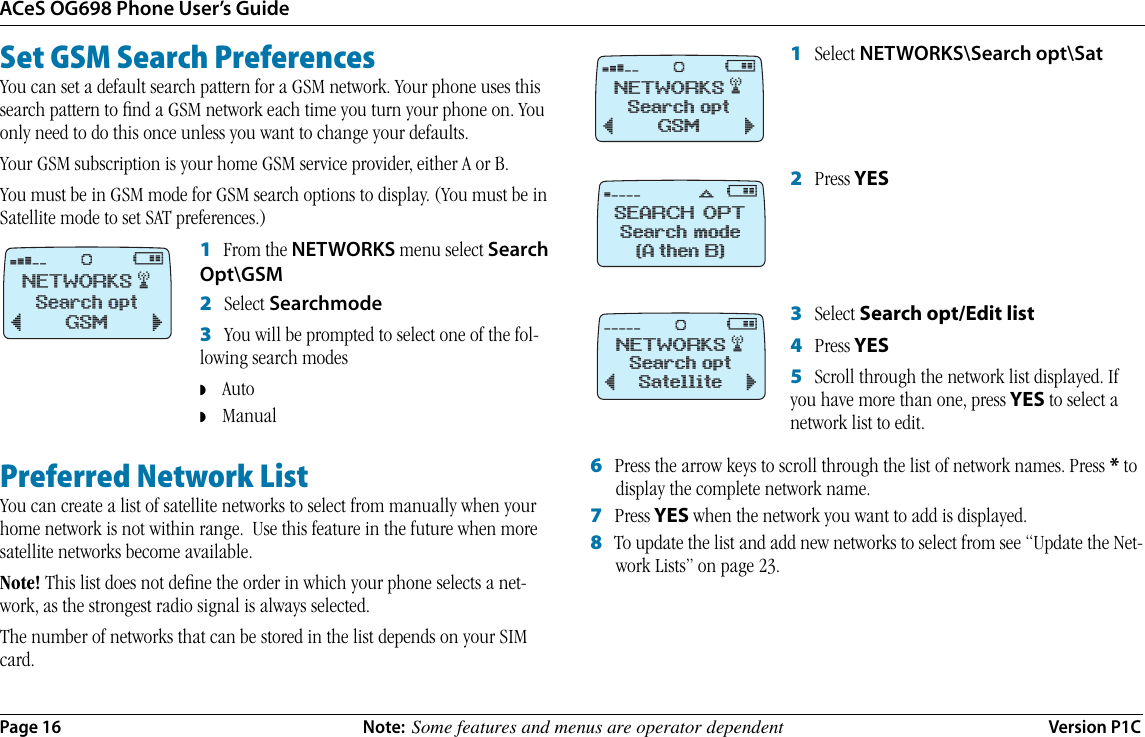
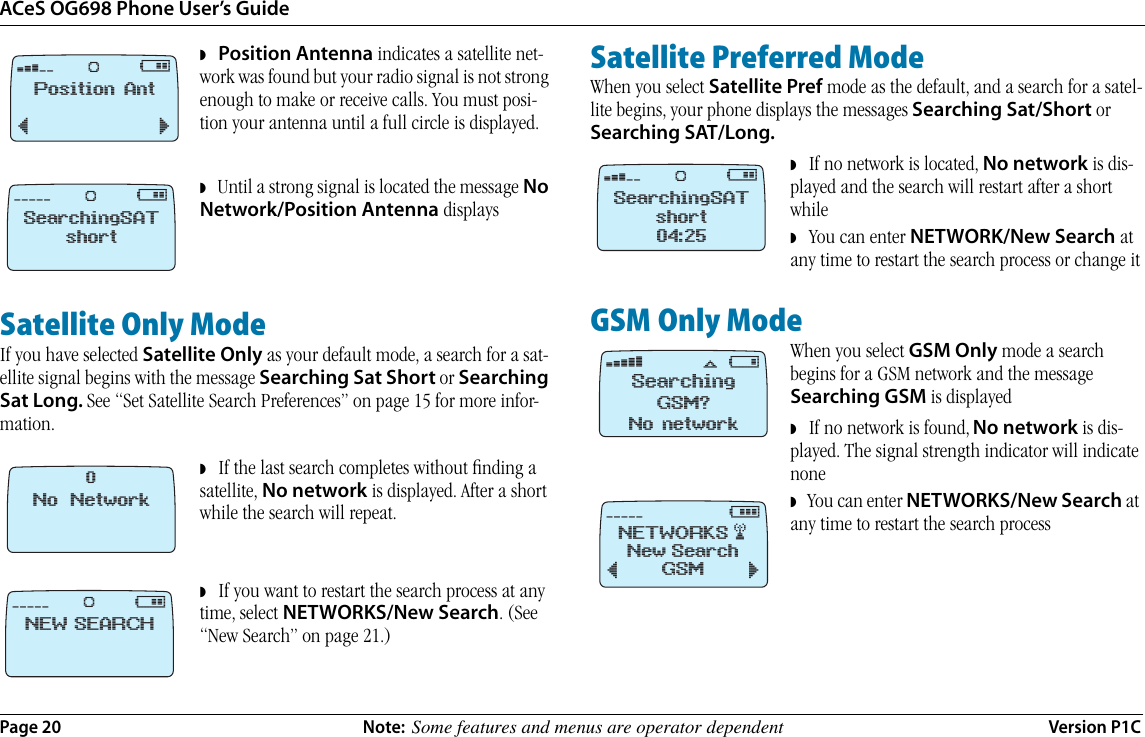
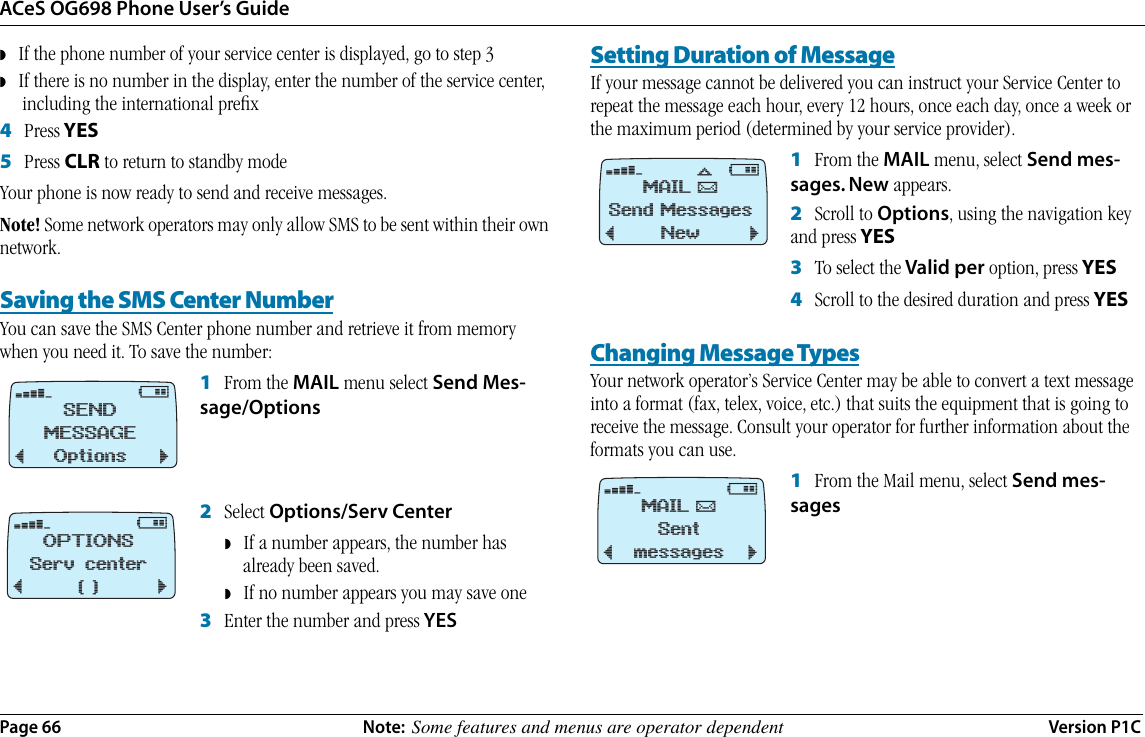
![ACeS OG698 Phone User’s GuideVersion P1C Note: Some features and menus are operator dependent Page 11 The menus are arranged in a continuous loop which you move through with the YES, NO, CLR and Navigation keys.To select a menu or make a setting:1 Press the navigation key to the until you reach the desired menu or function2 Press YES to enter the menu or to select the function3 Press the LEFT or RIGHT navigation key to find the desired submenu 4 Press YES to enter the submenu or to confirm the settingNote! If you do not press any key for 60 seconds, the phone will return to standby.Display Text and SymbolsWhen you navigate the menus the following indications apply:◗ Uppercase letters indicate the menu or function selected◗ Text within brackets ( [ ] ) indicates the current setting for the function dis-played ¯ and ˘ indicate you can scroll through more options with the navi-gation keyIndicators in the displaySee the table “Indicators in the Display” on page 81 for examples of symbols used in the display.Navigating the Menu SystemKey Name and functionNavigation Key: Press right or left to activate menu mode and scroll through menus.YES key: Answers a call, turns phone on, selects a menu or function, or sends a call when digits are dis-played. NO key: Ends a call, turns phone off, backs up one level and/or leaves a setting unchanged, clears the display if pressed while digits are on the display.Clear key: Takes you back to the standby menu. If pressed during an incoming call or call pending noti-fication, it mutes the ringer.](https://usermanual.wiki/HARRIS/TR-398-A2/User-Guide-32910-Page-15.png)
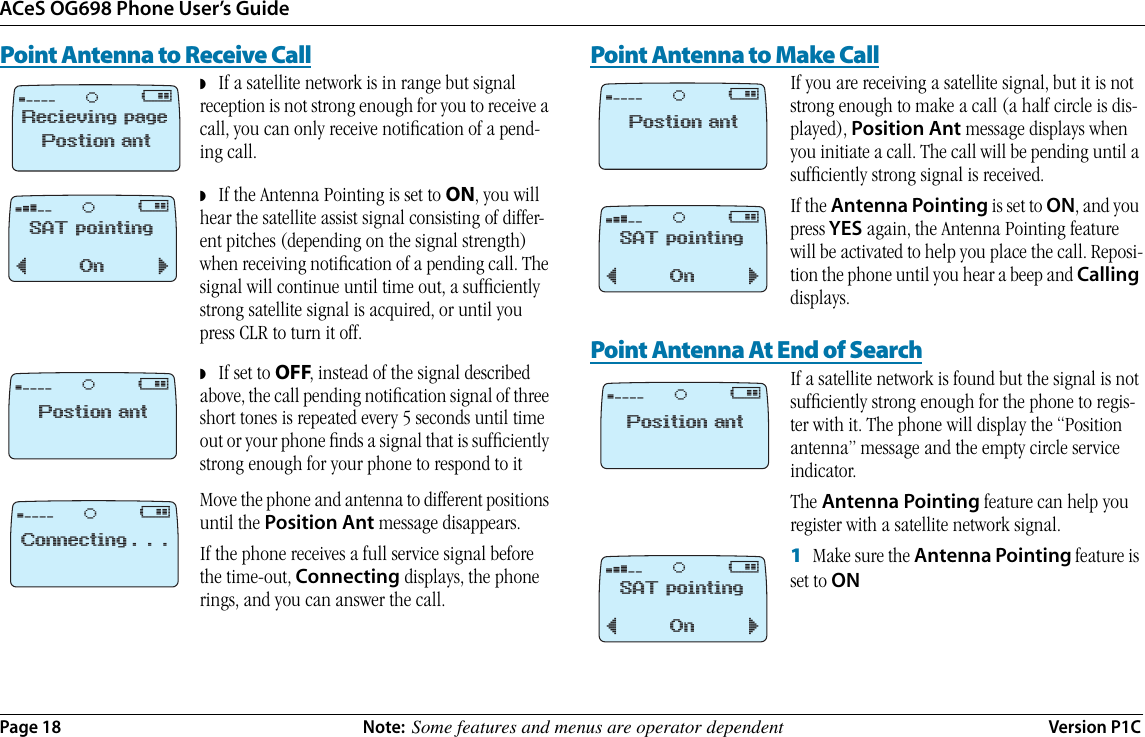
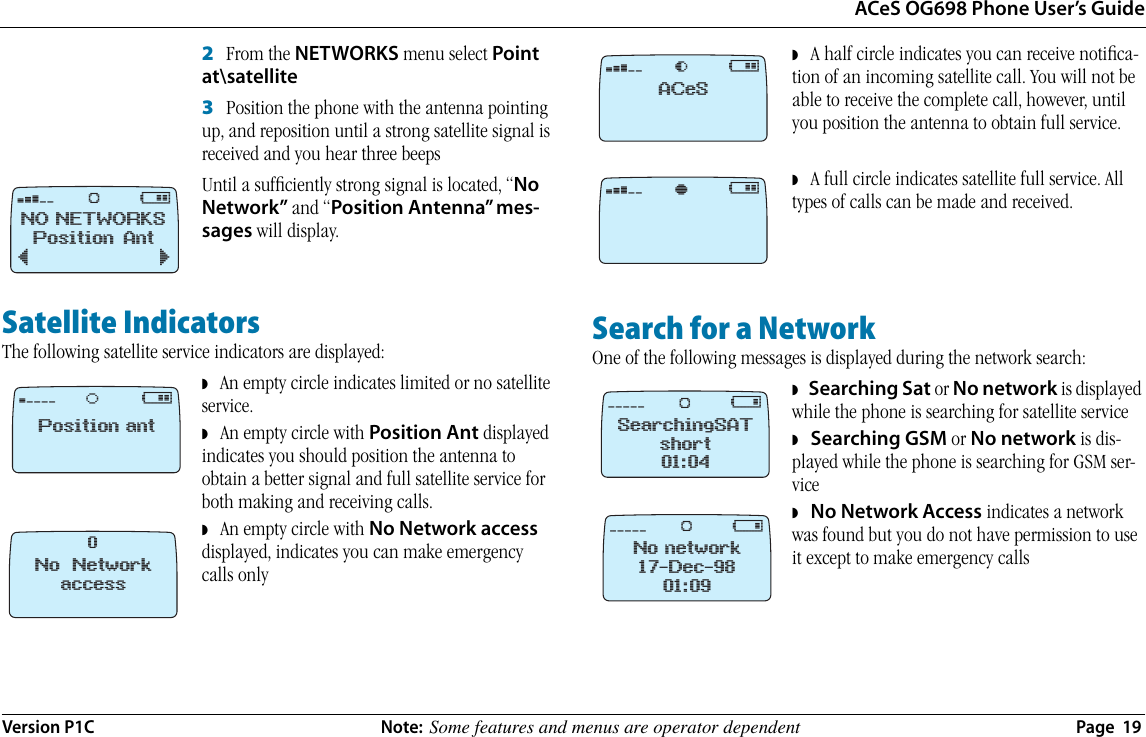
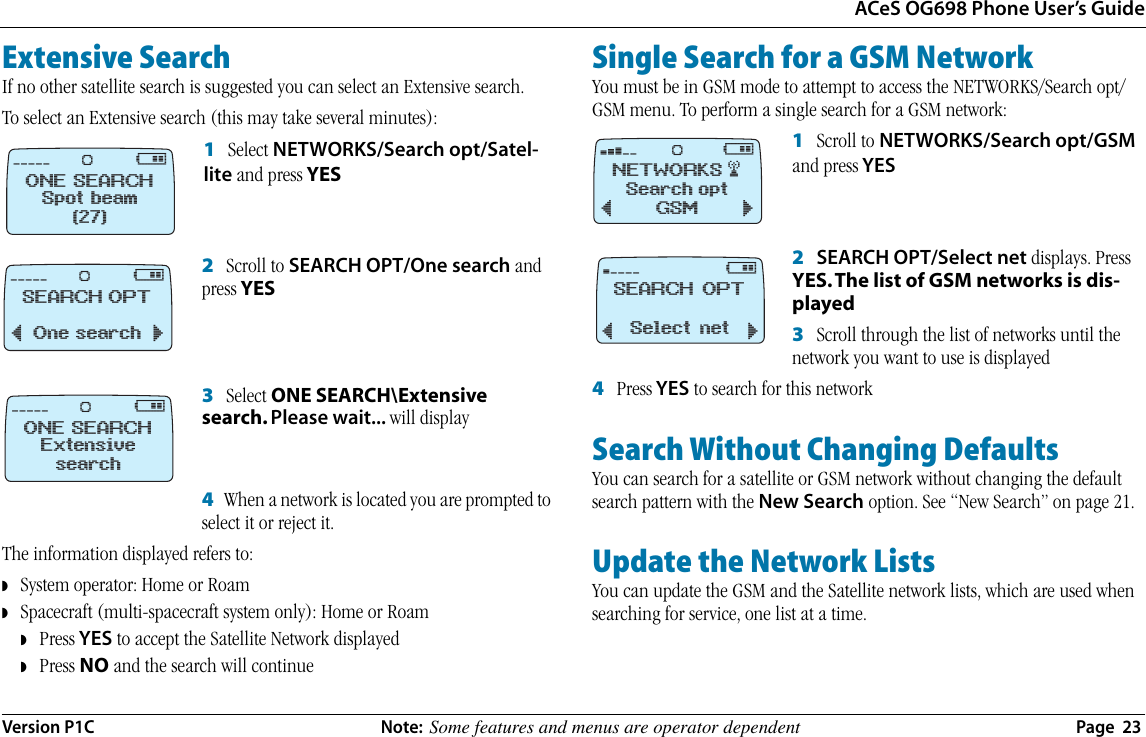
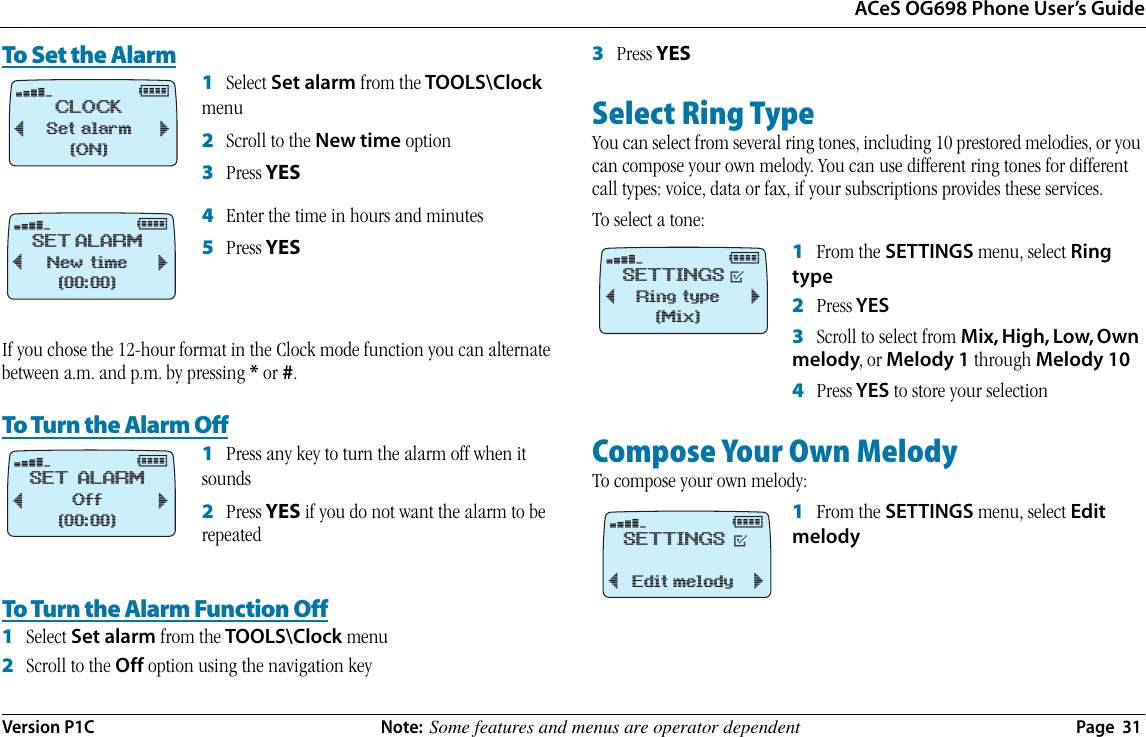
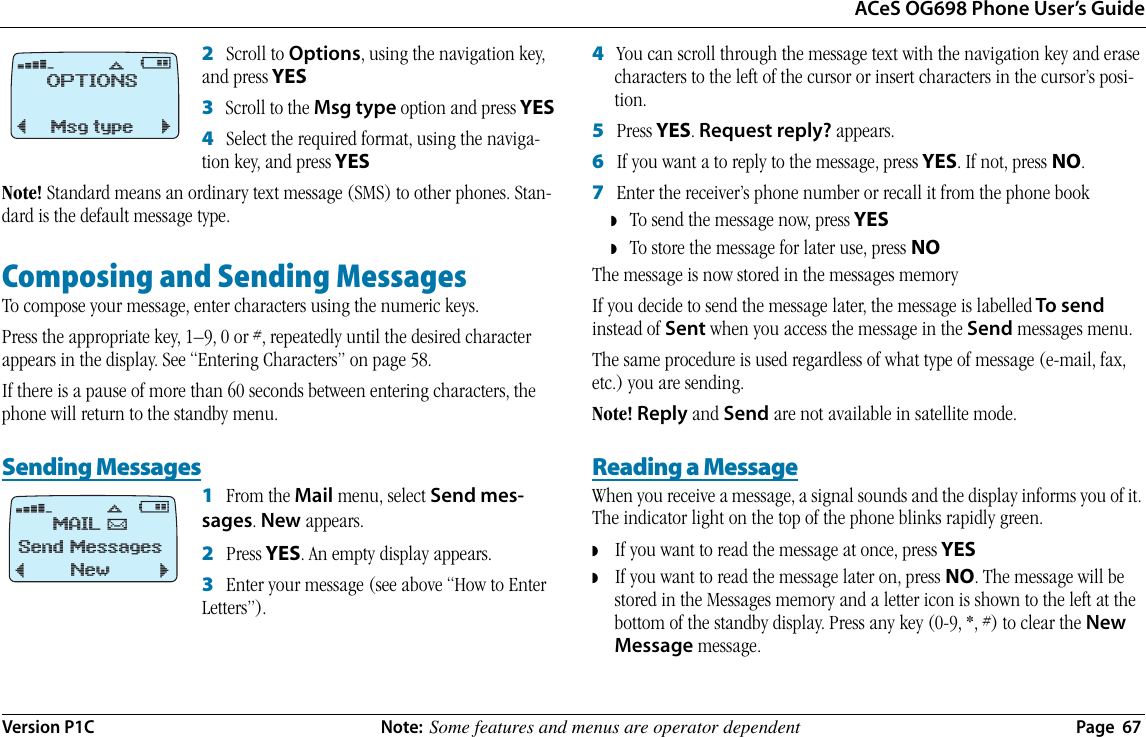
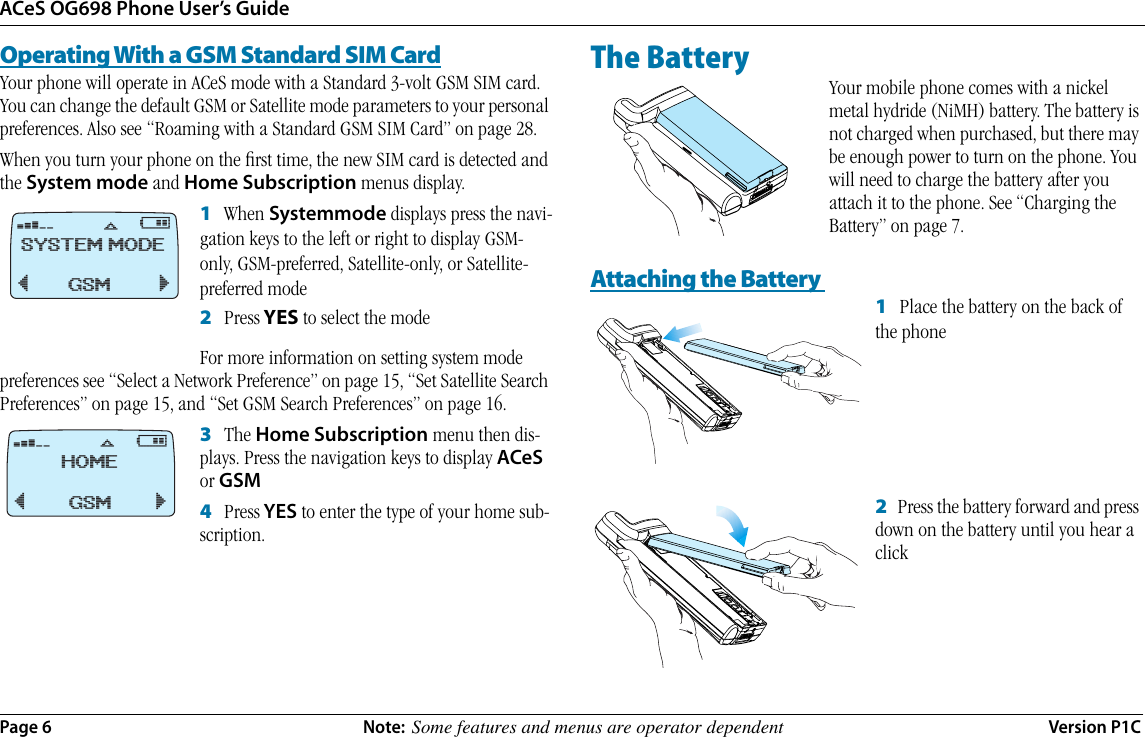
![ACeS OG698 Phone User’s GuidePage 14 Note: Some features and menus are operator dependent Version P1CSet ClockYour phone displays the time when in standby mode. During a call, it displays the time elapsed since the call began. You can also set other clock-related functions such as date, time and date format and the alarm. See “Time and Date” on page 29.To set the time:1 From the TOOLS\Clock menu select Set clock 2 Enter the time in hours and minutesIf Clock/Clockmode is set to AM/PM, you can switch between AM and PM by pressing * or #.3 Press YESSet Satellite Antenna PointingWhen the satellite signal is not strong enough for the phone to receive calls or register with the network, the Antenna Pointing feature can sound a signal that will assist you with positioning the antenna when receiving a call. See “Point Antenna” on page 17.To activate the antenna pointing feature:1 Scroll to display SETTINGS\Point antenna\ON2 Press YES to enable the featureTo deactivate the Antenna Pointing feature:1 Scroll to display SETTINGS\Point antenna\OFF2 Press YES ◗ If set to ON, you will hear the satellite assist signal consisting of different pitches (depending on the signal strength) when receiving notification of a pending call. The signal will continue until time-out or a full satellite signal is acquired, or until you press CLR to turn it off.◗ If set to OFF, instead of the signal described above, the call pending notifi-cation signal of three short tones is repeated every 5 seconds until timeout or your phone locks onto a signal that is strong enough for your phone to respond to it◗ If set to ON, you will see the display shown at the left when antenna pointing assistance is needed.The volume for the Antenna Pointing signal is the same as the ring volume. To change the setting see “Set the Ring Signal Level” on page 34.¤ @flCLOCK(Set clock)[08:35]¯˘SAT pointing‹ @Onد˘](https://usermanual.wiki/HARRIS/TR-398-A2/User-Guide-32910-Page-18.png)