Manual
AGES
5+
90324/90327 Asst.
(O) (
I
)
RIGHT
LEFT
(O) (
I
)
PRODUCT DOES
NOT CONVERT.
x6
1.5V AA or LR6 size
Phillips/cross head screwdriver (not included) needed
to insert batteries.
NOT INCLUDED
ALKALINE BATTERIES REQUIRED
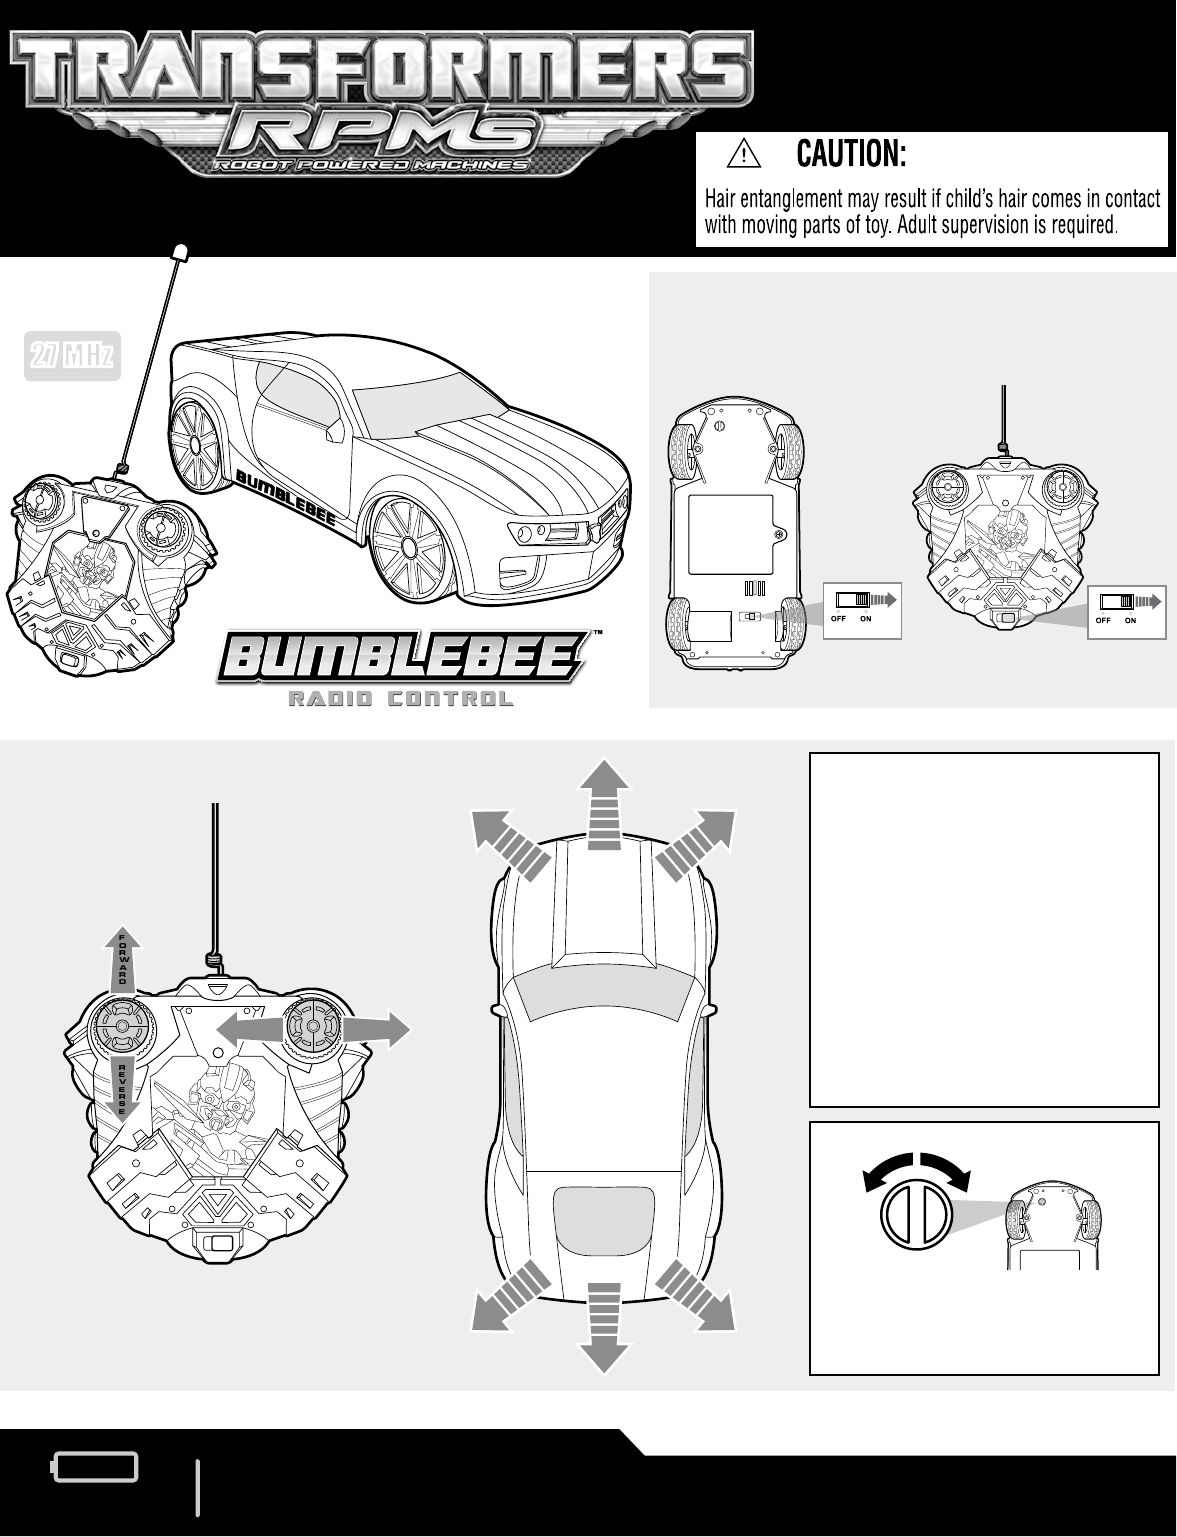
POWER SWITCH
Switch Remote and Vehicle to ON
for the full range of features.
DRIVING VEHICLE
VEHICLE
REMOTE
™
TRANSFORMERS.COM
27 MHz
Do not operate your vehicle on the
street or on wet surfaces.
If your vehicle is not responding to the
remote:
> Make sure both the vehicle and
remote are turned ON.
> Move the remote closer to the
vehicle.
> You may be experiencing
interference from other household
items, move away from the source
of interference and try again.
> Replace the batteries in both the
vehicle and remote.
Using a flat head screwdriver, turn the adjustment
knob on the bottom of your vehicle.
> If the vehicle is pulling to the left, turn the knob
clockwise.
> If the vehicle is pulling to the right, turn the knob
counterclockwise.
TO ADJUST STEERING:
P/N 6997690002
FCC STATEMENT
This device complies with part 15 of the FCC Rules. Operation is subject to the following two conditions: (1) This device may not cause harmful interference,
and (2) this device must accept any interference received, including interference that may cause undesired operation.
This equipment has been tested and found to comply with the limits for a Class B digital device, pursuant to part 15 of the FCC Rules. These limits are designed
to provide reasonable protection against harmful interference in a residential installation. This equipment generates, uses and can radiate radio frequency
energy, and, if not installed and used in accordance with the instructions, may cause harmful interference to radio communications. However, there is no
guarantee that interference will not occur in a particular installation. If this equipment does cause harmful interference to radio or television reception, which can
be determined by turning the equipment off and on, the user is encouraged to try to correct the interference by one or more of the following measures:
• Reorient or relocate the receiving antenna.
• Increase the separation between the equipment and receiver.
• Consult the dealer or an experienced radio/TV technician for help.
CAUTION: Changes or modications not expressly approved by the party responsible for compliance could void the user’s authority to operate
the equipment.
© 2009 DreamWorks LLC and Paramount Pictures Corporation
© 2009 Hasbro. All Rights Reserved.
TM & ® denote U.S. Trademarks.
TRANSFORMERS.COM
IMPORTANT: BATTERY INFORMATION
CAUTION:
1. Always follow the instructions carefully. Use only batteries specified and be sure to insert them
correctly by matching the + and – polarity markings.
2. Do not mix old batteries and new batteries or standard (carbon-zinc) with alkaline batteries.
3. Remove exhausted or dead batteries from the product.
4. Remove batteries if product is not to be played with for a long time.
5. Do not short-circuit the supply terminals.
6. Should this product cause, or be affected by, local electrical interference, move it away from other
electrical equipment. Reset (switching off and back on again or removing and re-inserting batteries)
if necessary.
7. RECHARGEABLE BATTERIES: Do not mix these with any other types of batteries. Always
remove from the product before recharging. Recharge batteries under adult supervision. DO NOT
RECHARGE OTHER TYPES OF BATTERIES.
NOTE TO UK CONSUMERS: This product and its batteries must be disposed of separately
at your local waste recycling centre. Do not dispose of in your household waste bin.
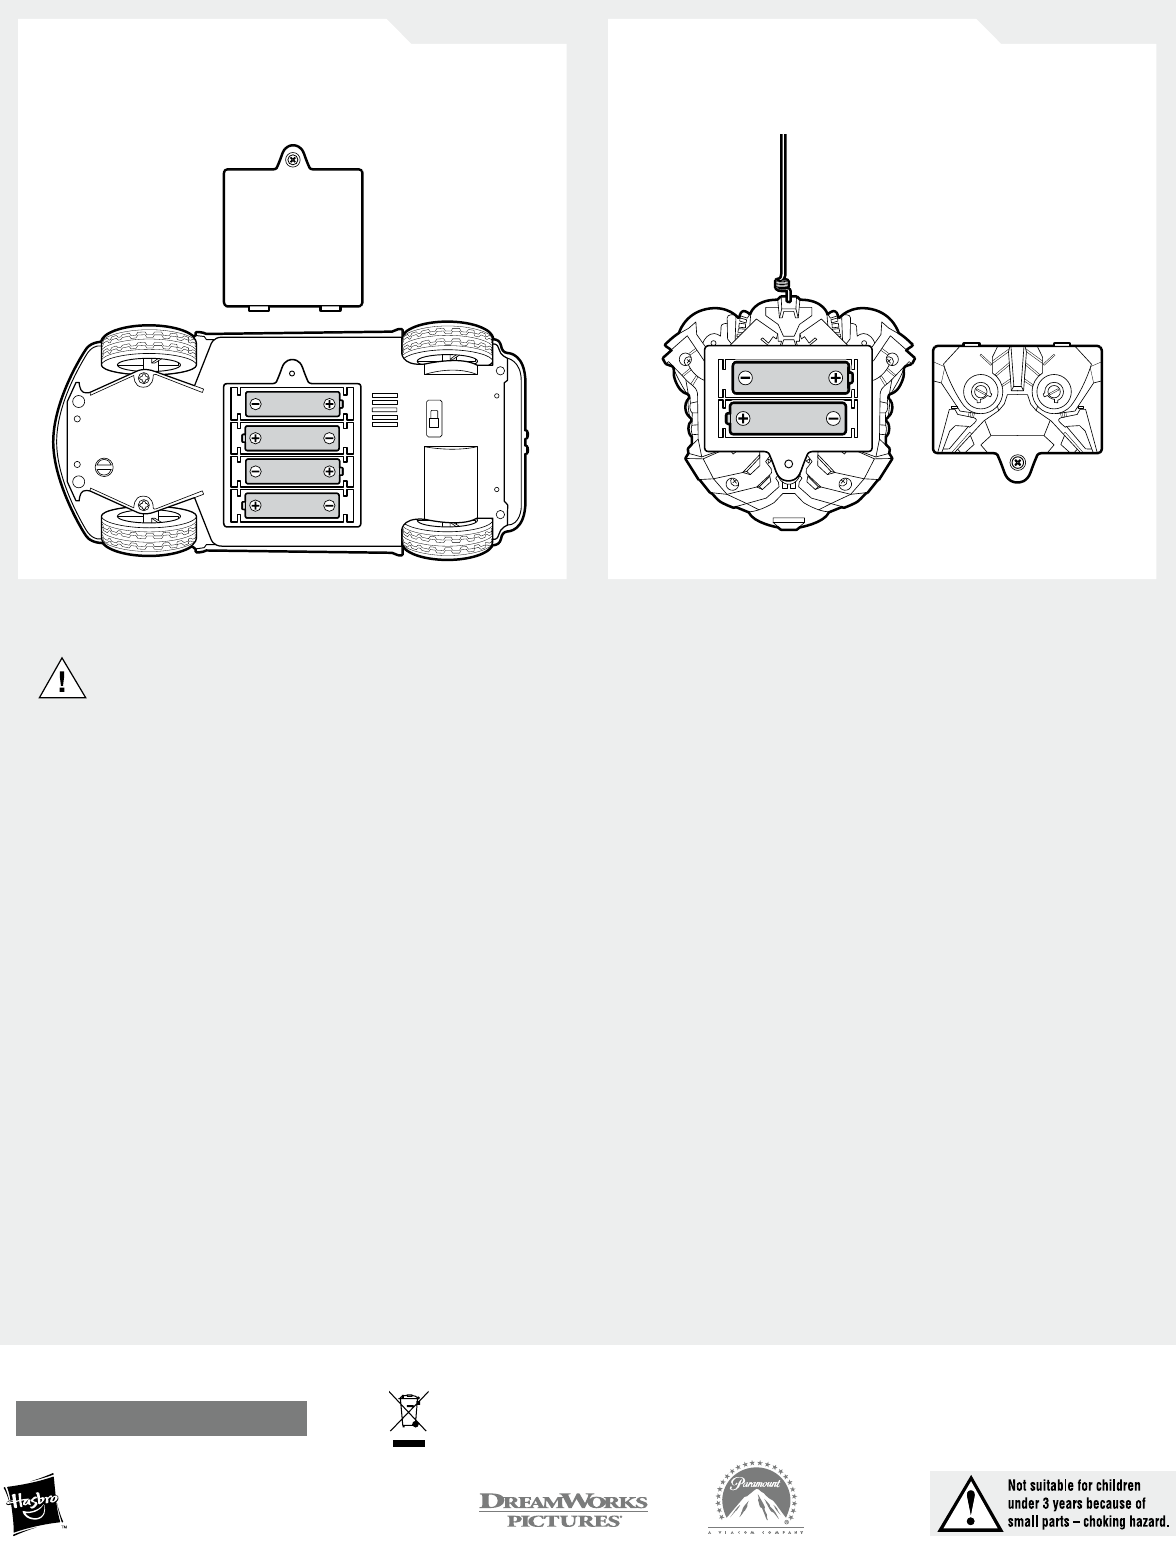
TO INSERT BATTERIES IN REMOTE:
Use a Phillips/cross head screwdriver (not included) to loosen
screws in battery compartment door. Remove door and discard
old batteries. Insert 2 x 1.5V “AA” or LR6 size batteries. Alkaline
batteries required. Replace door and tighten screws.
TO INSERT BATTERIES IN VEHICLE:
Use a Phillips/cross head screwdriver (not included) to loosen
screws in battery compartment door. Remove door and discard
old batteries. Insert 4 x 1.5V “AA” or LR6 size batteries. Alkaline
batteries required. Replace door and tighten screws.