HID Global X002200 This is a color card printer on a plastic identification cards User Manual Windows User Guide
HID Global Corporation This is a color card printer on a plastic identification cards Windows User Guide
Contents
- 1. Windows User Guide
- 2. Installation Guide
Windows User Guide
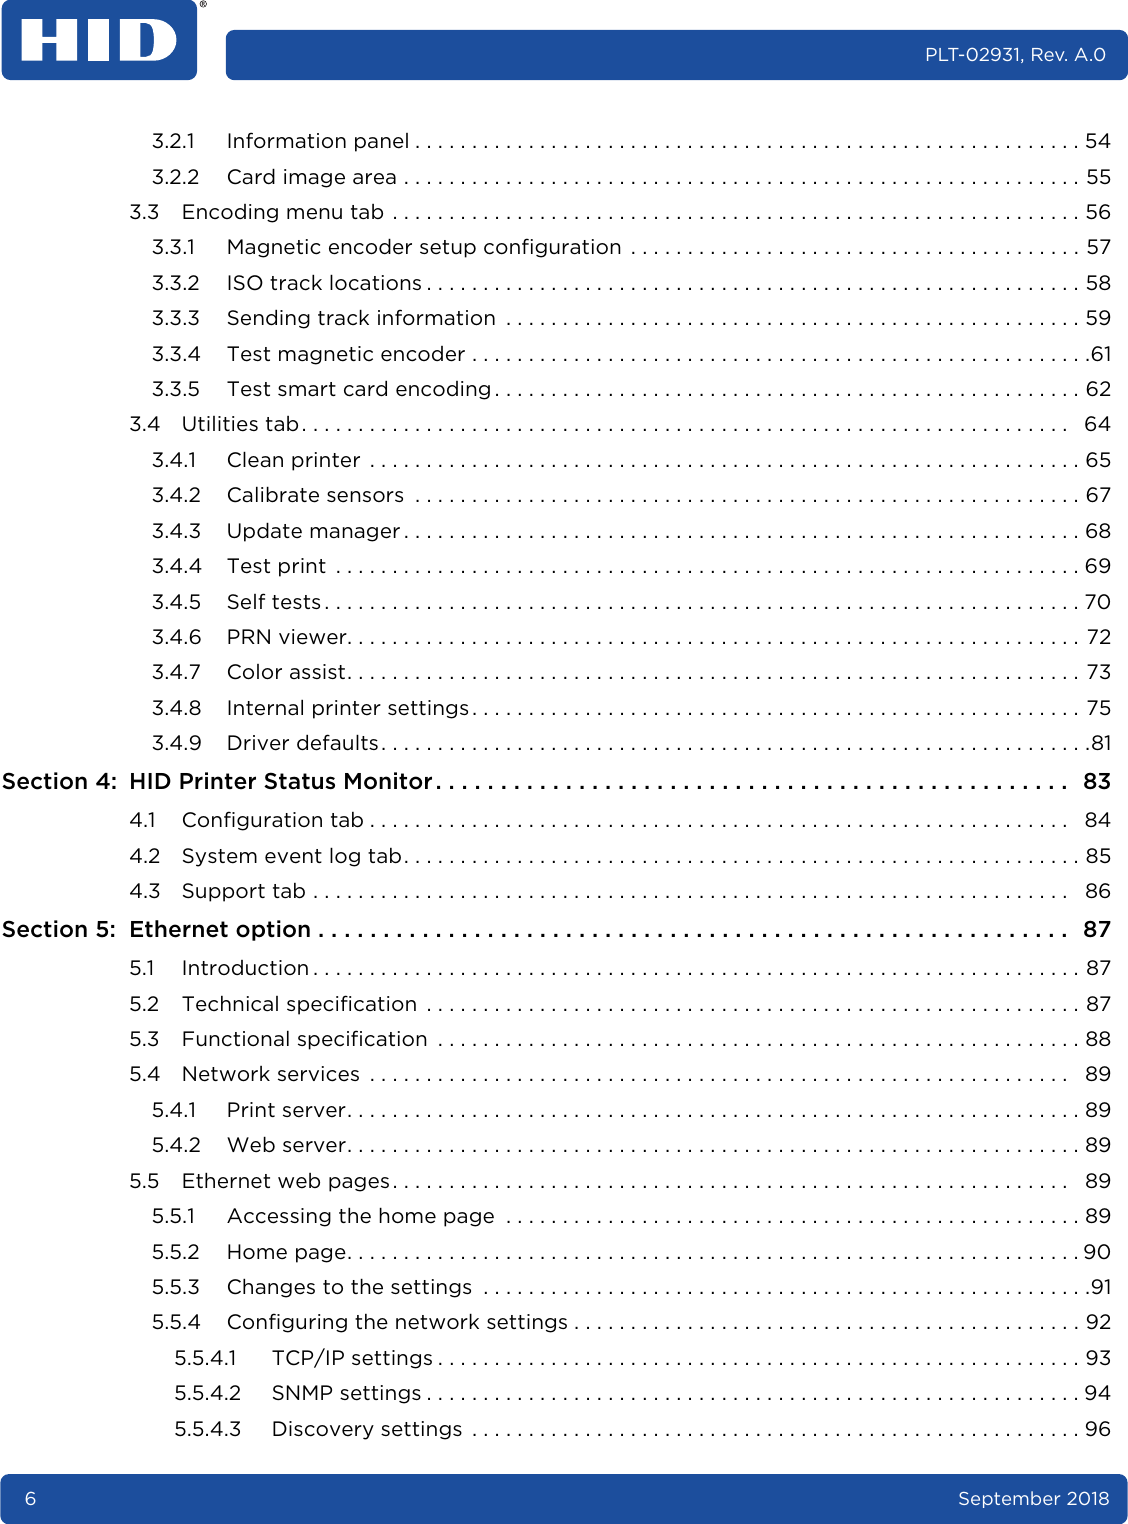

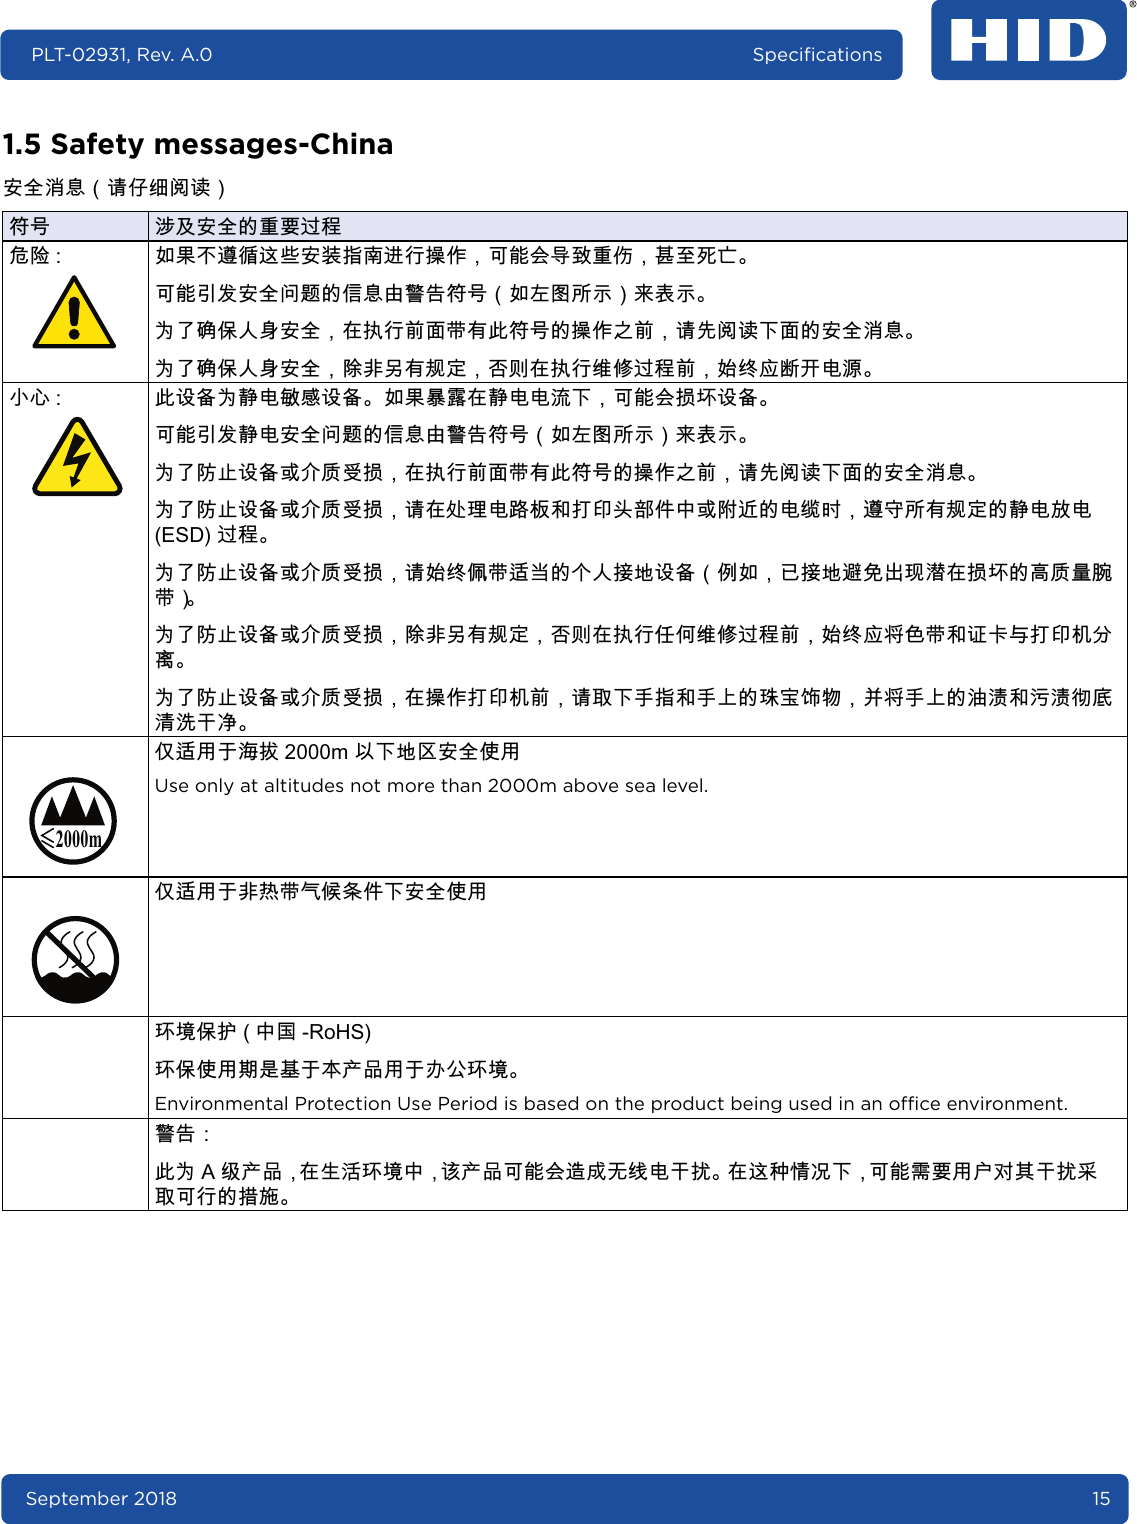


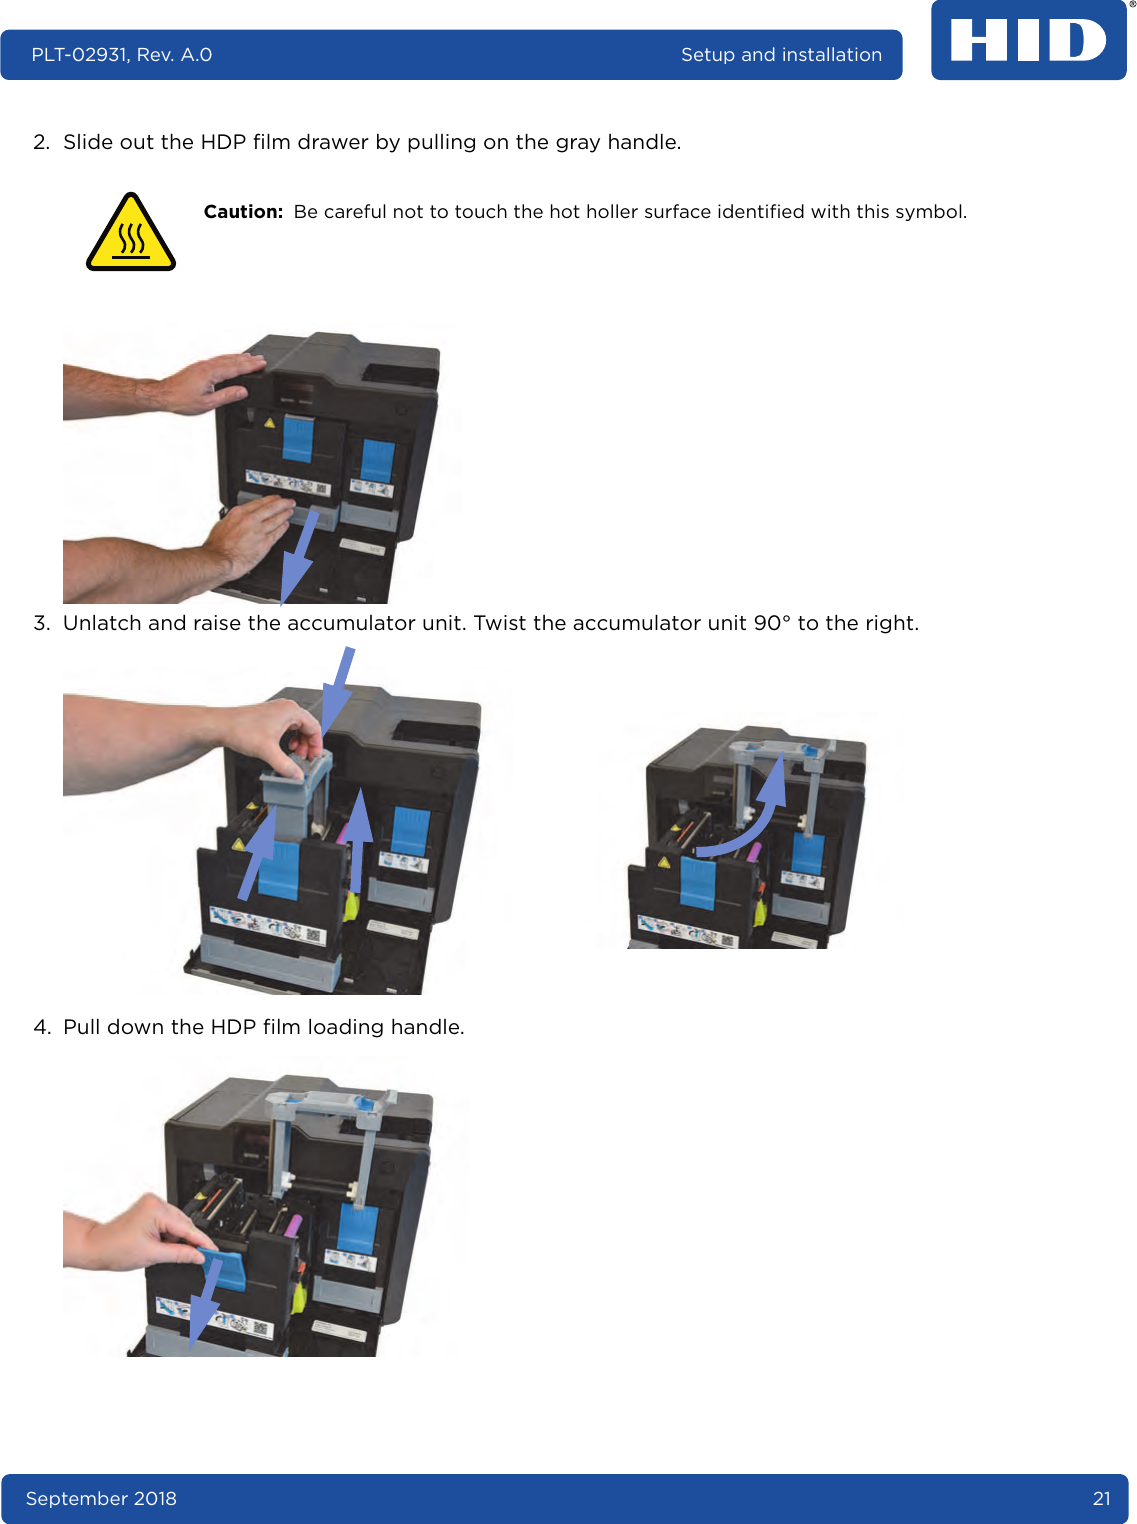

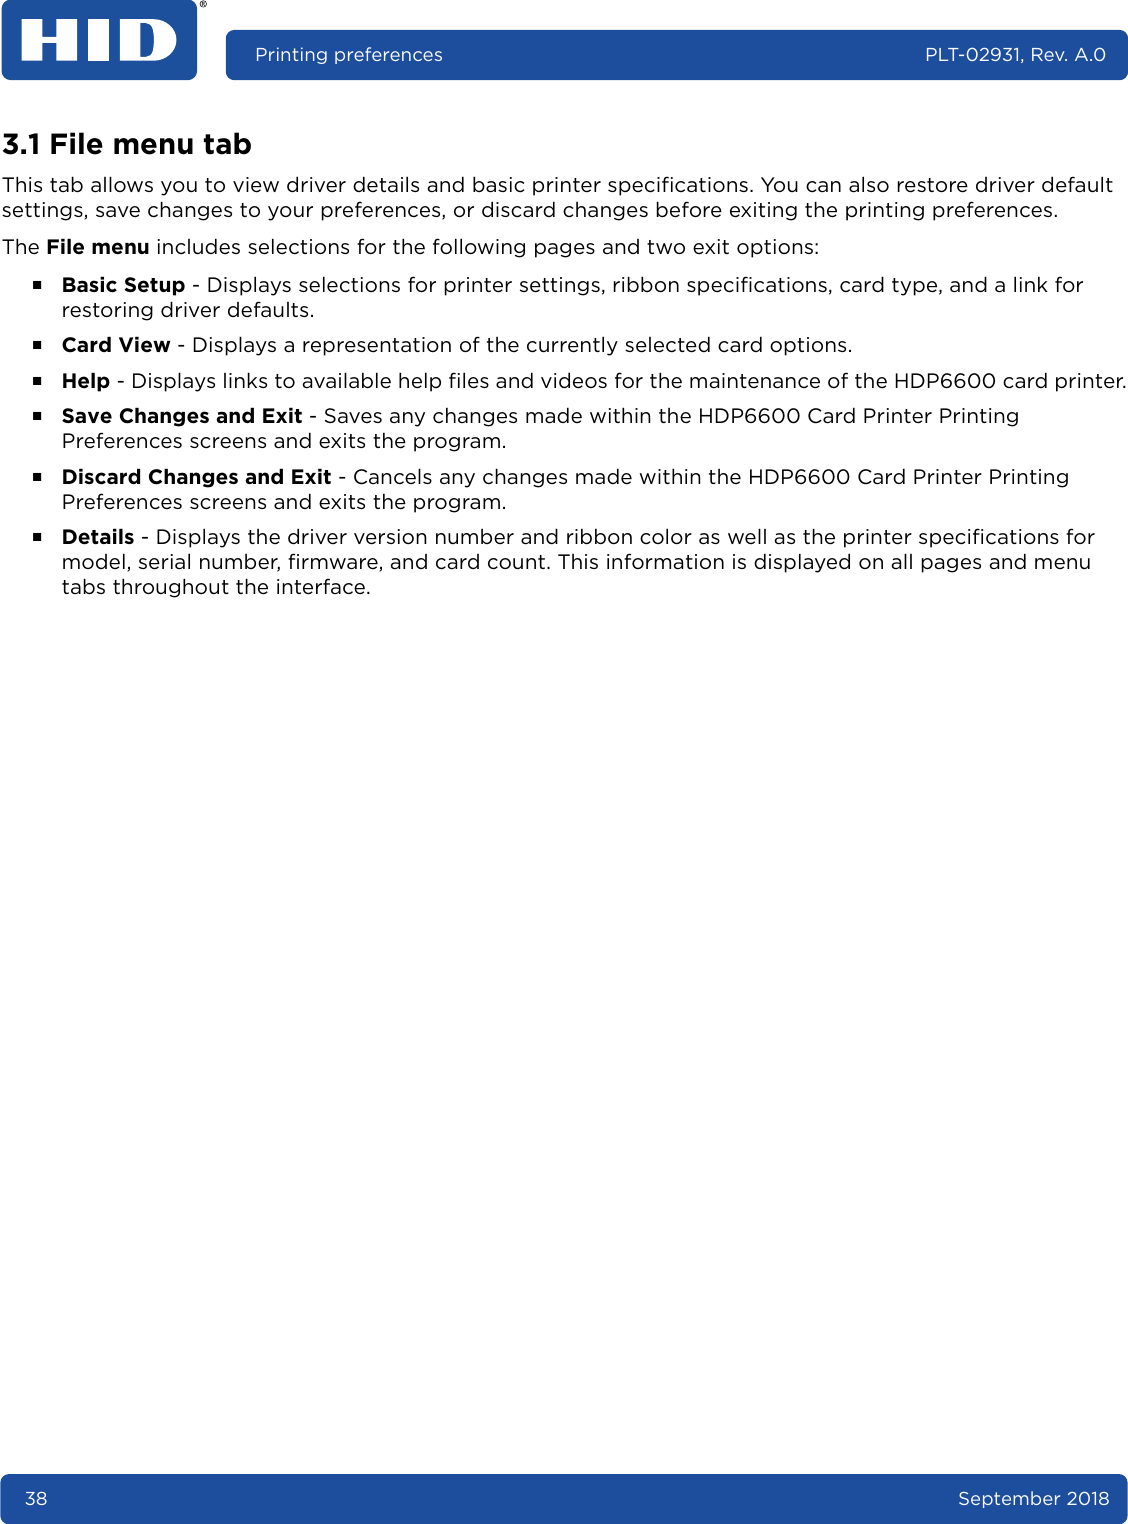

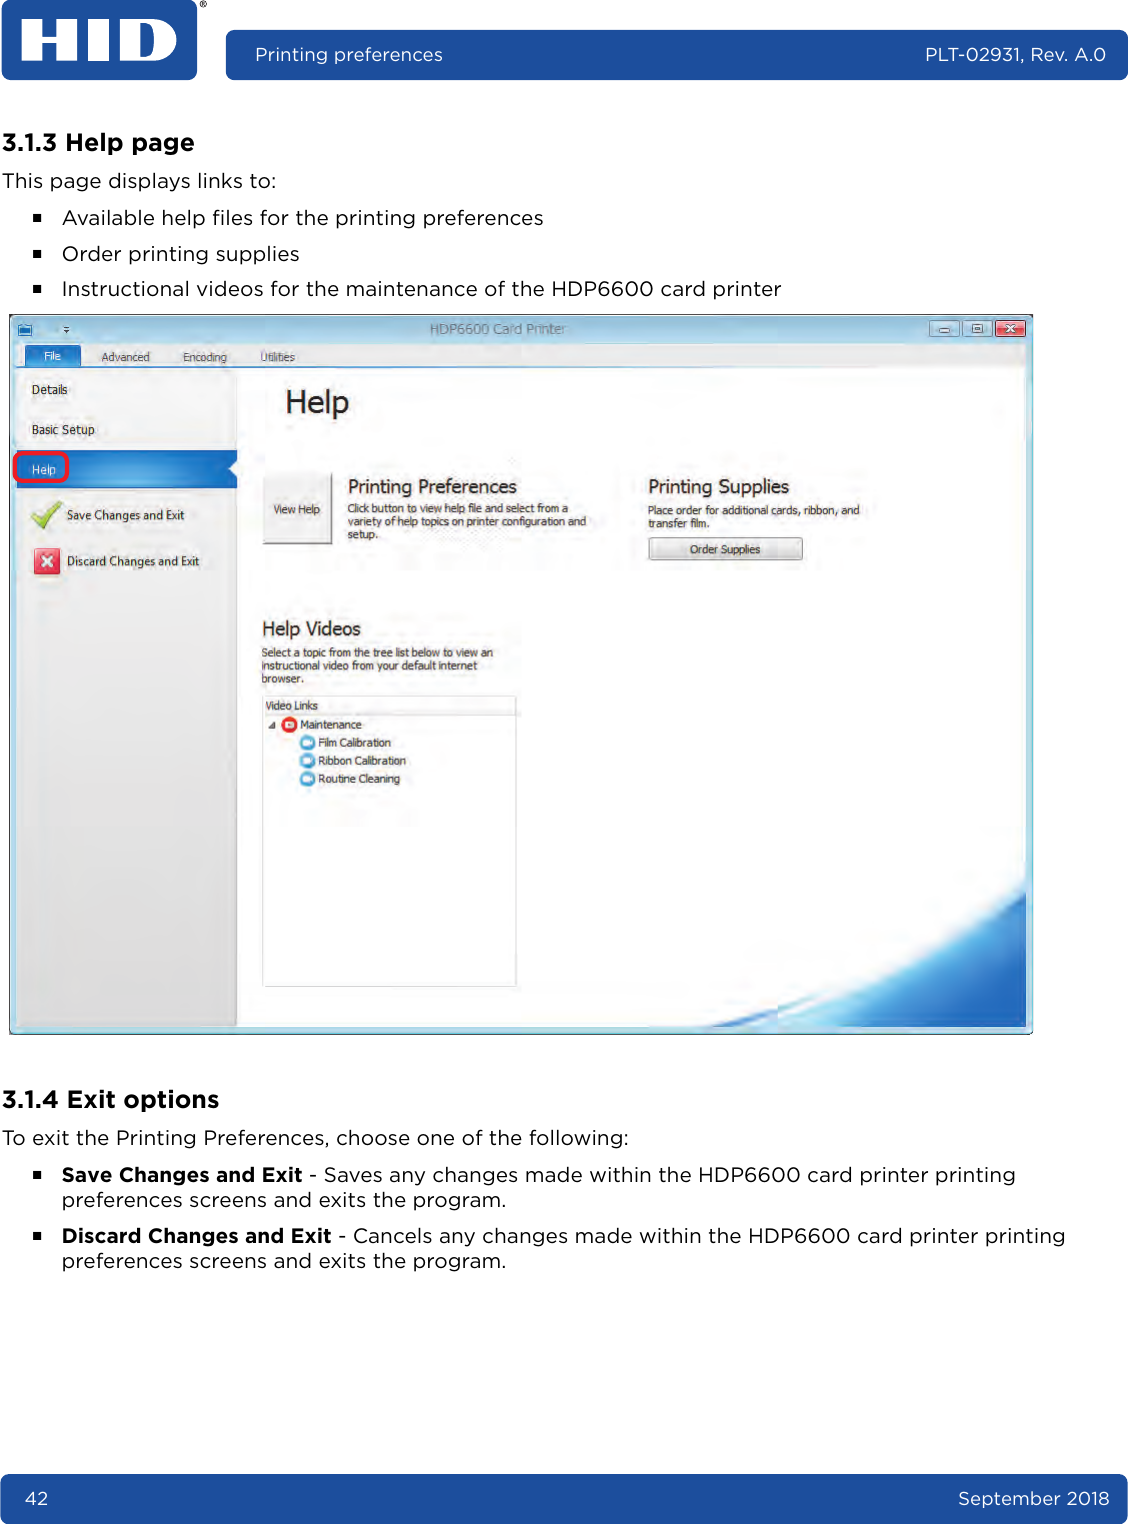
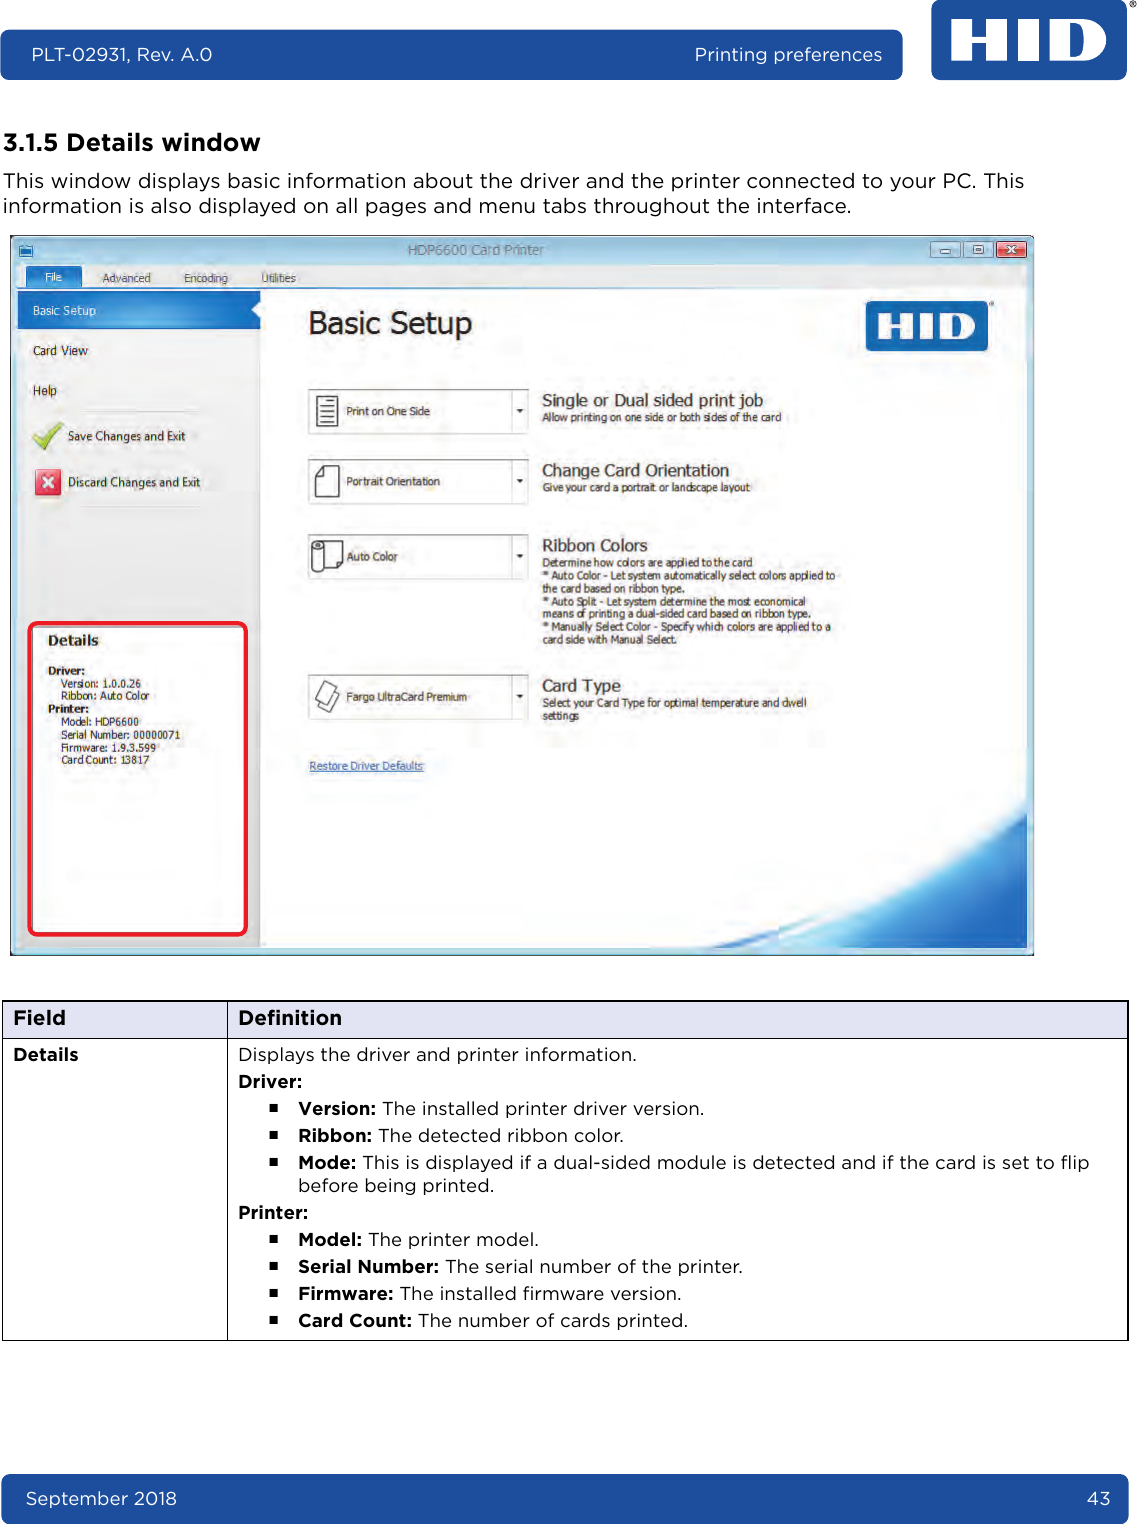
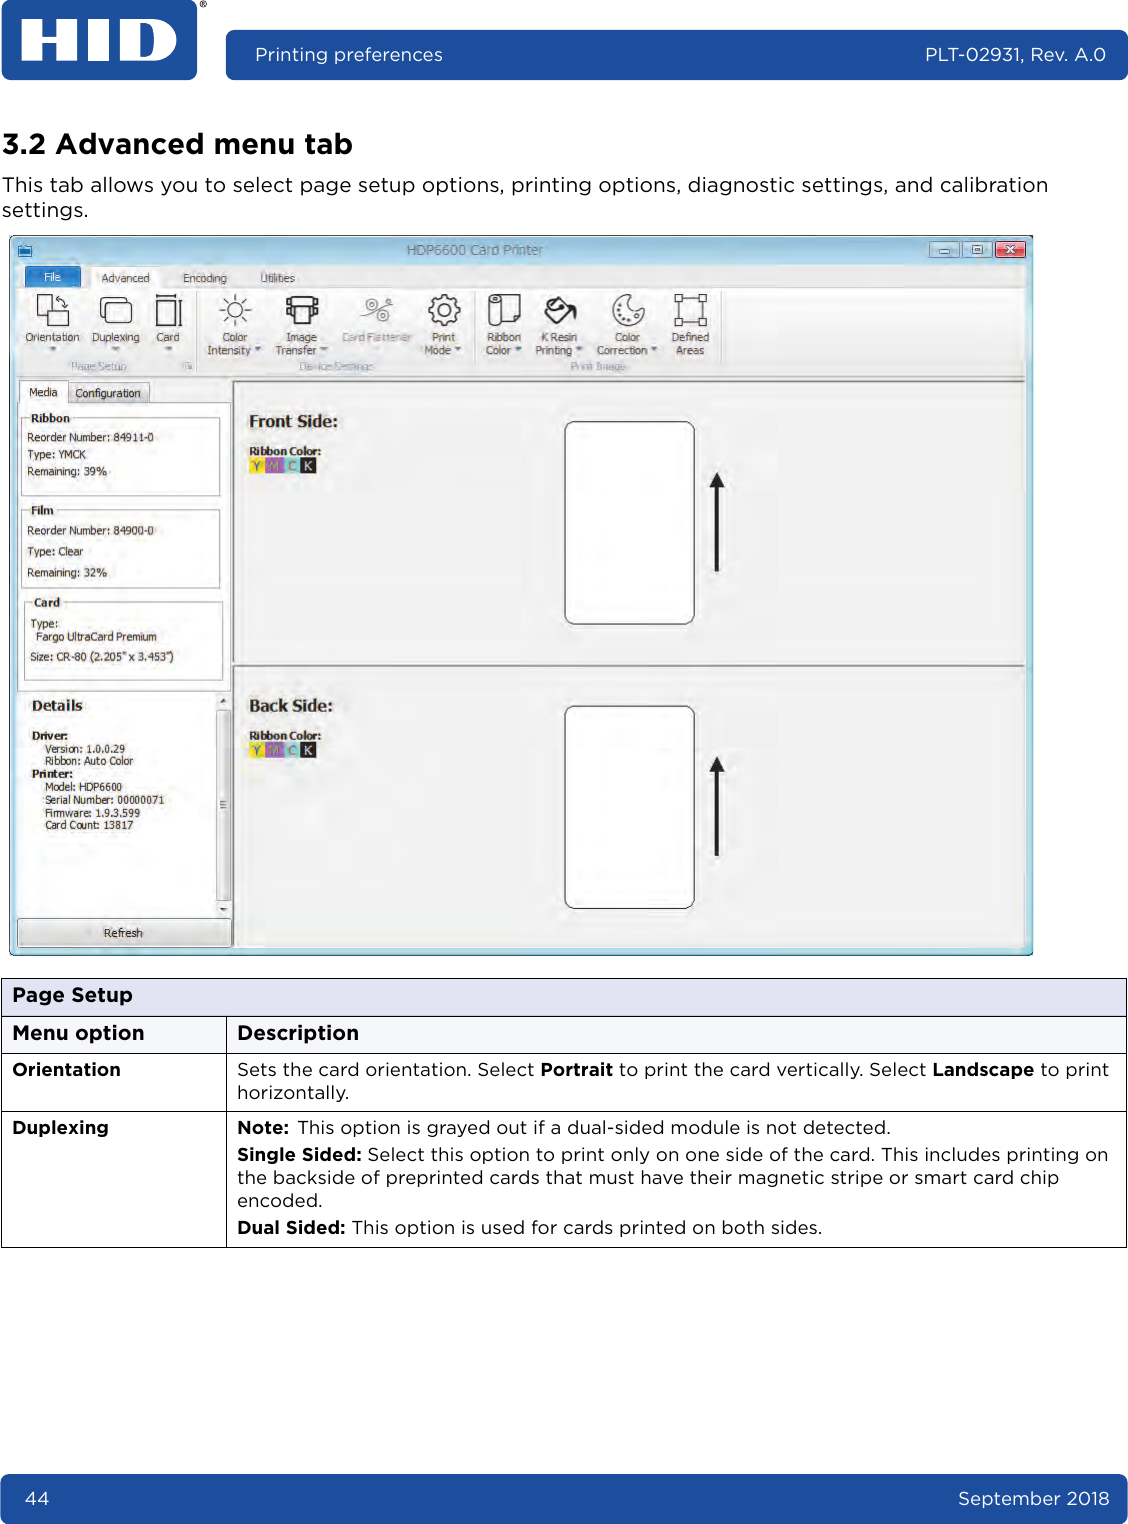

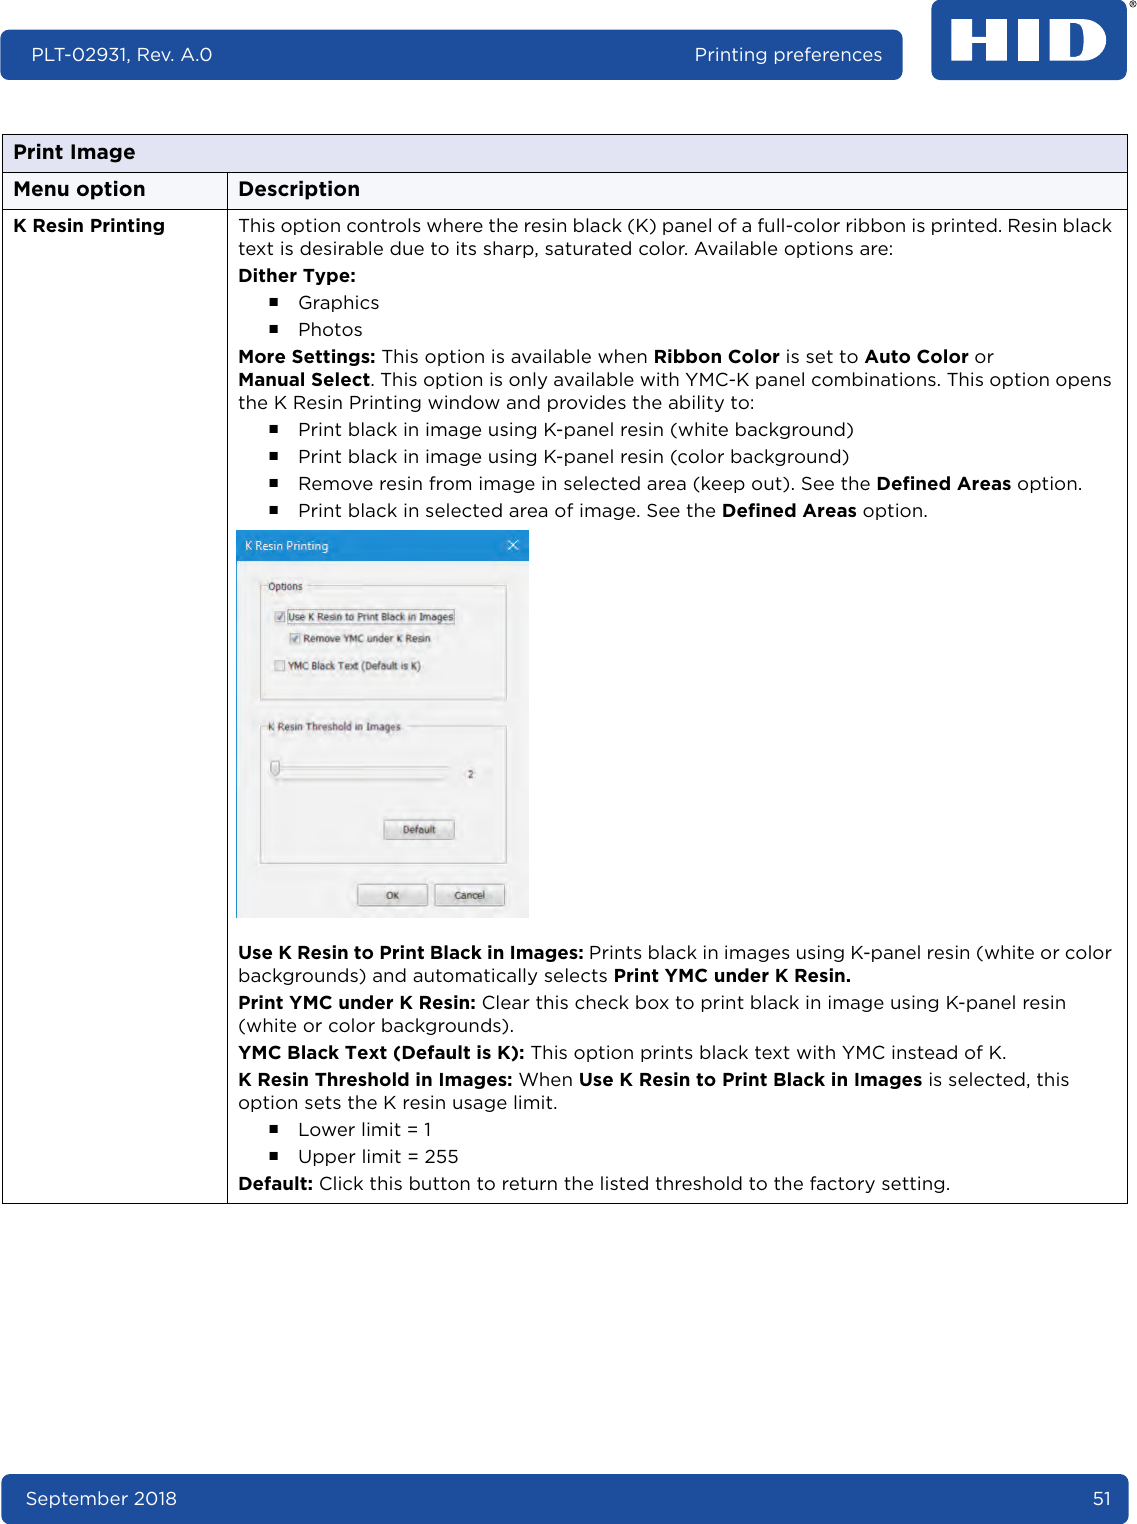

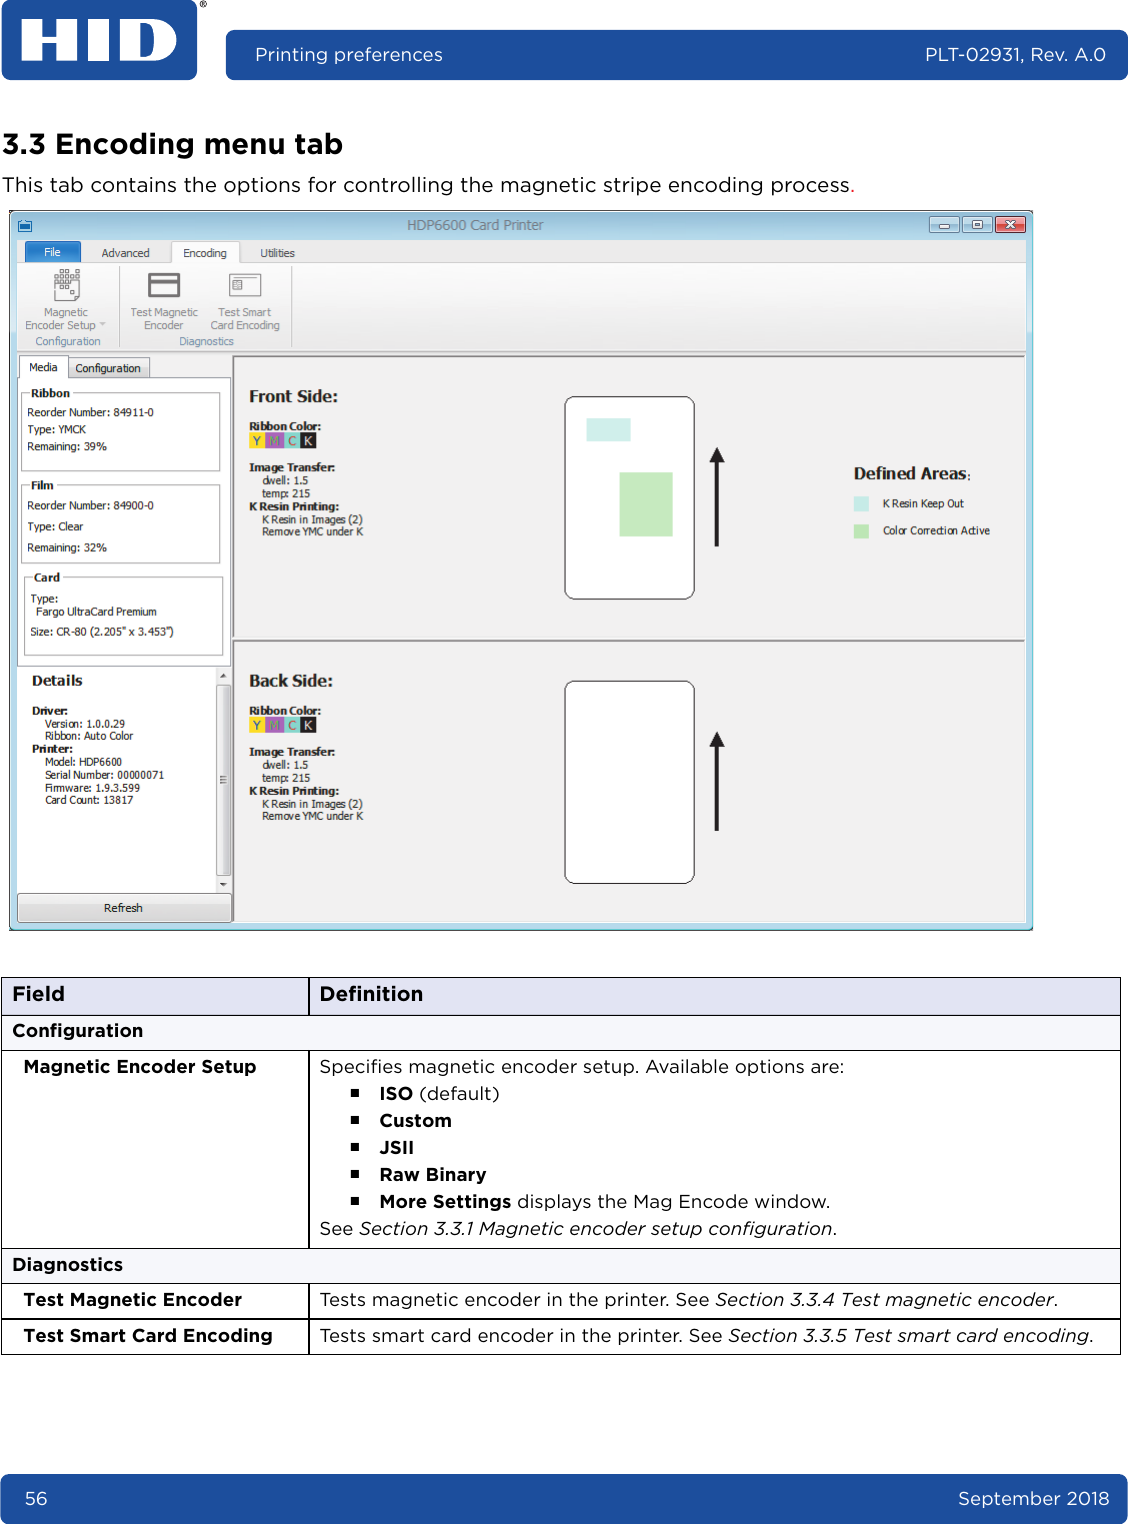
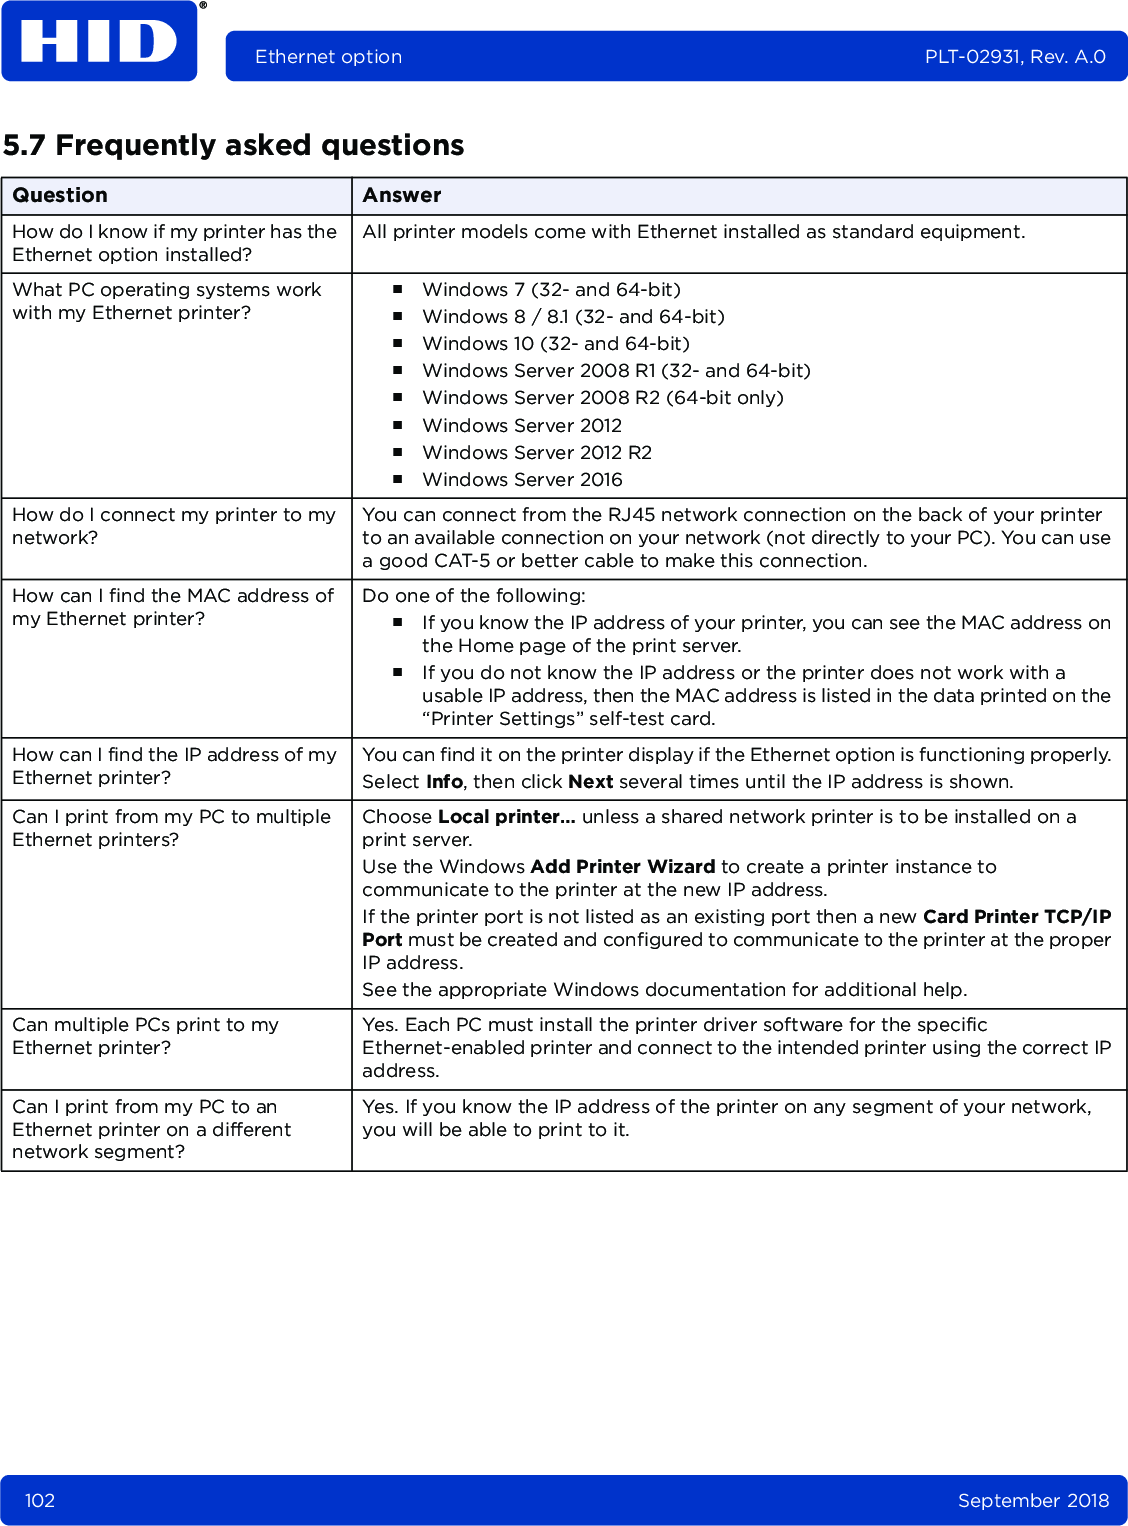
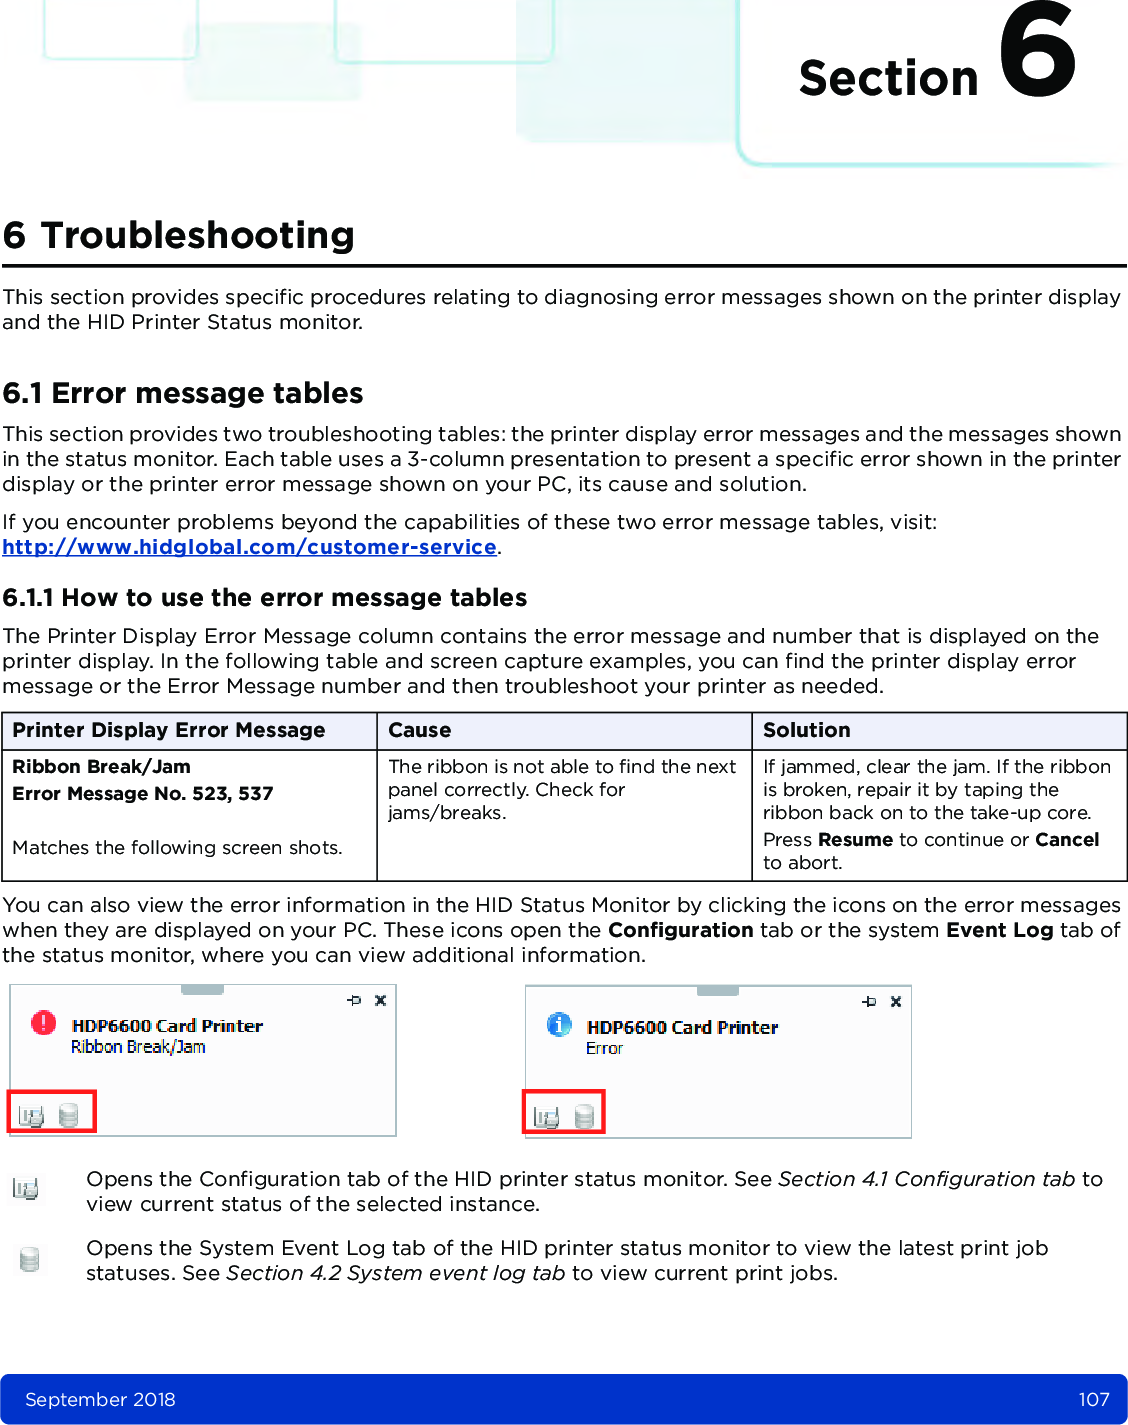
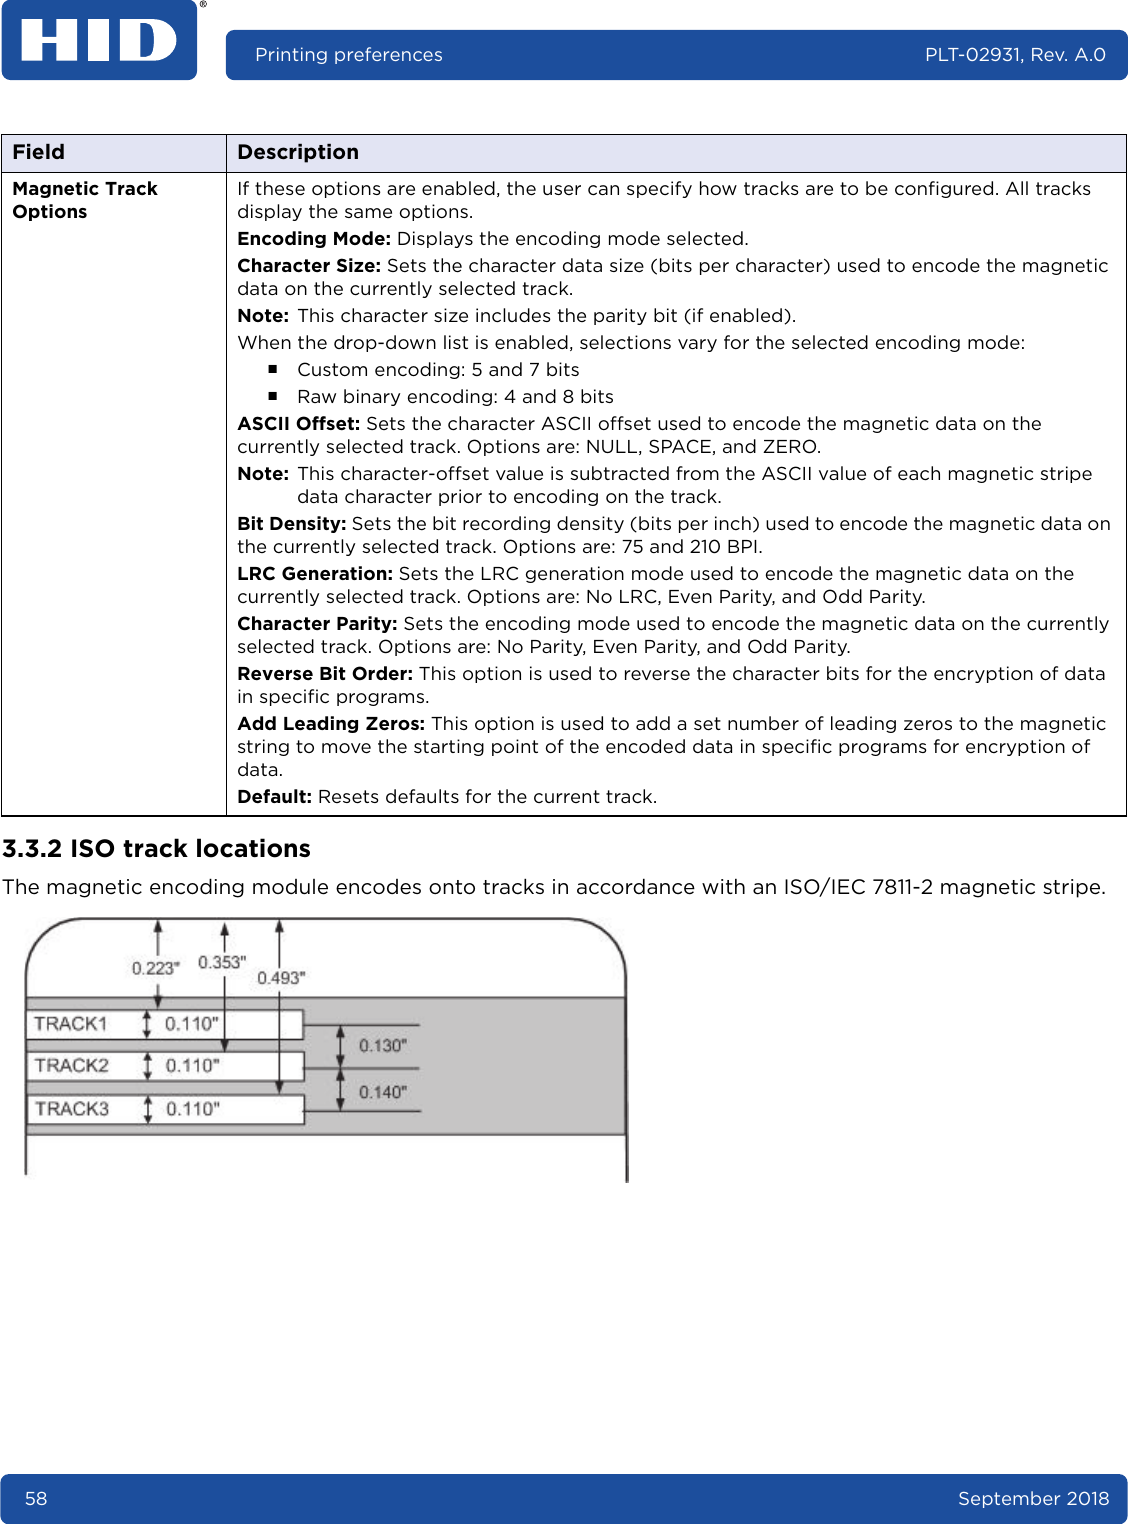
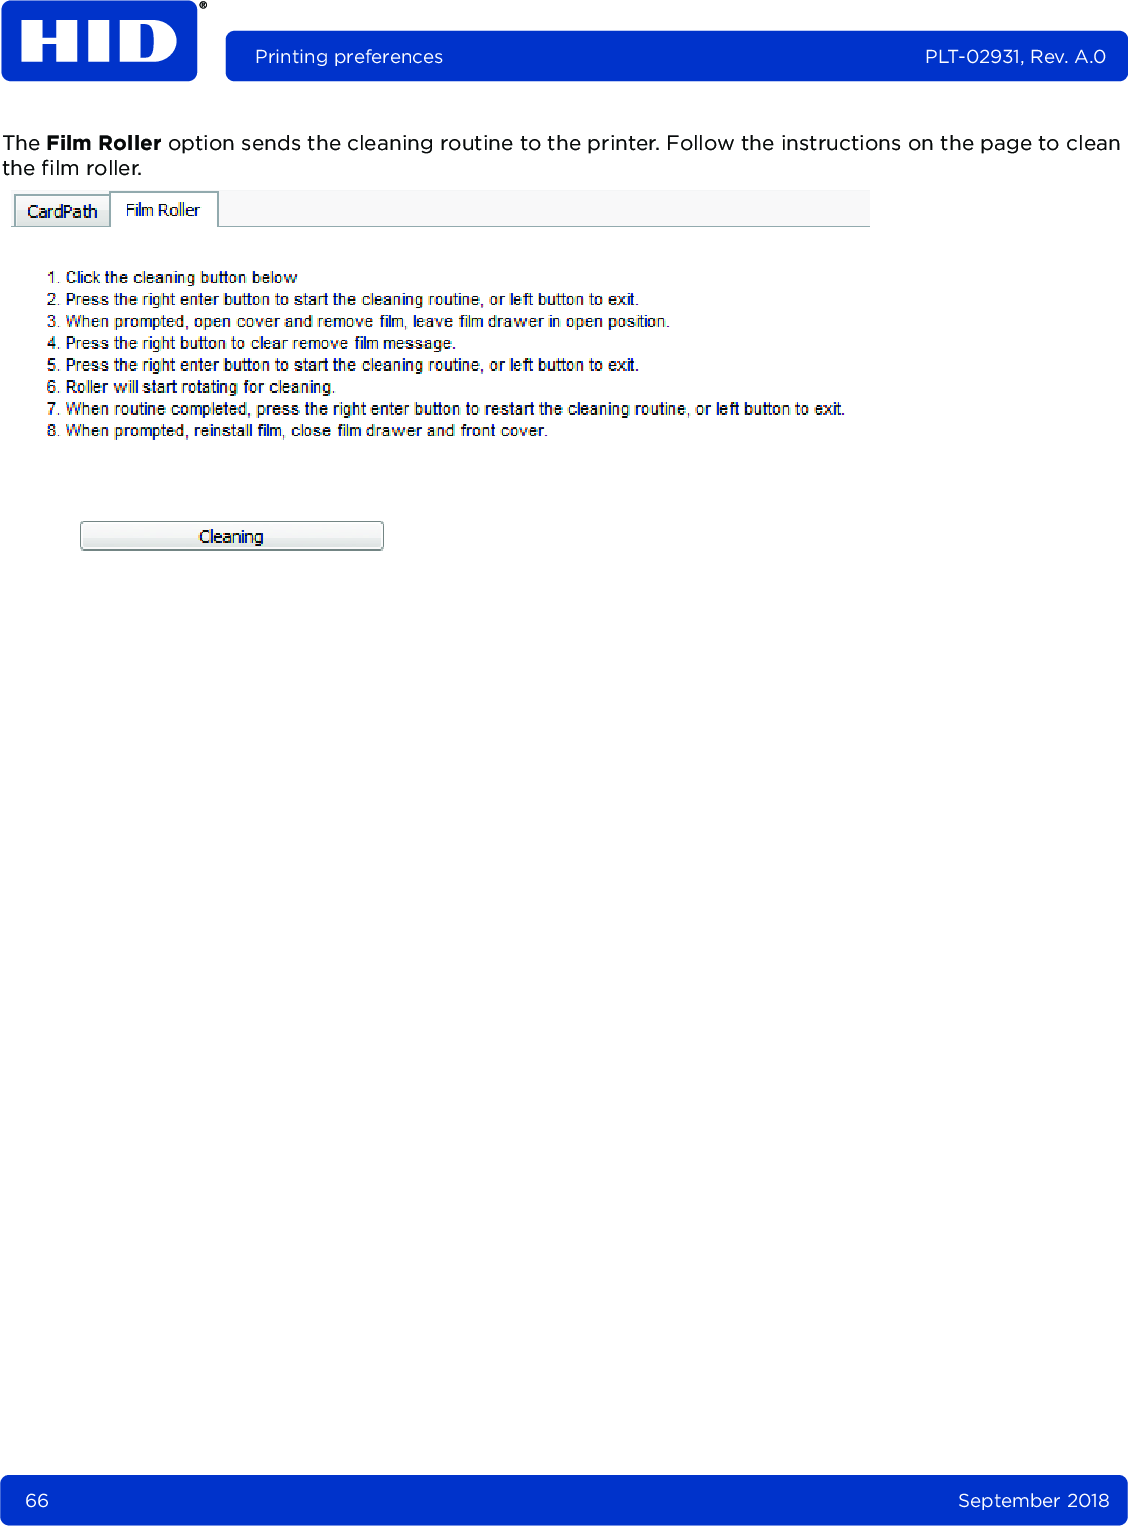
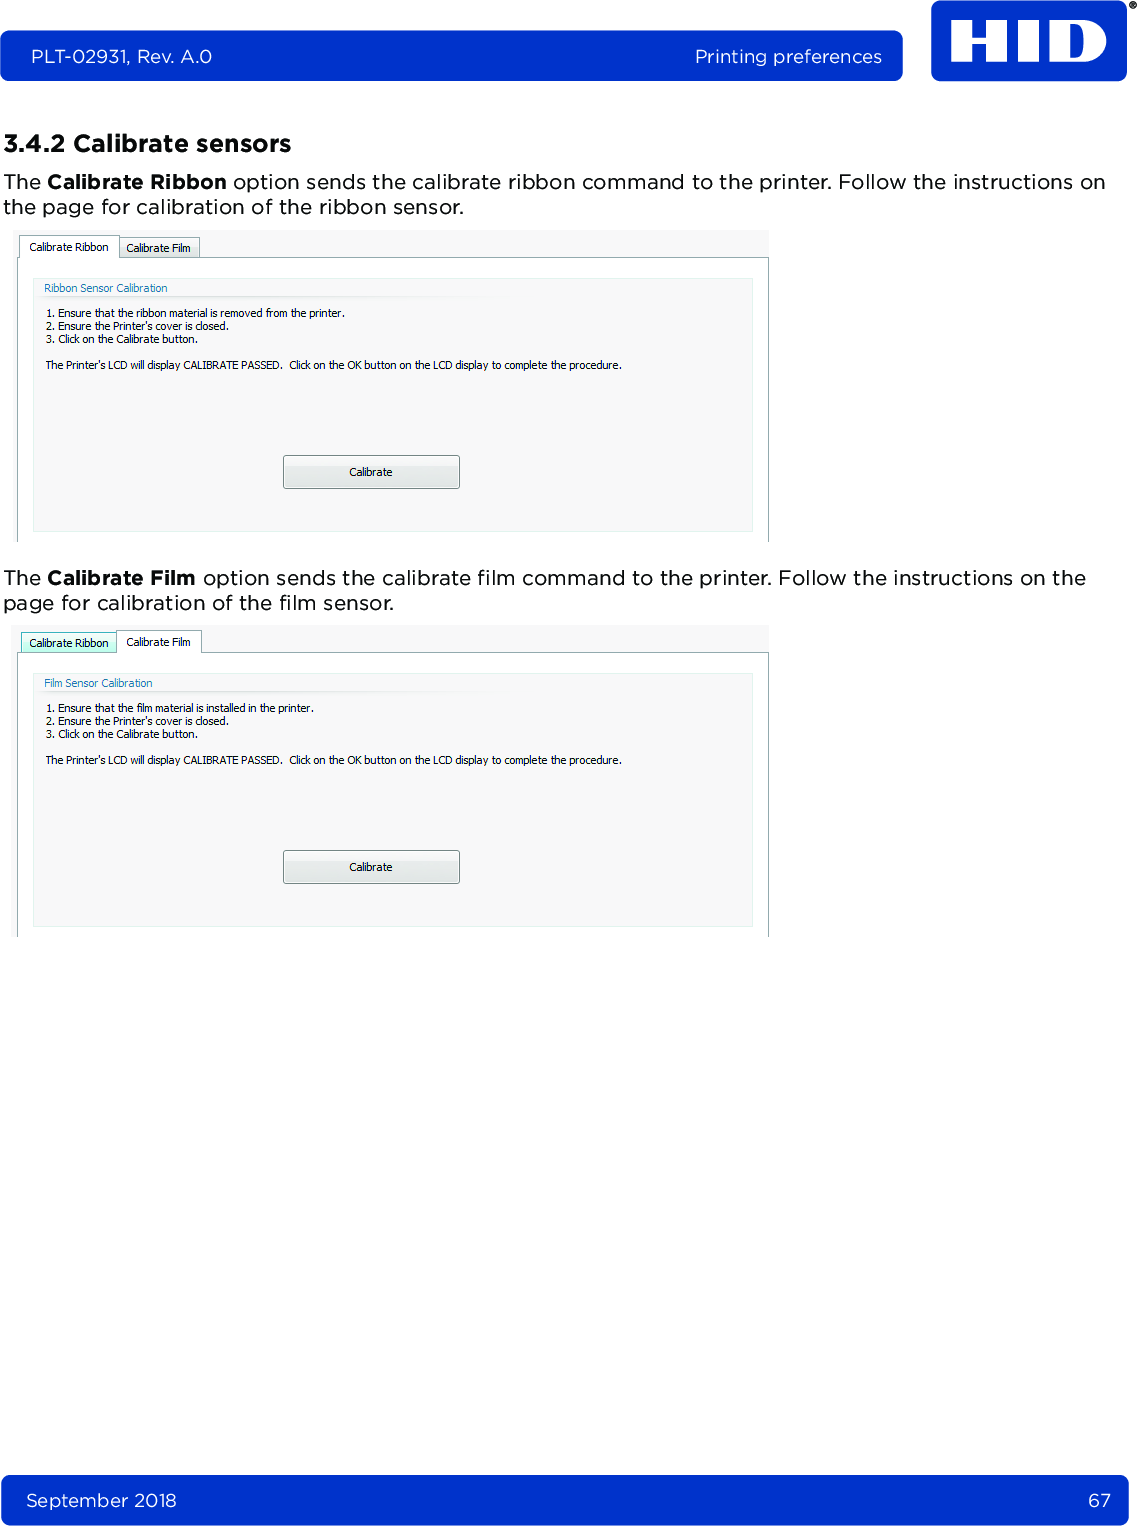
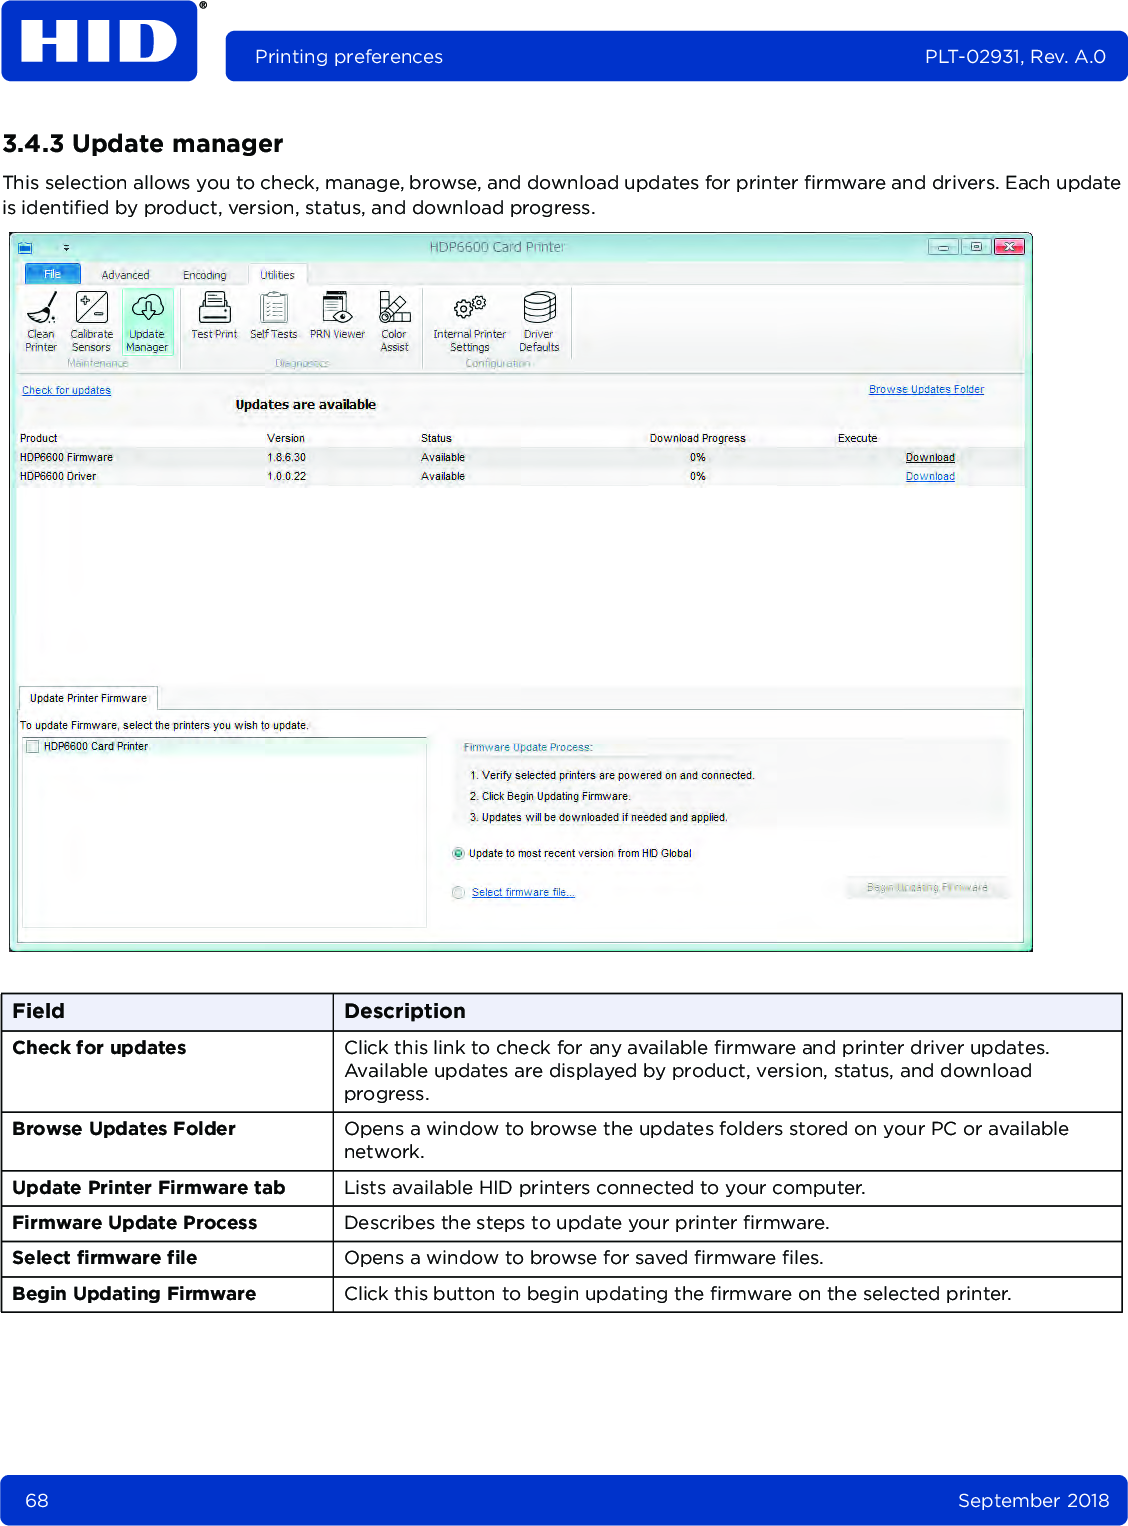
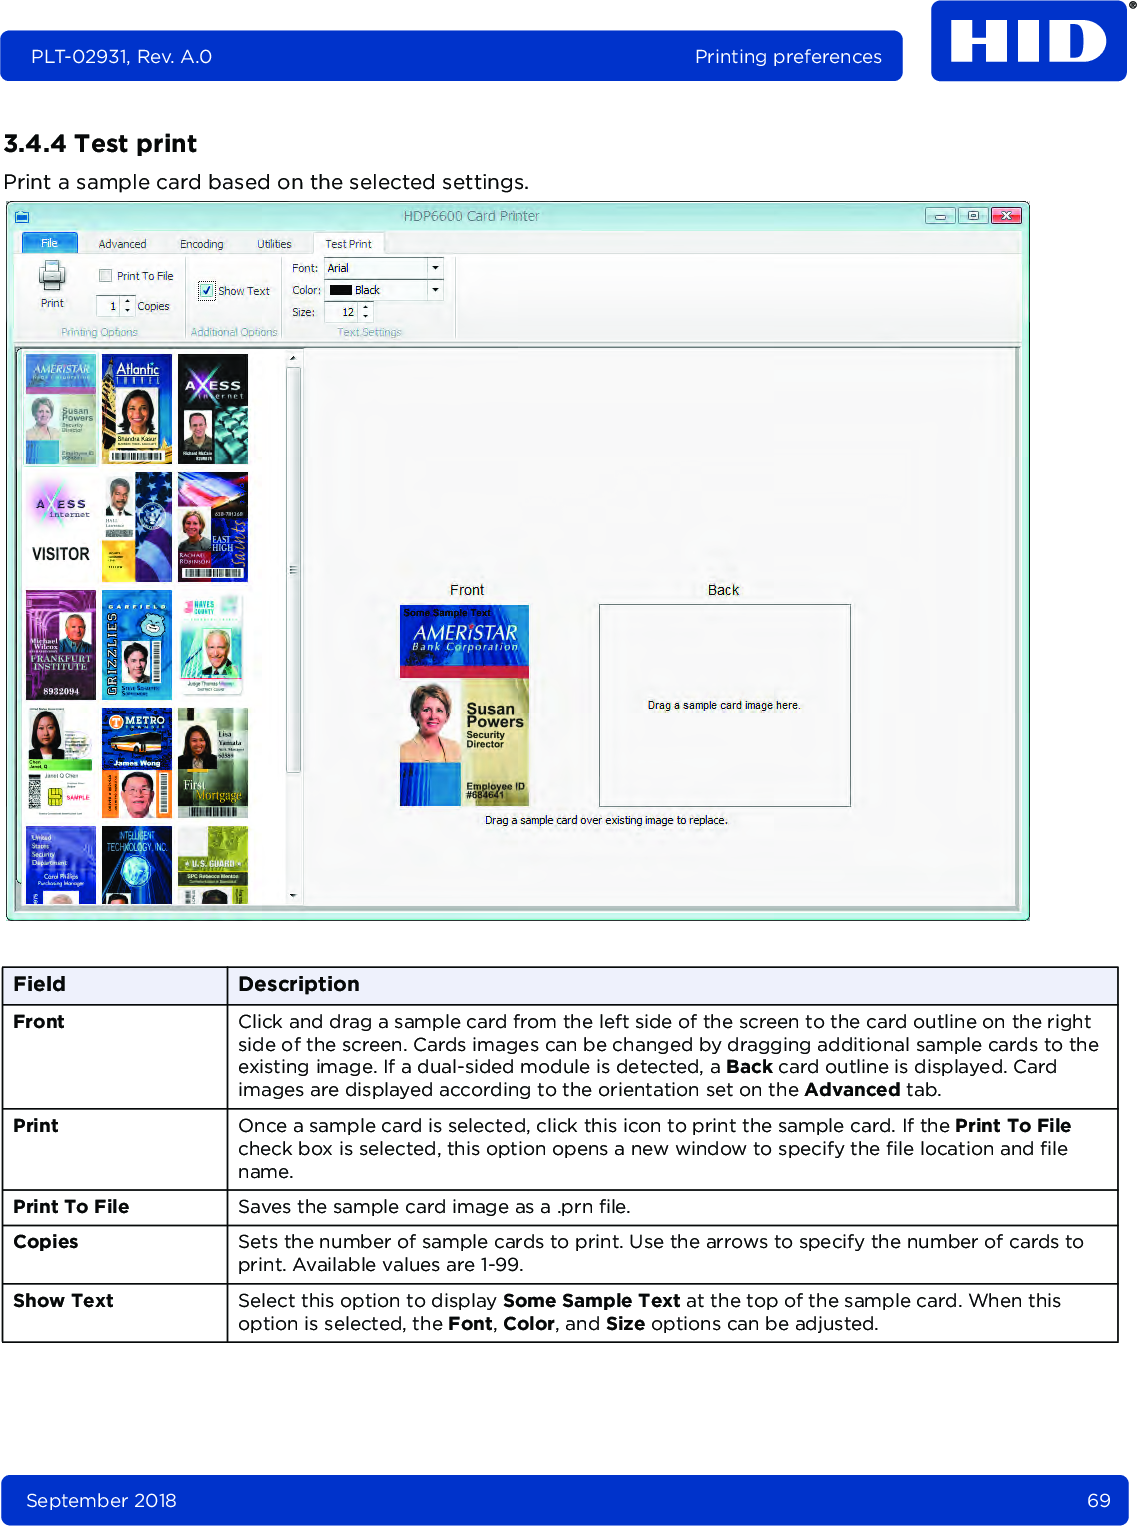
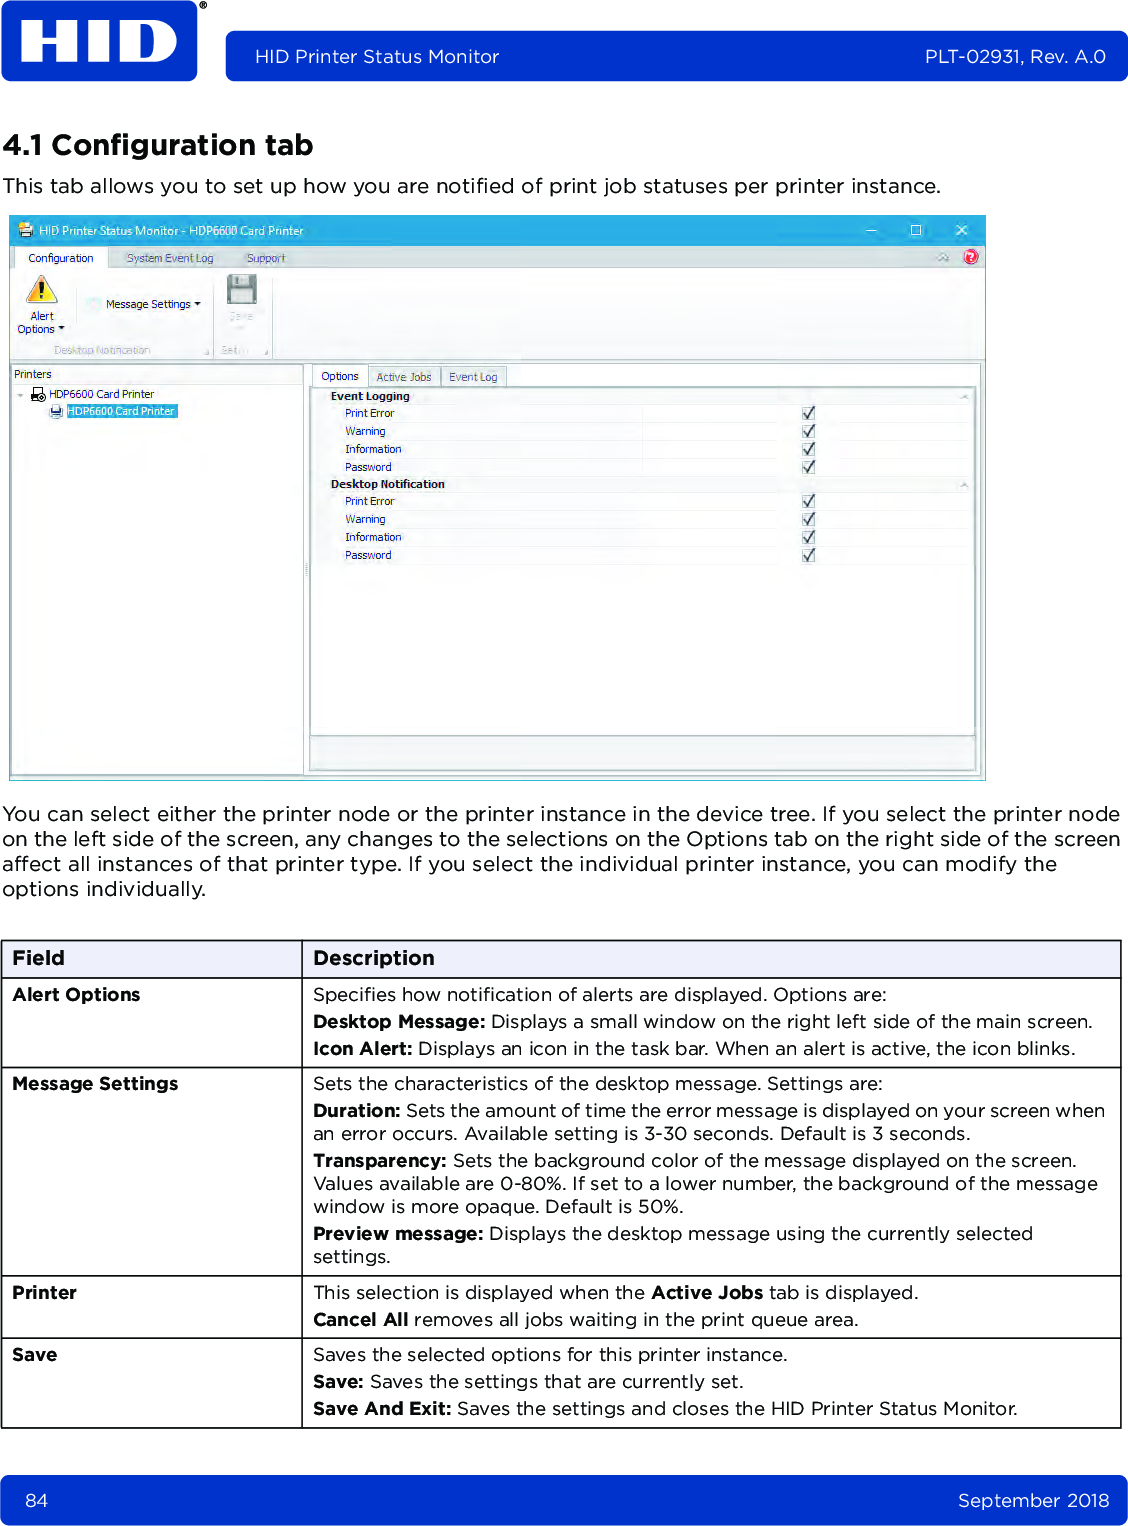
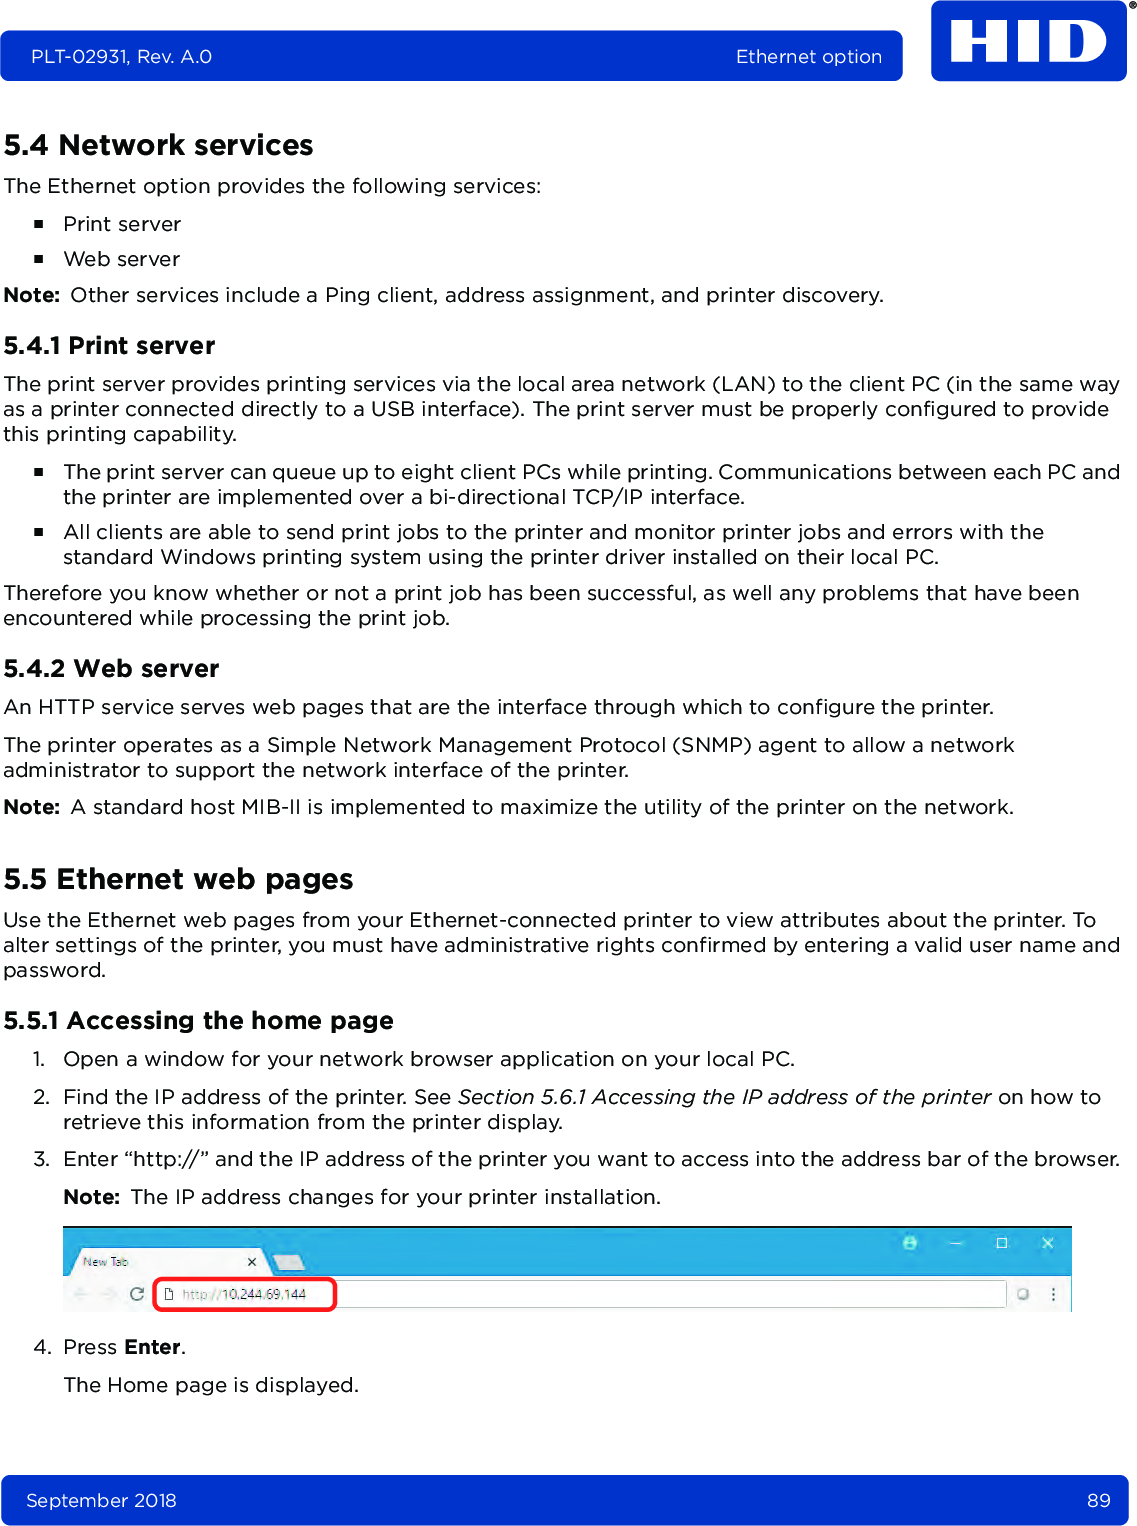
![September 2018 57PLT-02931, Rev. A.0 Printing preferences3.3.1 Magnetic encoder setup configurationThe Mag Encode window contains options for controlling the magnetic stripe encoding process. Field DescriptionEncoding Options Set the Encoding Mode and Coercivity or modify the ISO standards for Tracks 1, 2 and 3.႑ISO Encoding: sends a formatted set of characters to the encoding module. The magnetic track tabs are inactive and display ISO defaults for each track. This is the default. See Section 3.3.2 ISO track locations.႑Custom Encoding: all magnetic track options are active and can be changed.႑Raw Binary Encoding: sends a raw binary string rather than a formatted set of characters to the encoding module. Some magnetic track options are enabled.႑JIS II Encoding: specific standards are used. The magnetic track tabs are inactive and display JIS II defaults for each track.Coercivity: Select the Coercivity option (Oersted [Oe]) for the Magnetic Stripe type for the Card Type.႑Super High Coercivity = 4,000 Oe႑High Coercivity = 2,750 Oe (HID high coercivity UltraCard IIIs are 2750 Oe)႑Medium Coercivity = 600 Oe႑Low Coercivity = 300 OeShift Data Left: This option shifts the recorded magnetic data to the left-hand side of the magnetic stripe on the card. This is used when cards require insert type readers.](https://usermanual.wiki/HID-Global/X002200.Windows-User-Guide/User-Guide-4069218-Page-57.png)
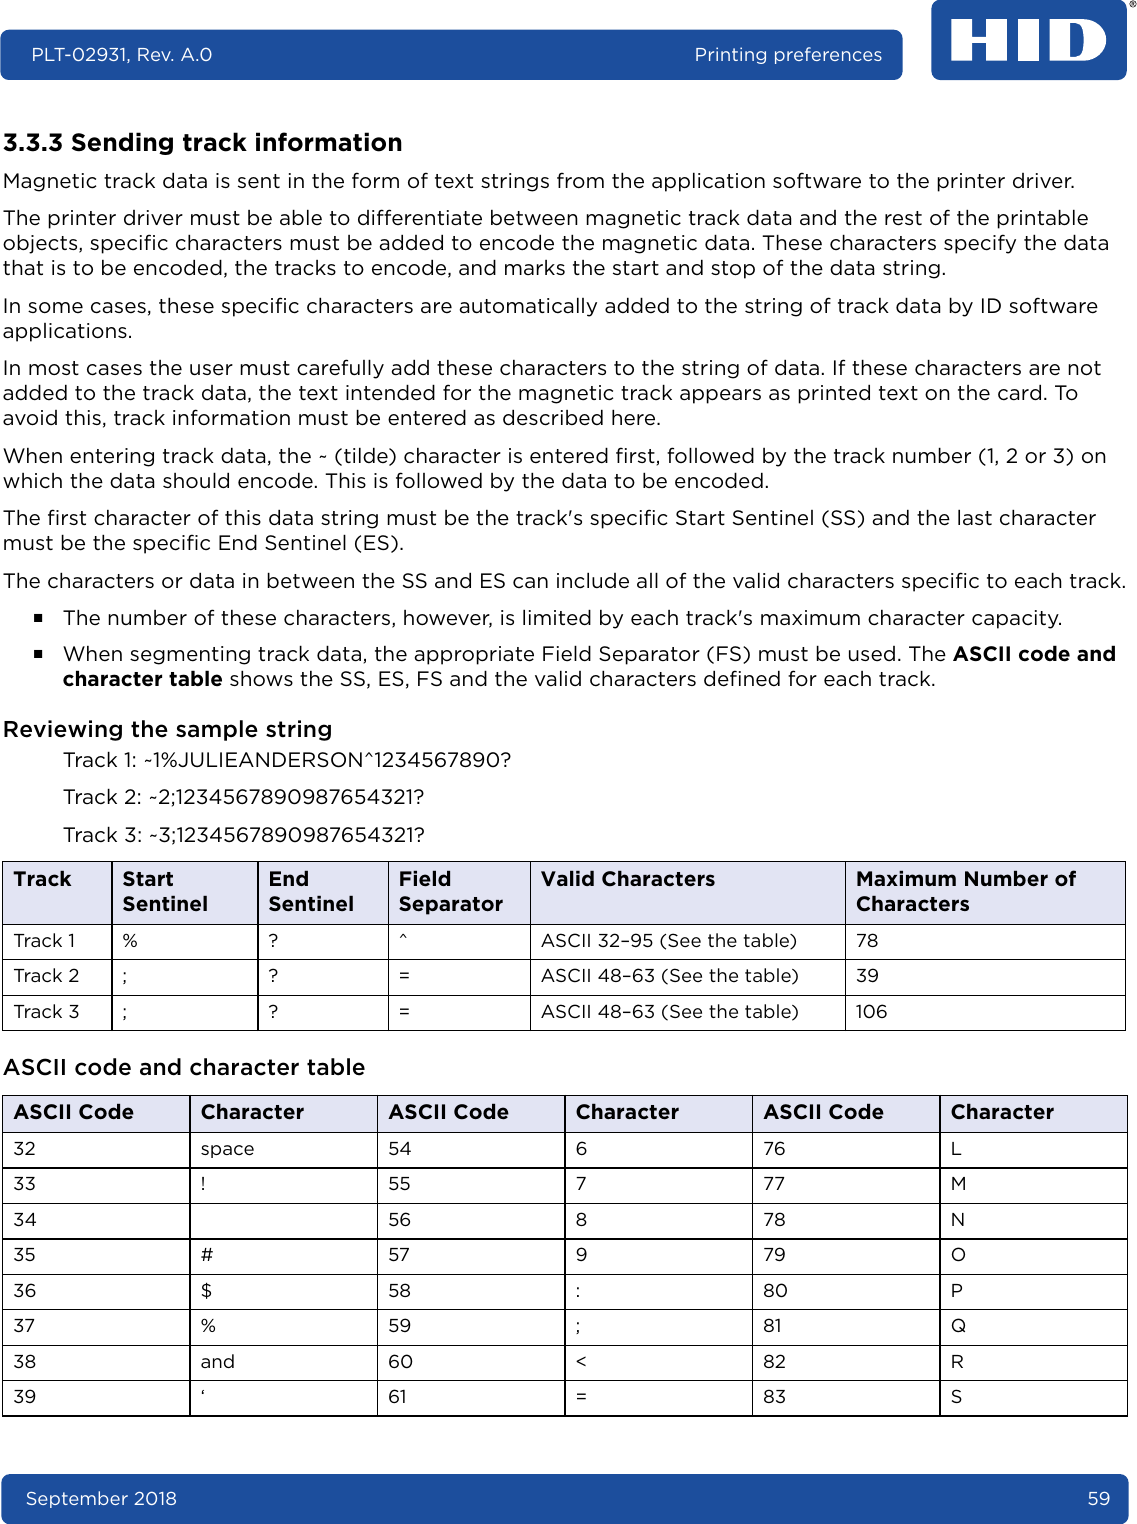
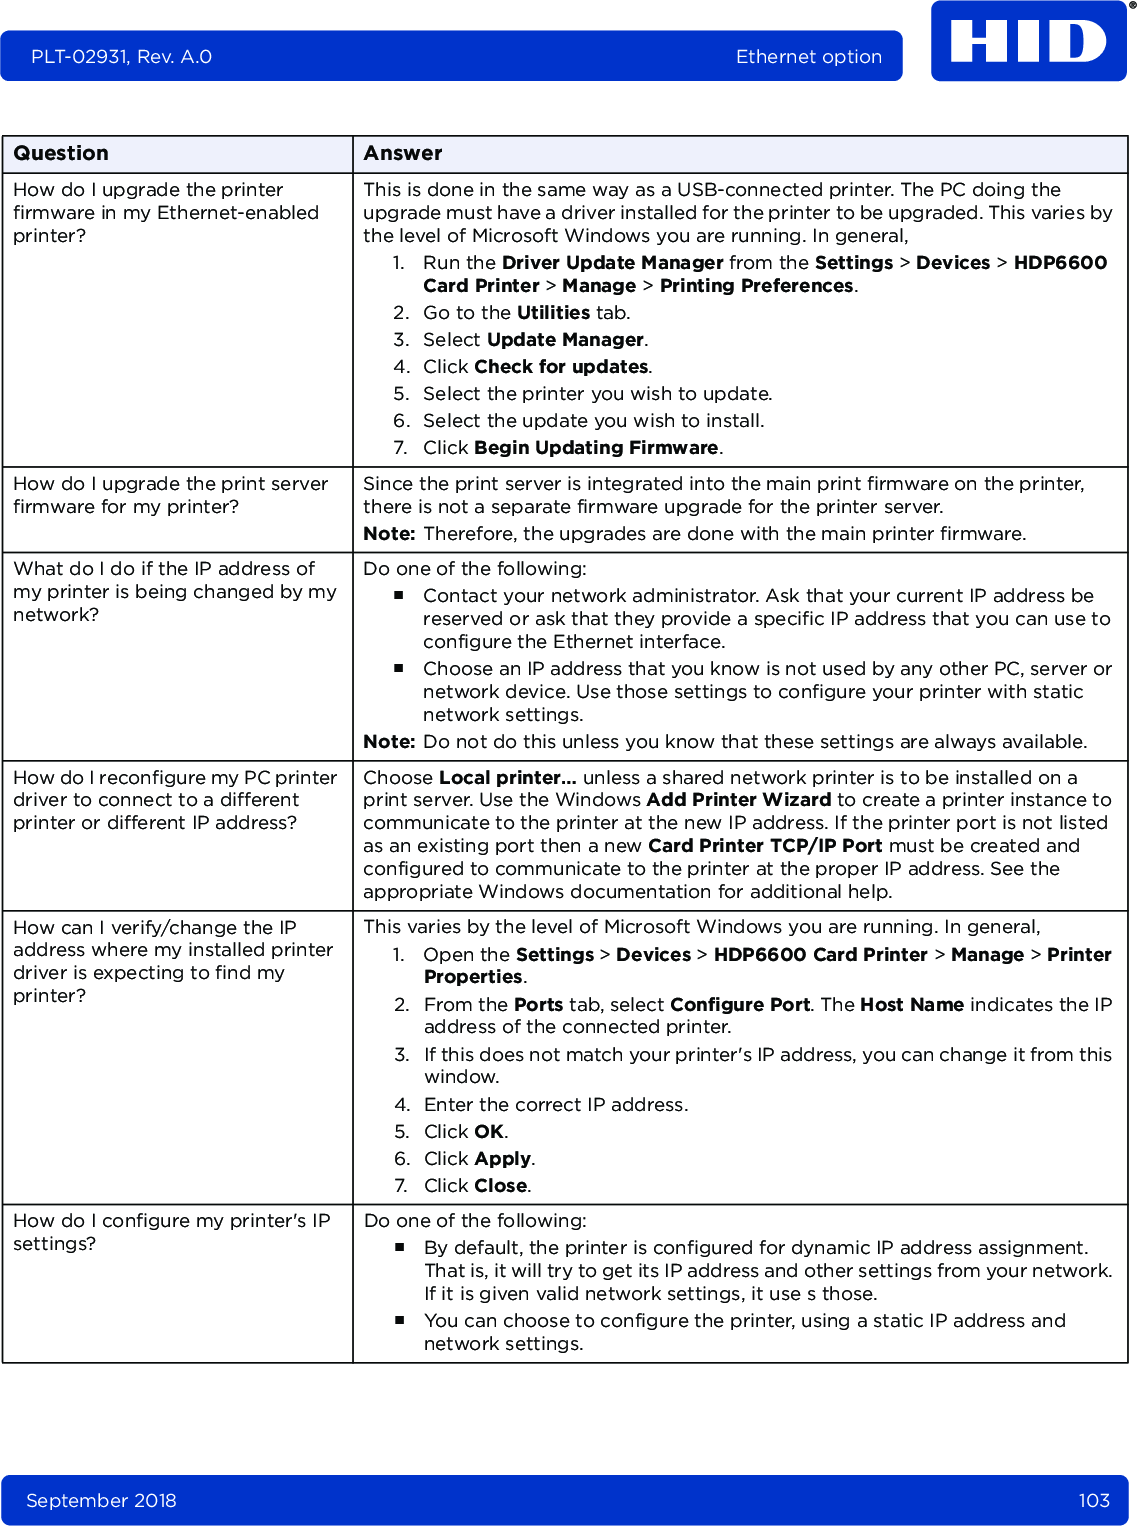
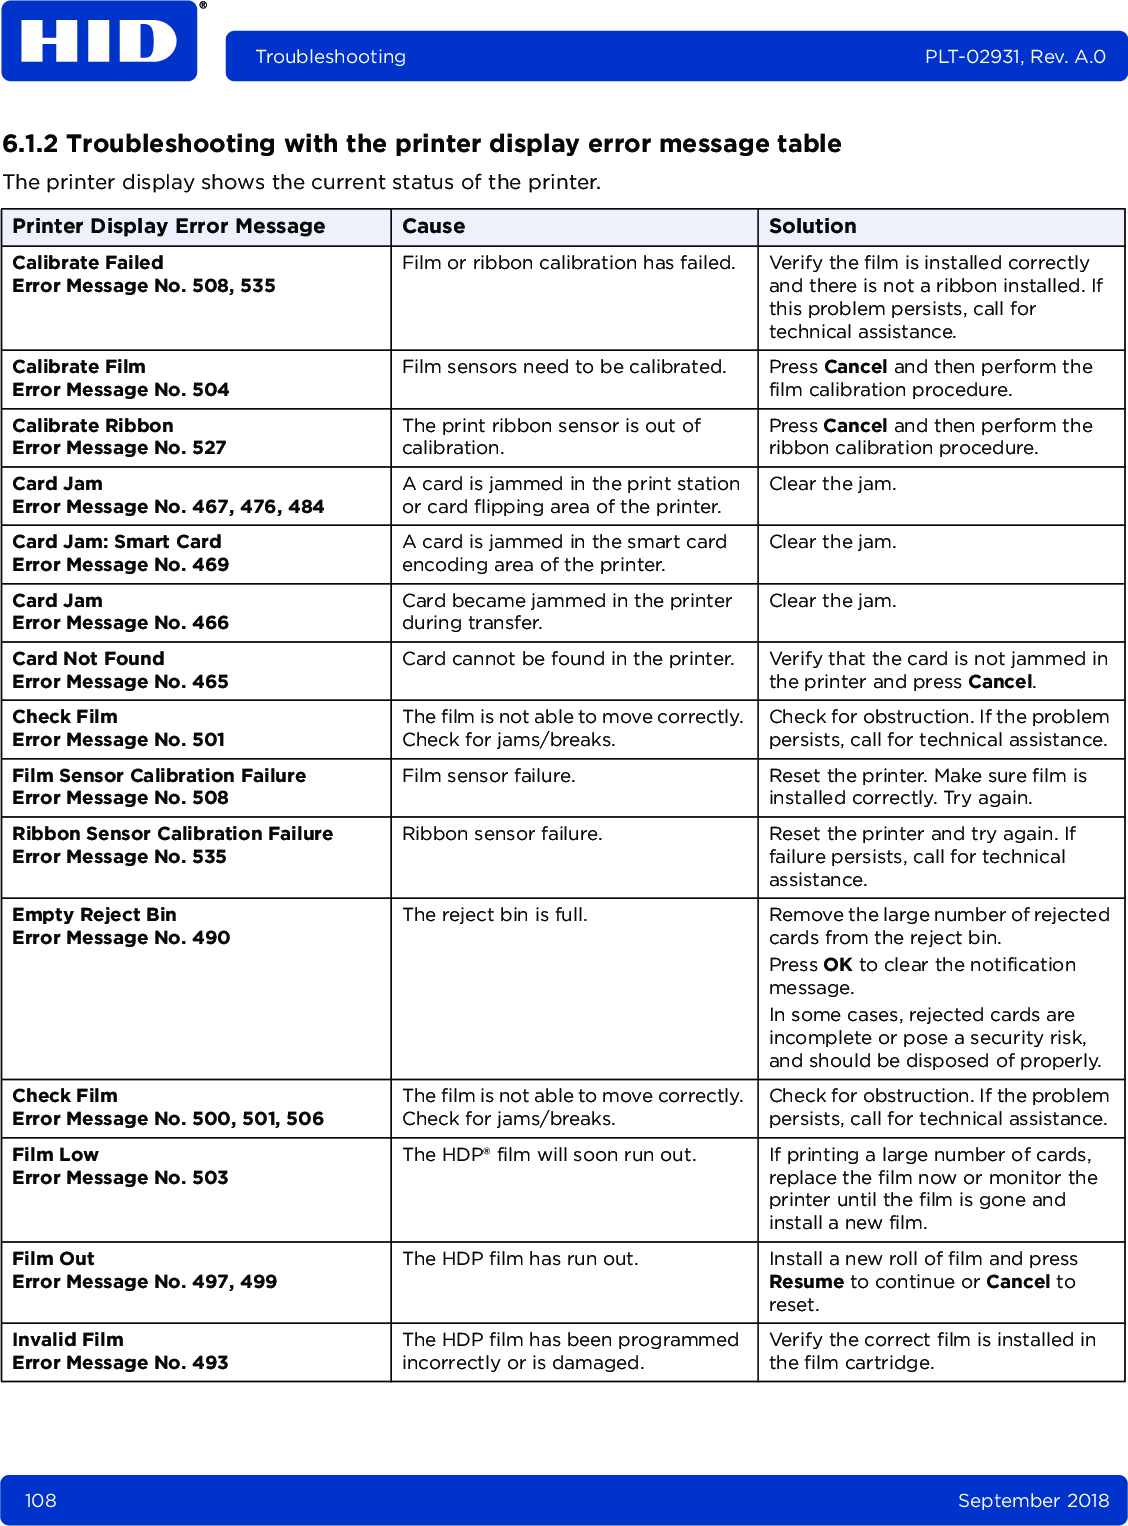
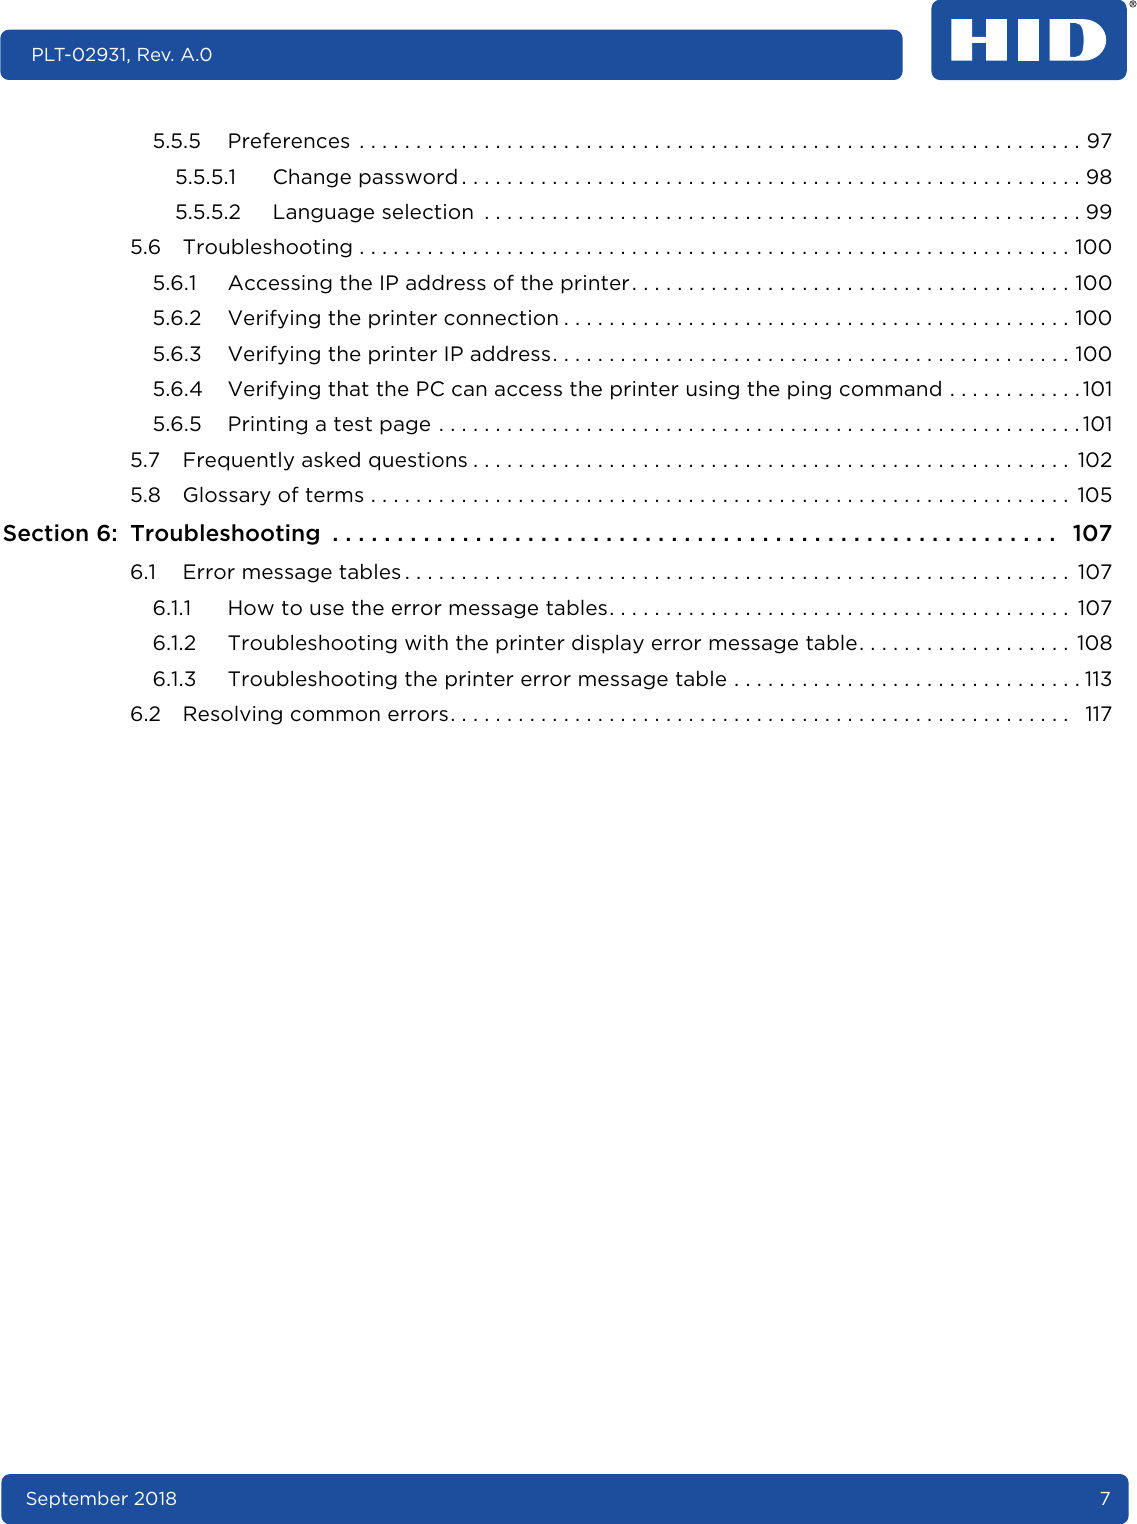
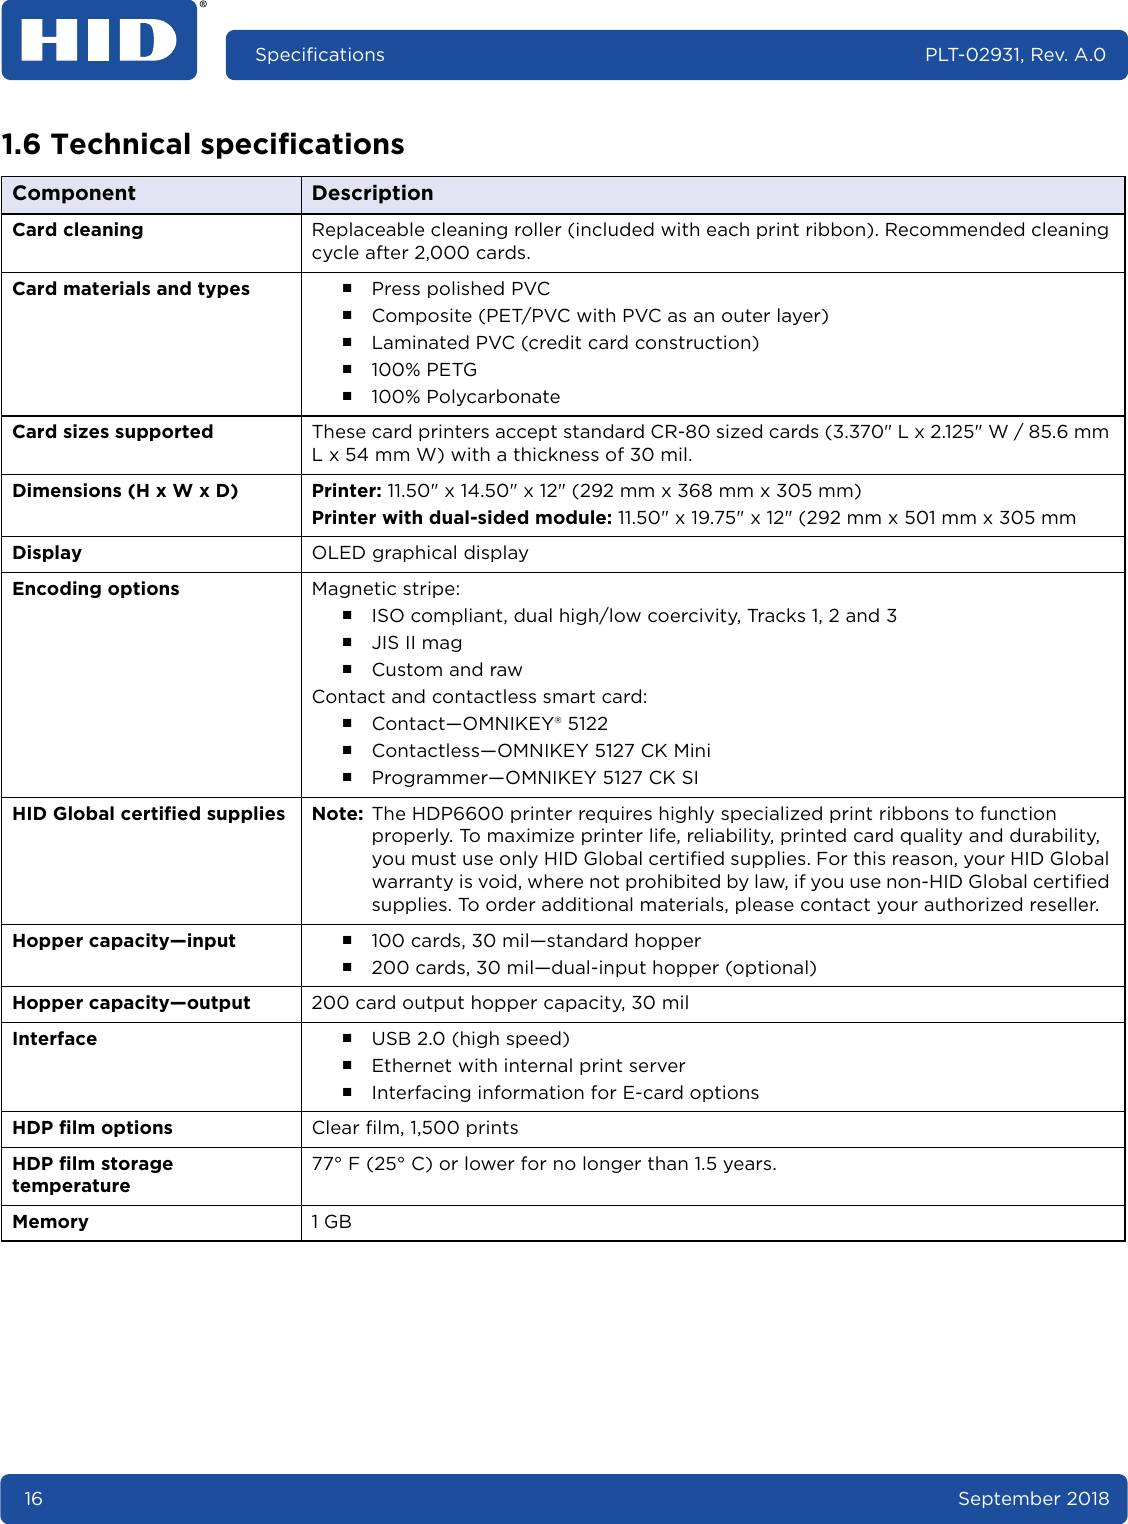
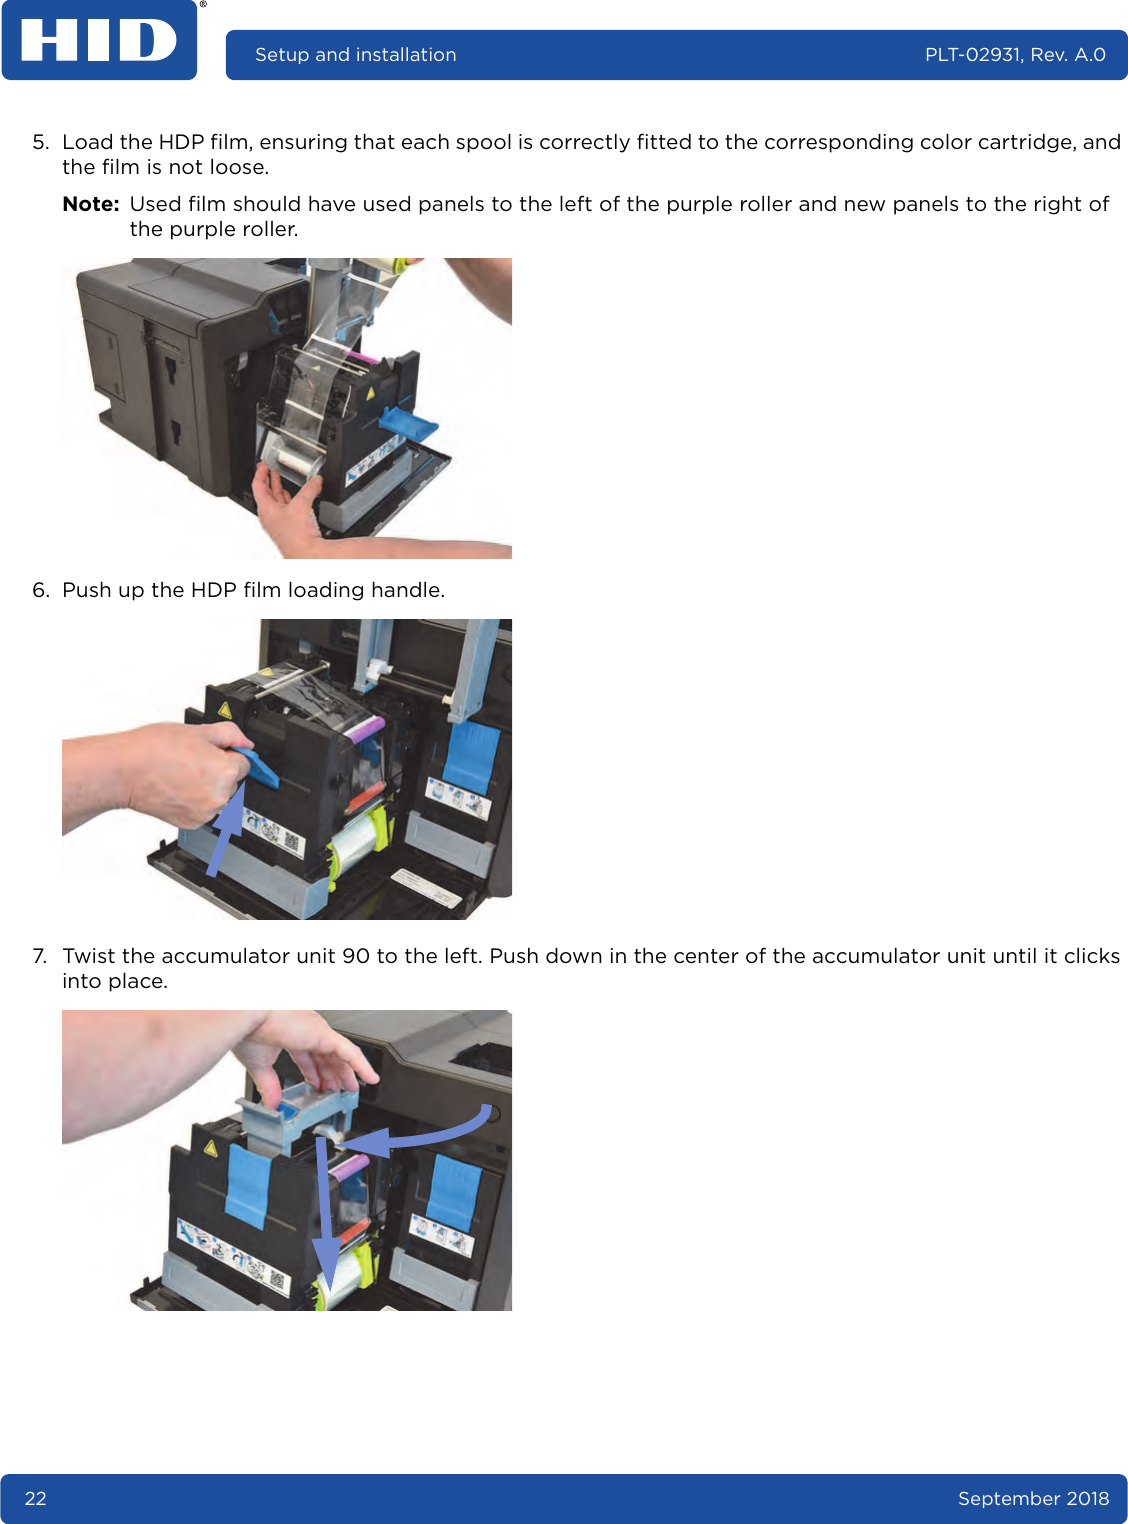
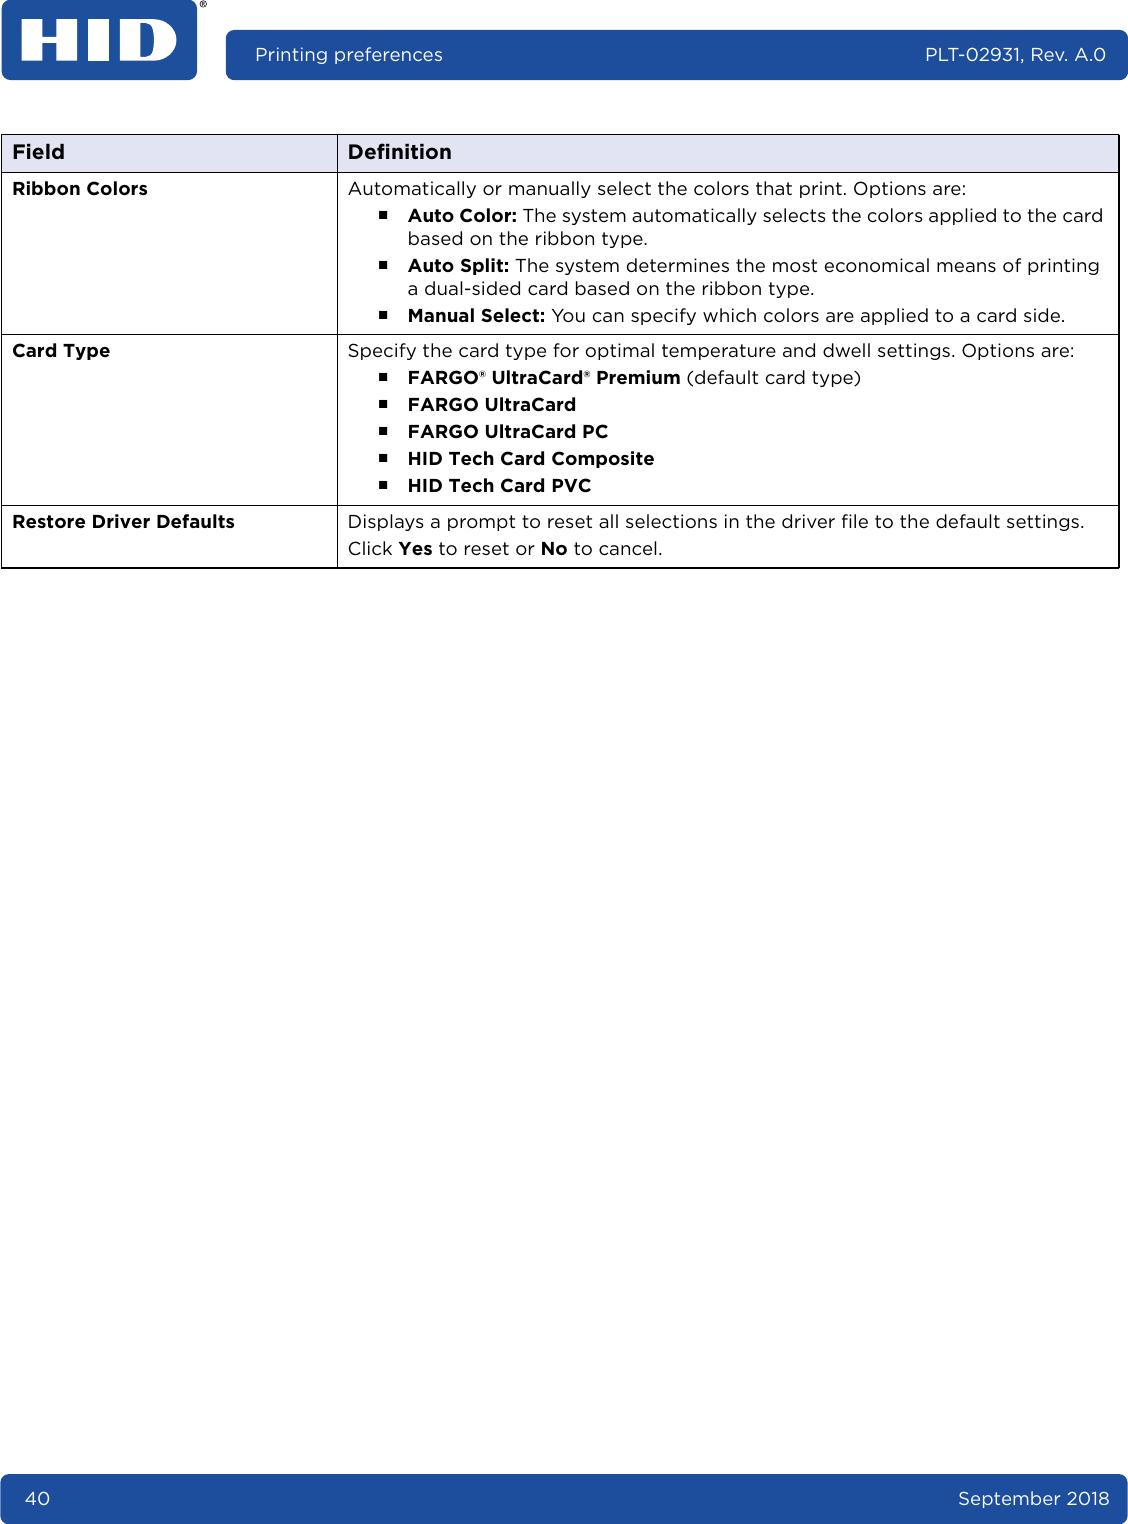
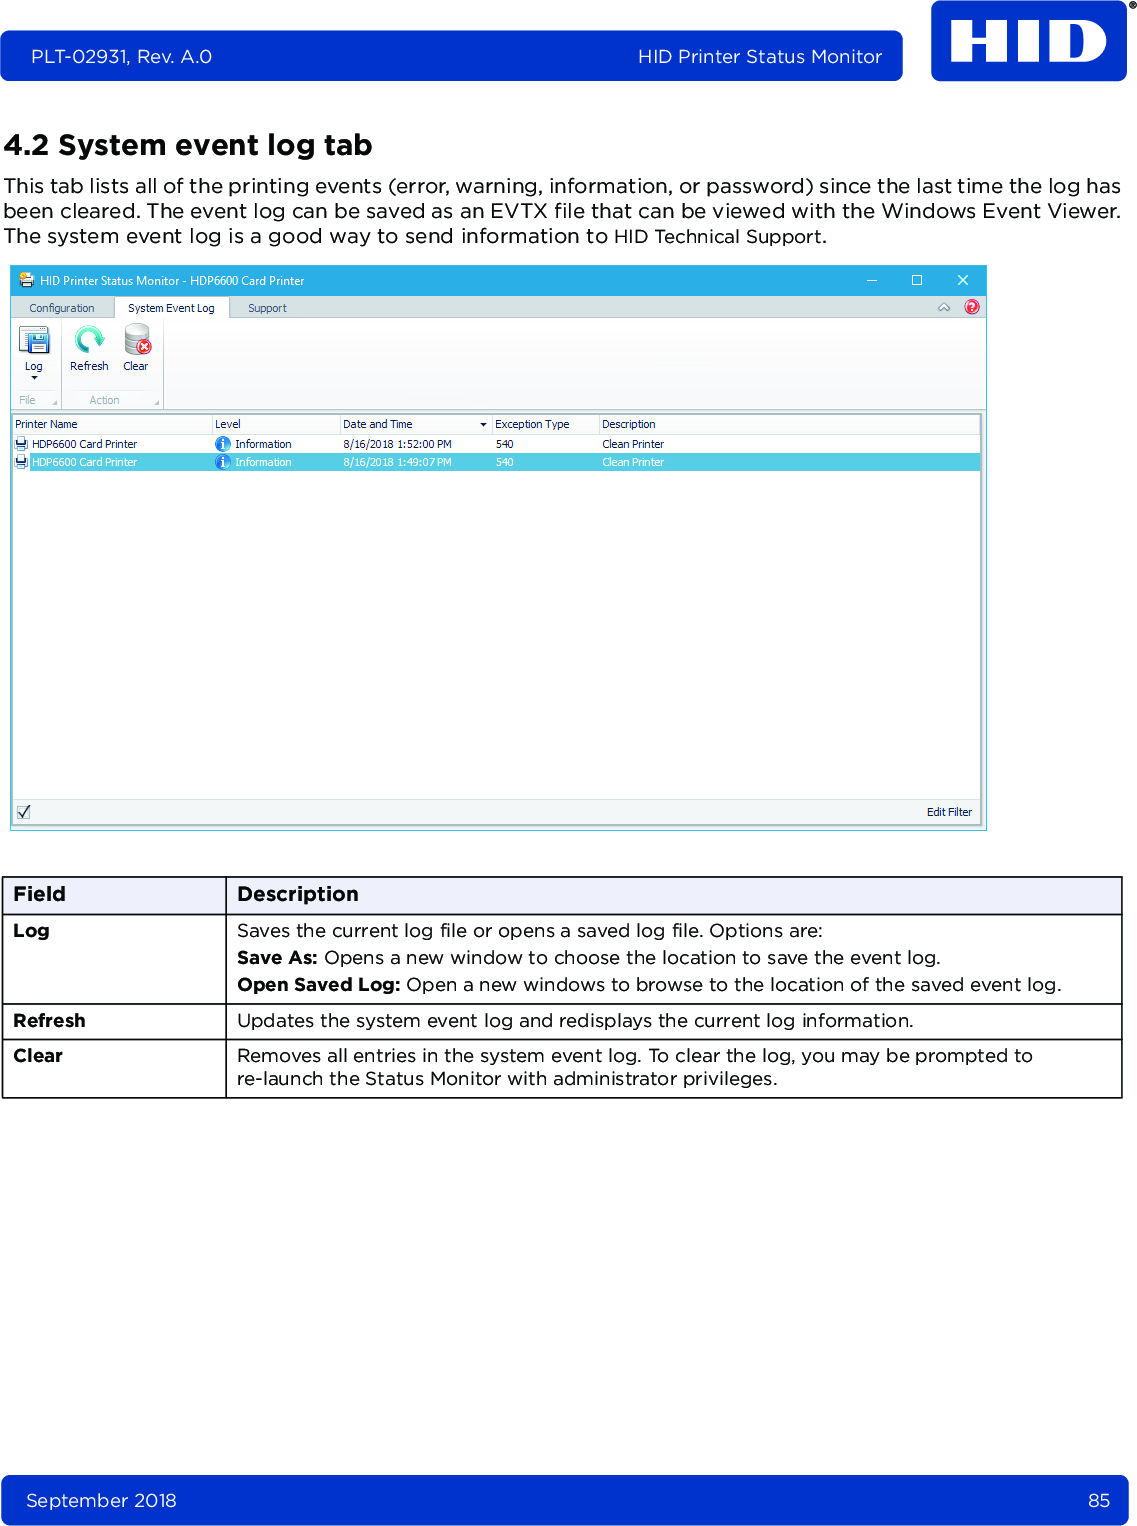
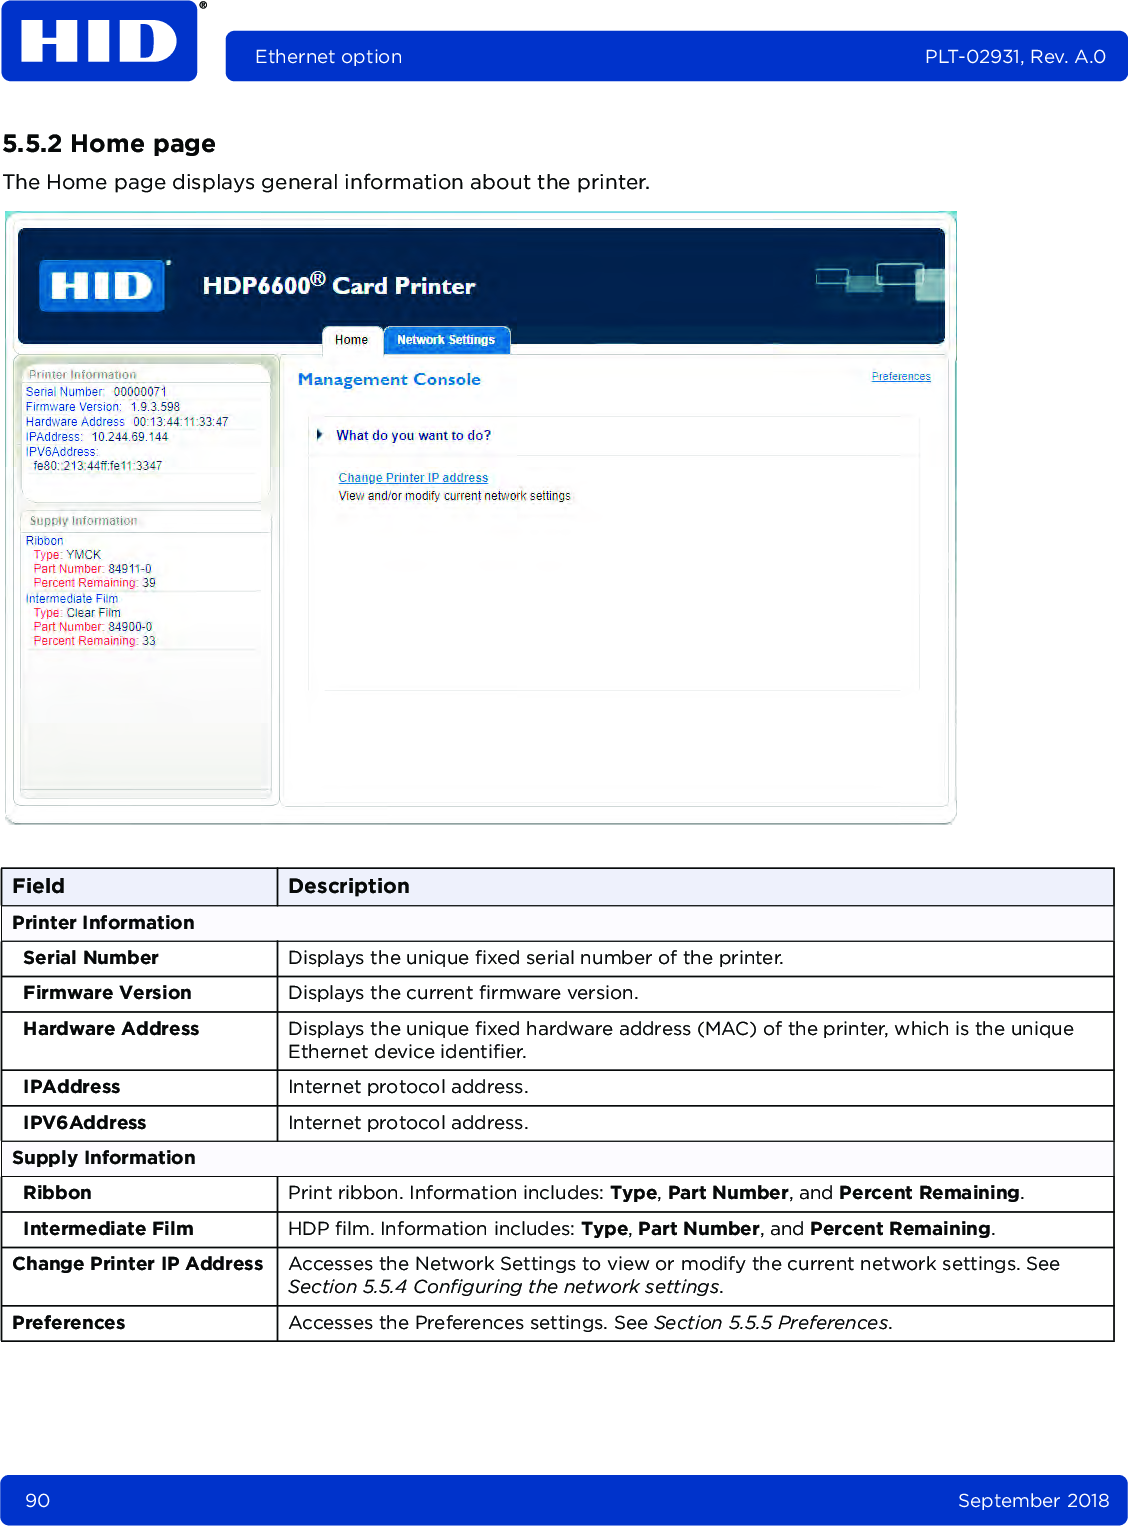
![60 September 2018Printing preferences PLT-02931, Rev. A.040 ( 62 > 84 T41 ) 63 ? 85 U42 * 64 @ 86 V43 + 65 A 87 W44 ‘ 66 B 88 X45 - 67 C 89 Y46 . 68 D 90 Z47 / 69 E 91 [48 0 70 F 92 \49 1 71 G 93 ]50 2 72 H 94 ^51 3 73 I 95 _52 4 74 J53 5 75 KASCII Code Character ASCII Code Character ASCII Code Character](https://usermanual.wiki/HID-Global/X002200.Windows-User-Guide/User-Guide-4069218-Page-60.png)


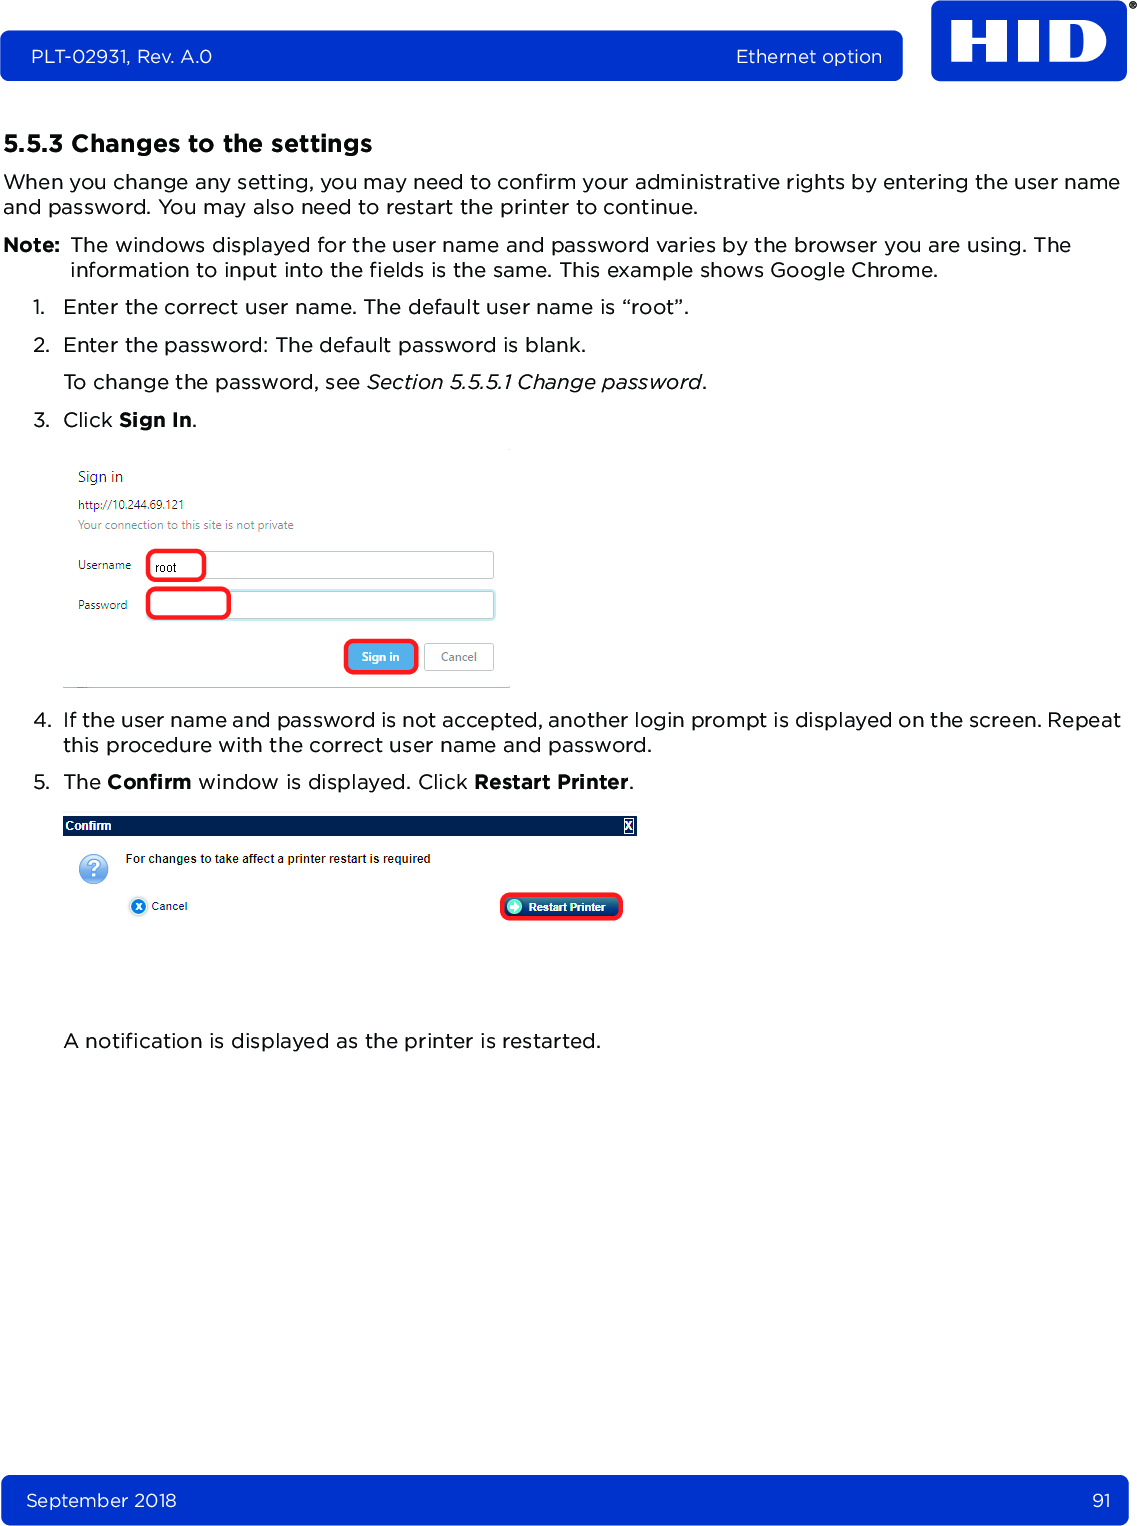
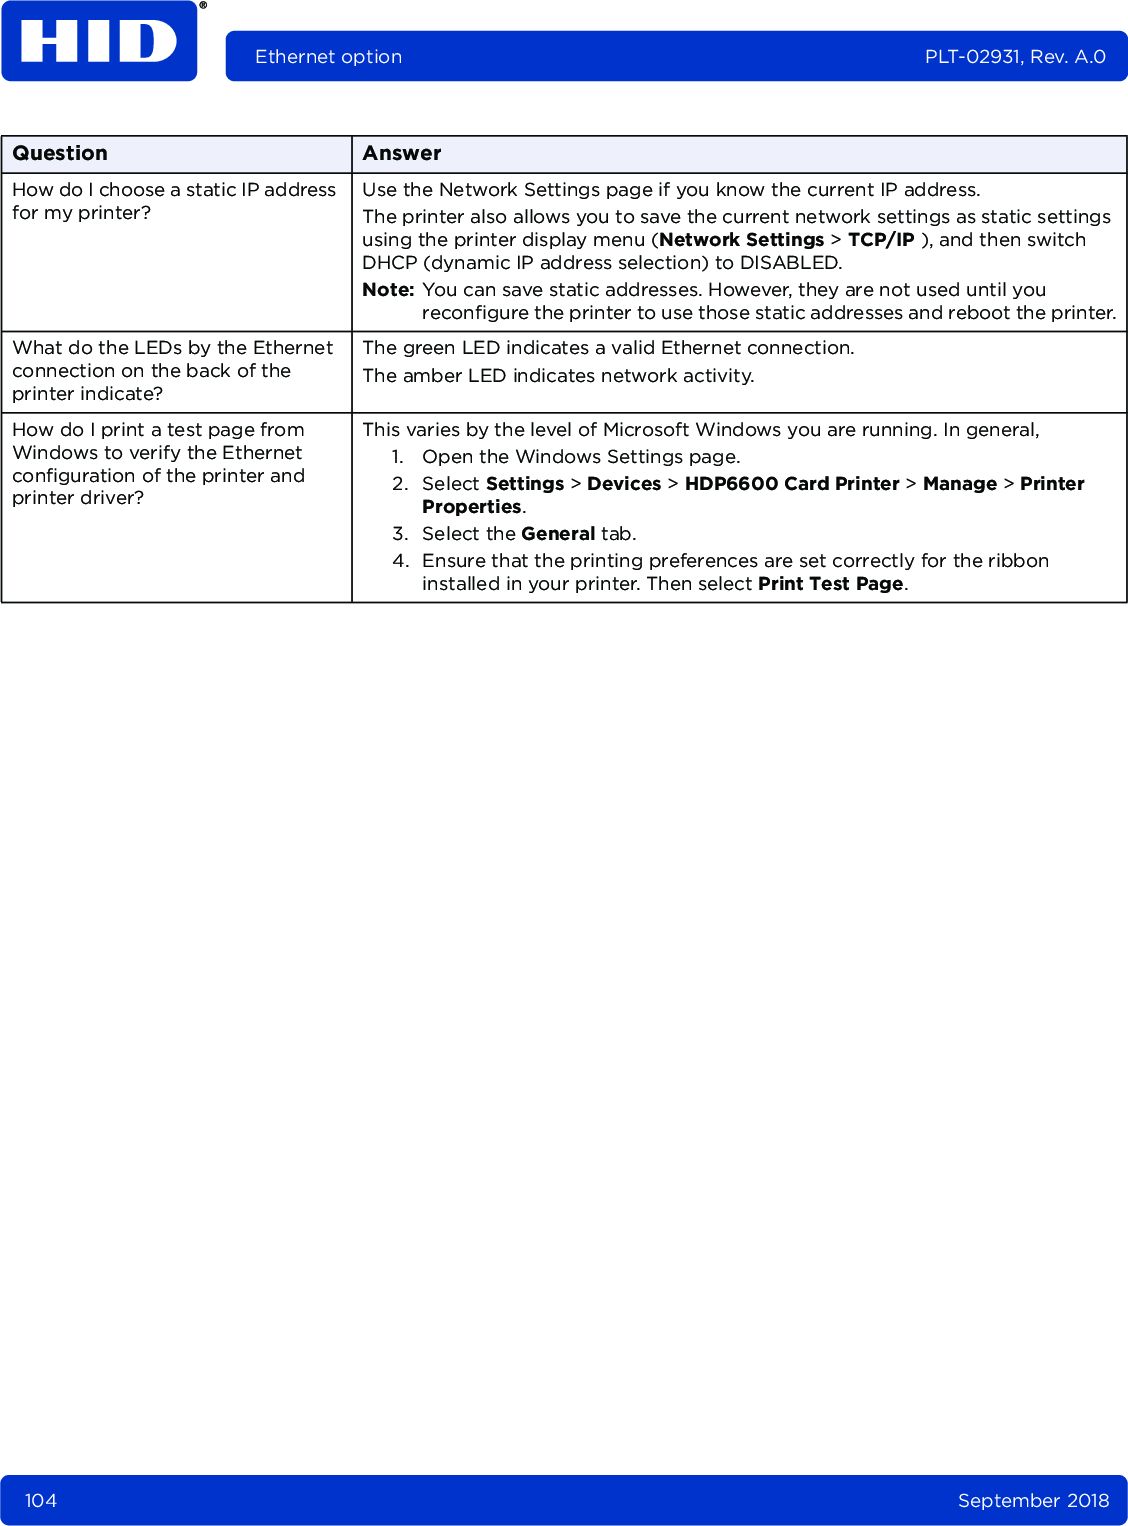
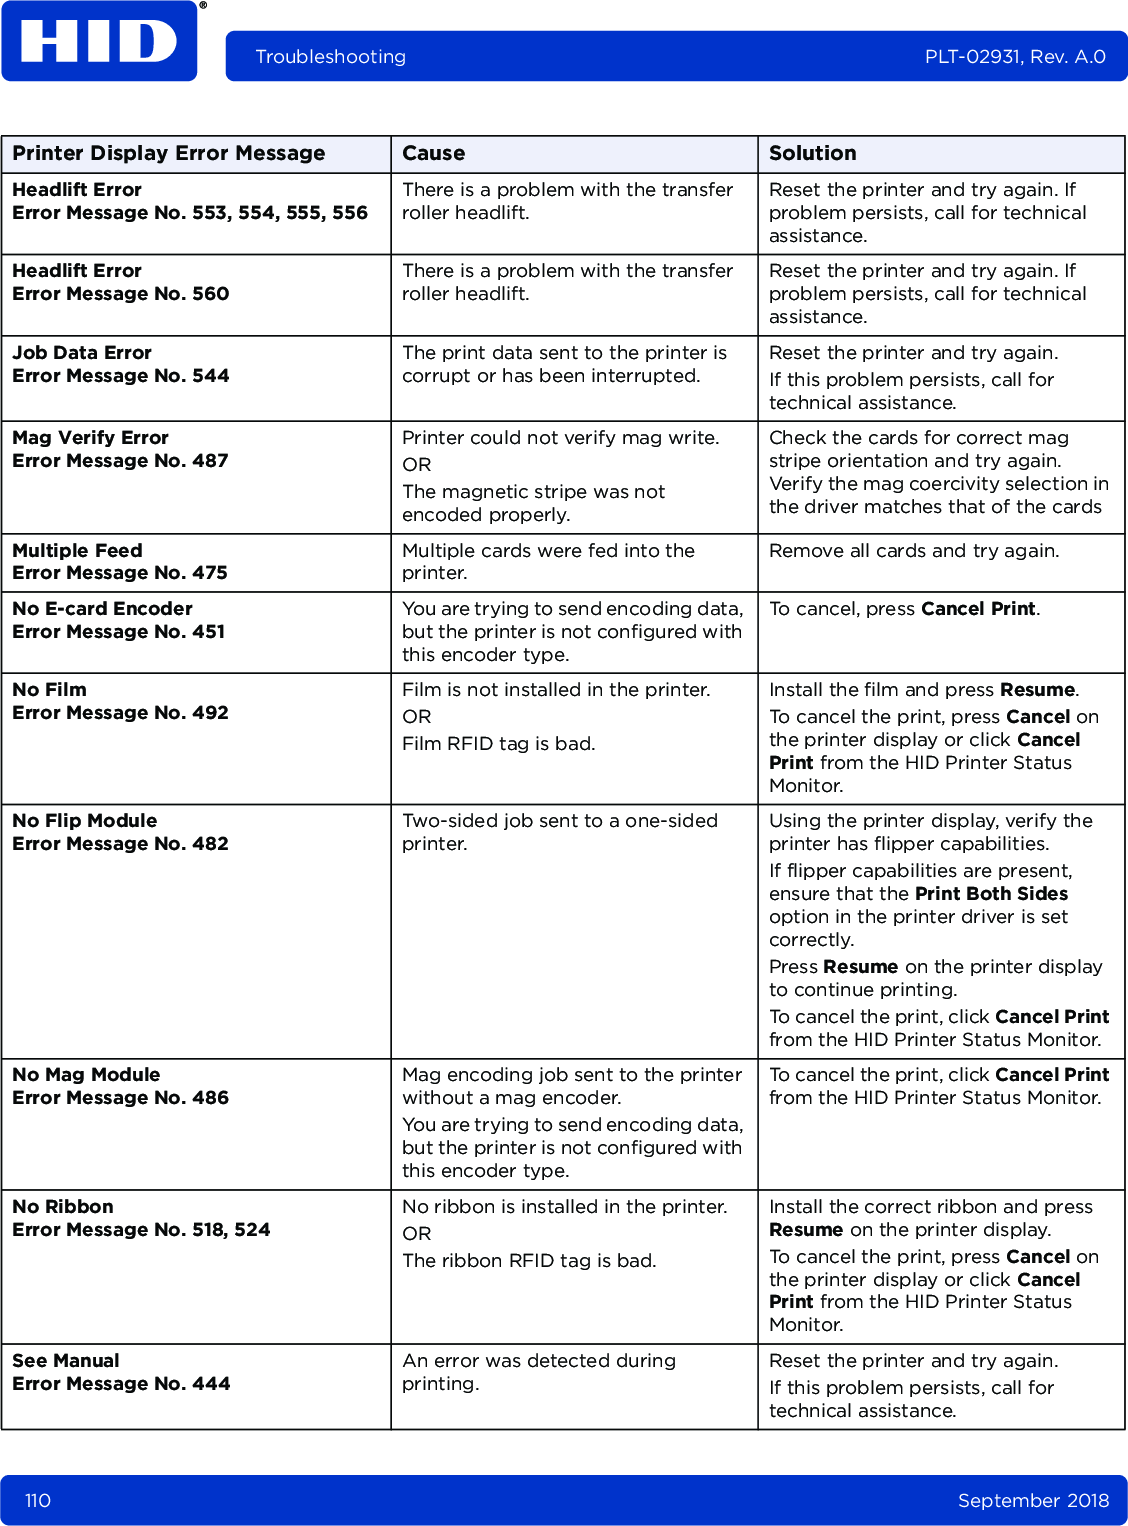
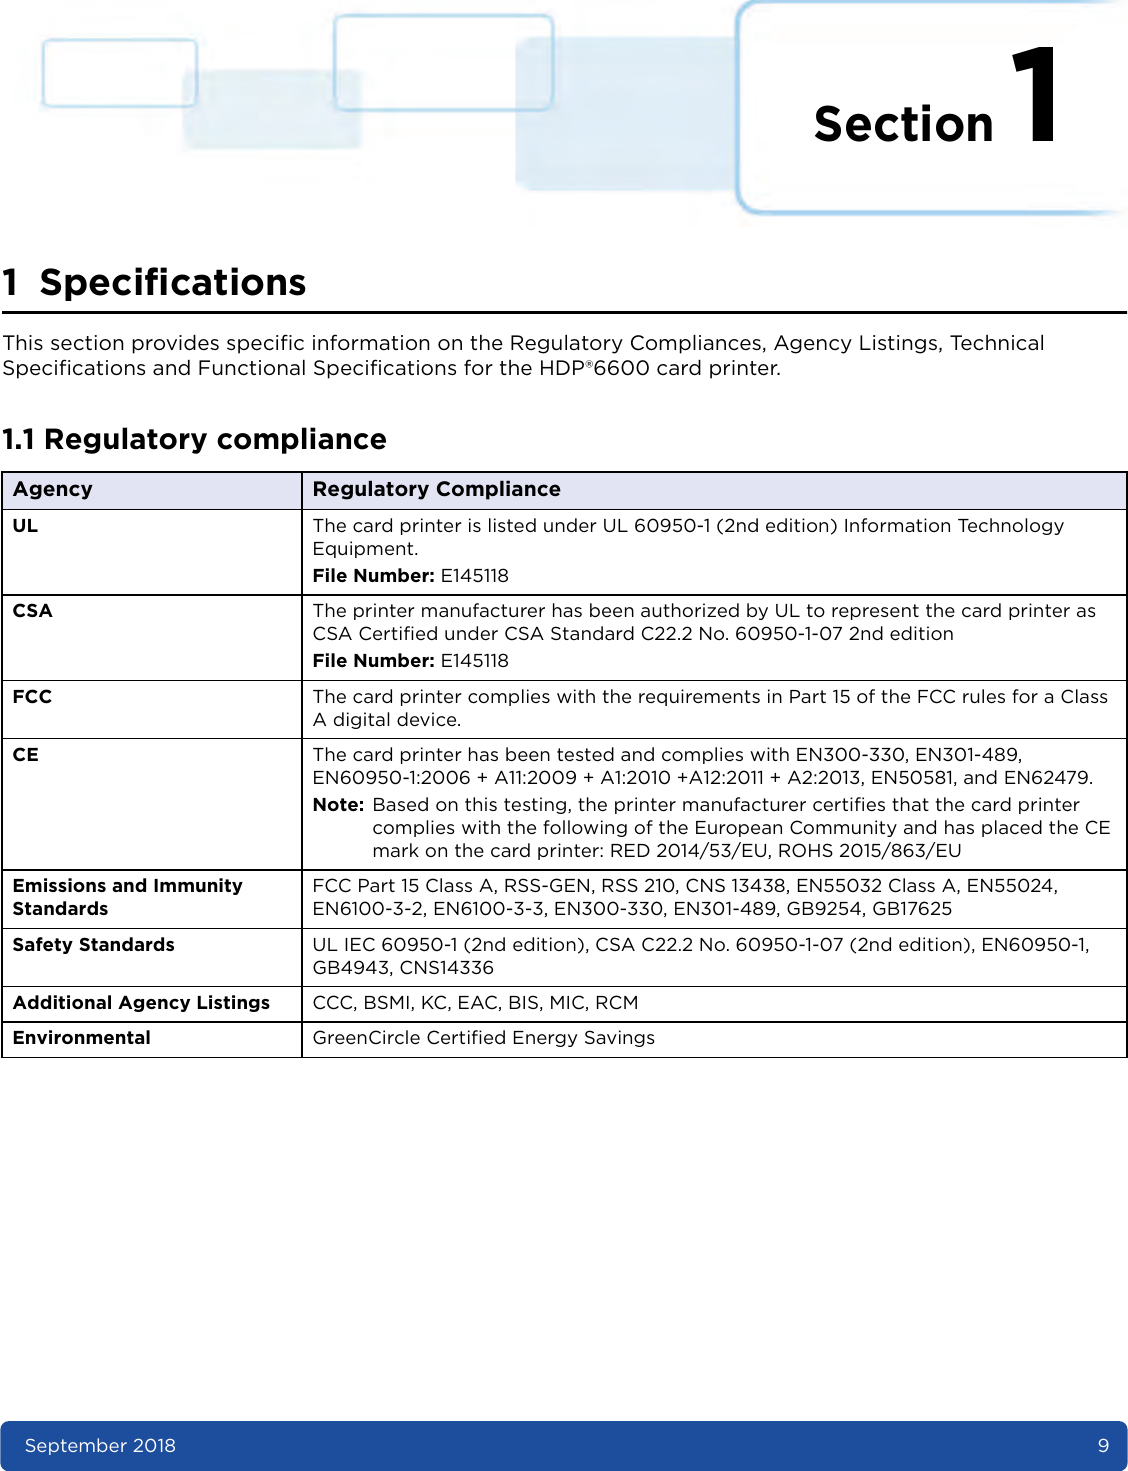
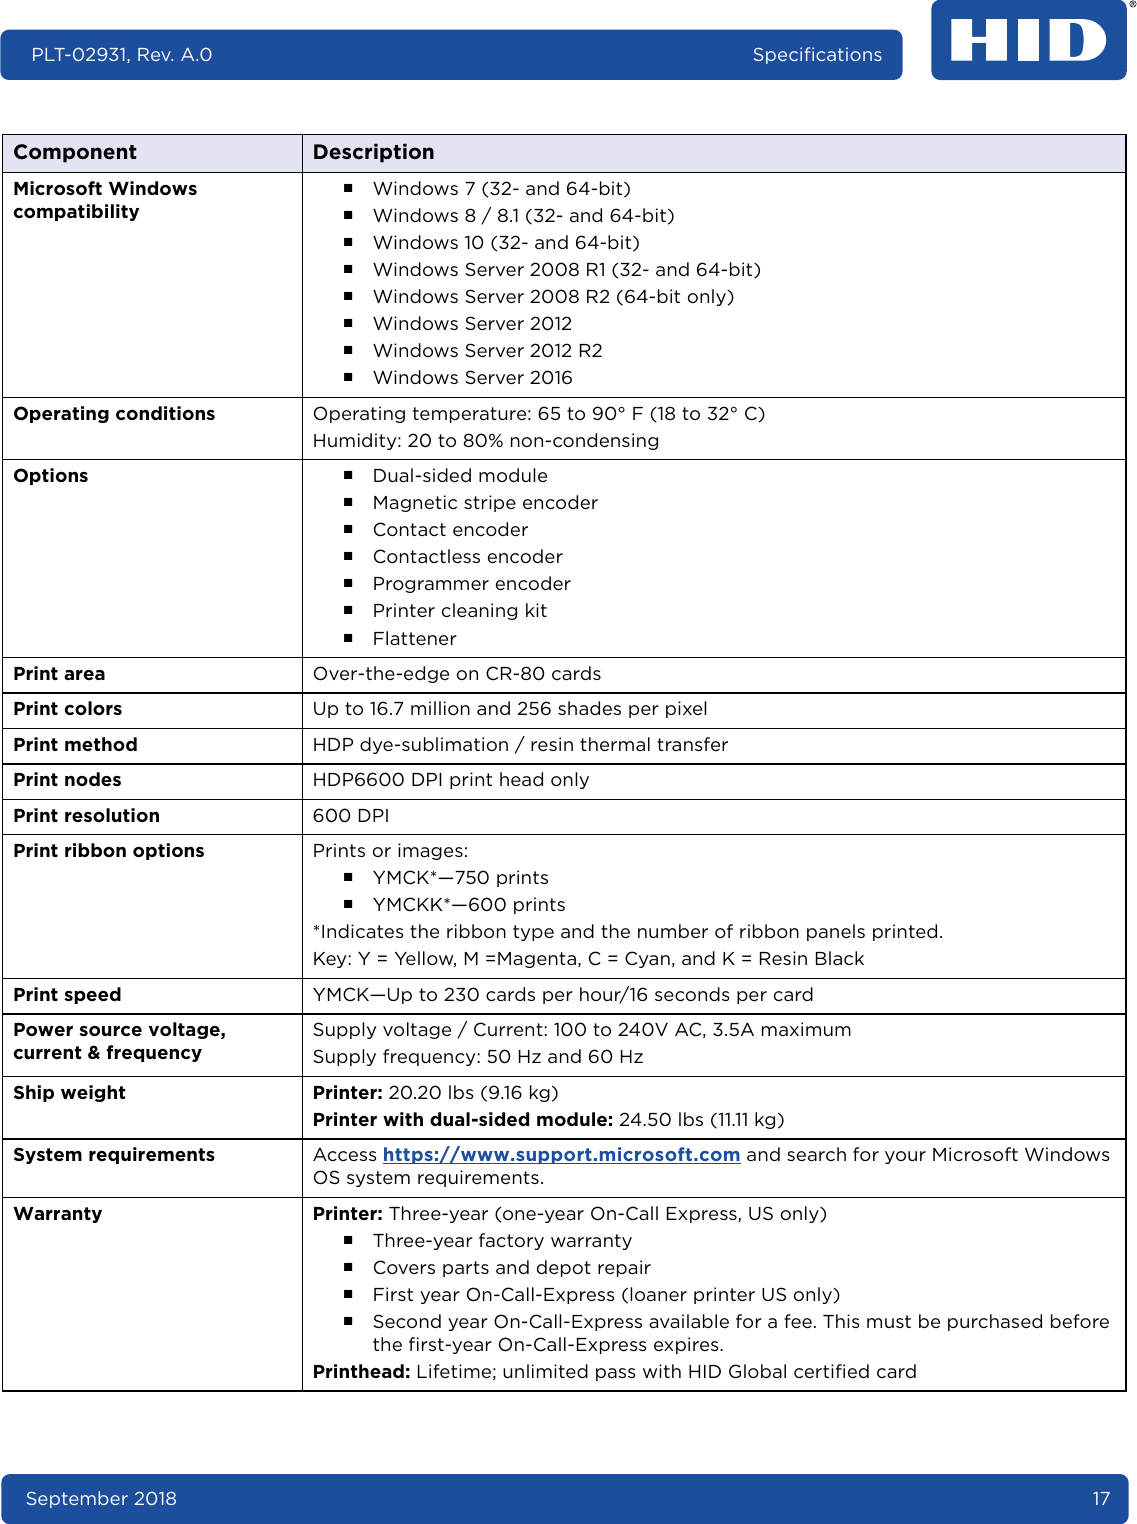
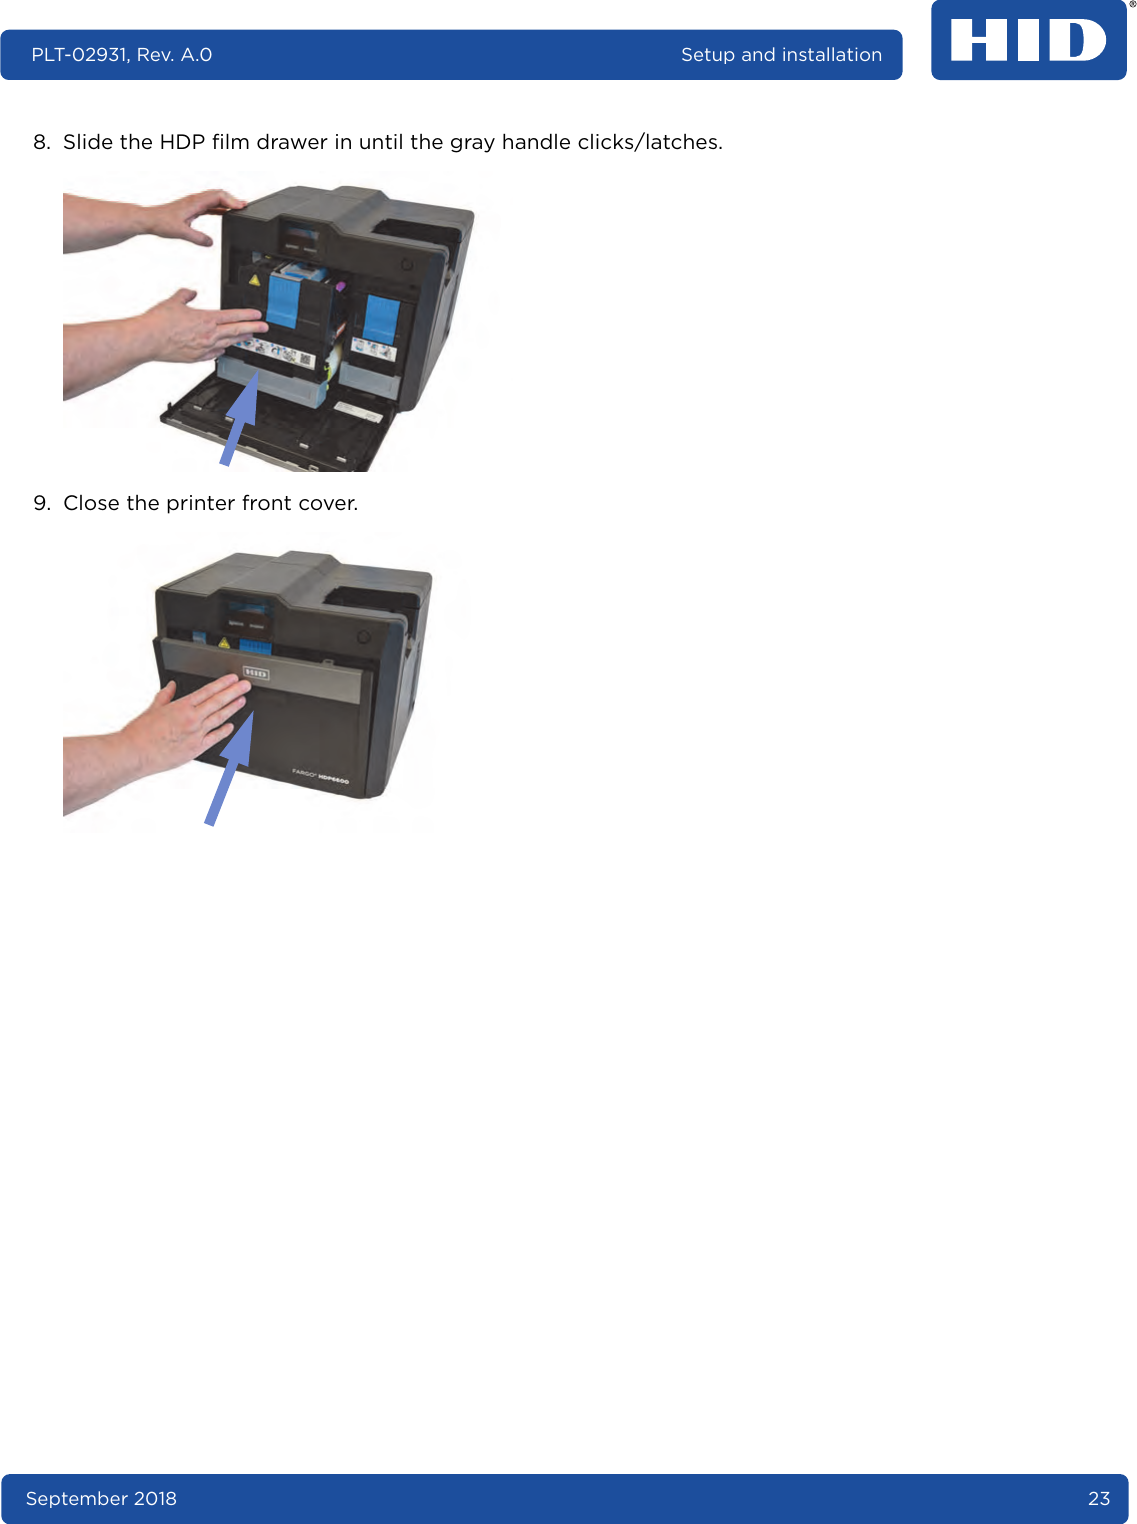
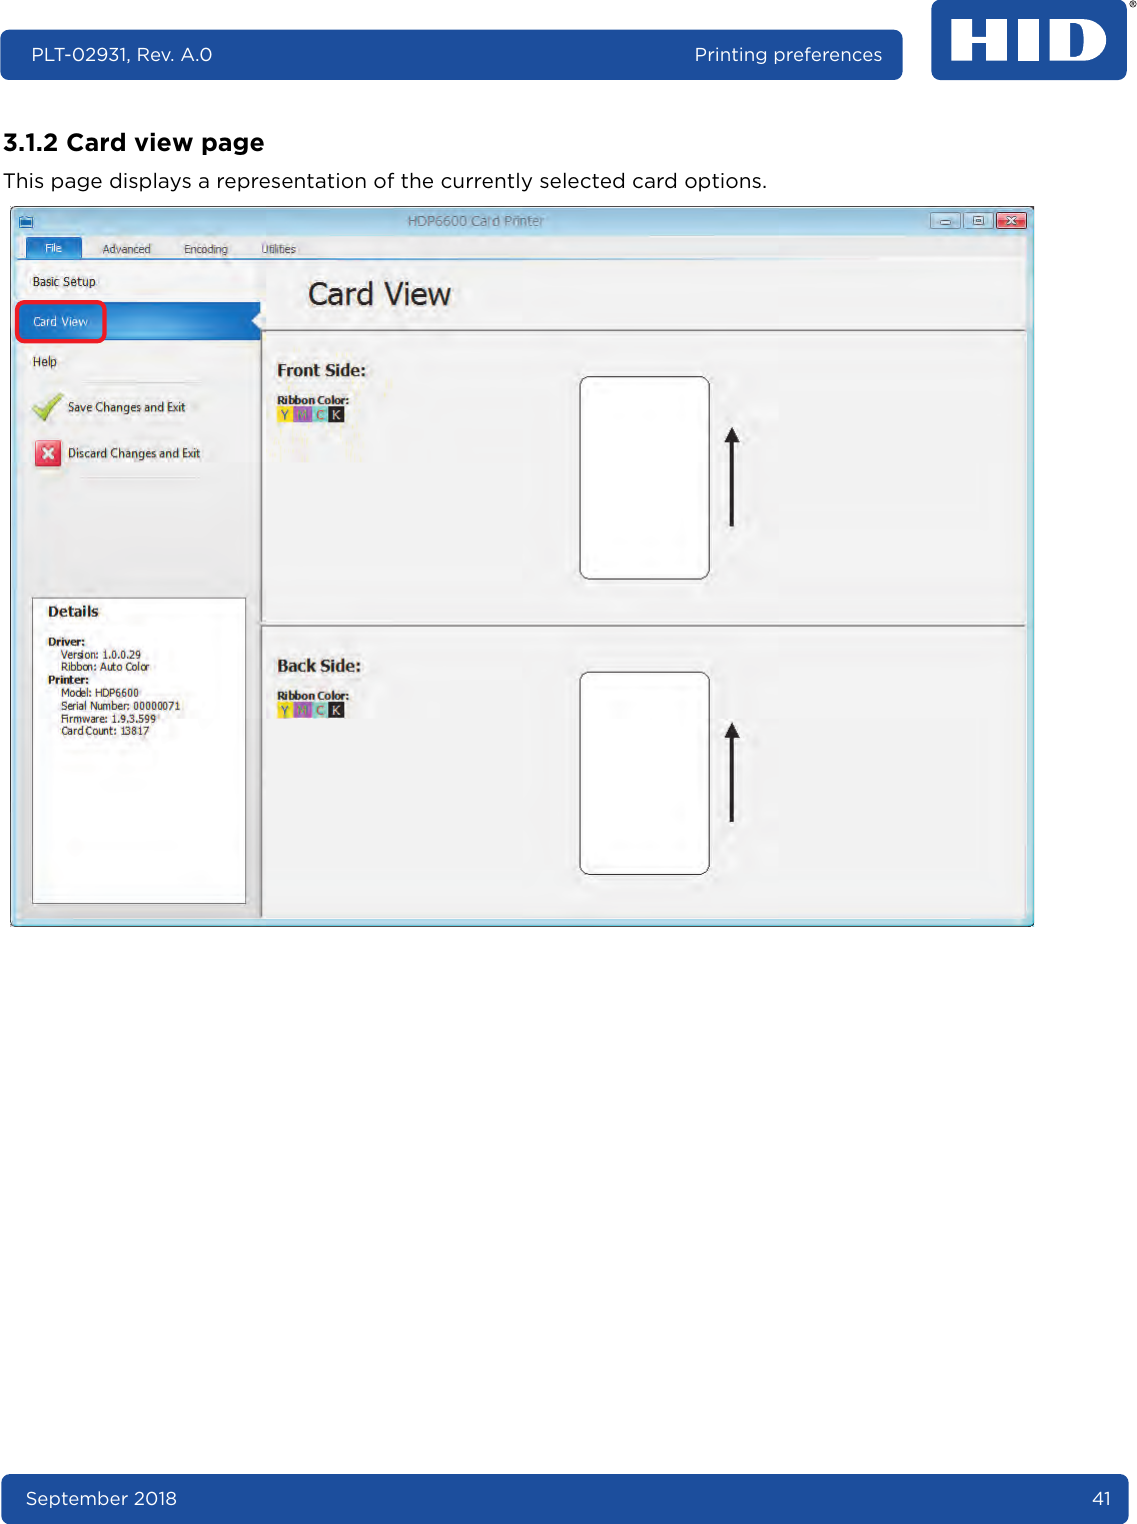
![September 2018 101PLT-02931, Rev. A.0 Ethernet option5.6.4 Verifying that the PC can access the printer using the ping commandFollow these instructions to issue a ping command to the printer.1. At a Command Prompt window, enter “ping [IP address]”: For example: C:\>ping 10.244.69.1442. A successful ping response is shown here:3. If the response is successful, move on to the next troubleshooting procedure. 4. An unsuccessful response is shown here:5. If the ping response is not successful, continue to Step 6.6. Verify that the PC and the printer are connected to the same network.7. You may be on different subnets of your network and some of the network settings for the printer are not correct. See your network administrator for additional assistance. Note: The subnet mask must be the same as other devices on the network, and the unique IP address must be part of the network specified by the subnet mask.5.6.5 Printing a test pageTry printing a test page from the printer driver properties window. If you cannot print a test page, then consider the following possibilities:႑There may be an error at the printer.႑There may be a job in the Windows print queue which has stalled.႑The printer may be paused or set to operate offline in the Windows print queue.](https://usermanual.wiki/HID-Global/X002200.Windows-User-Guide/User-Guide-4069218-Page-101.png)