HITACHI Reference Information (57) Manual L0410001
User Manual: HITACHI HITACHI Reference Information (57) Manual HITACHI Reference Information (57) Owner's Manual, HITACHI Reference Information (57) installation guides
Open the PDF directly: View PDF ![]() .
.
Page Count: 63
H ITAC H I
DIGITAL$AI"ELUTESYSTEM
A Ax
CAUTION: TO REDUCE THE RISK OF ELECTRIC SHOCK,
DO NOT REMOVE COVER (OR BACK).
NO USER-SERVICEABLE PARTS INSIDE.
REFER SERVICING TO QUALIFIED SERVICE PERSONNEL.
This symbol is hnte_ded to alert the user to
the presence of uninsulated "dangerous
voltage** within the product's enclosure that
may be of significant magnitude to
constitute a risk of electric shock to per son_
This symbol is intend_l to alert the uger to
the presence of important operating and
maint chance (servi_ag) instructions in the
literature accompanying the appliance.
Trademarks and Copyrigh_are contained in
the _eceiver and this manual is copyright © 1995, 1996 by
Hughes Network Systems, Inc. Some features are patent
pending. HNS InsightTM , and A1phaTuneTM are trademarks
of Hughes Network Systems, Inc. QuickTuneTM is a
trademark of Hitachi Home Electronics, Inc. DIRECTV _
and DSS® are registeredwade.marksand Direct "IacketTM is a
trademark of DIRECTV, Inc., a Hughes Electronics
Company. USSB®and Enter_ament Plus® are registered
trademarks of United States Sam!lite Broadcasting
Company, Inc. NFL Sunday Ticket* is aregistered
trademarkof the National Foothali League. N'BA League
passsr_ is a service rn_k of NBA Properties, Inc. NHL
Center IceTM is aservice mark of the National Hockey
League. ESPN Full CourtTM is a trademark of ESPN
Enterprises, a subsidiary of ESPN, Inc. ESPN® is a
regismred trademark of ESPN, Inc. MLB Extra IrmmgssMis
an official service mark of Maior League Baseball Properties,
Inc. HBO ® and Cinemax_ are registered trademarks of
Home Box Office, a division of Tune Warner
Entertainment Company, LP. ShowfimesM, The Movie
Channel sM, and FHX _ are service marks of Showdme
Networks ®, Inc. MTV: Music Tdevidon®, VHI Music
First_, and Nickelodeon ®are registered trademarks of M'rV
Networks, adivision of V'mcom International, Inc. Comedy
Central® is a registered trademark of Comedy Partners.
Lifetime Television® is a registeredtrademark of Lifetime
Entertainment Services. Disney is a copyright of the Walt
Disney Company. The Discovery Channel® is a registered
trademark of The Discovery Networks. CNN ® is a
registered trademarkof Turner Broadcasting System, Inc.
A&E® is a registered trademarkof A&E Tdevisiot_ El is a
registered trademark of El Entertainment Television, Inc.
Other product, corporate names, program titles, network
names, and logns may be the property of other companies,
and are used within this manual and related DSS recdver
software only for explanation to the owner's benefit,
without intent to infringe. This product is the subject of one
or more U.S. or foreign patents pending.
Disclaimer--Every effort has been made to ensure the
correctness and completeness of the material in this
document. No company shall be liable for errors contained
herein. The information in this document is subiect to
change without notice. No warranty of any kind is made
with regard to this material, including, but not limited to, the
implied warranties of merchantability and fitness for a
particnla_ purpose.
Macrovlslon Irlforrl_tion--Tl_s device incorporates an
•anficopy process technology that is protected by U.S.
patents and other intellectual property fights. The anficopy
process is licensed for noncommercial, home" use only.
Reverse engineenng or disassembly is prohibited.
Note on Recording Programming--Most television
programs and films are copyrighted. This means that
someone has ]effalrights governing the reproductionand
distribution of this material. In certain drcumstances,
copyright law may apply to private in-home taping of
copyrighted matemls. In most cases, it is permissible to
record for persoral use, as long as you do not sell the
material. You must act responsibly in this area - check into
the matter if you are unsure.
Some pay-per-view programs may be licensed from
producers as "view only" programs. These are copyrighted
ptograrm and may not be copied or reproduced for any
purpose without the express written perrmssion of the
copyl_ht owner.
DSS Programminff---For subscription information, or
to resolve prohlems related to DSS progranmang, call the
service provxlets, induding DIKECTV at 1-800-DIRECTV
(34%3288)and USSB at 1-800-204-USSB (8772).
Hitachi-brand DSS Hardware and Installation--
To arrange for professional installation of your DSS system,
ask questions, or to resolve problems related to your
Hitachi-brand DSS system, contact your dealer. If additioml
information is needed, please contact Hitachi toli free at 1-
800-477-1212.
Hitadai Home Eleca'onics (America),Inc.
3890 Steve Reynolds Boniev_d
Norcross, GA 30093
System Model#:
Receiver Model #:
Receiver Serial #:
Access Card #:
IMPORTANT SAFETY INSTRUCTIONS
PERTAINING TO A RISK OF FIRE, ELECTRIC
SHOCK, OR INJURY TO PERSONS
In additionto thecarefulattentiondevotedto the qualitystandardsin themanufactureofyour DSSproduct,safetyisamajorfactor
inthe designof everyinstroznen_However,safetyisyourresponsil;flity,too.
The followinginformationwillhelp to ensure your enjoymentandproper use of the DSS system.Pleaseread this informaaon
carefifllybeforeinstalli_ operatingandusingyourDSSequipment
Installation
1. Read and Follow Instructions--All the sffcty and
operating instr_ctiom shoed be read befure the DSS
productis operated.Follow alloperatinginsm_rions.
2. Retain Instructions--The safety and operating
instructions should be retained for future reference.
3. Heed'Warnings--Complywith allwarningson the
DSSproductand intheoperatinginstructions.
4. Polarlzatlolr--ThJs DSS product is equipped with a
polarized alternating_t line plug (a plug haxdng one
blade wider than the other). This plug will fit into the power
outlet only one way. This is a safety feature. If you are
unable to insert the plug flatlyinto the oudet, ny reversing
the plug. If the plug fails to fit, contact your decrtidan to
rephce your obsolete outlet. To prevent electric shock, do
not use this polarized plug with an extension cord,
receptacle, or other outlet unless the blades can be fully
inserted without blade exposure. If you need an extension
cord, use a polarized cord.
should never be blocked by phdag the product on abed,
sofa, rug, or other similar surface. This product should never
be placed near or over aradiator or heat registex, or in a
built:tn installation such as abookcase or rack unless proper
ventilation is provided.
9. Attachments--Do not use attachments unless
recommended by the DSS product manufactur_ as they
may cause hazards.
10. Water and Moisture--Do not use this DSS product
near water--fur example, near abath tub, wash bowl,
kitch_ sink or laundry tub, in awet basement, or near a
swimming pool and the like.
5. Power Sources--Thi_ DSS product should be
operatedonly from the type of power source indicated on
the marking label. If you are not sure of the type of power
supply to you home, consult your DSS dealer or local power
company. For DSS products intended to operate from
battery power, or other sources, refer to the operating
instsuciions.
6, Overloading_Do not overload wall oudcts or
extension cords as this can result in arisk of fire or electric
shock. Overloaded ac outlets, ex'l_a_on cords, flayed power
cords, damaged or cracked wire insulation, and broken plugs
are dangerous. They may result in a shock or fire hazard.
Periodically examine the cord, and if its appearance indicates
damage or deteriorated insulation, have it replaced by your
service technician.
7. Power Cord Protection---Power supply cords
should be routed so that they arenot likelyto be walked on
or pinched by items placed on or against them, paying
particular attention to cords at plugs, and the l:_mt where
they exit the DSS product.
8. VentlletiorP-Slots and openings in the case are
provided fur ventilation to ensure reliable operation of the
DSS product and to protect it from overheating.'These
openings must not be blocked or covered. The openings
11. Accessories--Do not phce this DSS product on an
unstable cart, stand,bracket, or table. The DSS product may
fall, causing serious injury to a child or adult as well as
serious damage to the DSS product Any mounting of the
product should follow the manufacturer's instructions.
12. Moving--A DSS product and cart comVmadon
should be moved with care. Quick stops, excessive force,
and uneven surfaces may cause the DSS product and cart to
ov_
13. Satellite Dish Antenna Gruunding_The
outdoor antenoa used to receive satd!ite signals and the
cable used to connect the antenna to the indoor receiving
unit are requared to comply with local instslladon codes and
the approp_te sections of the National E_lecthc Code
(NEC) and in particular Article 810-15, which covers proper
installation and grounding of television receiving equapmea-tt,
as weUas to Arfide 820_0, wblch spedfies that the satellite
dish cable ground shall be connected to the grounding
system of the building as dose to the pffmt of cable entry as
praedcal. These codes require proper grounding of the metal
structure of the outdoor anmnna and grounding of the
connecting cable at a l_mt where it enters the house (or
other buiJ.din_. If you are having a professional installer
make the installation, the iostaller must observe installation
codes. The "Satellite Antenna Installation Guide" provided
withtheDSSproductcontainsinstructionsonhowtomake
theinstallationincompliancewiththeNEC. If additional
local installation codes apply, contactlocal inspection
authorities.
Ground
clamp
Electric
service
equipment
Ground
clamps
oaxlal
cable
Grouncllng
block
Coaxial
cable
Groundlng
nductom
Power service
grounclin electrode
(NECArtg_ PartH)
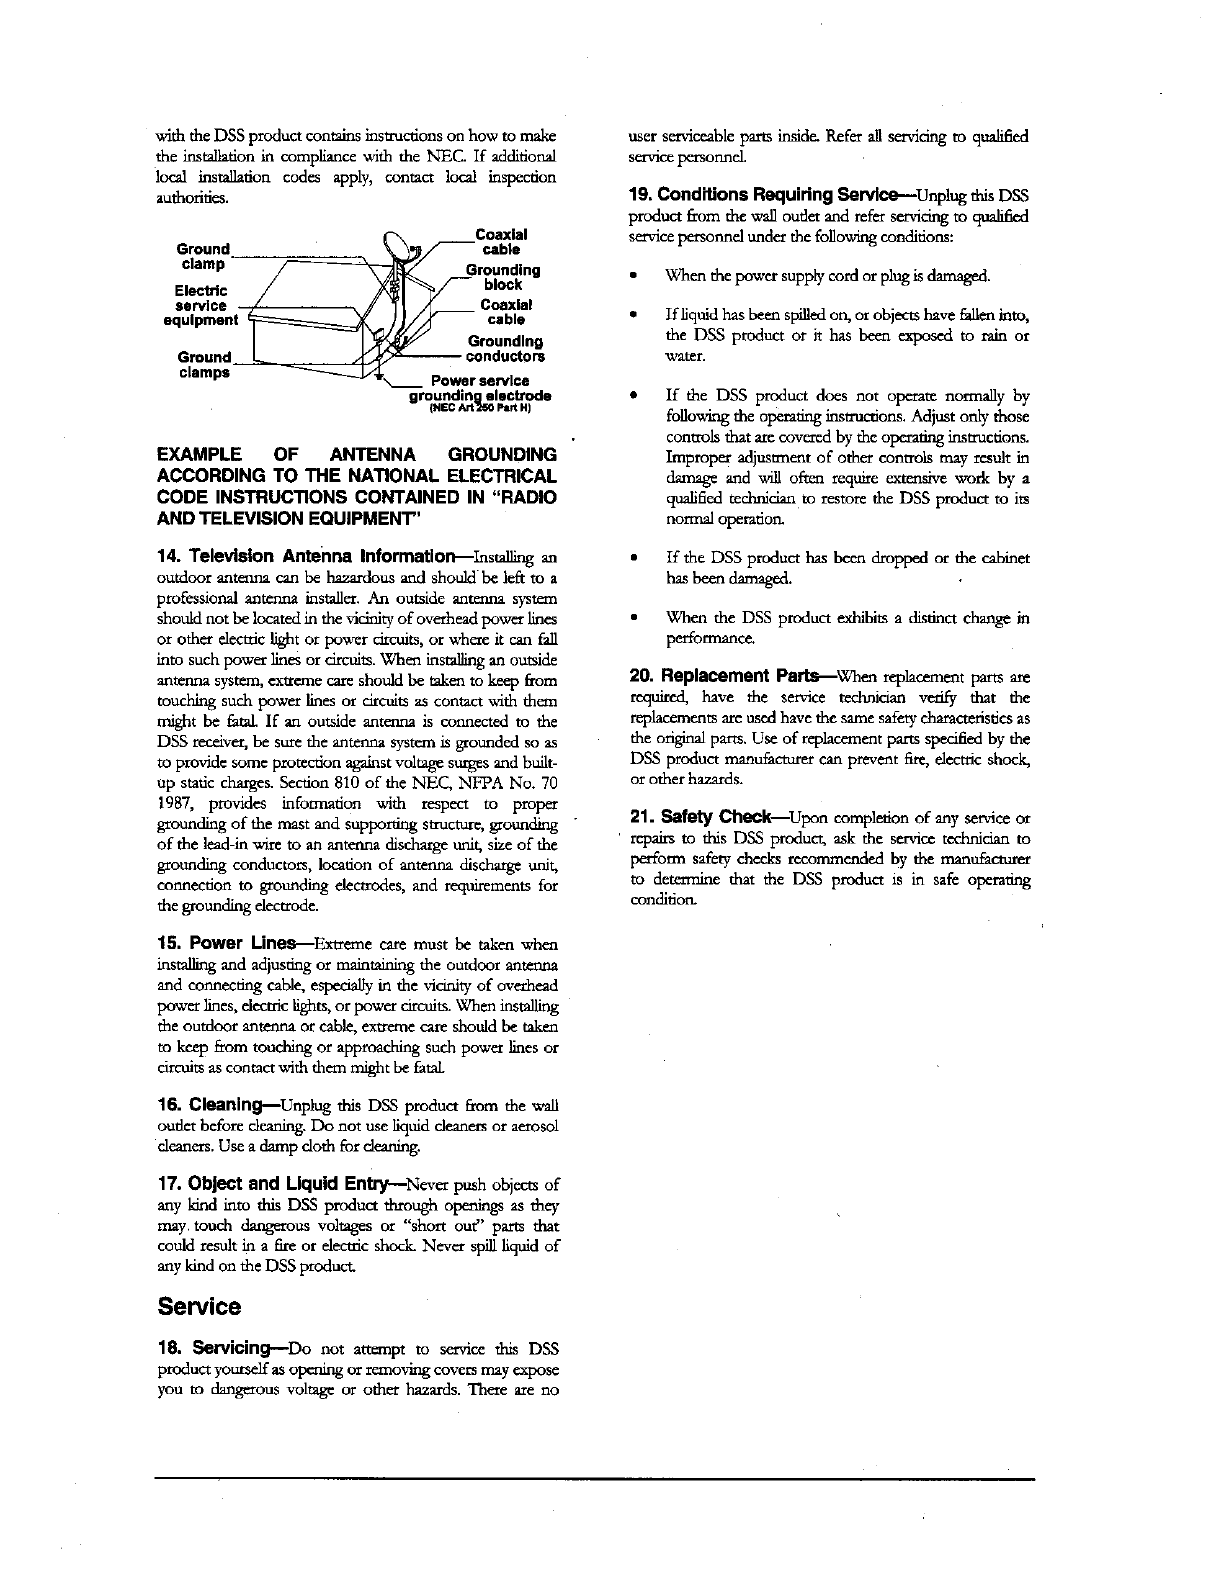
EXAMPLE OF ANTENNA GROUNDING
ACCORDING TO THE NATIONAL ELECTRICAL
CODE INSTRUCTIONS CONTAINED IN "RADIO
AND TELEVISION EQUIPMENT"
14. Television Antenna Informatlon_Ins_d]L_
outdoor anterma can be hazardous and should be left to a
professional antenna installer. An outside antenna system
should not be located in the vicinity of overhead power lines
or other electric light or power circuits, or where it can fall
into such power lines or circuits. When installing an outside
anw.noa system,extreme care should be token to keep from
touctfir_ such power lines or circuits as contact with them
might be fatal. If an outside antenna is connected to the
DSS receiver, be sure the antenna system is grounded so as
to provide some protection againstvoltage surges and built-
up static _s. Section 810 of the NEC, NFPA No. 70
1987, provides information with respect to proper
grounding of the mast and supporting structure, grounding
of the lead-in wire to an antenna discharge unit, size of the
grounding conductors, location of antenna discharge unit,
connection to grounding electrodes, and reqmrements for
the grounding electrode.
15, Power Unes.--Ext_e care must be taken when
installing and adjusting or maintaining the outdoor antenna
and connecting cable, espedalIy in the vicirfity of overhead
power lines, decuic lights, or power circuits. When installing
the outdoor antenna or cable, exueme care should be taken
to keep from touching or approaching such power lines or
dmfits as contact with them might be fatal.
16. Cleaning_Unplug this DSS product fi'om the wall
outlet before clemm_. Do not use Iiquid cleaners or aerosol
cleaners. Use a clamp cloth for deanmg.
17. Object and Liquid Entry---Never push objects of
any kind into this DSS product through openings as they
may. touch dangerous voltages or "short out" parts that
could result in afire or electric shock. Never si_fllliquid of
any kind on the DSS product.
Service
18. Sorvioinff--Do not attempt to service this DSS
product yomself as operang or removing covers may expose
you to dangerous voltage or other hazards. There axe no
user serviceable parts inside. Refer all servicing to qualified
service petsormel.
19, Conditions Requidng Service--Unplug this DSS
product from the wall outlet and refer servicing to qualified
sexvicepersormel under the followingconditions:
•When the power supply cord or plug is damaged.
• If liquid has been Sl_flledon, or objects have falleninto,
the DSS product or it has been exposed to rain or
w_tel_
If the DSS product does not operate nomaally by
following the operating insmactions. Adjust only those
controls that axe covered by the operating instructions.
Improper adjustment of other controls may result in
damage and will often require extensive work by a
qualified technician to restore the DSS product to its
normal operation.
If the DSS product has been dropped or the cal:;met
hasbeen damaged.
• When the DSS product exhil:;ttsa distinct change in
performanc_
20. Replacement Parts_Whe_ rephc_-nent parts are
required, have the service technician verify that the
replacementsare used have the same safety characteristicsas
the cVnginalparts. Use of replacement parts specified by the
DSS product manufacturer can prevent fire, electric shock,
or other hazards.
21. Safety Check--Upon completion of any service or
repairs to this DSS product, ask the service technician to
perfoma safety checks recommended by the manufacturer
to detemame that the DSS product is in safe operating
condition.
FEDERAL COMUNICATIONS COMMISSION
(FCC) REGULATORY INFORMATION
Federal Communications Commission (FCC)--
The Hitachi-brand DSS system complies with both Part 15
andPart 68 of the FCC rules.
detemaned and until mparr has been made. If this is
not done, the telephone company may mmpomfily
disconnect service.
Part 15 compliance--
This equipment has been tested and found to comply with
the limits for a Class B digital device, pursuant to Part 15 of
the FCC rules. These limits are designed to provide
reasonable protection against harmful interference in a
residential installation. This equipment generates, uses and
can radiate radio frequ_y energy and, if not installed and
used in accordancewith the instructions, may cause harmful
interference to radio communications.
3.
zk
The telephone company may make changes in its
technical operations and ptxxedures; if such changes
affect the compatibility or use of this device, the
telephone company is requiredto give adequate notice
of the changes, You willbe advised of your fight to file
a complaint with the FCC.
If the telephone company requests information on
what equipment is connected to their lines, infoma
them o£
However, there is no _tee that interfcmence will not
occur in aparticular installaton. If this equipment does
cause harmful interference to radio or television reception,
which can be detemtned by removing and applying power
to the equipment, the usex is encouraged to tiy to correct
the interference by one or more of the following measures:
•Reorientor relocate the receiving antenna.
• Increasethe separationbetween the equipment and
thereceivez,
• Connect the equipment into an oudet on acircuit
different from that to whinh the receiver is connected.
the telephonenumber daisunit is connected to.
the mager equivalence number (REN). The number
can be found on alabel located on the bottom of the
equipment.
the UniversalSer_ce Order Code (USOC) jack
required. This equipment requites aUSOC RJ11 jack.
the FCC reg_smation numbez, The number can be
found on alabel located on the bottom of dais
eqoipmenr.
•Consult the dealer or an experienced radio/TV
technician for help.
The user may find the following boomer, prepared by the
Federal Communications Commission, helpful: "How to
Idenufy andResolve Radio andTV Interference Problems."
This booklet is availablefromthe U.S. Government Printing
Office, Washington, DC,
To meet FCC requtrements, only peripherals (computer
input/output devices, r_zminals, printers, ercbcertified to
comply with the Class Blimits may be attached to this
device. Operation with non-certified pefiphezals is Iikely to
resultin interference to radioand TV reception.
To meet FCC requirements,shieldedcablesarerequiredto
cormectthe device to a personalcomputer,peripheral,or
othezClassB cerdfieddevice.
Part68compliance---
The FCC has establisbed Part 68 of the FCC Rules,
which perr_t this device to be directly connected to
the telephone network. Slandardized jacks are used for
these connections. This equipment should not be used
on corn lines or party lines.
2. If this device is malfimedoning, it may also be causing
harm to the telephone network; this device should be
disconnected until the source of the problem can be

TABLE OF CONTENTS
A FIRST LOOK AT THE
HITACHI-BRAND DSS SYSTEM ........ 1
Hitachi Brings You the Most Full-Featured Digital
Satellite System ......................................................... 1
What You Should Do First ..................................... 1
How Does All This Work? ..................................... 2
The Components of the Hitachi Digital Satellite
System ........................................................................ 3
The Hitachi Satellite Antenna ................................ 3
The Hitachi Digital Satellite Receiver ................... 3
The Hitachi Remote Control .................................. 5
SETTING UP YOUR HITACHI DIGITAL
SATELLITE SYSTEM...., ..................... 7
Don't Panic--It's Easier Than You Think ............ 7
Installing Batteries in Your Remote Control ......... 8
Choosing the Best Connection for Your
Entertainment System .............................................. 8
Hook Up the Audio/S-video Signals ...................... 9
Hook Up the Audio/Video Signals ....................... 10
Hook Up the RF Signals ....................................... 10
Hook Up to a Stereo System ................................ i 1
Finishing Up ......................................................... 11
Connecting the VCR Control Cable ..................... 12
Finding the VCR's Remote Control Sensor ......... 12
Now You Can Turn It On ...................................... 12
CONTROLLING THE HITACHI-BRAND
DSS RECEIVER ................................. 13
Now It is Time for You to Take Control.*............. 13
Front Panel vs. Remote Control Keys .................. 13
Basic Navigation ..................................................... 13
POINTING YOUR HITACHI
SATELLITE ANTENNA ..................... 15
One Spot--22,300 Miles in Space---and You'll
Find It ...................................................................... 15
Determine Where to Point Your Satellite Dish....15
The DISH POINTING MENU ............................. 15
The ZIP CODE and LATITUDE & LONGITUDE
Screens .................................................................. 16
ALIGNMENT RESULT Screen .......................... 16
Connecting the Satellite Dish ................................. 16
Positioning the Satellite Dish ................................. 17
The SIGNAL STRENGTH Screen ...................... 18
Fine Tuning the Antenna Alignment .................... 19
Authorizing Your Service ...................................... 20
WATCHING DSS PROGRAMS ON
THE HITACHI RECEIVER .................. 21
So Many Choices---So Many Ways to Choose.....21
Basic Channel Changing ........................................ 21
The Channel Banner ............................................. 21
The Information Banner ....................................... 22
QuickTune TM ........................................................ 22
AlphaTune TM ........................................................ 22
The Browse Banner .............................................. 23
The Logo Banner ................................ :................. 23
Alternate Services ................................................... 24
Alt. Audio .............................................................. 24
Data ...................................................................... 24
The PROGRAM GUIDE ............. .......................... 24
Moving Around the Guide ..................................... 25
Filtering the Guide ................................................. 25
Category ............................................................... 25
Type ...................................................................... 26
List ........................................................................ 26
Guide .................................................................... 26
Class ..................................................................... 26
Getting Program Information ............................... 26
The INFORMATION Screen ................................ 27
Done ..................................................................... 27
View ...................................................................... 27
Schedule ................................................................ 27
Schedule To View ................................................. 28
Cancel Schedule ................................................... 28
Buy $2.99 .............................................................. 28
Buy Options .......................................................... 28
Cancel Purchase ................................................... 28
Times ................................................................ :...29
YOUR HITACHI RECEIVER'S MAIN
MENU ................................................. 31
The Main Menu May Be Considered Your Home
Base .......................................................................... 31
Activities .................................................................. 31
Program Guide ..................................................... 31
Exit To Viewing .................................................... 32
Event Timer .......................................................... 32
Messages ............................................................... 33
READ MAIL ........................................................ 33
Limits and Lists ...................................................... 34
Spending ............................................................... 34
Ratings .................................................................. 34
Fay. Lists .............................................................. 35
Purchased PPVs ...................................................... 35
History .................................................................. 36
Upcoming ............................................................. 36
System ........................... ........................................... 36
Setup Menu ........................................................... 37
Lock ...................................................................... 37
Unlock .................................................................. 37
LOCK OVERRIDE .............................................. 38
YOUR HITACHI RECEIVER'S SETUP
MENU .......... ....................................... 39
Use the Setup Menu to Access Installation and
Customizing Features ............................................. 39
Main Menu ........................................................... 39
Preferences ........................................................... 39
Dish Pointing ........................................................ 40
Default Audio ....................................................... 40
System Test ........................................................... 40
Assistance ............................................................. 41
New Access Card .................................................. 41
VCR Setup ............................................................. 41
QuickTune Setup ................................................... 42
PREFERENCES ON YOUR HITACHI
RECEIVER .......................................... 43
Customize Your Hitachi Menus to Appear the
Way You Want ....................................................... 43
Done ..................................................................... 43
On-Screen Guide Width ....... ................................. 43
1V2Hrs. or 2 l-lrs ................................................... 43
Channel Sort Option ...... ....................................... 44
Number or Name .................................................. 44
Multi-Color Guide .................................................. 45
Yes or No ..................................................... _........ 45
Picture Size .............................................................. 45
4:3 or 16:9 ............................................................ 45
Label for Fourth List ............................................. 45
Fay. D or Family .................................................. 45
Receiver ID# ............................................................ 46
DSS 1 or DSS 2 ..................................................... 46
PROGRAMMING YOUR HITACHI
REMOTE CONTROL .......................... 47
Use Your Remote Control to Tame Other A/V
Devices ..................................................................... 47
Programming the Remote Control ....................... 47
Code Scan ............................................. ................ 47
Code Entry .................................................. :......... 48
Using the Remote Control ..................................... 50
QUESTIONS AND ANSWERS., ......... 51
Questions? Did We Forget to Tell You Something?
*...........°.....*****.*......°o*******.***..**.....oo**.****.*.**.....*........51
INDEX ..................................................................... 53
A FIRST LOOK AT
THE HITACHI-BRAND
DSS ®SYSTEM
Hitachi Brings You the Most
Full-Featured Digital Satellite
System
You did it! You've selected a Hitachi-brand DSS system. This system
provides the most advanced digital video and audio capabilities
available today.
You now have the capability to receive over 200 channels of video programming, CD-quality
audio, and data services. This may seem like magic, but it isn't. It is amazing, though!
What You Should Do First
Your Hitachi digital satellite system is both a compficated technical mirade and an easy to operate
source of entertainment. You should complete the following steps to achieve the greatest
performance from your system:
•Read the included guides and manuals to familiarize yourself with the system.
• Install your DSS receiver.
• Install your sateilite antenna and cable.
•Align the antenna toward the satellite.
• Arrange for programming from the services providers.
• Sit back and enjoy digital satellite TV!
Page 1
HITACHI DIGITAL SATELLITE SYSTEM OWNER'S MANUAL
How Does All This Work?
I
101°
Longitude
DSS
/Satellite
uplink
facility
III
Programming Authorizations
from studios
and networks
Satellite
antenna
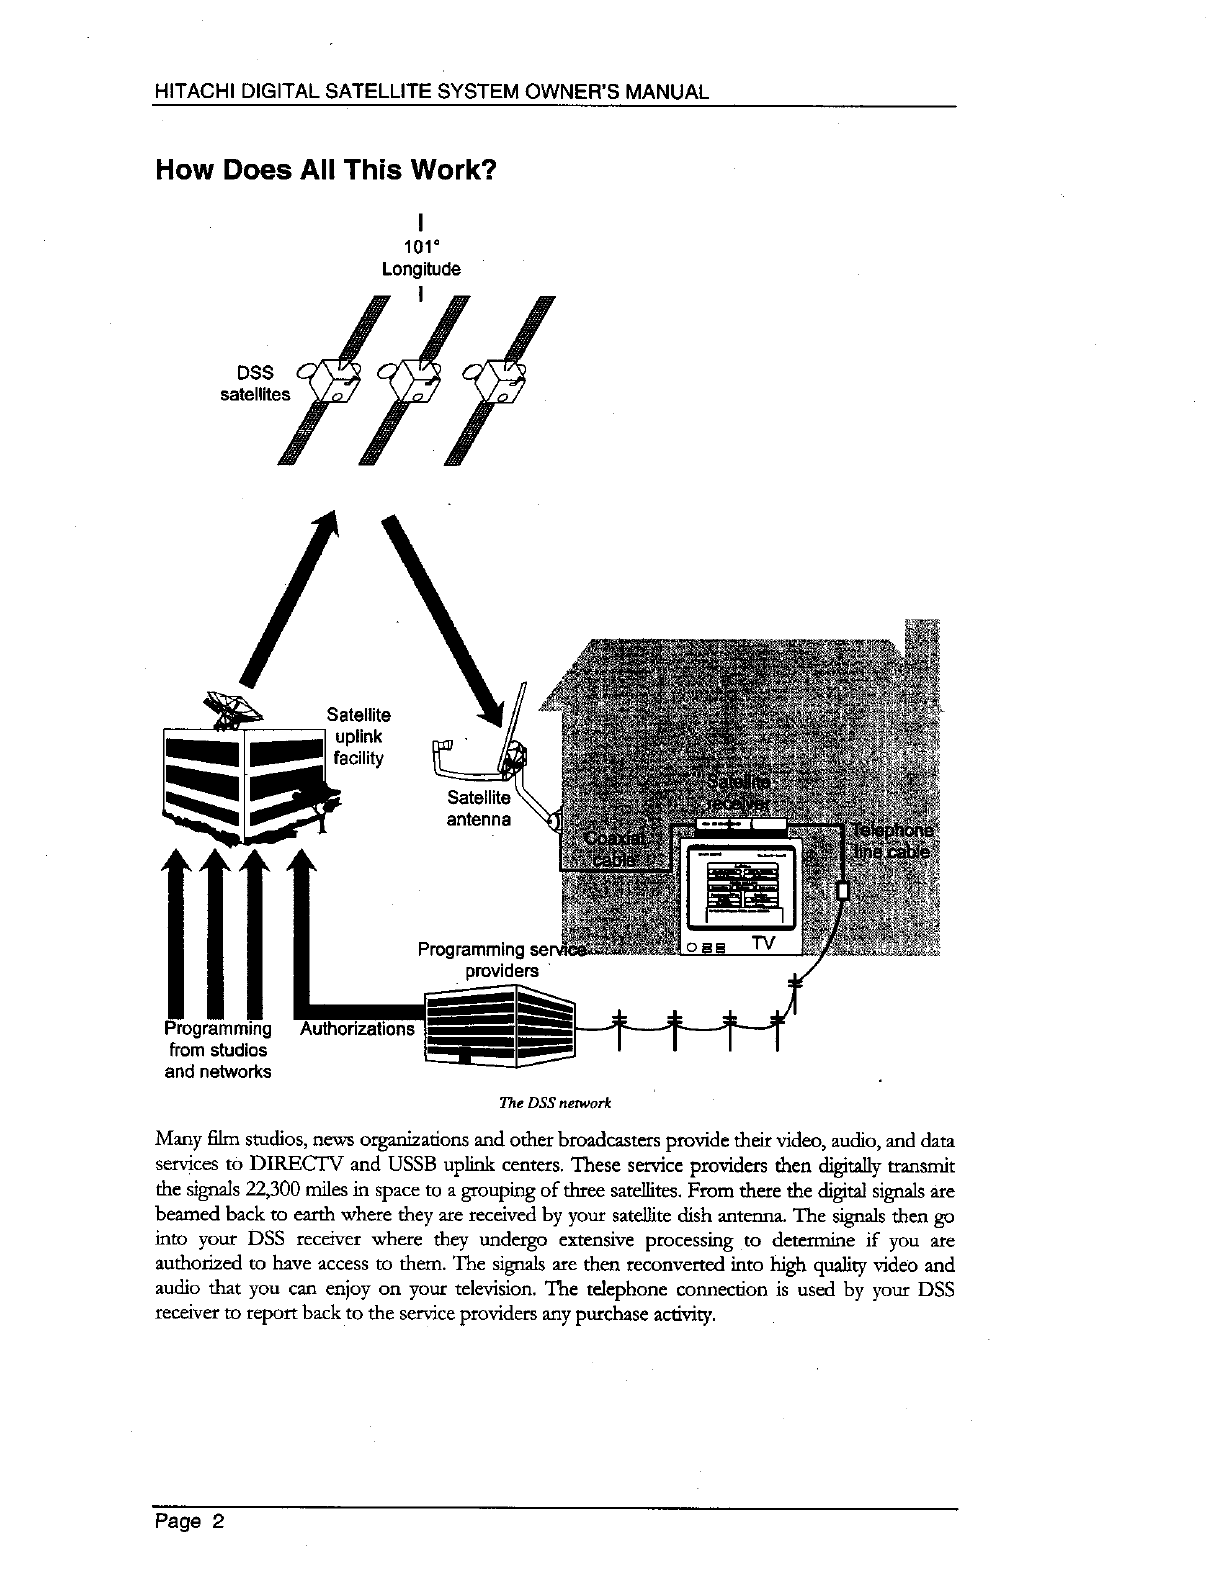
The DSS network
Many film studios, news organizations and other broadcasters provide their video, audio, and data
services to DIRECTV and USSB uplink centers. These service providers then digitally transmit
the signals 22,300 miles in space to a grouping of three satellites. From there the digital signals are
beamed back to earth where they are received by your satellite dish antenna. The signals then go
into your DSS receiver where they undergo extensive processing to determine if you are
authorized to have access to them. The signals are then reconverted into high quality video and
audio that you can enjoy on your television. The telephone connection is used by your DSS
receiver to report back to the service providers any purchase activity.
Page 2
A FIRST LOOK AT THE HITACHI-BRAND DSS SYSTEM
The Components of the Hitachi
Digital Satellite System
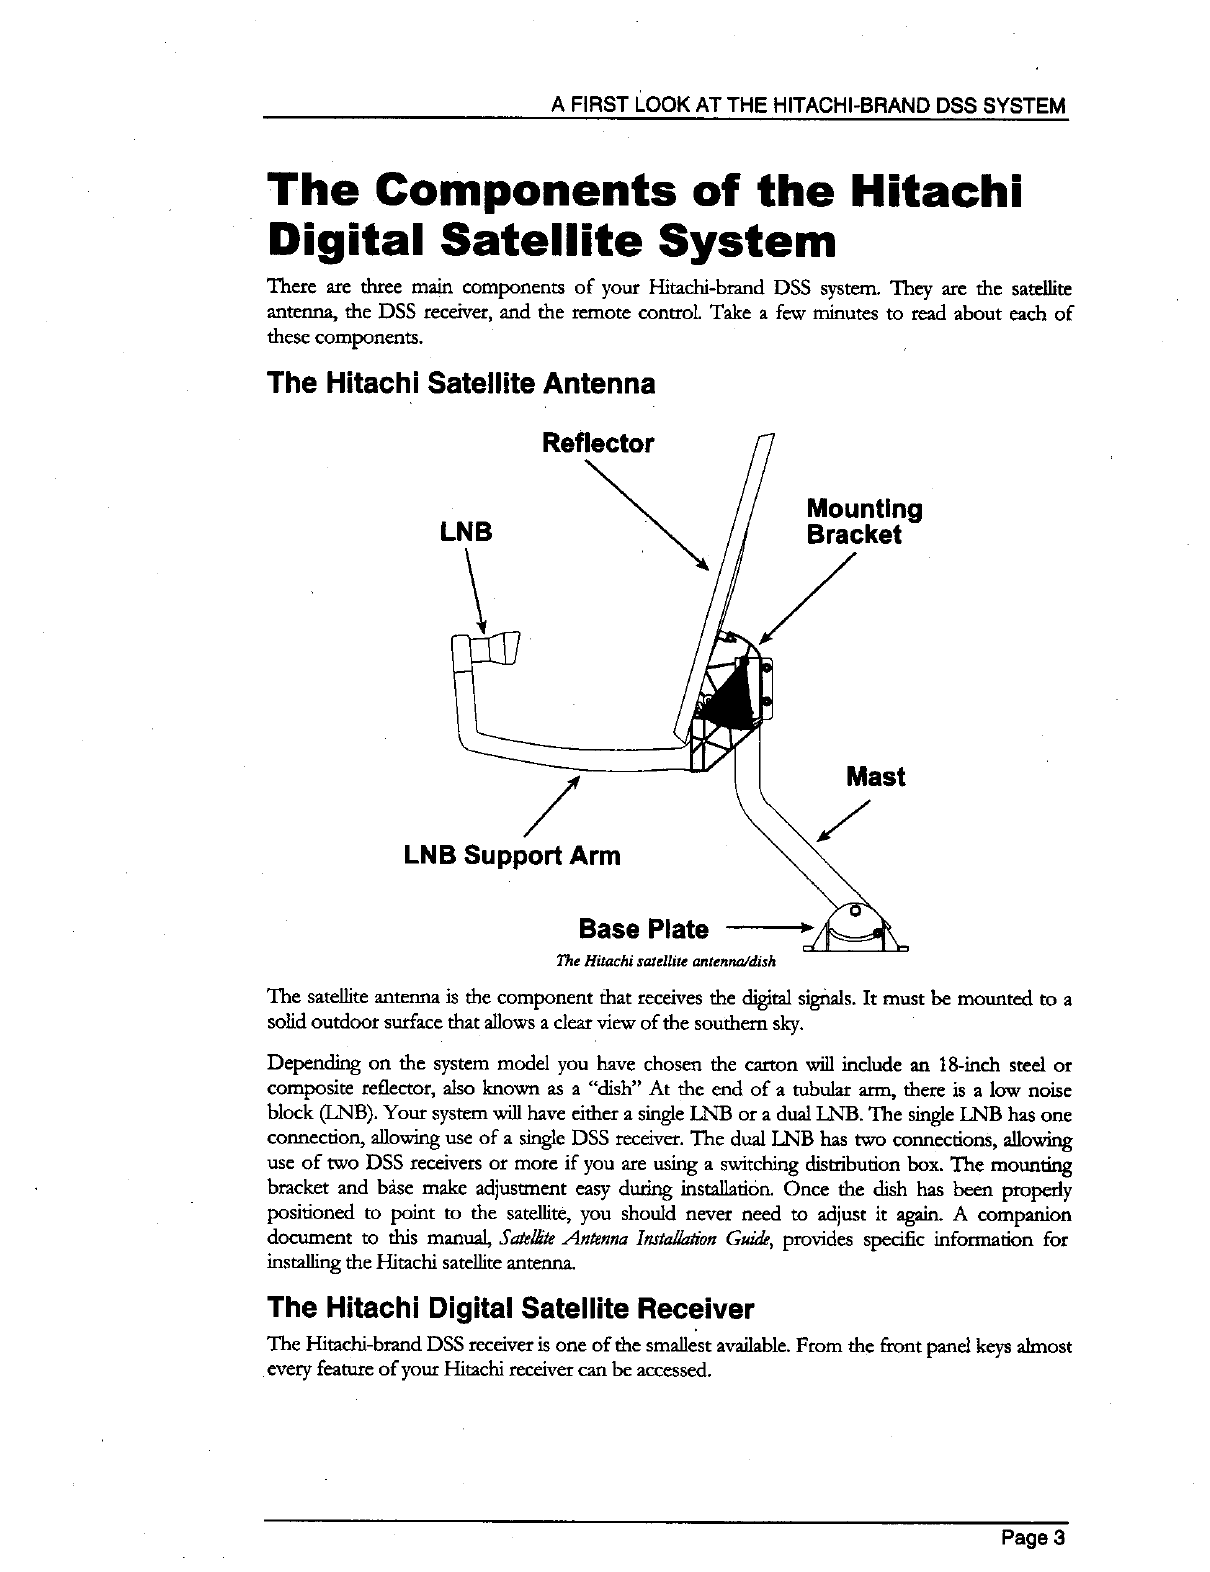
There are three main components of your Hitachi-brand DSS system. They are the satellite
antenna, the DSS receiver, and the remote control Take afew minutes to read about each of
these components.
The Hitachi Satellite Antenna
Reflector
LNB
/
LNB Support Arm
Base Plate
The Hitachi satellite antenna/dish
Mounting
Bracket
Mast
The satellite antenna is the component that receives the digital sigfials. It must be mounted to a
solid outdoor surface that allows a clear view of the southern sky.
Depending on the system model you have chosen the carton _ include an 18-inch steel or
composite reflector, also known as a "dish" At the end of a tubular arm, there is a low noise
block (LNB). Your system vail have either a single LNB or a dual LNB. The single LNB has one
connection, allowing use of a single DSS receiver. The dual LNB has two connections, allowing
use of two DSS receivers or more if you are using a switching distribution box. The mountLng
bracket and b_ise make adjustment easy during installation. Once the dish has been properly
positioned to point to the satellite, you should never need to adjust it again. Acompanion
document to this manual, Satelh'teAntenna Installation Guide, provides specific information for
installing the Hitachi satellite antenna.
The Hitachi Digital Satellite Receiver
The Hitachi-brand DSS receiver is one of the smallest available. From the front pand keys almost
every feature of yottr Hitachi receiver can be accessed.
Page 3
HITACHI DIGITAL SATELLITE SYSTEM OWNER'S MANUAL
/
HITACHI
\
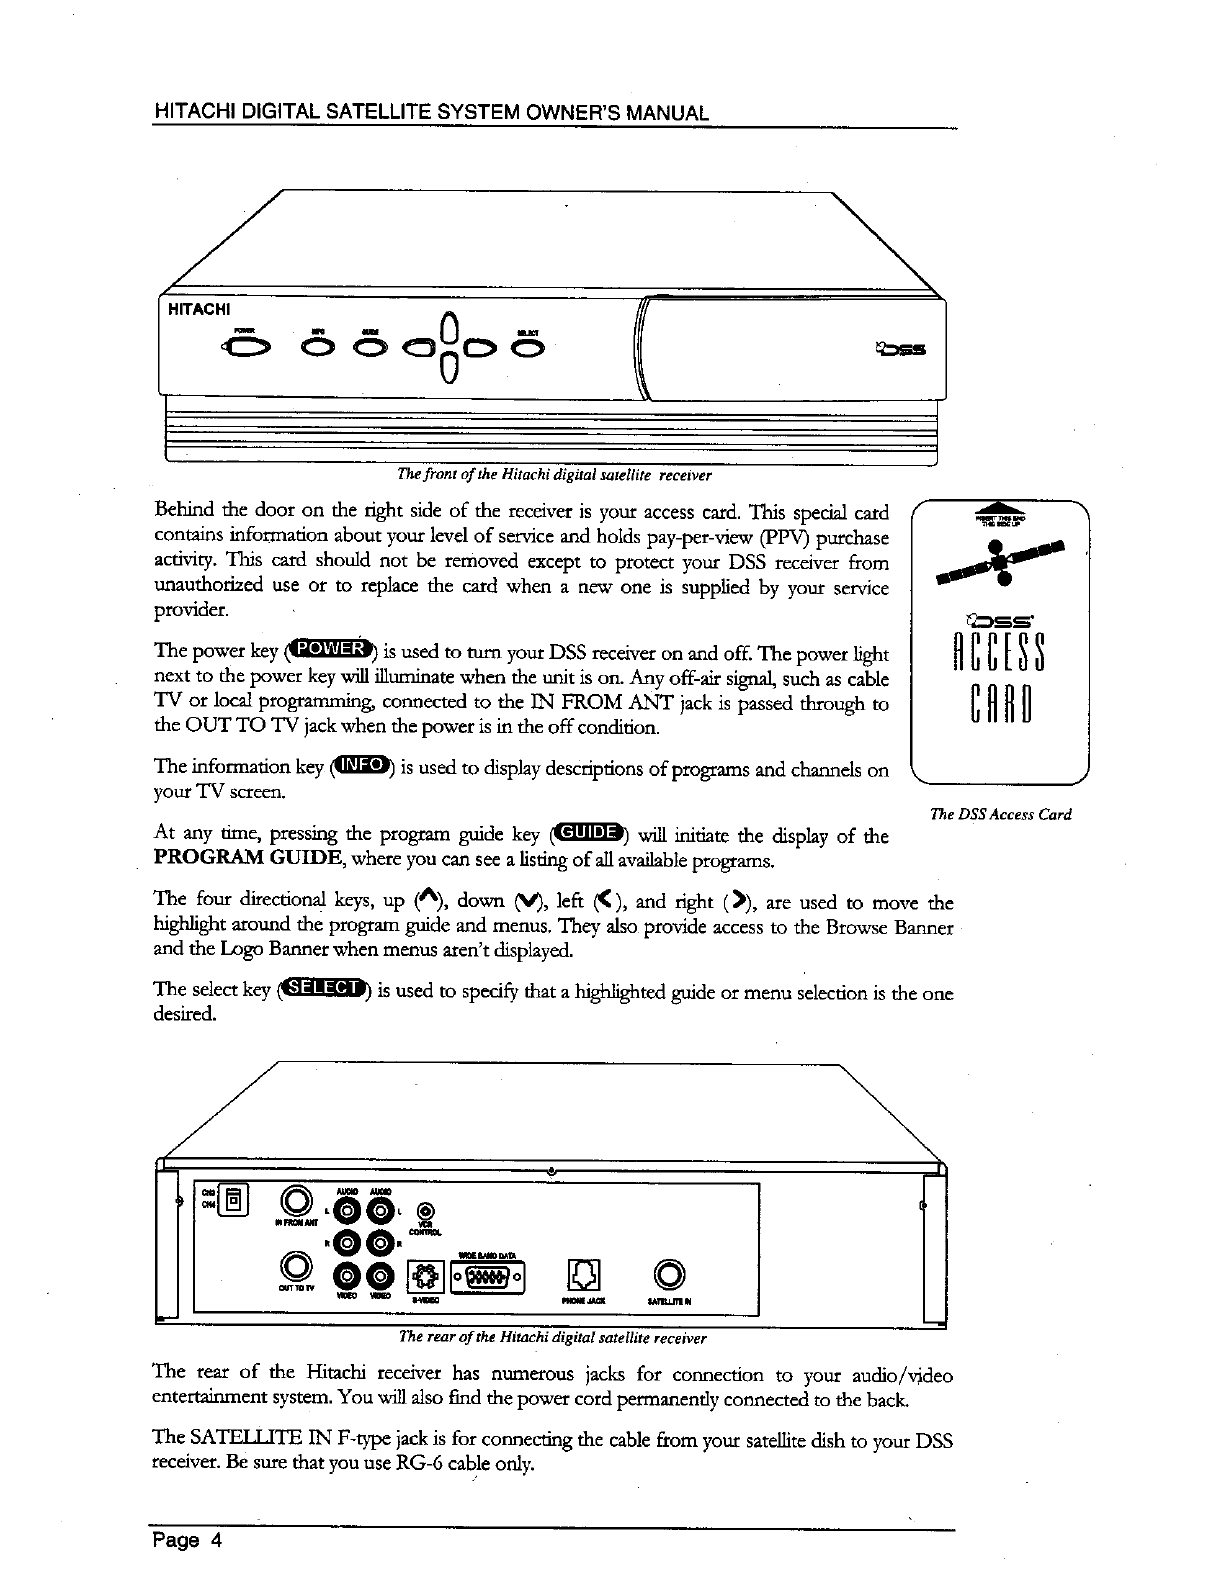
The front of the Hitachi digital satellite receiver
Behind the door on the right side of the receiver is your access card. This special card
contains infomaation about your level of service and holds pay-per-view (PPV) purchase
activity. This card should not be removed except to protect your DSS receiver from
unauthorized use or to replace the card when a new one is supplied by your service
provider.
The power key _ is used to turn your DSS receiver on and off. The power light
next to the power key will illuminate when the unit is on. Any off-air signal, such as cable
TV or local programming, connected to the IN FROM ANT jack is passed through to
the OUT TO TV jack when the power is in the off condition.
The information key _ is used to display descriptions of programs and channels on
your TV screen.
At any time, pressing the progmrn guide key _[]_) will initiate the display of the
PROGRAM GUIDE, where you can see a listing of aUavailable programs.
r A "
CnRD
The DSS Access Card
The four directional keys, up (A), down (V), left (_), and right ()), are used to move the
highlight around the program guide and menus. They also provide access to the Browse Banner
and the Logo Banner when menus aren't displayed.
The select key _ is used to specify that a highlighted guide or menu selection is the one
desired.
0
The rear of the Hitachi digital satellite receiver
The rear of the Hitachi receiver has numerous jacks for connection to your audio/video
entertainment system. You will also find the power cord permanently connected to the back.
The SATELLITE IN F-type jack is for connecting the cable from your satellite dish to your DSS
receiver. Be sure that you use RG-6 cable only.
/
Page 4
A FIRSTLOOKATTHEHITACHI-BRANDDSSSYSTEM
The IN FROM ANT F-type jack is an input where you can connect the cable from an RF
terrestrial source such as an off-air antenna or cable TV service.
The OUT TO TV F-type jack is an RF output which you may connect to your TV or VCR
(depending on your entertainment system). Note that the CH3/CH4 switch on the upper left
enables you to select the channel for your TV on which the DSS progranammg appears.
The two pairs of phono-type AUDIO output jacks, labeled (L and R) and color coded to indicate
left and fight, can be used for connection to your TV, VCR, or audio system.
The two phono-type composite VIDEO output jacks are color coded in yellow. You may use
either or both of these jacks for connection to your TV or VCIL
The multiple pin S-VIDEO jack is for high quality output of DSS video. You should use this jack
to achieve the dearest picture for your TV or VC1L Only newer high-end TVs, SVHS VCRs and
Hi8 VCRs suppoi't S-video type connections.
The special 15-pin WIDE BAND DATA port is intended for advanced applications such as
broadcast data services when available. Do not attempt to use this connectorudtbout a Hitachi-approved
wideband data cabk.
The VCR CONTROL mini-jack is for connecting the VCR control cable that was included with
your system. With this cable, your Hitachi satellite receiver can interface with most popular VCRs
to record selected programs automatically. See the "Finding the VCR's Remote Control Sensor"
section in Chapter 2, "Setting Up Your Hitachi Digital Satellite System" for proper placement of
the transmitter end of the VCR control cable.
The standard RJ-11 modular PHONE JACK is for connecting your DSS receiver to your phone
line. This phone connection is necessary to access certain program offemags from your service
providers. Any calls generated by the DSS receiver are toll free. The telephone line connection
should not normally interfere with your telepbone operation. If you should need to make a call
while it is calling in a report, simply disconnect the phone line from the DSS receiver.
The Hitachi Remote Control
Your Hitachi remote control can control alot more than just the DSS receiver. It is what is
known as a universal remote control, meaning that with it you can control many popular
televisions, VCRs, and audio components. What's more is that with this state-of-the-art remote
you have more control of your Hitachi digital satellite receiver than with any other brand available
today!
Before we get into the features, you should know that the Hitachi remote control is available in
two models. One can control components induding DSS, TV, cable boxes (CBL), and VCRs.
The other can control these devices, as well as many amplifiers (AMP), compact disc players, and
laser disc players (DISC).
The remote control uses invisible infrared light to send signals to your components when you
press the keys. You must aim your remote toward your component for it to receive the
command.
Descriptions and details of each individual key wi!l be given throughout this manual as they apply,
although an overview follows.
The mode keys across the top enable you to specify the device that you intend to control. This is
important as many devices share the same keys--such as thel["a_R_l_ key or the numeric keys.
Page 5
HITACHIDIGITALSATELLITESYSTEMOWNER'SMANUAL
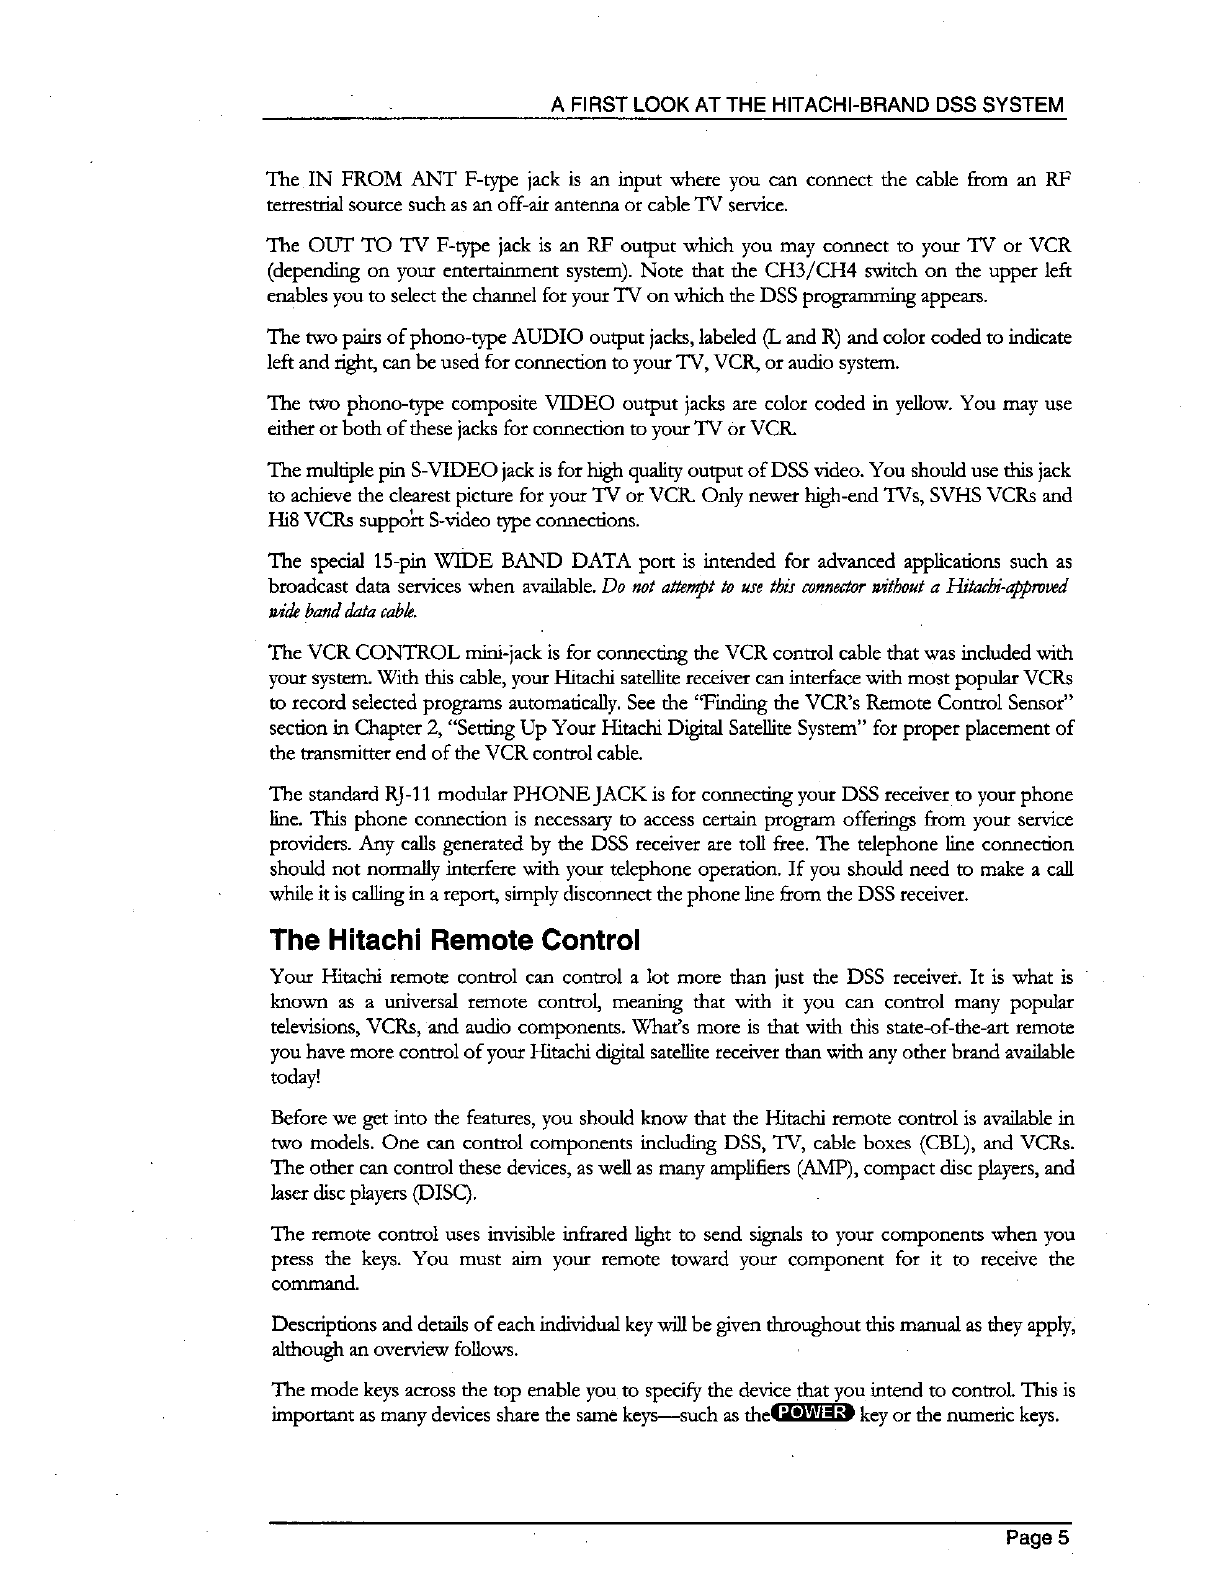
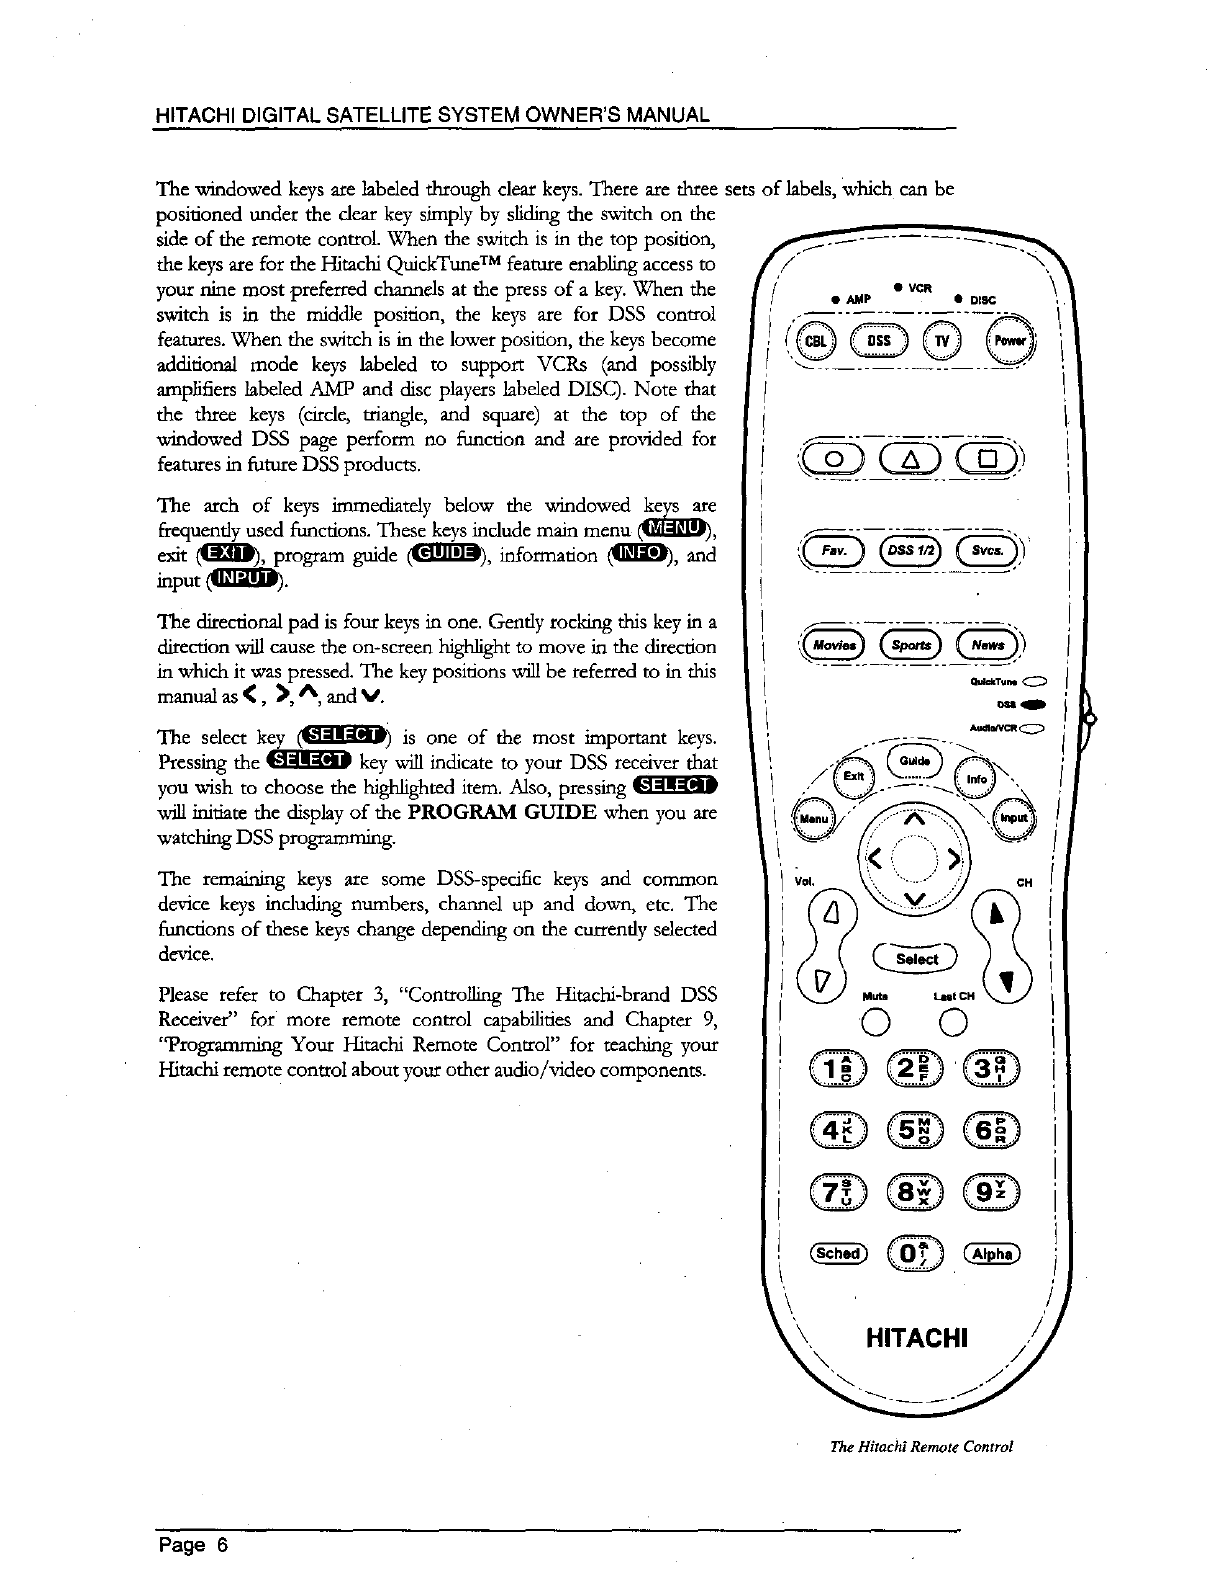
The windowed keys are labeled through clear keys. There are three
positioned under the dear key simply by sliding the switch on the
side of the remote control. When the switch is in the top position,
the keys are for the Hitachi QuickTune TM feature enabling access to
your nine most preferred channels at the press of a key. When the
switch is in the middle position, the keys are for DSS control
features. When the switch is in the lower position, the keys become
additional mode keys labeled to support VCRs (and possibly
amplifiers labeled AMP and disc players labeled DISC). Note that
the three keys (circle, triangle, and square) at the top of the
windowed DSS page perform no fimcdon and are provided for
features in future DSS products.
The arch of keys immediately below the windowed ke_e
frequently used functions. These keys indude main menu (II__RIB,_,
exit ((_][_), program guide (l_l_), information (1[]_), and
input
The directional pad is four keys in one. Gently rocking this key in a
direction will cause the on-screen highlight to move in the direction
in which it was pressed. The key positions will be referred to in this
manual as _, ), A, and V.
The select key (l_!_) is one of the most important keys.
Pressing the _ key will indicate to your DSS receiver that
you wish to choose the highlighted item. Also, pressing
will initiate the display of the PROGRAM GUIDE when you are
watching DSS prograrrm-fing.
The remaining keys are some DSS-specific keys and common
device keys induding numbers, cbannd up and down, etc. The
fimcfions of these keys change depending on the currently selected
device.
Please refer to Chapter 3, "Controlling The Hitachi-brand DSS
Receiver" for more remote control capabilities and Chapter 9,
"]Programming Your Hitachi Remote Control" for reaching your
Hitar.hi remote control about your other audio/video components.
sets of labels, which can be
0
(2D(2D)
VoL CH
HITACHI
The Hitachi Remote Control
Page 6
SETTING UP YOUR
HITACHI DIGITAL
SATELLITE SYSTEM
Don't Panic--It's Easier Than
You Think
Setting up your new Hitachi digital satellite system is much easier
than assembling a train set or a bicycle. You should be watching DSS
programming in a very short time. t
This chapter provides step-by-step instructions for setting up your Hitachi digital satellite system
and connecting it to your television or entertainment system. As you are reading this now, it is
assumed that you have already opened and unpacked the box.
The receiver carton includes the receiver itself, an Access Card (aLready installed in the receiver
behind the door), a remote control with four AAA batteries, a 6-foot length of coaxial cable, a 25-
foot length of telephone cord, a 6-foot A/V cable, a VCR Control cable, and this manual. Some
models may also include an S-video cable. Contact your dealer if any part is missing or damaged.
Please save all packing materials until the installation of your system is complete in case anything
needs to be returned.
You now need to decide where you want to place your DSS receiver. Avoid installing the receiver
in a location where the power cord or cables could be inadvertently disconnected. Obviously,
choose a place near your TV. The location should also be well ventilated. Do not set electronic
components or other objects (including this manual) on top of the receiver or block its cooling
vents.
If you have not already installed your DSS dish and run the cable to your DSS receiver area, you
should do so now. It is recommended that you have your dish professionally installed. This is due
to safety issues, dectrcal codes, and assurance of a quality installation. If you should choose to
perform the installation yourself, please pay special attention to the precautions in the
front of this manual and refer to the Satellite Antenna Installation Guide that
accompanied your DSS antenna. You may also want to obtain the Hitachi Do-It-YourseffDSS
InstallS'on Kit, sold separately.
Page 7
HITACHIDIGITALSATELLITESYSTEMOWNER'SMANUAL
Installing Batteries in Your
Remote Control
Before you can use your remote control, you must install the suppfied AAA batteries. First, slide
the battery cover from the back of the remote control. Install each
fresh battery as shown, making sure that the + and - on each battery
line up with the marks in the battery compartment. Next, slide the
covet" hack onto the remote control. Finally, press the _ key on
the top of the remote control to verify that the key lights up,
indicating that it is operating properly_ If the key doesn't fight, make
sure that the batteries are fresh and that each is inserted in the fight
direction.
Refer to Chapter 9, "Programming Your Hitachi Remote Control"
for setting the codes to control the devices in your entertainment
system.
Remove the battery cover and
insert four AAA batteries as shown
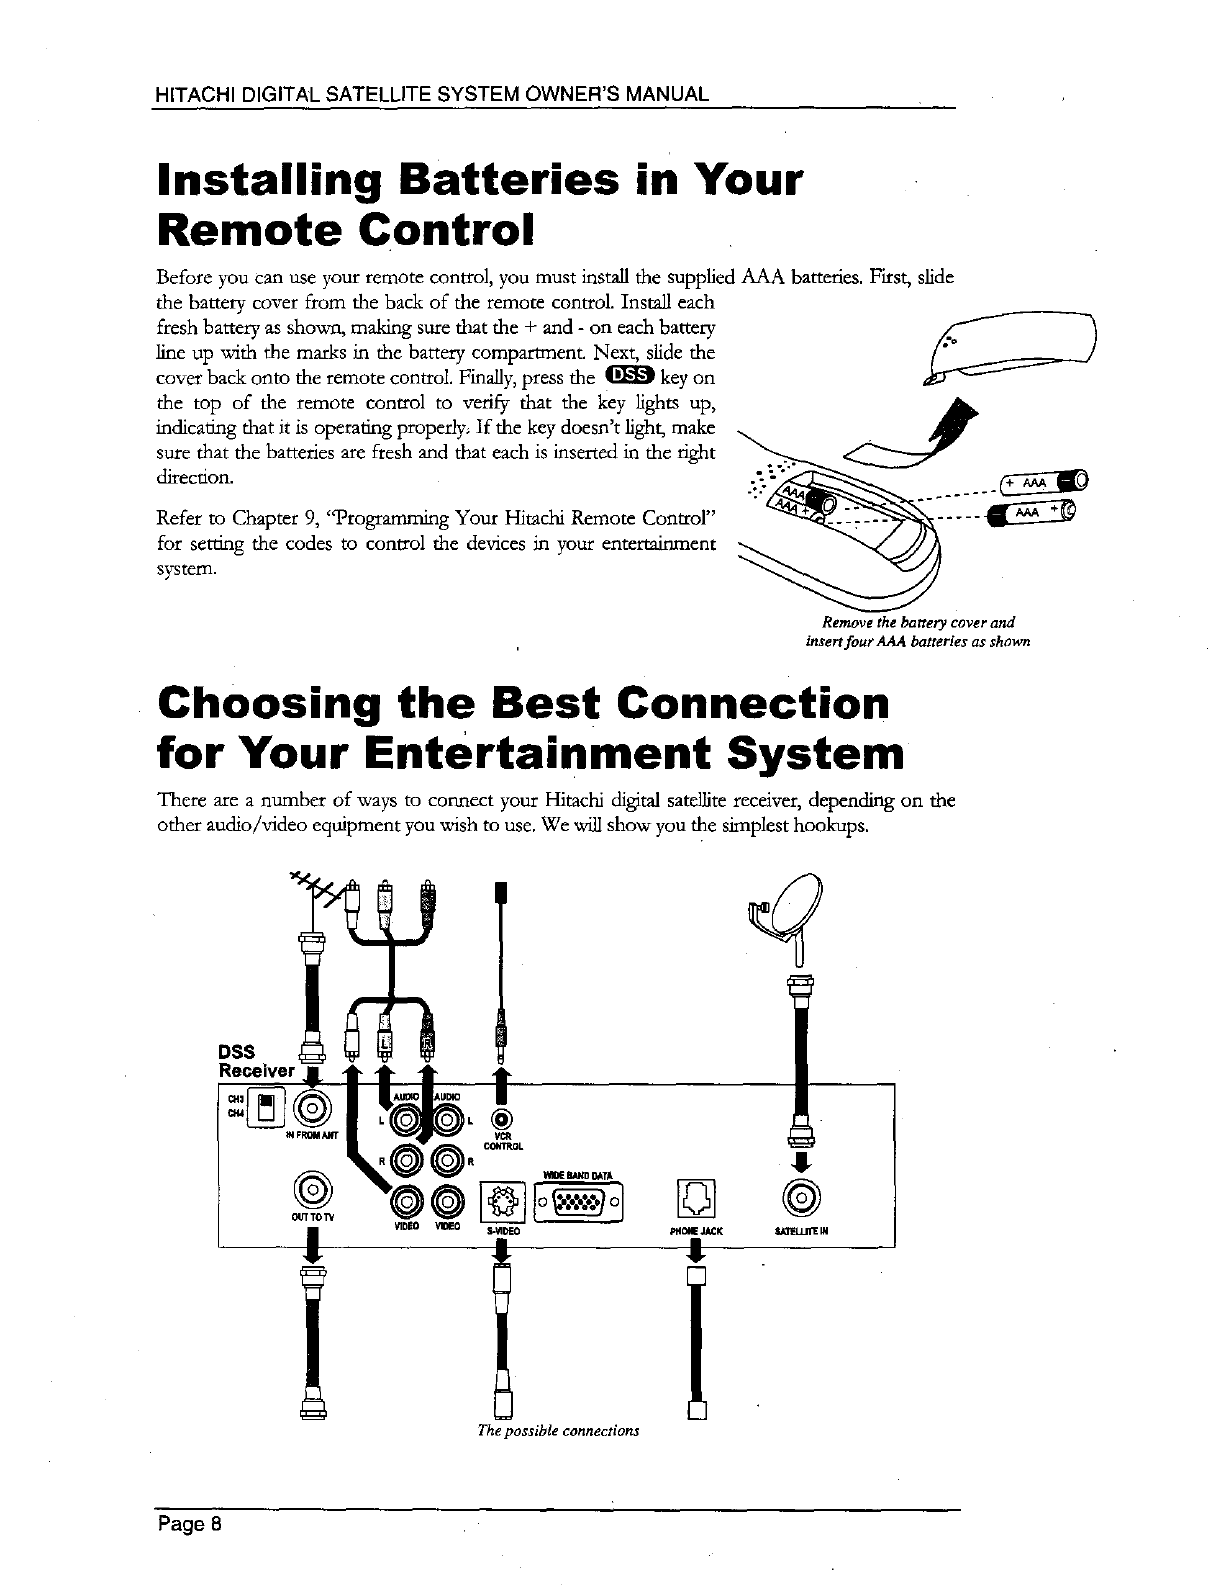
Choosing the Best Connection
for Your Entertainment System
There are a number of ways to connect your Hitachi digital satellite receiver, depending on the
other audio/video equipment you wish to use. We _ show you the simplest hookups.
J
The possible connections
!
Page 8
SETTING UP YOUR HITACHI DIGITAL SATELLITE SYSTEM
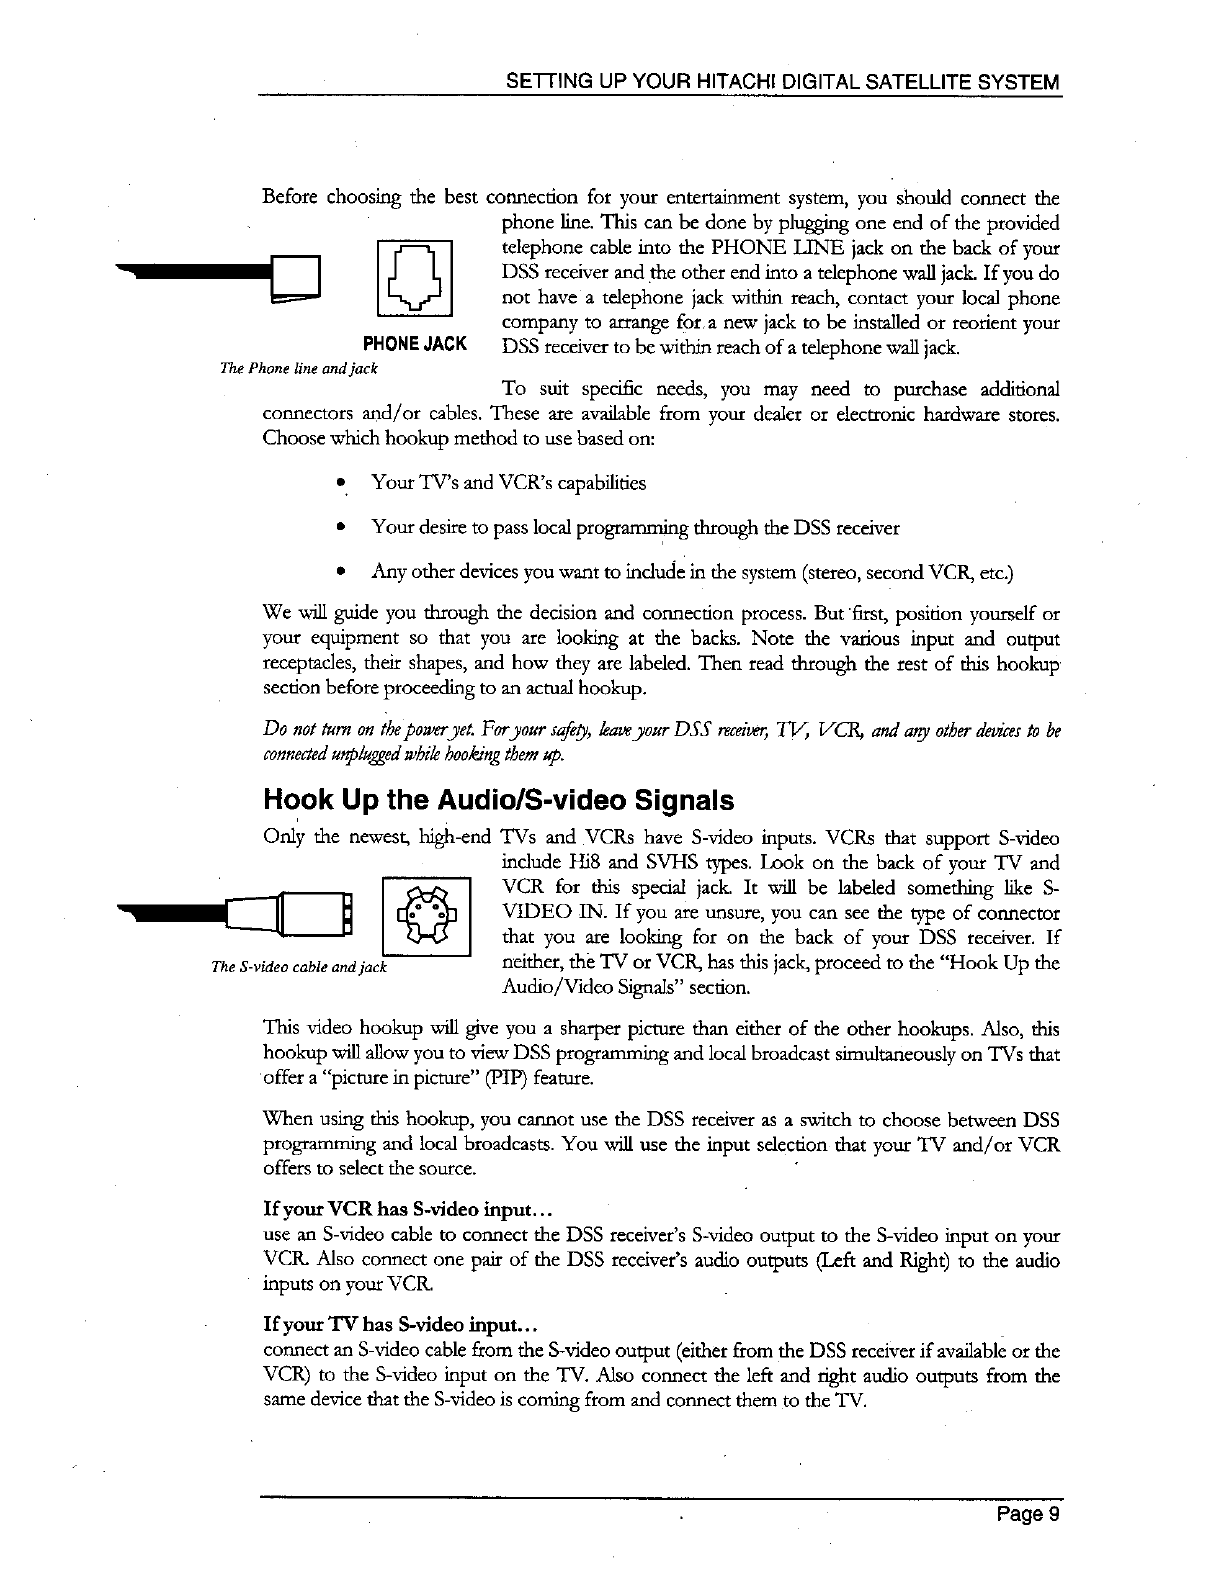
Before choosing the best connection for your entertainment system, you should connect the
PHONEJACK
The Phone line and jack
phone line. This can be done by plugging one end of the provided
telephone cable into the PHONE LINE jack on the back of your
DSS receiver and the other end into a telephone wall jack. If you do
not have a telephone jack within reach, contact your local phone
company to arrange for.a new jack to be installed or reorient your
DSS receiver to be within reach of a telephone wall jack.
To suit specific needs, you may need to purchase additional
connectors and/or cables. These are available from your dealer or dectrouic hardware stores.
Choose which hookup method to use based on:
• Your TV's and VCR's capabilities
• Your desire to pass local programming through the DSS receiver
•Any other devices you want to include in the system (stereo, second VCR, etc.)
We will guide you through the decision and connection process. But 'first, position yourself or
your equipment so that you are looking at the backs. Note the various input and output
receptacles, their shapes, and how they are labeled. Then read through the rest of this hookup
section before proceeding to an actual hookup.
Do not turn on tbepo_veryet. Foryour safety,kaueyour DSS receiver,77/,, VCR, and any otherdedces to be
connectedunpluggedwhik hookingthem up.
@
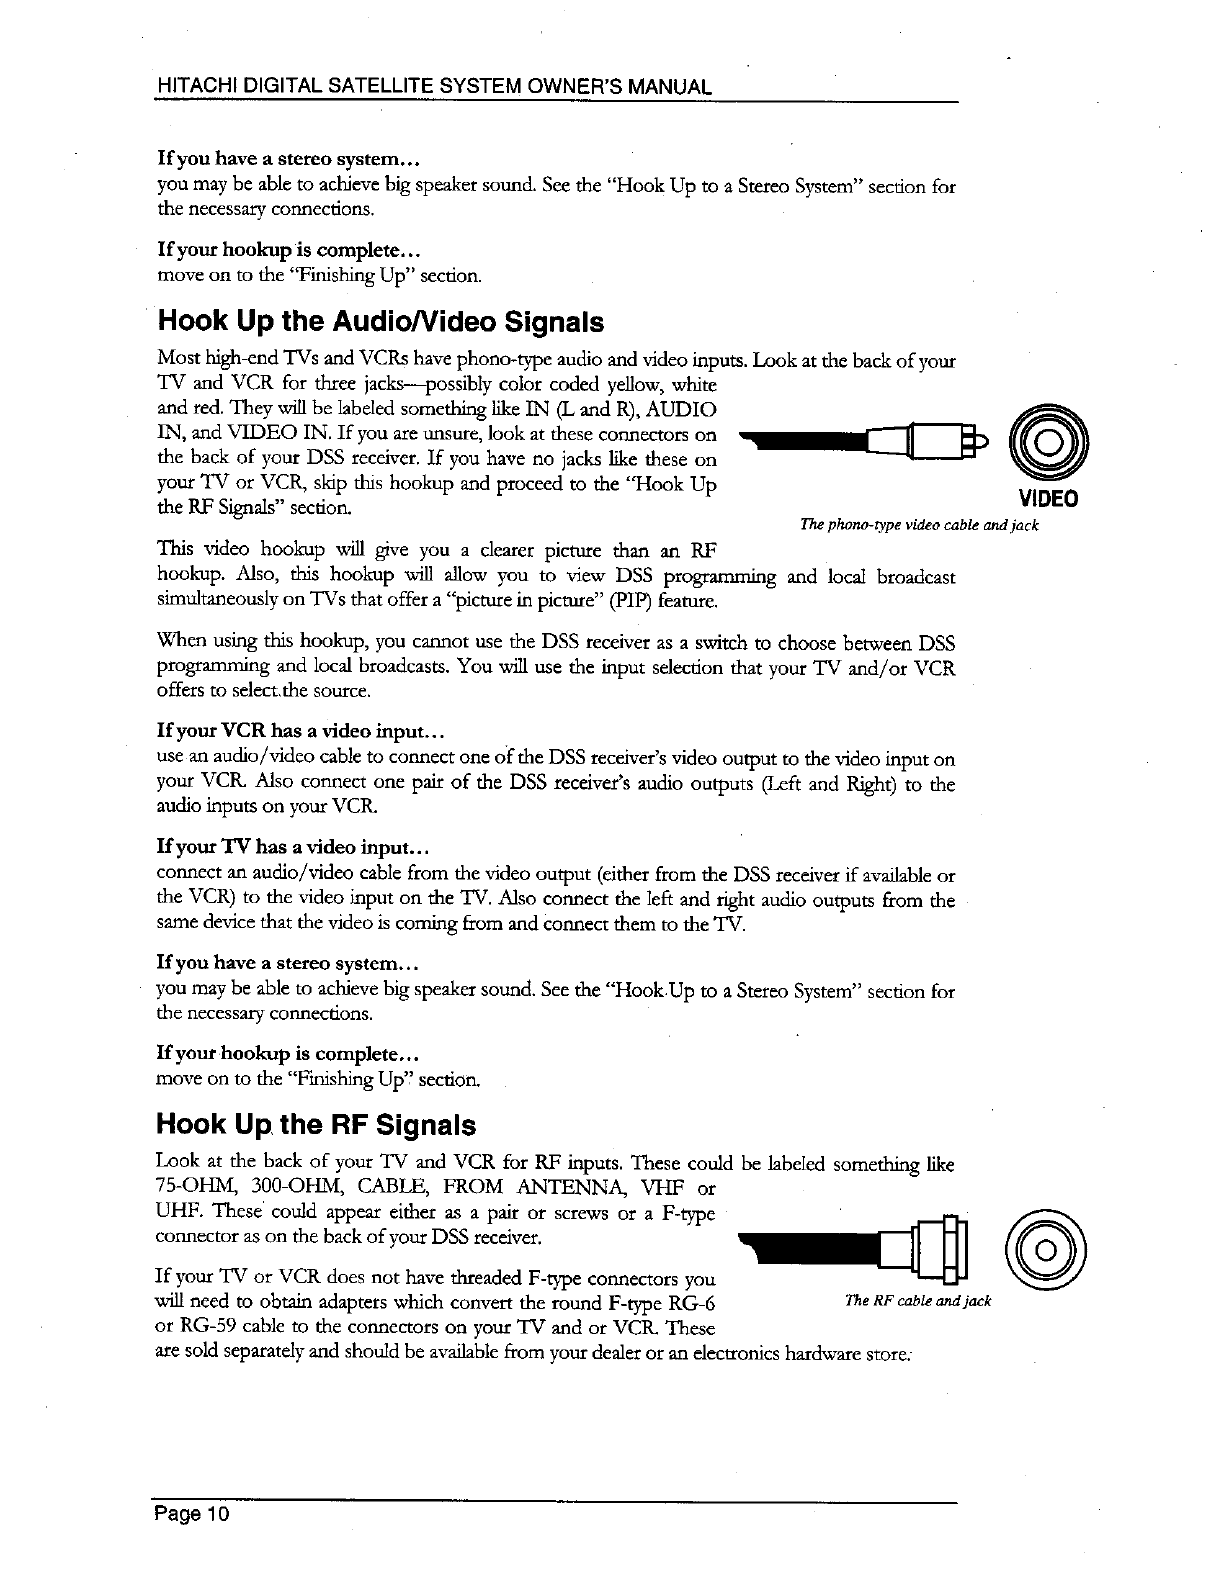
The S-video cable and jack
Hook Up the Audio/S-video Signals
Only the newest, high-end TVs and VCRs have S-video inputs. VCRs that support S-video
include Hi8 and SVHS types. Look on the back of your TV and
VCR for this special jack. It will be labeled something like S-
VIDEO IN. If you are unsure, you can see the type of connector
that you are looking for on the back of your DSS receiver. If
neither, the TV or VCR, has this jack, proceed to the "Hook Up the
Audio/Video Signals" secdon.
This video hookup will give you a sharper picture than either of the other hookups. Also, this
hookup will allow you to view DSS programming and local broadcast simultaneously on TVs that
offer a "picture in picture" (PIP) feature.
When using this hookup, you cannot use the DSS receiver as a switch to choose between DSS
programming and local broadcasts. You will use the input selection that your TV and/or VCR
offers to select the source.
If your VCR has S-video input...
use an S-video cable to connect the DSS receiver's S-video output to the S-video input on your
VCtL Also connect one pair of the DSS receiver's audio outputs (Left and Right) to the audio
inputs on your VCR.
If your '.V has S-vldeo input...
connect an S-video cable from the S-video output (either from the DSS receiver if available or the
VCR) to the S-video input on the TV. Also connect the left and fight audio outputs from the
same device that the S-video is coming from and connect them to the TV.
Page 9
HITACHI DIGITAL SATELLITE SYSTEM OWNER'S MANUAL
If you have a stereo system...
you may be able to achieve big speaker sound. See the "Hook Up to aStereo System" section for
the necessary connections.
If your hookup is complete...
move on to the "Finishing Up" section.
Hook Up the Audio/Video Signals
Most high-end TVs and VCRs have phono-type audio and video inputs. Look at the back of your
TV and VCR for three jacks--possibly color coded yellow, white
and red. They will be labeled something like IN (L and R), AUDIO
IN, and VIDEO IN. If you are unsure, look at these connectors on
the back of your DSS receiver. If you have no jacks like these on
your TV or VCR, skip this hookup and proceed to the "Hook Up
the RF Signals" section.
@
VIDEO
The phono-type video cable and jack
This video hookup will give you a dearer picture than an RF
hookup. Also, this hookup will allow you to view DSS programming and local broadcast
simultaneously on TVs that offer a "picture in picture" (PIP) feature.
When using this hookup, you cannot use the DSS receiver as a switch to choose between DSS
programming and local broadcasts. You will use the input selection that your TV and/or VCR
offers to select,the source.
If your VCR has a video input...
use an audio/video cable to connect one of"the DSS receiver's video output to the video input on
your VCK Also connect one pair of the DSS receiver's audio outputs (Left and Right) to the
audio inputs on your VCtL
If your TV has a video input...
connect an audio/video cable from the video output (either from the DSS receiver if available or
the VCR) to the video input on the TV. Also connect the left and right audio outputs from the
same device that the video is coming from and Connect them to the TV.
If you have a stereo system...
you may be able to achieve big speaker sound. See the "HookUp to a Stereo System" section for
the necessary connections.
If your hookup is complete...
move on to the "Finishing Up" section.
Hook Up, the RF Signals
Look at the back of your TV and VCR for RF inputs. These could be labeled something like
75-OHM, 300-OHM, CABLE, FROM ANTENNA, VHF or
UHF. These could appear either as a pair or screws or a F-type
connector as on the back of your DSS receiver.
If your TV or VCR does not have threaded F-type connectors you
will need to obtain adapters which convert the round F-type RG-6 TheRFcableandjack
or RG-59 cable to the connectors on your TV and or VCK These
are sold separately and should be available from your dealer or an electronics hardware store:
@
Page10
SE'H'ING UP YOUR HITACHI DIGITAL SATELLITE SYSTEM
To connect your VCR...
use a coaxial cable to connect the OUT TO TV from your DSS receiver to the RF input section
on your VCR. This is the first place Where an adapter may be needed if your VCR doesn't have
the F-tH?e connector.
To connect your 'IV...
connect acoaxial cable from the RF output (either from the DSS receiver's OUT TO TV if
available or the VCR) to the RF input on the TV.
Set the channel 3/4 switch on the back of your DSS receiver to the channel that is not broadcast
or has the weakest signal in your area. This WIUbe the channel that you need to set your TV
and/or VCR to for viewing or recording DSS programming.
You can also use your DSS receiver as a switch to select between DSS programming and local
broadcasts. This can be accomplished by pressing the _ key while the remote is in DSS
mode. Also, you must connect your local signal, either from an antenna or cable service, to the
IN FROM ANT on the back of your DSS receiver. If your antenna wire is not RG6 or RG-59
your _ need an adapter as described earlier.
If you have a stereo system...
you may be able to achieve big speaker sound. See the "Hook Up to a Stereo System" section for
the necessary connections.
If your hookup is complete...
move on to the "Finishing Up" section.
Hook Up to a Stereo System
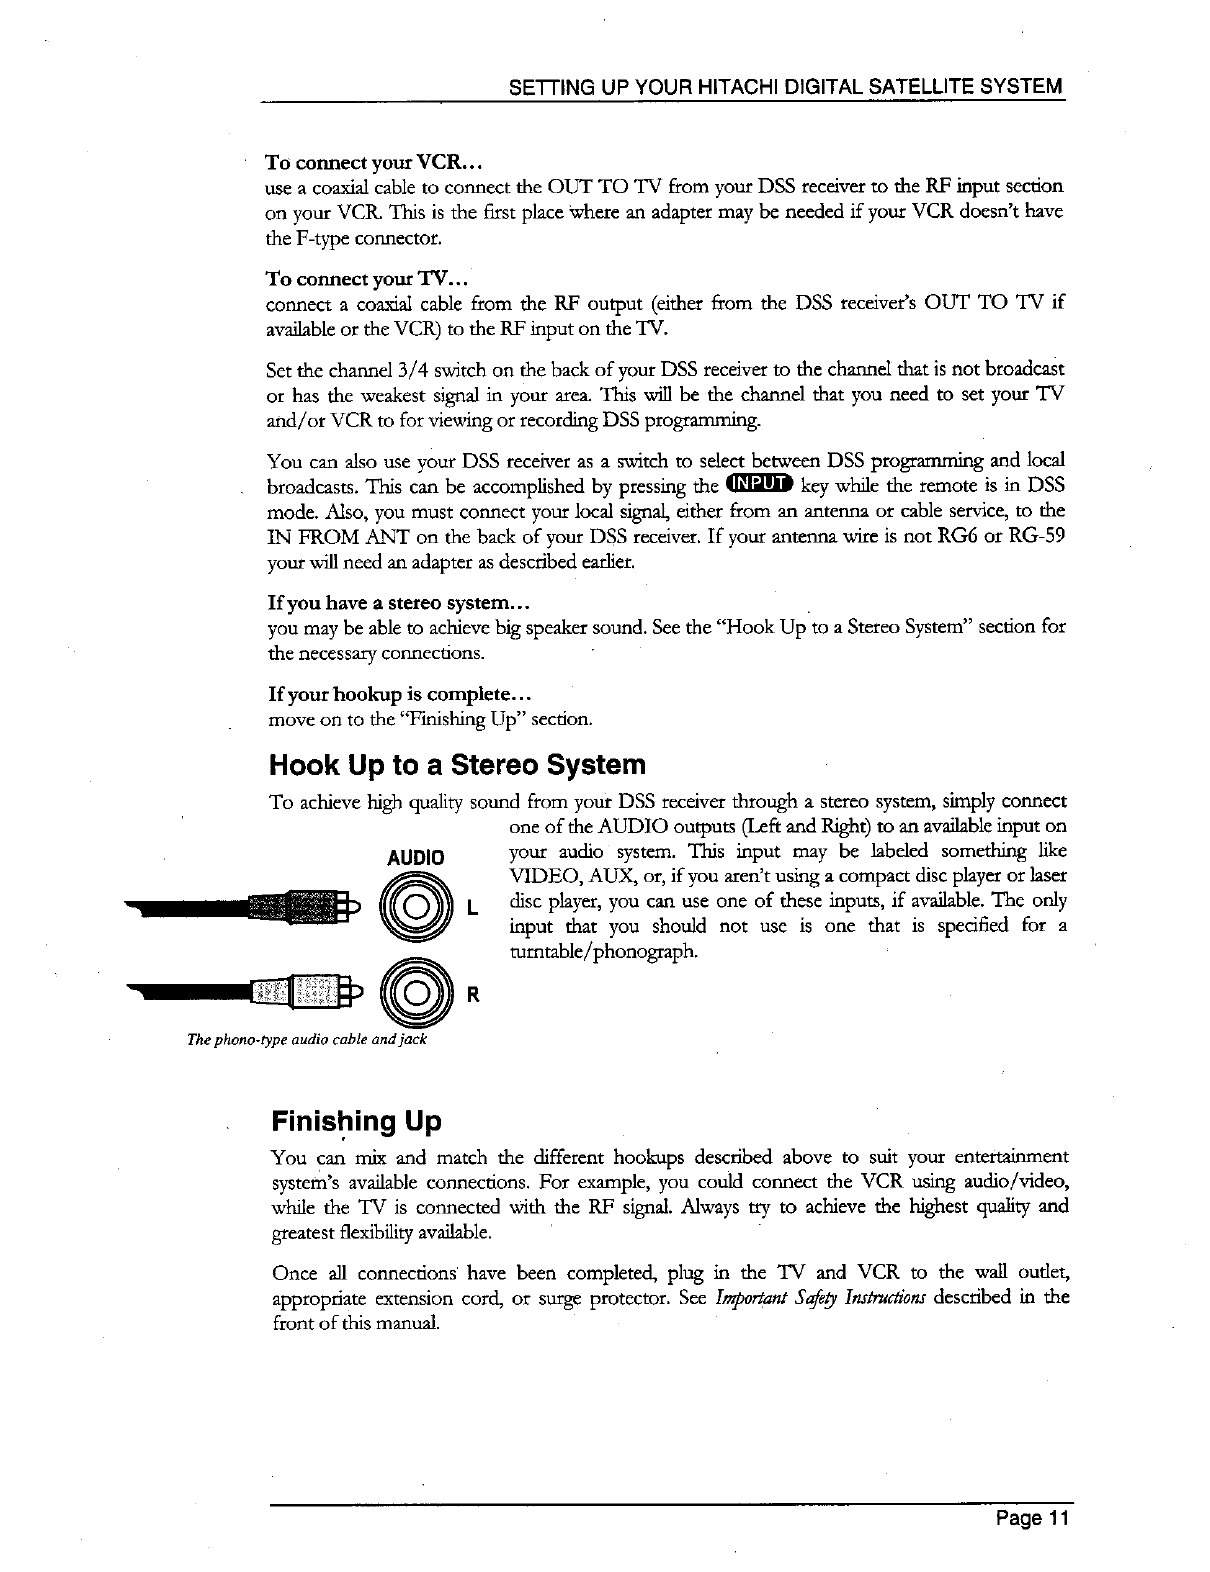
To achieve high quality sound from your DSS receiver through a stereo system, simply connect
one of the AUDIO outputs (Left and Right) to an available input on
AUDIO
@
@
The phono-type audio cable and jack
your audio system. This input may be labeled something like
VIDEO, AUX, or, if you aren't using a compact disc player or laser
discplayer,you canuse one oftheseinputs,ifavailable.The only
input that you should not use is one that is specified for a
turntable/phonograph.
R
Finishing Up
You can mix and match the different hookups described above to suit your entertainment
system's available connections. For example, you could connect the VCR using audio!video,
while the TV is connected with the RF signal. Always try to achieve the highest quality and
greatest flexibility available.
Once all connections have been completed, plug in the TV and VCR to the wall outlet,
appropriate extension cord, or surge protector. See Important Safqy Instructions described in the
front of this manual.
Page 11
HITACHI DIGITAL SATELLITE SYSTEM OWNER'S MANUAL
Connecting the VCR Control
Cable
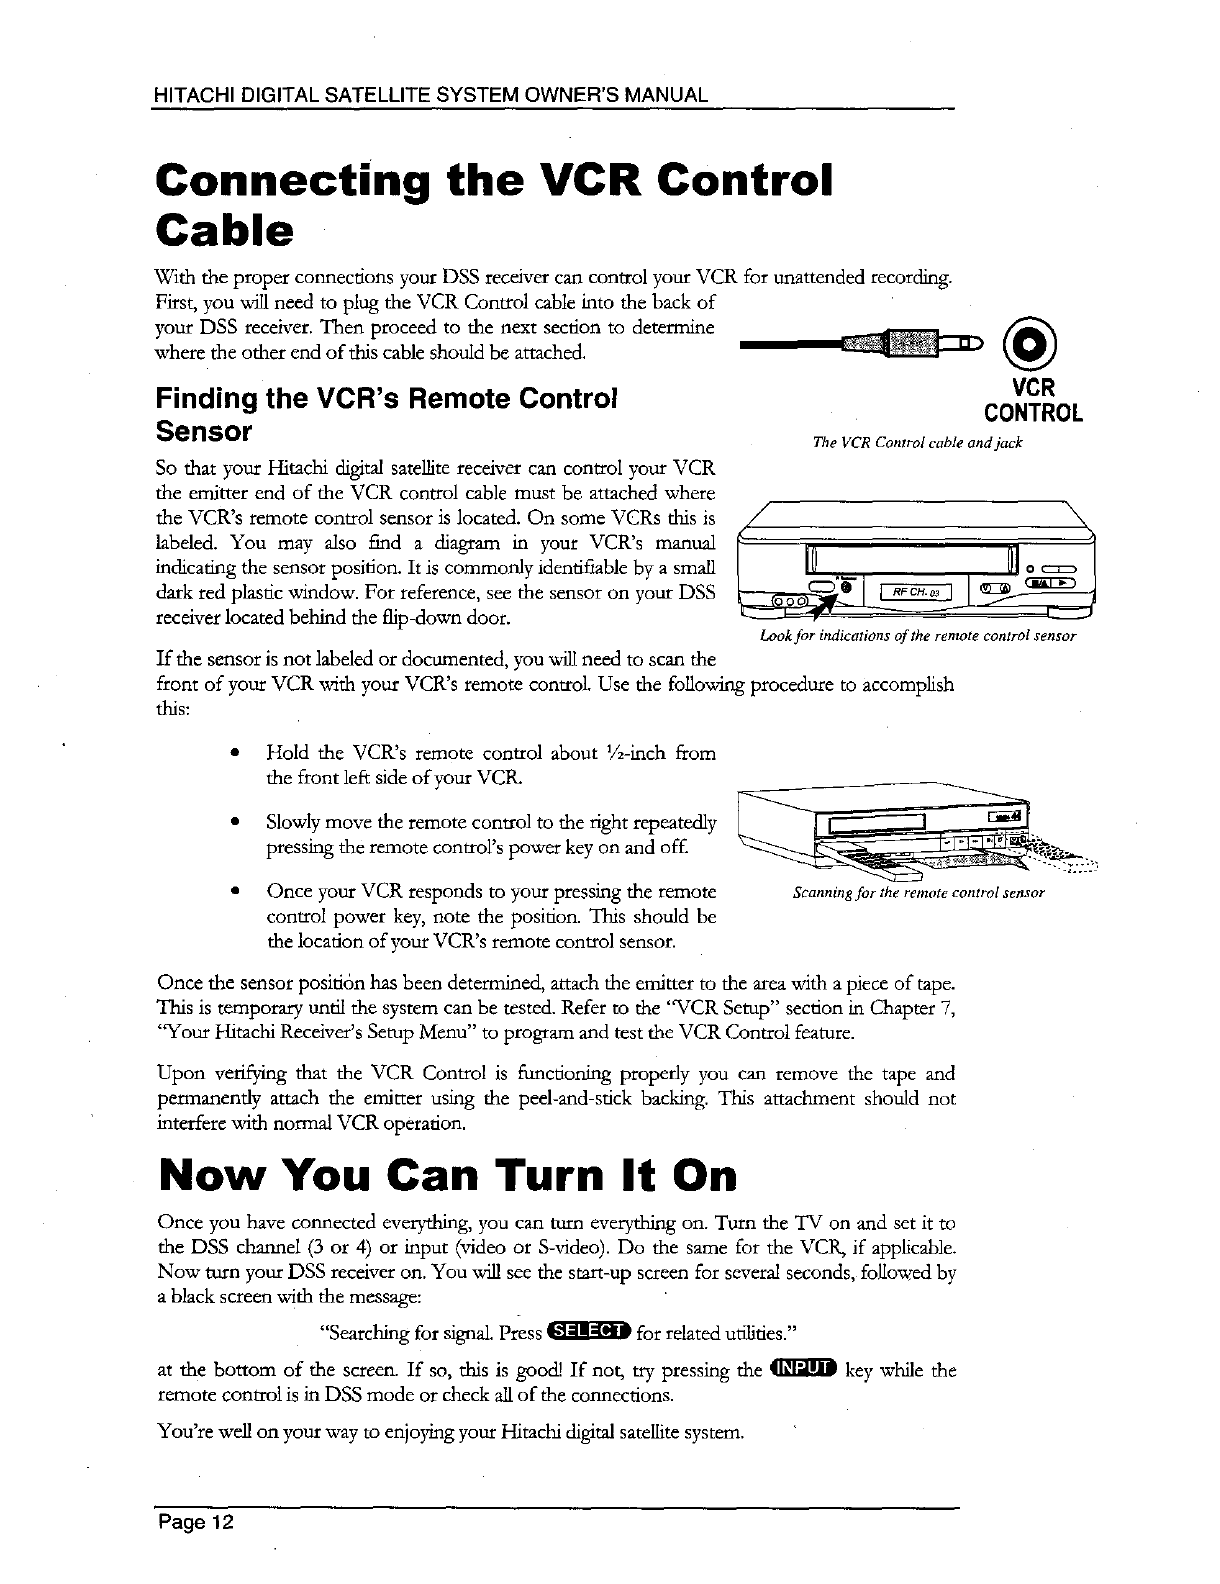
With the proper connections you* DSS receiver can control your VCR for unattended recording.
Ktrst, you will need to plug the VCR Control cable into the back of
your DSS receiver. Then proceed to the next section to determine
where the other end of this cable should be attached.
Finding the VCR's Remote Control
Sensor
So that your Hitachi digital satellite receiver can control your VCR
the emitter end of the VCR control cable must be attached where
the VCR's remote control sensor is located. On some VCRs this is
labeled. You may also find a diagram in your VCR's manual
indicating the sensor position. It is commonly identifiable by a small
dark red plastic window. For reference, see the sensor on your DSS
receiver located behind the flip-down door.
If the sensor is not labded or doctmaented, you will need to scan the
@
VCR
CONTROL
The VCR Control cable and jack
rO,o 1
Look for indications of the remote control sensor
front of your VCR with your VCR's remote control. Use the followirg procedure to accomplish
this:
• Hold the VCR's remote control about 1A-inch from
the front left side of your VC1L
• SlowIy move the remote control to the right repeatedly
pressing the remote control's power key on and off.
•Once your VCR responds to your pressing the remote
control power key, note the position. This should be
the location of your VCR's remote control sensor.
Scanning for the remote control sensor
Once the sensor positi6n has been determined, attach the emitter to the area with a piece of tape.
This is temporary until the system can be tested. Refer to the 'WCR Setup" section in Chapter 7,
"Your Hitachi Receiver's Setup Menu" to program and test the VCR Control feature.
Upon verifying that the VCR Control is functioning properly you can remove the tape and
permanently attach the emitter using the peel-and-stick backing. This attachment should not
interfere with normal VCR operation.
Now You Can Turn It On
Once you have connected everything, you can turn everything on. Turn the TV on and set it to
the DSS channd (3 or 4) or input (video or S-video). Do the same for the VCPs if applicable.
Now turn your DSS receiver on. You will see the start-up screen for several seconds, followed by
a black screen with the message:
"Searching for signal. Press _ for related uflkies."
at the bottom of the screen. If so, this is good! If not, try pressing the _ key while the
remote control is in DSS mode or check all of the connections.
You're well on your way to enjoying your Hitachi digital satellite system.
Page 12
CONTROLLING THE
HITACHI-BRAND DSS
RECEIVER
Now It is Time for You to Take
Control!
You are the master of your Hitachi digital satellite receiver. It does
what you tell it to. Take a few minutes to read through this chapter to
begin to understand how to "drive" your system.
Let's begin with a few simple rules. First, there is nothing that you can do, using the front panel
keys or the remote control keys, that could harm your DSS receiver in any way. Once you
understand the capabilities and options available in your receiver, you'll be able to undo any
changes or settings that you make.
The next important rule is to have fun! The features of your Hitachi-brand DSS receiver are
intended to make watching TV more enjoyable. It isn't necessary to know everything your system
can do right away. Learn the capabilities a little at a time. As you use your DSS receiver, the
techniques to control it will become second nature.
Front Panel vs. Remote Control
Keys
The front pand provides all of the basic controls needed to access and use the primary features of
the DSS receiver. The remote control has many more keys to provide shortcuts or access to
extended features of the DSS receiver. Most of the remote control keys can also be used to
control other components in your entertainment system. For this reason, you must remember to
press the _ key, putting the remote control in DSS mode, when you want to control your
DSS receiver. When the remote control keys are pressed, the device key for which the signals are
being sent will light.
Basic Navigation
The most common DSS-reiated keys that you will use are A, V, _, _, and l_l--dl_'_. The
direction keys are represented by four distinct keys on the DSS receiver front panel, or with a
single pad on the remote control. These keys are primarily used to move the highlight (also
known as a cursor) around the screen. The _ key should be pressed to indicate that a
highlighted item is the one that you wish to choose.
Another key you will be using frequently is the q_[]]][l_ key, located on both the front pand of
the DSS receiver as well as on the remote control This key is used when you want to display the
PROGRAM GUIDE. Once you are in the guide, pressing the _ key while a program title
is highlighted will display any available description text at the top of the screen.
Page13
HITACHI DIGITAL SATELLITE SYSTEM OWNE'R'S MANUAL
One additional key that appeazs on both the front panel and the remote control is the
key. This key is used to retrieve descriptive information about a currently airk_g event and to
provide access to scheduling information (and purchasing information for PPVs) about
highlighted programs in the PROGRAM GUIDE.
The final key that appears on both the remote control and the front panel is the _ key.
Make sure the remote control is in DSS mode for the d'ff'_ll_r/"ff_key to apply to the DSS
receiver. When you power the DSS receiver off, is has not actually stopped using electricity.
Rather goes into a standby condition that enables it to continue to monitor data being sent from
the service providers, call in status reports to the service providers, start and stop a VCR for
programs you have scheduled, receive messages, and perform other background activities. The
only apparent changes that occur in the standby condition are that the video is shut off, the IN
FROM ANTENNA connector signals are passed through to the OUT TO TV connector, and
the power light is off.
There are three keys on your remote control that you will likely use frequently. They are ([[_,
(_i), and(_llD.
After you have established favorite channel lists, as described in Chapter 6, "Your Hitachi
Receiver's Main Menu," you will want to cycle through these lists quickly and easily. This is
accomplished by pressing the _ key. Each press will advance to the next fist which contains
channels. After stepping through the favorite lists it will cycle back to "All Channels."
At any time, you can exit the PROGRAM GUIDE or menus through on-screen navigation,
working your way back to the MAIN MENU and selecting Exit to UieMng. This can be time
consuming, so a much quicker way is to press the _ key.
The _ key is only of use in the DSS mode if your DSS receiver is connected to your
entertainment system through RF, rather that video or S-video. If you are using RF, pressing the
key will switch the output between DSS programming and local broadcasts similar to the
way the _ key works. The reason that you may want to have local broadcasts passed
through but not turn the DSS receiver off is so you can watch or record local broadcasts while
recording or watching DSS programming through the A/V connectors.
With knowledge of these few keys you should be able to navigate through almost every
Hitachi-brand DSS receiver feature and menu.
Page 14
POINTING YOUR
HITACHI SATELLITE
ANTENNA
One Spot--22,300 Miles in.
Space--and You'll Find It
There's a cluster of satellites way out there in space, and just as a
telescope is pointed at a star, you need to point your dish at the
satellites.
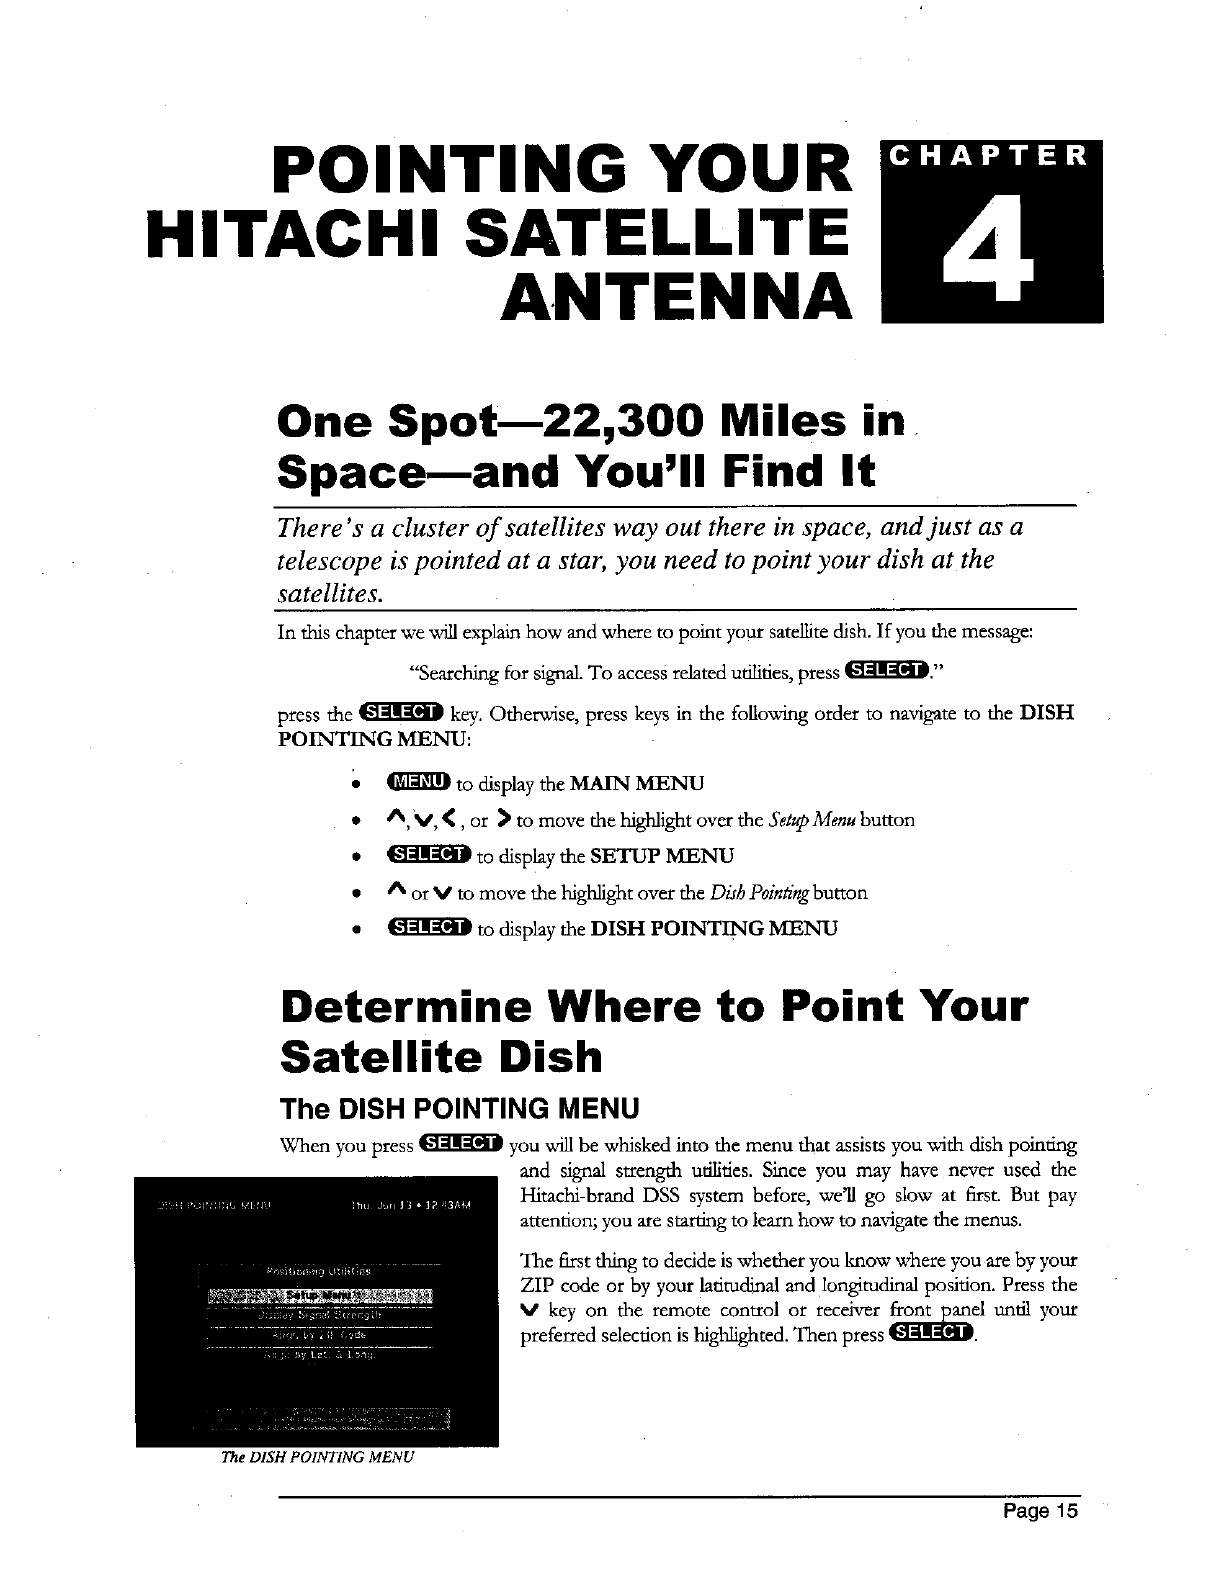
In this chapter we will explain how and where to point your satellite dish. If you the message:
"Searching for signal. To access related utilities, press 4k'ql--_I--.r_.-
press the Igq--dl[-=U_key. Otherwise, press keys in the following order to navigate to the DISH
POINTING MENU:
_ to display the MAIN MENU
•A,V,l{,or ) to move the higl'dight over the SetupMenu button
• _ to display the SETUP MENU
•Aor Vto move the highlight over the Dish Poinifngbutton
• _ to display the DISH POINTING MENU
Determine Where to Point Your
Satellite Dish
The DISH POINTING MENU
When you press _ you will be whisked into the menu that assists you with dish pc/rating
and signal strength utilities. Since you may have never used the
Hitachi-brand DSS system before, we'll go slow at first. But pay
attention; you are starting to learn how to navigate the menus.
The DISH POINTING MENU
The first thing to decide is whether you know where you are by your
ZIP code or by your latitudinal and longitudinal position. Press the
Vkey on the remote control or receiver ffont_el until your
preferred selection is highlighted. Then press qN_R._TdU.
Page 15
HITACHIDIGITALSATELLITESYSTEMOWNER'SMANUAL
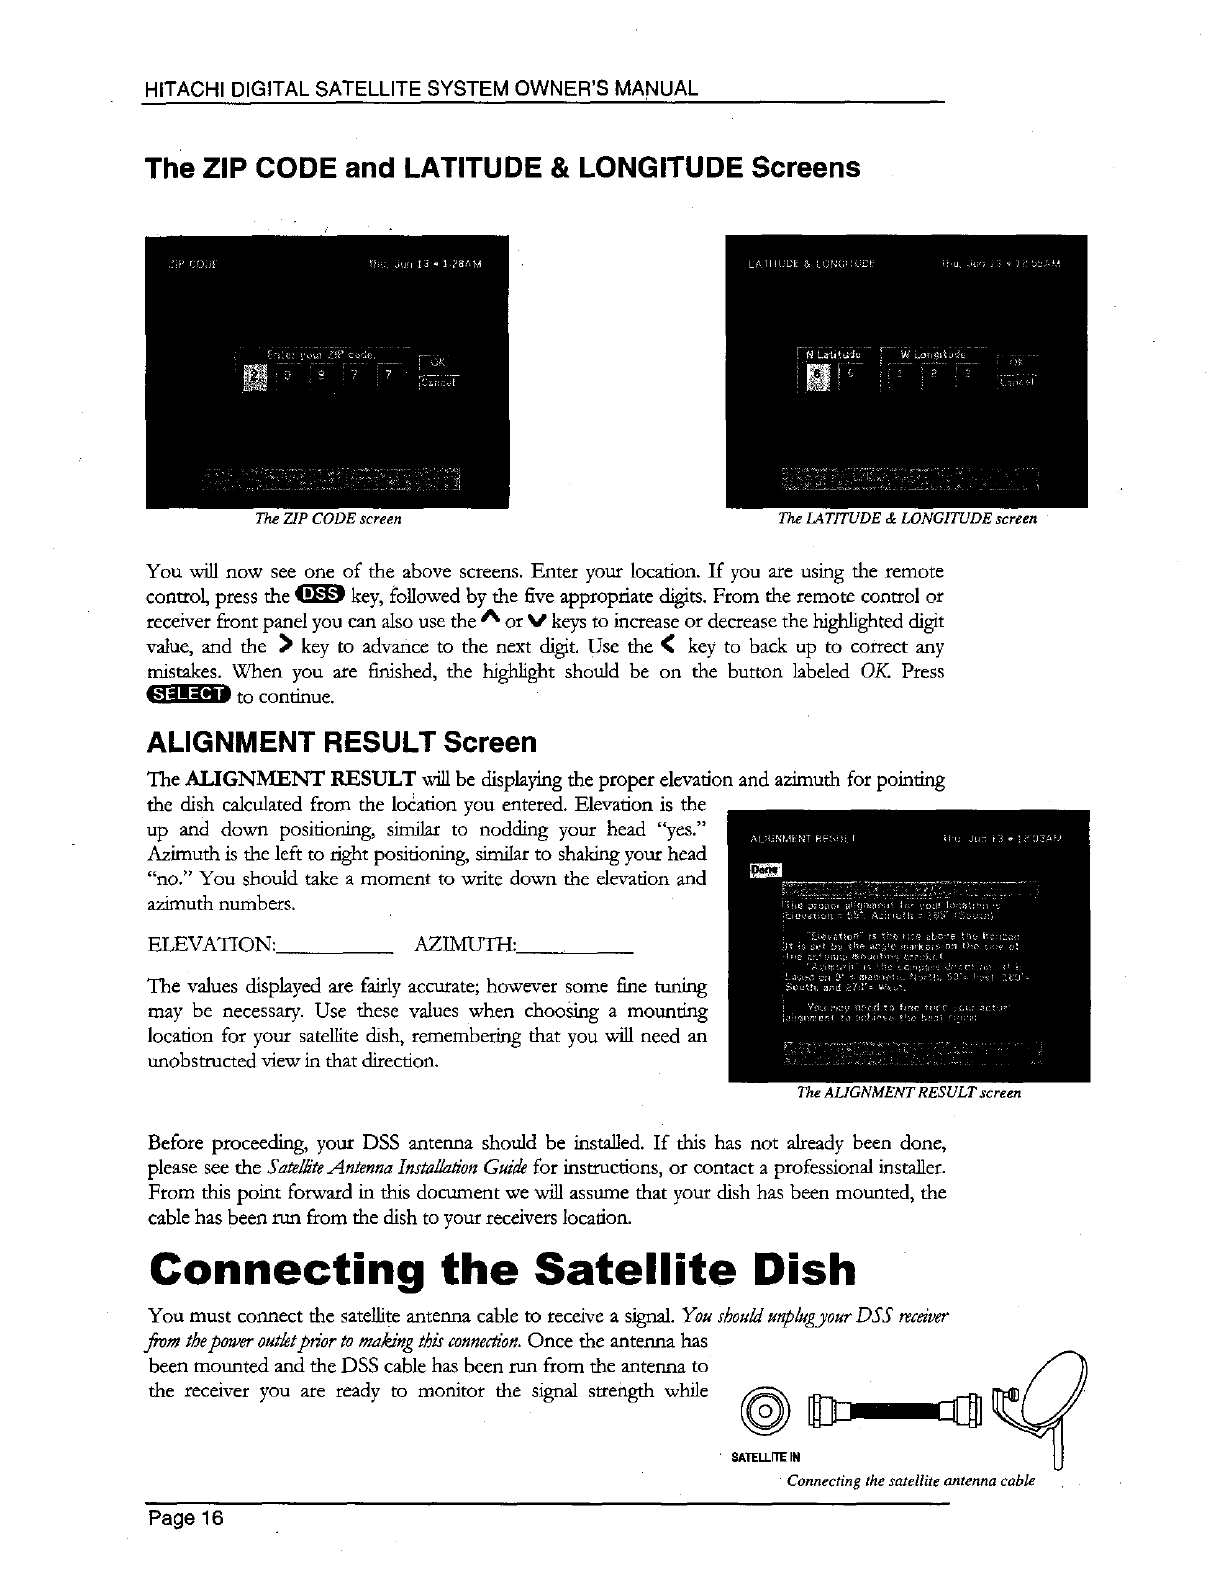
The ZIP CODE and LATITUDE & LONGITUDE Screens
The ZIP CODE screen The LATITUDE & LONGITUDE screen
You _ now see one of the above screens. Enter your location. If you are using the remote
control, press the _ key, followed by the five appropriate digits. From the remote control or
receiver front panel you can also use the A or V keys to increase or decrease the highlighted digit
value, and the > key to advance to the next digit. Use the < key to back up to correct any
mistakes. When you are finished, the highlight should be on the button labeled OK Press
to continue.
ALIGNMENT RESULT Screen
The ALIGNMENT RESULT will be disphying the proper elevation and azimuth for pointing
the dish calculated from the location you entered. Elevation is the
up and down positioning, fmailar to nodding your head "yes."
Azimuth is the left to right positioning, _mai!ar to shaking your head
"no." You should take a moment to write down the elevation and
azimuth numbers.
ELEVATION: AZIMUTH:
The values displayed are fairly accurate; however some fine tuning
may be necessary. Use these values when choosing a mounfng
location for your satellite dish, remembering that you will need an
unobstructed view in that direction.
The ALIGNMENT RESULT screen
Before proceeding, your DSS antenna should be installed. If this has not already been done,
please see the Satel_teAntenna Insta&#on Guide for instructions, or contact a professional installer.
From this point forward in this document we will assume that your dish has been mounted, the
cable has been run from the dish to your receivers location.
Connecting the Satellite Dish
You must connect the satellite antenna cable to receive a signal. You should urrplugyourDSS receiver
from thepower outletprior to making this connection.Once the antenna has
been mounted and the DSS cable has been run from the antenna to
the receiver you are ready to monitor the signal strength while @
• SATELLITE[N
Connecting the satellite antenna cable
Page16
POINTINGYOURHITACHISATELLITEDISH
adjusting the dish pointing. Now you can plug your DSS receiver into power again.
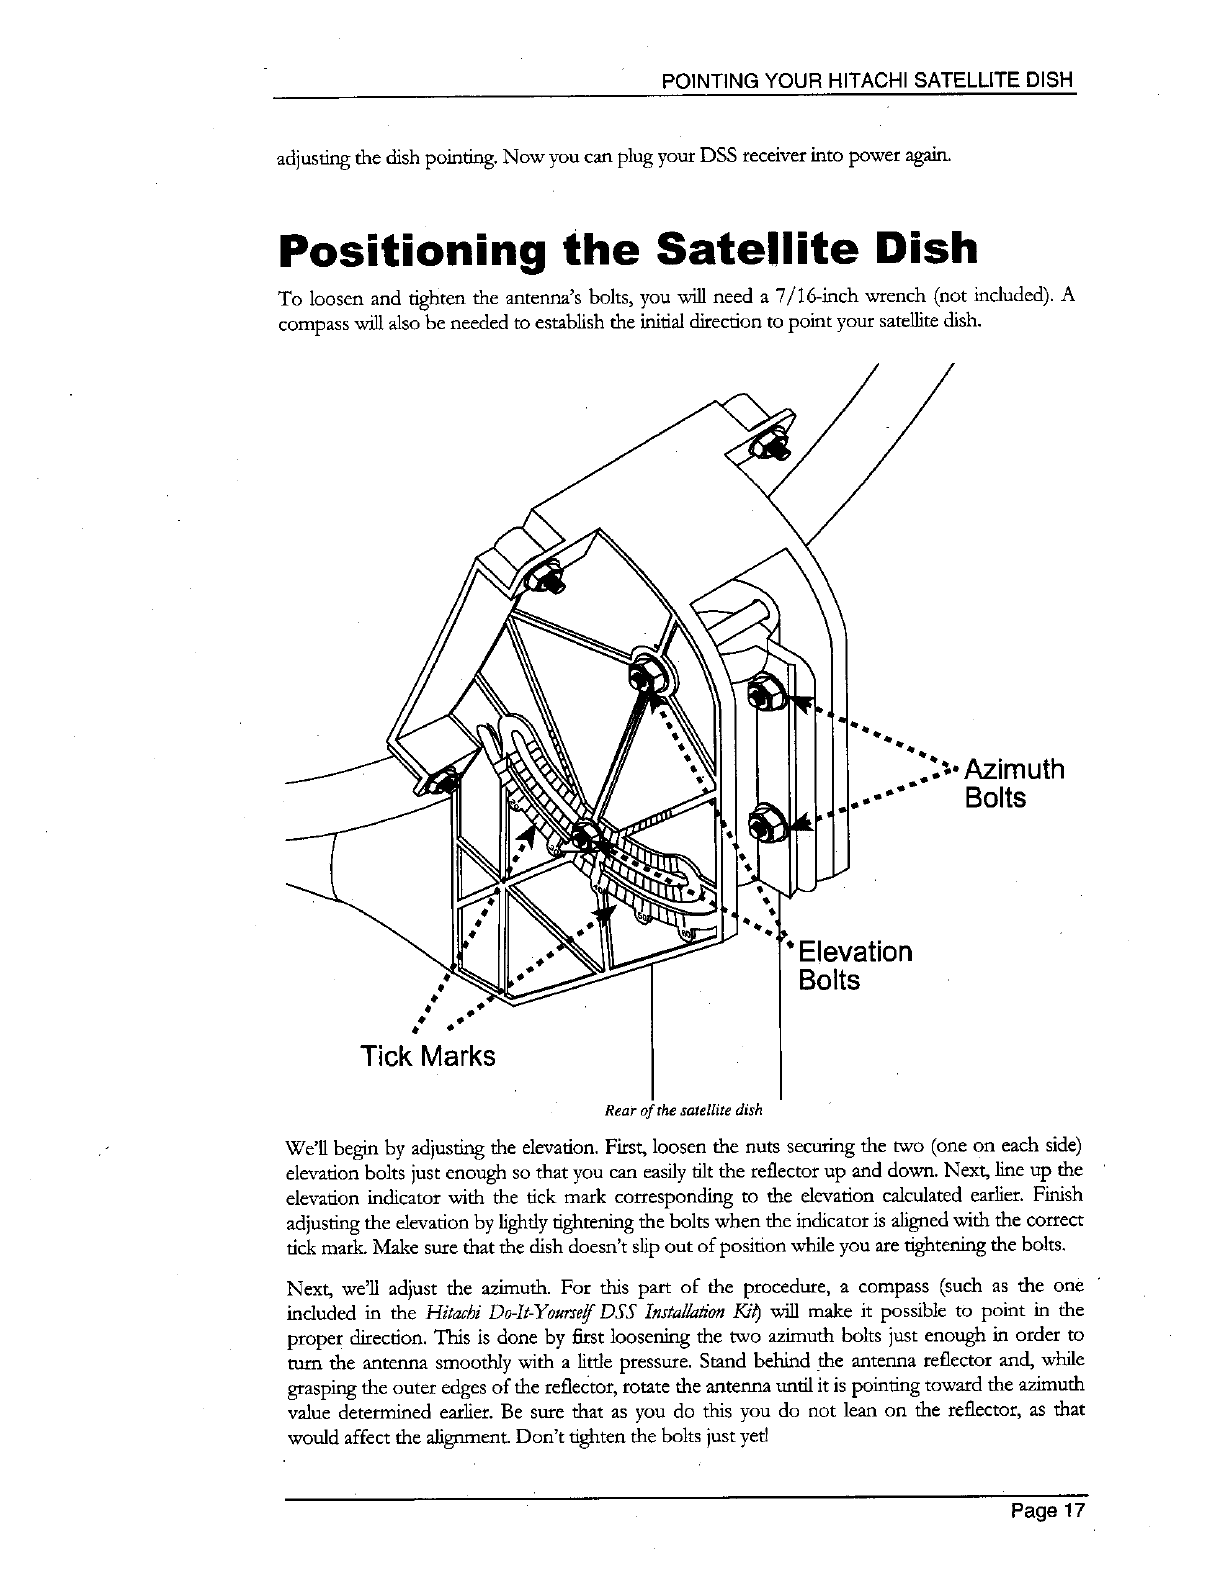
Positioning the Satellite Dish
To loosen and tighten the antenna's bolts, you viii need a 7/I6-inch wrench (not included). A
compass _ also be needed to establish the initial direction to point your satellite dish.
..: .Azimuth
.-'" Bolts
Tick Marks
Elevation
Bolts
Rear of the satellite dish
We'll begin by adjusfng the elevation. First, loosen the nuts secufng the two (one on each side)
elevation bolts just enough so that you can easily flit the reflector up and down. Next, line up the
elevation indicator with the tick mark corresponding to the elevation calculated earlier. Finish
adjusting the elevation by tightly tightening the bolts when the indicator is afigned with the correct
tick mark. Make sure that the dish doesn't slip out of position while you are tightening the bolts.
Next, we'll adjust the azimuth. For this part of the procedure, a compass (such as the one
included in the Hitachi Do-It-Yourself DSS Installalion Ki_) will make it possible to point in the
proper direction. This is done by first loosening the two azimuth bolts just enough in order to
turn the antenna smoothly with a little pressure. Stand behind the antenna reflector and, while
grasping the outer edges of the reflector, rotate the antenna until it is pointing toward the azimuth
value determined earlier. Be sure that as you do this you do not lean on the reflector, as that
would affect the alignment. Don't tighten the bolts just yet!
Page 17
HITACHI DIGITAL SATELLITE SYSTEM OWNER'S MANUAL
In the following procedure you ",viiibe referring to the meter on the SIGNAL STRENGTH
screen. If this screen is not currendy displayed, press the _ key, shutting the system
down, and then press the _ key to start the system up again.
Ify0u see a black screen with the message:
"Searching for signal. To access related uOlhies, press t[_]_."
press the _ key. Other, vise, press keys in the following order to navigate to the DISH
POINTING MENU:
•_ to display the MAIN MENU
•A, V, t[, or _ to move the highlight over the Setup Menu button
• _ to display the SETUP MENU
• A or Vto move the highlight over the Dish Poin_ng button
• _ to display the DISH POINTING MENU
Now highlight the D@!ay Signal Strength button and press the _ key. You should see a
meter displaying your signal strength.
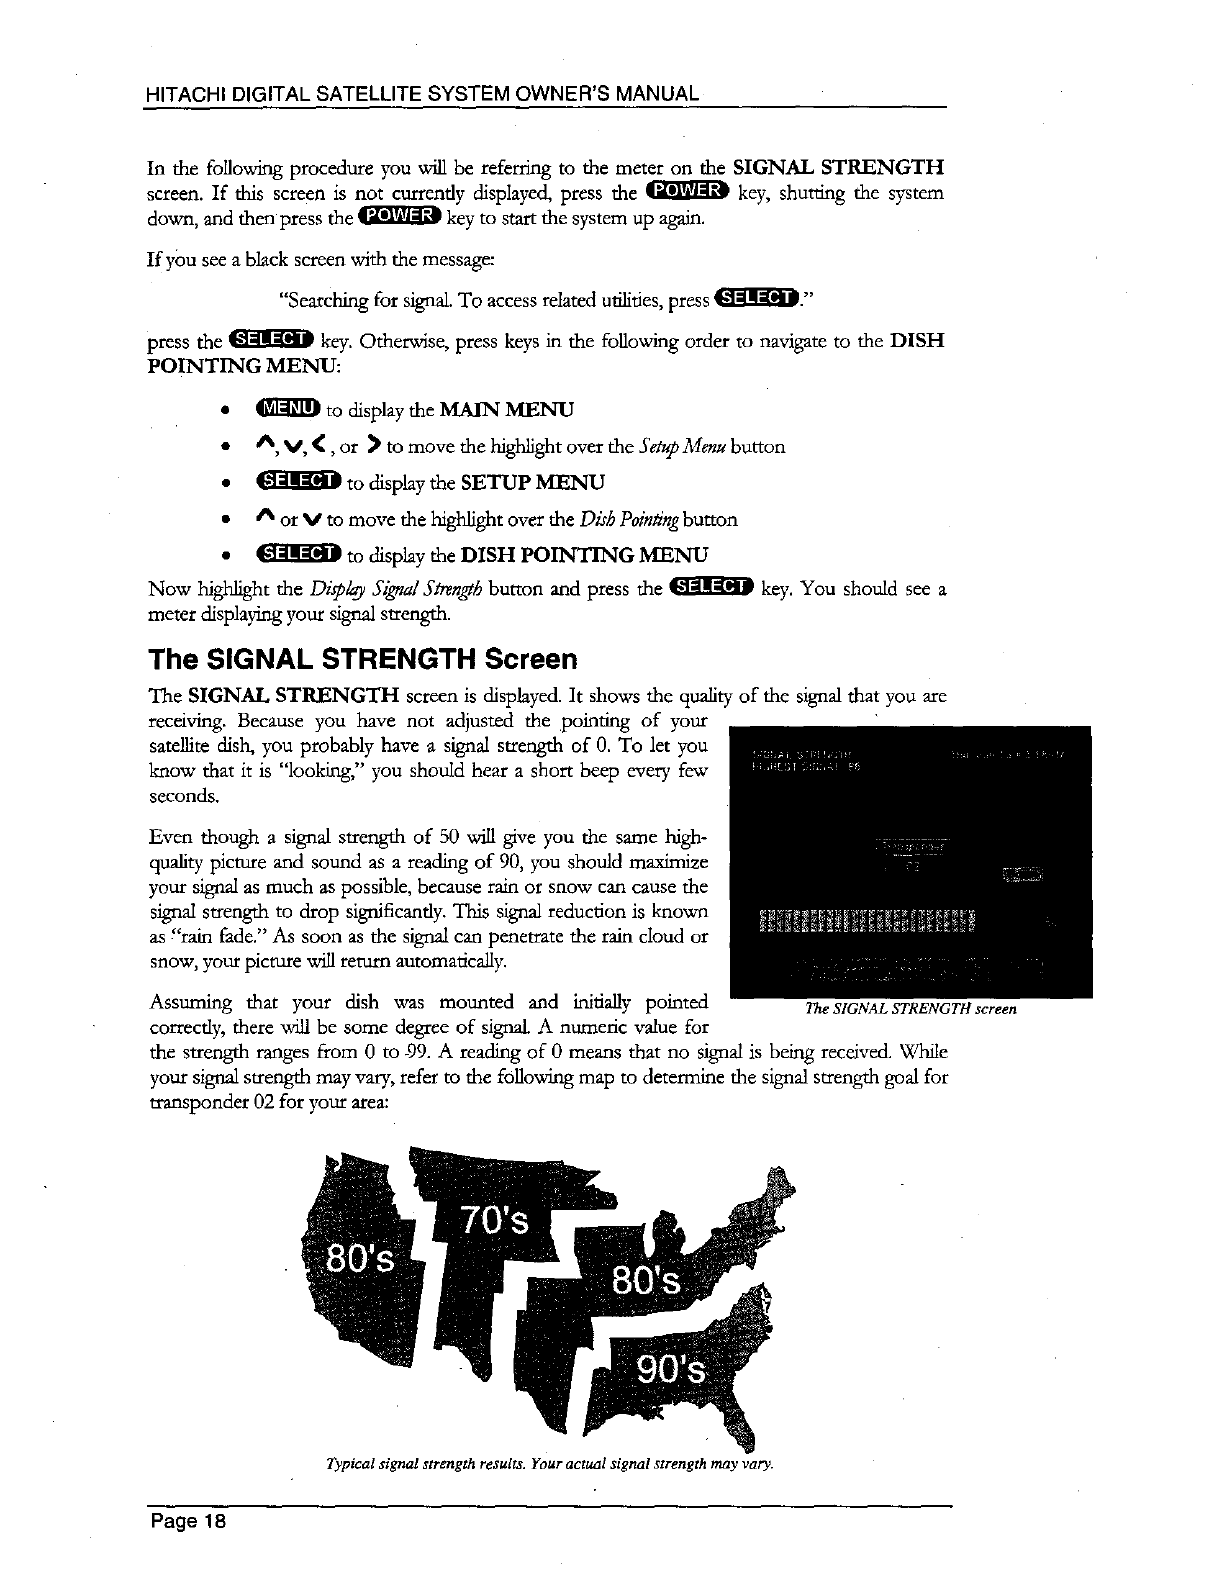
The SIGNAL STRENGTH Screen
The SIGNAL STRENGTH screen is displayed. It shows the quality of the signal that you are
receiving. Because you have not adjusted the pointing of your
satellite dish, you probably have a signal strength of 0. To let you
know that it is "looking," you should hear a short beep every few
seconds.
Even though asignal strength of 50 _ give you the same high-
quality picture and sound as areading of 90, you should maximize
your signal as much as possible, because rain or snow can cause the
signal strength to drop significantly. This signal reduction is known
as "rain fade." As soon as the signal can penetrate the rain cloud or
snow, your picture will return automatically.
Assuming that your dish was mounted and initially pointed
correctly, there will be some degree of signal. A numeric value for
the strength ranges from 0to 99. A reading of 0 means that no signal is being received. XXqlile
your signal strength may vary, refer to the foUovAng map to determine the signal strength goal for
transponder 02 for your area:
The SIGNAL STRENGTH screen
Typical signal strength results. Your actual signal strength may vary.
Page 18
POINTING YOUR HITACHI SATELLITE DISH
You may choose to try different transponders. Each transponder transmits multiple programs at a
time. The transponder displayed when entering the screen represents the one associated with the
last viewed program (or "02" if no program has been viewed). By moving the highlight to the
transponder area, you can enter a number from 01 to 32. Different transponders may show
varying signal strengths. This is not indicative of any problem unless the variations are extreme
(such as 40 and 90). In the event of signal reception problems, customer service representatives
may ask for information such as signal strength on a different transponder. Do not change
transponders trying to find the best signal since the transponder will automatically change to the
one that corresponds with the DSS channels that you view.
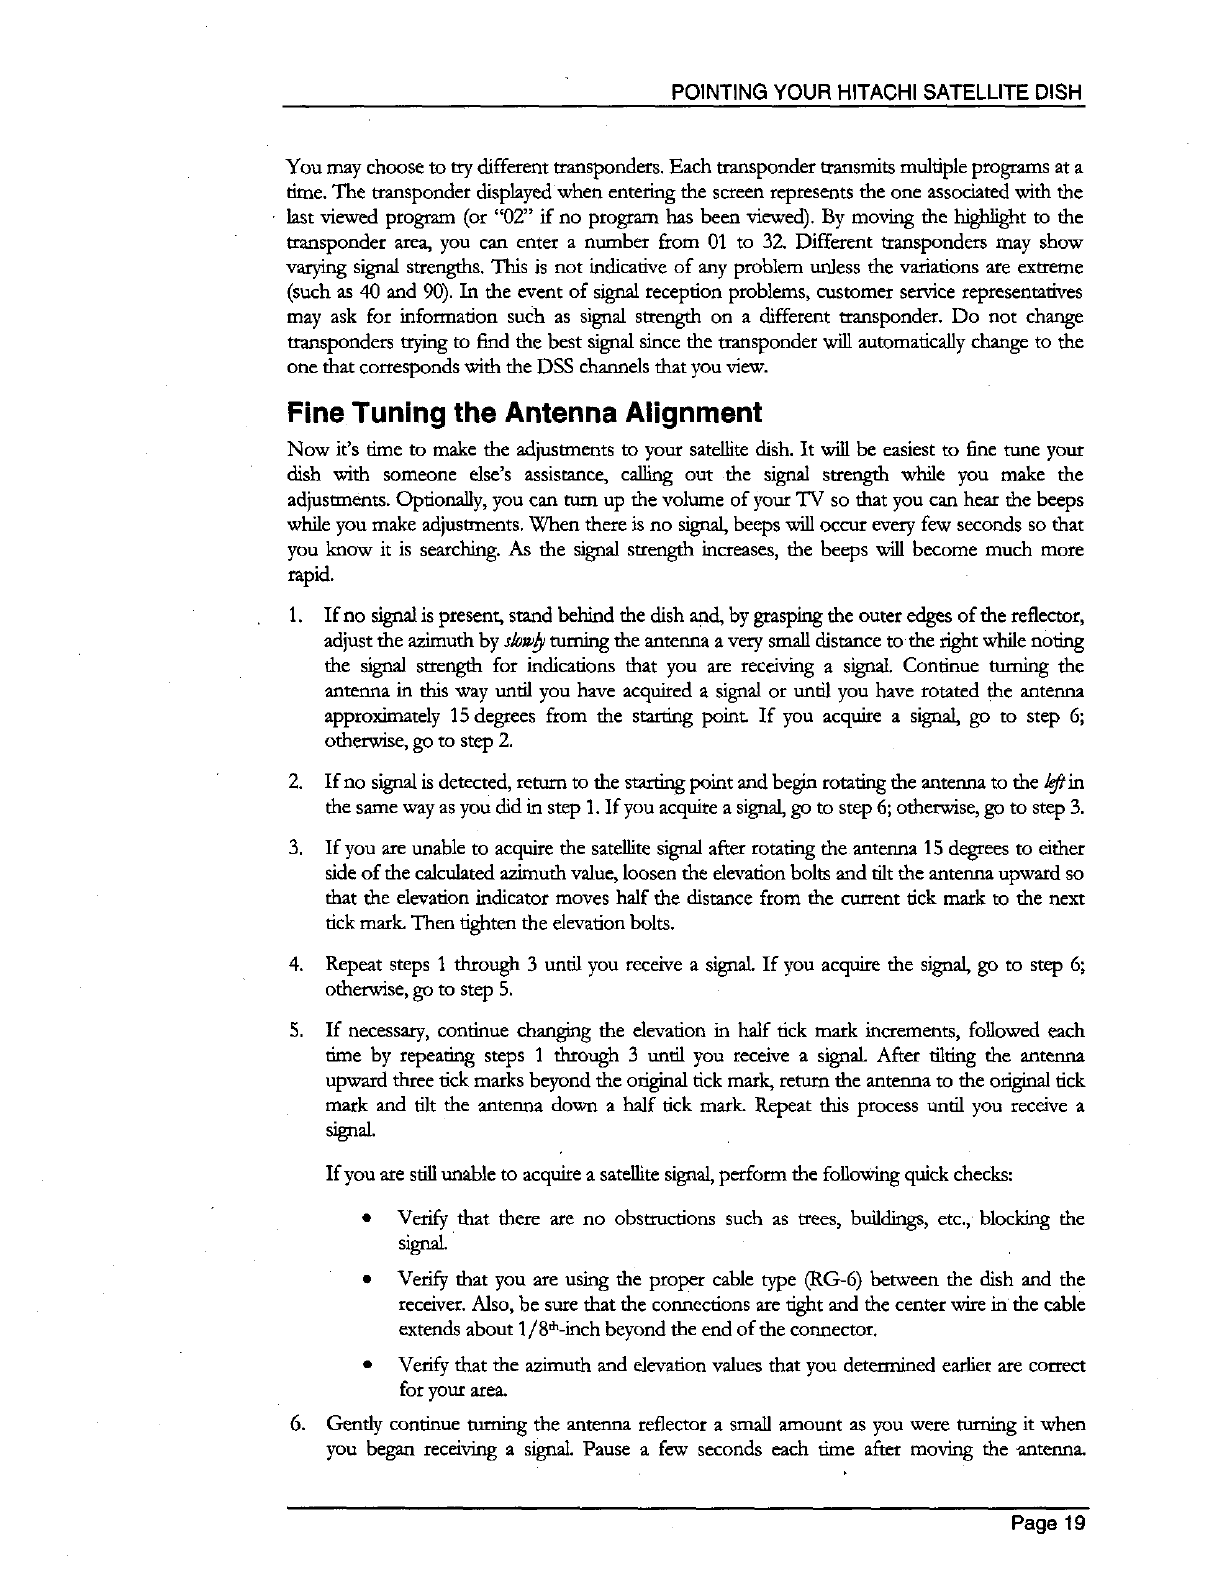
Fine Tuning the Antenna Alignment
Now it's time to make the adjustments to your satellite dish, It will be easiest to fine tune your
dish with someone else's assistance, calling out the signal strength while you make the
adjusrments. Optionally, you can turn up the volume of your TV so that you can hear the beeps
while you make adjustments. When there is no signal, beeps will occur every few seconds so that
you know it is searching. As the signal strength increases, the beeps will become much more
rapid.
.If no signal is present, stand behind the dish and, by grasping the outer edges of the reflector,
adjust the azimuth by s!0w_turning the antenna avery small distance to the right while noting
the signal strength for indications that you are receiving a signal Continue turning the
antenna in this way until you have acquired a signal or until you have rotated flae antenna
approximately 15 degrees from the starting point. If you acquire a signal, go to step 6;
otherwise, go to step 2.
2. If no signalis detected, return to the starting point and begin rotating the antenna to the/eft in
the same wayas you did in step 1. If you acquire a signal,go to step 6; otherwise, go to step 3.
,If you axe unable to acquire the satellite signal after rotating the antenna 15 degrees to either
side of the calculated azimuth value, loosen the elevation bolts and tilt the antenna upward so
that the elevation indicator moves half the distance from the current tick mark to the next
tick mark. Then tighten the elevation bolts.
4. Repeat steps 1 through 3 until you receive a signal. If you acquire the signal, go to step 6;
otherwise, go to step 5.
If necessary, continue changing the elevation in half tick mark increments, followed each
time by repeating steps 1 through 3 until you receive asignal After tilting the antenna
upward three tick marks beyond the original tick mark, return the antenna to the ori_al tick
mark and flit the antenna down ahalf tick mark. Repeat this process until you receive a
signal.
If you are still unable to acquire a satellite signal, perform the following quick checks:
.
• Verify that there are no obstructions such as trees, buildings, etc., blocking the
signal.
• Verify that you are using the proper cable type (RG-6) between the dish and the
receiver. Also, be sure that the connections are fight and the center wire in the cable
extends about 1/8_-inch beyond the end of the connector.
• Verify that the azimuth and elevation values that you determined earlier are correct
for your area.
Gently continue turning the antenna reflector a small amount as you were turning it when
you began recdving a signal. Pause a few seconds each time after moving the antenna
Page 19

HITACHI DIGITAL SATELLITE SYSTEM OWNER'S MANUAL
.
8.
Condnue to turn the antenna in this fashion until the signal strength meter reaches the
highest possible reading.
Tighten the azimuth bolts.
Loosen the elevation bolts.
9. Slowly tilt the antenna up and down to try to improve the signal strength reading. When you
are satisfied that you have achieved the strongest sigr_ tighten the elevation bolts.
If you have any questions or encounter any problems during antenna installation, call your dealer
or Hitachi at 1-800-477-1212.
Authorizing Your Service
The antenna is now installed and properly adjusted m receive signals. To confirm this, you should
be able to receive promotional channels from both DIRECTV and USSB. If you can receive
promotional channels, you can now arrange to receive your DSS programming 24 hours aday, 7
days a week, at the following numbers:
DIRECrV 1-800-DIRECTV (347-3288)
USSB 1-800-204-USSB (8772)
DIRECTV offers a variety of prog_mming packages to fit most any budget. Enjoy your favorite
news and entertainment networks induding A&E, CNN, The Disney Channel, AMC, TCM,
TBS, USA Network, The History Channel, and the Sci-Fi Channel Movie lovers will enjoy two
STARZ! premium movie channels and the Independent Film Channel in addition to seven
charmds of movies by theme from Encore. The music lover _ enjoy MuchMusic, TNN, CMT
and over 30 Music Choice channels with commercial-flee CD-quality music for all tastes. For the
sports enthusiast, add the Golf Channel, three new sports networks, and over 18 out-of-maxket
regional sports networks showing exciung collegiate action. Real sports fans may choose from
several season ticket options including the NFL Sunday Ticket, NBA League Pass, NHL Center
Ice, MLB Extra Innings, ESPN/ABC Sports college football, and ESPN Full Court college
basketball. Direct Ticket PPV is like having a video store fight in your living room with access to
up to 60 channels of movies, sports and live special events starm'tg as often as every 30 minutes.
USSB is the home for America's favofire networks. You'll enjoy channds filled with blockbuster
movies, great kids shows, non-stop comedy, the most current selection of music videos and
original programming. And your first month is absolutely fred With the most popular basic and
movie networks including five different HBO channels, three different ShowOme channels, three
different Cmemax channels, two different channels of The Movie Channel, and H.fiX. Add to
that the widely recognized names in music video, MTV and VH1; the number one network for
kids, Nickelodeon; the only 24-hour comedy network, Comedy Central; programming for
women, Lifetime; and classic "IV with "IV Land. Top off the programming with Big Event PPV
sporting events and concerts and you have great entertainment for the whole family.
There is no prognan-arang duplication between the two service providers. Subscribe to both,
DIRECTV and USSB, to enjoy over 200 channels of digitally delivered sports, movies, news, and
family entertainment. Check with the service providers regarding details of current offerings and
packages that may be available to you.
Page 20
WATCHING DSS
PROGRAMS ON THE
HITACHI RECEIVER
So Many Choices--So Many
Ways to Choose
Let's face it. You got your Hitachi digital satellite system because you
wanted lots of programming choices! In this chapter you will learn
many different ways to find the programs you want to watch.
The first thing that you should know is that channels in the DSS world axe arranged differendy
than you have probably experienced before. The lowest channd number is 100; the highest is
999. Channels are grouped by the hundreds. The following chart fists these groupings:
I 100-199I 200-299I 300-399I 400-499I 500-599I 900-999I
Basic Channel Changing
There are many ways to "surf' through the available programming. Anyone who has ever used a
remote control TV already knows at least two ways to change channds. The first of these is by
using the ueOand _0 keys. Each key press takes you m the next available channel in the direction
that you selected. The second way assumes that you know the number of the channd you want.
For example, to go to the Direct Ticket movie previews, simply press ([_N[_M_. Or to watch the
USSB preview channel, press ()_[_, You can enter the three-digit channd number for any
channd you wish.
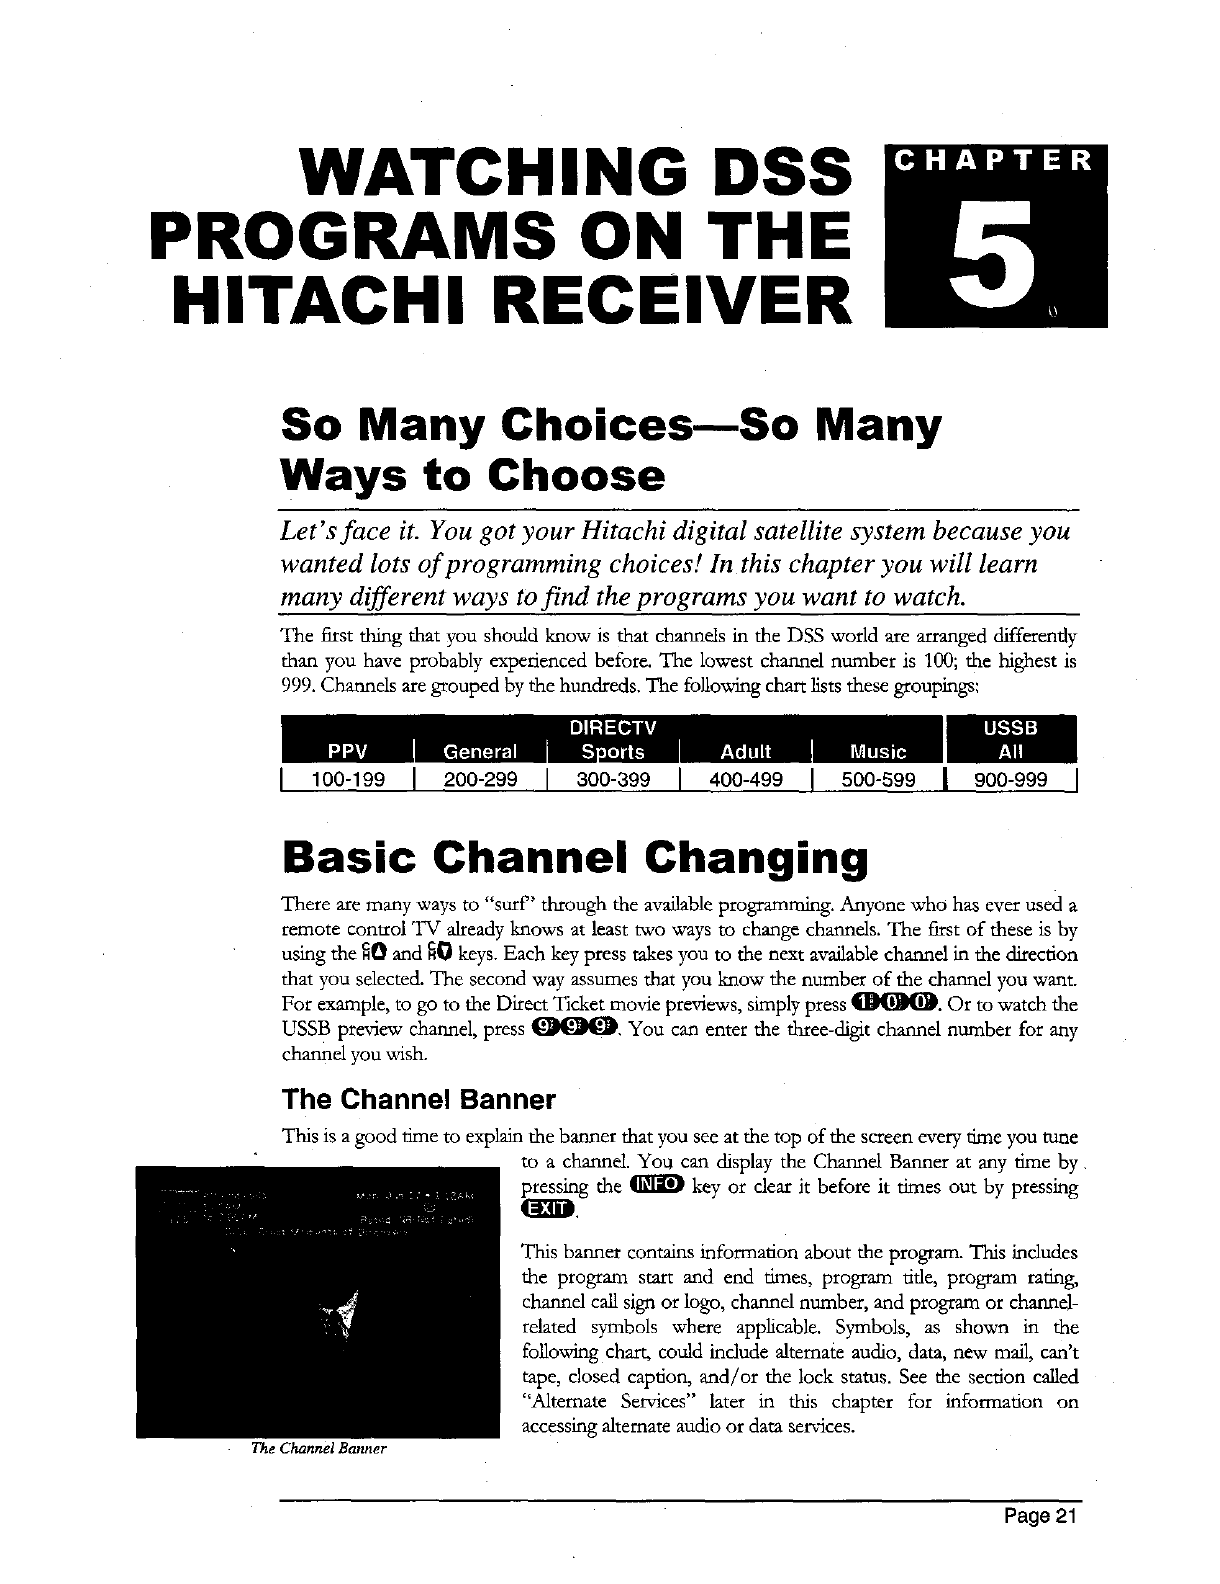
The Channel Banner
This is a good time to explain the banner that you see at the top of the screen every time you tune
to a channel. You can display the Channel Banner at any time by.
_g the _ key or dear it before it times out by pressing
The Channel Banner
This banner contains information about the program. This includes
the program start and end times, program title, program rating,
channd call sign or logo, channd number, and program or charred-
related symbols where applicable. Symbols, as shown in the
following chart, could indude alternate audio, data, new mail, can't
tape, closed caption, and/or the lock status. See the section called
"Alternate Services" later in this chapter for information on
accessing alternate audio or data services.
Page 21
HITACHI DIGITAL SATELLITE SYSTEM OWNER'S MANUAL
DATA ALT. _NEW
MAIL _t'_ CAN'T
SVCS. AUDIO _TAPE
Data Alternate Closed Received Limitsand Limitsand Recording
services audio captioning newmail Lists Lists not
available available available enforced overridden permitted
Additional information displayed in the banner indudes the current date and time, and current
favorite list.
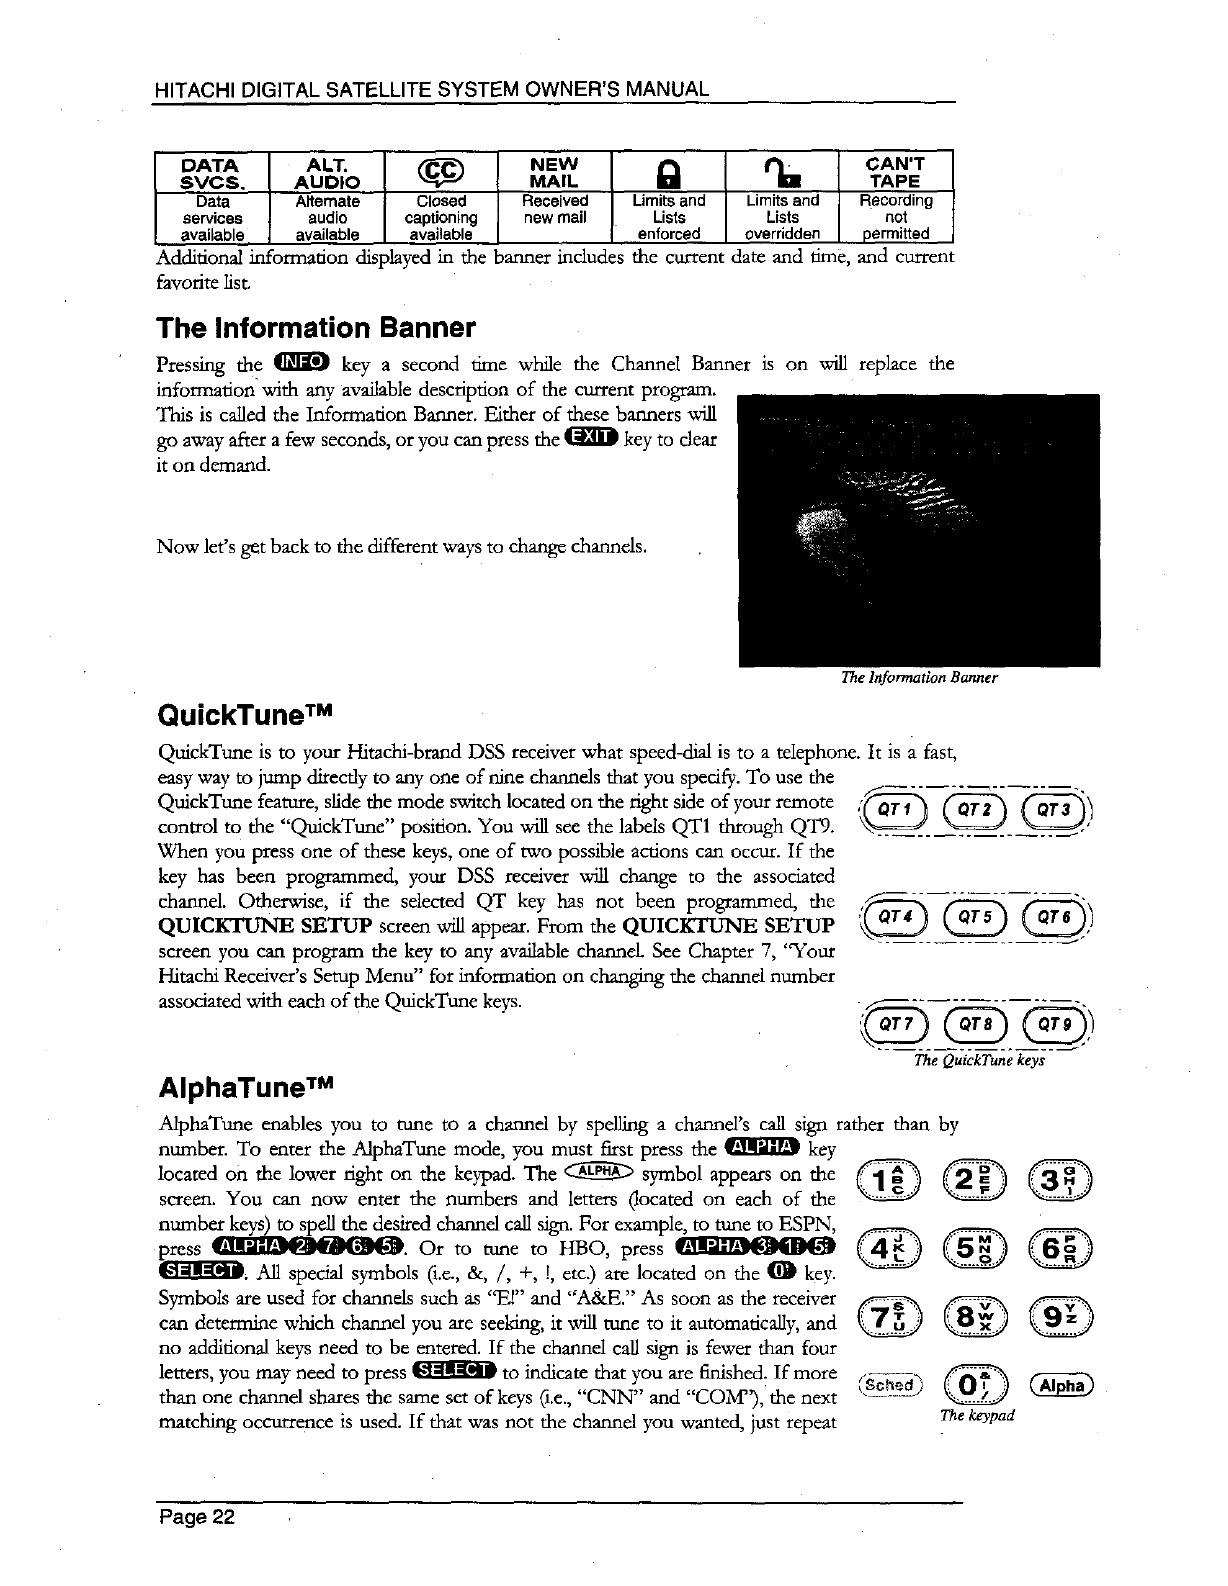
The Information Banner
Pressing the _ key a second time while the Channel Banner is on will replace the
informadonwith any available description of the current program.
This is called the Information Banner. Either of these banners will
go away after a few seconds, or you can press the _ key to dear
it on demand.
Now let's get back to the different ways to change channels.
The lnformation Banner
QuickTune TM
QuickT_ne is to your Hitachi-brand DSS receiver what speed-dial is to a telephone. It is a fast,
easy way to jump directly to any one of nine channels that you specify. To use the
QuickTune feature, slide the mode switch located on the right side of your remote
control to the "QuiekTune" position. You will see the labels QT1 through QT9.
When you press one of these keys, one of two possible actions can occur. If the
key has been programmed, your DSS receiver vail change to the associated
channd. Otheawise, if the selected QT key has not been programmed, the
QUICKTUNE SETUP screen will appear. From the QUICKTUNE SETUP
screen you can program the key to any available channel See Chapter 7, "Your
Hitachi Receiver's Setup Menu" for information on changing the charred number
associated with each of the QuickTune keys.
AlphaTune TM
The QuickTune keys
AlphaTune enables you to tune to a charred by spelling a channd's call sign rather than by
number. To enter the AlphaTune mode, you must first press the _ key
l°cated °n the l°wer right °n the keypad" The <_'-_::_ symb°l appears °n the @_
screen. You can now enter the numbers and letters Oocated on each of the
number keys) to spell the desired channd call sign. For example, to tune to ESPN,
press _. Or to tune to HBO, press _[_4_[]_[_ @ _ _
_, All special symbols O.e., &, /, +, !, etc.) are located on the (_ key.
Symbols are used for channds such as "E"' and "A&E." As soon as the receiver @@_
can determine which channel you are seeking, it will tune to it automatically, and
no additional keys need to be entered. If the channd call sign is fewer than four
letters, you may need to press _ to indicate that you are finished. If more (ggg_d)
than one chmnd shares the same set of keys (i.e., "CNN" and "COM"), the next ........
matching occurrence is used. If that was not the channd you wanted, just repeat Thekeypad
Page 22
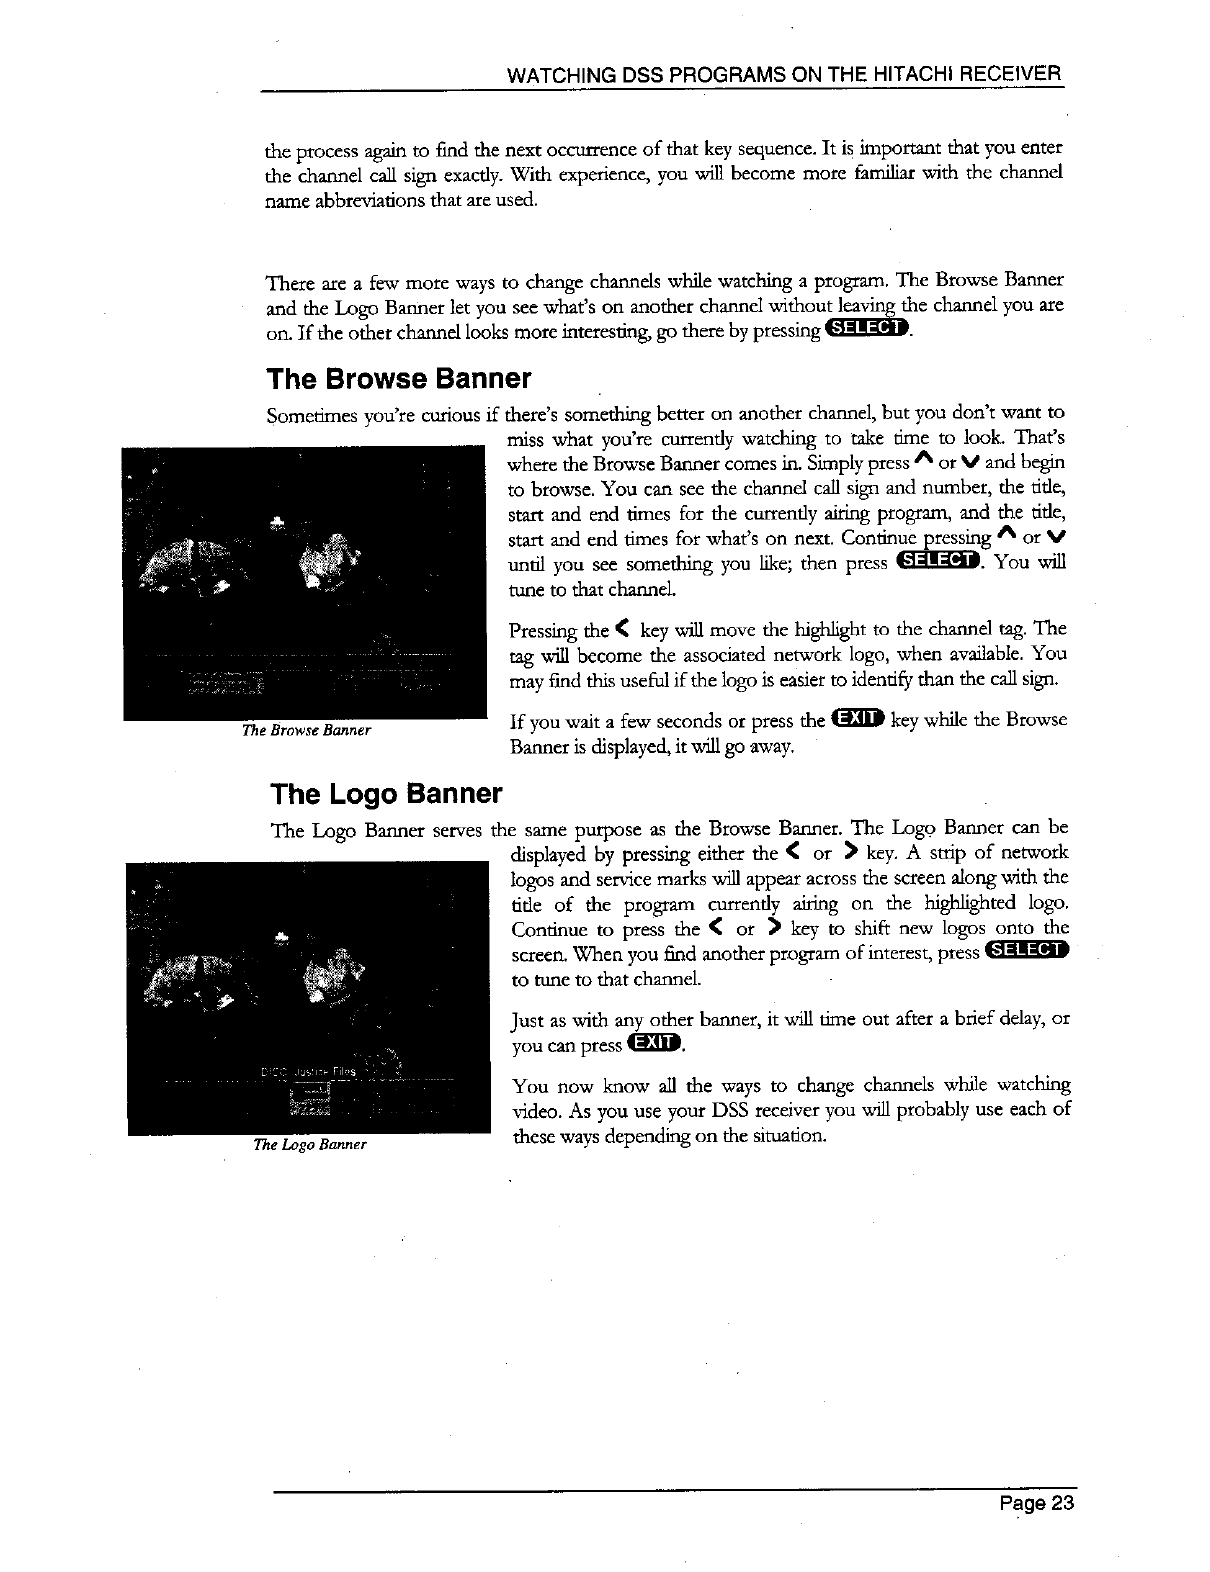
WATCHING DSS PROGRAMS ON THE HITACHI RECEIVER
the process again to find the next occuxrence of that key sequence. It is important that you enter
the channel call sign exactly. With experience, you will become more familiar with the channel
name abbreviations that are used.
There are a few more ways to change channds while watching a program. The Browse Banner
and the Logo Banner let you see what's on another channel withou_the channel you are
on. If the other channd looks more interesting, go there by pressing Ib.l_-3._.
The Browse Banner
Sometimes you're cauious if there's something better on another channel, but you don't want to
miss what you're currently watching to take time to look. That's
where the Browse Banner comes in. Simply press A or V and begin
to browse. You can see the charmel call sign and number, the title,
start and end times for the currently airing program, and the title,
start and end times for what's on next. Continue pressing A or V
until you see something you like; then press IN--AIF-.I_. You will
tune to that channel.
The Browse Banner
Pressing the <key will move the highlight to the channd tag. The
tag will become the associated network logo, when available. You
may find this useful if the logo is easier to identify than the call sign.
If you wait a few seconds or press the _ key while the Browse
Banner is displayed, it will go away.
The Logo Banner
The Logo Banner serves the same purpose as the Browse Banner. The Logo Banner can be
displayed by pressing either the ( or >key. A strip of network
logos and service marks _ appear across the screen along with the
title of the program currently airing on the highlighted logo.
Conl_nue to press the _ or > key m shift new logos onto the
screen. When you find another program of interest, press
to tune to that channel.
The Logo Banner
just as with any other banner, will time out after a brief delay, or
you can press _.
You now know all the ways to change channels while watching
video. As you use your DSS receiver you will probably use each of
these ways depending on the situation.
Page 23
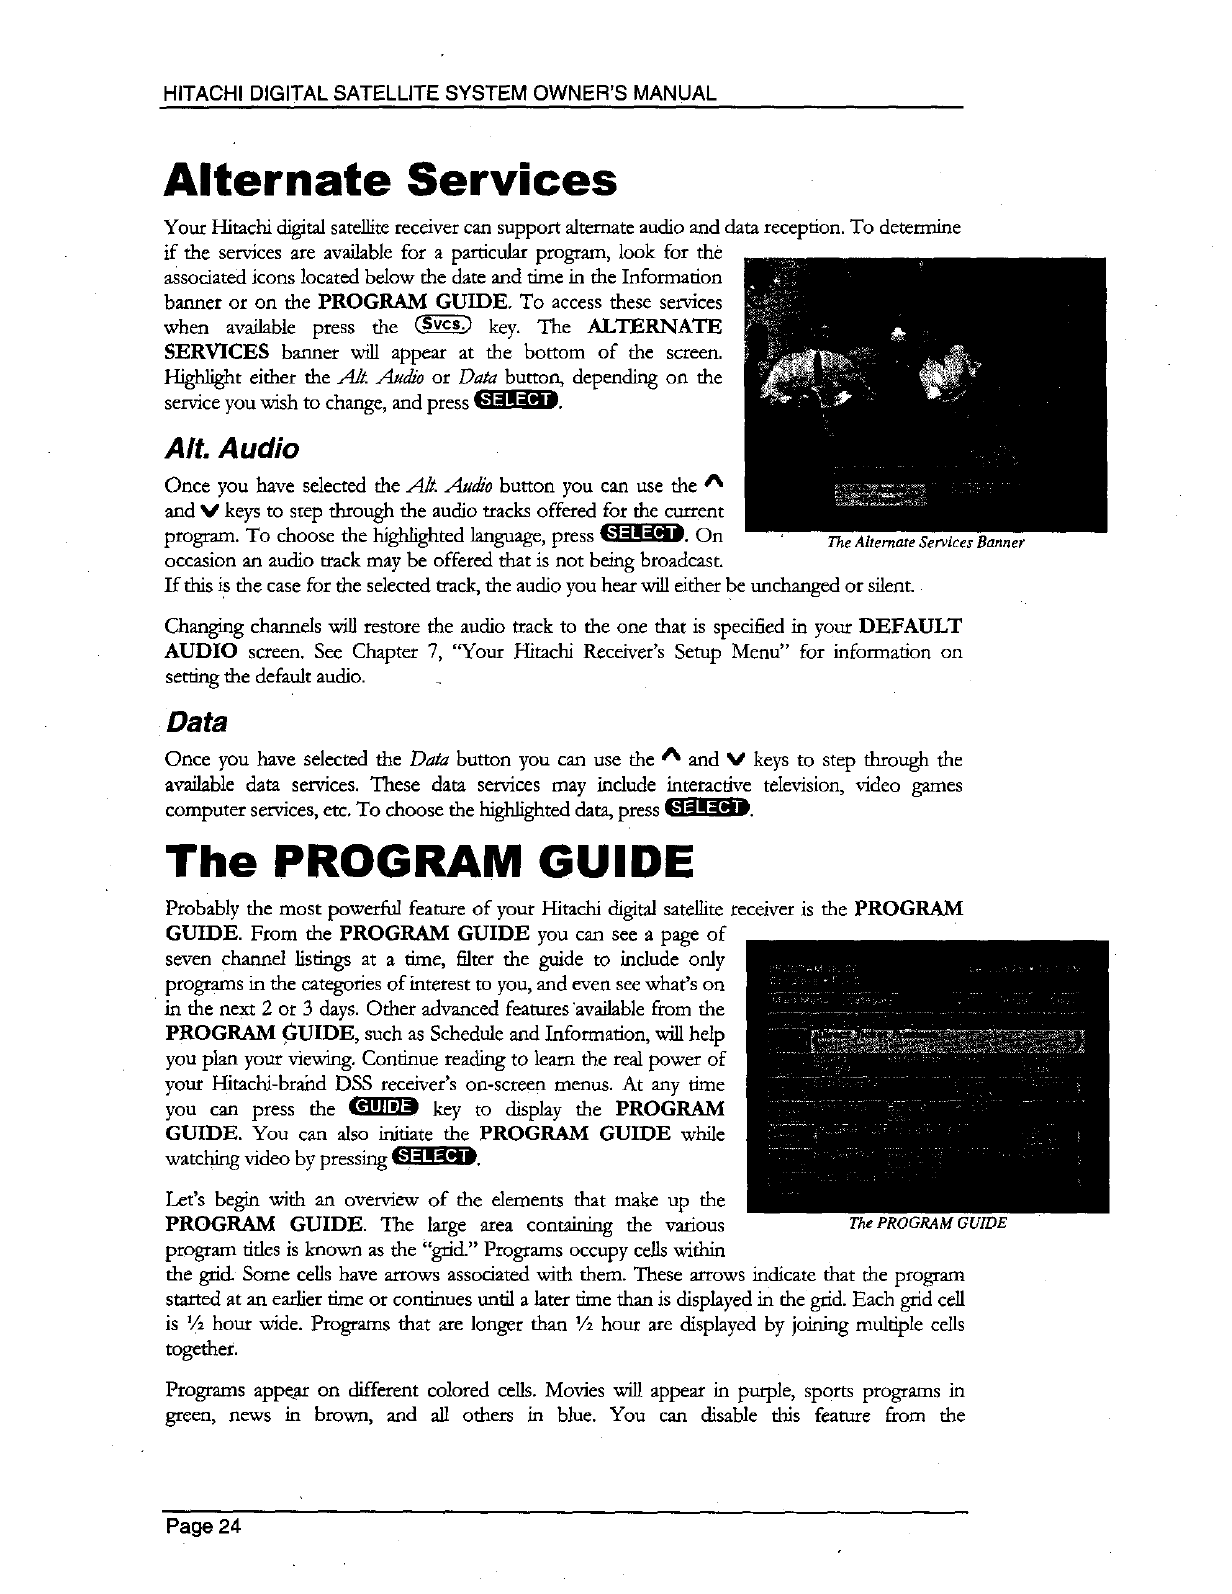
HITACHI DIGITAL SATELLITE SYSTEM OWNER'S MANUAL
Alternate Services
Your Hitachi digital satellite receiver can support alternate audio and data reception. To determine
if the services are available for a particular program, look for the
associated icons located below the date and time in the Information
banner or on the PROGRAM GUIDE, To access these services
when available press the _ key. The ALTERNATE
SERVICES banner _ appear at the bottom of the screen.
Highlight either the _Ah:Audio or Data butto_ depending on the
service you wish to change, and press _.
AIt. Audio
Once you have selected the A!t. Azdi0 button you can use the A
and Vkeys to step through the audio tracks offered for the current
program. To choose the highlighted language, press t[_]_. On
occasion an audio track may be offered that is not being broadcast.
If this is the case for the selecred track, the audio you hear will either b e unchanged or silent.
The Alternate Services Banner
Changing channels will restore the audio track to the one that is specified in YOur DEFAULT
AUDIO screen. See Chapter 7, "Your Hitachi Receiver's Setup Menu" for information on
setting the default audio.
Data
Once you have selected the Data button you can use the A and Vkeys to step through the
available data services. These data services may include interactive television, video games
computer services, etc. To choose the highlighted data, press _.
The PROGRAM GUIDE
Probably the most powerful feature of your Hitachi digital satellite receiver is the PROGRAM
GUIDE. From the PROGRAM GUIDE you can see a page of
seven channel listings at a time, filter the guide to include only
programs in the categories of interest to you, and even see what's on
in the next 2or 3 days. Other advanced features 'available from the
PROGRAM GUIDE, such as Schedule and Information, will help
you plan your viewing. Continue reading to learn the real power of
your Hitachi-brahd DSS receiver's on-screen menus. At any time
you can press the _ key to display the PROGRAM
GUIDE. You can also initiate the PROGRAM GUIDE while
watching video by pressing t_l--dr-d-o_.
Let's begin with an overview of the elements that make up the
PROGRAM GUIDE. The large area containing the various
program dales is known as the "grid." Programs occupy cells within
the grid. Some cells have arrows associated with them. These arrows indicate that the program
started at an earlier urne or continues until alater time than is displayed in the grid. Each grid cell
is '/2 hour wide. Programs that are longer than 1/2hour are displayed by j(fming multiple cells
together.
The PROGRAM GUIDE
Programs appear on different colored cells. Movies _ appear in purple, sports programs in
green, news in brown, and all others in blue. You can disable this feature from the
Page 24
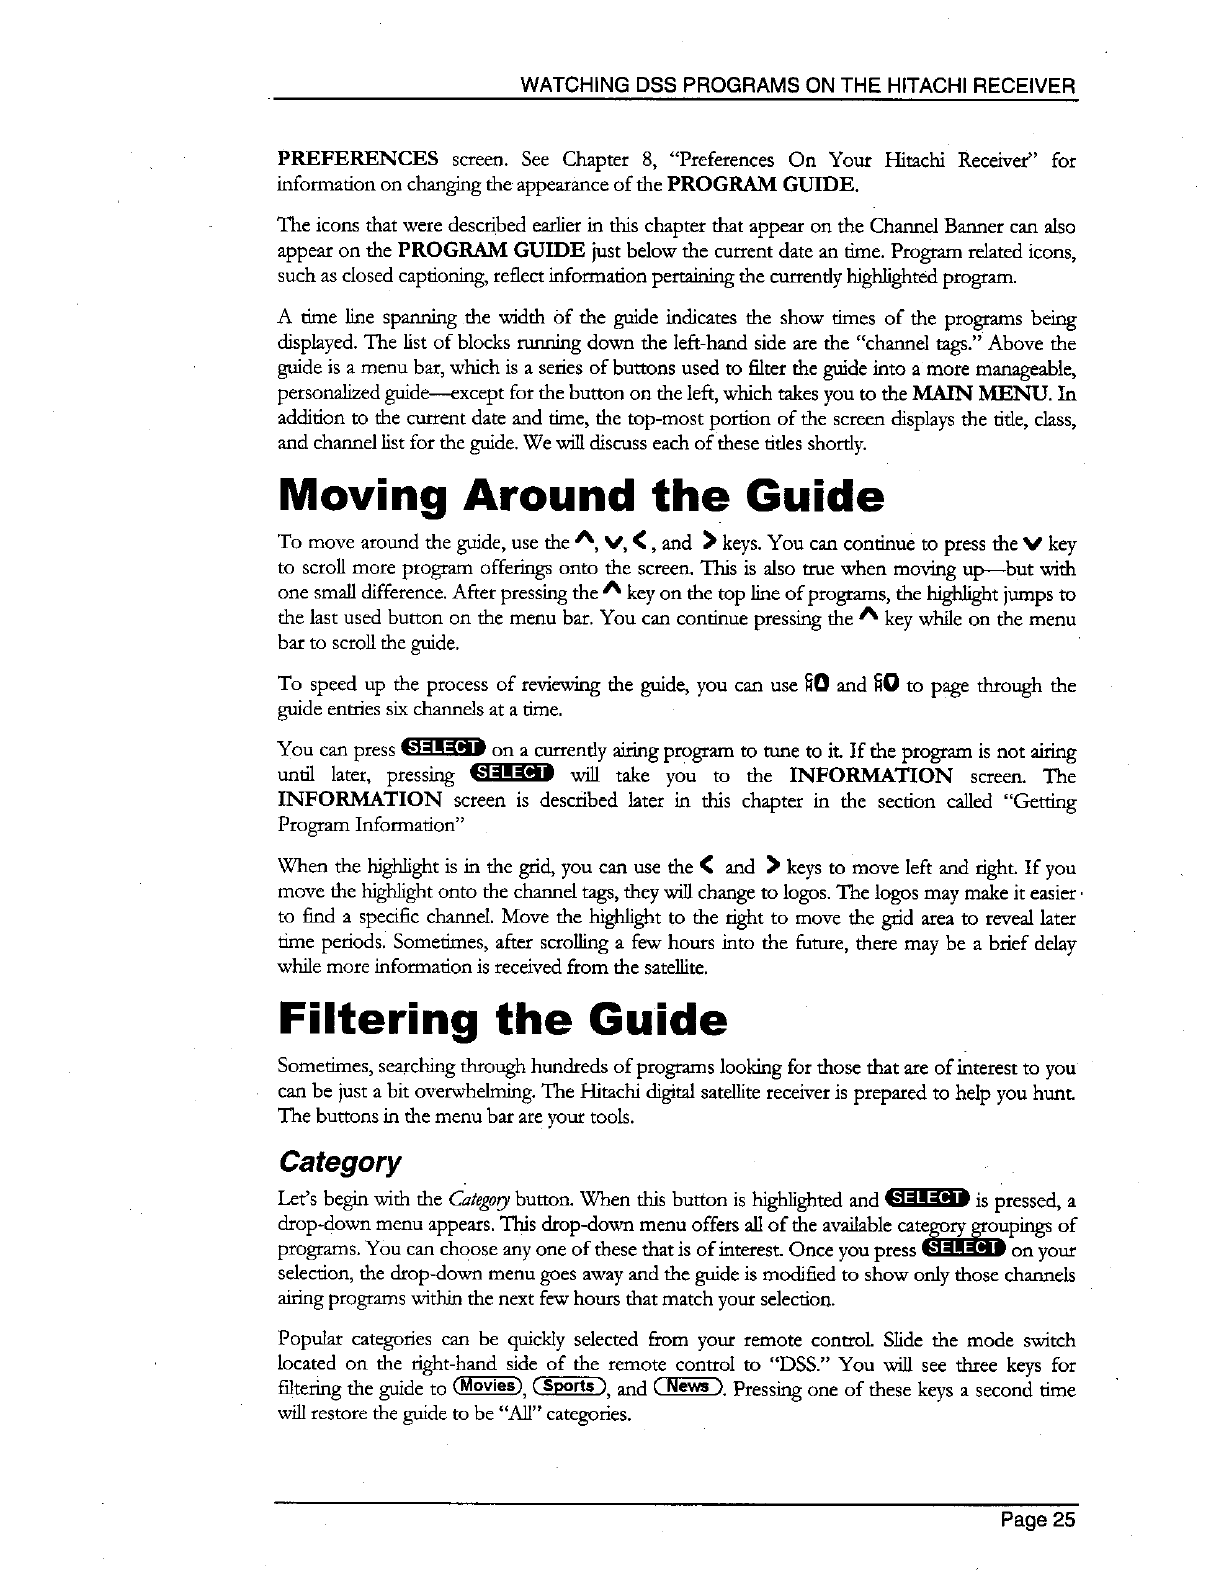
WATCHING DSS PROGRAMS ON THE HITACHI RECEIVER
PREFERENCES screen. See Chapter 8, "Preferences On Your Hitachi Receiver" for
information on changing the appearance of the PROGRAM GUIDE.
The icons that were described earlier in this chapter that appear on the Channel Banner can also
appear on the PROGRAM GUIDE just below the current date an time. Program related icons,
such as closed captioning, reflect information pertaining the cu_endy highlighted program.
A time line sparmmg the width of the guide indicates the show times of the programs being
displayed. The list of blocks running down the left-hand side are the "channel tags." Above the
guide is amenu bar, which is a series of buttons used to filter the guide into a more manageable,
personalized guide---except for the button on the left, which takes you to the MAIN MENU. In
addition to the current date and time, the top-most portion of the screen displays the tide, class,
and channel list for the guide. We will discuss each of these tides shortly.
Moving Around the Guide
To move around the guide, use the A, V, 4, and 11keys. You can continue to press the Vkey
to scroll more program offerings onto the screen. This is also true when moving up---but with
one small difference. After pressing the A key on the top line of programs, the highlight jumps to
the last used button on the menu bar. You can continue pressing the A key while on the menu
bar to scroll the guide.
To speed up the process of reviewing the guide, you can use fi0 and _0 to page through the
guide entries six channels at a time.
You can press _ on acurrently airing program to tune to it. If the program is not airing
until later, pressing dk'q-al-:V_ will take you to the INFORMATION screen. The
INFORMATION screen is described later in this chapter in the section called "Getting
Program Information"
When the highlight is in the grid, you can use the _ and ]) keys to move left and right. If you
move the highlight onto the channel tags, they will change to logos. The logos may make it easier.
to find a specific channel. Move the highlight to the right to move the grid area to reveal later
time periods. Sometimes, after scrolling a few hours into the future, there may be a brief delay
while more information is received from the satellite.
Filtering the Guide
Sometimes, searching through hundreds of programs looking for those that are of interest to you
can be just a bit overwhelming. The Hitachi digital satellite receiver is prepared to help you hunt.
The buttons in the menu bar are your tools.
Category
Let's begin with the Categorybutton. When this button is highlighted and _ is pressed, a
drop-down menu appears. This drop-down menu offers all of the available catew_pings of
programs. YOU can choose any one of these that is of interest. Once you press _ on your
selection, the drop-down menu goes away and the guide is modified to show only those channels
airing programs within the next few hours that match your selection.
Popular categories can be quickly selected from your remote control. Slide the mode switch
located on the tight-hand side of the remote control to "DSS." You will see three keys for
filtering the guide to _, _, and ([[_D. Pressing one of these keys a second time
will restore the guide to be "All" categories.
Page 25
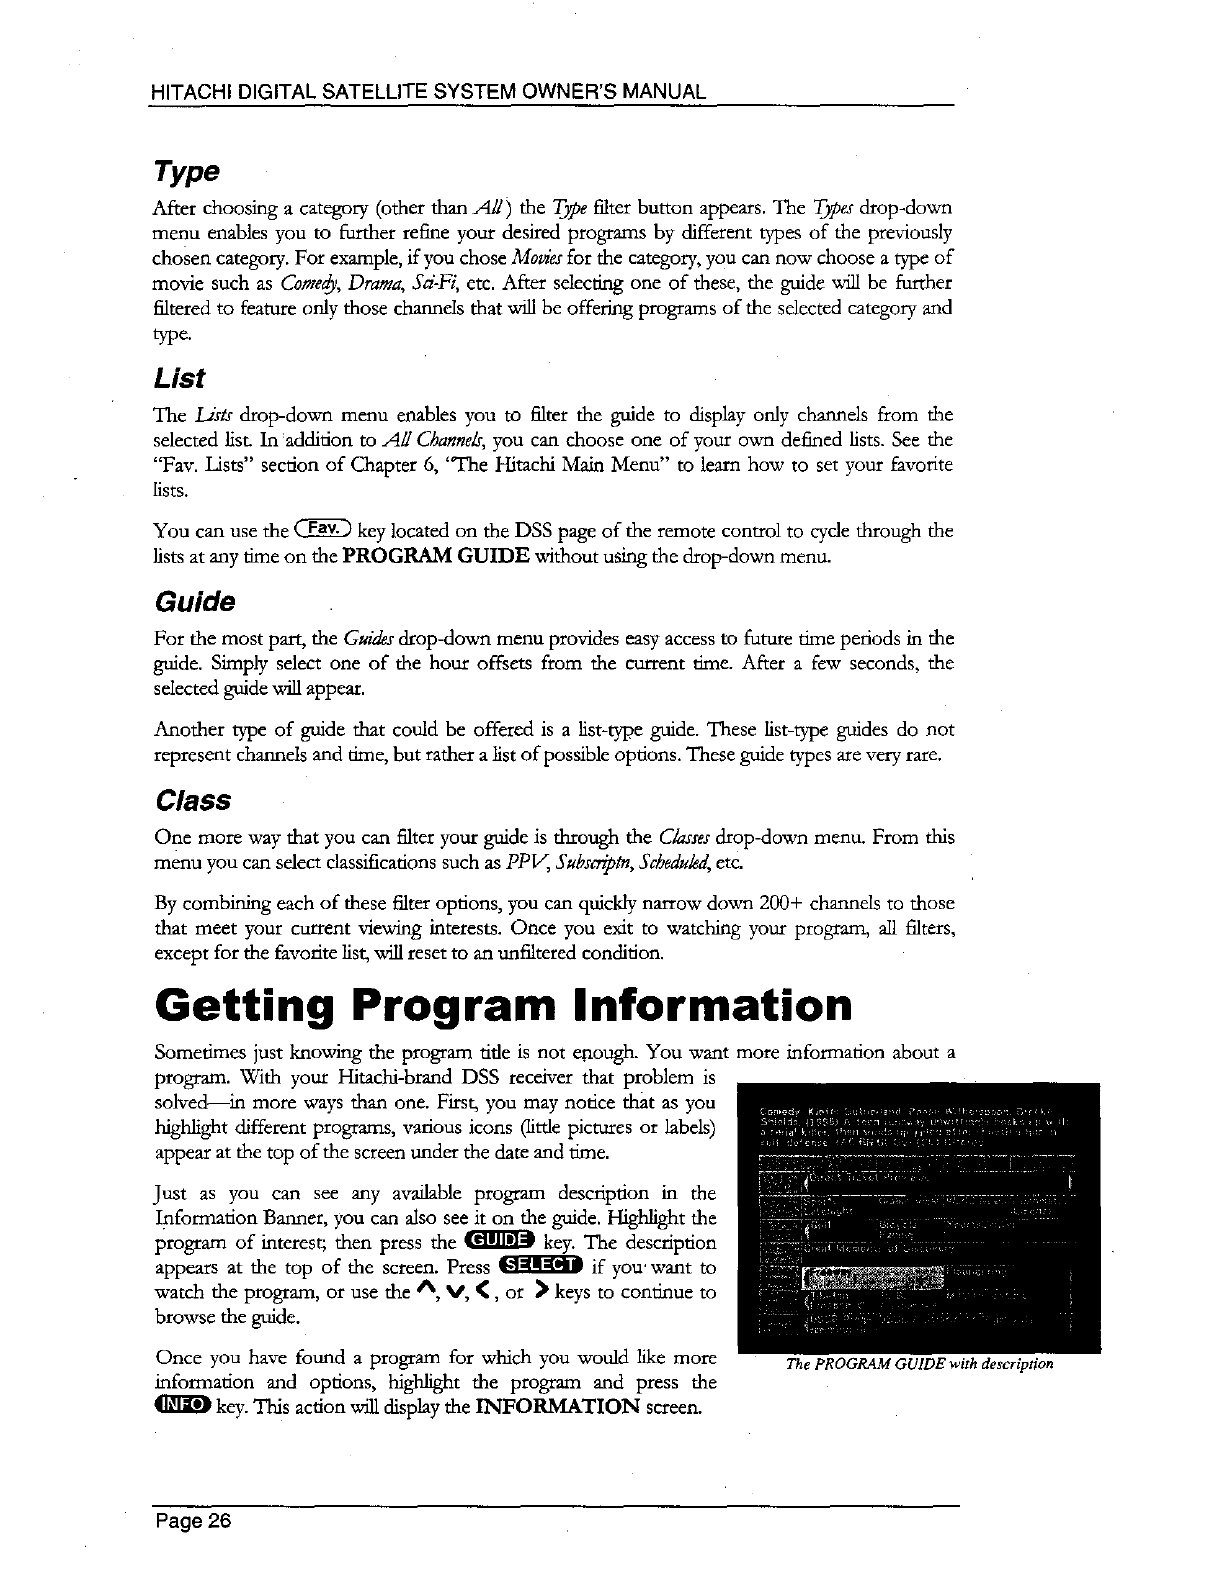
HITACHIDIGITALSATELLITESYSTEMOWNER'SMANUAL
Type
After choosing a category (other than A//) the Type filter button appears. The Types drop-down
menu enables you to further refine your desired programs by different types of the previously
chosen category. For example, if you chose Movies for the category, you can now choose a type of
movie such as Comedy,Drama, Sd-Fi, etc. After selecdr N one of these, the guide will be further
filtered to feature only those channels that _ be offering programs of the selected category and
type.
List
The Lists drop-down menu er_bles you to filter the guide to display only channds from the
selected list. In =addition to All Channels, you can choose one of your own defined fists. See the
"Fay. Lists" section of Chapter 6, 'Tne Hitachi Main Menu" to learn how to set your favorite
fists.
You can use the _ key located on the DSS page of the remote control to cycle through the
fists at any time on the PROGRAM GUIDE without using the drop-down menu.
Guide
For the most part, the Guides drop-down menu provides easy access m future time periods in the
guide. Simply select one of the hour offsets from the current time. After a few seconds, the
selected guide will appear.
Another type of guide that could be offered is afist-type guide. These list-D'pe guides do not
represent channels and time, but rather a list of possible options. These guide types are very rare.
Class
One more way that you can filter your guide is through the Classesdrop-down menu. From this
menu you can select classifications such as PPV,, Subscriptn,Schedukd, etc.
By combining each of these filter options, you can quickly narrow down 200+ channels to those
that meet your current viewing interests. Once you exit to watching your program, all filters,
except for the favorite fist,wq21reset to an unfiltered condition.
Getting Program Information
Sometimes just knowing the program title is not elaough. You want more information about a
program. With your Hitachi-brand DSS receiver that problem is
solved in more ways than one. First, you may notice that as you
highlight different programs, various icons (little pictures or labels)
appear at the top of the screen under the date and time.
just as you can see any available program description in the
Information Banner, you can also see it on the guide. Highlight the
program of interest; then press the _ key. The description
appears at the top of the screen. Press _ if you' want to
watch the program, or use the A, V, _, or _ keys to continue m
browse the guide.
Once you have found a program for which you would like more
information and options, highlight the program and press the
key. This action will display the INFORMATION screen.
Page 26
The PROGRAM GUIDE with description
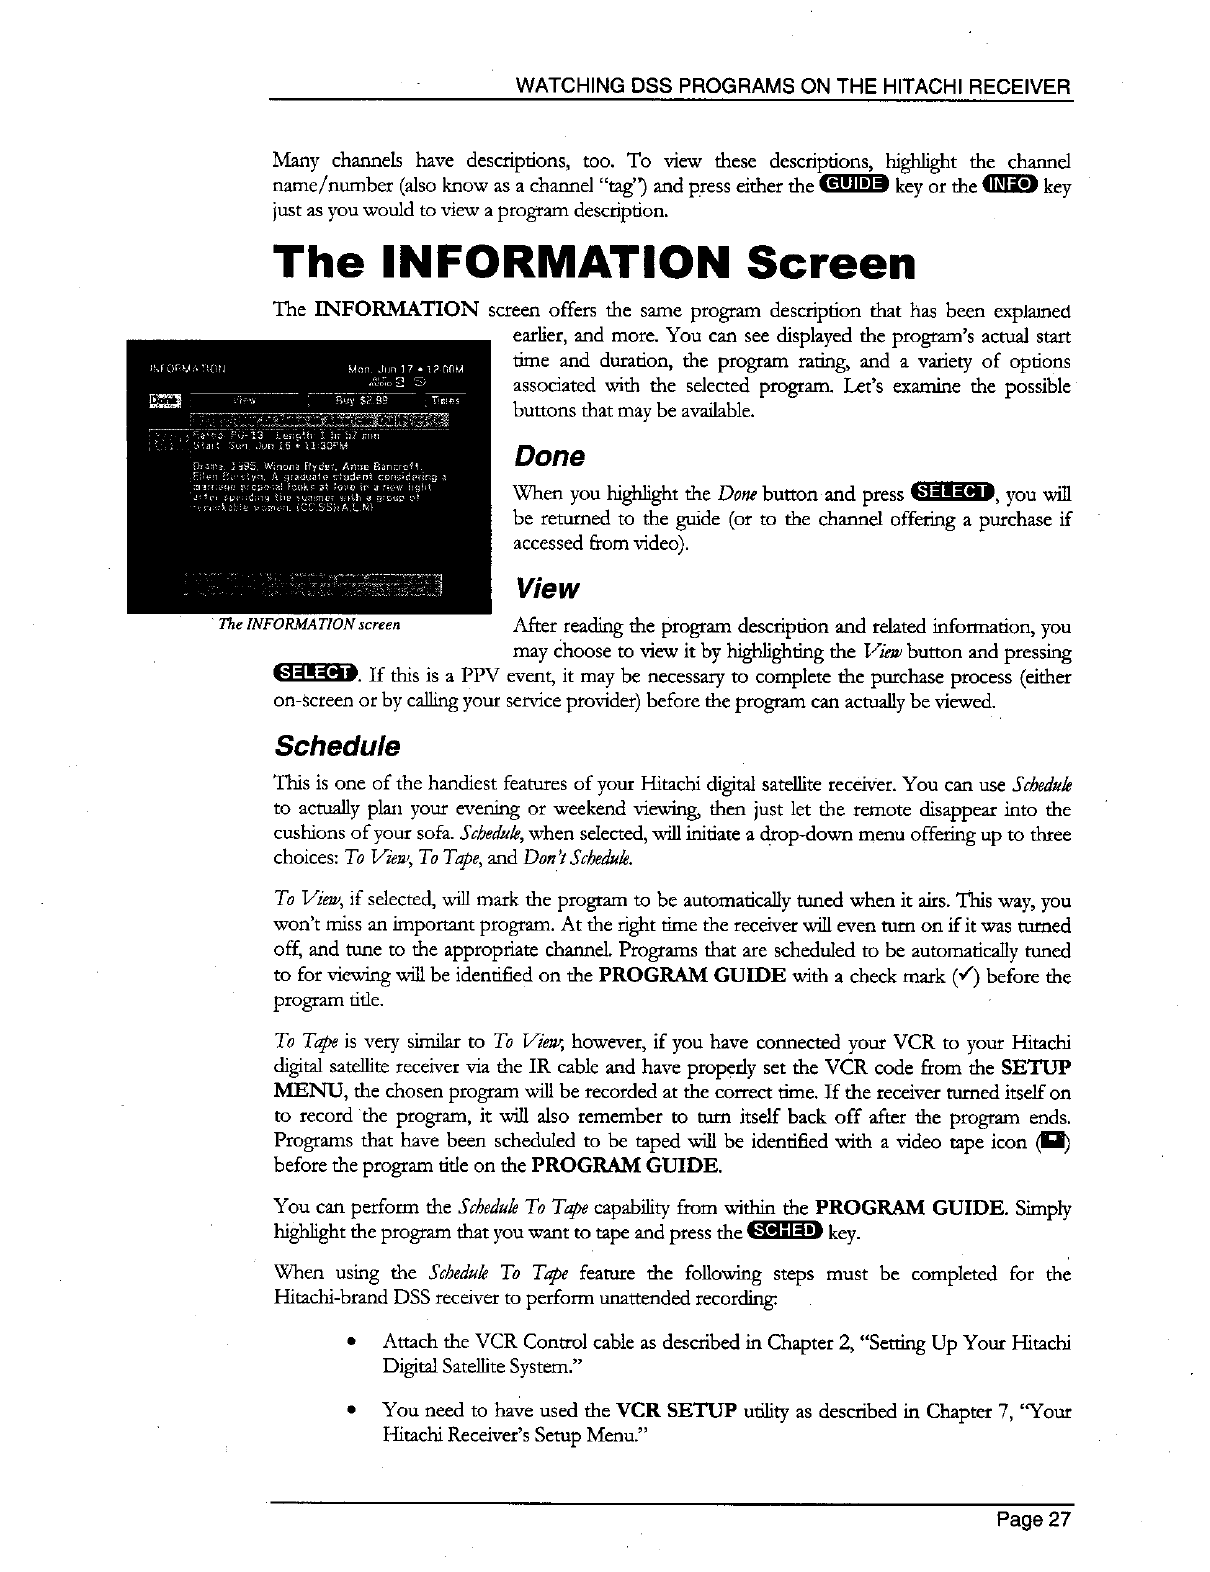
WATCHING DSS PROGRAMS ON THE HITACHI RECEIVER
Many channels have descriptions, too. To view these descriptions, highlight the channel
name/number (also know as a channel "tag") and pi'ess either the _ key or the _ key
just as you would to view a program description.
The INFORMATION Screen
The INFORMATION screen offers the same program description that has been explained
earlier, and more. You can see displayed the program's actual start
me and duration, the program rating, and a variety of options
associated with the selected program. Let's examine the possible
buttons that may be available.
The INFORMATION screen
Done
When you highlight the Done button and press Ik'4=dr'd;_, you will
be returned to the guide (or to the channel offering a purchase if
accessed from video).
View
After reading the program description and related information, you
may Choose toviewit by highlighting the View button and pressing
Ik'q--dlrff_. If this is a PPV event, it may be necessary to complete the purchase process (either
on-screen or by calling your service provider) before the program can actually be viewed.
Schedule
This is one of the handiest features of your Hitachi digital satellite receiver. You can use Schedule
to actually plan your evening or weekend viewing, then just let the remote disappear into the
cushions of your sofa. Scheduk, when selected, will initiate a drop-down menu offering up to three
choices: To View, To Tape, and Don't Scheduk.
To View, if selected, will mark the program to be automatically tuned when it airs. This way, you
won't miss an important program. At the right time the receiver will even turn on if it was turned
off, and tune to the appropriate channel. Programs that are scheduled to be automatically ttmed
to for viewing -willbe identified on the PROGRAM GUIDE with a check mark (€') before the
program title.
To Tape is very similar to To Vie_,, however, if you have connected your VCR to your Hitachi
digital satellite receiver via the 1R cable and have properly set the VCR code from the SETUP
MENU, the chosen program Hill be recorded at the correct time. If the receiver turned itself on
to record the program, it will also remember to turn itself back off after the program ends.
Programs that have been scheduled to be taped Hill be identified with a video tape icon (It:i)
before the program tide on the PROGRAM GUIDE.
You can perform the Schedule To Tape capability from within the PROGRAM GUIDE. Simply
highlight the program that you want to tape and press the _ key.
When using the Schedule To Tape feature the following steps must be completed for the
Hitachi-brand DSS receiver to perform unattended recording.
• Attach the VCR Control cable as described in Chapter 2, "Setting Up Your Hitachi
DigitalSatelliteSystem."
• You need to have used the VCR SETUP utility as described in Chapter 7, "Your
Hitachi Receiver's Setup Menu."
Page 27
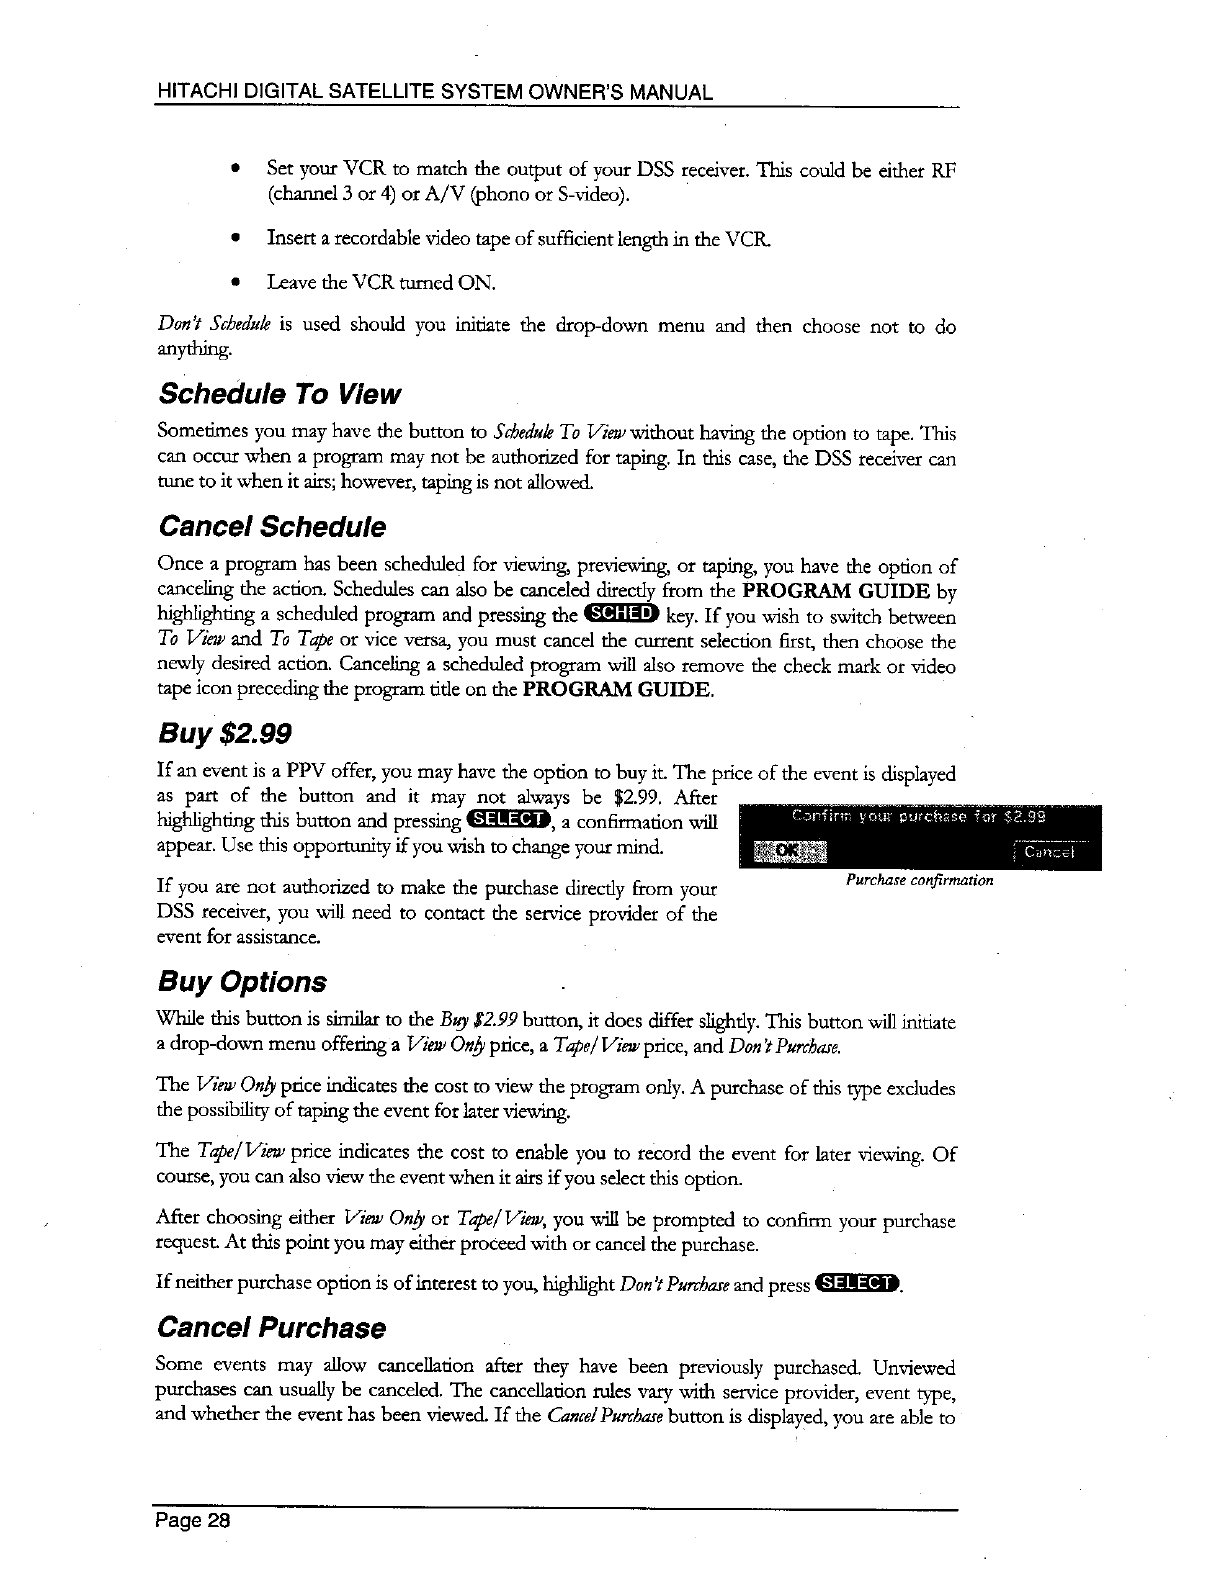
HITACHIDIGITALSATELLITESYSTEMOWNER'SMANUAL
• Set your VCR to match the output of your DSS receiver. This could be either RF
(channel 3 or 4) or A/V (phono or S-video).
• Insert a recordable video tape of sufficient length in the VCtL
•Leave the VCR turned ON.
Don't Scheduk is used should you initiate the drop-down menu and then choose not to do
anything.
Schedule To View
Sometimes you may have the button to Scheduk To View without having the option to tape. This
can occur when a program may not be authorized for taping. In this case, the DSS receiver can
tune to it when it airs; however, taping is not allowed.
CancelSchedule
Once a program has been scheduled for viewing, previewing, or taping, you have the option of
canceling the action. Schedules can also be canceled directly from the PROGRAM GUIDE by
highlighting a scheduled program and pressing the _ key. If you wish to switch between
To View and To Tape or vice versa, you must cancel the current selection first, then choose the
newly desired action. Canceling a scheduled program will also remove the check mark or video
tape icon preceding the program title on the PROGRAM GUIDE.
Buy $2.99
If an event is a PPV offer, you may have the option to buy it. The price of the event is displayed
as part of the button and it may not always be $2.99. After
highlighting this button and pressing 4_[HD, a confirmation will
appear. Use this opportunity if you wish to change your mind.
If you are not authorized to make the purchase directly from your
DSS receiver, you will need to contact the service provider of the
event for assistance.
Purchase confirmation
Buy Options
While this burton is similar to the Buy 1;2.99 button, it does differ slightly. This button will initiate
adrop-down menu offering aView On_ price, a Tape/View price, and Don't Purchase.
The View Only price indicates the cost to view the program only. Apurchase of this type excludes
the possibility of taping the event for later viewm_g.
The Tape/View price indicates the cost to enable you to record the event for later viewing. Of
course, you can also view the event when it airs if you select this option.
After choosing either View Only or Tape/View, you will be prompted to confirm your purchase
request. At this point you may either proceed with or cancel the purchase.
If neither purchase option is of interest to you, highlight Don't Purchaseand press I_[ll--a"€_.
Cancel Purchase
Some events may allow cancellation after they have been previously purchased. Unviewed
purchases can usually be canceled. The cancellation rules vary with service provider, event type,
and whether the event has been viewed. If the CancelPurchasebutton is displayed, you are able to
Page 28
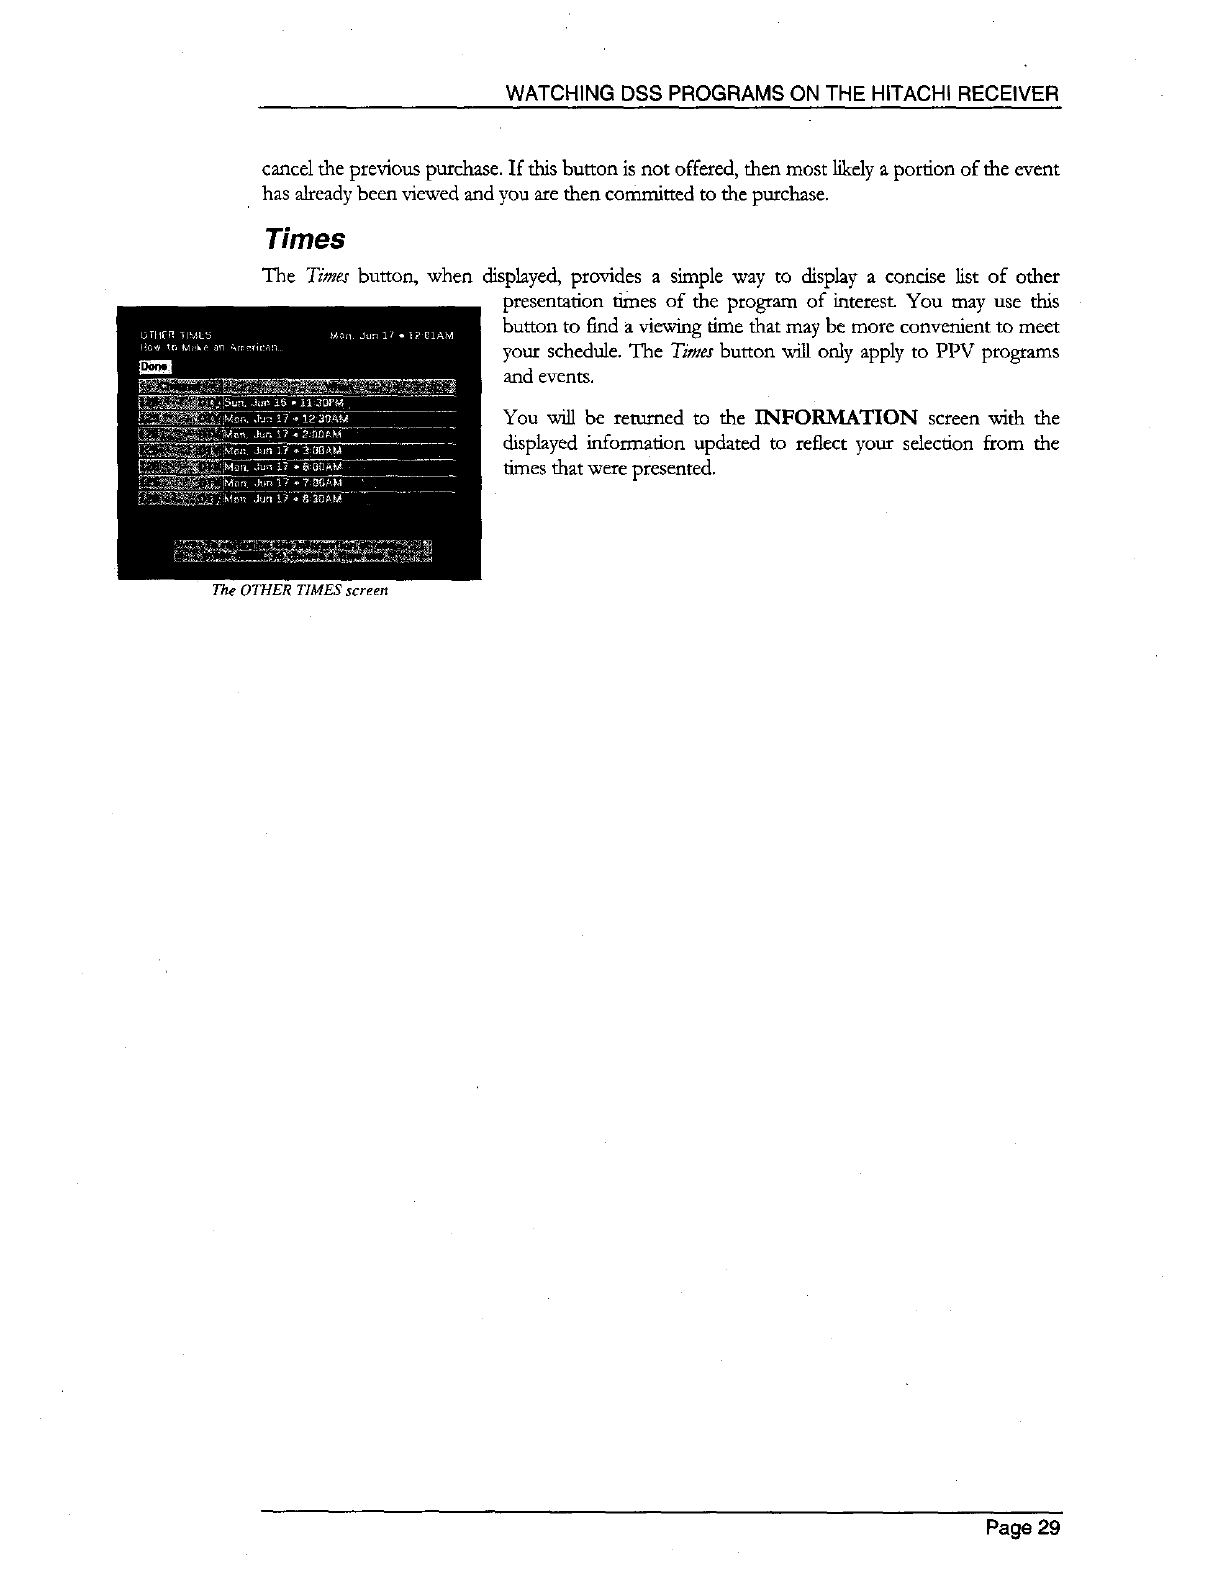
WATCHING DSS PROGRAMS ON THE HITACHI RECEIVER
cancd the previous purchase. If this button is not offered, then most likely aportion of the event
• has already been viewed and you are then committed to the purchase.
Times
The Times button, when displayed, provides asimple way to display a concise list of other
presentauon times of the program of interest You may use this
button to find a viewing time that may be more convenient to meet
your schedule. The Times button will only apply to PPV programs
and events.
The OTHER TIMES screen
You will be renamed to the INFORMATION screen with the
displayed information updated to reflect your selection from the
times that were presented.
Page 29
HITACHIDSSRECEIVEROWNER'SGUIDE
Page30
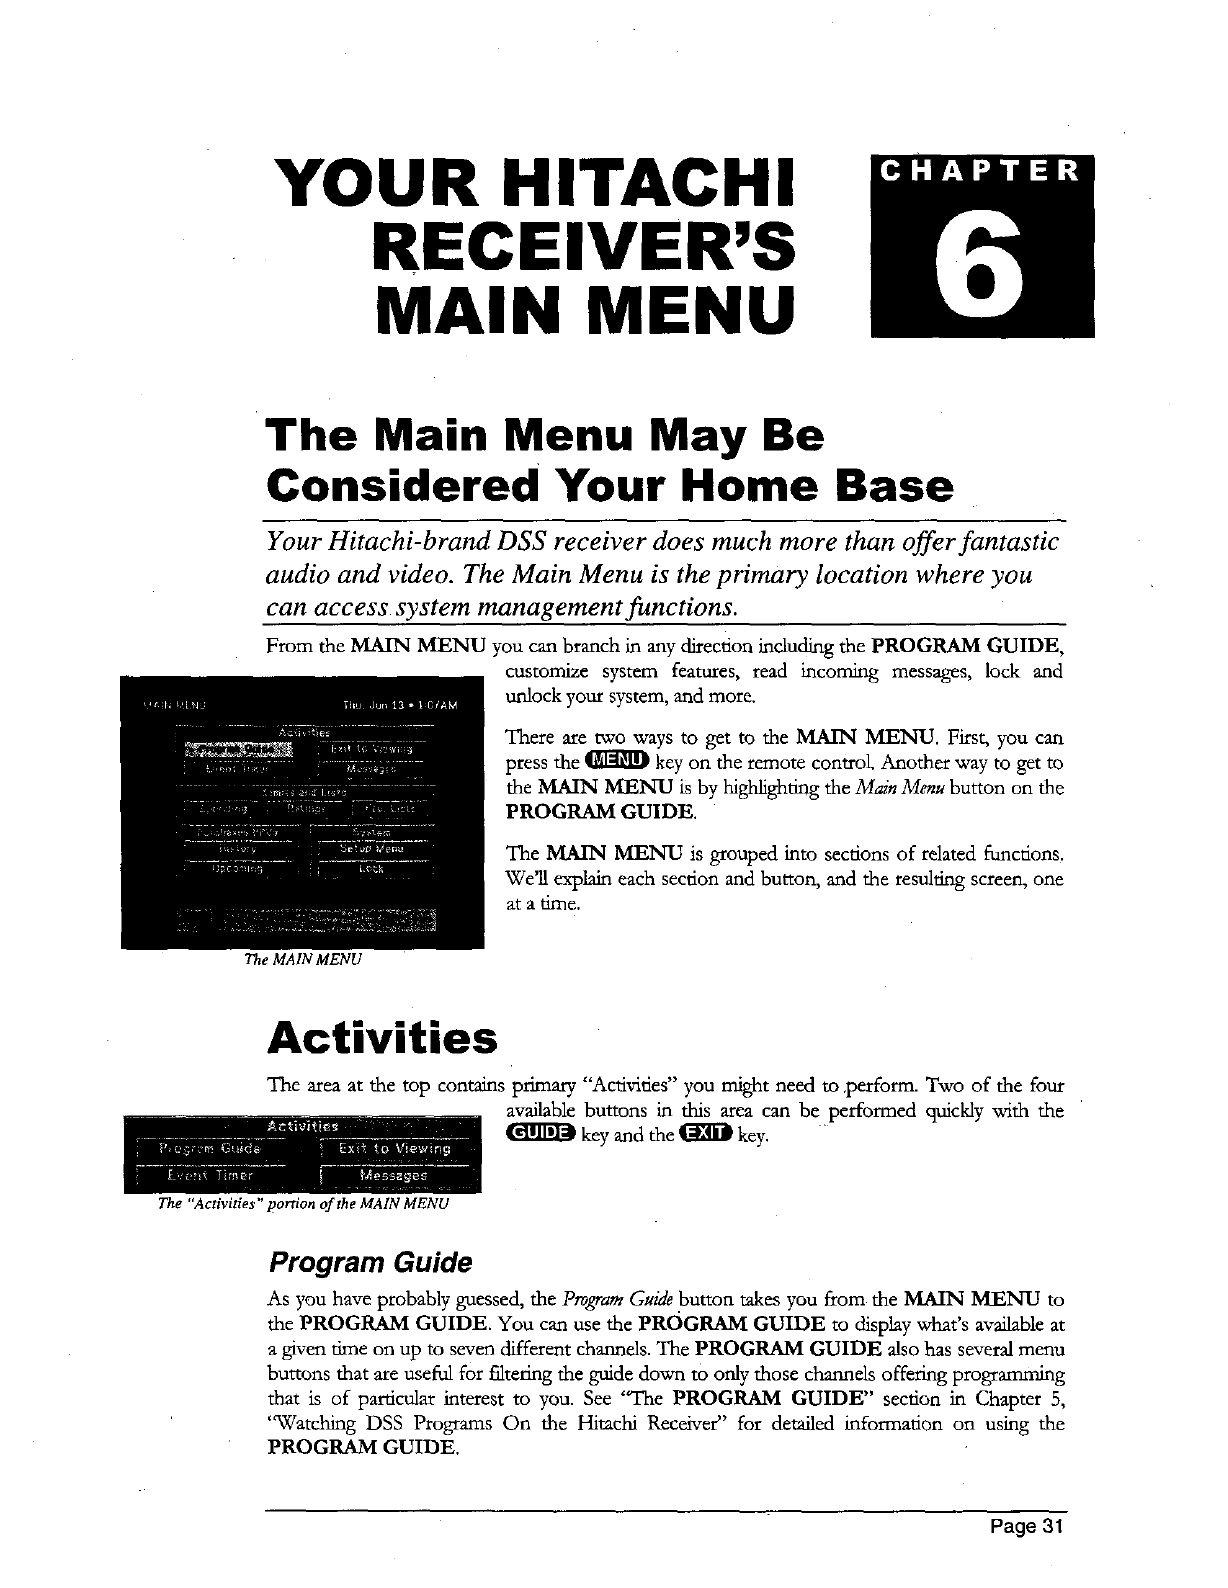
YOUR HITACHI
RECEIVER'S
MAIN MENU
The Main Menu May Be
Considered Your Home Base
Your Hitachi-brand DSS receiver does much more than offer fantastic
audio and video. The Main Menu is the primary location where you
can access system management functions.
From the MAIN MENU you can branch in any direction including the PROGRAM GUIDE,
customize system features, read incoming messages, lock and
unlock your system, and more.
The MAIN MENU
There are two ways to get to the MAIN MENU. First, you can
press the _ key on the remote control. Another way to get to
the MAIN MENU is by highlighting the Main Menu button on the
PROGRAM GUIDE.
The MAIN MENU is grouped into sections of related functions.
We'll explain each section and button, and the resulting screen, one
at a time.
Activities
The area at the top contains primary "Activities" you might need to ,perform. Two of the four
available buttons in this area can be performed quickly with the
key and the _ key.
The "Activities" portion of the MAIN MENU
Program Guide
As you have probably guessed, the Program Guide button takes you from the MAIN MENU to
the PROGRAM GUIDE. You can use the PROGRAM GUIDE to display what's available at
a given time on up to seven different channds. The PROGRAM GUIDE also has several menu
buttons that are useful for filtering the guide down to only those channels offering programming
that is of particular interest to you. See "The PROGRAM GUIDE" section in Chapter 5,
"Watching DSS Programs On the Hitachi Receive£' for detailed information on using the
PROGRAM GUIDE.
Page 31

HITACHIDIGITALSATELLITESYSTEMOWNER'SMANUAL
A quicker way to access the PROGRAM GUIDE from the MAIN MENU or any other menu
is by pressing the _ key, either on the remote control or on the DSS receiver's front panel.
Exit To Viewing
When you select EMt To Uie_in_ the MAIN MENU will dear from the display and you
return to the channel that was being viewed prior to entering the menus.
This button is provided for those occasions where you are using the DSS receiver's front panel
and don't have access to the remote control If the remote control is handy, pressing the
key is a much more convenient way to return to watcl'ting your program.
The information banner will appear briefly or you can erase it quickly by pressing the _ key
Event Timer
The 16-EVENT TIMER is pdmagly for those occasions when you want unattended recording
of a DSS program. You can use the 16-EVENT TIMER feature
along with your VCR to record events in your absence. You may
also use the 16-EVENT TIMER to automatically tune to a
program at a specific date and time or at a specific time on a
repeating basis.
The 16-EVENT TIMER screen displays eight rows of events.
Since there may be up to 16 events, you can use the Vkey to scroll
down, or the _0 key to page down to additional events.
Once you have highlighted the event you wish to set or edit, press
or ). The entire row changes color to indicate that it is
the one being changed and the highlight advances to the Chan.
column. The 16-EVENT TIMER screen
You can enter the desired charred number using the mmaber keys on the remote control, or using
the A and V, _[} and _0, or. QuickTune keys. The Alph_Tune feature can also be used. If you
don't know the charred number, use the ) to advance to the Name column and use the A and V
or I_Oand _0 to search for the channel call sign.
To erase an event entirely, enter _ for the channd number. All values for the highlighted
event will be deared.
If programming an event, use the l[_=dll_]} key orthe )key when you are ready to continue.
Next, enter a Start time using the mtmber keys on the remote control, or by using the A and V
keys. Press _ or _ to continue.
You then must spedfy whether the time you entered is "ANF' or "PM," using the A and Vkeys.
To continue, press &'q--dll--dg_or ).
Using the same procedure as setting the start time, set the program Length or duration. As before,
use _ or ) to advance to the When column.
The When column is very versatile. Using the A and Vkeys, you can spedfy when, or how often,
the event occurs. Your choices are: Today, Tomorrow,Eveo, Mon, Every Tue, EveO, Wed, Eve o, Thu,
Every Eft, Every Sat, Every Sun, Everyday,Mon-Fri, or /to specify an exact date. If you are specifying
a date, enter the numbers using the remote control in month/day format. The year Hill be set
automatically. Once you have set the When, advance using the _ or > key.
Page 32
YOURHITACHIRECEIVER'SMAINMENU
There are three possible settings for the On column: a check mark (¢') to indicate "to view," a
videotape _) to indicate "to tape," or empty to indicate that this specific event timer is disabled.
When using the 16-EVENT TIMER the following steps must be completed for the DSS
receiver to perform unattended recording.
"ttr Hi
• Attach the VCR Control cable as described in Chapter 2, Set6ng Up Yo "tachi
Digital Satellite System."
• You need to have used the VCR SETUP utility as described in Chapter 7, "The
Hitachi Setup Menu."
• Set your VCR to match the output of your DSS receiver. This could be either RF
(channel 3 or 4) or A/V (phono or S-video).
• Insert a recordable video tape of sufficient length in the VCIL
• Leave the VCR named ON.
Messages
The MESSAGES feature of your Hitachi digital satellite receiver enables service providers to
notify you about important information, upcoming special events,
offers, and other pr0modonal programming.
The MESSAGES Screen
When new messages are received, a "New Mail" indicator appears at
the top of all menu screens. This indicator will remain on the menus
until you have read the new message.
When you highlight the Messagebutton, the advisory message at the
bottom of the screen indicates if there axe any messages to read. If
there are, you can press tk'q-'.llFd;_ to access the Messages screen.
The MESSAGES screen _ list the first line of text for each
message that is available. Messages displayed include those that were
not erased or have not expired; and new, unread messages.
Using the Vkey, highlight the message that you wish to read and press I_!_.
READ MAIL
The entire message will then be displayed. If the message is too long to fit on one page, use the V
key to view addinonal pages.
The READ MAIL screen
You now have the opportunity to Erase this message if you won't
want to refer back to it later. Messages Hill "self erase" if they
become outdated or if space is needed to hold newer incoming
messages.
Page 33
HITACHI DIGITAL SATELLITE SYSTEM OWNER'S MANUAL
Limits and Lists
The middle of the MAIN MENU screen has an area called 'Timits and Lists." The buttons in
this area are used to help you establish restrictions on the use of
your DSS receiver. You can control PPV spending limits, viewable
program rating lirnits, and control access to various channel
groupings. The "Limits and Lists" portion of the MAIN MENU
Spending
PPV access enables you to purchase spedal, limited-broadcast events such as sporting events and
movies. You can set the amount of money that can he spent on a
per-event basis. When the highlight is on the Spending button, the
advisory at the bottom of the MAIN MENU indicates the current
spending limit. Presgmag _ displays the SPENDING
LIMIT screen where you set the limit
Use the number keys on the remote control to set the limit or use
the A and Vkeys to increase or decrease each digit. Use the ( and
•keys to highlight the digit that you want to change. The
maximum limit is $655.
Highlight Done and press _ to confirm the entered amount.
The PPV SPENDING LIMIT screen
For the spending limit to be enforced, the DSS receiver must
be locked. Locking is described later in this chapter. When the
system is locked, a small lock symbol appears within the Spending button on the MAIN MENU,
indicating that the passcode will be needed to access the SPENDING LIMIT screen.
Ratings
Program ratings indicate the suitability of a program's content for a given audience. For families
with younger children, a lower rating limit may be desirable. Other
families may choose to allow viewing of more sophisticated
pro_. The RATINGS LIMIT screen leaves this choice up
to you.
Highlighting the Ratings button on the MAIN MENU wSll dispLay
the current rating limit in the advisory message area at the bottom of
the screen. Pressing _ displays the RATINGS LIMIT
screen where 3iou set the limit. When the system is locked, a small
lock symbo! appears within the Ralings button, indicating that the
passcode x_l be needed to access the RATINGS LIMIT screen.
Use the Vto move the highlight to the highest allowable rafng for
your family. When you press _, all ratings up to and
including the chosen rating will be checked. All higher ratings will be
RestffctAll Viewing or A//ow A/!instead of setting a specific limit.
The RATINGS LIMIT screen
cleared. You may choose to
For the rating limit to be enforced, the DSS receiver must be locked. Locking is described
later in this chapter. When the system is locked, asmall lock symbol appears within the Ralings
button on the MAIN MENU, indicating that the passcode _ be needed to access the
RATINGS LIMIT screen.
Page 34
YOUR HITACHI RECEIVER'S MAIN MENU
Fay.Lists
The favorite lists feature enables you to preset your channd selecrions for four different
groupings. You can customize these grouIdmgs--Fav. A, Fay. B, Fav. C, and a fourth grouping
that can be tither Fay. D or Fami_--in avariety of ways. For example, Fay. A could be Dad's
favorite channels, Fay. B could be Mom's favorites, Fay. C could be the kids' channels, and Fami_
could be all channels that Mom and Dad have deemed appropriate for the entire family. See
Chapter 7, "Your Hitachi Receiver's Setup Menu," for informarion on labeling the fourth Fay.
list.
You can cycle through the favorite lists while watching DSS programming, on the PROGRAM
GUIDE, and on the FAVORITE LISTS screen by pressing the Q[_[) key.
On the FAVORITE LISTS screen, use the A, V, <, and >keys to highlight the button that
corres_nds to the channel and list that you wish to change. Press
the _ key to either add or remove the check mark. A check
mark indicates that the channd of the row is induded in the list
named at the top of the column.
The FAVORITE LISTS screen
To help you choose to indude or exclude a particular channel, the
ride of the currently airing program for that channel appears at the
top of the screen. This may be of some guidance.
Remember that when using aFamily list and the DSS receiver is
locked, only channels included in the Family list can be viewed. This
means that if you are currently set to the Fav. A, B, C, or A#
Channels list, you vail step through the channds included on the
current list, however to actually view or hear the program, the
selected channel must be on the Famitv list as well.
For the Family List limit to be enforced, the DSS receiver must be locked and the fourth
fist must be labeled "Family." Locking is described later in this chapter. When the system is
"locked" and the fourth list is labeled Fami/j, a small lock appears within the Fay. List button on
the MAIN MENU, indicating that the passcode will be needed to access the FAVORITE
LISTS screen.
The Ckar FamiO List and Set Fami# List provides a quick way to remove or include all channels
from the Family list. This may be used when you want to start from a known condition. Then
step through and add or remove only those channds that you wish to be on the Family list,
Selecting the Ckar Fami_ List button or the Set Fami_ List button cannot be undone!
Purchased PPVs
The "Purchased PPVs" area in the lower left of the MAIN MENU provides access to screens
that enable you to review your receive*'s most recent pay-per-view
activity.
The "Purchased PPVs" portion of the MAIN MENU
Page 35

HITACHIDIGITALSATELLITESYSTEMOWNER'SMANUAL
History
The PURCHASE HISTORY screen displays recently viewed PPV events that you have been
or will be billed for. Events that you purchased, but later canceled,
or cancelable events that were purchased but the receiver never
tuned to, will not appear. Events that were ordered by directly
calling the service provider will not appear on this list. You cannot
remove events from this list. Reported events will disappear from
this list as the DSS receiver needs space to log newer purchased
events.
You can see displayed the channel on which the event occurred, the
event rifle, the start dare and 6me, and the cost. There may be more
events than can fit on the screen. You can access these by using the
V key or advance a page at a time by press'rag _O.
The PURCHASE HISTORY screen
If you need to discuss an event with your service provider, highlight
the questioned event and press I_I_U=F_. Additional information that the representative may ask
for is provided in the advisory message area at the bottom of the screen.
Upcoming
The UPCOMING PURCHASES screen displays PPV events that you have purchased but not
yet viewed. Events that were ordered by calling the service provider
will not appear on this list.
You can see displayed the channel on which the event wili occur,
the event title, the start date mad time, and the cost. There may be
more events than can fit on the screen. You can access these by"
us'nag the V key or advance a page at a time by pressing _0.
If you would like to cancel an event, highlight the event in question
and press _. You will be taken to another screen where you
may be given the oppommity to cancel your purchase.
System The UPCOMING PURCHASES screen
The area in the lower right of the MAIN MENU is labeled "System." This area provides
buttons to access system setup features and the capability to lock
and unlock your DSS receiver.
The "System" portion of the MAIN MENU
Page 36

YOURHITACHIRECEIVER'SMAINMENU
Setup Menu
The SETUP MENU provides access to kems that are usually one-time setup options. It
contains buttons to access rarely needed aspects of your Hitachi
digital satellite receiver. This includes your preferred audio language,
QulckTune key setup, VCR code setup, system test, assistance, and
the familiar dish pointing menu.
The SETUP MENU
Refer to Chapter 7, "Your Hitachi Receiver's Setup Menu" for item-
by-item descriptions of each button on the SETUP MENU.
Lock
When you first receive your DSS system, it wh]lbe unlocked. That is, no limits or restrictions are
in effect. To enforce the limits (spending, ratings, and possibly the "Fatr_' favorite list), you
must lock the system.
When the button on the MAIN MENU reads Lock, no lock symbol appears at the top of the
menu screen, indicating that the system is unlocked.
When you highlight the Lock button and press the _ key, the LOCK SYSTEM screen is
displayed.
The Lock screen
Use the A and Vkeys or the remote control number keys to enter a
four-digit passcode of your choosing. If you enter the code using
the number keys, you will not see the numbers appear on the
screen. After entering a four-eliot passeode, highlight and select OK
to proceed. Otherwise, choose Cancelto abort the locking process.
If you continue locking, you _ be asked to enter the code again in
the same fashion as before for confirmation purposes. Once again,
highlight and sdect OK to proceed. Otherwise, choose Cancel to
abort the locking process.
Once OK has been selected, your DSS receiver is locked. The
button previously used to access LOCK SYSTEM is now used to
access SYSTEM UNLOCK A lock symbol appears at the top of every menu screen to remind
you that your DSS receiver is locked.
REMEMBER YOUR CODE! You will need this code whenever you wish to override the lock
or to unlock your DSS receiver.
Unlock
Once you have locked your DSS receiver and would like to remove the lock and its restrictions at
some later date, highlight the Unlock button and press the _ key.
Page 37
HITACHI DIGITAL SATELLITE SYSTEM OWNER'S MANUAL
When the SYSTEM UNLOCK screen appears, you can use the A and V keys or the remote
control number keys to enter the four-digit passcode that you used
to lock the DSS receiver earlier. If you enter the code using the
number keys, you will not see the numbcrs appear on the screen.
After entering a four-digit passcode, highlight and select OK to
proceed to unlock the DSS receiver. Once your DSS receiver has
been unlocked, all limits and restrictions are removed_
Otherwise, choose Canoe/to keep the lock in effect.
If you should happen to forget the four-digit code that you used to
lock your DSS receiver, call your service provider for assistance.
LOCK OVERRIDE
Unlock screen
There are times that you may wish to access a program or channel which exceeds the spending
limit, rating limit or family approved channels while your DSS receiver is locked. You can do this
without unlocldng your DSS receiver. When you press 41_m_D, when prompted, the LOCK
OVERRIDE screen _ be displayed. It looks and navigates just like the SYSTEM UNLOCK
screen. The main difference is that when you enter the correct four-digit code your DSS receiver
_11 remain unlocked until you power the receiver off. At that time all locks and limits will be
enforced again.
By now you should be feeling comfortable with your Hitachi digital satellite receiver. You can see,
the menus are presented in an organized and friendly fashion. As you continue to use your
system, yon Hill find that navigating through the screens becomes second nature.
Page 38
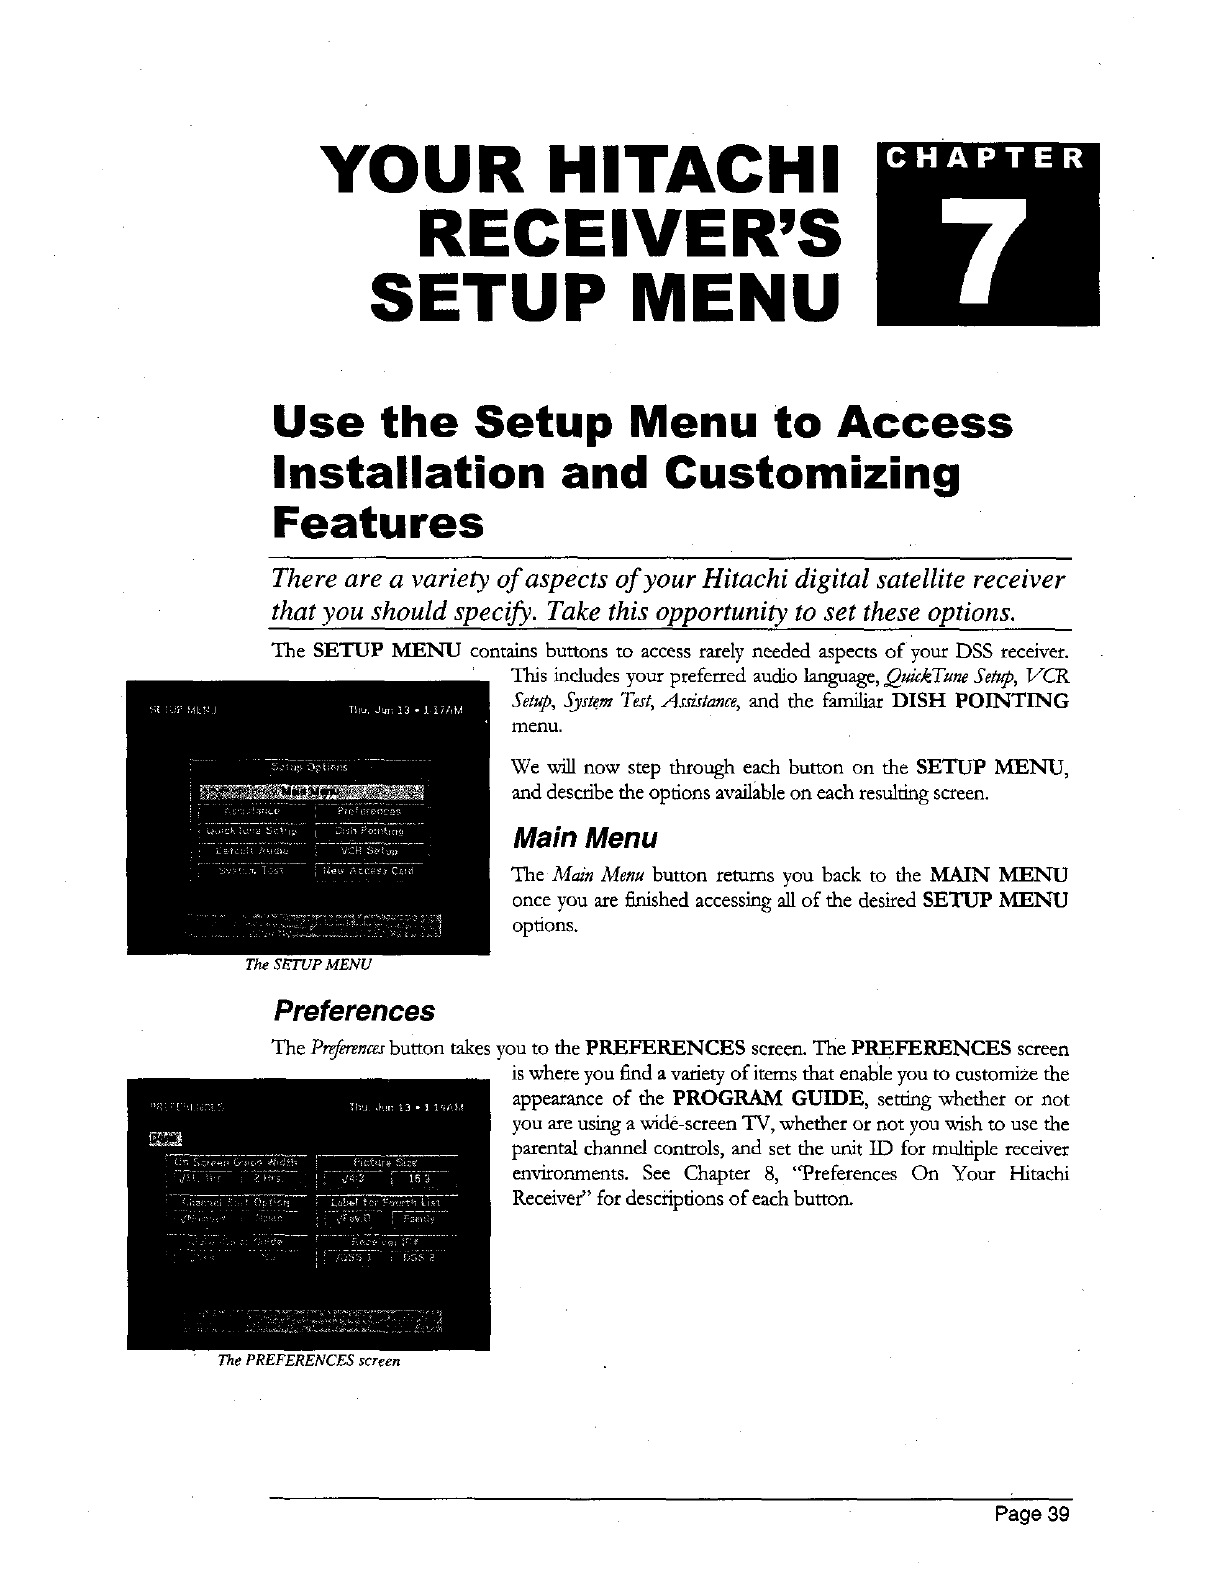
YOUR HITACHI
RECEIVER'S
SETUP MENU
Use the Setup Menu to Access
Installation and Customizing
Features
There are a variety of aspects of your Hitachi digital satellite receiver
that you should specify. Take this opportunity to set these options.
The SETUP MENU contains buttons to access rarely needed aspects of your DSS receiver.
This includes your preferred audio language, QuickTune S#up, VCR
Setup, System Test, Assistance, and the familiar DISH POINTING
The SETUP MENU
illenu.
We will now step through each button on the SETUP MENU,
and describe the options available on each resulting screen.
Main Menu
The Main Menu button returns you back to the MAIN MENU
once you are finished accessing all of the desired SETUP MENU
options.
Preferences
The Preferencesbutton takes you to the PREFERENCES screen. The PREFERENCES screen
is where you find a variety of items that enable you to customize the
appearance of the PROGRAM GUIDE, setting whether or not
you axe using a wide-screen "IV, whether or not you wish to use the
parental channel controls, and set the unit ID for multiple receiver
environments. See Chapter 8, "Preferences On Your Hitachi
Receiver" for descriptions of each button.
The PREFERENCES screen
Page 39
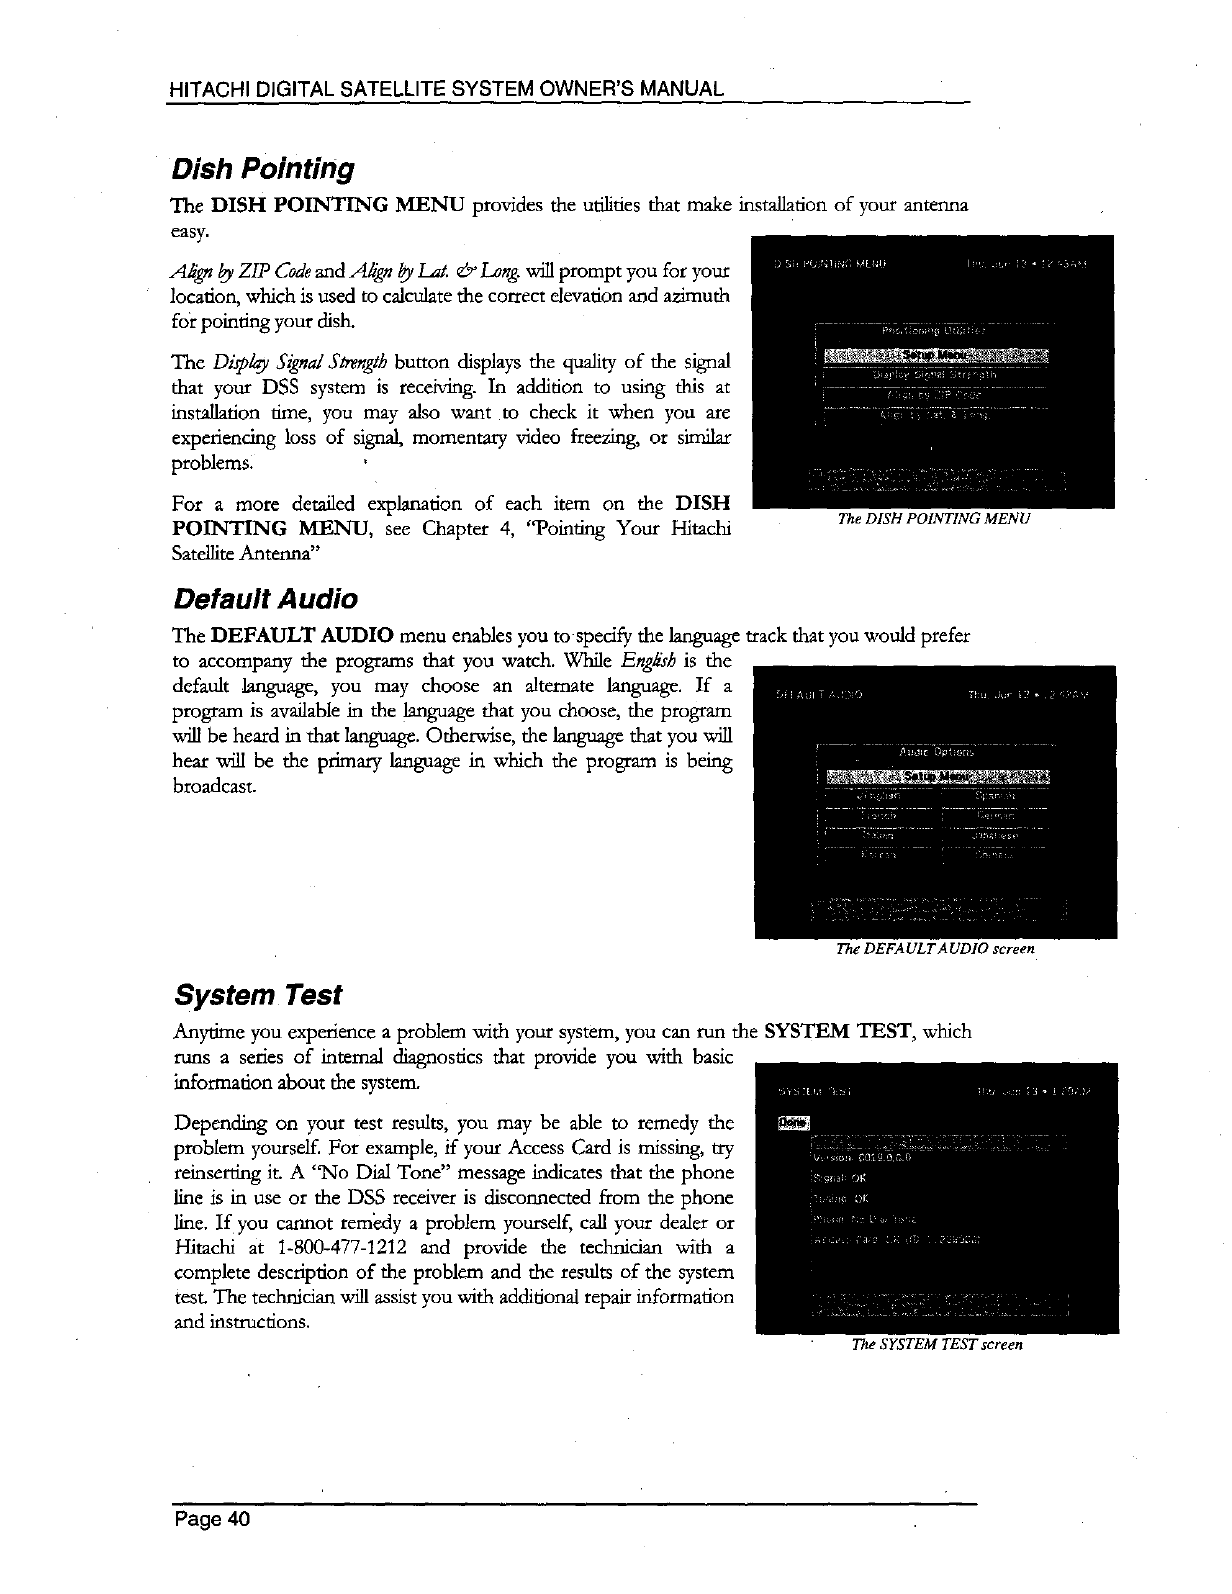
HITACHI DIGITAL SATELLITE SYSTEM OWNER'S MANUAL
Dish Pointing
The DISH POINTING MENU provides the utilines that make
easy.
Align by ZIP Codeand Ak[gn by I_at. ¢&'Lang. will prompt you for your
location, which is used to calculate the correct elevation and azimuth
for pointing your dish.
The Di4olay Signal Strength button displays the quality of the signal
that your DSS system is receiving. In addition to using this at
installation time, you may also want to check it when you are
experiencing loss of signal, momentary video freezing, or similar
problems.
For a more detailed explanation of each item on the DISH
POINTING MENU, see Chapter 4, "Pointing Your Hitachi
Satellite Antenna"
installation of your antenna
Default Audio
The DISH POINTING MENU
The DEFAULT AUDIO menu enables you to spedfy the language track that you would prefer
to accompany the programs that you watch. While English is the
default language, you may choose an alternate language. If a
program is available in the language that you choose, the program
will be heard in that language. Otherwise, the language that you will
hear will be the primary language in which the program is being
broadcast.
The DEFA UL TAUDIO screen
System Test
Anyume you experience a problem with your system, you can run the SYSTEM TEST, which
runs a series of internal diagnostics that provide you with basic
information about the system.
Depending on your test results, you may be able to remedy the
problem yoursd£ For example, if your Access Card is missing, tx'y
reinserfing it. A "No Dial Tone" message indicates that the phone
line is in use or the DSS receiver is disconnected from the phone
line. If you cannot remedy a problem yoursdf, call your dealer or
Hitachi at 1-800-477-1212 and provide the technician with a
complete description of the problem and the results of the system
test. The technidan will assist you with additional repair information
and instructions.
Page 40
The SYSTEM TEST screen
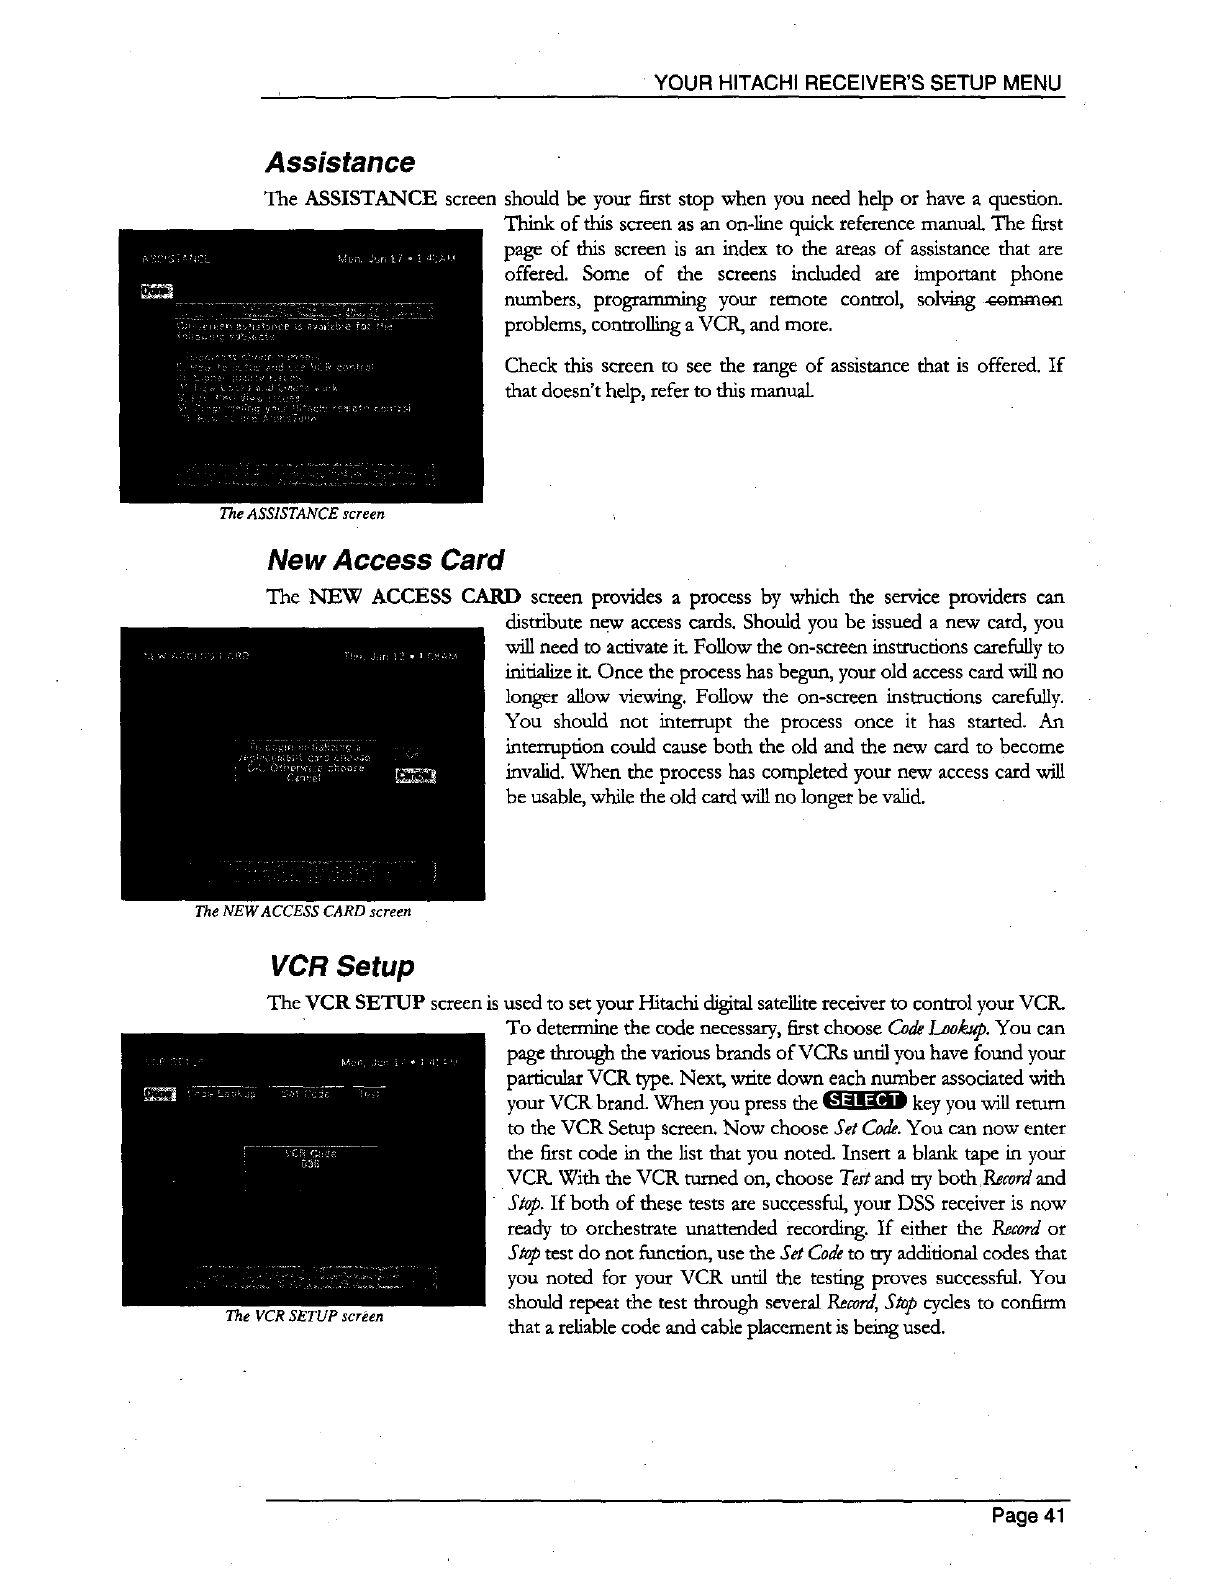
YOUR HITACHI RECEIVER'S SETUP MENU
Assistance
The ASSISTANCE screen should be your first stop when you need help or have a question.
Think of this screen as an on-line quick reference manual The first
page of this screen is an index to the areas of assistance that are
offered. Some of the screens included are important phone
numbers, programming your remote control, solving oammon
problems, controlling a VCR, and more.
The ASSISTANCE screen
Check this screen to see the range of assistance that is offered. If
that doesn't help, refer to this manual
New Access Card
The NEW ACCESS CARD screen provides aprocess by which the service providers can
distribute new access cards. Should you be issued a new card, you
will need to activate it_ Follow the on-screen instructions carefully to
initialize it. Once the process has begun, your old access card will no
longer allow viewing. Follow the on-screen instructions carefully.
You should not interrupt the process once it has started. An
interruption could cause both the old and the new card to become
invalid. When the process has completed your new access card w4al
be usable, while the old card will no longer be valid.
The NEW ACCESS CARD screen
VCR Setup
The VCR SETUP screen
The VCR SETUP screen is used to set your Hitachi digital satellite receiver to control your VCR.
To determine the code necessary, first choose CodeLaokup. You can
page through the various brands of VCRs until you have found your
particular VCR type. Next, write down each number associated with
your VCR brand. When you press the _ key you will return
to the VCR Setup screen. Now choose Set Code.You can now enter
the first code in the list that you noted. Insert a blank rape in your
VCIL With the VCR turned on, choose Test and try bothRecord and
Stop. If both of these tests are successful, your DSS receiver is now
ready to orchestrate unattended recording. If either the Record or
Stop test do not function, use the Set Codeto try additional codes that
you noted for your VCR until the testing proves successful. You
should repeat the test through several Record,Stop cycles to confirm
that a reliable code and cable placement is being used.
Page 41
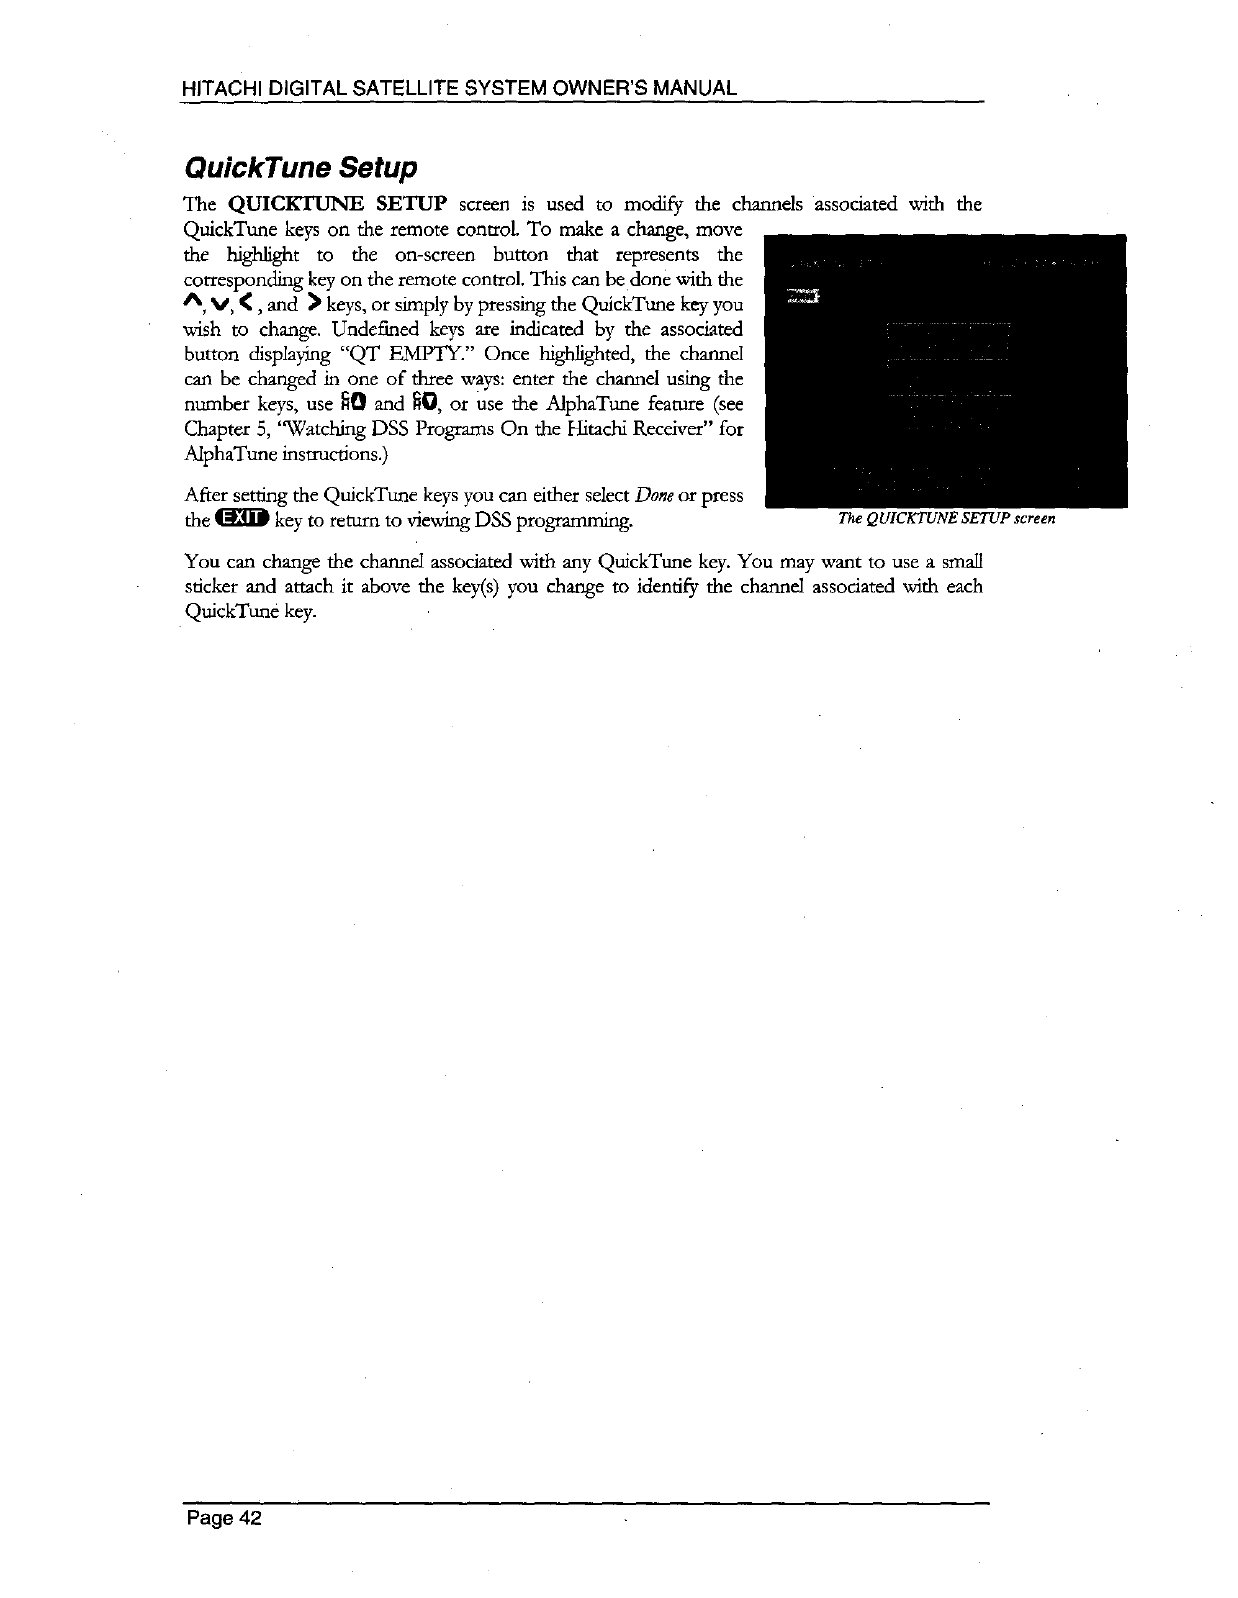
HITACHI DIGITAL SATELLITE SYSTEM OWNER'S MANUAL
QuickTune Setup
The QUICKTUNE SETUP screen is used to modify the channels associated with the
QuickTtme keys on the remote control. To make a change, move
the highlight to the on-screen button that represents the
corresponding key on the remote control. This can be done with the
A, V, <, and _ keys, or simply by pressing the QuiekTune key you
wish to change. Undefined keys are indicated by the associated
button displaying "QT EMlYlY. '' Once highlighted, the channel
can be changed in one of three ways: enter the channel using the
number keys, use fi0 and _0, or use the AlphaTune feature (see
Chapter 5, "Watching DSS Programs On the Hitachi Receiver" for
AlphaTtme instructions.)
After setting the QuickTune keys you can either select Done or press
the _ key to return to viewing DSS programming. The QUICKTUNE SETUP screen
You can change the channel associated with any QuickTune key. You may want to use a small
sticker and attach it above the key(s) you change to identify the channel associated with each
QuickTune key.
Page 42
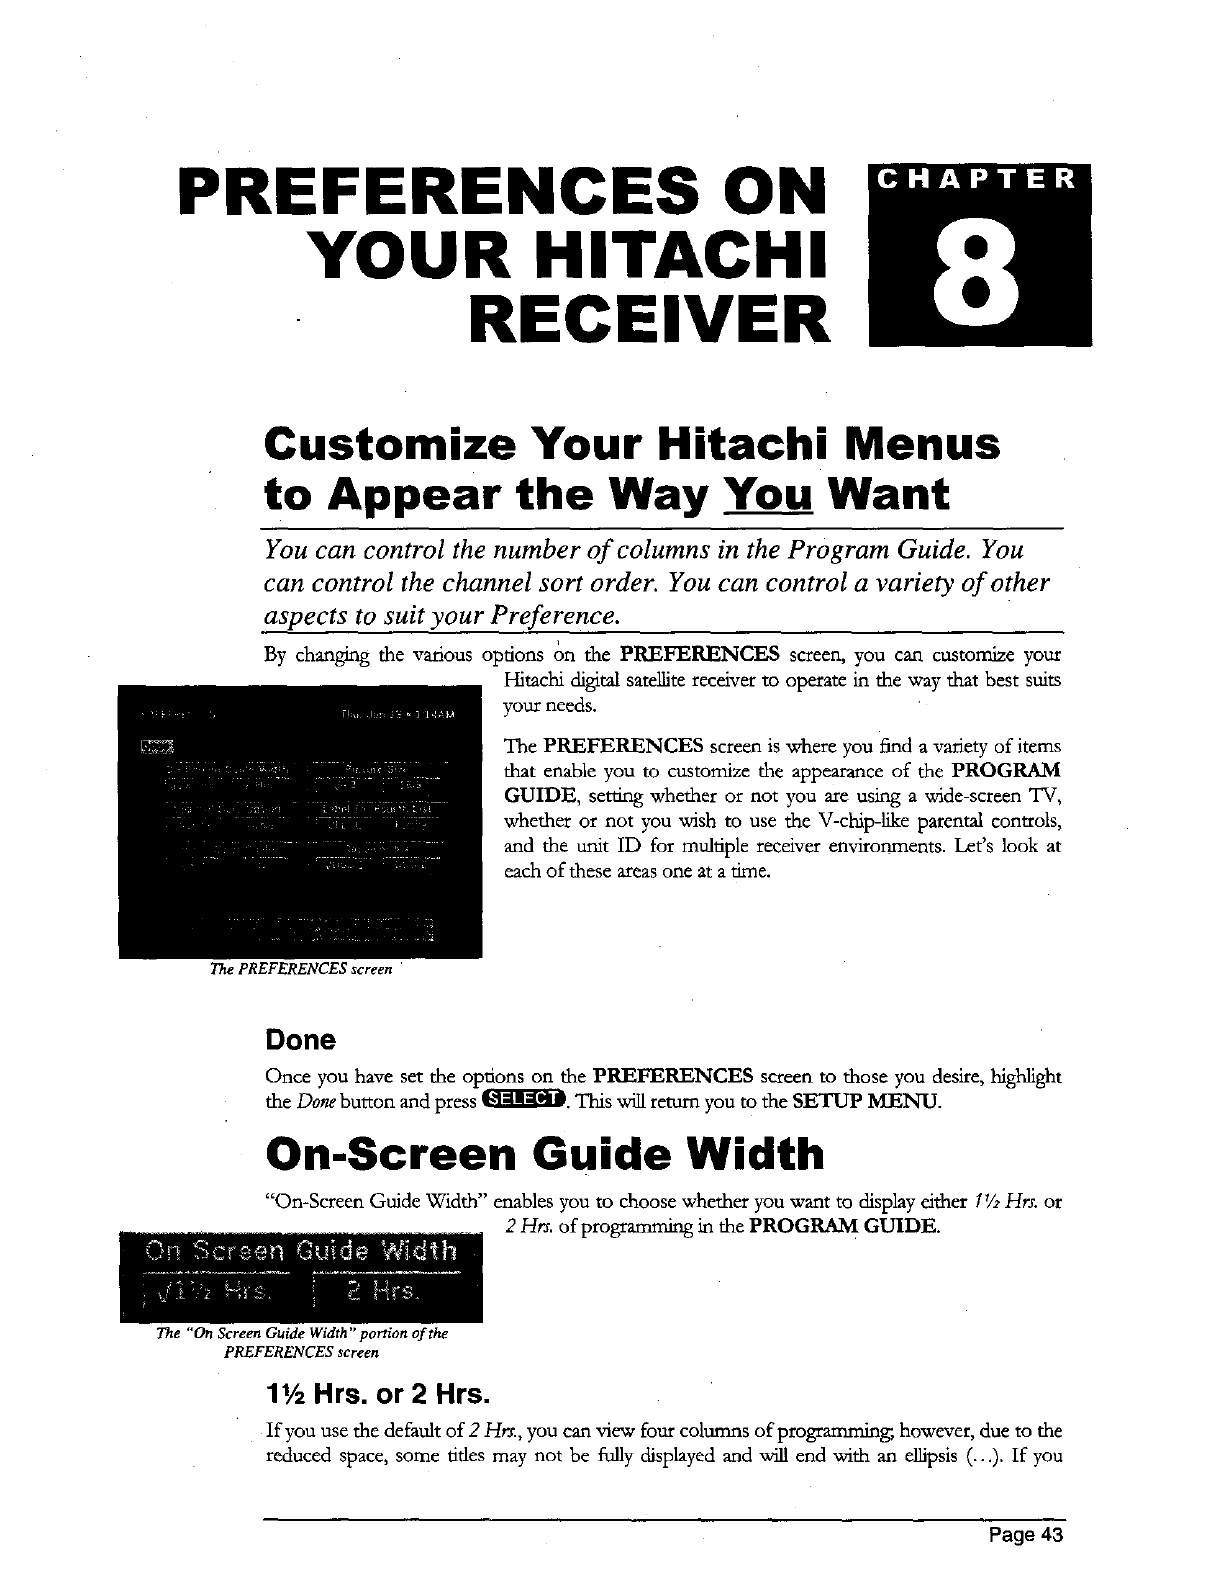
PREFERENCES ON
YOUR HITACHI
RECEIVER
Customize Your Hitachi Menus
to Appear the Way You Want
You can control the number of columns in the Program Guide. You
can control the channel sort order. You can control a variety of other
aspects to suit your Preference.
i
By changing the various options on the PREFERENCES screen, you can customize your
Hitachi digital satellite receiver to operate in the way that best suits
your needs.
The PREFERENCES screen
The PREFERENCES screen is where you find a variety of items
that enable you m customize the appearance of the PROGRAM
GUIDE, setting whether or not you axe using a wide-screen TV,
whether or not you wish to use the V-chip-like parental controls,
and the unit ID for multiple receiver environments. Let's look at
each of these areas one at a One.
Done
Once you have set the options on the PREFERENCES screen to those you desire, highlight
the Done button and press I[_j][_t_. This will return you to the SETUP MENU.
On-Screen Guide Width
"On-Screen Guide Width" enables you to choose whether you want to display either 172Hrs. or
2 Hrs. of prograrnmmg in the PROGRAM GUIDE.
The "On Screen Guide Width" portion of the
PREFERENCES screen
lg= Hrs. or 2 Hrs.
If you use the default of 2 Hrs., you can view four coktmns of programming; however, due to the
reduced space, some tides may not be fi.fllydisplayed and will end with an ellipsis (...). If you
Page 43
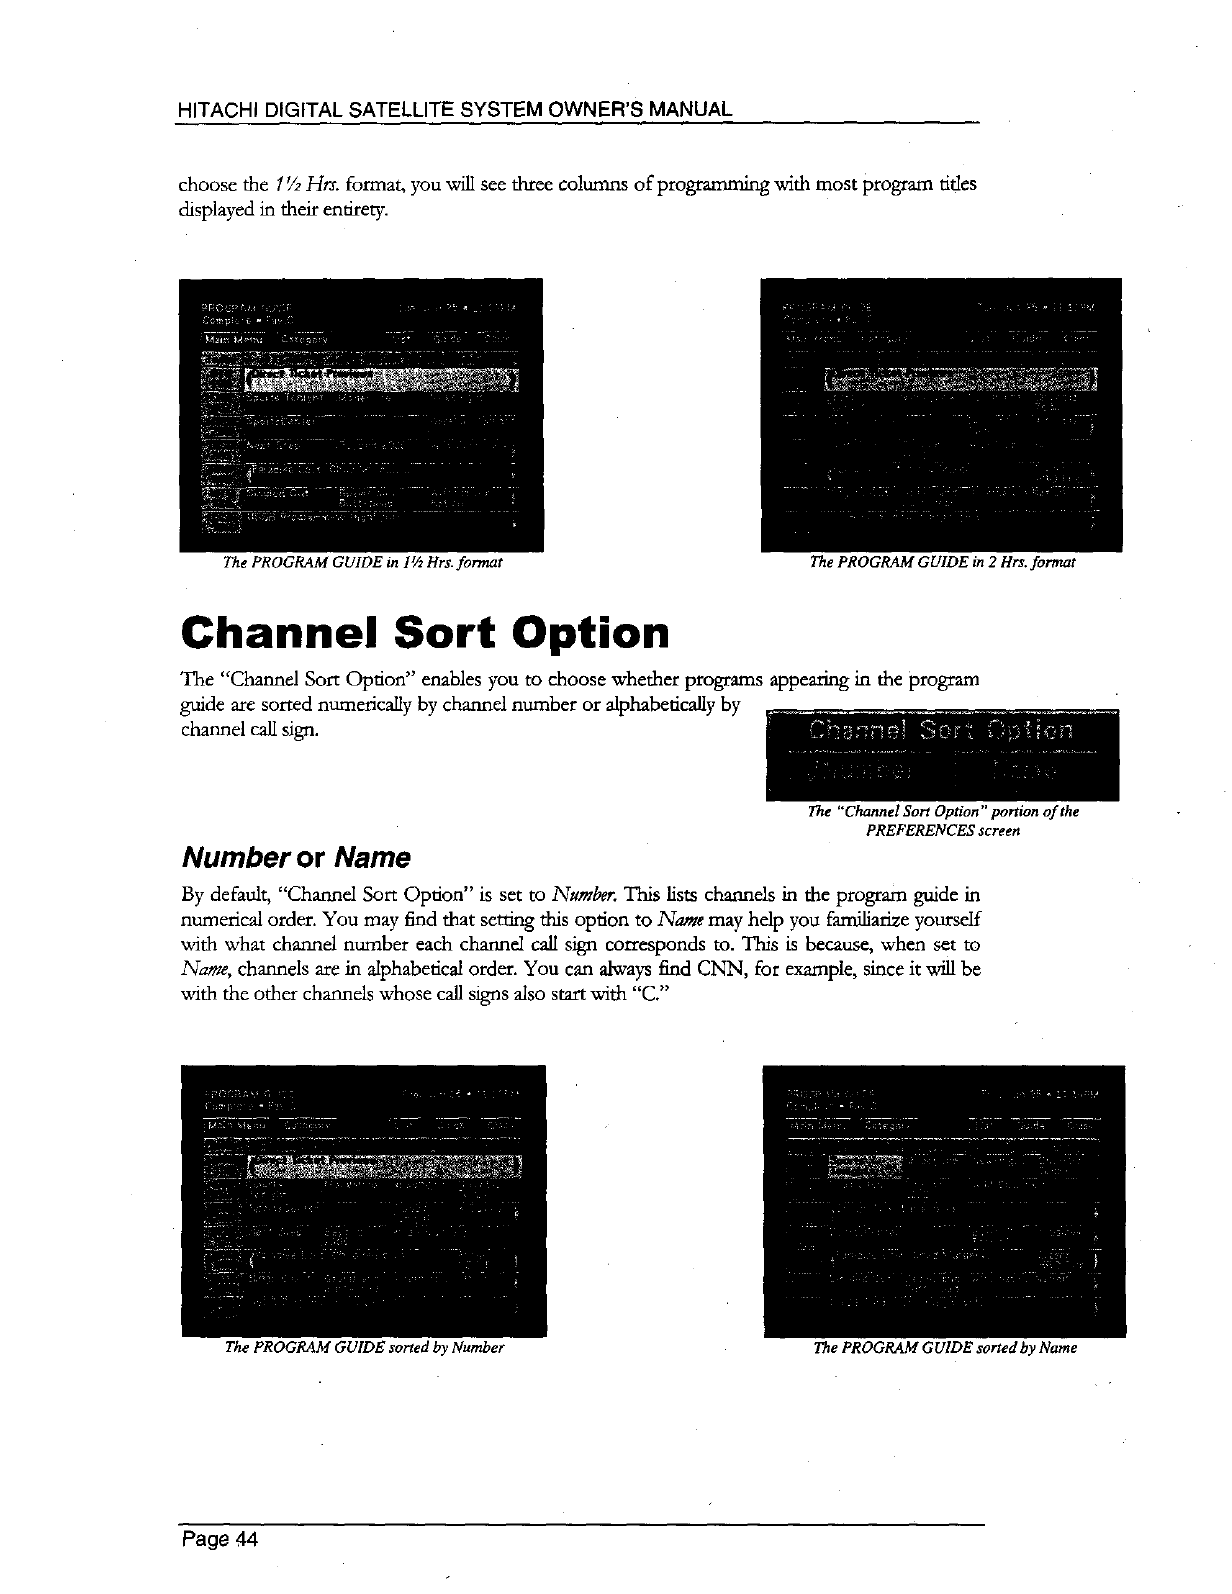
HITACHIDIGITALSATELLITESYSTEMOWNER'SMANUAL
choose the 1V2Hrs. format, you will see three colun_qs of programming with most program tides
displayed in their entirety.
The PROGRAM GUIDE in 1½ Hrs. format
Channel Sort Option
The PROGRAM GUIDE in 2 Hrs. format
The "Channel Sort Option" enables you to choose whether programs appearing in the program
guide are sorted numerically by channel number or alphabetically by
channel call sign.
Number or Name
The "Channel Sort Option" portion of the
PREFERENCES screen
By default, "Channd Sort Option" is set to Number. This lists charmds in the program guide in
numerical order. You may find that semng this option to Name may help you familiarize yoursdf
with what channel number each channel call sign corresponds to. This is because, when set to
Name, channels are in alphabetical order. You can always find CNN, for example, since it will be
with the other channds whose call signs also start with "C."
The PROGRAM GUIDE sorted by Number The PROGRAM GUIDE sorted by Name
Page 44
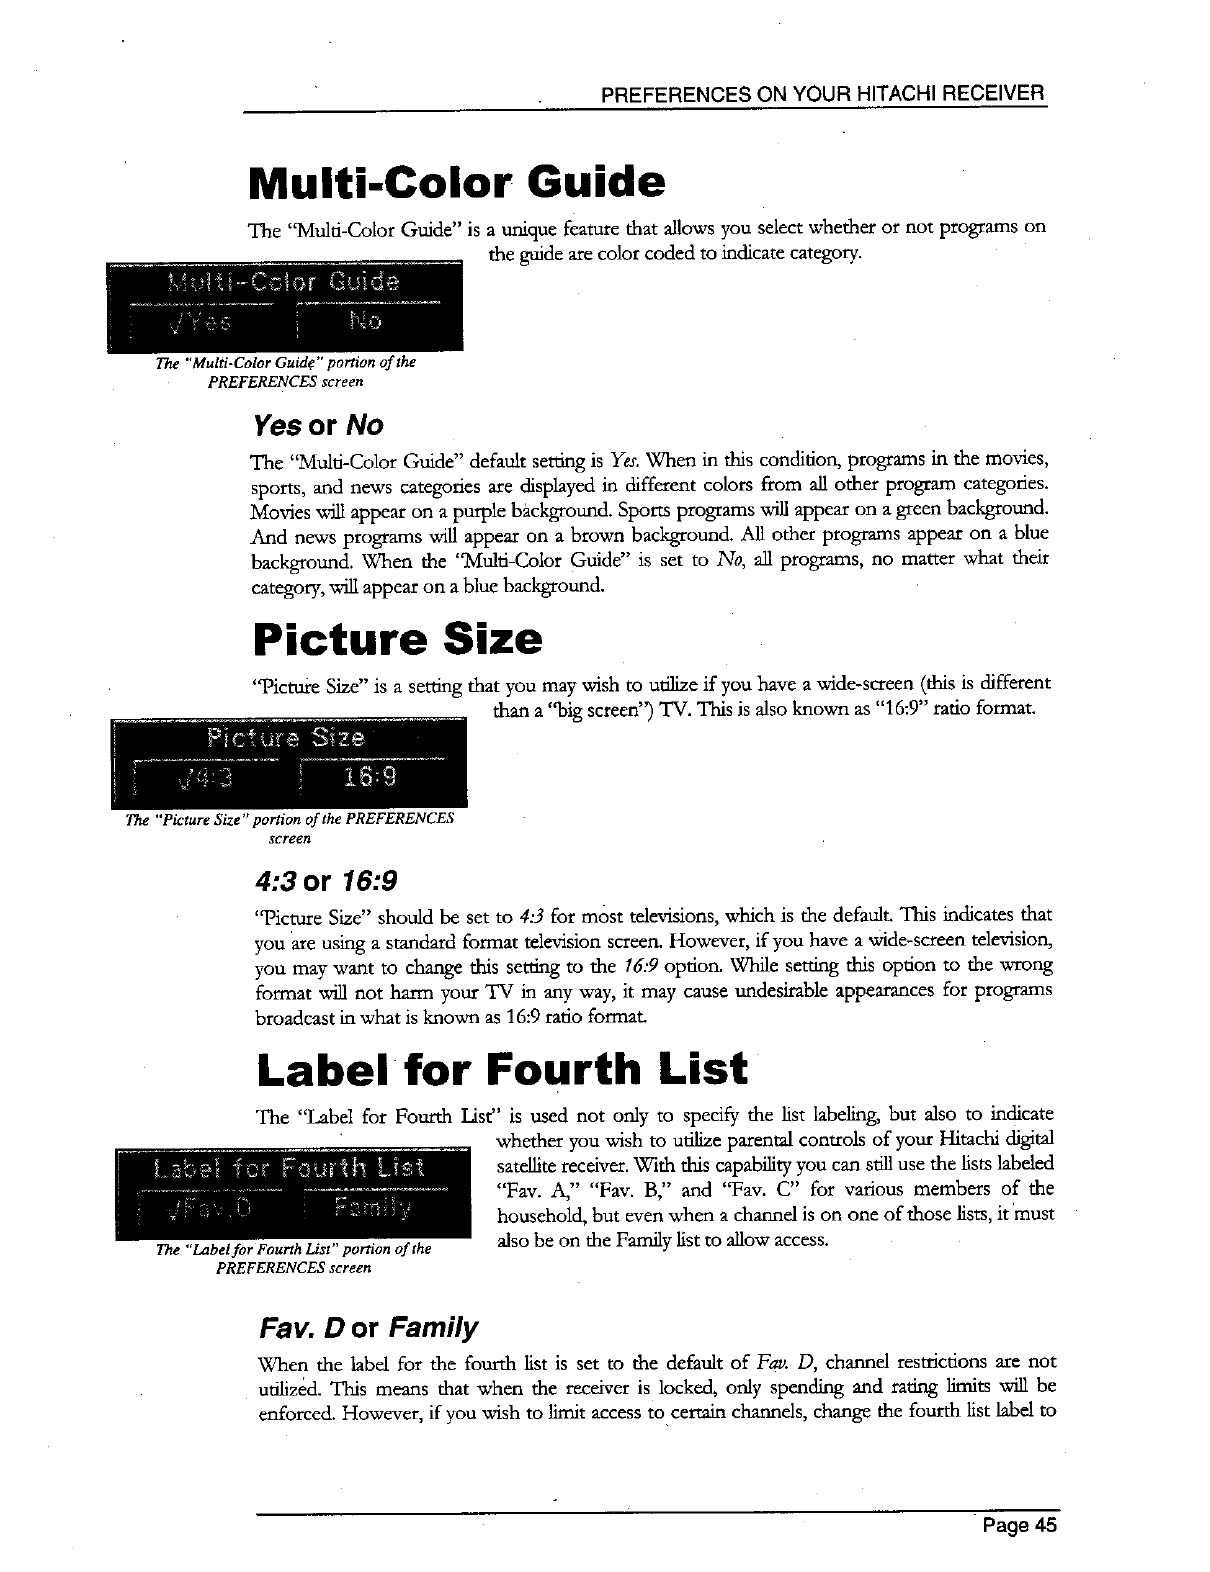
PREFERENCESONYOURHITACHIRECEIVER
Multi-Color Guide
The "Multi-Color Guide" is a unique feature that allows you select whether or not programs on
the guide are color coded to indicate category.
The "Mu ti-Color Guide" portion of the
PREFERENCES screen
Yes or No
The "Mulu-Color Guide" default setting is Yes. When in this condition, programs in the movies,
sports, and news categories are displayed in different colors from all other program categories.
Movies will appear on a purple background. Sports programs _ appear on a green background.
And news programs will appear on a brown background. All other programs appear on a blue
background. When the "Multi-Color Guide" is set to No, all programs, no matter what their
category, will appear on a blue background.
Picture Size
"Picture Size" is a setUng that you may wish to utilize if you have a wide-screen (this is different
than a "big screen") TV. This is also known as "16:9" ratio format.
The "Picture Size" portion of the PREFERENCES
screen
4:3 or 16:9
"Picture Size" should be set to 4:3 for most televisions, which is the default. This indicates that
you are using a standard format television screen. However, if you have a wide-screen television,
you may want to change this setmag to the 16:9 optioo. While setting this option to the wrong
format _ not harm your TV in any way, it may cause undesirable appearances for programs
broadcast in what is known as 16:9 ratio format.
Label for Fourth List
The "Label for Fourth List" portion of the
PREFERENCES screen
The "Label for Fourth List" is used not only to specify the fist labeling, but also to indicate
whether you wish to utilize parental controls of your Hitachi digital
satellite receiver. With this capability you can still use the lists labeled
"Fav. A," "Fay. B," and "Fay. C" for various members of the
household, but even when a channel is on one of those fists, it must
also be on the Family list to allow access.
Fav. D or Family
When the label for the fourth list is set to the default of Fay. D, channd restrictions are not
utilized. This means that when the receiver is locked, only spending and rafng limits Hill be
enforced. However, if you wish to limit access to certain channels, change the fourth list label to
Page 45
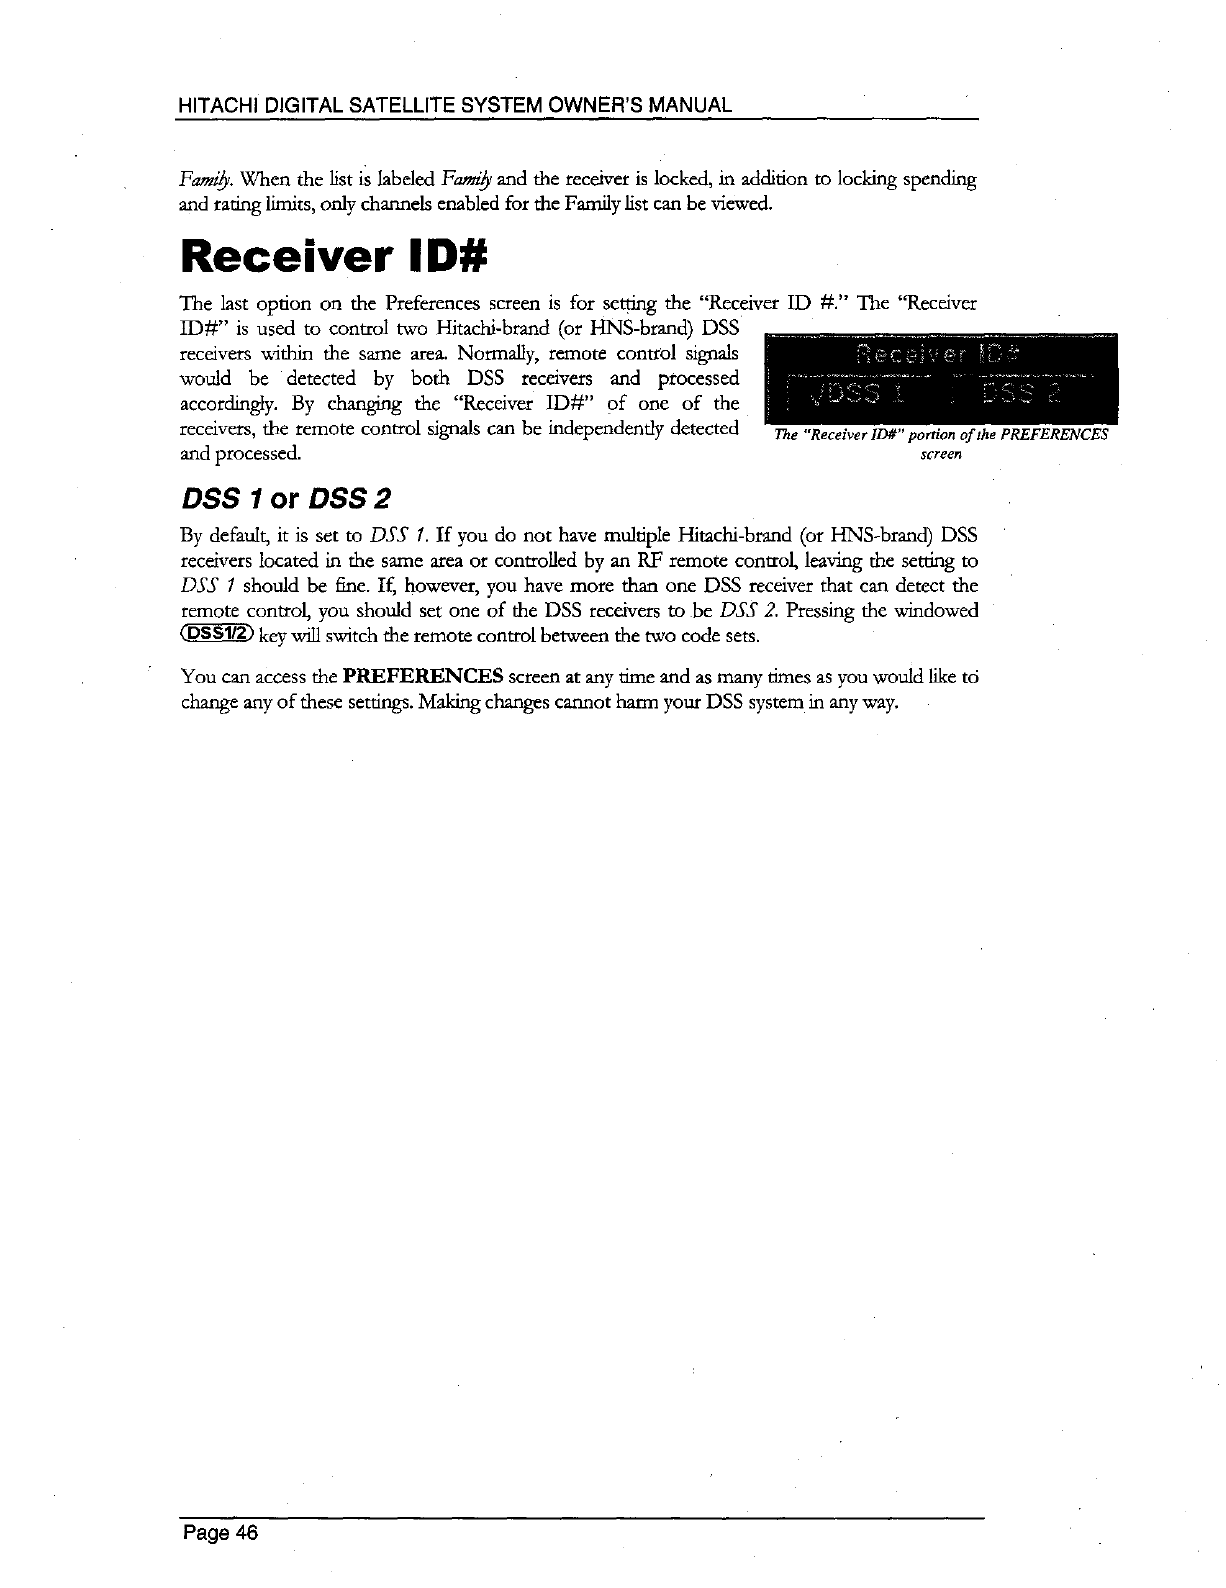
HITACHI DIGITAL SATELLITE SYSTEM OWNER'S MANUAL
Fami_. When the list is labeled Fami_ and the receiver is locked, in addition to locking spending
and rating limits, only channels enabled for the Family list can be viewed.
Receiver ID#
The last option on the Preferences screen is for setting the "Receiver ID #." The "Receiver
tD#" is used to control two Hitachi-brand (or HNS-brand) DSS
receivers within the same area. Normally, remote control signals
would be detected by both DSS receivers and processed
accordingly. By changing the "Receiver ID#" of one of the
receivers, the remote control signals can be independently detected
and processed, screen
The "Receiver ID#" portion of the PREFERENCES
DSS I or DSS 2
By default, it is set to DSS 1. If you do not have multiple Hitachi-brand (or HNS-brand) DSS
receivers located in the same area or controlled by an RF remote control, leaving the setting to
DSS 1 should be fine. If, however, you have more than one DSS receiver that can detect the
remote control, you should set one of the DSS receivers to be DSS 2. Pressing the windowed
key _ switch the remote control between the two code sets.
You can access the PREFERENCES screen at any time and as many times as you would like to
change any of these settings. Making changes cannot harm your DSS system in any way.
Page 46
PROGRAMMING
YOUR HITACHI
REMOTE CONTROL
Use Your Remote Control to
Tame Other A/V Devices
You can use the remote control that came with your Hitachi-brand
DSS receiver to control other components in your entertainment
system. Here's how...
Some of the devices that you can control with your remote control include TVs, VCRs, and cable
boxes. Some receiver models come with a remote control that can also control audio devices such
as amplifiers, and disc players such as CDs and video discs.
Programming the Remote
Control
There are two different ways to program your remote control to match the devices you want to
control: code scan, or code entry. Code scan can take some lime, but it avoids having to dig out
this manual whenever you want to program your remote control. Code entry saves some time;
however, you will need to look up the possible codes that are assigned to the manufacturer of the
device you want to control
Code Scan
Keep your remote control aimed at the device you want to control during this process. The
remote control will send out the "power" command for DSS, TV, cable (CBL), and audio
components (AMP). The "Play" command will be sent for disc players (DISC), and VCRs.
While holding down the device key that you are programming, press the power key, and
simultaneously release both keys. The light assodated with the device you are programming
should be flashing rapidly. If it isn't, repeat the process.
Now that you are in programming mode, enter _ to enter the scan mode. You can
now press the _0 key to try the next code, sending out either the power or play command. This
could take some time since there are could be as many as 120 codes associated with each type of
device. When your device responds to your tapping the _0, you have found the code! If you
inadvertently go past a code that responded, or realized that you may not have been aiming the
remote at the device, you can use the _0 key to step backward through the code.
In order to lock in the code, either press the device key again or simply walt 10 seconds. You will
see the lights on the remote light in a circle to indicate that the code was accepted. The remote
will remember the code until your reprogram it.
Page 47
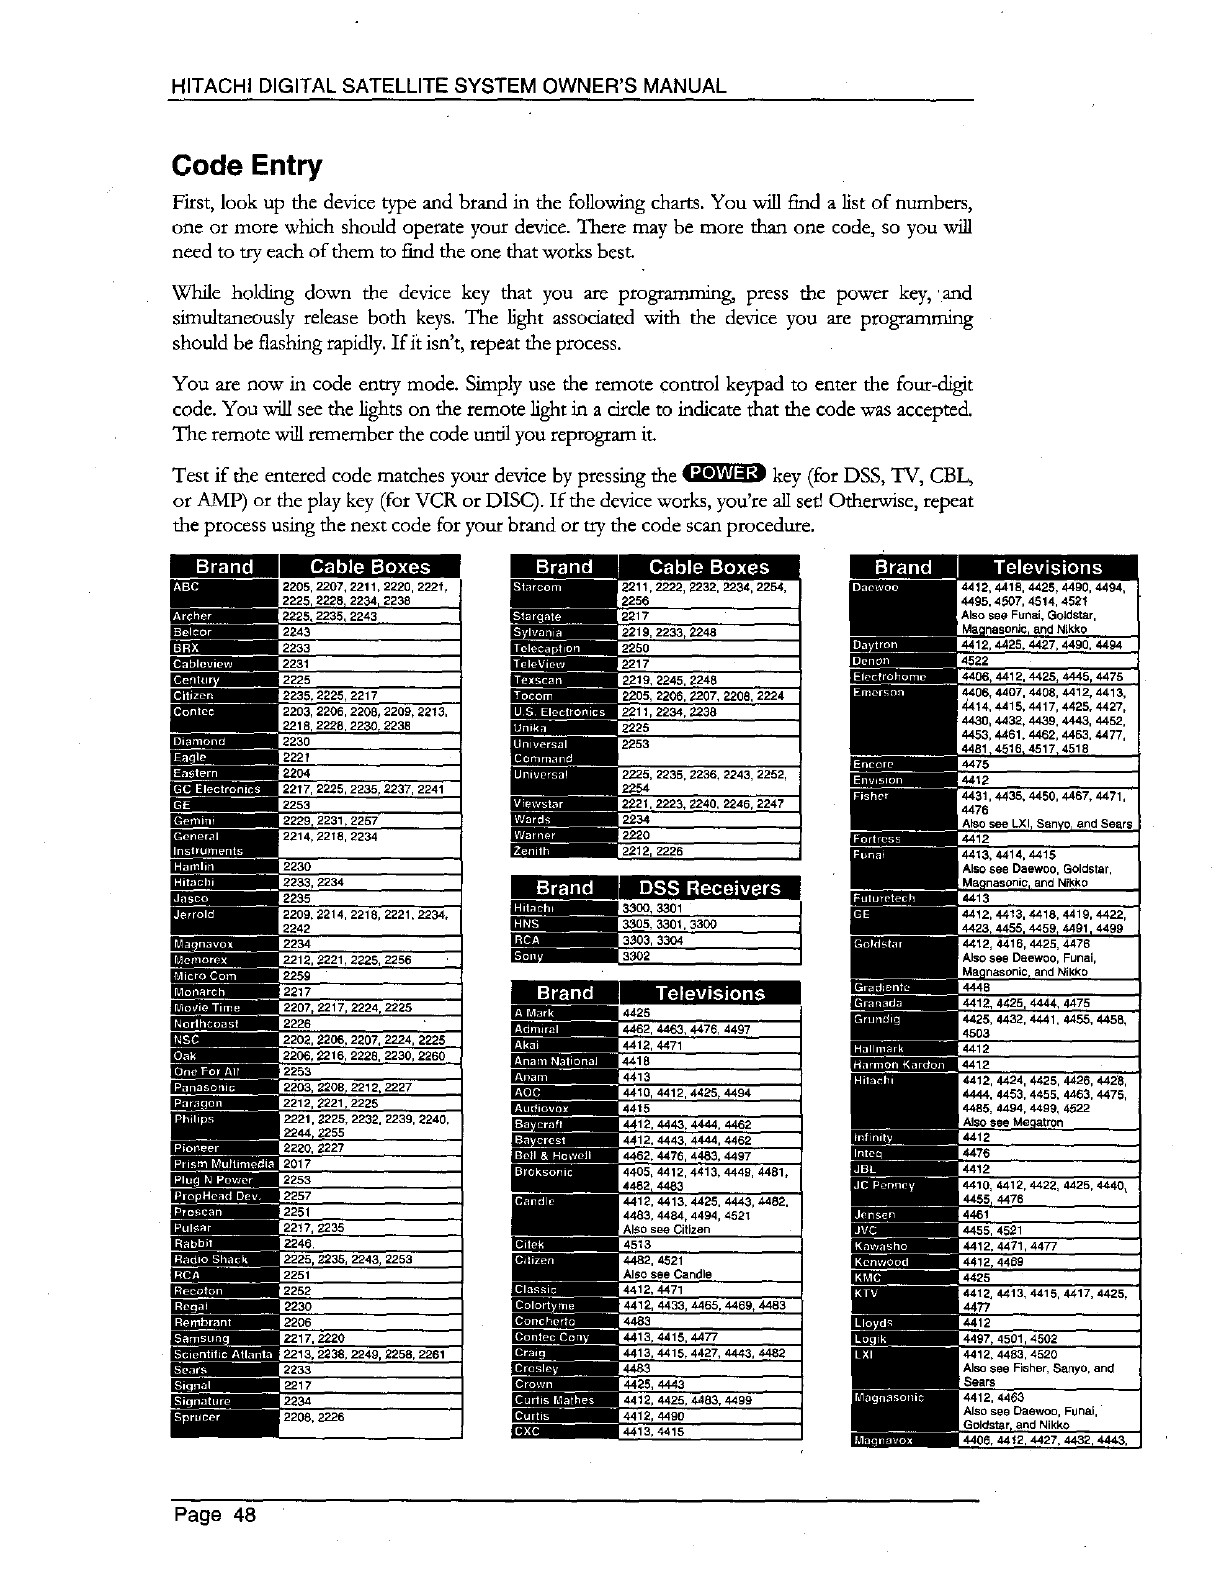
HITACHIDIGITALSATELLITESYSTEMOWNER'SMANUAL
Code EntW
First, look up the device type and brand in the following charts. You will find alist of numbers,
one or more which should operate your device. There may be more than one code, so you will
need to try each of them to find the one that works best.
While holding down the device key that you are programming, press the power key, and
simultaneously release both keys. The light associated with the device you are programming
should be flashing rapidly. If it isn't, repeat the process.
You are now in code entry mode. Simply use the remote control keypad to enter the four-digit
code. You _ see the lights on the remote light in a circle to indicate that the code was accepted.
The remote "willremember the code until you reprogram it.
Test if the entered code matches your device by pressing the _ key (for DSS, TV, CBL_
or AMP) or the play key (for VCR or DISC). If the device works, you're all sefl Otherwise, repeat
the process using the next code for your brand or try the code scan procedure.
2229,2231,2257
2214,2218,2234
2233,2234
2258,2261
2212, 2226
_a,4463, 4476, 4497
4412, 4471
4410, 4412, 4425, 4494
Also see Citizen
4419, 4425, 4483, 4499
4412, 4490
4413,4415
4412, 4424, 4425, 4426, 442_,
4444, 4453, 4455, 4463, 4475,
4485, 4494, 4499, 4522
4455,4521
4412,447%4477
4412,44B9
Page 48
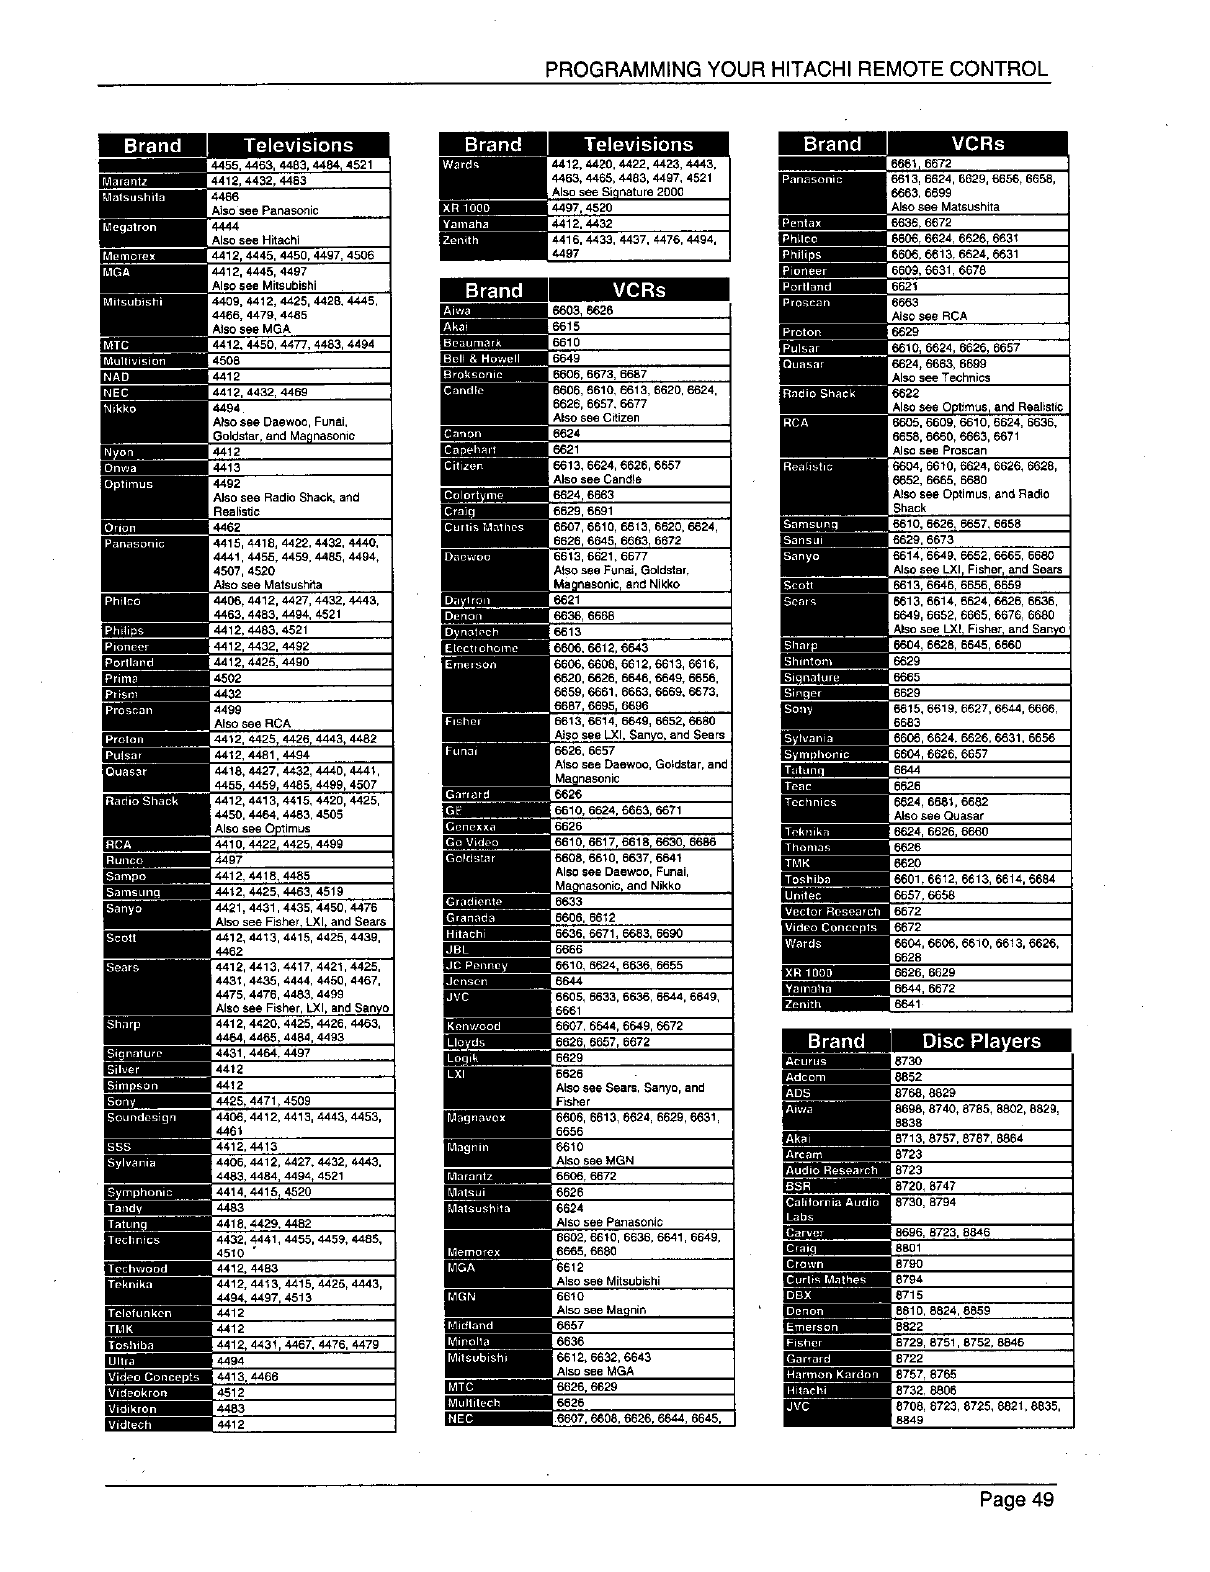
PROGRAMMING YOUR HITACHI REMOTE CONTROL
Also see Hitachi
4412, 4445, 4450, 4497, 4506
4412, 4445, 4497
Also see Mitsubishi
4409, 4412, 4425, 4428, 4445,
4466, 4479, 4485
Also see MGA
m
m
|',_IRTI_I
m
| "J'i'tl]$11
P'ITRI_'n
;_]i'_-"]L_r-Jl
a
I'.Rll"t&_l
m
l
[I"J6'131_]
l
I'JItT_
m
_lT_*lIThaim
_m
[Pm
li ii_prill.,_1
m
LI_
i
I'4_11111
m
mm
mF.']t3F_l
m
I_J_T_H
imm
m
mm
imm m
mram
IIT4"tr,'_il
I
4415, 4418, 4422, 4432, 4440,
4441, 4455, 4459, 4485, 4494,
4507, 4520
Also see Matsush8a
4406, 4412, 4427, 4432, 4443,
4463, 4483, 4494, 4521
4412, 4483, 4521
44!2 '4432, 4492
4412, 4425, 4490
4502
4432
4499
Also see RCA
4412, 4425, 4426, 4443, 4482
4412, 4481,4494
4418, 4427, 4432, 4440, 4441,
4455, 4459, 4485, 4499, 4507
4412, 4413, 4415, 4420, 4425,
4450, 4464, 4483, 4505
4410, 4422, 4425, 4499
4412, 4418, 4485
4412, 4425, 4463, 4519
4421, 4431,4435, 4450, 4476
Also see F]sher, LXI, and Sears
4412, 4413, 4415, 4425, 4439,
Also see Fisher, LXI,
4412, 4420, 4425, 4426, 4463,
4464, 4465, 4454, 4493
4431, 4464, 4497
4412
4412
4425, 4471,4509
4406, 4412, 4413, 4443, 4453,
4461
4412, 4413
4406, 4412, 4427, 4432, 4448,
4483, 4484, 4494, 4521
4414, 4415, 4520
4483
4418, 4429, 4462
4432, 4441, 4455, 4459, 4495,
4510 *
4412, 4483
4412, 4413, 4415, 4425, 4443,
4494, 4497, 4513
4412
4412
4412, 4481, 4467, 4476, 4479
4494
4413, 4466
4512
4483
4412
I.2_-lllI"
I:_tFJL_TR
_U
l
m
m
II
_mGIPZ_1
m
4520
4412, 4432
4416, 4433, 4437, 4476, 4494,
4497
6606, 6673, 6687
6666, 6610, 6613, 6620, 6624,
6626, 6657, 6677
Also see Cffizen
6613, 6624, 6626, 6657
Also see Cand!e
6624, 6663
6629, 6691
6607, 6610, 6613, 6620, 6624,
and Nikko
6606, 6612, 6643
6606, 6608, 6612, 6613, 6616,
6620, 6626, 6646, 6649, 6656,
6659, 6661, 6663, 6669, 6673,
6696
6610, 6617, 6618, 6630, 6686
6608, 6610, 6637, 6641
Also see Daewoo, Funai,
and Nikko
6626
AlSO see Sears, Sanyo, and
Rsher
6666, 6613, 6624, 6629, 6631,
6656
6610
Also see MGN
6606, 6672
6626
6624
Also see Panaso_i_
8692, 6610, 6636, 6641, 6649,
6665, 6680
Also see Mitsubishi
6610
Also see Ma nirl
6657
6636
6612, 6632, 6643
Also see MGA
6626, 6629
6626
6607, 6666, 6626, 6644, 6645,
m
F'_'l
6613, 6624, 6629, 6656, 6666,
6663, 6699
Also see Matsush0a
6636, 6672
6606, 6624, 6626, 6631
6606, 6613_ 6624, 6631
6609, 6631, 6678
6621
6663
Also see RCA
6629
6610, 6624, 6626, 6657
6624, 6663, 6699
Also see Technics
6622
Also see O tlmus and Reahstic
6605, 6609, 6610, 6624, 6636,
6658, 6660, 6663, 6671
Also see Proscan
6652, 6665, 6680
Also see Optimus, an9 Radio
Shack
6610, 6626, 6657, 6658
6629, 6673
6614, 6649, 6652, 6665, 6680
Also see LXI Fisher, and Sears
6613, 6646, 6656, 6659
6613, 6614, 6624, 6626, 6636,
6649, 6652, 6665, 6676, 6680
Also see LXI, Fisher, and San.y_
6604, 6628, 6645, 6660
6629
6665
6620
6615, 6619, 6627, 6644, 6666,
6663
6666, 6624_ 6626, 6631, 6666
6604, 6626, 6657
6626
6624, 6661, 6682
Also _e_ Quasar
6624, 6626, 6660
6626
_o
6601, 6612, 6613, 6614, 5684
6667, 6658
6672
6672
6604, 6606, 6610, 6613, 6626,
6628
6626, 6629
6644, 6672
6641
II]_-"_t"_ =J p,_v_t..] ik,
873O
6652
8766, 8829
8698, 8740, 8785, 8802, 8829,
8838
8713, 8757, 8787, 8864
8723
8723
8720, 8747
8730, 6794
8696, 8723, 6846
879O
6794
5715
8810, 8824, 8859
8822
6729, 875!, 8752, 8646
8722
8757, 8765
8"732, 8806
8708, 8723, 8725, 8821, 8835,
8849
Page 49
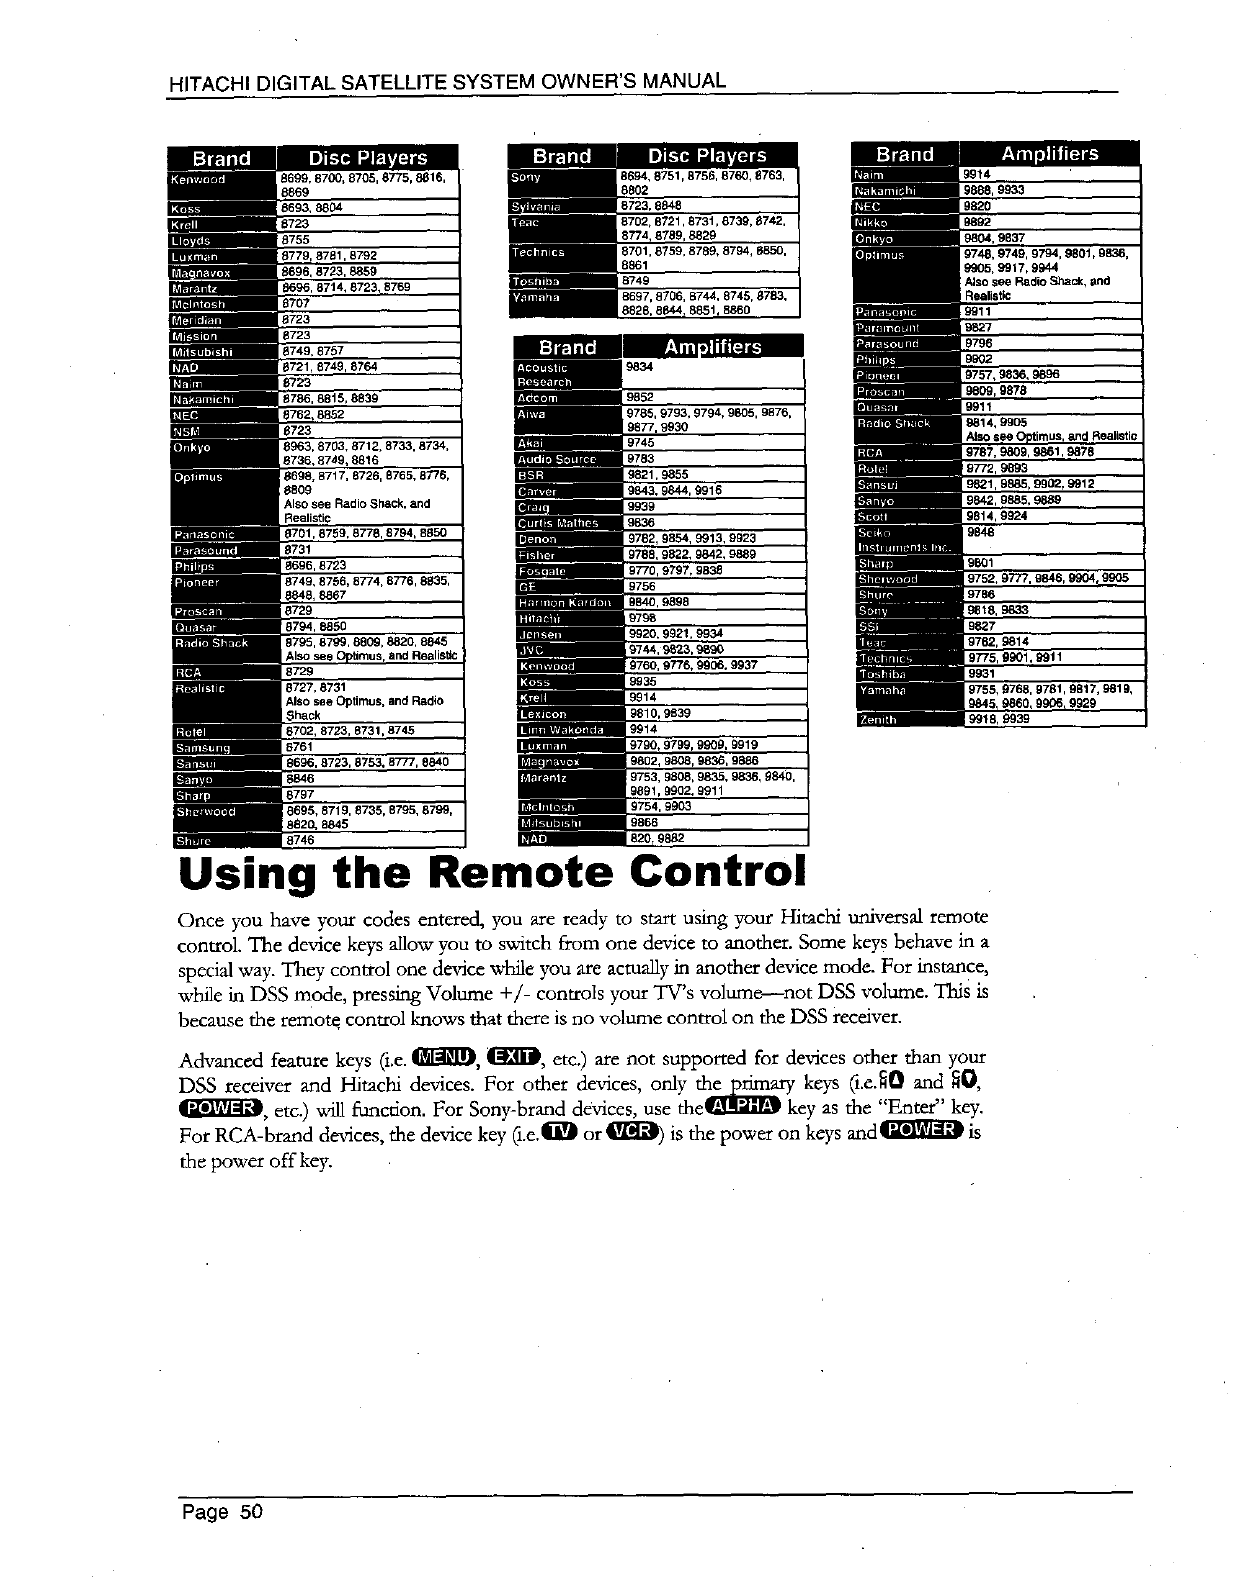
HITACHIDIGITALSATELLITESYSTEMOWNER'SMANUAL
8_44,8_t,8_0
820, 9882
Using the Remote Control
Once you have your codes entered, you are ready to start using your Hitachi universal remote
control. The device keys allow you to switch from one device to another. Some keys behave in a
special way. They control one device while you are actually in another device mode. For instance,
while in DSS mode, pressing Volume +/- controls your TWs volume--not DSS volume. This is
because the remote control knows that there is no volume control on the DSS receiver.
Advanced feature keys (i,e. _, _IiD, etc.) are not supported for devices other than your
DSS receiver and Hitachi devices. For other devices, only the primary keys (i.e.]O and _0,
(_, etc.) will fianctlon. For Sony-brand devices, use the 'gillil/i9 key as the Enter' k y.
For RCA-brand devices, the device key (i.e.|[]_ or _ is the power on keys and I_d_ilFff_ is
the power off key.
Page 50
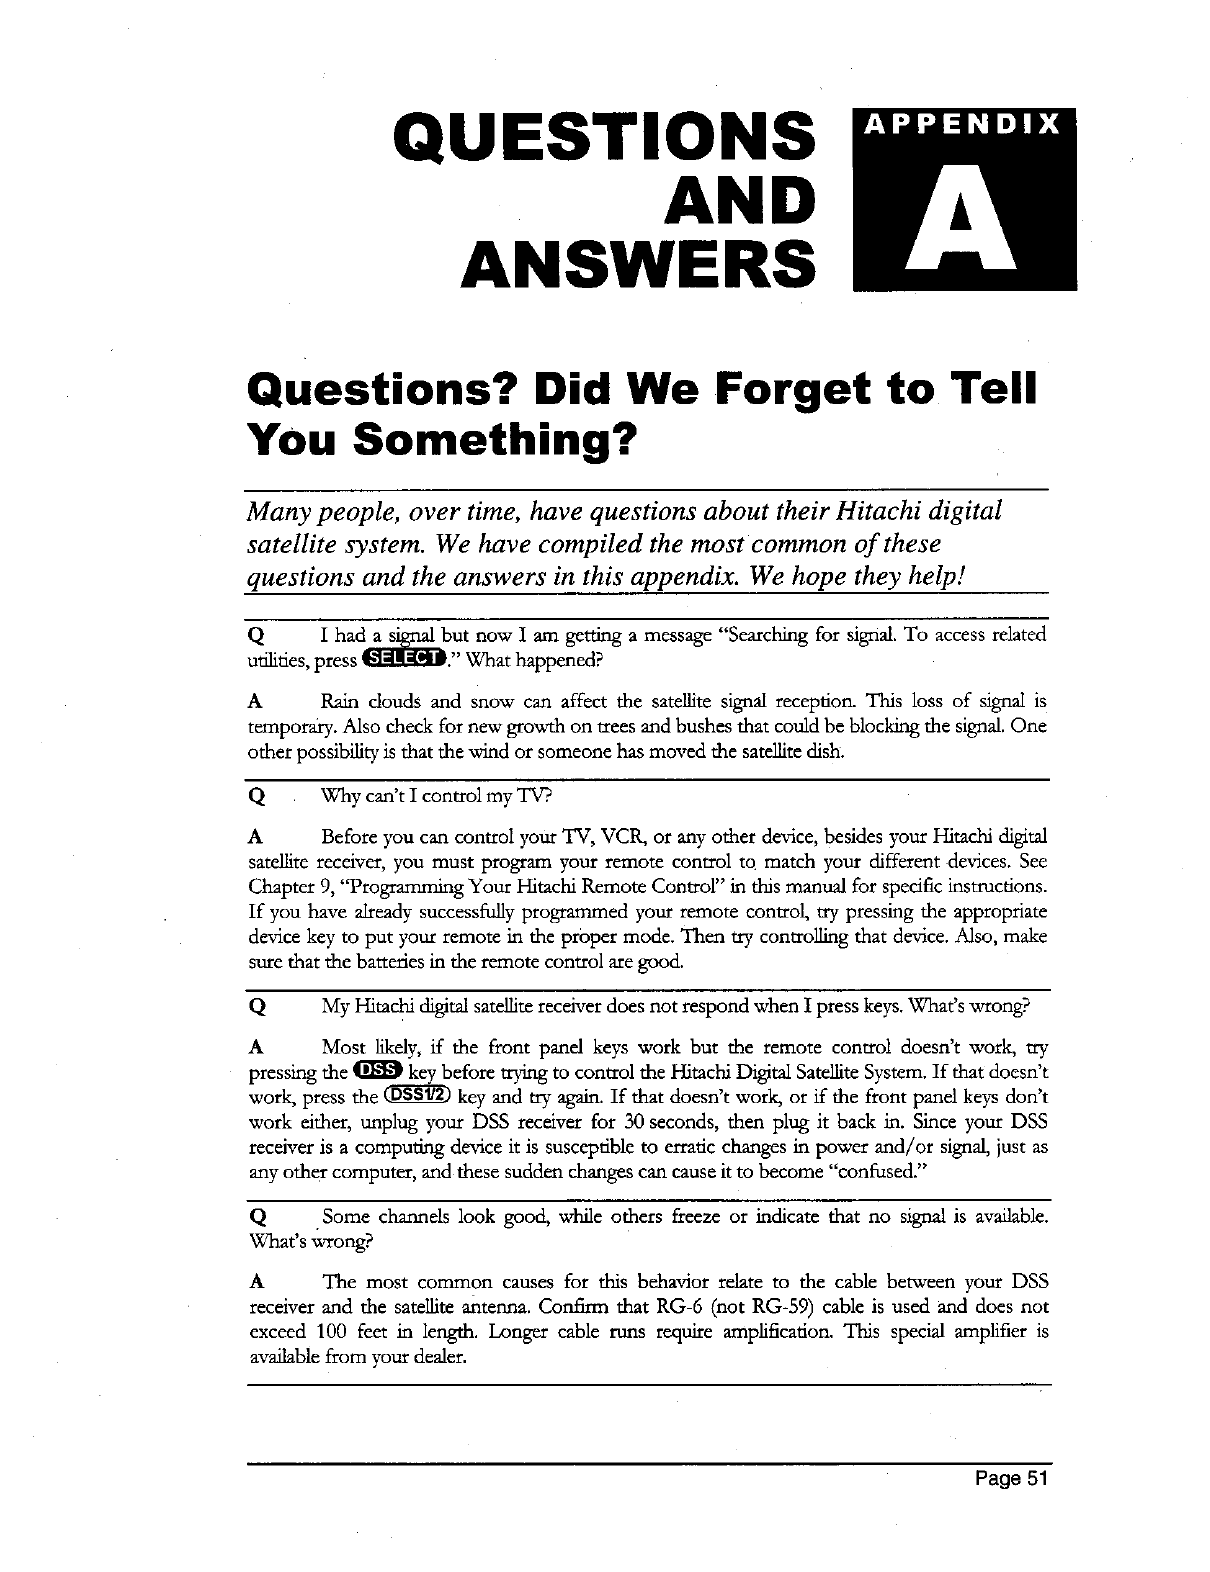
QUESTIONS
AND
ANSWERS
Questions? Did We Forget to Tell
You Something?
Many people, over time, have questions about their Hitachi digital
satellite system. We have compiled the most common of these
questions and the answers in this appendix. We hope they help. t
Q I had as_,u,t now Iam getung a message "Seaxching for signal. To access related
utilities, press q_I._UP. What happened?
A Rain clouds and snow can affect the satellite signal reception. This loss of signal is
temporary. Also check for new gro_h on trees and bushes that could be blocking the signal. One
other possibility is that the wind or someone has moved the satellite dish.
Q Why can't I control my TV?.
A Before you can control your TV, VCR, or any other device, besides your Hitachi digital
satellite receiver, you must program your remote control to match your different devices. See
Chapter 9, "Programming Your Hitachi Remote Control" in this manual for specific instructions.
If you have already successfully programmed your remote control, try pressing the appropriate
device key to put your remote in the proper mode. Then try controlling that device. Also, make
sure that the batteries in the remote control axe good.
QMy Hitachi digital satellite receiver does not respond when I press keys. What's wrong?
A Most likely, if the front panel keys work but the remote control doesn't work, try
pressing the _ key before trying to control the Hitachi Digital Satellite System. If that doesn't
work, press the _ key and try again. If that doesn't work, or if the front panel keys don't
work either, unplug your DSS receiver for 30 seconds, then plug it back in. Since your DSS
receiver is a computing device it is susceptible to erratic changes in power and/or signal, just as
any other computer, and these sudden changes can cause it to become "confused."
Q Some channels look good, while others freeze or indicate that no signal is available.
What's "¢¢roug?
A The most common causes for this behavior relate to the cable between your DSS
receiver and the satellite antenna. Confirm that RG-6 (not RG-59) cable is used and does not
exceed 100 feet in length. Longer cable runs requJxe ampfification. This special ampfifier is
available from your dealer.
Page 51
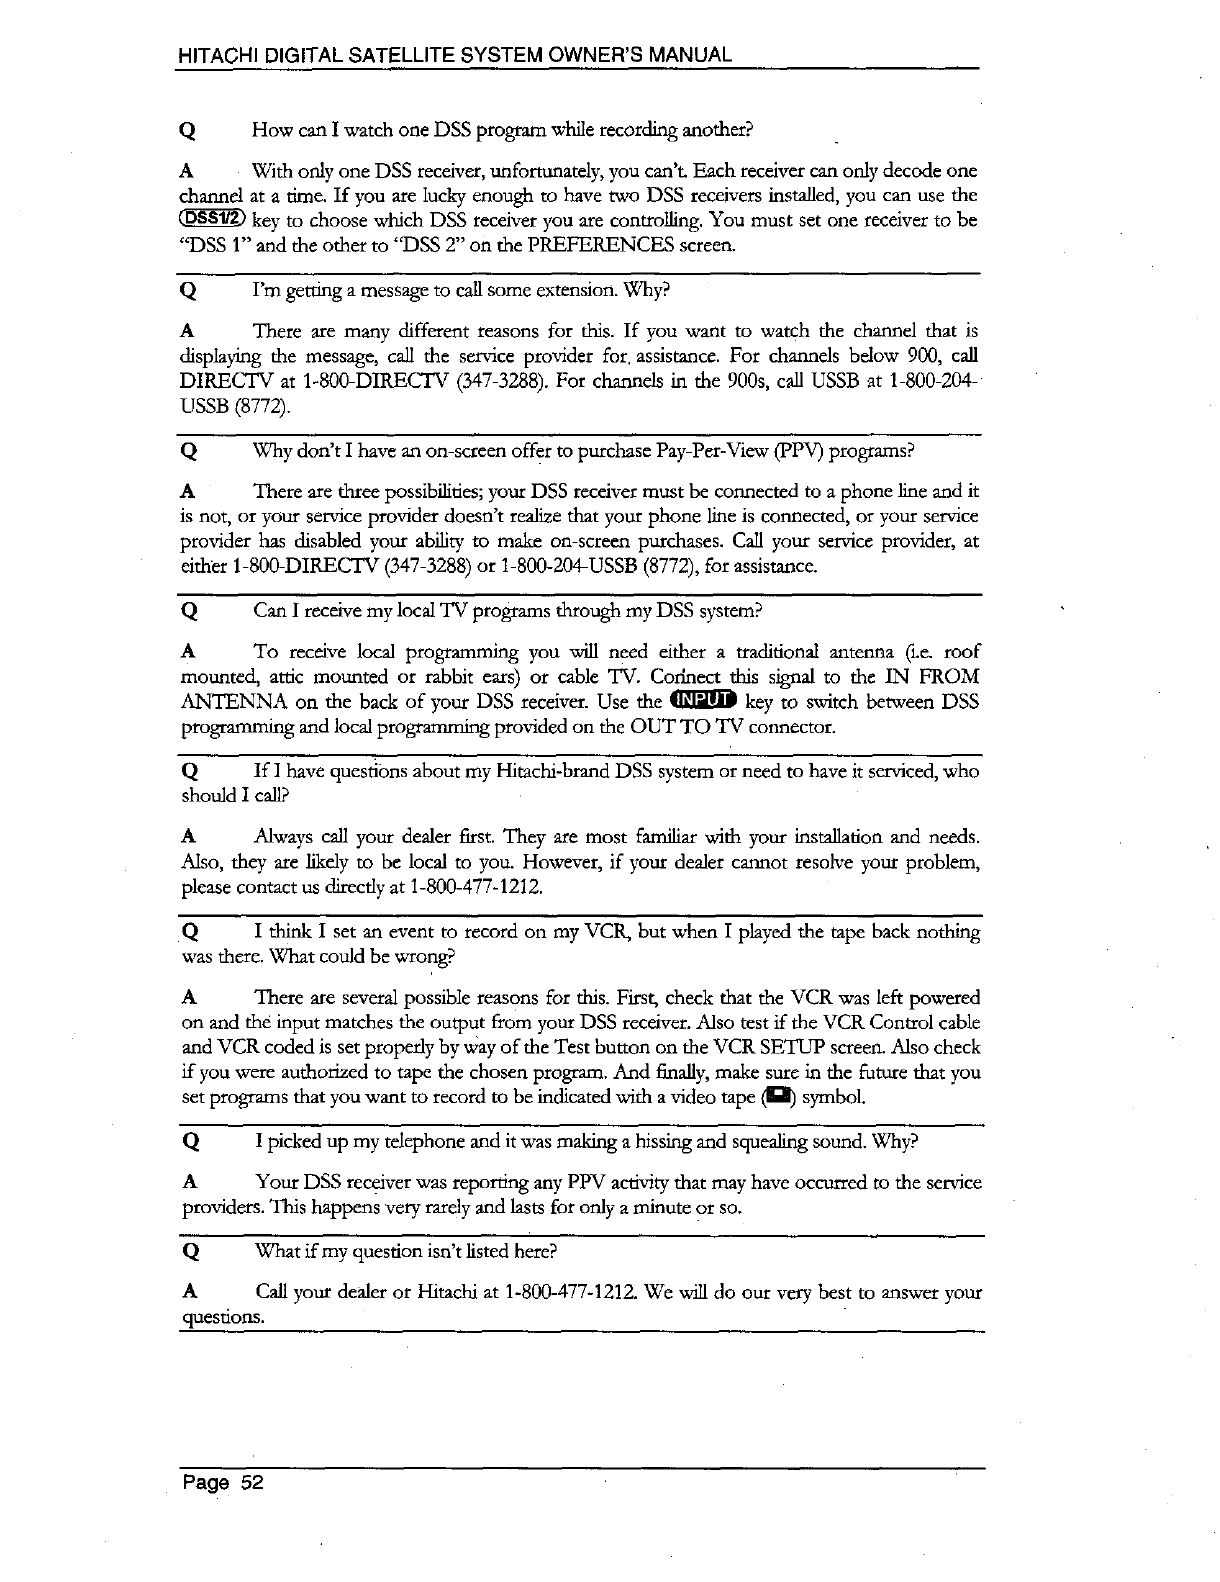
HITACHIDIGITALSATELLITESYSTEMOWNER'SMANUAL
Q How can I watch one DSS program while recording another?
A With only one DSS receiver, unfortunately, you can't. Each receiver can only decode one
channel at a time. If you are lucky enough to have two DSS receivers installed, you can use the
key to choose which DSS receiver you are controlling. You must set one receiver to be
"DSS 1" and the other to "DSS 2" on the PREFERENCES screen,
Q rm getting amessage to call some extension. Why?
A There are many different reasons for this. If you want to watch the channel that is
displaying the message, call the service provider for. assistance. For channds bdow 900, call
DIRECTV at 1-800-DIRECTV (347-3288). For channels in the 900s, call USSB at 1-800-204-
USSB (8772).
Q Why don't I have an on-screen offer m purchase Pay-PerAqew (PPV) programs?
A There are three possiKt!ities; your DSS receiver must be connected to aphone line and k
is not, or your service provider doesn't realize that your phone line is connected, or your service
provider has disabled your ability to make on-screen purchases. Call your service provider, at
dtlqer 1-800-DIRECTV (347-3288) or 1-800-204-USSB (8772), for assistance.
Q Can I receive my local TV programs through my DSS system?
A To receive local programming you will need either a traditional antenna (i.e. roof
mounted, attic mounted or rabbit ears) or cable TV. Codnect this signal to the IN FROM
ANTENNA on the back of your DSS receiver. Use the _ key to switch between DSS
prograrma'm_ and local programming provided on the OUT TO TV connector.
Q If I have questions about my Hitachi-brand DSS system or need to have it serviced, who
should I call?
AAlways cal! your dealer first. They are most familiar with your installation and needs.
Also, they are likely to be local to you. However, if ),our dealer cannot resolve your problem,
please contact us directly at 1-800-477-1212.
QI think I set an event to record on my VCR_ but when I played the tape back nothing
was there. What could be wrong?
A There are several possible masons for this. First, check that the VCR was left powered
on and the input matches the output from your DSS receiver. Also test if the VCR Control cable
and VCR coded is set properly by way of the Test button on the VCR SETUP screen. Also check
if you were authorized to tape the chosen program. And finally, make sure in the future that you
set programs that you want to record to be indicated with a video tape _) symbol.
QIpicked up my telephone and it was making a hissing and squealing sound. Why?
A Your DSS receiver was reporung any PPV activity that may have occurred to the service
providers. This happens very rardy and lasts for only aminute 9r so.
Q What if my question isn't listed here?
ACall your dealer or Hitachi at 1-800-477-1212. We will do our very best to answer your
questions.
Page 52

INDEX
A
Access card ............ :.............................................. 4, 41
ALIGNMENT RESULT screen ............................... 16
AlphaTune ..................................................... :.......... 22
Alt. Au_o ................................................................. 24
Alternate Services ..................................................... 24
Alt. Audio .............................................................. 24
Data .................................................................... ;.24
ASSISTANCE screen ............................................... 41
Azimuth .................................................................... 16
B
Browse Banner ......................................................... 23
Buy $ ........................................................................ 28
Buy Options .............................................................. 28
Don't Purchase ...................................................... 28
Tape/View ............................................................ 28
View Only ............................................................ 28
C
Cancel Purchase ....................................................... 28
Categories ................................................................. 25
Channel Banner ........................................................ 21
Channel lists .................................... See Favorite Lists
Classes ...................................................................... 26
D
Data ..........................................................................24
DEFAULT AUDIO screen ....................................... 40
DIRECTV .................................. See Service providers
DISH POINTING MENU .................................. 15, 40
E
Elevation ................................................................... 16
EVENT TIMER screen ............................................ 32
Exit To Viewing ....................................................... 32
F
Favorite Lists
Family List ............................................................ 35
parental control ..................................................... 45
FAVORITE LISTS screen ....... :............................... 35
G
Guides ....................................................................... 26
H
Hookup
overview ................................................................. 8
phone jack ............ ................................................... 9
rear jacks ................................................................. 4
RF ......................................................................... 10
satellite .................................................................. 16
stereo system ............................... :........................ 11
S-video ....................................... :............................ 9
VCR Control ......................................................... 12
video ..................................................................... 10
I
Icons ......................................................................... 21
Information
from the guide ....................................................... 26
from the Information screen ................................. 27
from video ............................................................ 22
Information Banner .................................................. 22
INFORMATION screen ........................................... 27
Buy $ ..................................................................... 28
Buy Options .......................................................... 28
Cancel Purchase ................................................... 28
Cancel Schedule ................................................... 28
Done ..................................................................... 27
Schedule ................................................................ 27
Times .................................................................... 29
View ...................................................................... 27
L
LATITUDE & LONGITUDE screen ....................... 16
Limits and Lists ........................................................ 34
Lists .......................................................................... 26
LOCK OVERRIDE screen ....................................... 38
LOCK SYSTEM screen ........................................... 37
Logo Banner ............................................................. 23
M
MAIN MENU ........................................................... 31
Event Timer .......................................................... 32
Exit To Viewing .................................................... 32
Fav. Lists .............................................................. 35
History .................................................................. 36
Lock ...................................................................... 37
Messages .............................................................. 33
Program Guide ..................................................... 31
Ratings Limit ........................................................ 34
Setup Menu ........................................................... 37
Spending limit ..................................................... ..34
Unlock .................................................................. 37
Upcoming ............................................................. 36
MESSAGES screen .................................................. 33
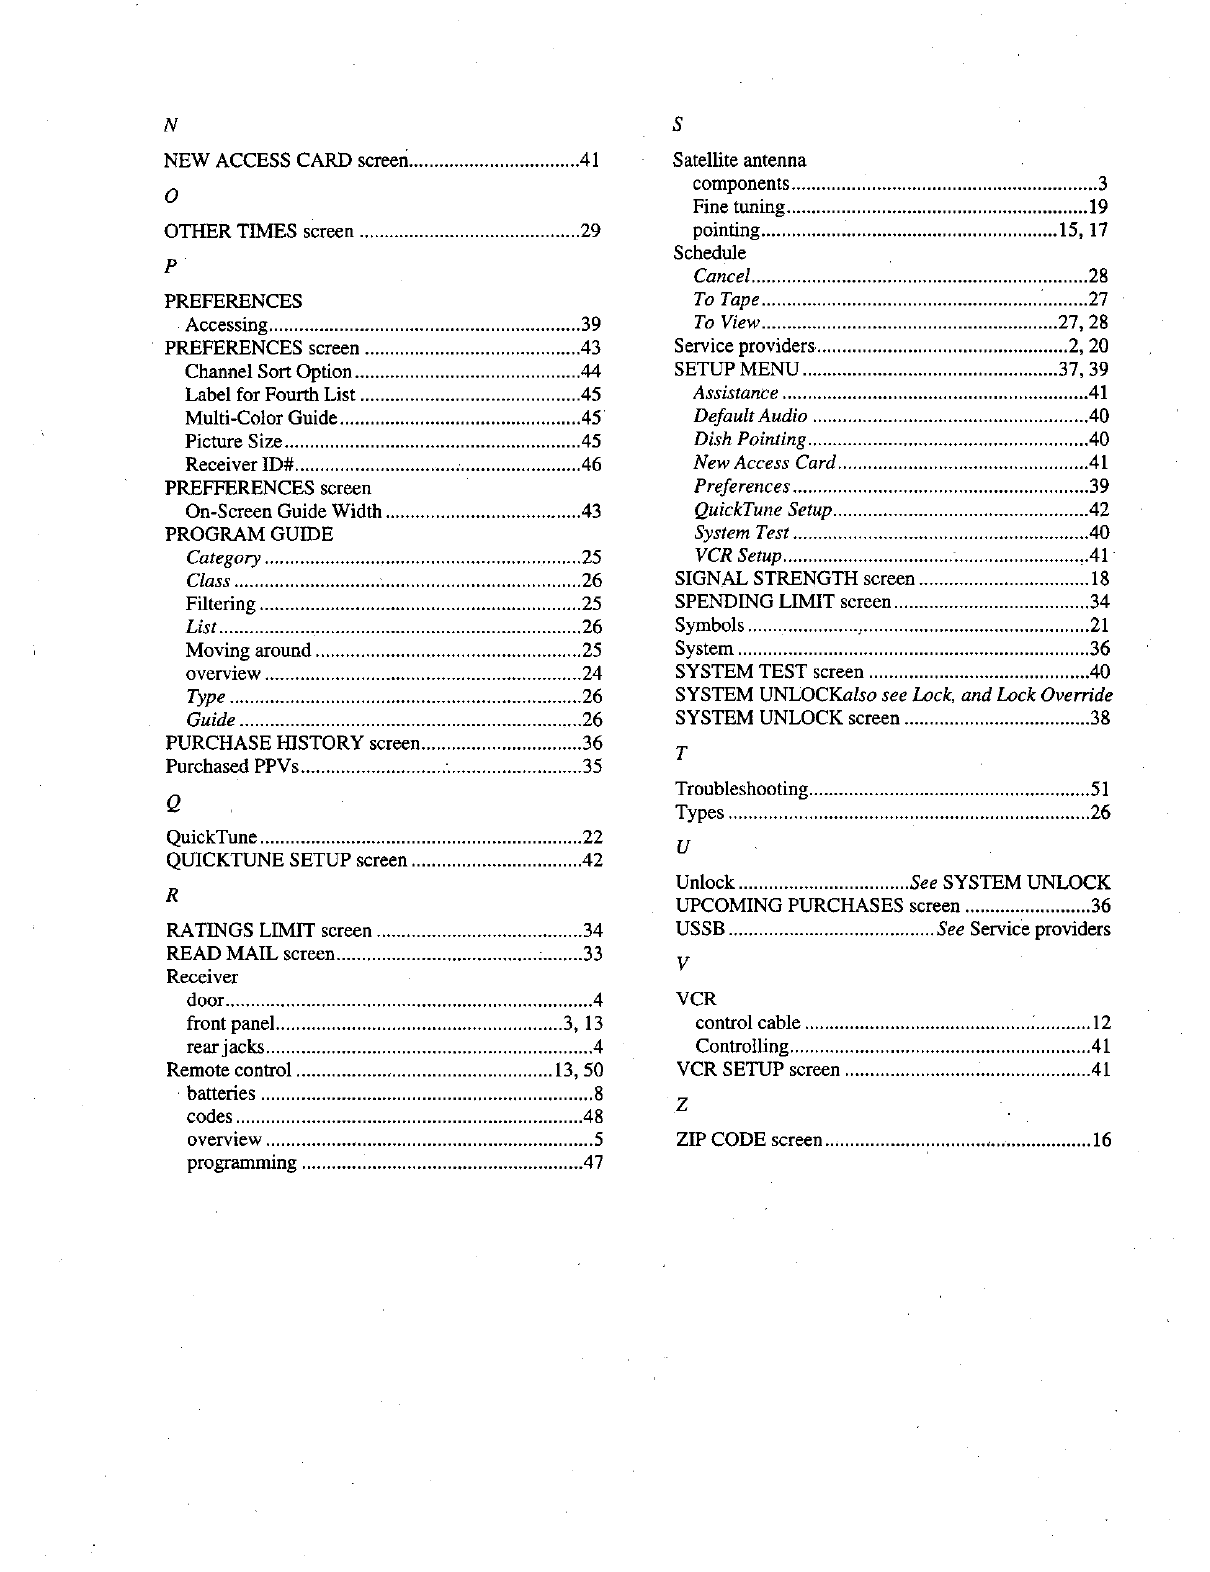
N
NEW ACCESS CARD screen .................................. 41
O
OTHER TIMES screen ............................................ 29
P
PREFERENCES
Accessing .............................................................. 39
PREFERENCES screen ........................................... 43
Channel Sort Option ............................................. 44
Label for Fourth List ............................................ 45
Multi-Color Guide ................................................ 45
Picture Size ........................................................... 45
Receiver ID# ................................ :........................ 46
PREFFERENCES screen
On-Screen Guide Width ....................................... 43
PROGRAM GUIDE
Category ............................................................... 25
Class ............................. _....................................... 26
Filtering ................................................................ 25
List ........................................................................ 26
Moving around ..................................................... 25
overview ............................................................... 24
Type ...................................................................... 26
Guide .................................................................... 26
PURCHASE HISTORY screen ................................ 36
Purchased PPVs ............................. . .......................... 35
a
QuickTune ................................................................ 22
QUICKTUNE SETUP screen .................................. 42
R
RATINGS LIMIT screen ......................................... 34
READ MAIL screen ........................................ :........ 33
Receiver
door ......................................................................... 4
front panel ......................................................... 3, 13
rear jacks ................................................................. 4
Remote control ................................................... 13, 50
batteries .................................................................. 8
codes ..................................................................... 48
overview ................................................................. 5
programming ........................................................ 47
s
Satellite antenna
components ............................................................. 3
Fine tuning ............................................................ 19
pointing ........................................................... 15, 17
Schedule
Cancel ................................................................... 28
To Tape ........................................................ ......... 27
To View ........................................................... 27, 28
Service providers. ................................................. 2, 20
SETUP MENU ................................................... 37, 39
Assistance ............................................................. 41
Default Audio ....................................................... 40
Dish Pointing ........................................................ 40
New Access Card .................................................. 41
Preferences ........................................................... 39
QuickTune Setup ................................................... 42
System Test ........................................................... 40
VCR Setup .................................. ;........................ ,.41
SIGNAL STRENGTH screen .................................. 18
SPENDING LIMIT screen ....................................... 34
Symbols ...................... ,............................................. 21
System ...................................................................... 36
SYSTEM TEST screen ............................................ 40
SYSTEM UNLOCKalso see Lock, and Lock Override
SYSTEM UNLOCK screen ..................................... 38
T
Troubleshooting ........................................................ 51
Types ........................................................................ 26
U
Unlock .................................. See SYSTEM UNLOCK
UPCOMING PURCHASES screen ......................... 36
USSB ......................................... See Service providers
V
VCR
control cable ............................................. 2........... 12
Controlling ............................................................ 41
VCR SETUP screen .......................... ....................... 41
Z
ZIP CODE screen ..................................................... 16

Notes
Revision A
Part # 1022510-0001
This documentwas printedinthe U.S.A. on
recycledpaper.
