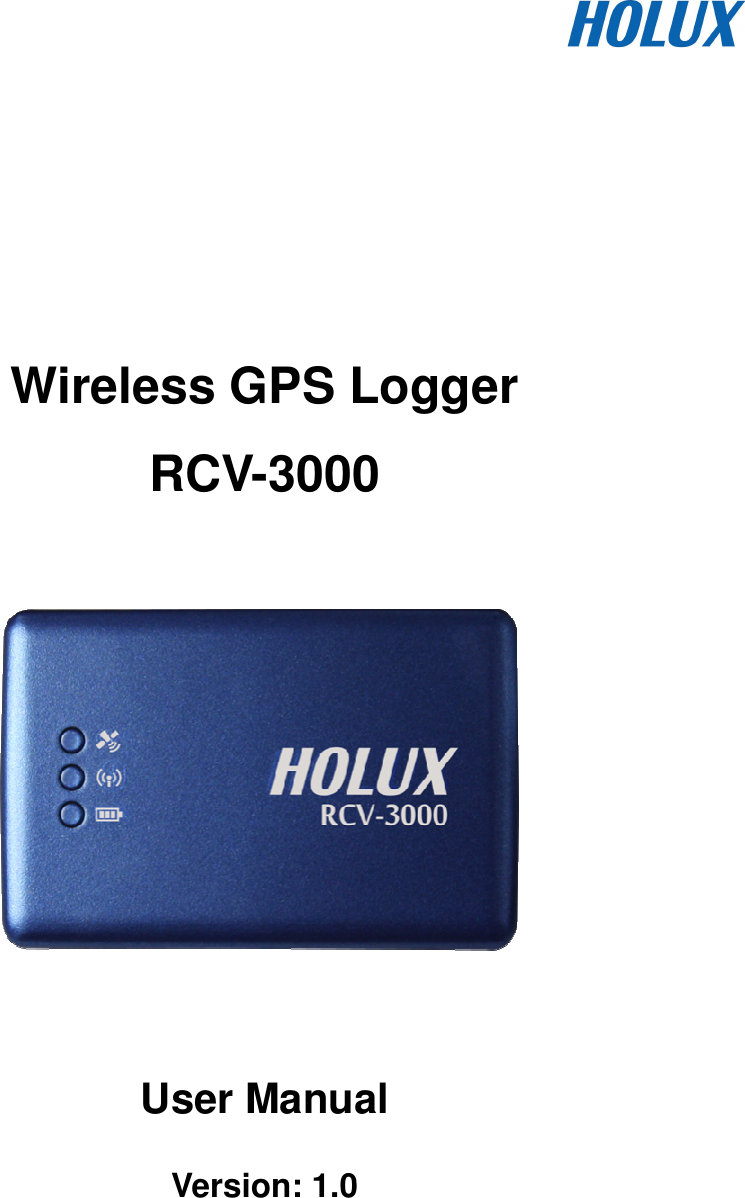
HOLUX Technology RCV3000 Wireless GPS Logger RCV-3000 User Manual RCV 3000 UM EN 130517
HOLUX Technology, Inc Wireless GPS Logger RCV-3000 RCV 3000 UM EN 130517
UserManual.wiki
>
HOLUX Technology
>
RCV3000 User Manual
User manual
Navigation menu
Upload a User Manual
Namespaces
Wiki Guide
HTML
PDF
Info
Views
User Manual
Discussion / Help
Navigation


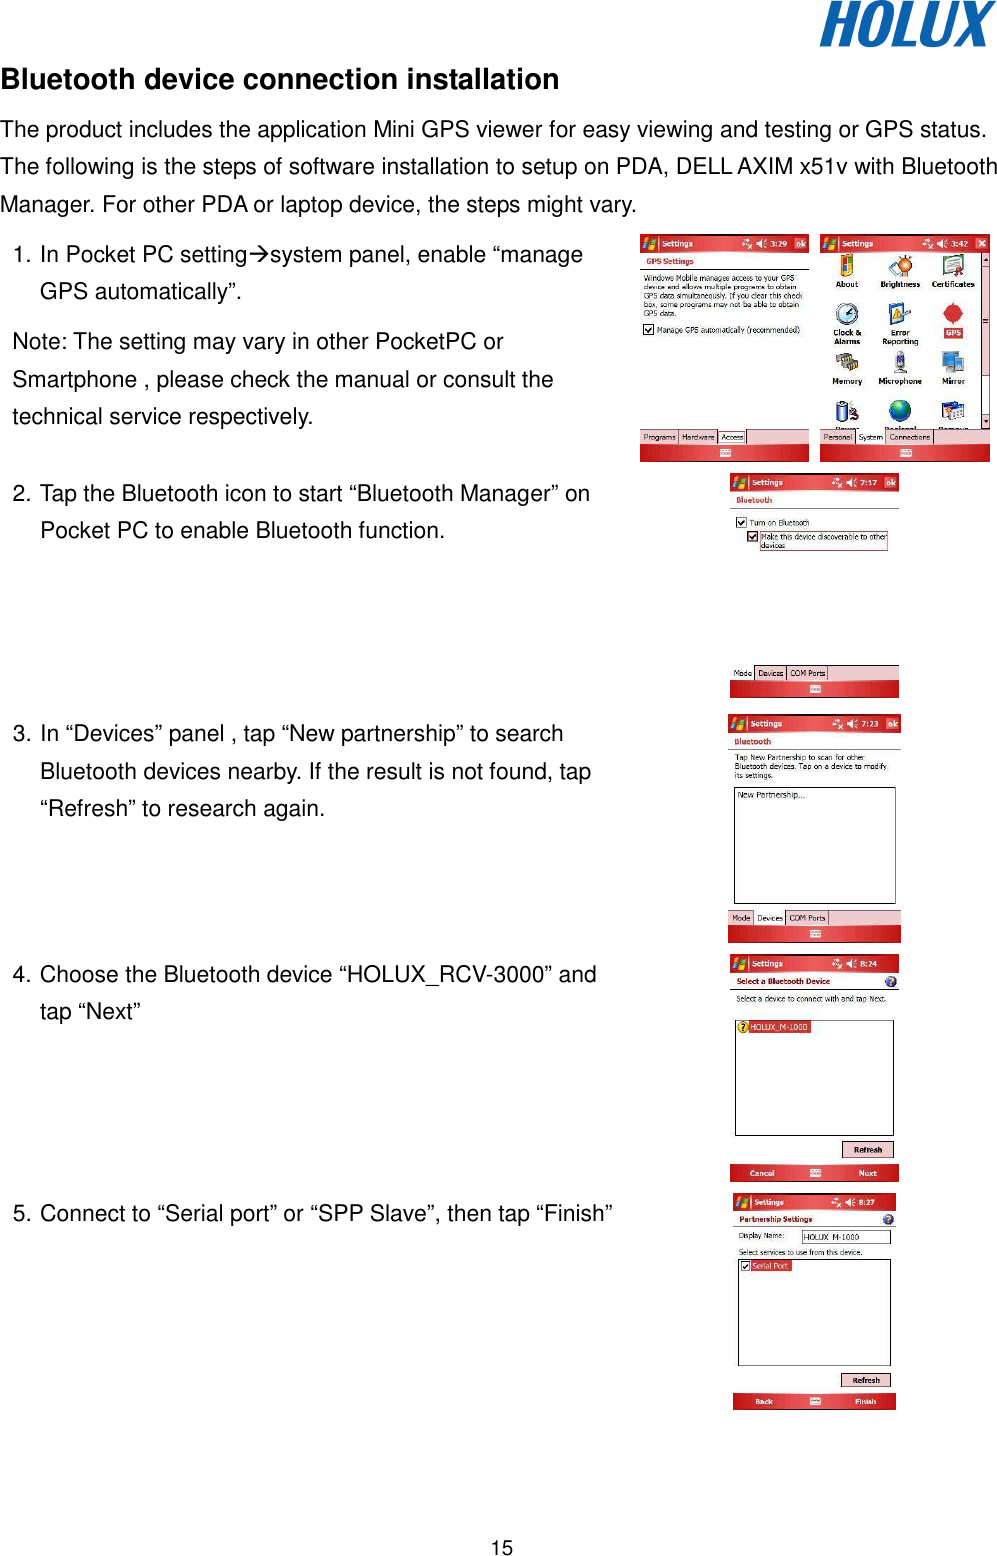
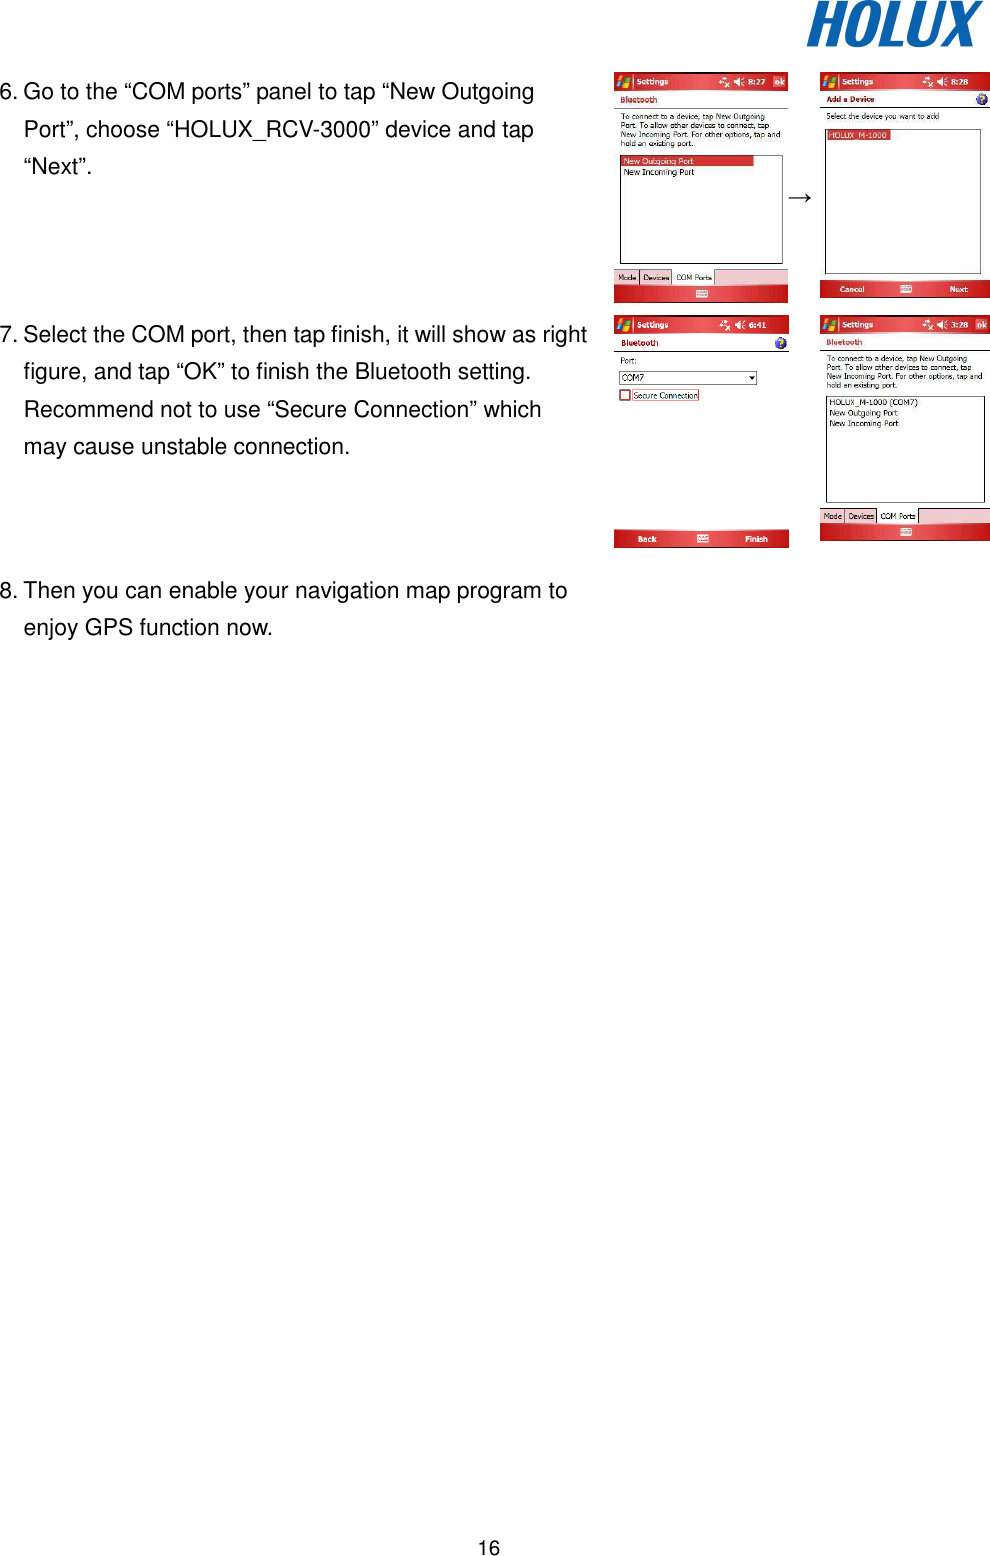
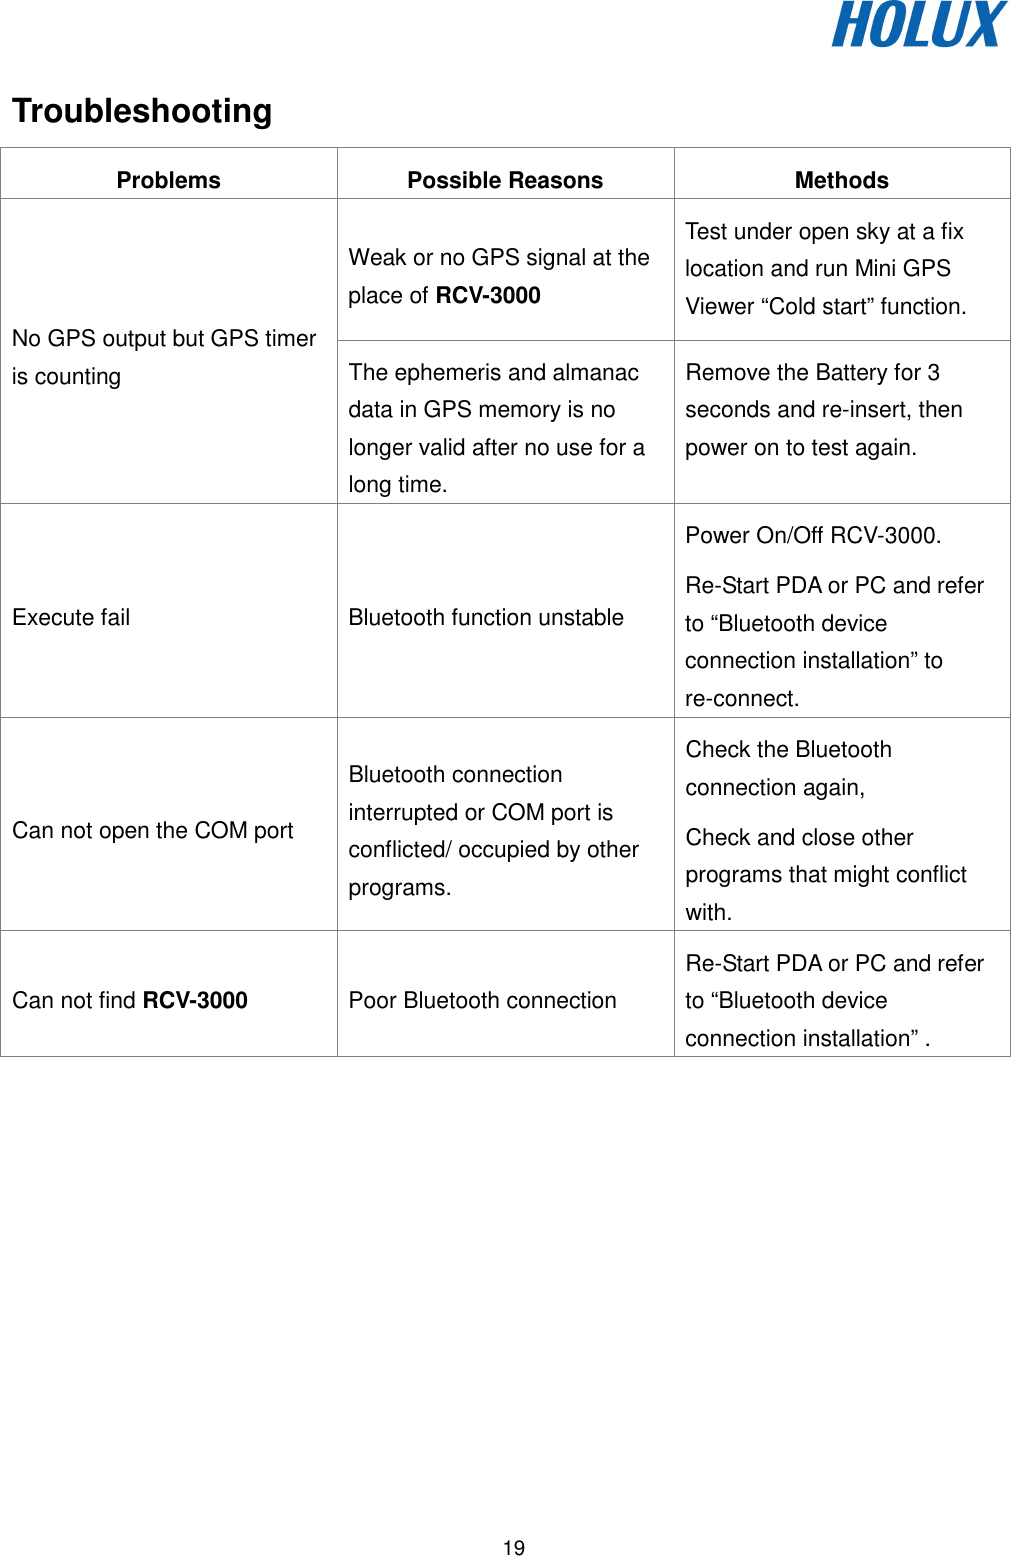
![13 RCV-3000 Logger Track Logging and Mode Setting Data Logging When the power is turned on, the device will automatically search for satellite positioning (orange LED on), and then logging will begin. When the power is switched off, the logging will stop. When the power is turned on again, it will once again conduct satellite positioning and start logging. GPS Data Logging Mode Setting 1. Install ezTour onto a PC or notebook (see ezTour instructions manual for installation) 2. When the application runs, the following main screen can be seen: 3. From the Menu bar select [Setup GPS Logger] to bring up the settings window](https://usermanual.wiki/HOLUX-Technology/RCV3000/User-Guide-1970734-Page-14.png)
![14 4. Make sure that the RCV-3000 is connected to a PC or notebook, and select [reconnect] or [manual settings] 5. The logger can be set to record by a set time or set distance. The conditions for recording can be set the following ways: (1) Select car, bicycle, exercising, or walking mode. (2) Manually set the time or distance. 6. When the logger’s data storage is full, there are two modes to choose from: (1) Rewrite: When the data is full, data will begin to be rewritten, overwriting the data from the beginning. (2) Terminate: When the data is full, the logger will cease to record any further data. 7. Press [Confirm] to start logging according to the new setting. Data Read When the logger RCV-3000 is connected to a PC or notebook through USB or Bluetooth, the data can be extracted through ezTour. Please see ezTour instruction manual for details.](https://usermanual.wiki/HOLUX-Technology/RCV3000/User-Guide-1970734-Page-15.png)