HOTPOINT Microwave/Hood Combo Manual L0607422
User Manual: HOTPOINT HOTPOINT Microwave/Hood Combo Manual HOTPOINT Microwave/Hood Combo Owner's Manual, HOTPOINT Microwave/Hood Combo installation guides
Open the PDF directly: View PDF ![]() .
.
Page Count: 40
RVM1435
RVM1635
Counter Saver P/us Microwave Oven
Owner's Manual
Important Safety Information
P_eca_da#_;t_ AvoZ Poa:;#BeFxpas_e
_aExcessive M_c_awaveF_e_#y
/_ecJa_ Na_eaAba#_MicrawavmI
2
5
m
[] Helpful Information
Mm_awave Temps' m
If Something Goes Wrong
Berate Ya__?AIFor Se_'v_e _5
Batl_a[#t Set'v_ce_m_beys 37
Back Cave€
Writethemodel andserialnumbershere:
Model#
Serial#
Find dmse numt)ers on a label inside the o\_.'_:,.
For aSpanish version of this manual,
visit our Website at Hotpoint com.
Para consultar una versi6n en espafiol
de este manual de instrucciones, visie
nuestro sitio de intemet Botpoint.com.
HOTPOINT
Ho_om_com BE68-02954A
39-40472
01-06 JR
READ ALL SAA_2TY
INFORMATION BEFORE USING
,_ WARNING!
Foryoursafety,theinformationin this manualmustbe followed tominimize therisk of fire or
explosion, electric shock,or toprevent property damage,personal injury orloss of life.
For your safiqy, die intbrma|iolt ill this manual
lnus/be tollowed to mininlize /he risk of fire
or explosion or/o prevem property damage,
Pt_CAUIYONS persollal_l_>.orlosso,li*_
Do Not Attempt Do Not Operate1tie oven
/o operate /his oven ifil is damaged. 1/is
with lhe door open particularly importan/
_ince opell-door that tile OVell door
operauon call resul/ close properly and
TO EXCESSIVE i,l_l_,rmr_,lexposuretlla,,llereisllO
lo illicrowave ellergw, dalllage to tile:
MICROWA_ It is impor,anl no, to 'door (ben,).
deti_a_ or tmnper with 2hiJlges and lmches
ENERGY ,hesali_'y interlocks. ,broken or loosened _.
Do Not Place rely objec_ 3door seals and sealing
between lhe oven [i'Oll/ surthces
tace and tile door or The OvenShouldNot
allow soil or eleaneI be adjusted or repaired
residue to accumulaw by allVOlle excepl
on sealing sur[aces properly qualified
servlce persolllle].
I!l
This microwave oven is
IlL listed for installation
over electric and gas
ranges.
This microwave oven is
not approved or tested
for marine use,
• Read and tollow the
specific "Precamions to
A\oid Possible Exl_osure
1o [_2x(essive Mi(-rowa_.e
Energy" on 1)_,ge 2.
• This applian(e must be
gr(mnded. C(mnect only
to protmrly gr(mnded
outlet. See (_r(mn(ling
Instru_ tions section on
page 9.
• I)o not re(rant this
_q)l)liam e over _, sink.
• Install or loc_,te this
_,l)l)lian(e only in
_,ccor(tan(e with the
provided Installation
[llStrll( |ions.
• This o_e_=the-range oven
was designed/i)r use over
ranges no wider than 36."
It may be installed over
both gas _md ele(tri_
cooking equipment.
• I)o not operate this
appliance if it has a
damaged power cord or
plug, i/it is not working
properly or i/it has been
damaged or drol_pe(t.
If the power (ord is
damaged, it must be
replaced t)v General
Electric Service or an
m_thorized service agent
using a power cord/i'om
(;enerM Ele( u:ic.
• I)o not cover or block
any openings on the
al_l_liance.
•Use this at_pliance only
/or its intended use _,s
des(ribed in this mmmM.
[)O not HSC corrosi_,e
(hemicMs or v_lt)ors in
this _,l)pli_m(e. This
micro_a_e oven is
sl)e(ifi_ all _' designed to
heat, (Ir_' or cook/i)()(t,
and is not intended
/k)r laboratory or
industrial use.
READ ALL SAPETY
INFORMATION BEFORE USING
®Do not store this appliance
Otltdoors.
®Do not use this prod/let
near water I_)r exktl//ple,
ill a wet I)ktSeilleilt,
near a swilnming pool,
near a sink or ill sinlilar
locations.
o Keep power cord awm
flx)nl heated surli_ces.
®Do not iinmerse i)ower
co_xl or pl/lg in wate_:
*'Ib re&me tile risk of fire
ill the o\en c;t\il\,:
-- Do not overtook I_)od.
Cmx'filllv attend apt)lim_(e
Mien paper; plasti( or
otll_ r ( onll)ustible
materials ar_ placed
inside tile o_n while
cooking.
-- I_eIno_e wire twist-ti(s
and metal halldles
lix)in paper or plastic
coi/t_tii/eFs belore placing
them in th( o\_n.
-- Do not use the o_en
tor storag_ pro'poses.
Do not lea\ _ paper
products, cooking
ulensils or lood ill the
OVell Wllell llOt ill Hse.
-- If inat_ rials inside o_en
ignite, keep th_ (/\en
door closed, turn tile
o've) l oil and disconnect
tile t)ower cord, or sh/H
off power at tile Ihs( or
circuit breaker panel.
If tile door is opened,
tile fire may spread.
-- Do not use tile
S('I/sor Fe;Hilres Iwi(e ill
sm(ession on tll_ skulle
lood portion. If t;.)od is
under cooked after tile
first countdown, use
7_meCook/ill" additional
cooking time.
®See door s/lrli_ce cleaning
instluctions ill the Crux'
and Cleaning section (s)
of this nlan/lal.
®This api)liance must only
be s_ r\ic_ d by q/lalified
ser\ice t)ersonnel. Contact
nearest authorized s_ r_ice
litcilil}/i)r _xamination,
,>pair or a/!j/lstment.
®.ks with ally appliance,
close s/q)ervision is
neeessar\, when used
1)\. chil(lrelL
® Do not store anything
(tir(ctly on top of th(
l/licrow_lve O\ell S/lr]ilc(
whei/tile l/licrowave ovell
is in operation.
SAVE THESE INS TR UCTIONS
I!1
SPECIAL NOTF;S ABOUT MICRO WAVING
Arcing is tile nlicrowm (
term lot sparks ill tile
o_en. Arcing is cruised by:
o The metal shelf (if
included) not installed
eorr(ctlv so it tlmches tile
micro_ave wall.
• The ten/perature l)robe
(if iilcluded) in tile
microwave hilt Hot
inserted ill tile tood.
• M(tal or foil louching
file side of file oxen.
• Foil not mol(l(d to lood
(/Ipt/u:ned edges act like
HI/tCIlI/HS),
,, Metal, su(h as tMst-ties,
poultr} pins or gold-
rinnned dishes, in tile
nlicrowaw.
• Recycled i)al)er towels
containing small metal
pieces being used in
tile i/licl'ow_we.
• l)o not t)Ol ) popcorn ill
Your microwave oven
mlless ill a special
llliCl?OWaV(' t)ot)eOl?l/
accessory Ol: Ill/less VO/l
use l)Opcorll labeled tot
use ill microwave ovens.
• Sol//e t)l?odHcts sHch as
whole eggs and sealed
containers tor examl)le,
dosed jal:s--are able to
explode and should not
be heated ill this
nlicrowa_e o_en Such use
of the nlicrowa_ e oven
could result ill il_jury.
• Do not t)oil eggs ill a
nlicrowave oven. Pressure
will build up inside egg
yolk and will cause it to
burst, possibly resulting
ill iqj _l_yr.
• ()t)erating the microwave
with no tood inside/or
more than a millute or
tWO lll_ly C_HISC d_tl//_lge
to the oven and could
stal't a {ilTe. It ill(lTeases
tile heat arOulld the
n/agneu:lm and Call
shorten file lilt of
tile OVell
• Foods with mlbroken
Ollter "skill" S/l(h _tS
potatoes, hot dogs,
sausages, tOlllatoes,
apples, chicken li_ers
and other giblets, and
egg yolks should be
t)ielxed to allow steam
to escape dm:ing
looking.
SPECIAL N07 2S ABOUF MICRO WAVING
SAFETYFACT
SUPERHEATED WATER
Liquids, such as water,
coffee or tea, are able to
be overheated beyond
the boiling pohlt without
appearing to be boiling.
Visible bubbling or boiling
when the container is
removed from the microwave
oven is not always present.
THIS COULD RESULT
IN VERYHOT LIQUIDS
SUDDENLY BOILING OVER
WHEN THE CONTAINER IS
DISTURBED OR ASPOON
OR OTHER UTENSIL IS
INSERTED INTO THE LIQUID.
To reduce the risk ot i_jm T
to l)( rsons:
-- Do no1 overhem the
liq/lid.
-- Stir tll( liq//id 1)oth
l)elbr( and hall\ray
tllr(mgh heating it.
--Do not us( straight-sid(d
co11[_lii/(Fs with narrow
necks.
-- After heating, allow
the colltainer to stan(t
in the microwa_( ov(n
tot a short time betk)re
removing the containe_:
-- Use extF(l//e tare when
inserting a spoon or
otll(r utensil into the
conmin(r.
®Axoid heating bab} Iood
in glass jars, ev(n with tile
lid off. Make s/ire all
inlmlt toDd is thoroughly
cooked. Stir toDd to
(tist_Jt)/lte tile heat exenl\..
Be careflll to pr('_ent
scalding _,_llen W_lFl/liI/g
Iorinula or 1)feast milk.
"l['ll( comainer nlm li_'el
cool(r than tlle nlilk really
is. Always test tlle nlilk
belore IL'e(ling the bal)y.
*Don't deli:ost li:ozen
t)ev( rages ii/narrow-
necked bottles (especially
carbonated beverages).
E_en if the container is
opei/ed, t)r(ssHre can
buiht lip. This can cause
the c()ntain(r to burst,
possibly resulting in
i@_w.
*l{ot Ioods and steam
can cause 1)urns. Be
careful when opening
any containers of hot
Iood, including popcorn
bags, cooking pouches
and boxes. "Ib prevent
possible i,ljur}., direct
steam aw_l\, tl'()I/l hands
and tiice.
o Do not overcook
l)otatoes. They could
dehvdrate and catch
tire, ca/lsing damage
to your ()Veil.
o Cook n/eat and l)ouhry
thoroughly--n/eat to
at least an [NTERNAI,
tenlp(ratur( of 1(_0'F
and i)oultry to at least an
[NTERNAI temperatur(
of 180'E Cooking to
these temperatures
US/lally protects against
tbodborn( ilhless.
I!1
Make sure all cookware
/Ise(l ill VO/IF I/lit t'(lW_lVe
()veil is s/fitable lot
inicrowa_ing. Most glass
casseroles, cooking dishes,
measuring cups, custard
cups, potter} or china
dillnerware which does no[
have metallic trim or glaze
with a metallic sheen can
be/lsed. Nellie _ookware
is labeled "suitable for
nficrowming."
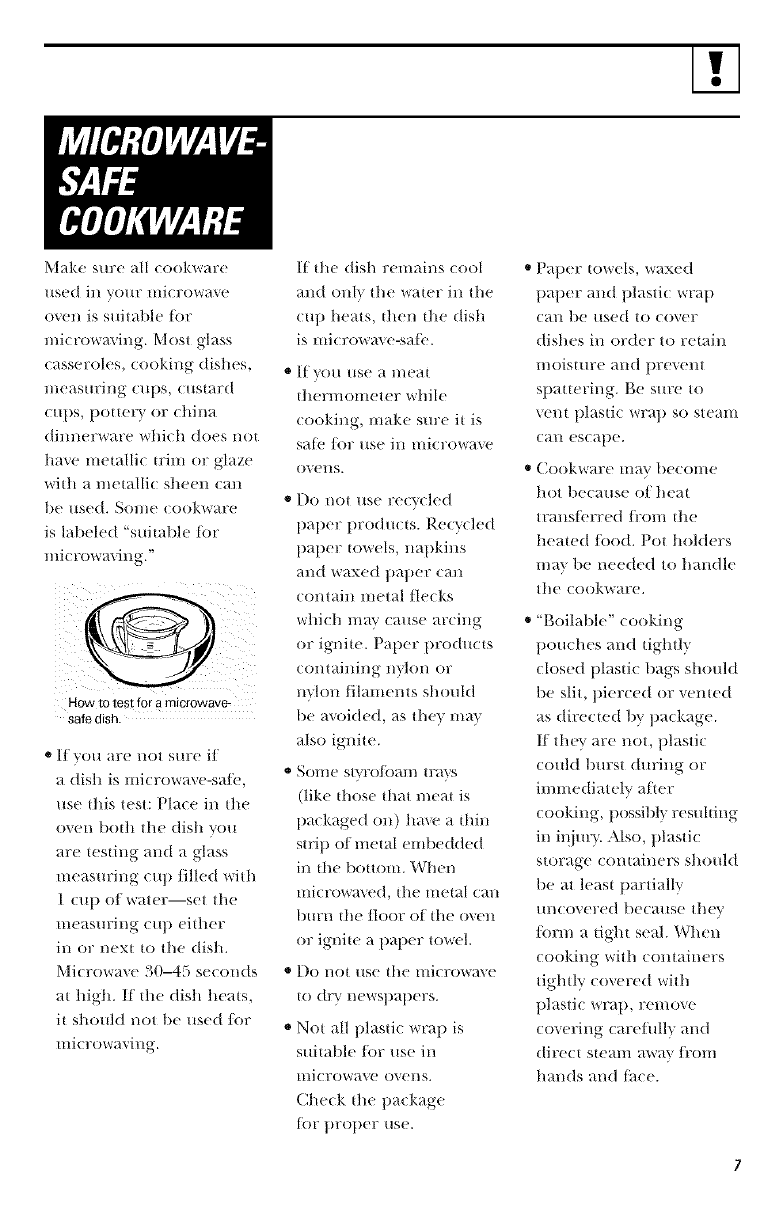
How tO test for amicrowave
safe dish
O HVOH ;_l'e lie| StlFe 11
., dish is lUiCri)waxe-sutb.
IIN( Ihis IeSl; Pl_I('I _ il Illl
o\en |/(/_h lhe dlsh \.ol
are testlilg and a _-lass
iueaeurillg cup lilled with
1(ttlli)fwaler sellhe
i/leUStlril/g Cttll eit]lel"
iu in" new to |he dish.
Microwave 30-45 seconds
at high. If the dish heals.
il sJ/otlld IlIH lie tteeet ]_of
ulicri_waviug.
If the dish reinains cool
and only the water in the
(up heats, 01en the dish
is microwa_ e-sale.
* If you use a meat
thernlonleter while
(ookhlg, make sure it is
salt' J()l" /lee ill i/lici'owave
eve lie.
* Do not use recycled
paper products. Recycled
paper towels, napkhls
and waxed pallet call
contain metal flecks
which ram. cause arcing
or ignite. Paper l)roducts
containing iivlon or
nylon lilaments should
be avoided, as thev ma}
also ignite.
* Sortie st}.roJbam trays
(like those that meat is
packaged on) llm,e a thin
strip of metal enlbedded
in tile bottoHl. When
microwa_ed, tile llletal ca_l
1)[1171/tile floor of tile ()veil
or ignite a paper towel.
. Do not use the microwave
to e/l-},newspapers.
. Not all plastic wrap is
suitable tot use ill
microwave ovens.
Check the llackage
tot llroper rise.
®Paper towels, waxed
llaper and plastic wrap
can be used to cover
dishes in order to retain
inoisture and i)revent
spauering. Be stn:e to
vent plastic wrap so steam
Call escape.
®Cookware ill_l\. [)ecoii/e
hot because of heat
translbrre d fl:oin the
heated Iood. Pot holders
ina}' be needed to handle
the cookware.
" "goilable" cooking
pouches and tightly
closed plastic bags should
be slit, llierced or xemed
as directed by package.
If they are not, plastic
co/fld burst d/n'ing or
immediateh, alter
cooking, possibly res/flting
in iqi/n" }. Also, plastic
storage containers sho/fld
be at least partially
/recovered because they
Ibrm a tight seal. When
cooking with containers
tightly covered with
plastic wrap, renlove
covering carefully and
diree t steai/i awa}' ]iX)Ill
hands and lhce.
SPECIAL N07 2S ABOUF MICRO WAVING
oUse Ibil only as directed in
this nlanu_d. When using
loll in the ink rowa_e
oven, keep the li)il at least
1" awm from the sides of
the o_en.
* Plastic rookware Plastic
cookwar_ designed lor
microw_ cooking is v_r?
us(fill, ll/lt should 11( used
ear(fllll}. E_en microwu_e-
sate l)lastic may not be as
tolerant of o_ ercooking
conditions _s are gl_lss or
cerumic materials _md
muy solien or chin: if
subject_ d to short l_eriods
of o_ ercooking./n longer
exllosures to o_ercooking,
the lood and cookware
could ignite.
Follow these guidelines:
IUse lnicrowm e-sate
plastics onk. and use
them in StlJCt romtlliance
with the cookware
l/lan/ll_lrtllrer_s
r( COI//Illei/(tati OilS.
2Do not illicrowave ( l//l)l},'
contaiHers.
3Do not permit chikh:en
to/lse plastic cookwalx
without con/illete
Still( rvision.
The ]kli/will operate
autoinaticallv under
certain (onditions (see
Automatic Fan tbamre).
"E_k( care to tlrevent tile
starting and spreading of
accidental looking lires
while tile x_nt lira is ill use.
®Clean tile mld(rside of
tile i//icrow_t\ e ()lien.
Do not allow grease
to build ut) on tile
I/licrowa_( or the
thn lilters.
* hi the exent of a grease
fire on the surlhce units
below tile l/licrowave
ov(n, smother a flaming
lla]l Oll tile s/lrl_lce tlnit
b} co_ering tile pan
completely with a lid, a
cookie sheet or a fiat tra_,.
* Use care when cleaning
the vent thn filters.
Corrosive cleaning
agents, su(h as h.e-based
o,,(n cleuners, l/l_t}
damage the lilters.
®When pr(ilaring
/laining loods under tile
microwav(, turn the vent
Ihn on.
®N(ver lem:e s/lrlkice units
t)eneath VO/lr illicrowave
oven m/atlended at high
heat settings, goilovers
cause smoking and
greasy spillox ers that may
ignite and spread if tile
Hlicrow_t\( V(HI ihn is
ol/eradng. "Ib ininin/ize
a/ltoI/lati( l;_ll oil(ration,
use ad(quate sized
cook_are and use high
heat on surlhee tlnits
only wheH n_ eessar}.
I'.1
GR0 UNDING INSTR {7(;770NS/ Offl TONAI+KFIS
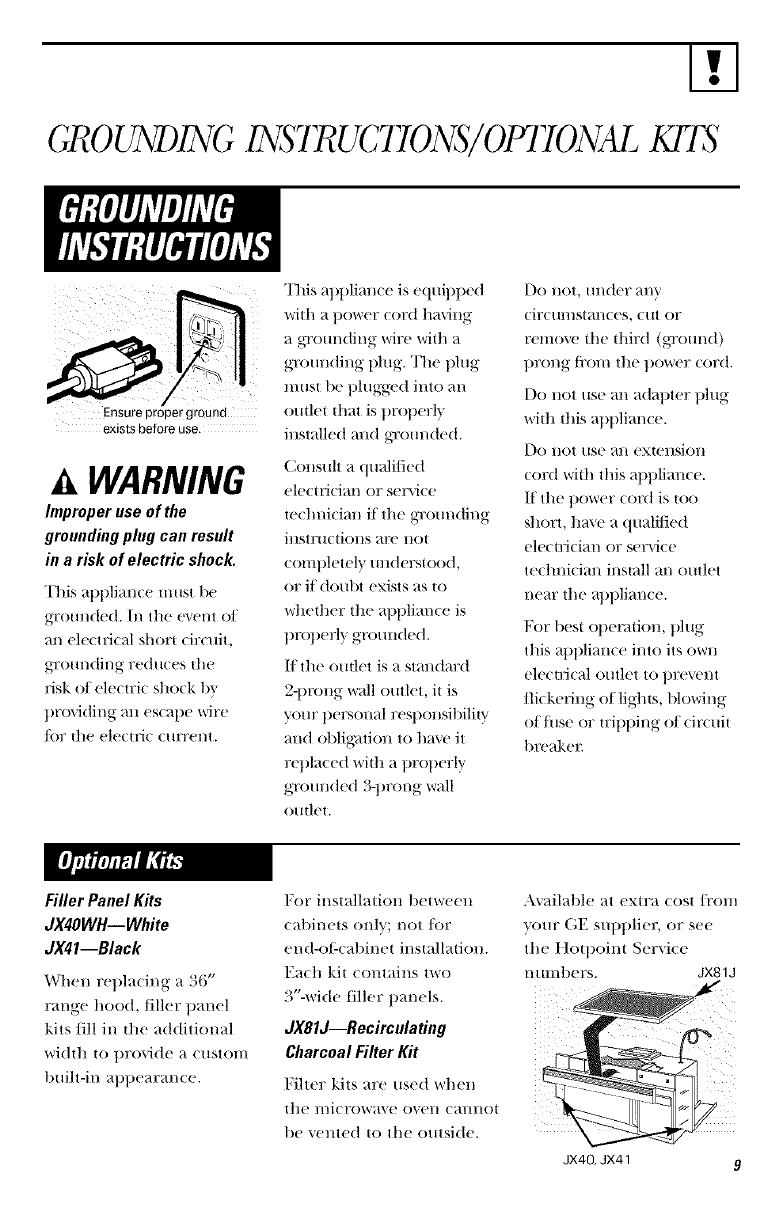
Ensure proper ground
exists before use.
AWARNING
huproper use of the
grounding plug can result
in a risk of electric shock.
This appliance Inust be
g-rom/de(t. Ill tile event of
an electlJcal short circuit,
gTounding reduces tile
risk of elecirie shock 1)_
t)roviding all escape wire
/_)r the electric current.
This appliance is e(tuiplled
with a t)ower cord having
a gTom/(ting _,ire with a
grounding plug. The l)lug
musl be t)lugged into an
omlei d/at is t)rotlerl}
installed and g_xmn(ted.
Consuh a qualified
ele(u'i(-ian or service
te(lmi(ian if tile grom/ding
instructions are n()t
eomt)letely understood,
or if doubt exists as to
wheiher the appliance is
tlrot)efly grounded.
I/the omlet is a standard
2-llrong wall outlet, it is
your personal resllonsibilit y
and oblig_fion to have it
ret)la(ed widl a t)rollerly
grounded 3-t)rong wall
omlei.
[)O not, iin(teF ;41iv
('ilX'/ll//slan(es, ('lit OF
remove the third (grom/(t)
t)rong tix)m the t)ower cord.
Do not use an adat)ter plug
wilh ihis atltlliance.
Do not use an exiension
cord with this appliance.
If the power cord is too
short, ha\ e a qualNed
ele(Ui(ian or ser_i(e
te(lmi(ian install an outlet
near tile al)tllian(e.
For best ollet_don, plug
this al)lllimwe into its ()_r_
eleci]Jcal outlet to t)revent
flickering of lights, blowing
offilse or u:itltling of cir(uit
breaker.
Filler Panel Kits
dX4OWH--White
dX41--Black
When replacing a 36"
range hood,/iller panel
kits/ill in the additional
wi(hh to t)rovide a custom
built-in al)l)earance.
For installadon belween
(abinets only; not/i)r
end-otZ(abinei installadon.
Ea(h kil contains two
._4"-wi(te liller panels.
JX81J--Recirculating
Charcoal Filter Kit
Fiher kits are used whell
lhe microwave oven cannol
be vented to tile outside.
Available at extra (;()st ti'on/
"_our (;E SUl)l)lier, or see
the t ]OqlOint Service
murd)ers. JX81J
I
JX40, JX41 9
2
3
4
5
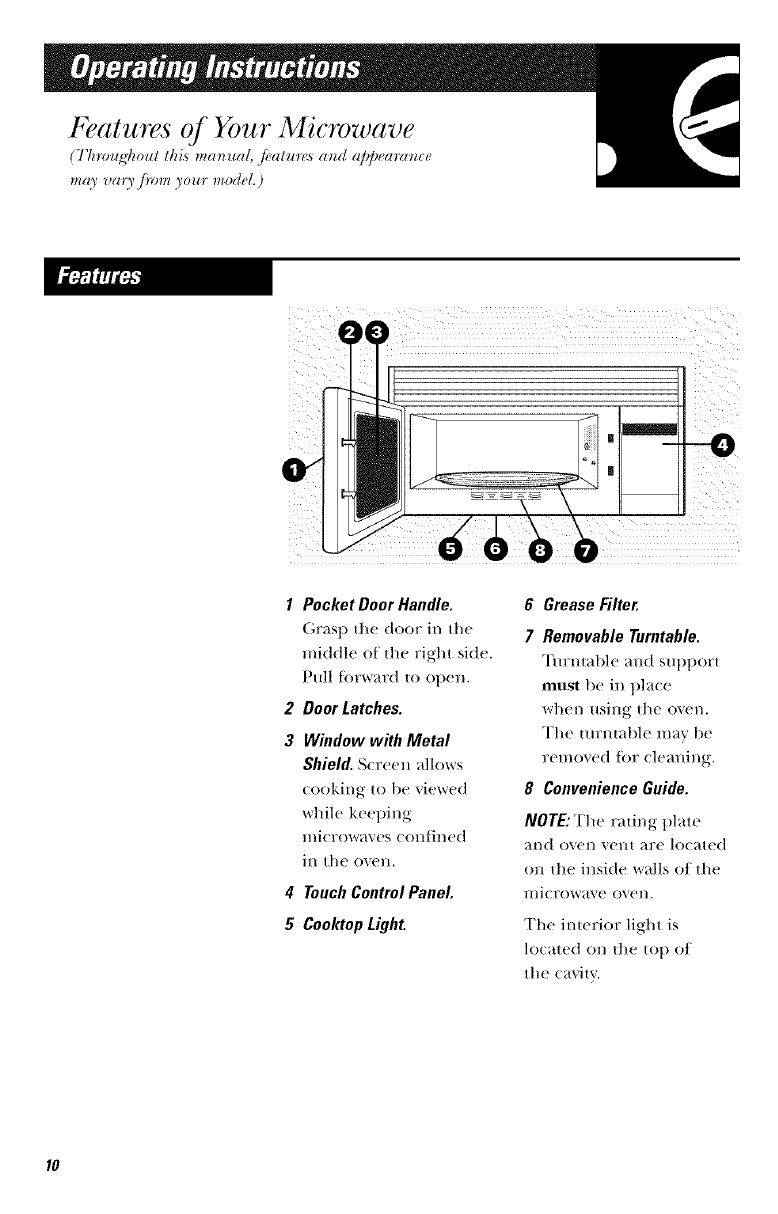
Pocket Door Handle.
(',r+_s1) the door in the
middle of the right side.
Ptfll tbrward to open.
Door Latches.
Window with Metal
Shield. Screen allows
cooking to be viewed
while keeping
microwaves confined
in the o_en.
TouchControlPanel.
Cool+topLight
6 Grease Rlter.
7 Removable Turntable.
Turntable _md SUl)pOrt
must bc in t)la(c
when using the oven.
The tm:ntable may be
removed ti)r cleaning.
8 Convenience Guide.
NOTE:The rating ])late
and oven vent are located
on the inside walls of the
l//i(r()w_,_ e oven.
The interior light is
lo(_++ted on the top oI
the ca'vitv.
The Controls on Your Microwave Oven
(Th_vugt_oul this ma_u_d, /_,alur(_ _lnd a]_]_eam_c_ma) v_l_3jiom )our model.)
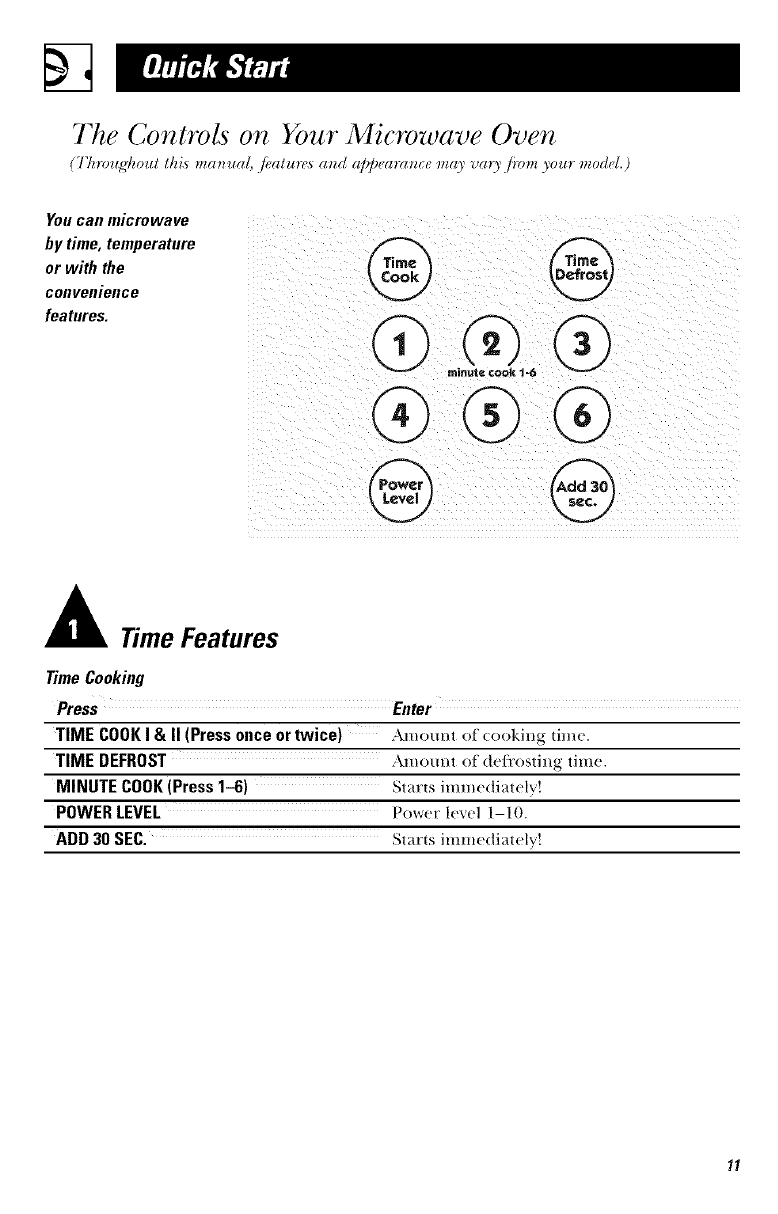
Youcan microwave
ATime Features
TimeCooking
Press Enter
TIME COOKI & II (Press once or twice) Amount of _ookhlg time.
TIME DEFROST \mount of (tefi'osting time.
MINUTE COOK(Press 1-6) Stare imme(liat_+d
POWERLEVEL Power level 1-10.
ADD 30 SEC. Staz_'tsimm_!(liatpl'd
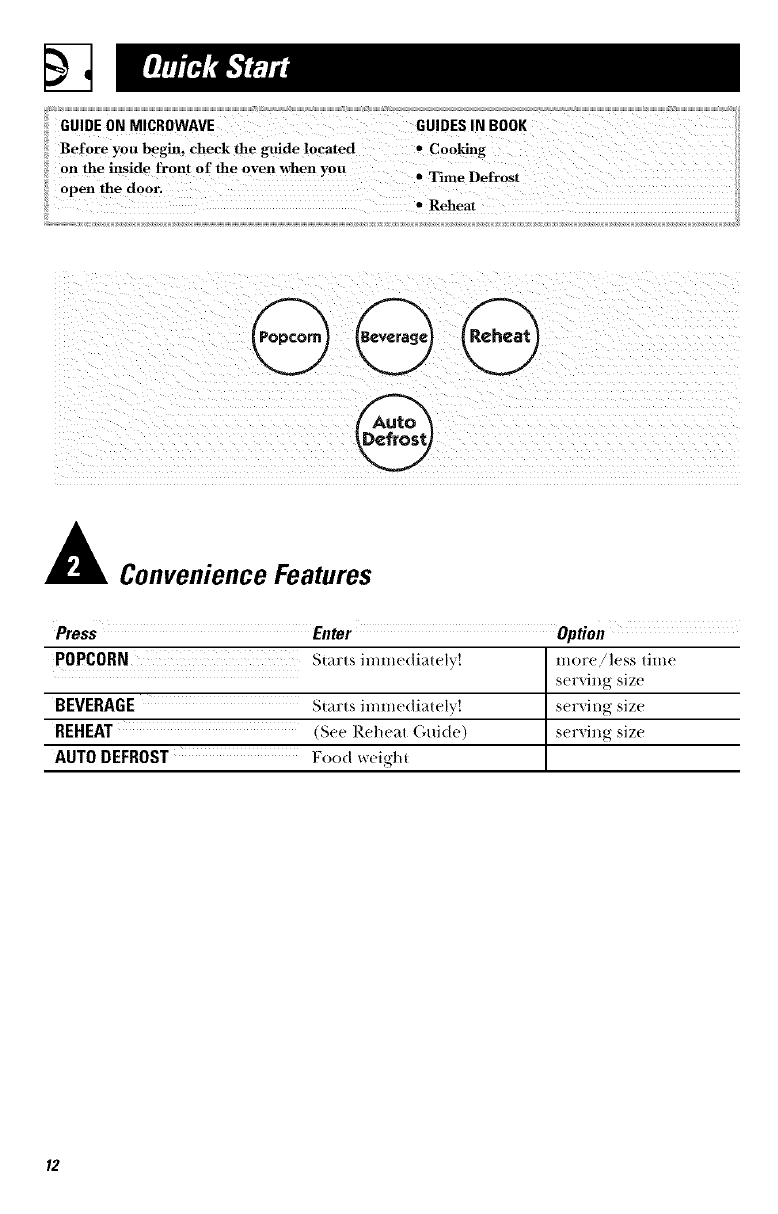
Convenience Features
Press Enter Option
POPCORN St_'tl:tS il/_l_le(tJatelv! l_lor'e/less til_ll_!
BEVERAGE Stal:ts il//l_lediatelv! serving siz(!
REHEAT (S_'e Reheat (',uide) servillg size
AUTO DEFROST Food weight
:i ¸¸¸¸¸_¸¸¸¸¸¸¸_:::::::..........................................>??????_!:':::::::_::::::_:::::::::::::::::::_:_:!::_!_iiii
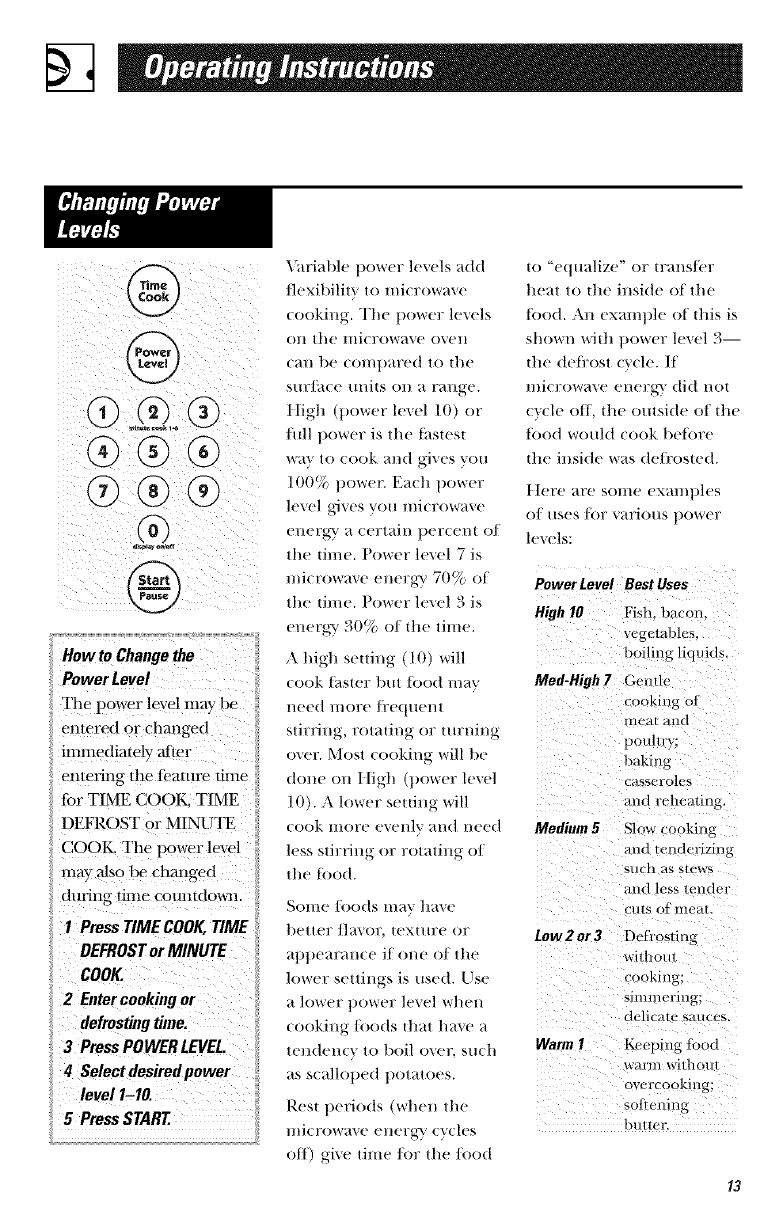
HowtoCha.gethe
Power Level
The Powerk,ve!m_,Ytie i:
_mtere d or C!lm!ged
immediately after
ij J
entering t!le I_ature tinm
ior TIME Cool_ TIME
DEFROST or MINUTE
COOK The power level
may also t)e. Changed
dl!ring lili!e countdown.
\_lriallle power lmels add
tlexibililv Ill micl_/lwaxe
cookiug. The i)ower levels
Oll lhe l/licFowa\e OVell
Call be COl//]laFed 10 tile
SIII']_ICe Ul/its Oll a rallge.
l{igh (t)ower level 10) or
htll ilower is the thstest
way lo cook al/d gi\es VIlli
100% tlOWe_: Each pOWel"
le\el gives you //liClxl\'va\e
energ_ a cerlain i)eFcel/t /)f
the time. Power le\el 7 is
l//icFowa_e elleFgy 70% Ill'
the time. Power lexel 3 is
energy 30% of the time.
A high setting (10) will
cook t_lsteF bill t})od l/laY
Need l//oye /i'e(ltlel/t
stirdug, rotating or turnit_g
oxer. Most Co/lking will tie
done/m/ligh (t>ower lmel
10). A lower settiug will
Io 'eqllalize" OF (Fal/SleF
heal lo the inside ot Ill(
to(id. \u e×aUl])lc (it this is
sllowl/ with 1,ov, er level 3
the dell_osl (v(-le. /[
l/llClXlWave ('l/er__ did l/or
c_(-le o11. the ottlside oI the
[()()(t WOIl|(| look lleIk)r('
the inside \_as deli'osted.
t[eF_' ;Ire St)tile exal/pies
O] /ISeS ]()r vario/ts power
levels:
PowerLevel BestUses
High 10 Fish. bacon.
v,,g-elables.
boiling liquids.
Med-High 7 Gentle
cooking o:
Ill_'_kl I alld
poultry;
baMng
casseroles
and reheating.
cook ulore evel/lv ;rod need Medium 5 Slow cooking
less slirt'ing /lr r/ll;Hillg Of and tenderizing
tile t()(ld, such as slews
and less tender
SOl/le ]()ods l/lay t|ave Cl/tS Of meal.
belief /la_llF, teXtllFe OF tow2or3 Deh'osting
a]ltlearallCe if ol/e of lhe
lower Seltil/gS is /Ised. {]se
a lower ]lower level whel_
cookiug/oods t]/al ha',e a
tetldet_Q Illboil o\er such Warm I
as scallolled potatoes.
Rest tleriods (when the
lHicrowa_e ellergv cycles
ott) give lime/or the/ood
without
cooking:
simmerina:
delicate sauces.
Keeping {sod
w}lrnl _.vil tl oIlt
ovL'l'cookillg:
softening
bt/ltCl-.

77me Features
@
®®®
I Press TIME COOK.
Time Cook I
Allows _'o/1 to micro>,ave
tbr any lime up to 99
mimltes and 99 seconds.
Power le',el l0 (/ligh) is
_ltltOl/l_tlJc_tl/} sel, bill _OH
lll}J_' (llHllge il ]br more
) (lexibilit},..
"tim may open the door
during Time Cook lo
check |he Iood. Close dw
door and press STkRT lo
reSt/l//e cooking.
2 Enter cooking time.
3 Change power level
if you don't want full
power. (Press POWER
LEVEL.Select a
desired power level
I-I0.)
4 Press START.
Time Cook II
I x'ts y(m chang-_ i)ower
kvels automatically during
cooking, ltere's how to
do it:
IPress TIME C()()K.
2Emer lhe firsl (,.x)k lime.
3Change tile power level
if you don't want full
power. (Press P()WER
I,EVEI,. Select a desir_ d
power lexel 1-10.)
4Press TIME COOK
again.
5"Enter tile second look
time.
6Change the power kvel
if yo/l don't want full
power. (Press P()WER
IJ_VEI, Select a power
level 1-10.)
7Press ST.\R'E
,\1 lhe end oI Tiin( (_ook/,
Time Cook II <otmts doD, rl/.
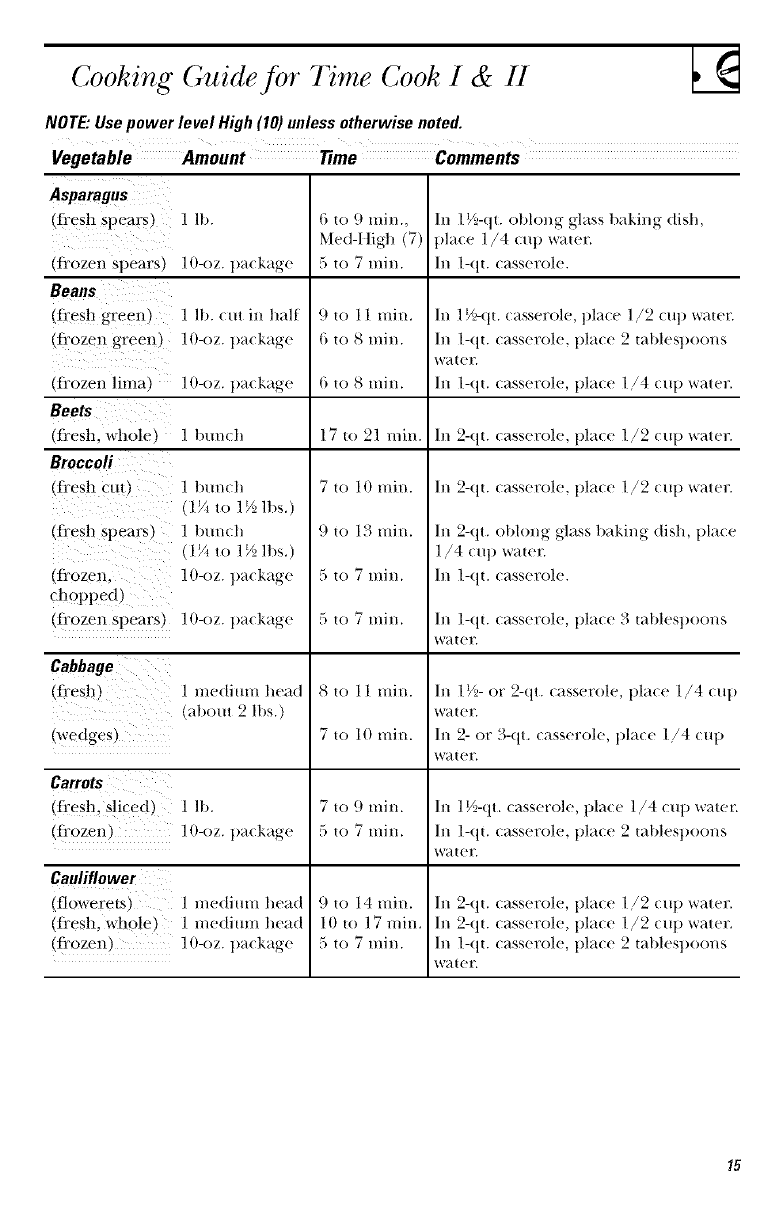
Cooking Guide for Time Cook I & II
NOTE."Use power level High (I0) unless otherwise noted.
Vegetable Amount Time Comments
Asparagus
(fi'es h spears) 1 lb.
(fi'ozen Spears) 11)-oz. package
(li'es h green) I lb. cut in half
(fiozen green) ll)-oz, t)a(kage
(li'ozen lima) 1O-oz. package
Beets
(fresh, whole) 1 bm*(h
Broccoli
(fresh cuO 1 immh
(1V_ to 17_,lbs.)
(fresh spears)I t)unch
(1V_ to 1__,lbs.)
(li'ozen, 1 O-oz. package
chopped)
(li'ozenspears) 10-oz. package
Cabbage
(fresh)
(wedges)
1 medim_, head
(about 2 lbs.)
(li'esh, s!iced ) 1 lb.
(li'ozen) ] 1)-oz.package
6to 9 mi+_,.,
Med-I tigh (7)
5 to 7 min.
9 to 11 min.
6 to 8 mi+_,.
In 11/_-qt.oblong glass 1)aking dish,
place 1/4 cu 1) water.
In 1-qt. casserole.
6 to 8 mi+_,.
In 2-qt. casserole, t)la(e 1/2 cup _ater.
17 to 21 min.
7 to 10 min.
9 to 13 min.
5 to 7 min.
5 to 7 min.
8 to 1 1 min.
7 to 10 min.
In 1_/>qt. casserole, place 1/2 (Ul) water.
In 1-qt. (asserole, pla(e 2 tablespoons
water.
In 1-qt. casserole, place 1/4 cup water.
In 2-qt. casserole, place 1/2 cut)water.
In 2-qt. oblong glass baking dish, place
1/4 cup water.
In 1-qt. casserole.
In 1-qt. casserole, place 3 tablespoons
water.
In I_/_,-or 2-qt. casserole, place I/4 cup
w_lter.
h_, 2- or 3-qt. ca.sserole, place 1+/4 cup
W_lt er.
Cauliflower
(flowerets) 1 me(titan head
(liesh, whole) 1 medium head
(frozen) 1O-oz. package
9 to 14 min.
11) to 17 min.
5 to 7 min.
7 to 9 mi+_,.
5 to 7 mim
In 2-qt. casserole, 1)lace 1/2 cu l) water.
In 2-(it. (asserole, 1)la(e 1/2 (u t) water.
S•
In 1-(lU (as.;erole, t)la(e 2 ml)lesl)oons
w_lter.
In 1 V_,-qt. (asserole, l)lace 1/4 (u 1) water.
In 1-qt. (asserole, t)la(e 2 ml)lesl)oons
water.
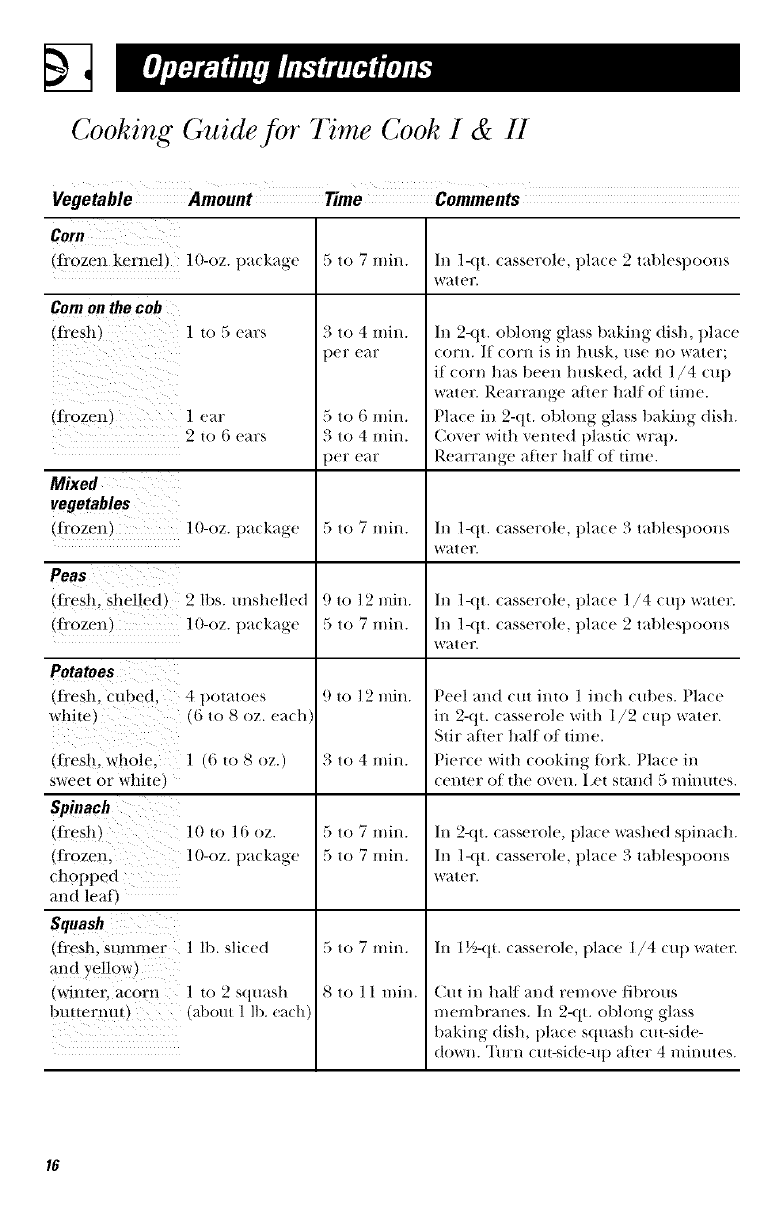
Cooking Guide for 71me Cook I & II
Vegetable Amount Time Comments
CoN]
tffozen kernel, ]O-oz. package
Corn on the cob
(lresh ]to ,_ ears
(frozen J ] e_lr
2 u_ G ears
Mixed
vegetables
(ffozen_
Peas
]O-oz. t)a(bge
5to 7 nlin.
3to 4 rain.
)er e;4r
5to 6 rain.
3 to 4 rain.
)er e;4r
5to 7 rain.
Ill l-qt. (asser(/le, t)la(e 2 talllesl)OOllS
water.
Ill 2-qt. obh)ng glass baking dish, t)lace
corn. If corn is ill husk, use no water;
if (orn has kleen husked, add 1/4 CUll
water. Rearrange a/ler half of time.
Place in 2-qt. oblong glass t/aking dish.
Cover wifll _e//md t)lastic wrat).
Rearrange alter half of time.
Ill 1-Kit. (asserole, t)la(e 3 tal)lest)(ions
w_!ter.
(fi'esh. shelled) 2 Ills. unshelled
(fi'ozen_ ] 0-oz. t)a(kage
Potatoes
(li'esh. cubed, 4 t)ot;_toes
white) ((i to S oz. ea(h
(freslb whole, ] (6 to 8 oz.)
sweet or white)
Spinach
(_i'esh) 1(t., __i(,_.
(ti'ozen, 1O-oz. t)a(kage
chopped
and leaf)
Squash
(ffes!b summer 1 lb. sli(ed
and yel!ow)
(wintm, aco!TI! ] tO 2 S(luash
bnttertlu t) (al)ottt 1 ll). ca(hi
9 to 12 rain.
5 to 7 rain.
9t(/ 12min.
3 to 4 rain.
5 to 7 rain.
5 to 7 rain.
5 to 7 rain.
8 to 11 rain.
Ill ]-(It. (assel?ole, t)la(e ]/4 (/l t) vcater.
Ill l-qt. (asserole, t)la(e 2 tal/lest)oons
w_!ter.
Peel and cut into 1 inch cut)es. Place
in 2-qt. casserole with 1/2 cut) water.
Stir afmr half of time.
Pierce with cooking tork. Place ill
center of the ovell. I el stalld ,_ l//ill/lles.
In 2-(It. casserole, tlla(e washed sllina(h.
Ill 1-qt. (asserole, t)la(e 3 tal)lesl)oons
water.
In 1½-(I t. casserole, tllace 1/4 cut) water.
Cut ill half and ren/ove fibrous
membranes. Ill 2-qt. oblong glass
baking dish, ilia((" squash (m-side-
down. Turn (ut-side-u t) after 4 n/inutes.
Time Features
®
®®®
@
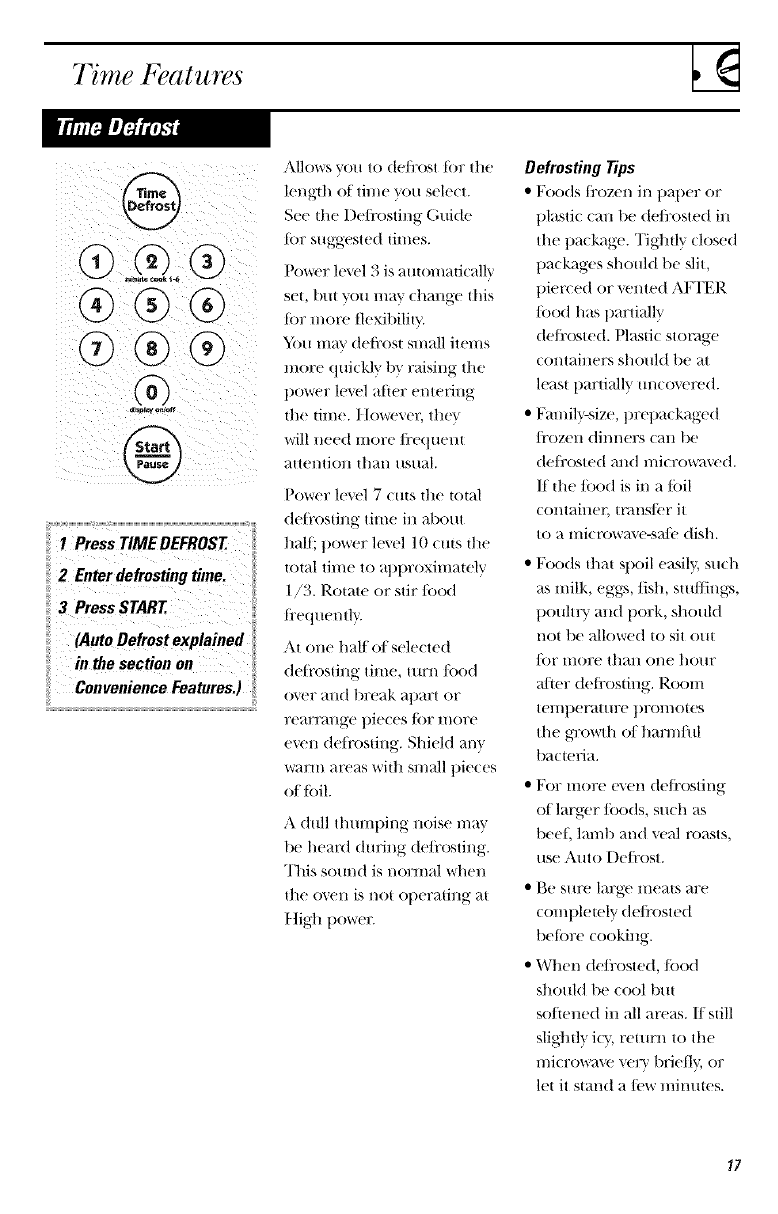
ii ! Press TIMEDEFROST ,2 Eeterdefrosting time,
iii 3 PressSTART
(Auto Oefrost explained
ie the section on i
Convenience Features.)
Mlows you to defl:ost tot the
length of time you select.
See tile De/i'osting (bride
ior suggested times.
PoweF h'vel 3 is auton/aticalh'
set, but you m_ Uchange this
tot more tlexitlilit'_.
_i)u m_c_'deti:ost small items
more qui(kly by raising tile
power level alier entedng
the time. Ito_vve_; th_
will need more/i'equem
attention than usual.
Power h'vel 7 cuts the total
deti'osting time in about
halt:, power h'\el 10 cuts the
total time to al)l/roximately
1/3. Rotate or stir/ood
frequently.
At one hag o/selected
deti'osting trine, tm'n/ood
over alld break +lt)al;t OF
rt'arl'_l)ge t)ieces/()r lIlOFe
even deti'osting. ShieM any
w+mn +_t'('+_swith sm+dl t)ie( es
o/toil.
A dull thuml/ing noise may
1)e heard (truing de/i'osting.
This sound is normal when
|he ovell is no| ol/er_tiog at
t]igh t/ower.
Defrosting Tips
• Foods frozen ill t)al/er or
t)lastic can be (te/ix)sted ill
the package. Tightly closed
t)a(kages should tie slit,
pierced or vented AKI'ER
/ood has partially
(te/ix)ste(t. Plastic storage
containers should be at
least partially m/cover('d.
• Famil)_size, tn:et)ackaged
/i'ozen dinners call be
deli'osted and micro_*ved.
If the/ood is in a toil
container, tmns/(T it
to a micmwm e-sale dish.
• Foods ttlat spoil easily, such
as milk, egg_, fistl, stt!//ings,
t)ouhry and l)ork, stlobLld
not be Mlowed to sit out
]OF lllO17e than oI/e hollF
a/ier deti'osting. Room
temt)eramre in:on/ores
the gTowth of ham/fill
bacte]Ja.
• For more e\ el/ defrosting
of larger/oods, such as
beeL lmnb and veal masts,
use Auto Defrost.
• [_e Sill'(' lal?ge llleaIs al;e
completely de/i'osted
betore cooking.
• When de/i:osted,/ood
should be cool but
so/tened in all areas. I/still
slightly iQ; return to the
l//iCl?OW_\'e veYy briefly, or
let it stand a/('w mimnes.
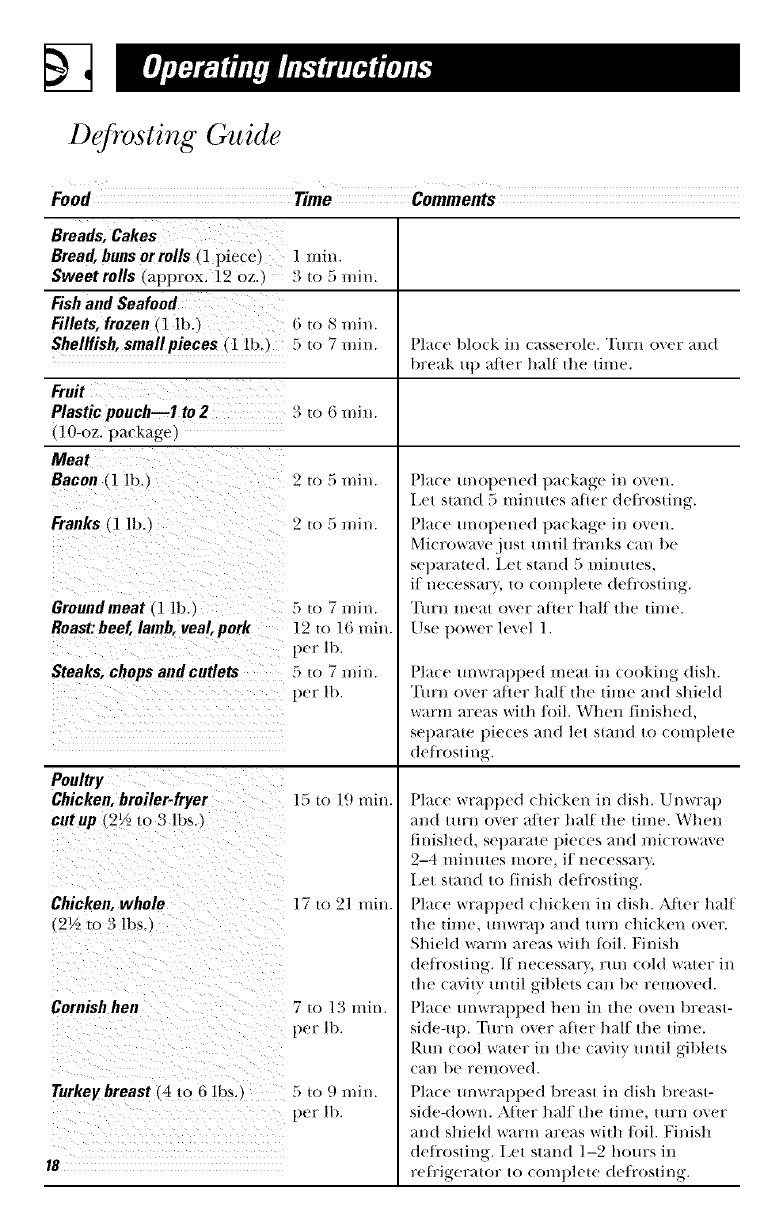
Defrosting Guide
Food Time Comments
Breads, Cakes
Bread, buns or rolls +]piece) | mhL
Sweetrolls approx. 12 oz.. 3 t(_ "+,rain.
Fish and Seafood
Fillets, frozen _1 lb., 6 u, _ rain.
Shelffish, smallpieces (1 lb.t 5to 7 rain. P|a(e b|o(k in (a.',sero|e. "I'm_n oxer and
break u]) a/ier half dm l]/lle.
Fruit
Plastic pouch--1 to2 :4 u, +_rain.
(]0-oz. package)
Meat
Bacon 1 lb.,
Franks (1 lb3
Groundmeat I lb.,
Roast: beef, lamb, veal, pork
Steaks, chops and cutlets
Poultry
Chicken,broiler-fryer
cutup (2½ +o 3 lbs.
Chicken,whole
_2½ to 3 lbs._
Cornish hen
Turkey breast, 4 +o 6 lbs.,
18
:5 Io 7 min.
12 to 16 rain.
per lb
:5 io 7 min.
per ll)
15 to lDmin.
17 to 21 min.
7t() 13min.
per lb
Place unopened package in oven.
Iet stand 5 minutes after deflx)sting.
Place unopened package in oven.
Microwave just until R'anks can be
separated, let stand 5 minutes,
if necessar}, to complete defl:osting.
Turn IIleat over after half tile time.
Use power level 1.
Place unwrapped meat in cooking dish.
Turn over after half file tillle _+.ndshield
warm areas with R)il. When thfished,
separam pieces and let stand to complete
de/i'osting.
Place wrapped chicken in dish. Unwrap
and turn over after half tile time. When
finished, separate pieces and microwaxe
2-4 minutes more, if necessary.
Iet stand to tinish det_'osting.
Place wrapped ehi(ken in dish. AJler half
[lie lime,/l//wra]) alld tllrll e]lickell over.
Shield warm areas wifll toil. Nnisft
de/i'osting. If ne( essavy, run cold water in
tile cavity until giblets can be removed.
Place unwrapped hen in tile oven breast-
side-up. Tm:n over after ftalt tile time.
Run cool water in tile (avity tmtil giblets
can 1,e removed.
Place unwral)l)ed breast in dish breast-
side-down. After half tile time, turn over
and shield warm areas with/i)il. Finish
deti'osting. Eet stand 1-2 hours in
rel_'igerator to COml)lem de/i'osting.
Time Features
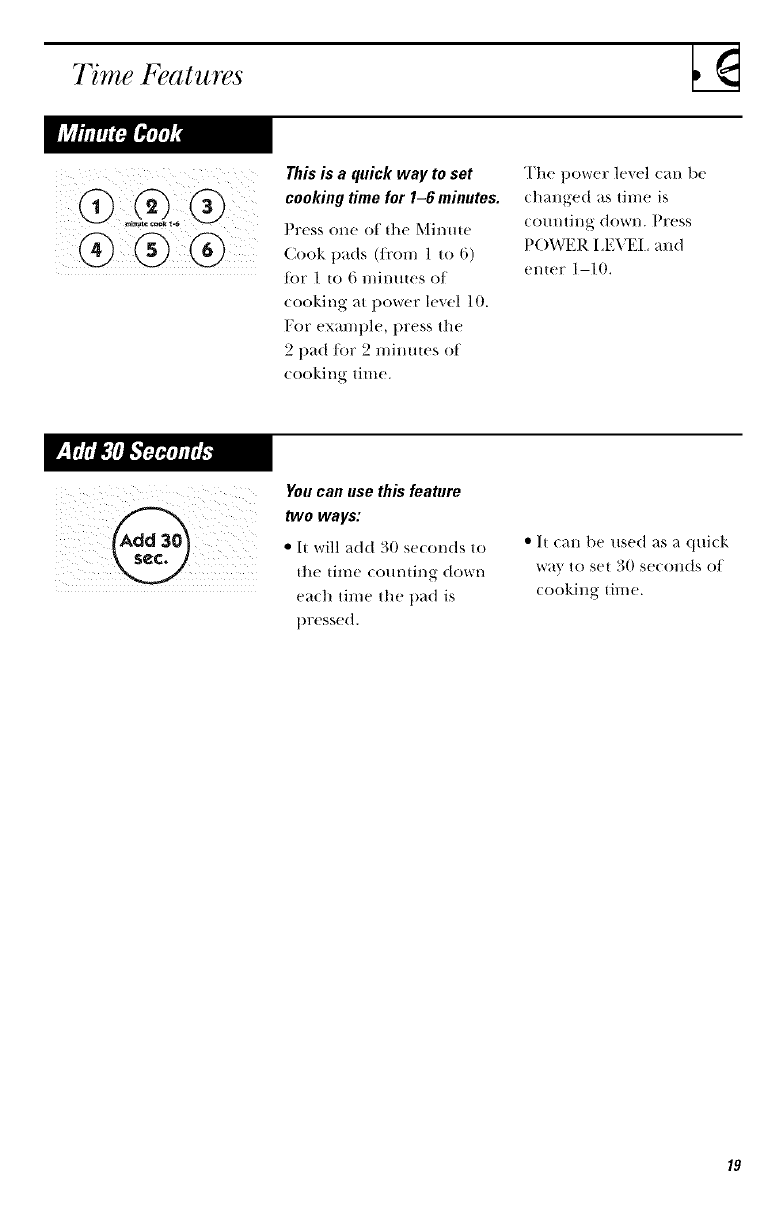
This is a quick way to set
cooking time for 1-6 minutes.
Press one of the Minl_te
Cook pads (/i'om 1 to (i)
t_)t" ] to 6 minutes of
cooking at t)ower level 10.
For example, 1)tess tile
2 pad/i)r 2 minlltes of
cooking time.
The power level can be
changed as time is
counting down. Press
POWER I ,EX_2I _and
enter 1-10.
You can use this feature
two wags:
•It will add 30 seconds to
the time c()m_ting down
each time the pad is
pressed.
•It (an t)e used as a (lui(k
w_t'_ to S( t _)0 se(ollds of
(ookillg time.
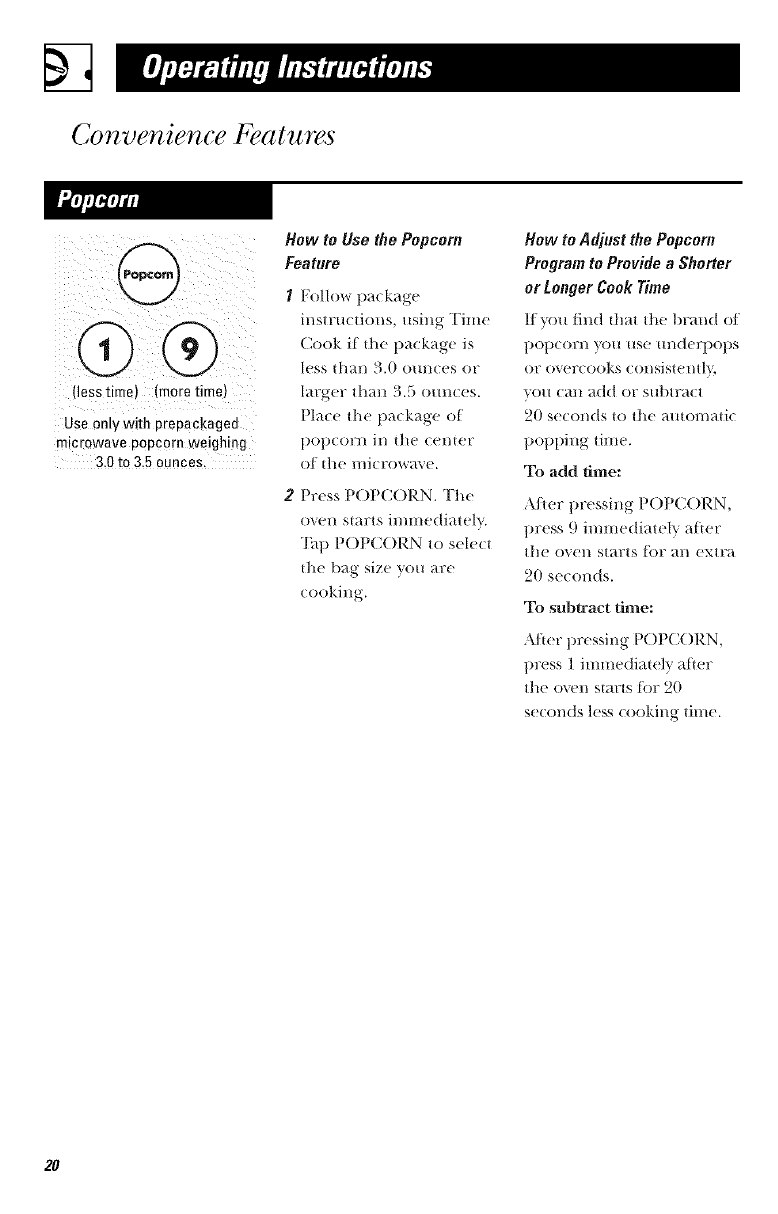
Convenience Features
0
(less time) (more time
Use oRywith prepackagee
microwave popcorn weighie£
3.0to 3.5 ounces.
How to Use the Popcorn
Feature
IFollow package
instructions,/_sing Time
Cook if the package is
less than 3.0 ounces or
larger than 3.5 ounces.
Place the package of
l)Ol)COr_l in th( center
of the l/licrow_l\e.
2Press POPCORN. The
oxell starts il/liilediatelv.
"I.q_ POPCORN to s_lect
the bag size you arc
cooking.
Bow to Adjust the Popcorn
Program to Provide aShorter
or Longer Cook Time
IJ ',_)U 1]_1(1thnt the l)r_nd ot
l)Ol)COr]l _/OH rise un(l(rl)Ol)S
or overcooks consistentl}.
you can add or subtract
20 seconds to the automatic
popping tiln(.
To add time:
After pressing P()PC()RN,
press 9 immediately al_er
the o_en starts li)r an extra
20 s_conds.
To subtract time:
•\lier pressing P()PC()RN,
pr(ss ] immediat(ly after
the o_n starts li)r 20
seconds less cooking time.
2O
®®®
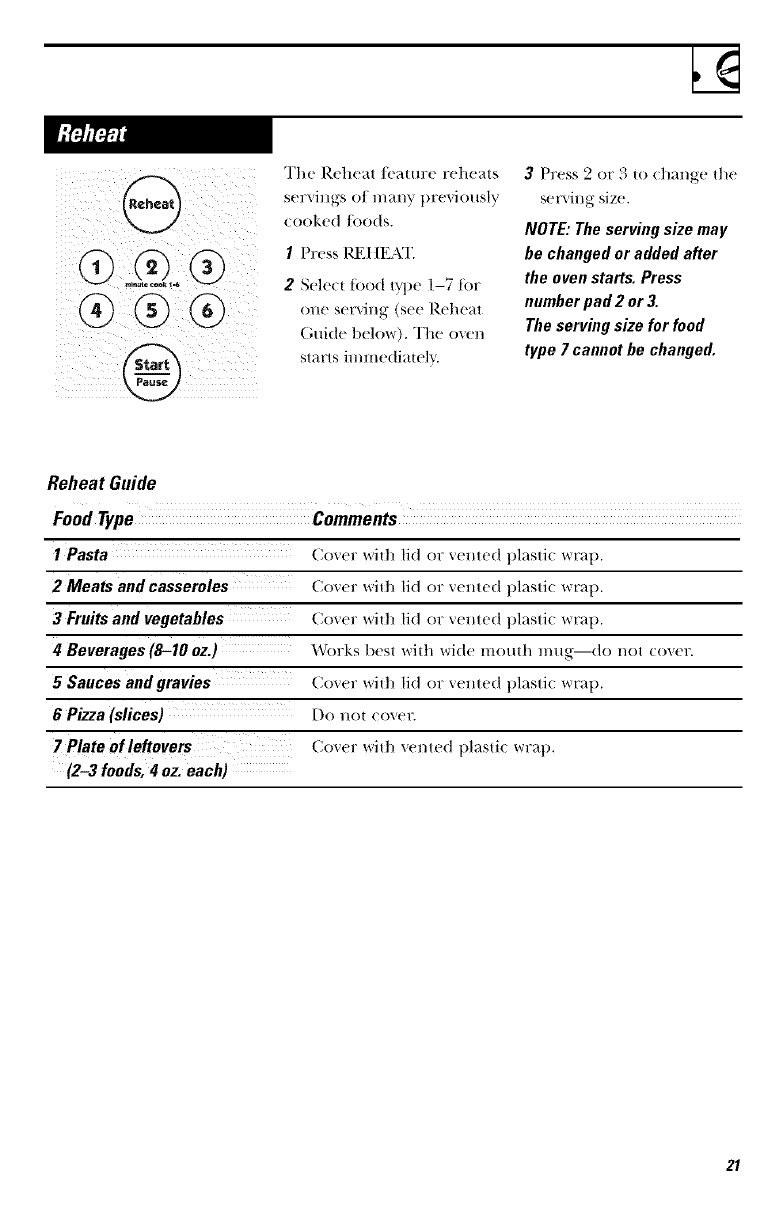
]'he Rehem l_'amre rchem,_
cooked leeds.
IPre._s 1_21 IEAT.
2Select tbod type 1-7 fi)r
one serving (scc Rchc_lt
(;uide belo',+). The oven
slarls iumledi;i|e|_..
3Press 2 or 3 to (hange the
set\ ing size.
NOTE:Theserving size may
be changed or added after
the oven starts. Press
nmnber pad 2 or 3.
The serving size for food
type 7 cannot be changed.
Reheat Guide
I Pasta Coxer _ri|]l lid or xented plasti( wrap.
2 Meats and casseroles Coxer _ri|]l lid or xeHted plasti( wr_lp.
3 Fruits and vegetables Coxer _ri|]l lid or xeHted plasti( _rr_lp.
4 Beverages (8-10 oz.) Works best wi|h wide mouth mug--do not (oxer.
5 Sauces andgravies Coxer wii]l lid or xeHted plasti( wr_tp.
6 Pizza (slices) Do not ( oxer.
7 Plate ofleftovers Coxer _*_ri|]l_,(!l/ted t)klsti( wr}tp.
(2-3foods, 4oz. each)
21
Convenience Features
The Beverage/_'ature
or 12 o/|n(e selT_illgs ()_
a,,,l,e,era e.
Press t_E_21_\(;E. The
oven starts immediateh.
The serving size is
alltomaticallv set at
4 ounces, but can be
(hanged b} tat)t)ing
BE'_2RAGE to select
8 or 12 omlces.
Drhlks heated with the
Beverage feature may be
very hot. Remove the
container with care.
22
@
®
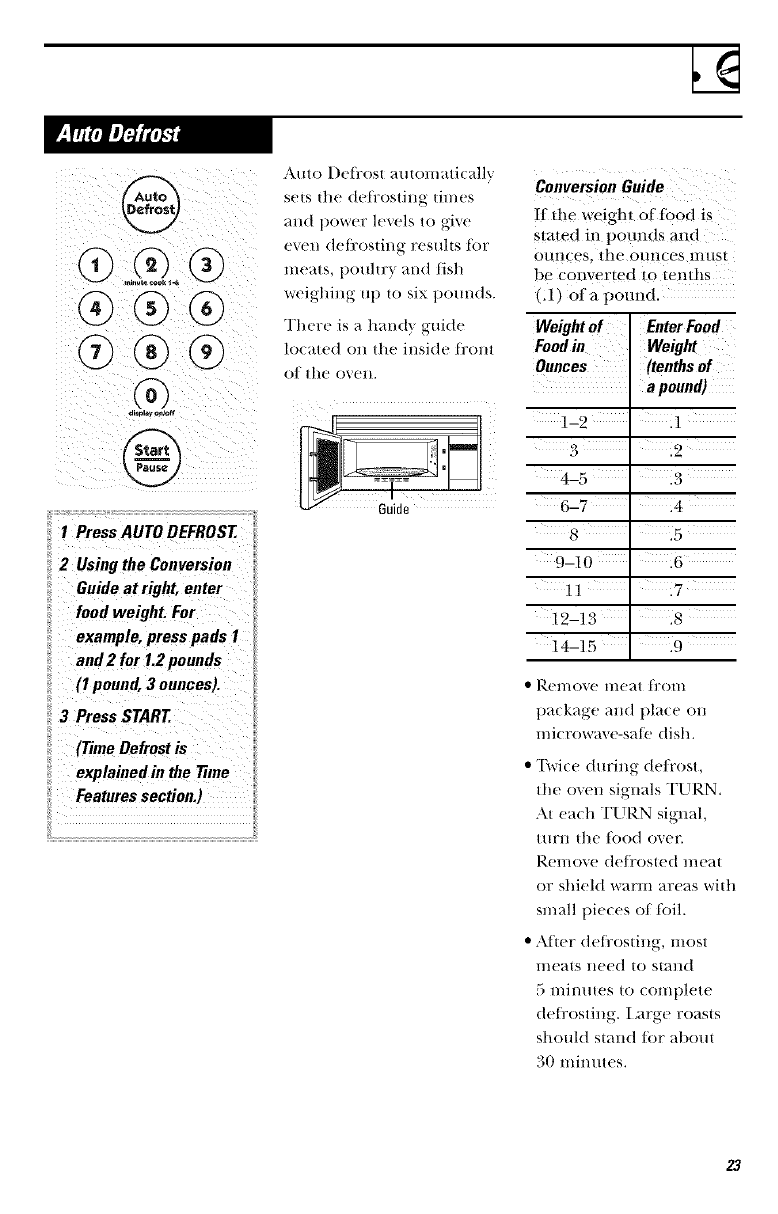
1 Press AUTO DEFROST
2 Using the Conversion
Guide at right, enter
food weight. For
example, press pads 1
and 2 for 1.2 pounds
(I pound, 3 ounces).
3 Press START
(Time Defrost is
explained in the 77me
Features section.)
Auto I)efl:ost automatically
sets tile (tetkosting times
and ltower levels to give
even )tefi:osting results tot
meats, pouhry and fish
weighing utt to six p(mnds.
There is a handy guide
h)eated on the inside fi'om
of the ovetl.
Guide
Conversion Guide
!f the weight of food is
stated i!:t pot/rids and
o/l(ices_ the Ot((ICeS ))lUSt
be converted to tenths
(A) of a potmd.
Weightof EnterFood
Food in Weight
Ounces (tenths of
a pound)
1-2 'A
3 .2
4-5 .3
6-7
8 .5
9-10 16
11 ' 17
12-13 ' .8
14-15 .9
• I+_)?l((o'_e (I(e}tt i]x)(I(
package and place on
((/ierowax e-sat_! dish.
• ]\vice during de/i'ost,
the oven signals TURN.
At each TURN signal,
ttirl( tile tood ()vet:
Remove de/i'osted (((eat
or shield warm areas with
small pieces of tbil.
•Atter detrosting, most
meats need to stand
5 mimttes to complete
(tetrostiHg. Large roasts
should stand tor abom
30 minutes.
23

Other Features Your Model May Have
To remind you that you
have food in tile oven, tile
owm will display "END"
and beep once a l//iI/[lte
until YOUeither open the
ovell 0oo1" of plPeSS
CI ,EAR!( )FE
Pl:ess to entel: the time of
day or to check file time of
day while microwaving.
Ith:ess CI,()CK.
2Enter time of da_.
3Press START or CI,()CK.
24
To turn the (lock dist)lay
off, press and hold 0 tor
at>out three se(onds.
"[k) redist)lay the clo(k,
ret)e_tt.
@®®
G®®
Delay Start allows _x)u to
set ttle ii/icrow_tve to delta
cooking ut) to 24 hours.
I Press DEI._\Y STAR'E
2Enter the time you
want the o_en to start.
(Be sure the mi(rowa_e
clock shows the (orre(t
time of d_ly'.)
3Select any combination
of Auto or Time I)e/i'ost
or Time Cook I & II.
4Press S'E_\RT.
The l)el_lv Start time will
be disl)layed. The oven will
automatically start at the
delmed time.
The time of d_v mm be
displmed by t)ressing
CI,()CK.
25

Other Features Your Model May Have
Tinier (In!Off operates as
a minute tinier and €an be
Hsed at ally tin/e, even
when the libel/ is ot/eratillg.
To Ilse the tilller as a
nlinute timer when tile
()Veil is no[ ot)er}ItJng:
IPress TIMER ON!OFE
2Enter tile time you want
to COmlt down.
3Press ST\RT/PAUSE to
start.
When time is ut), the <)veil
will signal.
NOTE:The timer indicator
will lie lit while the timer
is ot)erating.
To use the timer while tile
<)veil is operating:
IPress TIMER ON/OFE
2Enter tile time you want
to count down.
3Wait 5 se(ollds. The
timer will start (Omlting
d Ol*_rl l au|o<//ati( allY.
When time is up, the oven
will signal. To tm:n off tile
timer signal, press TIMER
()N!()FF.
h/addition to slarling man}
all<ms )o/t 1o slop (ooking
wi,llo,,,//IIe,/illg lIe
or clearing the disl/la ?.
26
\l_OIl II/aV lotk die CO]lirol
t)allel Io t)FeVel/t the
liliCl?OWaVe froH/ 1)_'il/_
a_(idenmllT_ started or used
b'v (hildren.
"Ik) lock or mflock tile
controls, press and hold
CI,ILAR!()FF/or about
three seconds. When die
control panel is locked,
"I ()C" will be displayed.
27
Other Features Your Model May Have
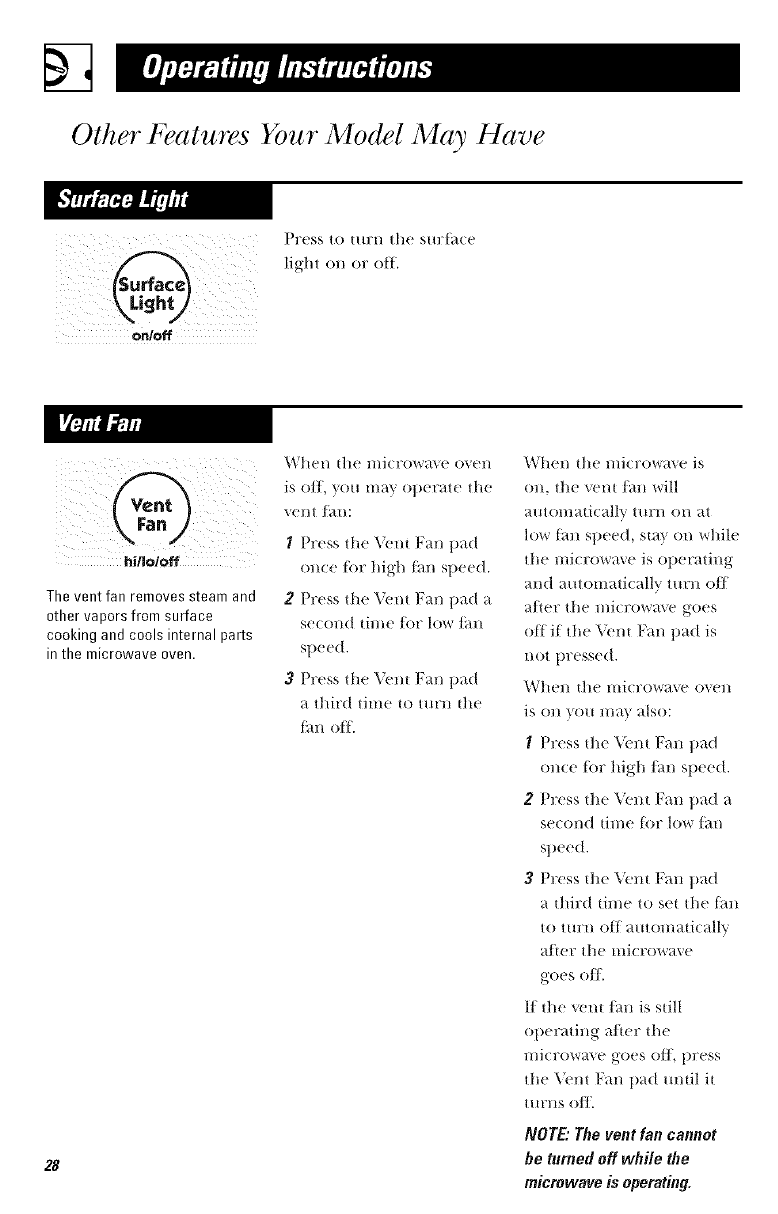
])Yeas tO [[IYH the SllYI_l(e
light on or off.
hi/Io/off
The vent fan removes steam and
other vapors from surface
cooking and cools internal parts
in the microwave oven.
28
is ell yo ma? op(rale the
",(!Ill f_/l/;
I Press tile Vent Fan pad
once liw high lhn Sliced.
2 Press the Vent Fan pad a
second time li)r low Iml
sl)eed.
3Press tile Veil[ Fan pad
a third time to turn tile
thn off.
When tile microw_t_ e is
on, th( vent Iml will
a/m)nlaticallv tm:n on at
low lml sp(ed, stay on while
the microwm e is operating
and a/uoinaticallv turn off
aller tile nli(rowme goes
off if the Vent Fan pad is
not pr( ssed.
Whell tile i/li(mowaFe ovell
is 011VO// l/l_t} also:
I Press th( V(nt Fall pad
once li/r high thn speed.
2Press tile Vent Fall pad a
second time ti)r low lhn
sp(ed.
3Press th( Vent Fan ll_t(1
a third tinle to s(t tile lml
to ttlrn off a//tomati(all\.
alder tile microwave
goes oil
If the yen| Iml is still
operating al_er the
nlicrow_t_( goes oil i)ress
the Xi'nt Fan pad /mtil it
tH£11S 0]]_
NOTE: The vent fan cannot
be turned off while the
microwave is operating.
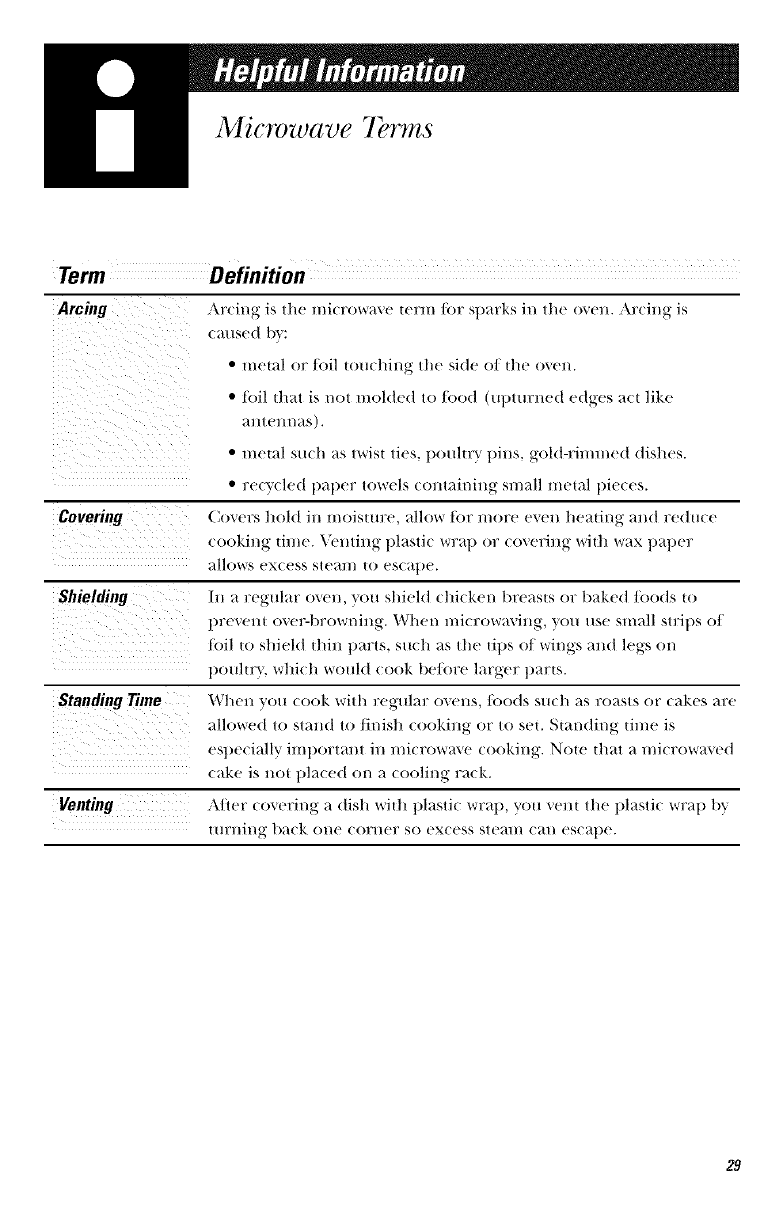
Microwave Terms
Term Definition
Arcing
Covering
Shielding
StandingTime
Venting
Arcing is the llliCrowa',,e term tor sparks in the oxen. Arcing is
(atlsed 1)_:
• metal or fi)il touching the side of tile oven.
• toil that is not molded to/ood (upturned edges _l(-tlike
_mtem/as).
• metal su(h _,s twist ties, poultr} t)ins, gold-rimmed dishes.
• re(y<led paper towels (ontaining small metal pie(es.
Covers hold ill moisture, allow tot more even heating and red uce
cooking time. Xi'nting pklstic wrap or (overing with vv_lx paper
allows ex(ess steam to es(ape.
Ill a regular oven, you shield (hi(ken bre_lsts or baked/oods to
prevent ovel_browning. When mi(row_ving, you use small strips of
toil to shield thin parts, such _s tile tips of wings _md legs on
t/oultv}, whi(h wotll(t (ook be/ore larger parts.
When you (ook with regular ovens,/_)ods su(h as roasts or (akes are
allowed to stand to finish cooking or to set. Standing time is
est)e(i_dly imtlortaHt ill mi(row_\e (()()king. Note that _1mi(ro_*_ed
(ake is not placed on _ (()()ling rack.
Aller (overing _ dish with t)k_sti(wral) , _'OH vent tile plastic v_r_q/l/y
turning b_wk one corner so excess steam <all es<atle.
29
%
Care and Cleaning
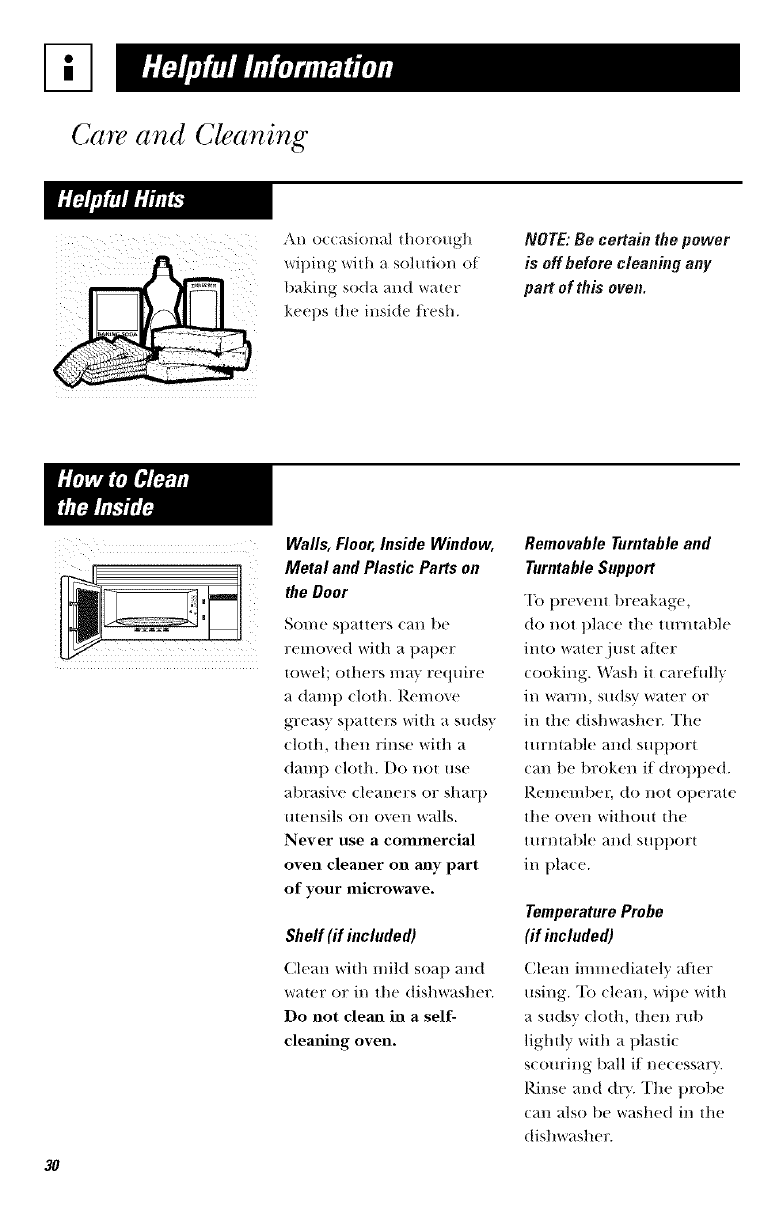
An occasional thorough
wiping with a sohltion of
baking soda and water
keeps the insid( I}:esh.
NOTE: Be certain the power
is off before cleaning any
part of this oven.
3O
Walls, Floor, Inside Window,
Metal and Plastic Parts on
the Door
Some sl)atters can be
removed with a paper
towel; others ma} require
a damp cloth. Remove
greas} spatters with a sudsy
cloth, then rinse with a
damp cloth. Do v,ot use
abrasive cleaners or sharp
utensils on oven walls.
Never use a COlllnlercial
oven cleaner on rely part
of your microwave.
Shelf (if included)
(]lean wit]l mild so_lp and
water or in the dishwasher.
Do not clean in a self-
clemfing oven.
Removable Turntable and
Turntable Support
To prevent breakage,
do not pla(e the turntable
into water.just atter
cooking. W_lsh it carefulh'
in warm, sudsy water or
in the dishwasher. The
turntable and support
can be broken if dropped.
Uelilell/l)eI, do not operate
the oven without the
ttlrntal)le alld sllpport
in place.
TemperatureProbe
(if included)
Clean immediately afler
using. To clean, wipe with
a su(Isv cloth, then rtd)
lightly with a plastic
scorn:inN ball if neeessavv.
Rinse and (tvv. The probe
can also be washed in the
dishwasher.
Care and Cleaning Ill
We recmnmend against
using cleaners with
almnonia or alcohol,
as they can damage
the appearance of the
microwave oven. ff you
choose to use a common
household cleaner, first
apply the cleaner directly
to a clean cloth, then
wipe the soiled area.
Case
Clean tile outside of tile
microwave with a sueisx
cloth. Rinse and then dry.
Wipe tile window clean
with a dam]') cloth.
Contro! Panel
Wipe with a damp cloth.
Dr}. thoroughl}. Do not
use cleaning sprays, large
aIllO/lI/tS of soap and water,
abrasives or sharp ol!ie ets
on tile panel--thev can
dalnage it. Some paper
towels cai/also scratch
the control panel.
Door Pane!
Belore cleaning tile front
door llanel, inake sm:e you
know what I}pe of panel
you ha_e. Re/br to tile
eighth digit of tile model
numl/er. "S" is metallic,
"(;" is graphite, "1 2is
CleanStee 1 and "P;', "W" or
"C" are plastic colors.
Stainless Steel
The stainless steel tlanel
can be cleaned with
Stainless Steel Mag% or a
similm: tlroduct using a
clean, sot_ cloth. Apply
stainless cleaner earetully
tO }wold tile surrounding
plastic parts. Do not use
appliance wax, polish,
l/leach or i)roelucts
containing chlorine on
Stainless Steel linishes.
CleanSteel, Metallic or
Graphite
Else a clean, soil light and
lightly dampened cloth,
then dr} thoroughly. Do
not /lSe alll)lian(e wax,
])olish, l)leaeh or ilroelucts
containing any chelnical
agent on the CleanSte el,
(;raphite or Metallic
s/lrl_tees.
Plastic Color Panels
Llse a clean, soil lightly
dampened cloth, then (lrv
thoroughl}..
Door Seal
It's important to keep the
area clean where tile door
seals against tile' microwme.
Use only lnild, non-al/rasiv_
detergents applied with a
clean sponge or soft cloth.
Rinse well.
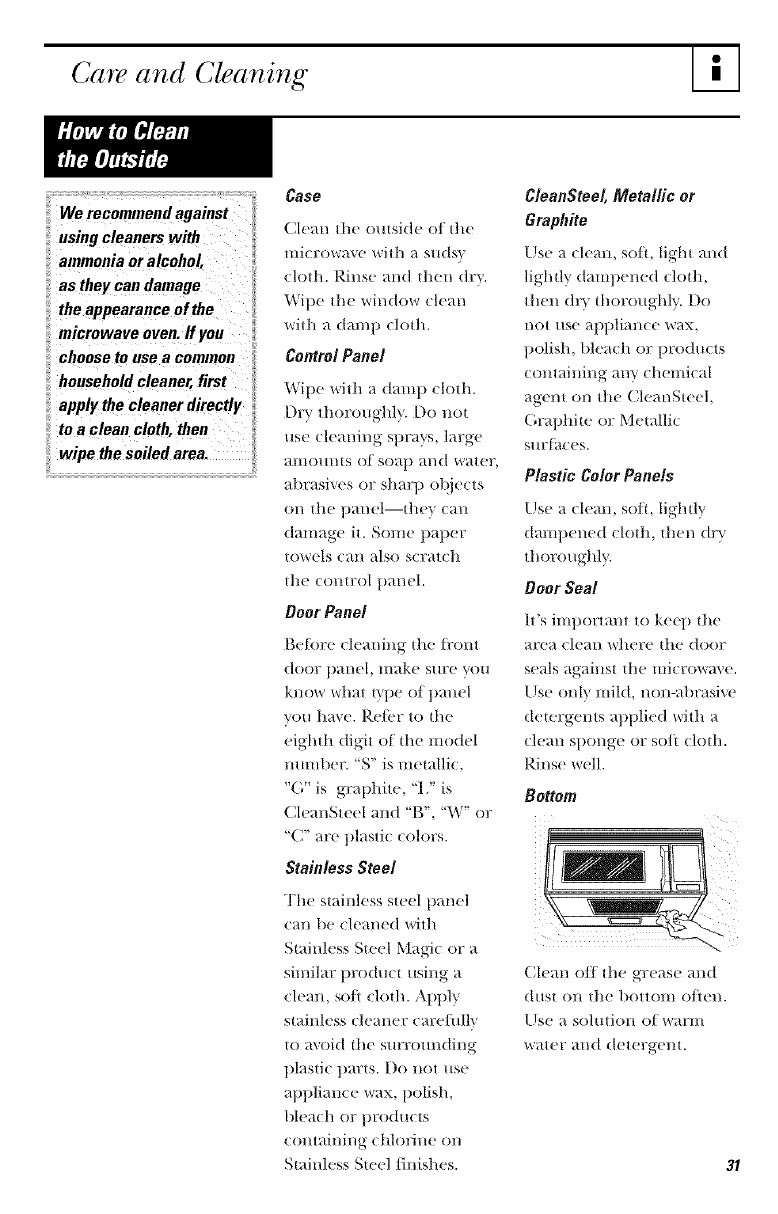
Bottom
Clean off tile grease and
(hlst on the bottOlll otlell.
Use a solution of warm
water and detergent.
31

%
Light Bulb Replacement
iI 40-wattincandescent
I To replace tile I/ull/, first
(liscolllle( t the l)(/wer ut
the main ills( or circuit
breaker panel or lmll
tile plug.
2Remove tile screw ti'oln
light cox(r and lower
the co'_ ( r.
3Be sure tile bulb is cool
l/elbre removing. After
breaking tile adhesive
seal, remove the bull) b_.
gently turning.
41Replace tile bull). Close
tfi_ light co_er and
secure tile co'_(r with tile
screw. Connect electrical
power to tile oven.
Remove Screw
ii Replace the burned,out
:: bulb with a 120 volt }
:: gO-watt incandescent
:bulbCwB3ax ooo3),
(: available from your
GE supplier.
1"1"orepla( e the oxen light,
firs| dis(ol/lle(t the t)ower
at the ]//all/filse or (iF(flit
breaker panel or pull
the l)lug.
2Remoxe the ti'ont grille l/v
backing out 01e 3 screws
along 0/e top, Slide 0/e
grille to the lefi, then pull
straight out.
32
3Rel//ove tile chin:coal
/ilten if llresem. Reach
imo |fie opening, just
right of (enter. The light
bull) is lo(ated tleneath
a light comt)artmem
cover. Press and hold
the center snap while
lifiing tile tab on tile
left corllett Remove the
cover. Remove file bult/
1)y turning gently.
4 Install the relllacemeni
bull). Reins|all |fie
coml)artment co_er and
charcoal filter, if present,
Reinstall the ti'ont grille
panel with the 3 original
screws.
terior Li
Housing
5(]Ol/l/ecl electri(al t)()_rer
to the ovell.
The Exhaust Feature
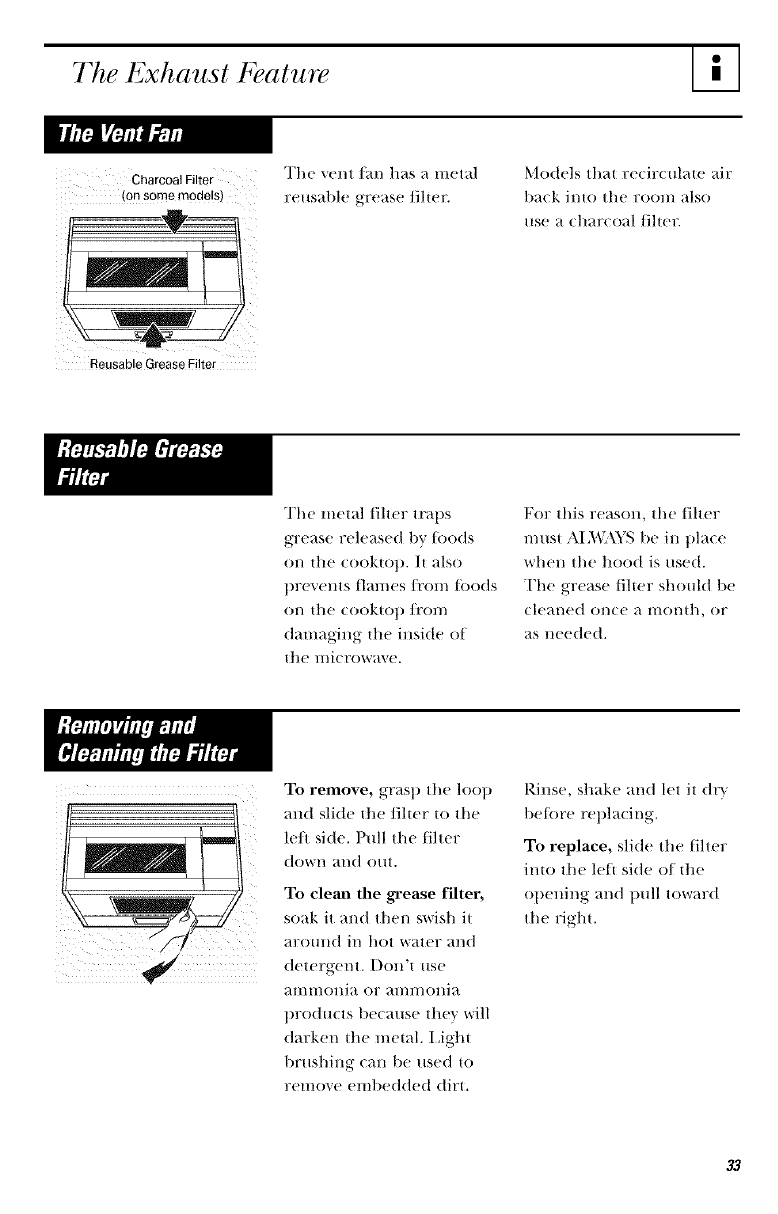
Charcoal Filter The xent ]'an has a Hleta]
(onsomem0dels) reusable grease filter.
Models that re/irculate air
balk il/to the rool//also
use a (har( oal filter.
Reusable Grease Filter
The metal fiher trails
grease released by toods
on tile cooktop. It also
preveHts ilames/_'om toods
Oil the cookto]) ]l'O]//
(/amaging the inside of
till' l//icrow_l_ e.
For this reason, tile filter
must AIM_\YS be ill place
when tile hood is used.
The grease fiher should be
cleaned once a month, or
as needed.
ITo remove, grasp tile loop
and slide tile filter to tile
le/1 side. Pull tile filter
dowl/ al/d o/It.
To cleml the grease filter,
soak it and then s'wish it
_lrOlllld ill hot water and
,eter ent )ol;t,ise
mnmonia or ammonia
prod u/ts i)e/ause they will
darken the metal. I _ight
brushing/ml be used to
remoxe embedded dirt.
Rillse, shake and Met it dry
betore replacing.
To replace, slide tile filter
into tile lett side of tile
opening and pull toward
tile riglm
33
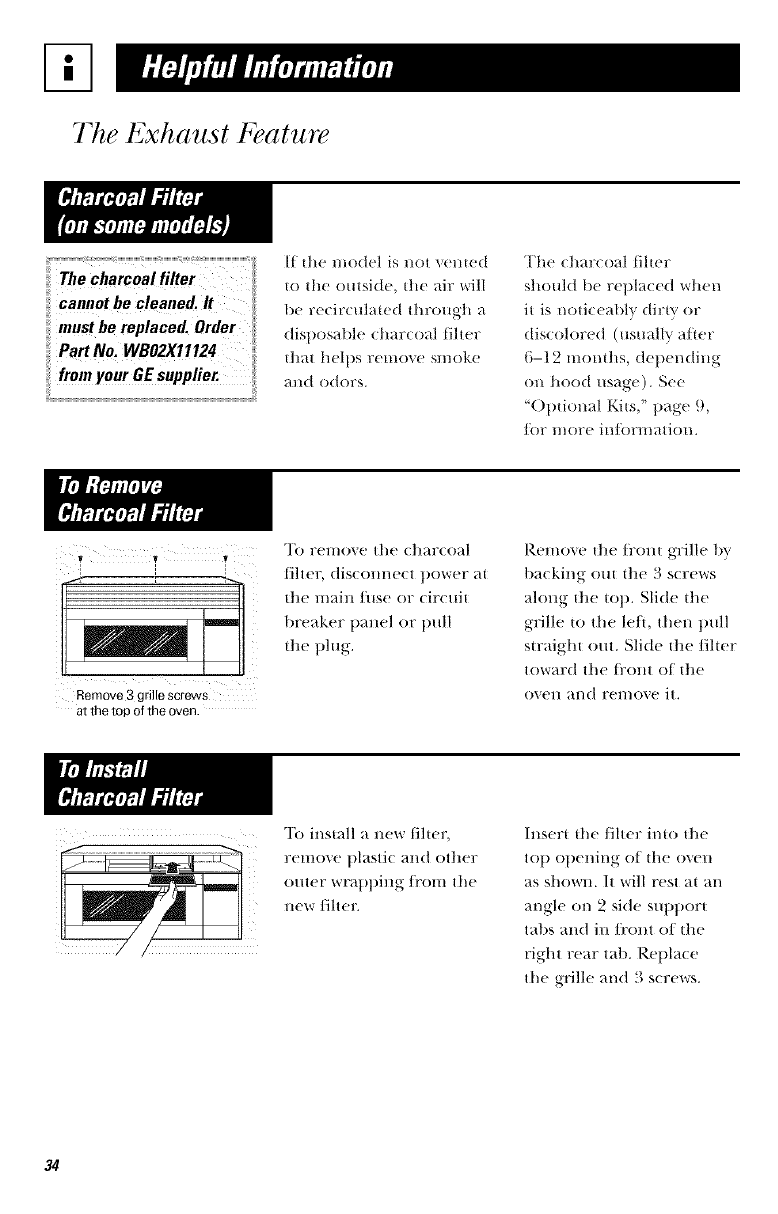
Part No. WBO2X11124
from your OE supplier.
If the model is not x(nted
to tile outsid(, the air will
lie r_ circul_ted through u
dispos_dfle charco>d filter
thut heltIs r(move smoke
and odors.
The charcoal filter
should lie replaced when
it is noticeably dirty or
discolored (usually alter
6-12 months, depending
on hood usage). See
"()ptional Kits," page 9,
]()1" l/IOr( inlk)rl//ation.
Remove 3 grille screws i i
at the top 0f the oven_
To l°el//o'_e the (]lar(oal
filter, diSCOlll/e(_t t)ower at
the main tuse or (ir(uit
breaker panel or pull
the plug.
Remove the fl:ont grille lU
backing out the 3 screws
along the top. Slide the
grille to the left, then ptfil
straight out. Slide the filter
toward the fi'ont of the
oven and remove it.
ii[ // i!
To install a new filter,
remove plastic and other
outer wrapping/ir)m the
new/iltelt
hJ,sert the filter into the
top opening of the oven
as shown. It x_ill rest at an
angle on 2 side support
tabs and in/i'ont o/the
right rear tab. Replace
the grille and 3 s(rews.
34
Before You Call For Service
Problem PossibleCause Whatto Do
Oven will not
start A fuse in your home
may be blown or the
circuit breaker tripped.
Power surge.
Plug not fully inserted
into wall outlet.
Door not securely closed.
Floor of the oven is
warm, even when
the oven has not
been used
The cooktop light is
located below the oven
floor. When the light
is on, the heat it
produces may make the
oven floor get warm.
"LOC" appears The conwol has been
on display locked.
Vent fan will not The vent fro1
turn off automatically turns on
to cool hlternal parts
Mille the microwave
is on.
"BAD PROBE" The probe has not been
appears On display completely inserted into
the oven wall outlet.
The probe is defective.
"PLEASEINSERT Probe has been
PROBES' appears forgotten or not
on display inserted properly.
"SENSOR ERROR" When ushlg a Sensor
appears on display feature, the door was
opened before steam
could be detected.
Steaul was not detected
in maxhntun mnotmt
of time.
•Rel)lace tuse or reset circuit breaker.
• Llnt)ft N the HliCrOW_tve ovell, thell plug
it 1)a(k in.
• Make sm:e the 3-1)tong plug on the
oxen is ftdlv inserted imo wall outlet.
• ()pen the door an(t close seem:ely.
• This is normal.
• Press and hold CI]L+\R/OFF tot
abom 3 seconds to mflock the coHtrol.
• "Fl/e VCH[ t_lll (_lllll()[ be [HrHc(I oil
while the mi(ro_a_e is operating.
This is normal. Wait [6r the mi( rowave
to turn off _md the tbH will eidler go
off mttomati(allv or you will need to
turn it off 1)5 pressing die Vent Fan
pad after the mi(rowave is o/E
Illser{ tfte t)robe t)rol)erly into the
ovell wall ()/ltlet.
• Ret)lace the probe.
• Insert the 1)rol)e 1)rot)erly iHto die
oxel/ wall oHtlet.
I)O llOt ot)el) door /llltil s{ealll is
sel/se(1 _'tlld til//e is StlOWrl/ C()Hlltil/_
down on disl)lay.
Use Time Cook to heat tk)r more time.
35
Before You Call For Service
o Moisture on t]l( ovel/
door and wails whik
cooking. Wipe the
moisture off with a paptr
towel o: so_i cloth.
o Moisture bt tween the
oven door pant ls when
cooking certain Ioods.
Moistm:t sh(mld dissipate
shordv after cooking is
linisht d.
o Steain of vapor t stal)i:/g
ll'ol/l alTot/l/d [lit alooF.
o Light refit cfion at(rand
door o1: Ol/ter case.
o Dimming oven light and
change in the blowt r
sound at power levt ls
other than high.
o Dull thumping s(mnd
while ovtn is operating.
o "I'ht ve:_t/:m opt rating
while the microw:_t is
operating. Tht vent/:m
will not go off nor can it
bt turned off until the
lnitrowa_t is oil.
o T\_radio interlZ'rt rice
might be noticed while
/lSil/g tilt InicYowavt.
Similar to the inter_Z'renct
caused bx othtr small
applianct s, it dots not
indicate a problem with
the microwme. Ph/g the
microwave into a t/lilt ten t
ek ctrical circuit, move the
radio or TV as lilr away
]]'onl [lit nliclTowavt as
possible or check tht
positionand signal of
the mViradio antetma.
36

We lBe
Hotpointcom
Hotpointcom
t]ave a question or need
assistance wilh VOllr
appliance? Try die
t]oq)oint Website 24 hom:s
a day, any day of the year!
"_bu can also shop fi)r
more great ItotpoiHt
products and take
advantage of all of our
on-line support services
designed for _r()_1_:
convenience.
800.GE.CARES
(800.432.2737)
Expert t]otl)oim repair
service is only ol/e step
away t_'om your door.
Get on-line and schedule
VO/lr service at v()/ll?
COllVel/iel/ce 24 holll?S
any day of the year!
()r (all 800.(;E.CAI),£2S
(800.4,'42.2737) during
normal business hom:s.
ge.com
800.TDD.GEAC
(800.833.4322)
GE SUl)l)orts the Universal
Design concel)t--l)rod ucts,
servi(es and enviromnents
that (mJ, be used It>}t)eotlle
o/all ages, sizes and
cat)at)ilities. We recognize
the need to design/or a
wide range of physical and
mental abilities and
iml)airmems. For details
of GE's Universal Design
applications, including
kitchen design ideas/or
t)eol)le with disabilities,
check out our \_i't)site
to(tar. For the hearing
impaired, please call
800.TDD.GEA(_
(800.833.432'.2)).
ge.corn
800.626.2224
Pro:chase a t]otpoint
extended warrant_ and
learn al)om special
(tis(om_ts that m:e a_ailable
while v(mr warramv is still
in e/lcct. You can t)m:chase
it on-lille anytime, or call
800.626.2224 d m:ing
normal business hom:s.
t]Otl)oint Consmner t ]ome
Services will still be there
atter vom: warranty ext)ires.
37

We'll Be There!
Hotpointcom
800.626.2002
Hotpointcom
In(livid uals qualified
to sevvice their own
_q)l)liam es ('ml have
t)m:ts or a((essories sent
dire(tlv to their hon/c.
(VISA, MasterCard and
Discover cards are
accepted.) ()rder on-line
m(t m, 24 hours e_er_ (lay or
1)_ rphone _t 800.626.2002
dm'ing normal business
ho/lrS.
Instructions contained
in this manual cover
procedures to be
performed by rely user.
Other servichlg generally
should be referred
to qualified service
personnel. Caution
must be exercised, since
improper servichlg may
cause tmsafe operation.
Register your new
appliance on-lhle--
at your convenience!
Timely t)roduct registration
will alh)w/or enhanced
comnmnication au(t
t)rou:q)t sevvi(e under tile
wrms of your warranty,
should the need arise.
51)u may also mail in tile
t)re-t)riuted registration
card included in die
t)acking material.
38

39
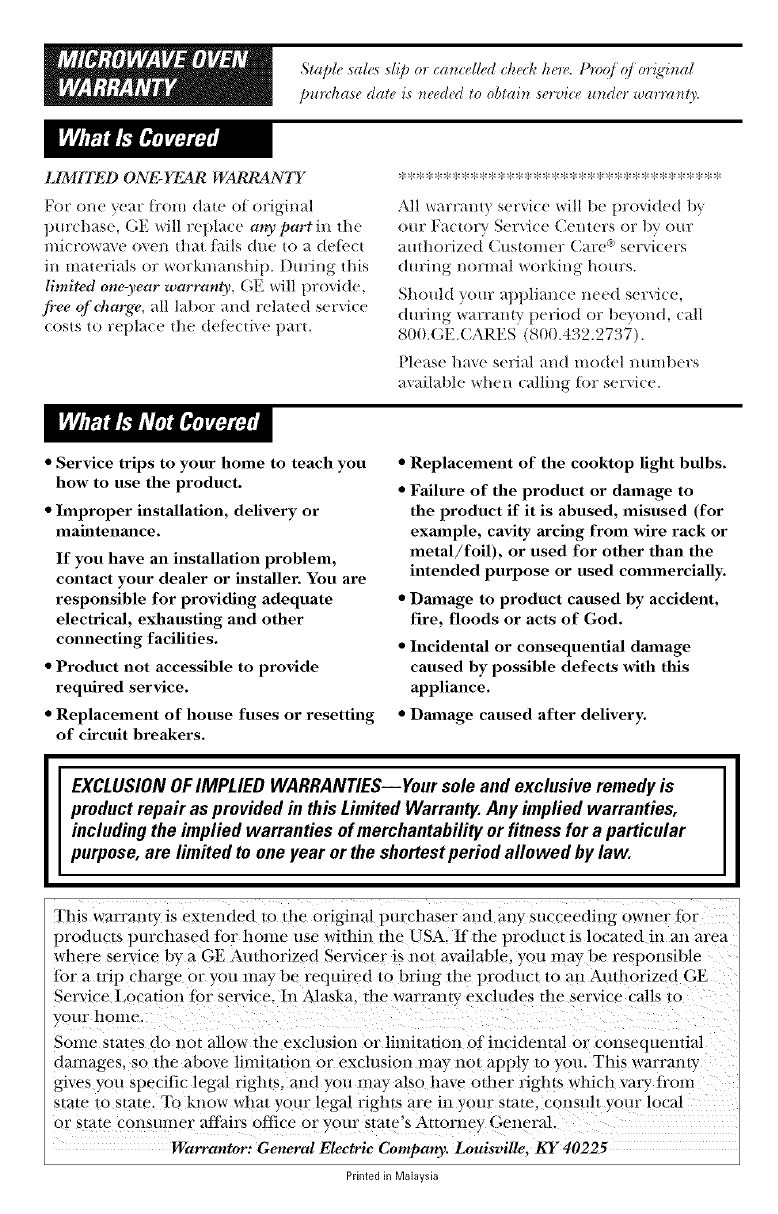
St'aide sa/c_5 _lip or ca_cdh, d clu,cl¢ he, v,. Pmo o ori._qmd
¢ ¢ ,
purH_ase daie i_ _eeded it obiain service under warra_ly.
LIMITED ONE-YEAR WARRANTY
For one year tl'oill (late of original
lmrchas(, (_E will replace any part in the
microwme o_en that lidls d/le to a d(l_'ct
in materials or workmai}ship. Dm:ing this
limited one-year warranty, C,E will proxide,
free ofchmlge, all labor and related service
costs to replace the d(lbctive part.
All warranty service will be provided by
()Ill; Factor\. Service Centers or 1)v o/lr
authoriz(d C/lstomer Care °'' servicers
dm:ing normal working hours.
Should your appliance n((d service,
d urii}g warran V period or beyond, call
800.GE.CARES (800.432.2737).
Please have serial and mod(I numbers
availaMe when calling tor service.
• Service trips to your home to teach you
how to use the product.
• Improper installation, delivery or
lllalntenauce.
If you have an installation problem,
contact your dealer or hastaller. You are
responsible for providing adequate
electrical, exhausting and other
connecting facilities.
• Product not accessible to provide
required service.
• Replacement of house fuses or resetting
of circuit breakers.
•Replacement of the cooktop light bulbs.
•Failure of the product or damage to
the product if it is abused, misused (for
example, cavity archlg from wire rack or
metal/foil), or used for other than the
intended purpose or used commercially.
• Damage to product caused by accident,
fire, floods or acts of God.
•Incidental or consequential damage
caused by possible defects with this
appliance.
• Dmnage caused after delivery.
EXCLUSIONOFIMPLIED WARRANTIES--Yoursoleand exclusiveremedyis
productrepairasprovided inthisLimitedWarranty.Anyimpliedwarranties,
includingthe implied warrantiesofmerehantability or fitnessfor aparticular
purpose,are limitedto oneyear orthe shortestperiod aflowed by law.
This warrant) is extended to _he original imrchaser and ally succeeding owner _i)r
products pur( based ti)r home use within the USA. If the product is located in m_ area
where service b} a (;E Authorized Servacer is not available, you may be responsible
{br a nip charge or you may be required to bring the product lo an Authorized GE
Service I,ocation lor ser_ ice. In Alaska. the warranlv excludes the service calls lo
your honle.
Some sm_es do not allow the exclusion or lilnimfion of incidental or consequential
damages, so the above limitation or exclusion lllay 11o[ apply to you. This warranty
gives you specitic legal rights, and you may also h_we oilier rights which vm T ti'om
s_a_e _o s/nip. To know wha/your legal rights al't _ in your state. COllSull your local
oI stale constnuer afthirs oItice or your slale's 2\Horney (;eneral.
Warrantor: General Electric Company, Louisville, KY 40225
Printed in Malaysia
