HP Laser Jet Print To Mail (English) Solution Guide, 5968 9701EUC Bpl07844
User Manual: HP HP LaserJet Print to Mail - (English) Solution Guide, 5968-9701EUC
Open the PDF directly: View PDF ![]() .
.
Page Count: 16

• Using Print to Mail with your software
• Printing mail-ready checks
• Expanding the Print to Mail system
• Customizing media to improve your image
• Tips on integrating Print to Mail into your office
Tips and Tools for simplifying
your office mailings
Solution Guide
HP LaserJet Print to Mail
solution_guide_layout.qxd 4/11/00 10:08 AM Page 1

Table of Contents
4 Easy Steps from Print to Mail
Introduction .................................................................................................................3
Establishing Print to Mail in Your Office
Options for Completing Steps 1-4 ....................................................................6
Adjusting Your Output for Print to Mail ............................................................7
Reformatting Your Data on Print to Mail Forms
Why Do I Need to Reformat My Documents?
How Do I Reformat My Documents? ............................................................8
Selecting the Right Print to Mail Media ..........................................................10
Printing Secured, Sealed Checks ........................................................................12
Signing Checks and Other Documents ..........................................................13
Printing Postage with Your Printer......................................................................14
Tips on Using the HP LaserJet Print to Mail System ................................15
Print to Mail Solution Providers ..........................................................................16
2
solution_guide_layout.qxd 4/11/00 10:08 AM Page 2
1
2
3
Introduction
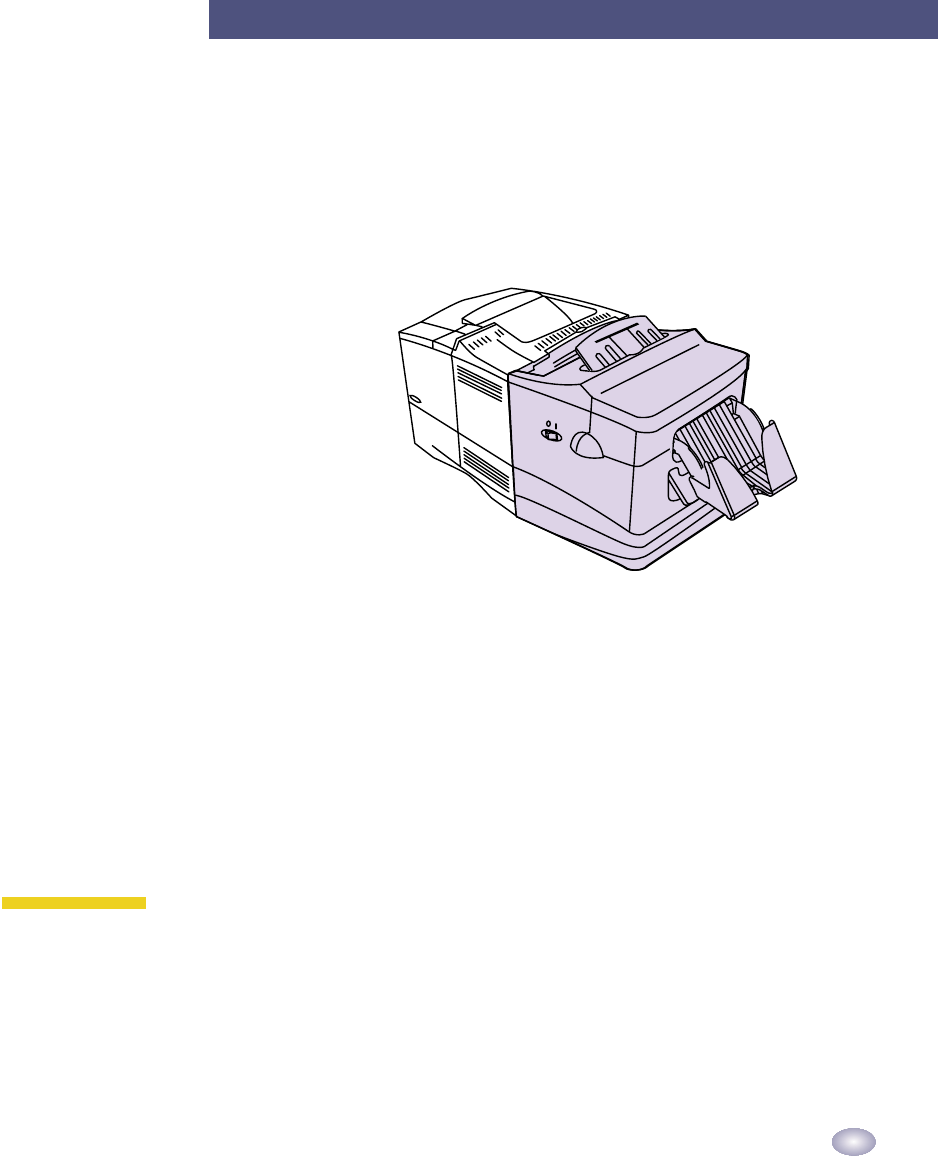
Install your Print to Mail accessory
Instructions for installing the accessory are included in the
HP LaserJet Print to Mail User’s Guide. The installation
requires an HP LaserJet 4050 printer and the Print to Mail
folding and sealing accessory.
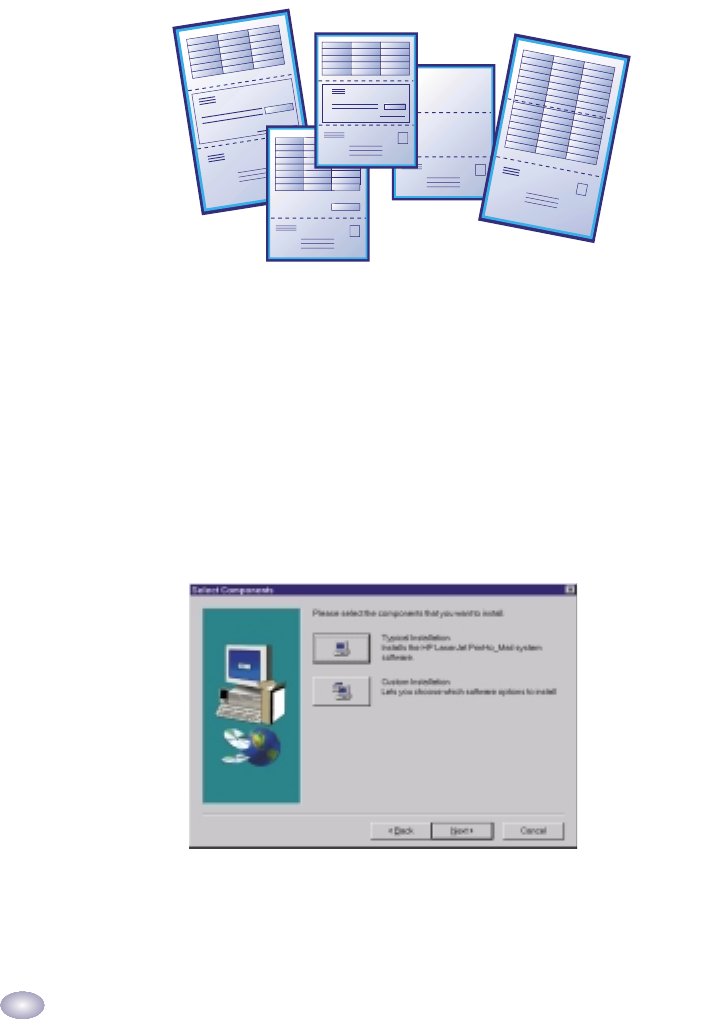
Select your special Print to Mail forms
While your LaserJet Print to Mail system will Z-fold standard
paper, you can significantly increase your productivity by
using special Print to Mail forms. These forms are folded and
pressure sealed in one step, eliminating the need for an enve-
lope and the labor required to insert and seal the envelope.
Print to Mail forms are available as blank stock or as pre-
printed, color mailers. Preprinted mailers are standardized
for use with common accounting software like QuickBooks
or Peachtree, or you can have them personalized for your
specific business needs. There are also forms available that
are specially designed as checks, or you can create your
own checks on blank Print to Mail forms. Page 12 describes
different options for printing checks.
All of these forms are available by contacting Moore
North America, HP’s solution partner for LaserJet
Print to Mail. (See page 16).
4 Easy Steps from Print to Mail
solution_guide_layout.qxd 4/11/00 10:08 AM Page 3
3Format your printer output for Print to Mail forms
The LaserJet Print to Mail accessory is engaged by opening
the rear exit door of the printer. No software is required to
control the device. However, two adjustments must be made
to the printed data. Most forms require that the image on
the page be rotated 180 degrees (printed upside down rela-
tive to the usual printed orientation). The proper page size
must also be set to letter or legal—depending on the size
of your Print to Mail form. For customers with Windows-
based accounting software, a Print to Mail CD is provided in
the box to help you properly size and orient the page. For
non-Windows users, refer to page 7 for instructions on
adjusting your printer output. (See the Print to Mail User’s
Guide for further details.)
4
HP LaserJet Print to Mail system software
solution_guide_layout.qxd 4/11/00 10:08 AM Page 4

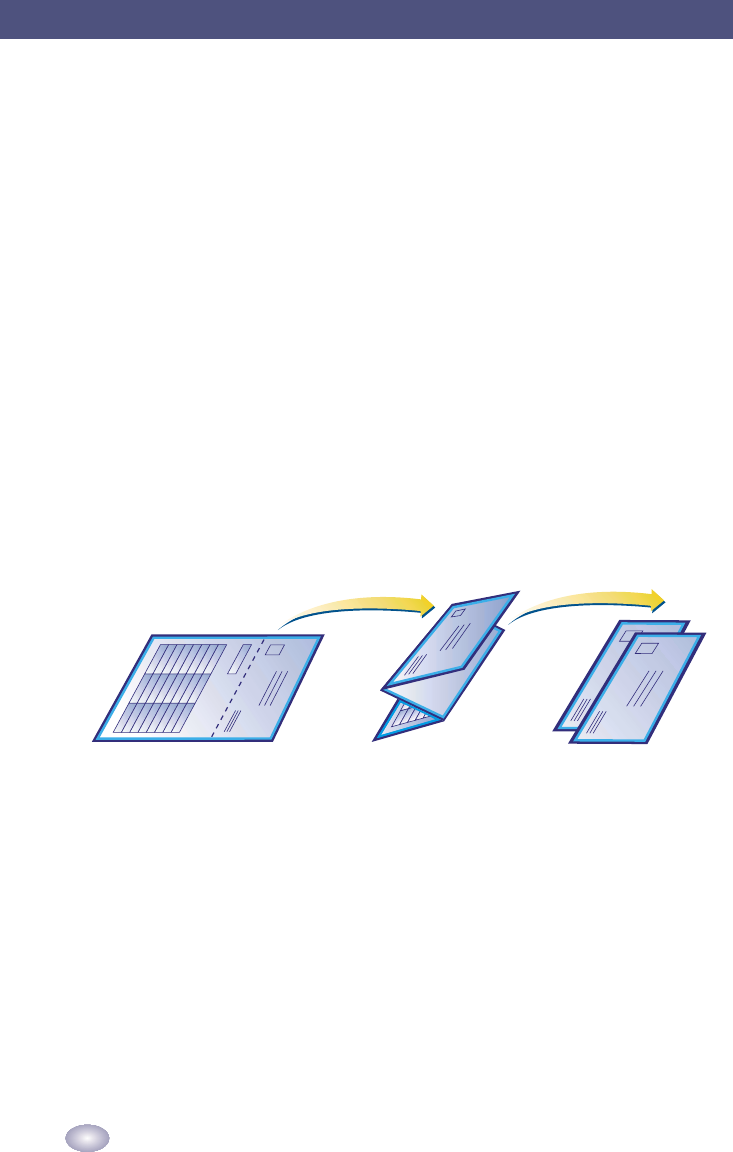
4Format your mailer’s data correctly
In addition to page size and orientation, your data must be
positioned in the appropriate place on the form so that the
address appears on the outside of the mailer and the data
is folded inside. If you are using Print to Mail mailers, the
system requires the form to have the address on the bottom
1/3 of the page with the upper 2/3’s reserved for your
data—opposite the format of most applications that are
designed to print for window envelopes. It also requires
certain margins for the “tear away” sides. Each specific
application (i.e. invoices, checks, billing statements) will
require that the data be formatted correctly.
The following pages explain your options in more detail
5
solution_guide_layout.qxd 4/11/00 10:08 AM Page 5
Options for Completing Steps 1-4
HP has given careful consideration to your business
environment and we have assembled a consortium of
products that will turn the HP LaserJet Print to Mail system
into a simple and complete mail process for your office.
(More information on each of these solutions is available
in detail in the right column.)
Section A: Set up your hardware and select media
Section B: Rotate your image (select one option)
Section C: Modify your forms (select one option)
6
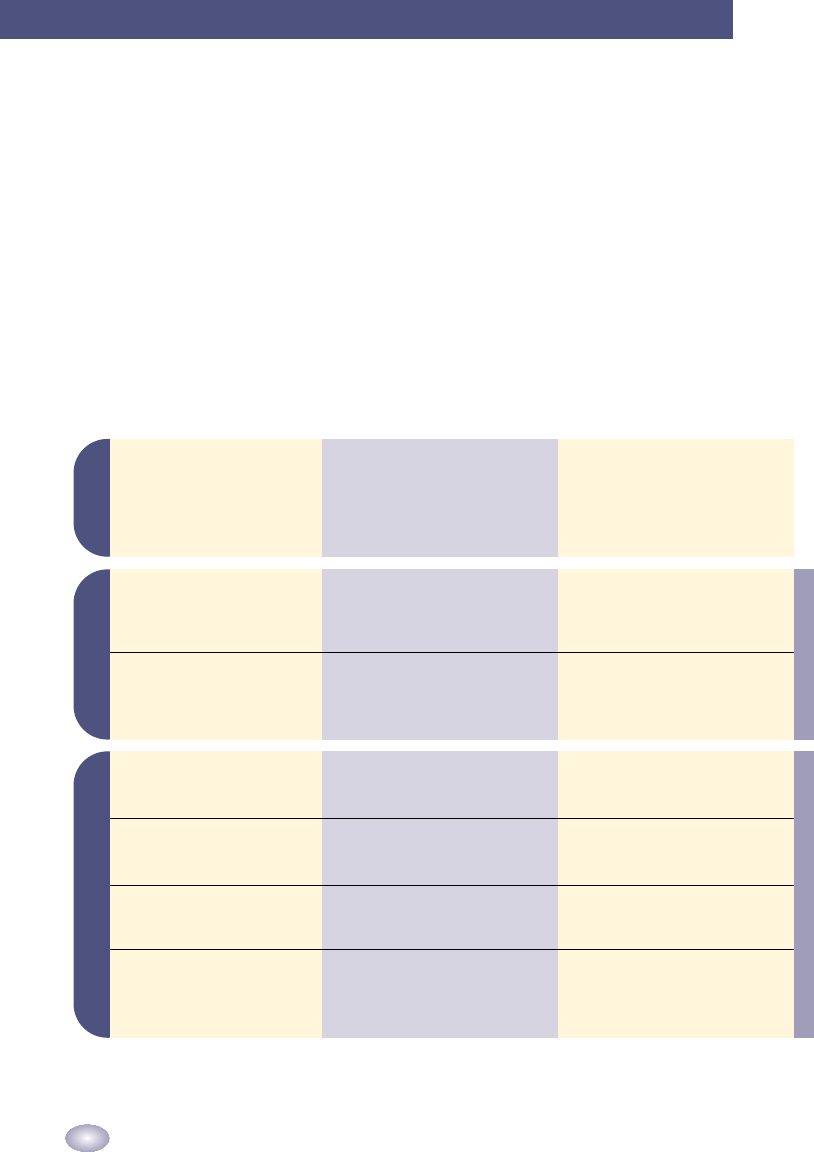
If you use: You need: From:
A
B
C
Establishing Print to Mail in Your Office
Any Computing platform
Windows 9x, NT 4.0,
and 2000
Other operating system
The latest versions of Intuit’s
Quickbooks, Peachtree,
or MS Word
Software applications
which permit simple form
reformatting
Windows based software
that does not support
customizing your forms
Windows OR non-Windows
based software that does
not support customizing
your forms
• A Print to Mail accessory
• An HP LaserJet 4050 printer
• Print to Mail forms
(blank or customized)
• The HP Print to Mail Windows
software to properly orient the
printer’s output
• To set the proper paper size
(letter or legal)
• To send the PCL command for
“portrait, rotated”
• Document templates and instruc-
tions to help you format your data
• Layout templates for formatting
and positioning your data
• A Windows “print filter” that refor-
mats your data after you click print
• A printer DIMM which reformats
your data to fit the form once it
reaches the printer
HP
Moore North America
(see page 16)
HP, on the Print to Mail CD ROM
HP’s documentation
HP, on the Print to Mail CD ROM
Moore Media Sample Pack
(included with Print to Mail Accessory)
“PrintChef” for Print to Mail from
MindGate (see page 16)
Capella’s Auto-Formatting DIMM
(see page 16)
for more detail see page 7 for more detail see pages 8-9
solution_guide_layout.qxd 4/11/00 10:08 AM Page 6
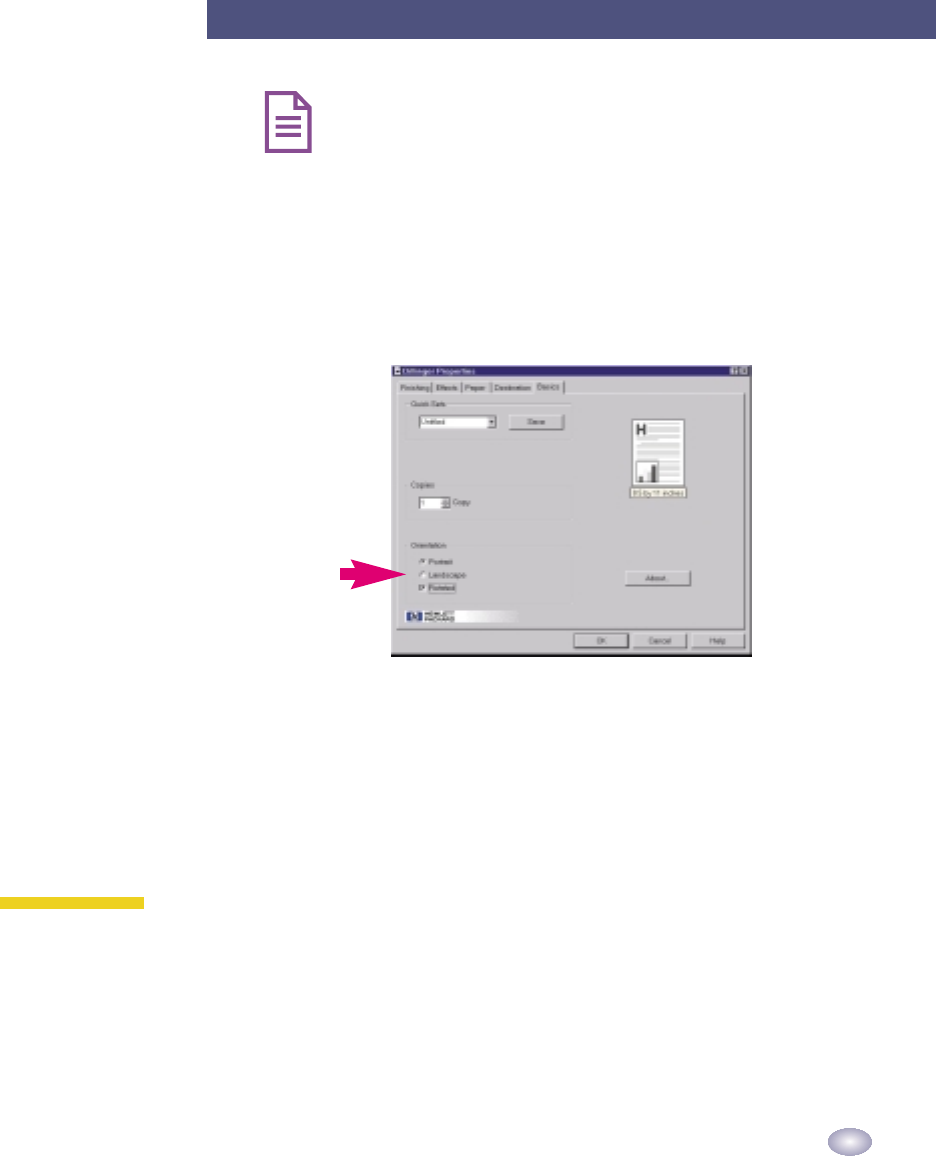
If you are using Windows 9x, NT, or 2000, you should simply
load the software from the CD included with the Print to
Mail system. The print job must be rotated 180 degrees so
that the address panel will emerge from the printer first. If
the job is not rotated, the outside of the mailer will contain
data that was meant to print inside the mailer.
When you print, simply set the proper paper size (letter or
legal) and set the orientation to “portrait” “rotated” in the
printer’s “properties.”
If you are NOT using Windows 9x, NT, or 2000, you will
need to send special commands to the printer to rotate the
image and set the paper size. If you need assistance with
inserting these commands in your application, contact
your application vendor. The HP Customer Care Center
may be able to help with the formulation of these commands.
See your user’s manual for the HP Customer Care Center
contact information.
Don’t want the hassle? Capella Technologies’ “Print to Mail
Assistant” DIMM can be installed in your printer and will
rotate the page automatically. This DIMM is available from
Capella Technologies (see page 16.)
7
Adjusting Your Output for Print to Mail
solution_guide_layout.qxd 4/11/00 10:08 AM Page 7
Why Do I Need to Reformat My Documents?
Print to Mail forms replace both the envelope and the paper
used with conventional mail. Since each form incorporates
both the address panel (on the outside of the mailer) and the
data that will be folded inside the mailer, you will need to
format your page accordingly.
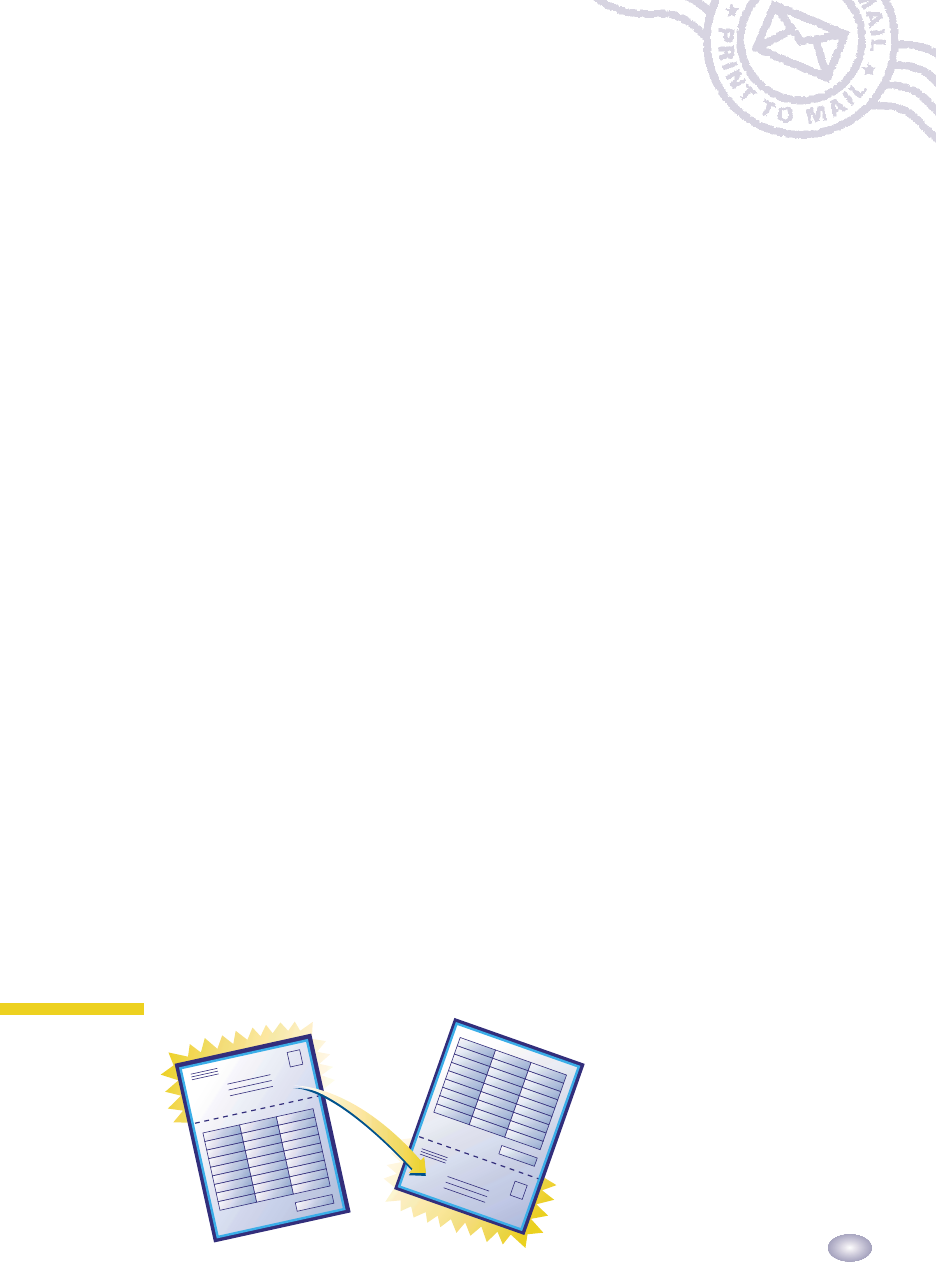
If you use window envelopes today, your data is probably
formatted in a way similar to a Print to Mail form. However,
the addresses are probably located at the top of the
document. For LaserJet Print to Mail, your addresses need
to be located on the bottom of the form. Also, on traditional
invoices, some data like the account number may be located
on the address panel. This is acceptable when using a window
envelope because the envelope blocks all areas except the
address windows. On a Print to Mail form, any data on the
address panel will be readable from the outside of the mailer.
You will probably want to move this extra, non-address data
to an area that will be inside the mailer.
8
Formatting Your Data on Print to Mail Forms
How Do I Reformat My Documents?
Most accounting software applications allow you to easily
reformat your documents to work with Print to Mail forms.
Often, you only need to reformat the document template in
your database or accounting software (sometimes called a
“report writer”). There are several methods available to
manually or automatically reformat your data.
• Manually reformat your mailings. Paper templates are
included with the Print to Mail media sample packs that
will help you place data in your documents. (See page 11.)
solution_guide_layout.qxd 4/11/00 10:08 AM Page 8
9
• Use HP supplied electronic templates. Templates for the
latest version of Intuit’s QuickBooks, Peachtree account-
ing software, and Microsoft Word are included with the
Print to Mail accessory.
If you cannot easily reformat your documents, solutions
are available that will automatically rearrange your docu-
ments without changing your software application.
• Automatically reformat your Windows output, without
changing anything in your application. PrintChef from
MindGate Technologies allows you to select “PrintChef”
as your printer, rather than the “HP LaserJet 4050 Printer.”
When you click “OK” to print, an extra screen will appear
that will assist you in modifying your form. PrintChef can
move your address data to the bottom of the form and
reposition other data. It can even create a mailer from your
existing letter sized form after it leaves your application
by fitting it onto a legal size “Print to Mail” form. It will
then create the address panel using the extra space on
legal sized paper. This solution can also apply electronic
postage to your mailers and merge data from multiple
sources. For more information, visit MindGate at
www.mindgate.com
• Automatically reformat any document at the printer with
a solution from Capella Technologies. This solution works
well, regardless of your operating system or application.
A hardware DIMM is inserted into the printer that can
reformat your form as it enters the printer. Simply send
an electronic copy of your form to Capella and they can
program the DIMM specifically for your needs. For more
information, contact Capella at www.capellatech.com
solution_guide_layout.qxd 4/11/00 10:08 AM Page 9

The LaserJet Print to Mail system is a versatile and valuable tool
for automating office mailings. The alternatives listed here repre-
sent a wide breadth of media solutions for your business.
• Fold standard paper with your LaserJet Print to Mail system —
Sometimes, you need to send a traditional letter. Whether
you are sending formal business correspondence, detailed
statements that won’t fit on Print to Mail mailers, or you
need to insert additional material (like a return envelope)
you can save time and money by using the LaserJet Print
to Mail system. The LaserJet Print to Mail accessory will
Z-fold 20-24#paper. Z-folds are excellent for inserting
into window envelopes or standard envelopes.
• Create complete mailers with blank Print to Mail forms—
To maximize office mail efficiency, Print to Mail forms offer a
one step mail preparation process. The forms have specially
placed, pressure activated glue that is sealed as it passes
through the Print to Mail accessory. This allows you to insert
the media in the printer’s tray, click print, and take completed
mailers from the Print to Mail system’s output bin.
• Blank forms have pressure activated glue and blue
security panels to ensure privacy.
• Print to Mail check forms are specially designed to
prevent fraud.
• Blank forms can be pre-printed to include your company
logo or other specialized looks.
• Specialized Print to Mail forms —The most common use of
the HP LaserJet Print to Mail system is for accounting mail
such as invoices, checks, and payroll. Pre-printed invoice
and check forms are available for common software pack-
ages such as Intuit’s QuickBooks and Peachtree accounting
software. These color-imprinted forms can be customized to
include your company logo.
•Customized Print to Mail forms —If your business has spe-
cial form needs, you can have almost any form pre-printed.
See Moore’s catalog that’s included in the starter kit or go
to www.themoorestore.com.
10
Selecting the Right Print to Mail Media
solution_guide_layout.qxd 4/11/00 10:08 AM Page 10
11
All of these forms are available directly from the Moore
order center (see page 16.) The Print to Mail forms come in
packages of 250, but are available in quantities of 500 or
greater with volume discounts.
7.5"
7.5"
.5"
6.3"
3.1"
1.1"
5.5"
2.7"
4.2"
1.1"
.5"
7.5"
9.4"
3"
1.1"
.5"
7.5"
6.3"
6.1"
1.1"
.5"
PRINT AREA
PRINT AREA
PRINT AREA
PRINT AREA
tear-away remittance
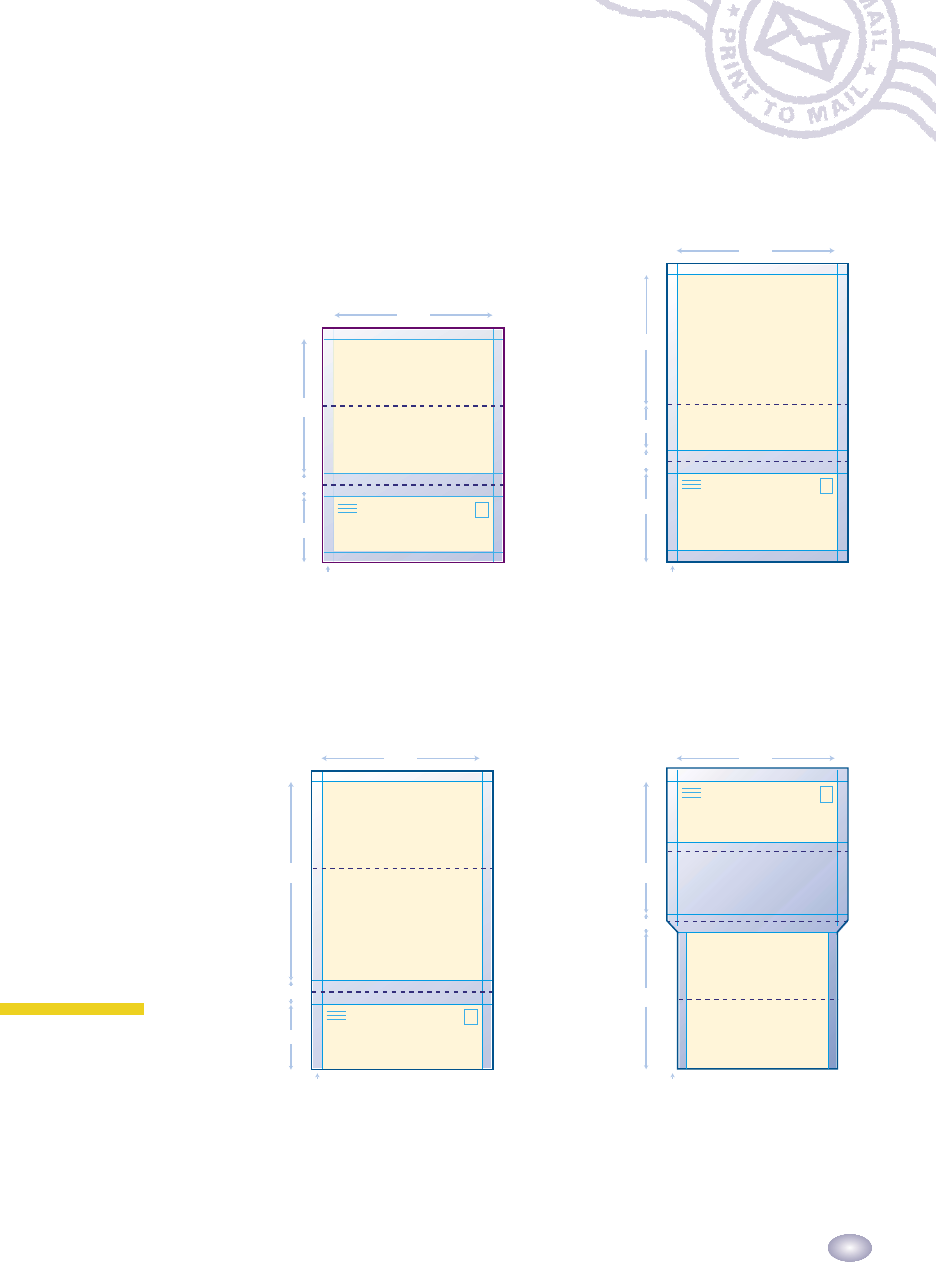
Letter Size 4B
Excellent general, low cost form when
extended printing space is not needed.
(Printable area, inside mailer:
7.5" wide by 6.3" long)
Legal Size 2C
An effective form when a larger print
area is required. Ideal for invoices,
statements and promotional mailings
where a detachable remittance advice or
coupon is required. (Printable area,
inside mailer: 7.5" wide by 8.2" long)
Legal Size, Easy Open 4D
Tear a single strip from the top of the
mailer to reveal a 7.5" wide by 6.1" long
insert. Great for promotional pieces.
Limited availability. (Printable area,
inside mailer: 7.5" wide by 6.1" long)
Legal Size, Extended Image 1B
An effective form when larger print
area is required. Nearly the same print-
able area inside as a letter size piece of
paper. (Printable area, inside mailer:
7.5" wide by 9.4" long)
solution_guide_layout.qxd 4/11/00 10:08 AM Page 11
12
Producing, managing, and mailing checks exposes a business
to risk—particularly if you’re sending a large number of
checks each month. The HP LaserJet Print to Mail system
can help your business manage this risk by providing folded
and sealed checks that are ready to mail. The check and
“envelope” are made from one piece of paper so getting
checks into the right envelope is assured. The checks emerge
from the machine sealed so they are not visible to others.
Special check printing solutions provide additional security
to the process. If your business needs to print checks, several
options are available.
•Select your media —Print to Mail check forms have
numerous fraud prevention features including fluorescent
paper fibers, solvent reactivity to indicate altering, an arti-
ficial watermark, a security coating to enhance toner
adhesion and special printing that displays “VOID” if the
check is copied.
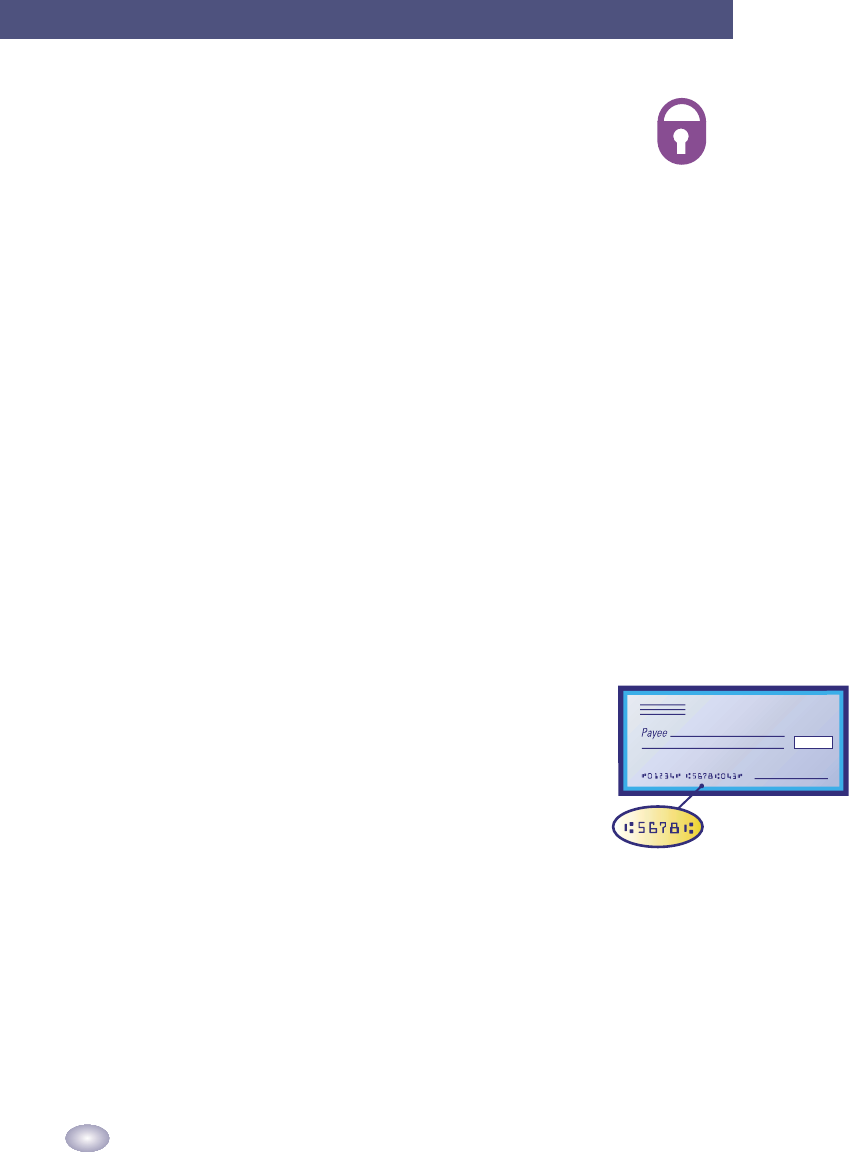
•Imprint checks with bank numbers (MICR-line) and check
numbers. There are 3 ways to have these numbers put on
your Print to Mail form.
1. You can purchase blank check stock and have a print
shop print the special MICR coding on the checks
(check with your printer to ensure they are able to
print with MICR ink. This ink is specially formulated
to be read by bank scanners).
2. You can have Moore’s media center imprint the
checks for you. Contact Moore’s media center
(see page 16.)
3. Your HP LaserJet 4000 or 4050 can print the entire
check, including MICR numbers on blank check stock.
This option allows your business to save money on
checks. You must purchase a special toner cartridge
and a special font DIMM. For more information contact
Capella Technologies (see page 16.)
Printing Secured, Sealed Checks
solution_guide_layout.qxd 4/11/00 10:08 AM Page 12
13
Because the LaserJet Print to Mail system prints, folds,
and seals the checks in one step, the checks must be hand
signed, or the signature must be printed on the check as it
passes through the printer. Electronic signatures are
commonly used by most major corporations.
If you prefer to visually inspect the checks before sealing
them, the LaserJet Print to Mail device has an opening
between the printer and the accessory that will allow you
to view the checks just before they are folded and sealed.
The device cannot be paused, but a quick glance can ensure
the payee, the amount, and the signature are all in place.
If you prefer to sign the checks after they are printed,
consider the “Print to Mail Assistant” DIMM from Capella
Technologies (see option 2 below).
There are 4 ways to sign LaserJet Print to Mail checks:
1. Presign the checks before printing them. This option
works well for companies that print relatively few checks
or individuals who prefer to personally sign every check.
2. Capella Technologies sells an economical DIMM that
can be installed in your printer to assist with check
making. This DIMM, called the “Print to Mail Assistant,”
allows you to print the checks, sign them, and then
easily rerun the checks through the “Print to Mail” system
to be folded and sealed.
3. Include a signature bitmap in your application. Simply
insert a scanned bitmap of your signature into your
software on the signature line. (Capella can scan your
signature and provide it to you. MindGate also has
signature solutions.)
4. When signature control is required, your signature can
be electronically encoded and inserted into a DIMM
—a small removable card that can be inserted into
your printer. Signature DIMM’s ensure that only your
specific printer can print your signature. Other processes
are available that help ensure the security of your
signature. (Capella Technologies offers an extended list
of options for securing your Capella signature.)
Signing Checks and Other Documents
solution_guide_layout.qxd 4/11/00 10:08 AM Page 13
14
With Stamps.com™and MindGate’s PrintChef software, you
can automate the postage step in your mailing process.
Since the postage is printed at the same time your job prints,
you can print, fold, seal, and post your documents in one
step. Just click “Print” and drop the mailers in the mailbox.
Stamps.com allows you to purchase and print postage right
from your desktop. All you need is an on-line connection,
printer and computer. No additional hardware is required.
PrintChef can apply postage on Print to Mail forms from any
Windows application. When you print, select “PrintChef”
instead of your “HP LaserJet 4050.” PrintChef will add
postage to your output before sending it on to the printer.
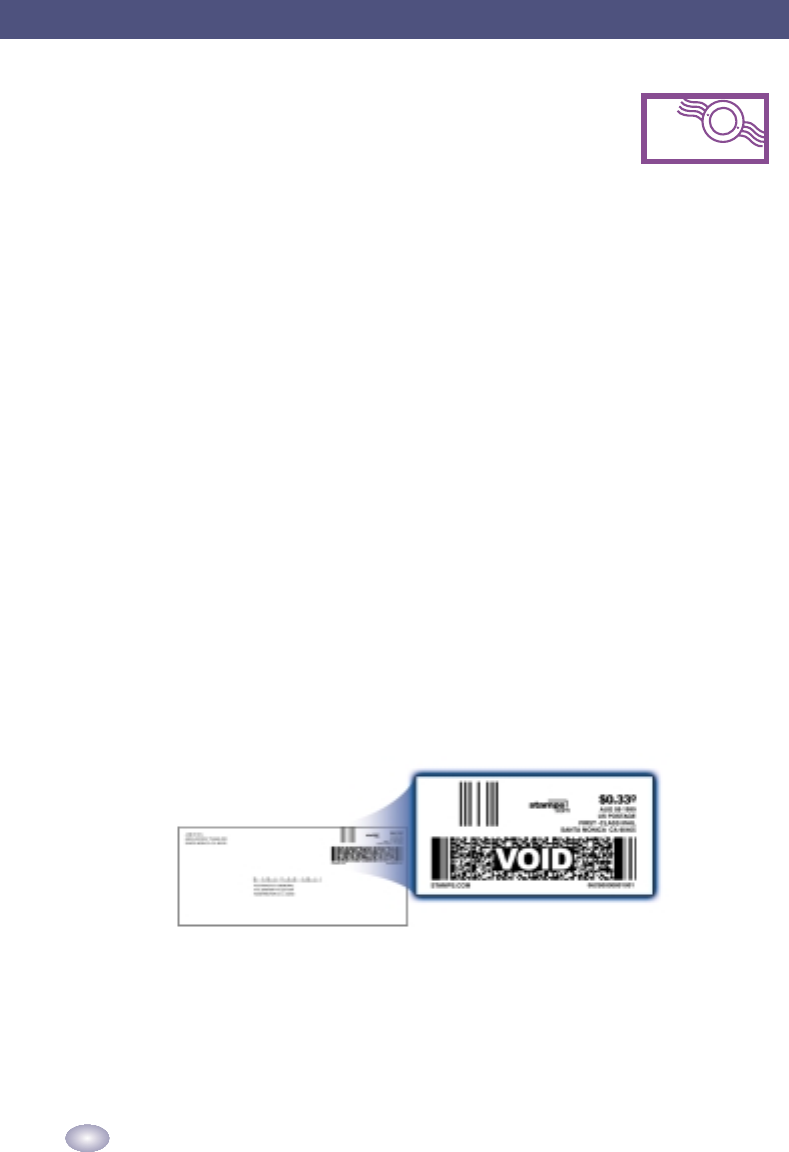
Internet Postage™is a great addition to your office mailing
system. Stamps.com uses an indicia in place of a stamp or
meter mark. This two-dimensional barcode contains informa-
tion to make your mail piece unique, such as delivering and
routing information, postage value and a digital signature.
You can vary the postage amount depending on the piece.
To use this solution, you must be connected to the Internet
when you print.
For more information on these solutions, visit
www.stamps.com/hp or www.mindgate.com
P
R
I
N
T
T
O
M
A
I
L
•
P
R
I
N
T
T
O
M
A
I
L
•
Printing Postage with Your Printer
solution_guide_layout.qxd 4/11/00 10:08 AM Page 14

15
• Print to Mail is not just for mail! It is great for securing
confidential personnel documents, medical and grade
reports, PIN numbers, and other sensitive documents.
• What about a return envelope? Many businesses experi-
ence no negative effects when they omit the return enve-
lope. If you are concerned, consider using Print to Mail
forms for your current accounts. For your past due
accounts, use the Print to Mail accessory as a folder for
traditional invoices with return envelope inserts.
• Use Print to Mail for promotional mailings! Great for
coupons and personalized messages.
• Electronically stamp your media. Electronic postage,
printed through your printer, is becoming standard.
Check with stamps.com for a Print to Mail solution.
• Need a copy of your invoices and other documents?
Print the job once on plain paper with the rear door of
the printer closed. Check it for accuracy. Reprint the job
a second time on special forms with the rear door open to
engage the Print to Mail accessory. The Capella “Print to
Mail Assistant” DIMM can automatically print a proof copy.
• If you use the Print to Mail with your LaserJet 4000
(rather than your 4050) you will need to install and use
the 4050 driver on your 4000. Drivers are available at
www.hp.com (support). The LaserJet 4000 printer will
continue printing if your Print to Mail accessory jams.
The LaserJet 4050 printer stops when the accessory jams.
Tips on Using the LaserJet Print to Mail System
solution_guide_layout.qxd 4/11/00 10:08 AM Page 15

16
Moore-www.themoorestore.com
Mailers are available in the most popular sizes and formats to suit a
wide variety of applications, including invoices, statements, checks,
notices, reports and tax forms. Patented SealerMate®technology
insures reliable operation and secure sealing for complete confi-
dentiality. For added visual impact customize your mailers by
adding color, logos and other graphics with Moore’s custom print-
ing services. Review the media catalog in the starter kit or visit our
web site or call 1-800-323-6230.
MindGate-www.mindgate.com
PrintChef®reformats the output of any Windows application to
work with HP’s LaserJet Print to Mail system. Choose from hundreds
of print recipes that will readily transform invoices, checks, payroll,
and promotional pieces into layouts ready for the HP Print to Mail
solution. PrintChef also creates bar codes, makes booklets and
impositions, plus many other features. Call 1-800-648-6840.
Peachtree-www.peachtree.com
With a complete line of checks and forms, Peachtree has the
Print to Mail forms you're looking for. Let Peachtree customize
your forms with your logo or choose from a selection of free
standard logos. Plus, all Peachtree forms are tested and 100%
guaranteed to work with your Peachtree Software. For more
information visit our web site or call Peachtree Business Checks
and Forms at 1-800-617-3224.
Capella-www.capellatech.com
Customize your Print to Mail process to meet your business
needs. Capella Technologies offers “add on” options for printing
secure MICR checks, barcodes, signatures, logos, e-forms, trans-
form data and offers forms design services. For more informa-
tion on these and other Capella products visit our web site at
www.capellatech.com or call 1-888-232-4200.
Stamps.com-www.stamps.com
It’s the easiest, quickest way to get postage: Stamps.com™
Internet Postage™. There is no need to stamp or meter your mail,
U.S. Postal Service-approved postage is automatically printed onto
envelopes, labels or Print to Mail mailers from your HP printer, all
in one step! For more information go to www.stamps.com/hp and
download your free software to start printing postage today!
Enter promotion code: 200149. For customer support or more
information about Stamps.com call 1-888-434-0055.
MindGate
© Hewlett-Packard Company, 2000 Printed in the USA The information contained in this document is subject to change without notice. 5968-9701EUC 4/00
HP Print to Mail Solution Providers
solution_guide_layout.qxd 4/11/00 10:08 AM Page 16
