HP Create And Use Variable Data In Web Jetadmin ENWW C05382532
User Manual: HP HP Web Jetadmin - Create and Use Variable Data
Open the PDF directly: View PDF ![]() .
.
Page Count: 6

1
CREATE AND USE VARIABLE DATA
in HP Web Jetadmin
CONTENTS
Overview ............................................................................................................................. 2
Create user defined fields to store your variable data .................................................................. 2
Import the variable data into HP Web Jetadmin.......................................................................... 3
Create a template with variables .............................................................................................. 3
Using variable data with OXPd files ......................................................................................... 4
2
OVERVIEW
With HP Web Jetadmin 10.4 SR2 or later, templates and OXPd files support variable data.
When creating a configuration template, the following configuration options support variable data:
● Asset Number
● Quick Sets
● LDAP Sign in Setup
● Fax Archiving
● Fax Header Settings
● Outgoing Servers
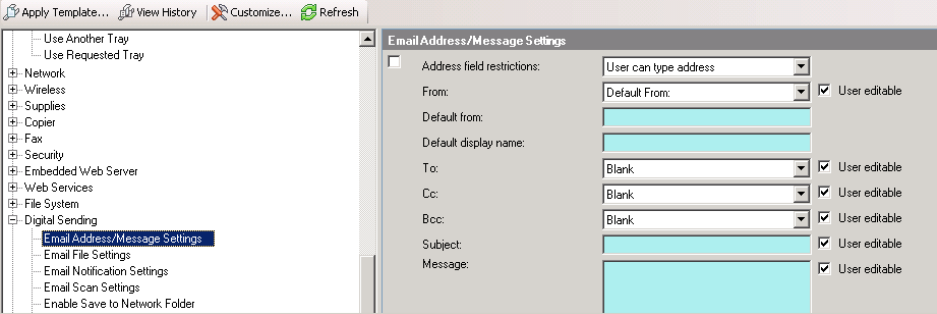
● Email Address/Message Setting
If the value field for the configuration item displays a blue colored background, then that configuration item can use
variable data.
CREATE USER DEFINED FIELDS TO STORE YOUR VARIABLE DATA
If you want to use variable data, you need to create user defined fields to store your variable data. The user defined
field can have any name. Use the following steps to create user defined fields:
1. Click Tools, and then Options.
2. Click Device Management, and then click the plus sign to expand Configuration, and then
click User Defined.
3. Click New to create a new user defined field.
4. On the Create User Defined Settings screen, in the Setting Name field, enter a name.
For example: var_DefaultFrom or var_DefaultDisplayName.
3
Tip: By starting the variable data name with var_, it’s easier to find and identify user
defined fields in HP Web Jetadmin.
5. Click OK, and then repeat these steps for all the variable fields.
Note: Every user defined field uses a unique number in the HP Web Jetadmin database which is invisible to
users. If you delete a user defined field and create a new user defined field with the same name, another
unique number will be associated with the user defined field. Therefore, you must create the user defined field
on one HP Web Jetadmin server, export the user defined field, and then import it on other HP Web Jetadmin
servers so that data synchronization works with the user defined field.
IMPORT THE VARIABLE DATA INTO HP WEB JETADMIN
Use the following steps to import variable data:
1. Create a CSV file with the following syntax on the first line:
IP Addr,Port,UserDefinedFieldName1,UserDefinedFieldName2
2. On the lines after that, list the actual values. The Port option is always 1 for network-connected devices.
IP Addr,Port,var_DefaultFrom,var_DefaultDisplayName
10.10.10.10,1,Pfxe.fser@company.com,Peter
10.10.10.11,1,sdf.cxe@company.com,Sandra
Note: Instead of IP Addr, you can also use Mac Address or IP Hostname.
Note: HP Web Jetadmin stores the user defined values only in its own database. Nothing gets configured
on the
device itself. For more information, see the user guide.
3. In HP Web Jetadmin, right-click Configuration and then select Configure Devices.
4. Select File, and then Import, and then follow the wizard.
CREATE A TEMPLATE WITH VARIABLES
After identifying the variable configuration options and creating the corresponding user defined fields, create a
template and refer to the user defined field as variable data by using one of the following conventions:
Variable data (a variable in a template always starts and ends with %% with the name of the variable in
between the starting and ending %% signs)
%%<custom variable>%% (where “<custom variable>” is the name of the user defined field)
Variable data along with a combination of static content before or after the variable
<static value>%%<custom variable>%%<static value>
-or-
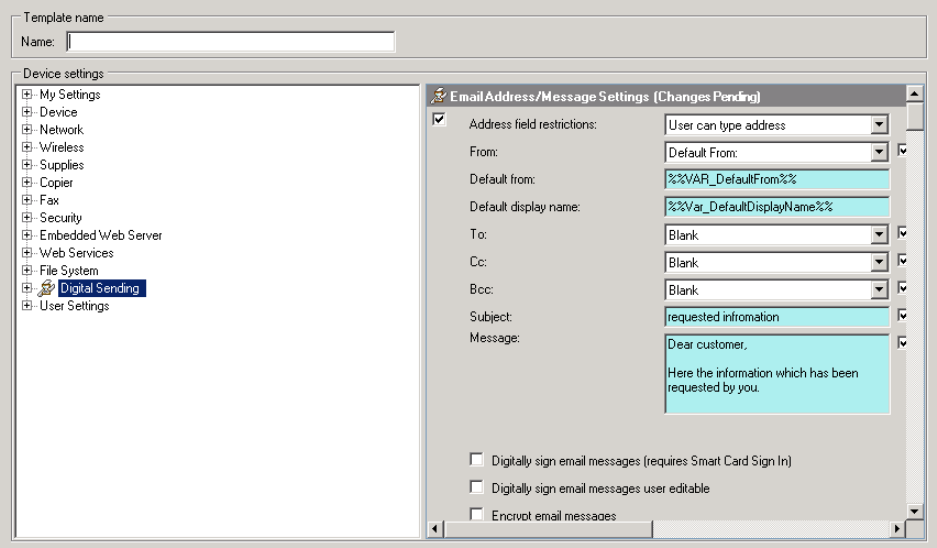
4
<static value>%%<custom variable>%%
For more information on creating a template, see the user guide.
USING VARIABLE DATA WITH OXPD FILES
You can use variable data in the following OXPd files:
OXPd Device Functions
OXPd Accessory Records
OXPd Authentication Agents
OXPd Statistics Agents
OXPd Quota Agents
In the following fields:
Server context ID
URI
User name
Vendor ID (only for OXPd Accessory Records)
Product ID (only for OXPd Accessory Records)

5
After creating user defined variables, which will be used as variables inside the OXPd files, add them to the OXPd file
to replace the actual static value inside the file. The variable starts and ends with %% with the name of the variable in
between the starting and ending %% signs.
For example, the original static format inside the OXPd file looks as follows:
<vendorId>1008</vendorId>
After creating the variable (user defined field) with the name var_VendorID, the OXPd file looks as follows:
<vendorId>%%var_VendorID%%</vendorId>
The following examples show an OXPd file before and after replacing the static values with variables. This example
shows the static values for Vendor ID, Server context ID, and URI:
<?xml version="1.0" encoding="UTF-8"?>
<FleetOwnedAccessoryRecord xmlns:xsi="http://www.w3.org/2001/XMLSchema-instance"
xsi:schemaLocation="http://www.hp.com/schemas/imaging/OXPm/service/solutionregistration/2010/05
/27 solutionregistration.xsd"
xmlns:common="http://www.hp.com/schemas/imaging/OXPm/common/2010/05/27"
xmlns="http://www.hp.com/schemas/imaging/OXPm/service/solutionregistration/2010/05/27">
<name>Nestle Accessory Record</name>
<vendorId>1008</vendorId>
<productId>0069</productId>
<serverContextId>DeviceAddress=10.10.10.15</serverContextId>
<callback>
<common:uri>http://10.10.10.16:8080/CustomerAuthentication/services/AccessoriesService</
common:uri>
<common:binding>Soap12</common:binding>
<common:7connectionTimeout>60</common:connectionTimeout>
<common:responseTimeout>60</common:responseTimeout>
</callback>
</FleetOwnedAccessoryRecord>
This example shows the OXPd file after replacing the static values with variables called var_VendorID,
var_ServerContext, and var_URI:
<?xml version="1.0" encoding="UTF-8"?>
<FleetOwnedAccessoryRecord xmlns:xsi="http://www.w3.org/2001/XMLSchema-instance"
xsi:schemaLocation="http://www.hp.com/schemas/imaging/OXPm/service/solutionregistration/2010/05
/27 solutionregistration.xsd"
xmlns:common="http://www.hp.com/schemas/imaging/OXPm/common/2010/05/27"
xmlns="http://www.hp.com/schemas/imaging/OXPm/service/solutionregistration/2010/05/27">
<name>Nestle Accessory Record</name>
<vendorId>%%var_VendorID%%</vendorId>
<productId>0069</productId>
<serverContextId>%%var_ServerContext%%</serverContextId>
<callback>
<common:uri>%%var_URI%%</common:uri>
<common:binding>Soap12</common:binding>
<common:connectionTimeout>60</common:connectionTimeout>
<common:responseTimeout>60</common:responseTimeout>
</callback>
</FleetOwnedAccessoryRecord>

6
Import the OXPd file into HP Web Jetadmin. For more information, see Import the variable data into HP Web Jetadmin
on page 3.
It’s now possible to create a template that uses the imported OXPd file, and it can be applied to the required printers.
© 2017 HP Development Company, L.P. The information contained herein is subject to change without notice. The only
warranties for HP products and services are set forth in the express warranty statements accompanying such products
and services. Nothing herein should be construed as constituting an additional warranty. HP shall not be liable for
technical or editorial errors or omissions contained herein.
Microsoft and Windows are either registered trademarks or trademarks of Microsoft Corporation in the United States
and/or other countries.
c05382532, Rev. 1, April 2017
