HTC DRM PDA Phone User Manual Kila User Guide
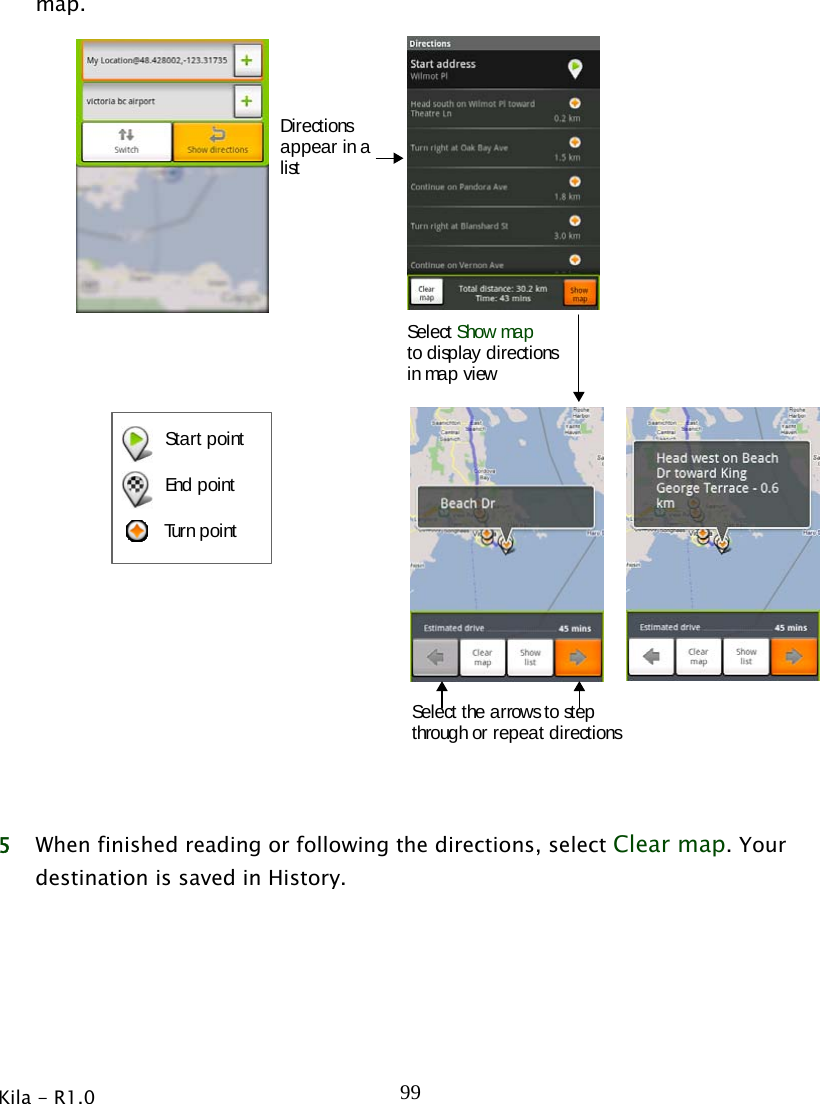
HTC Corporation PDA Phone Kila User Guide
UserManual.wiki
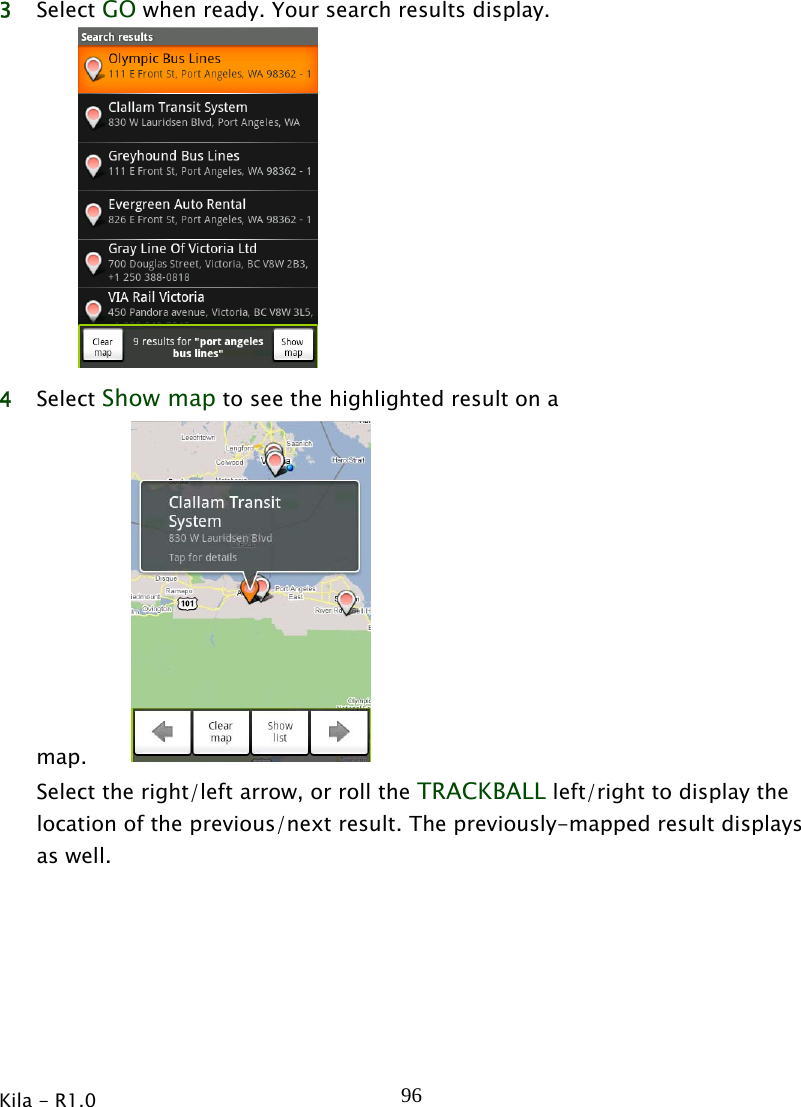
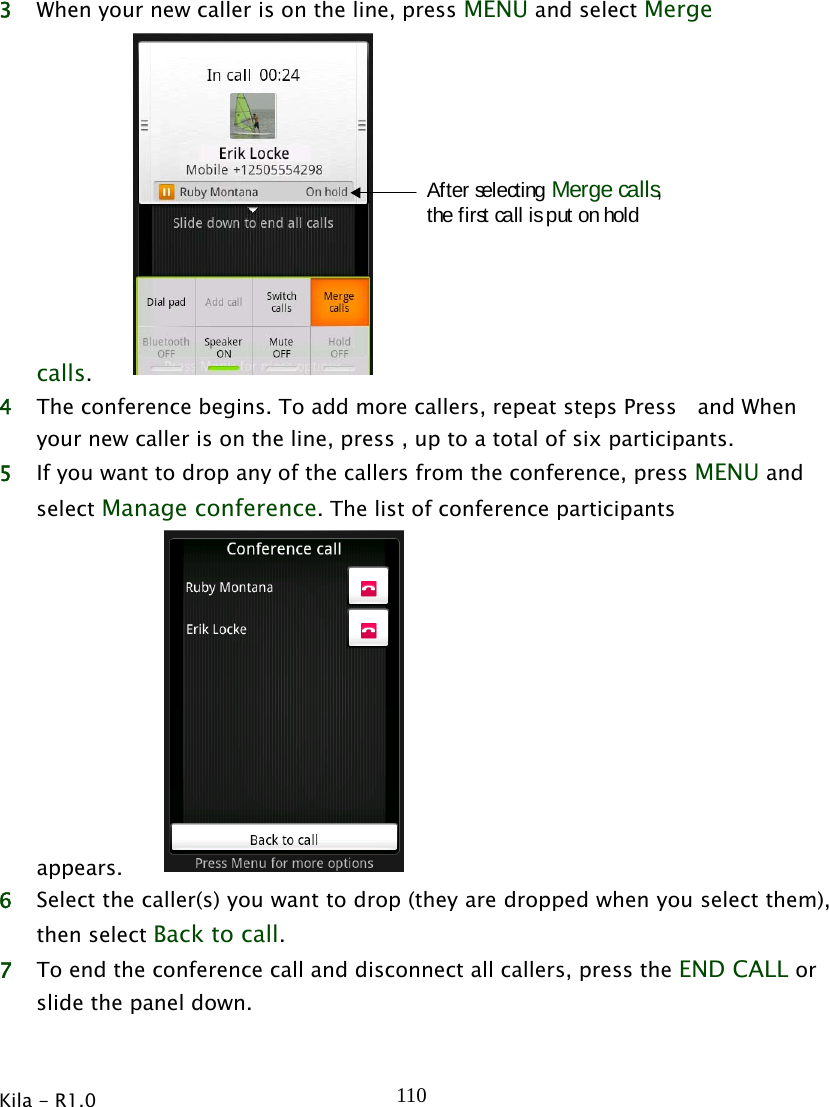
>
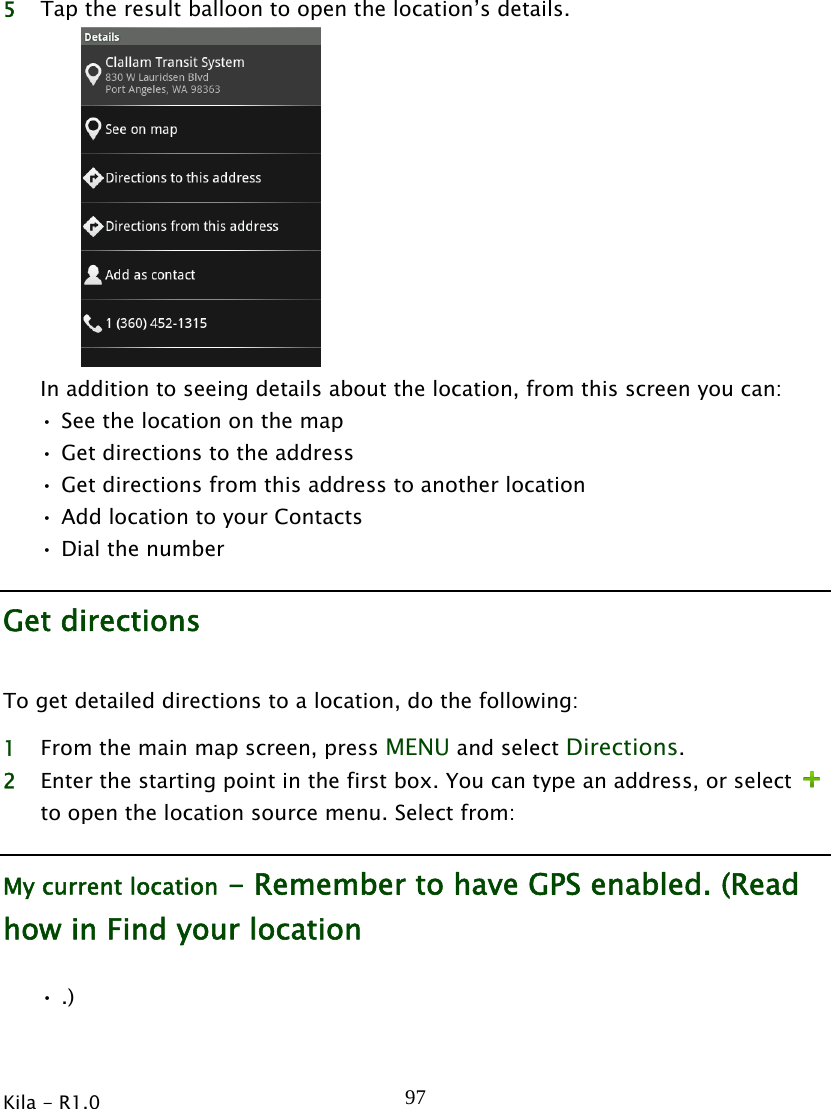
HTC
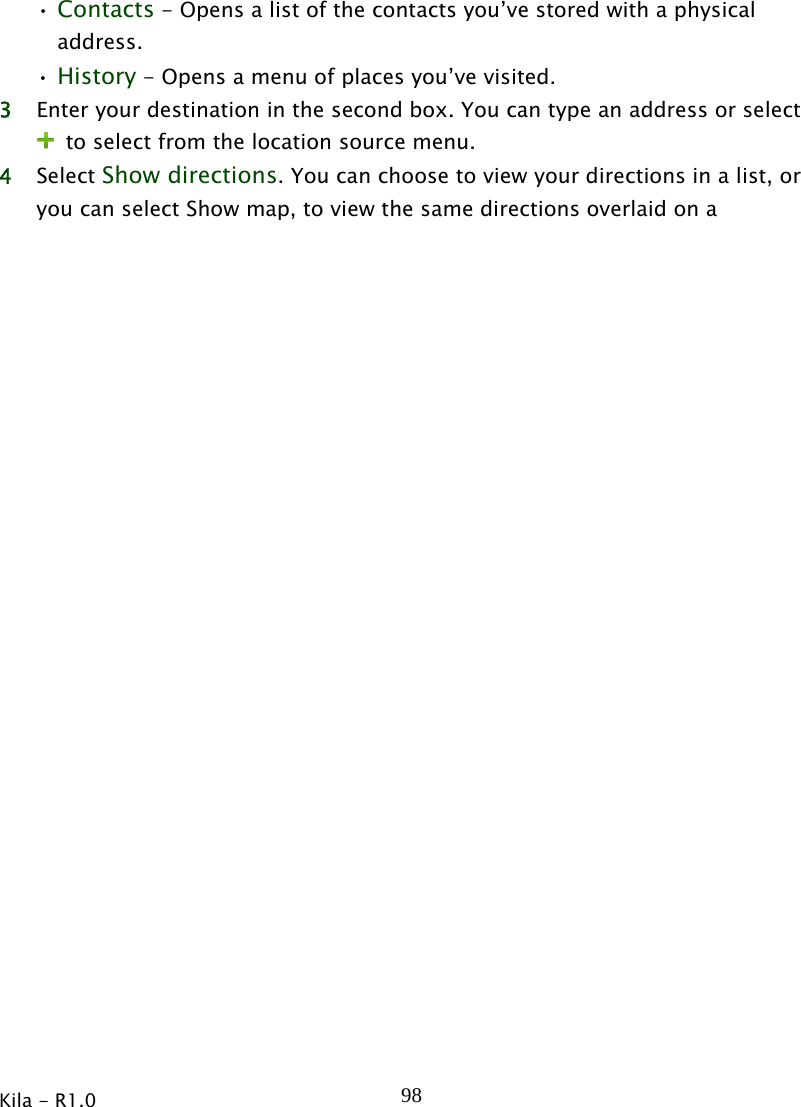
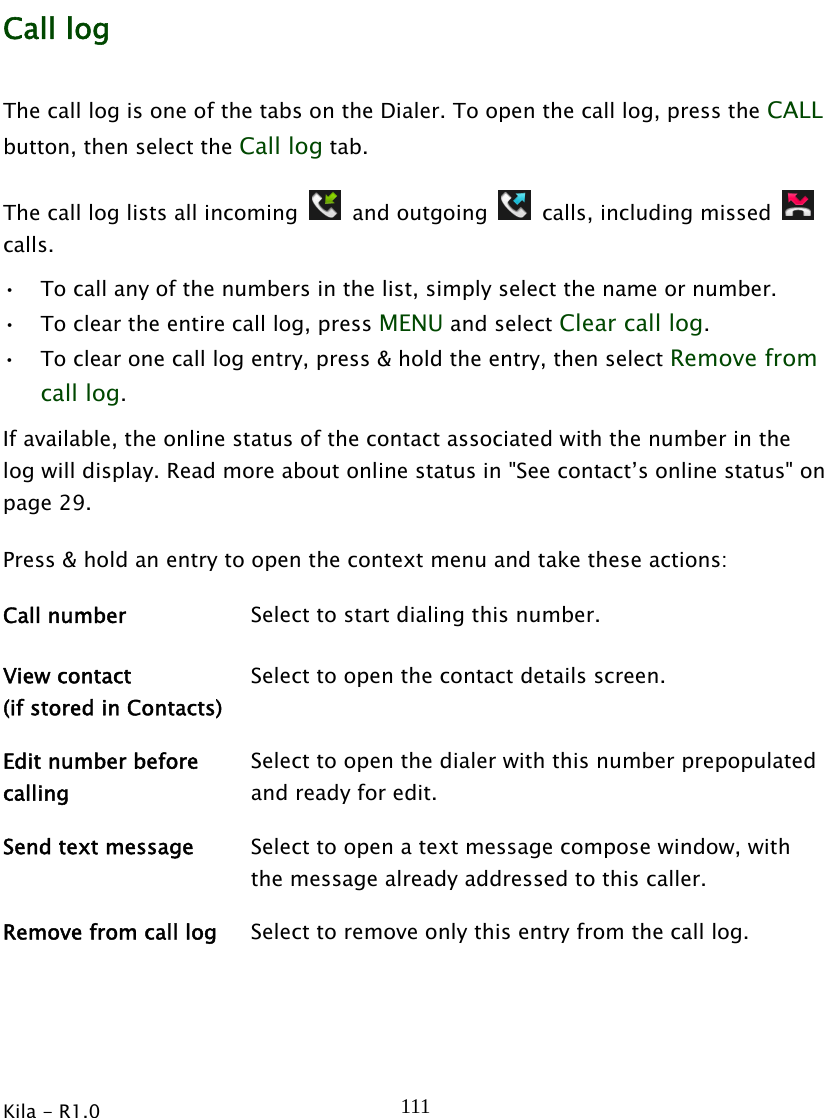
>
DRM User Manual
manual
Navigation menu
Upload a User Manual
Namespaces
Wiki Guide
HTML
PDF
Info
Views
User Manual
Discussion / Help
Navigation


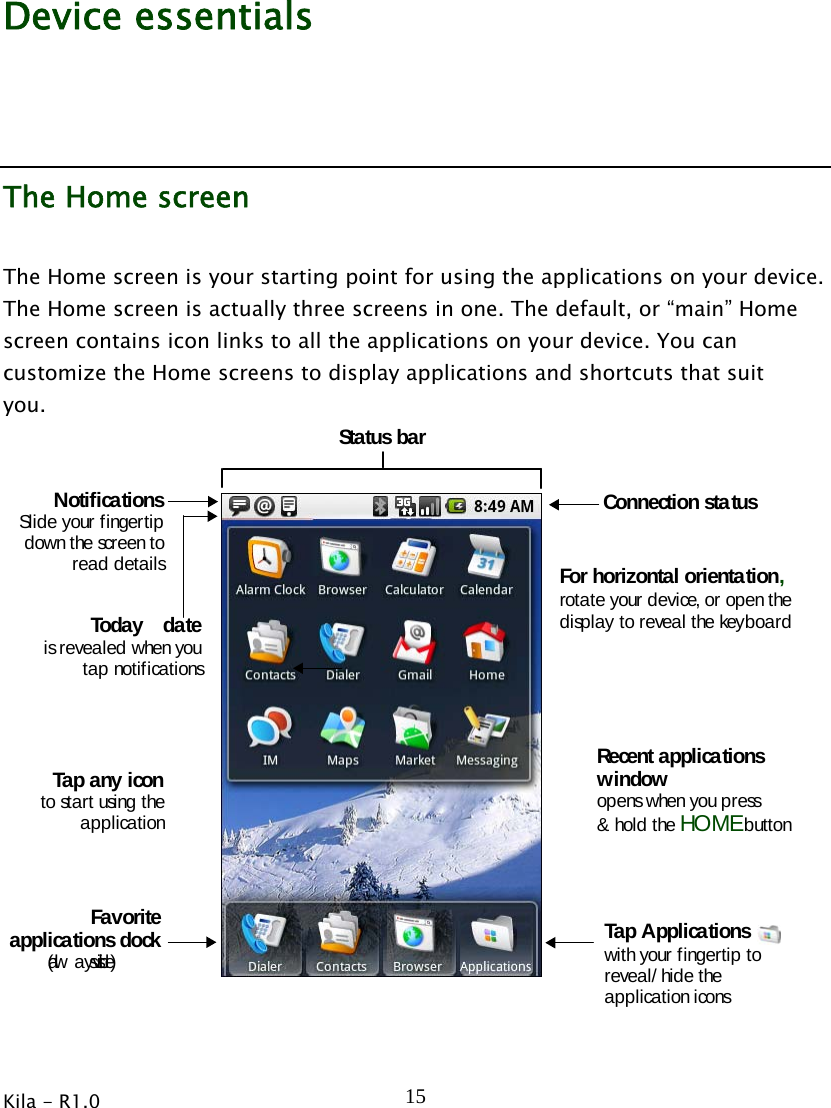
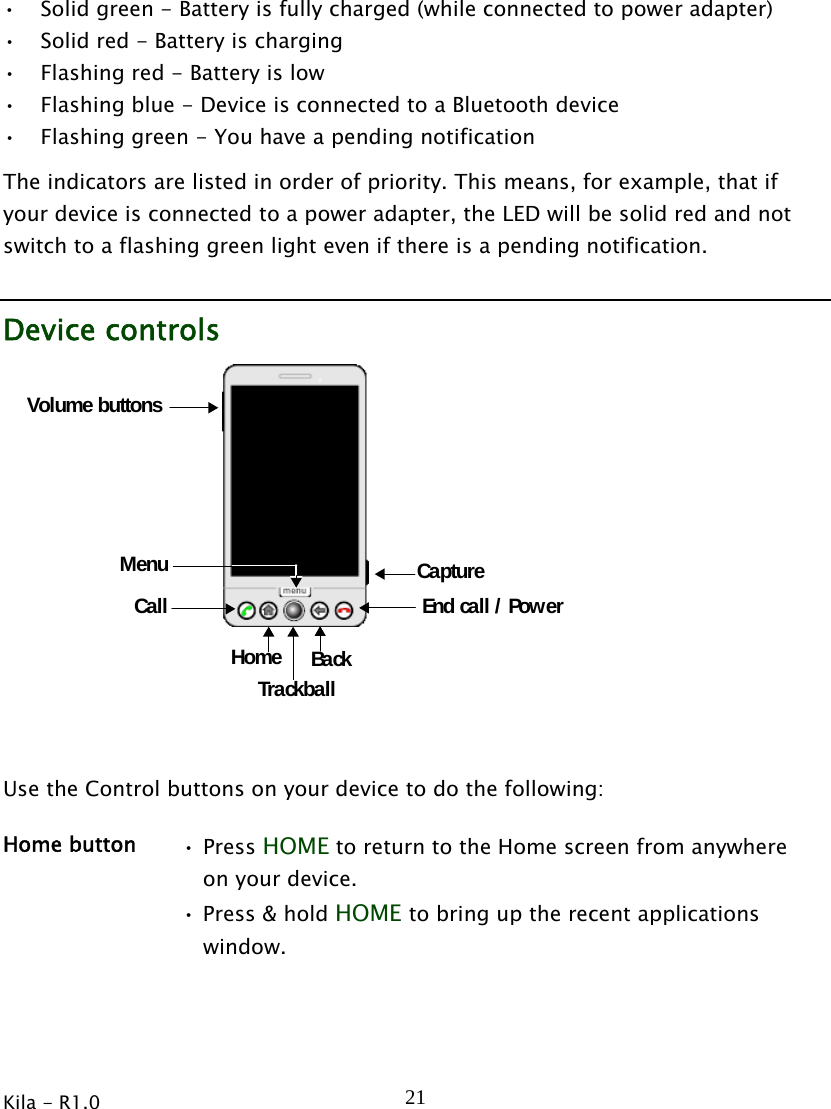
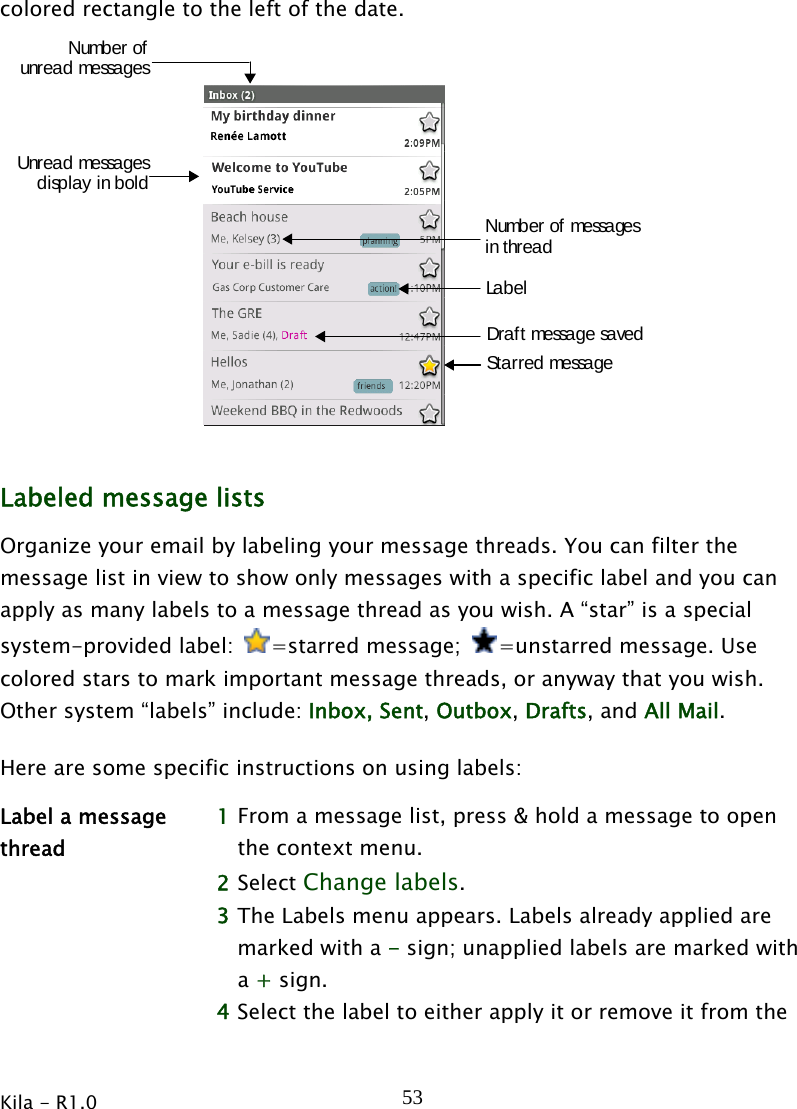
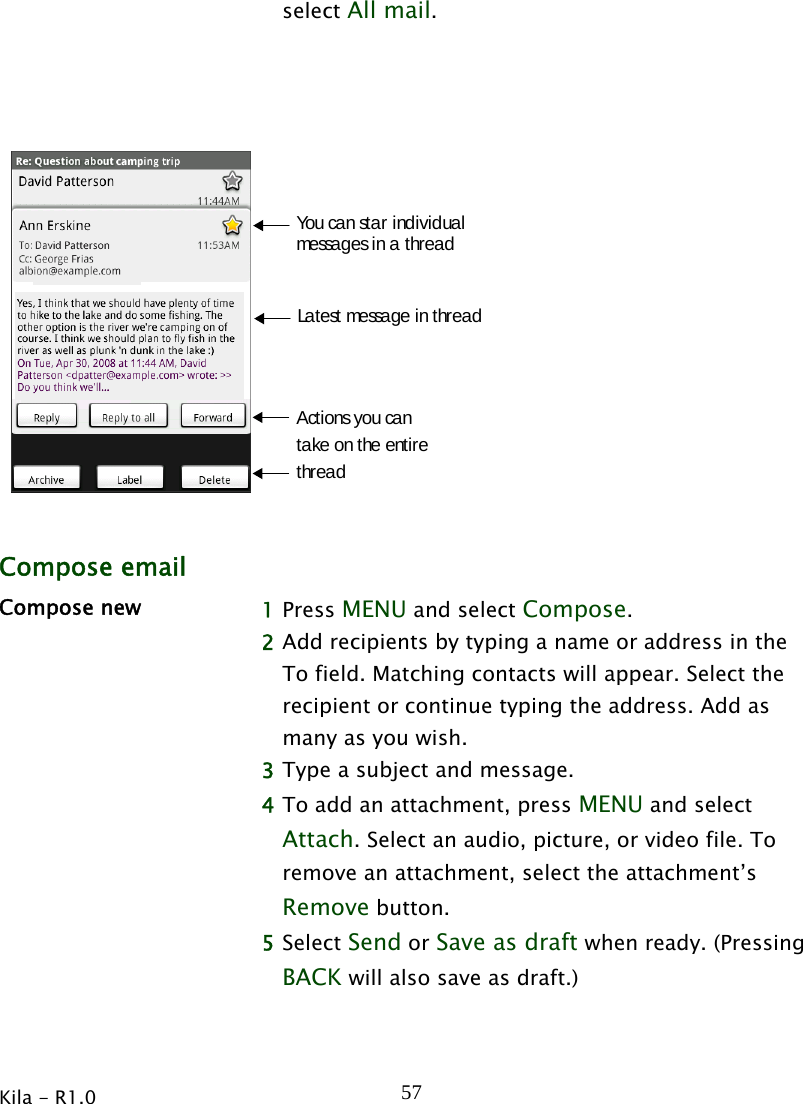
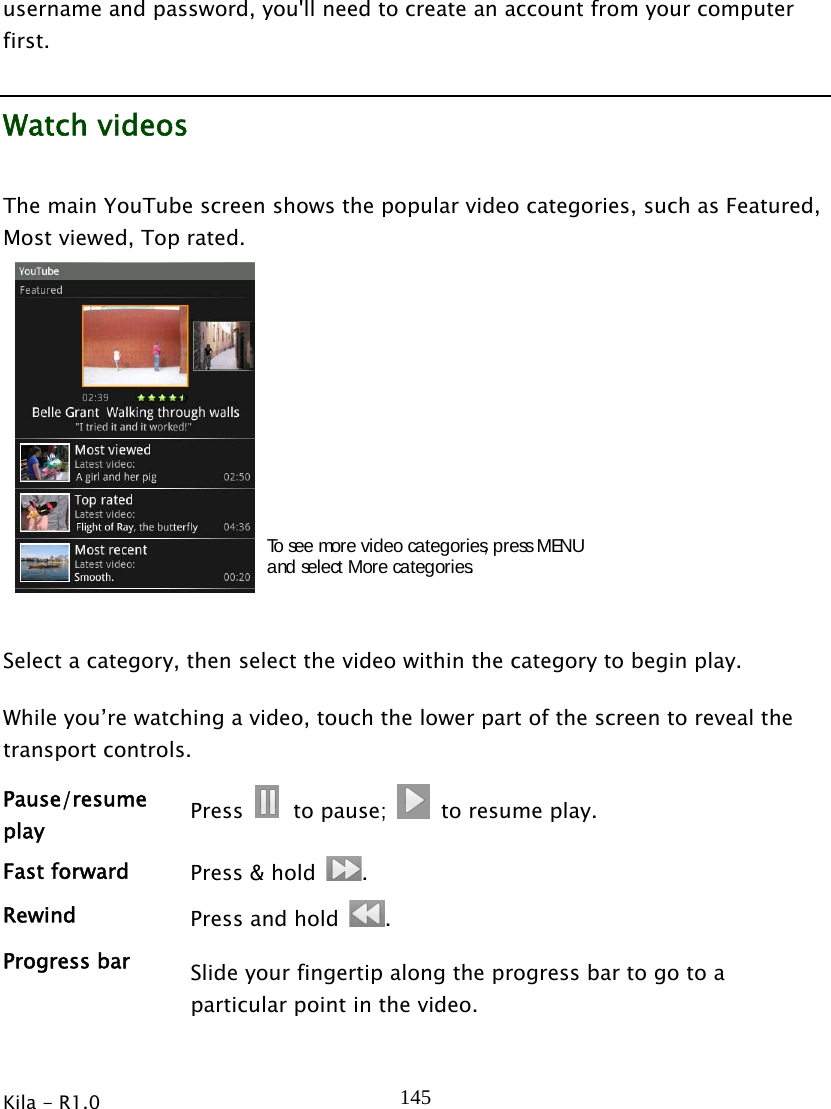
![Kila - R1.0 25display will always use the horizontal screen orientation when your keyboard is open (except in Browser and Pictures, where you can set the orientation explicitly). SEARCH key There is a SEARCH key (just to the left of @), which you can use when the keyboard is open. Pressing the SEARCH key launches the Google Search window. Type the information you’re seeking and select GO. MENU key There is a MENU key (just to the left of Z), which you can use when the keyboard is open instead of pressing the MENU control button. This means, with the keyboard open, you can open the menu using your left hand (press the MENU key) and select a menu option with your right (roll and click the TRACKBALL). ALT key To type the characters shown in light green on some of the keys, first press the ALT key, then the key showing the special character. For example, if you need to type a double quote (“), you would first press the ALT key, then the key [ALT, k]. • Lock the ALT key to type a series of characters by pressing the key twice. • Unlock the ALT key by pressing it once again.](https://usermanual.wiki/HTC/DRM/User-Guide-986137-Page-26.png)