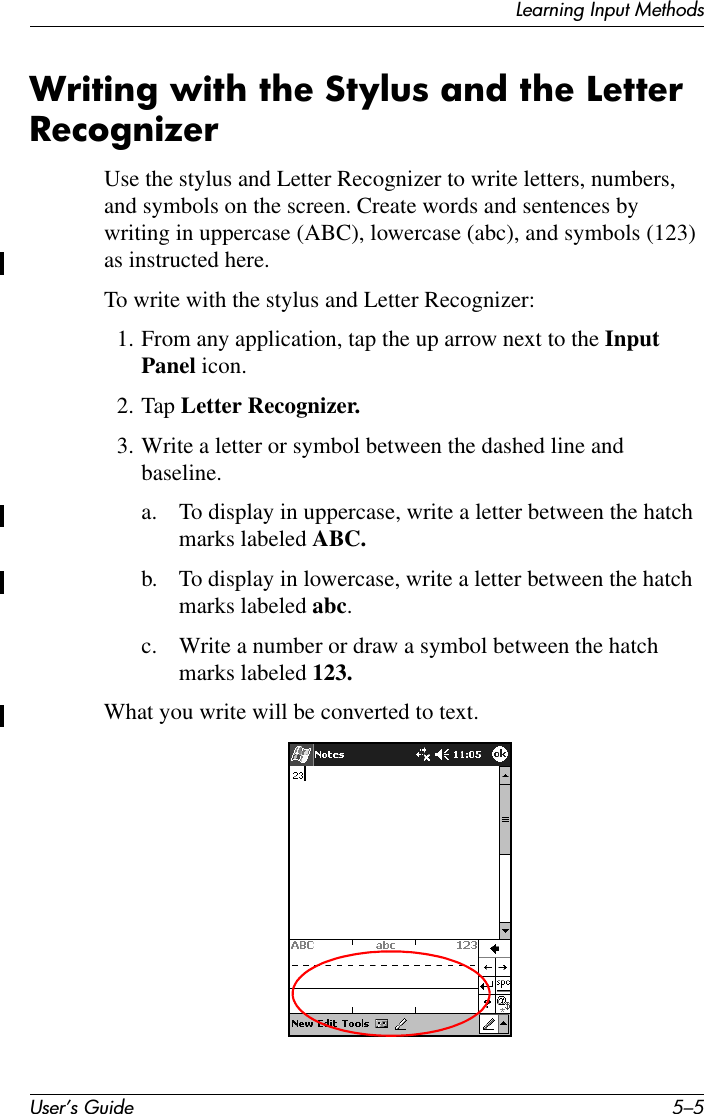
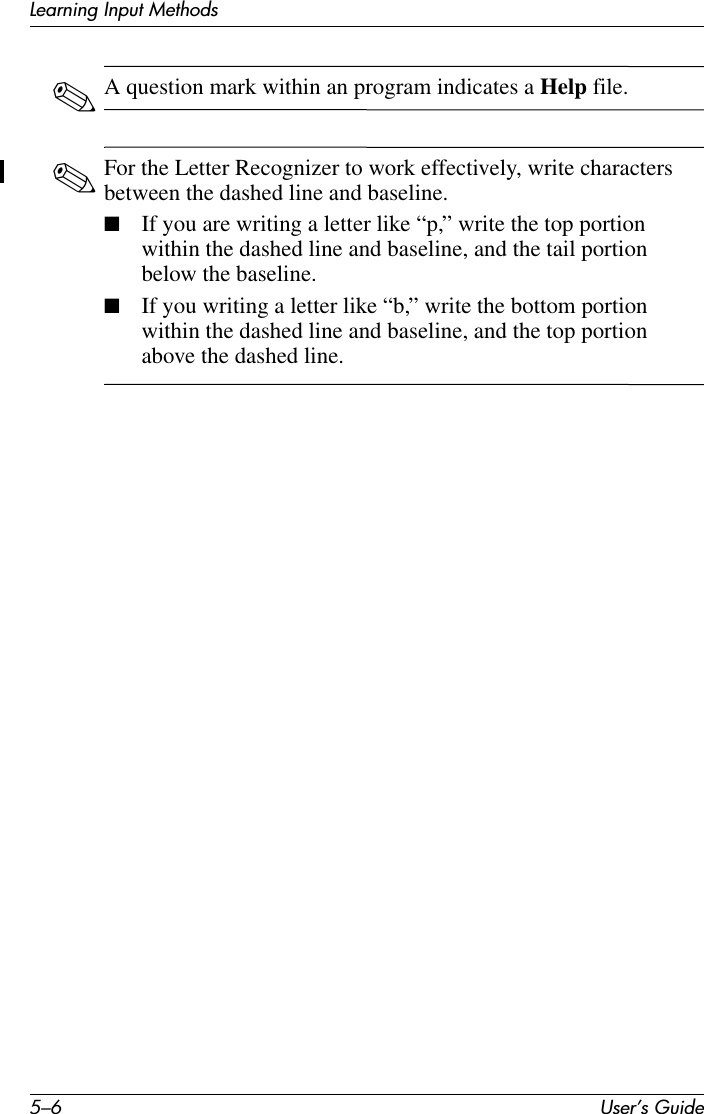
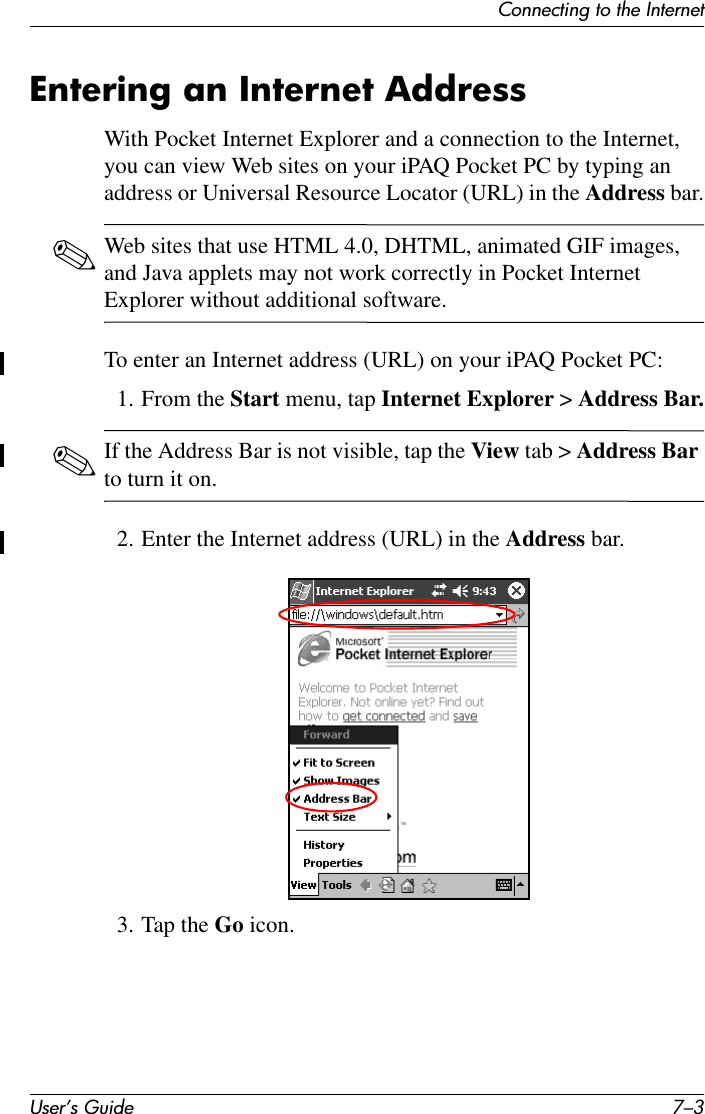
HTC HB20 PDA with Bluetooth Radio User Manual hp iPAQ Pocket PC h2200 Series
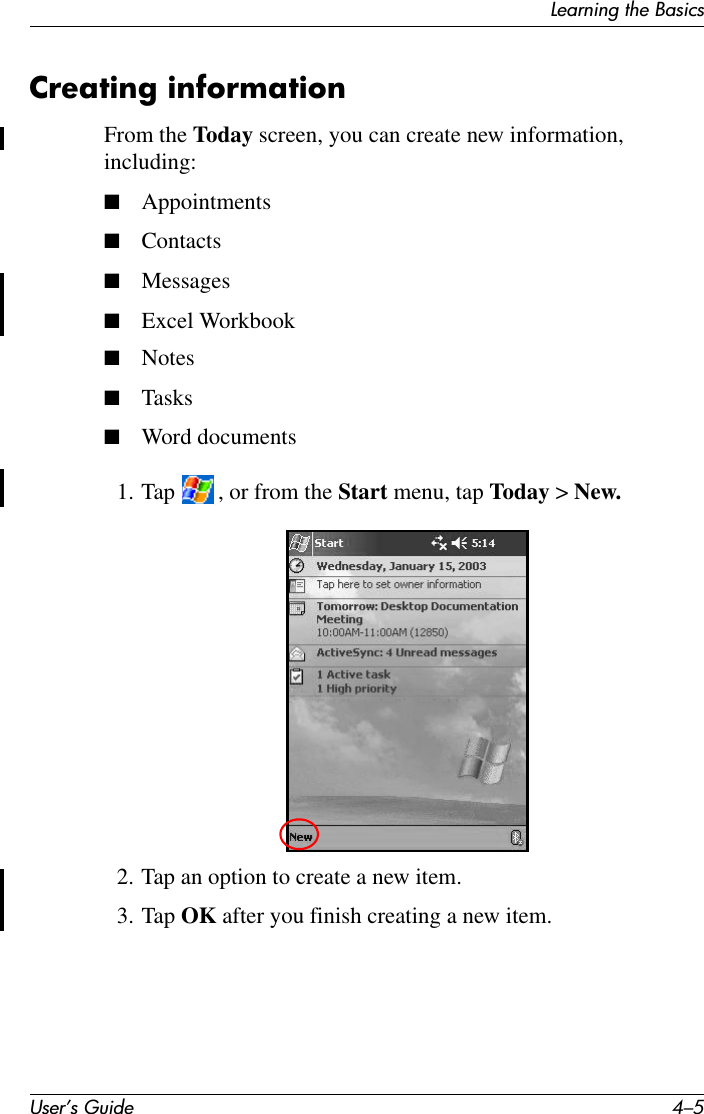
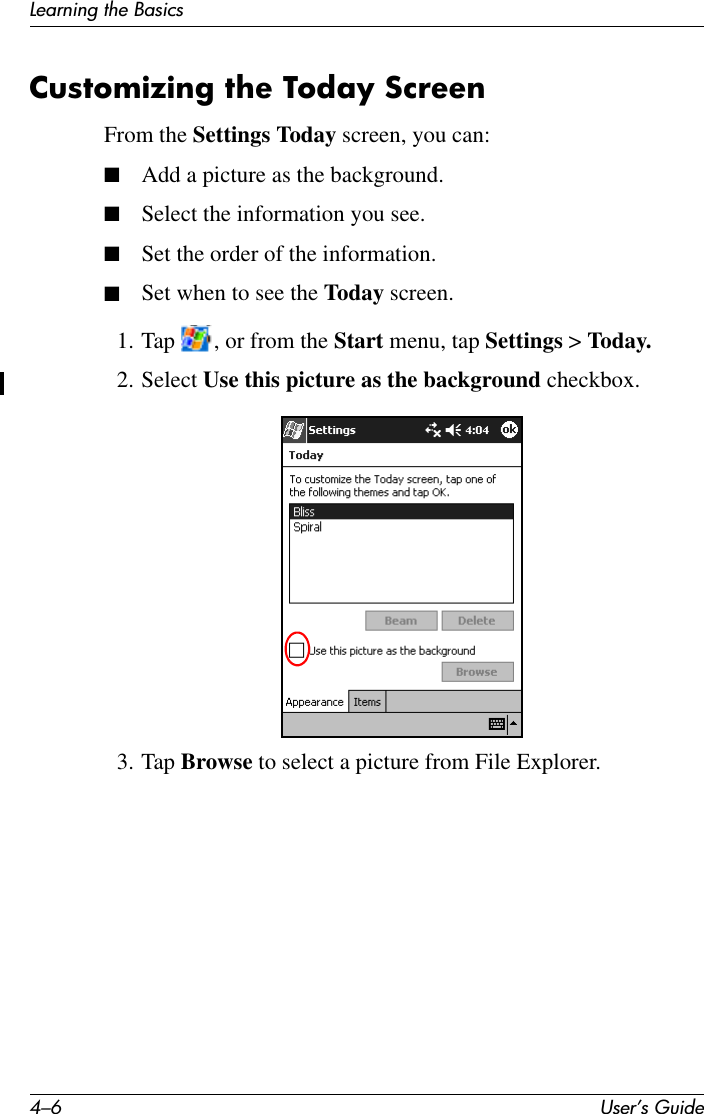
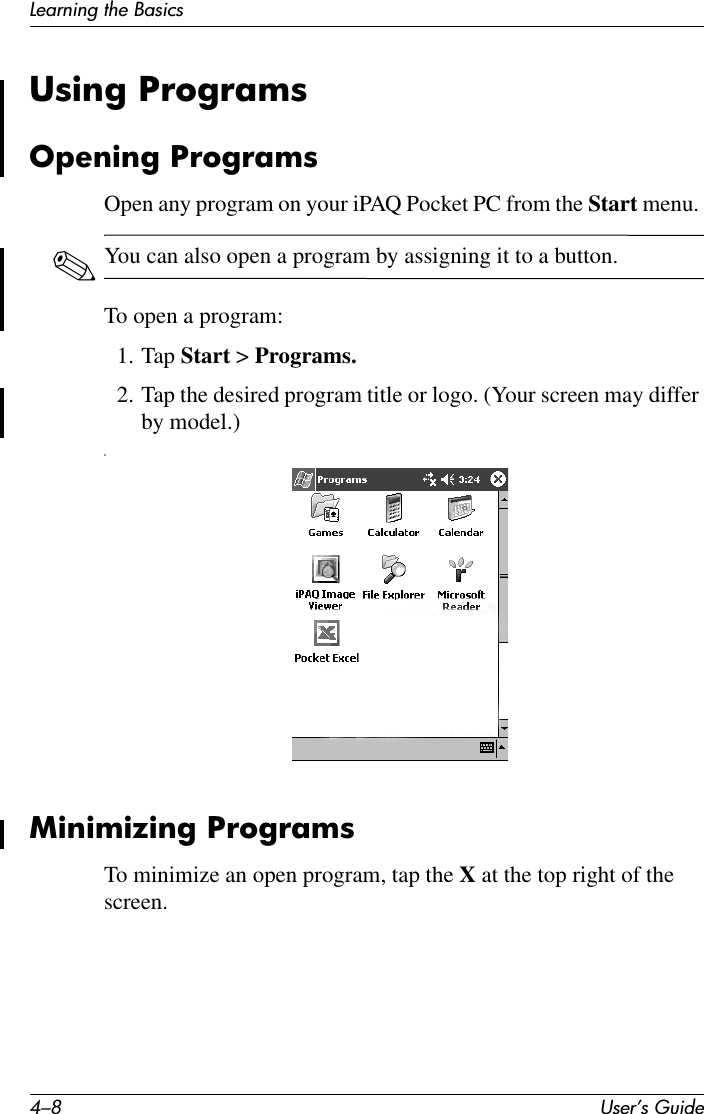
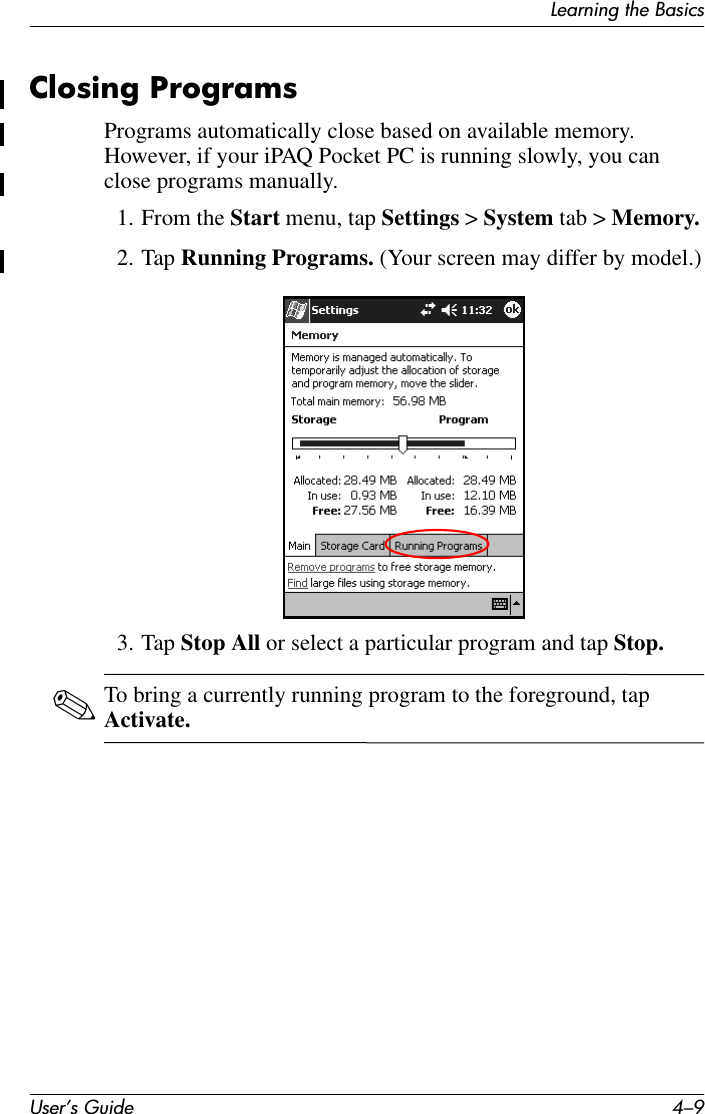
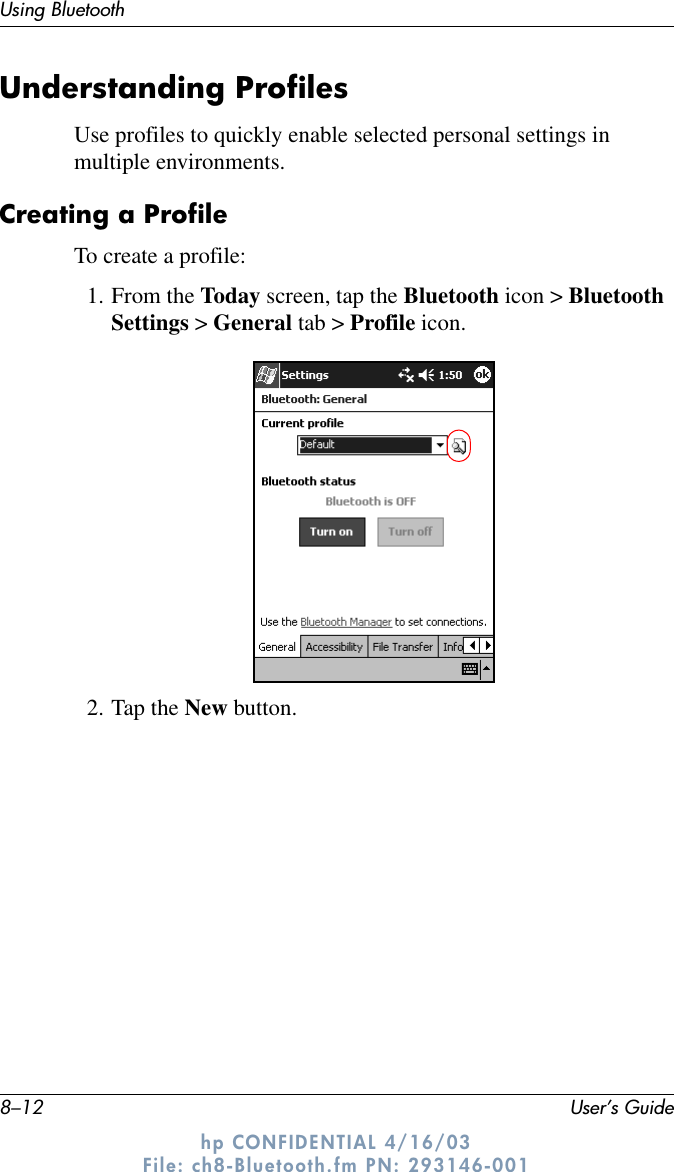
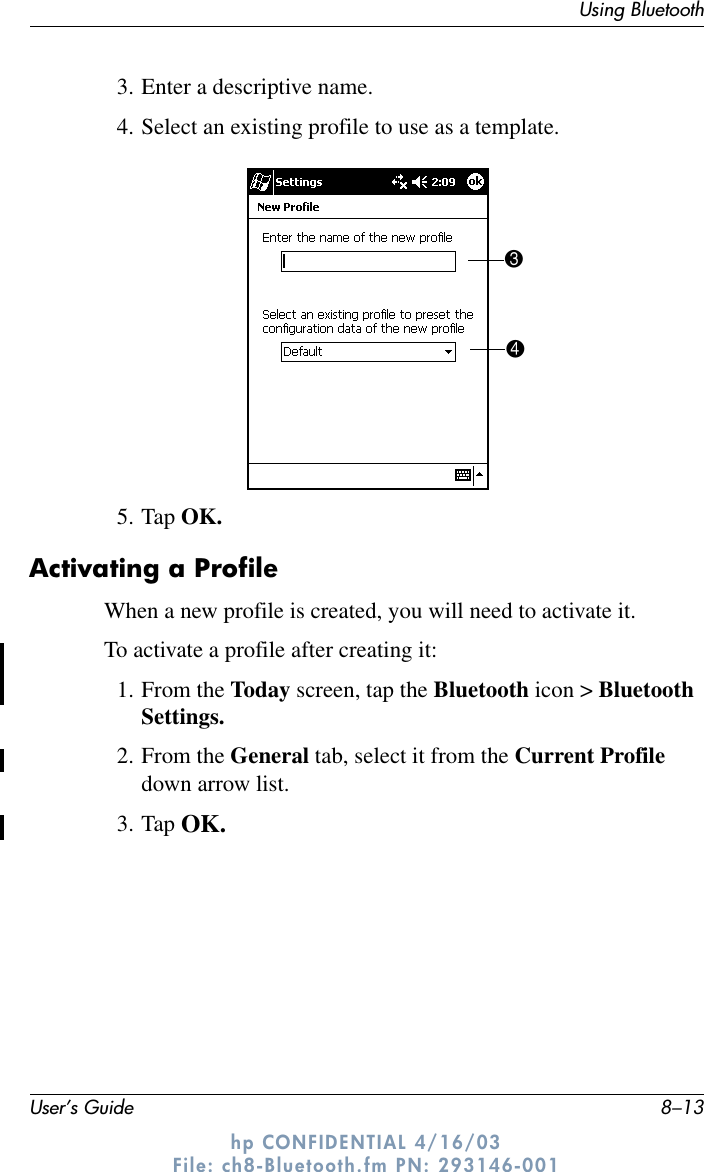
HTC Corporation PDA with Bluetooth Radio hp iPAQ Pocket PC h2200 Series
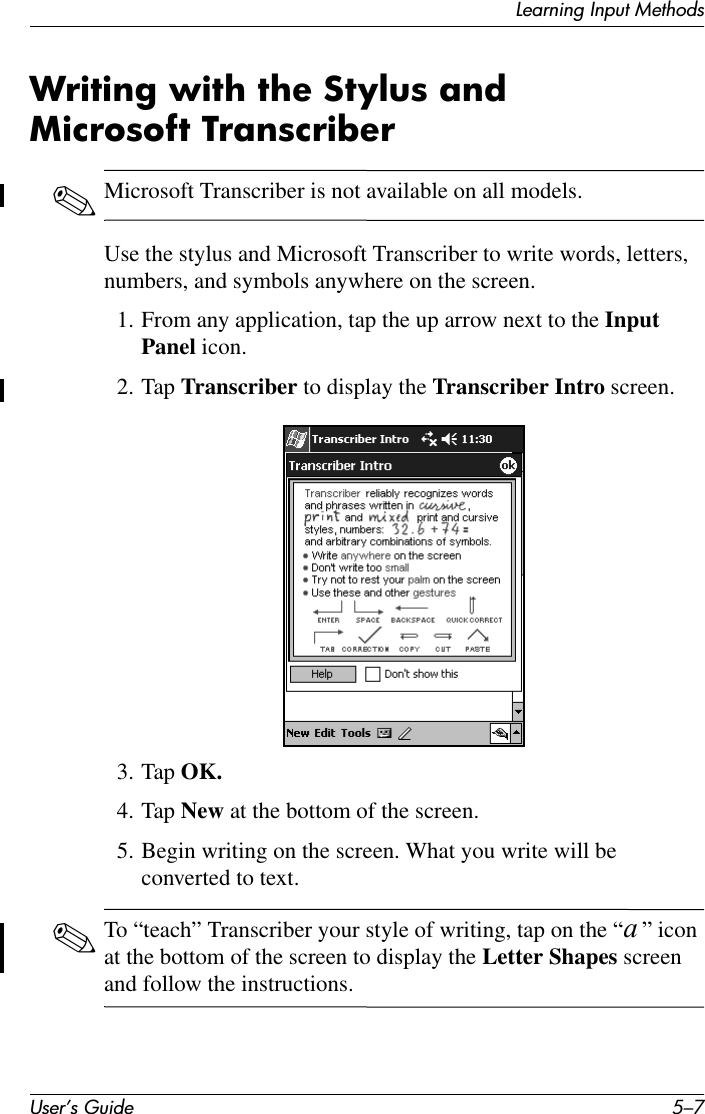
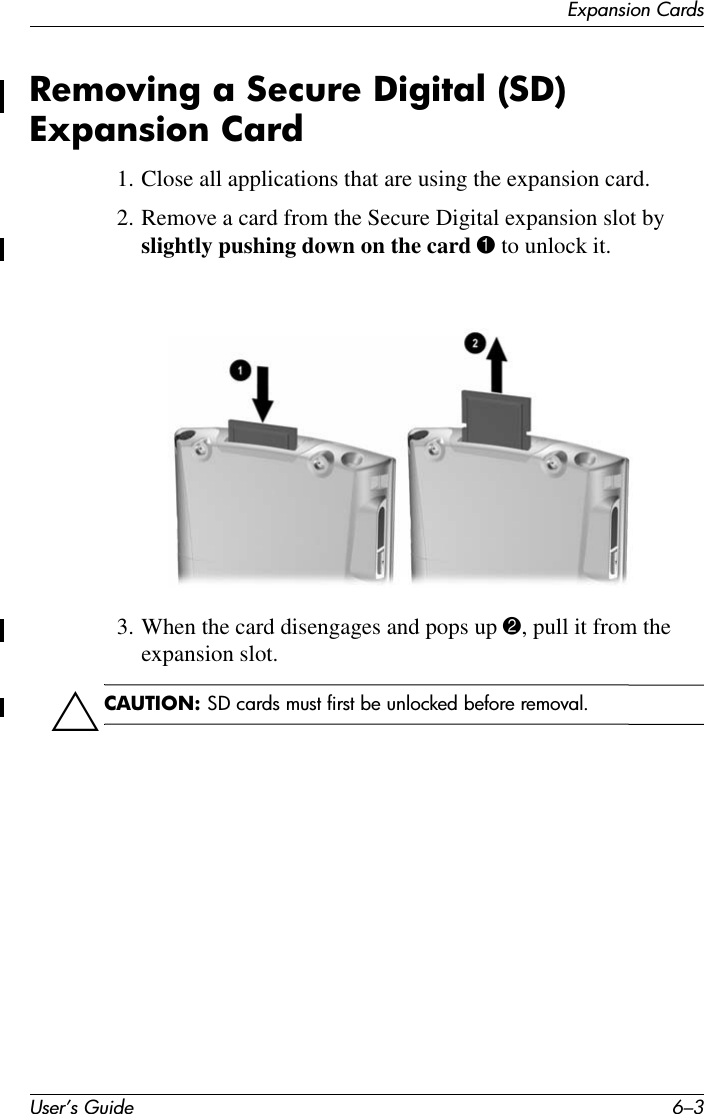
UserManual.wiki
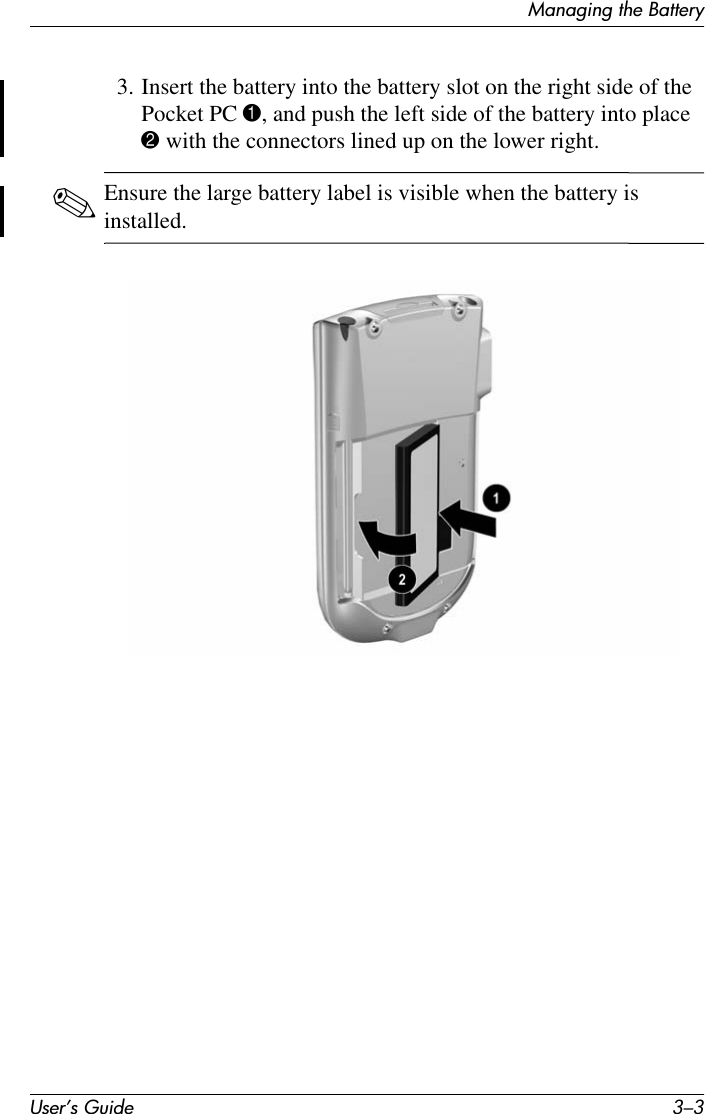
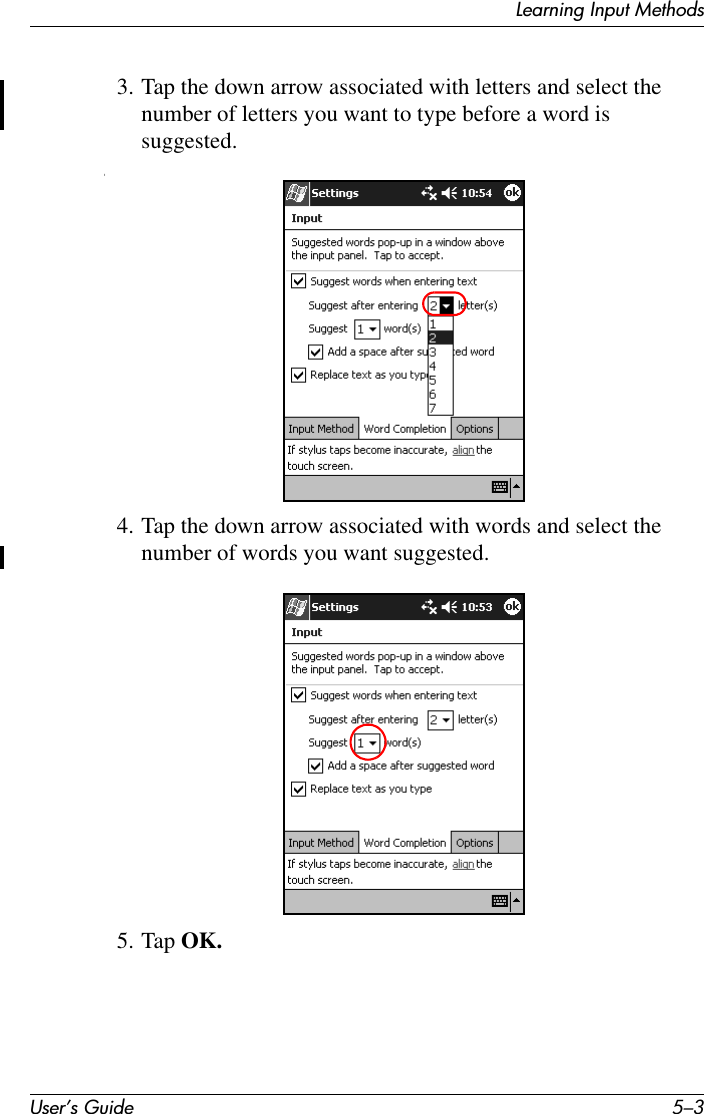
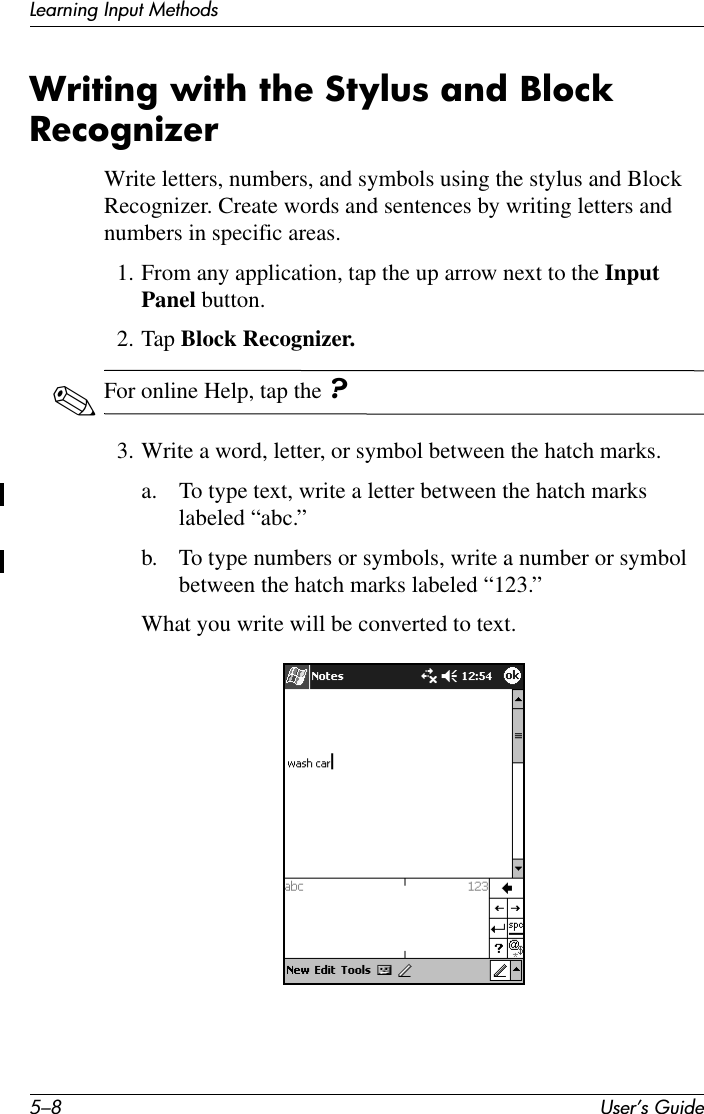
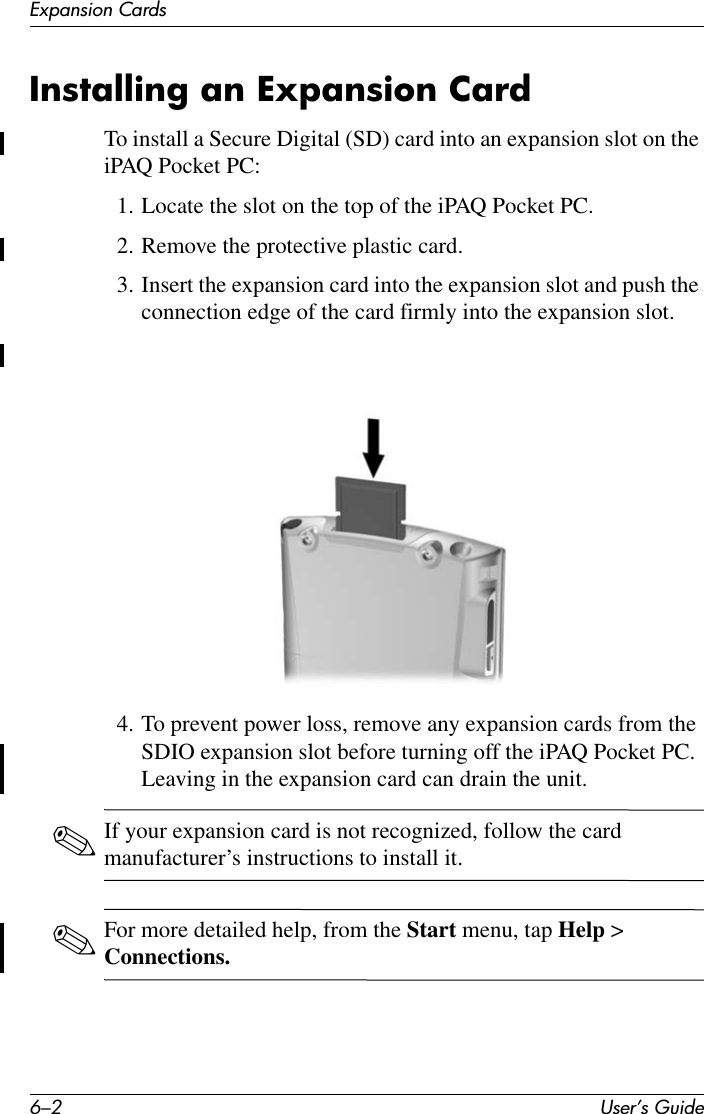
>
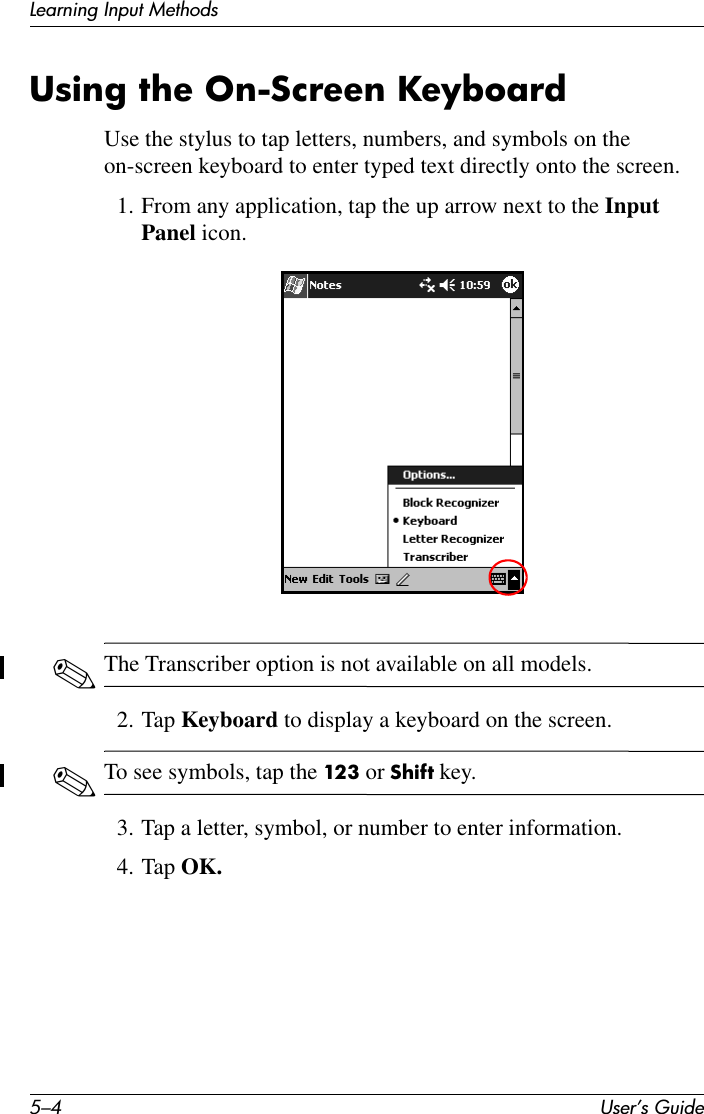
HTC
>
HB20 User Manual
Users Manual
Navigation menu
Upload a User Manual
Namespaces
Wiki Guide
HTML
PDF
Info
Views
User Manual
Discussion / Help
Navigation


![TroubleshootingUser’s Guide 9–3When I try to open the Inbox, I receive an error or the application hangs.Limit the number of e-mail services you create.I get an error when I try to record a note in Calendar or in Tasks.Try using a more compressed recording format in Calendar or Tasks (8,000 Hz, Mono, [.7 KB/s] is the most compressed format available).I want to see the current date.1. From the Start menu, tap Calendar.2. Tap the Go-to-Today icon to see today’s date.I cannot see all my appointments.Be sure the appointment you created is in the selected category.I cannot find the document or workbook Isaved.Pocket Word and Excel recognize and display documents in only one folder below My Documents. For example, if you created another folder in the Personal folder in My Documents, the documents in that folder will not show.My device is always asking me for a password.Tap Start > Settings > Personal tab > Password to be sure the password settings are configured as you wish.I cannot find files sent to me by another device.Check My Documents, which is the default save location used to receive files.Problem Solution](https://usermanual.wiki/HTC/HB20/User-Guide-328719-Page-107.png)