HTC HHH06C Pocket PC Phone User Manual 378871 001
HTC Corporation Pocket PC Phone 378871 001
UserManual.wiki
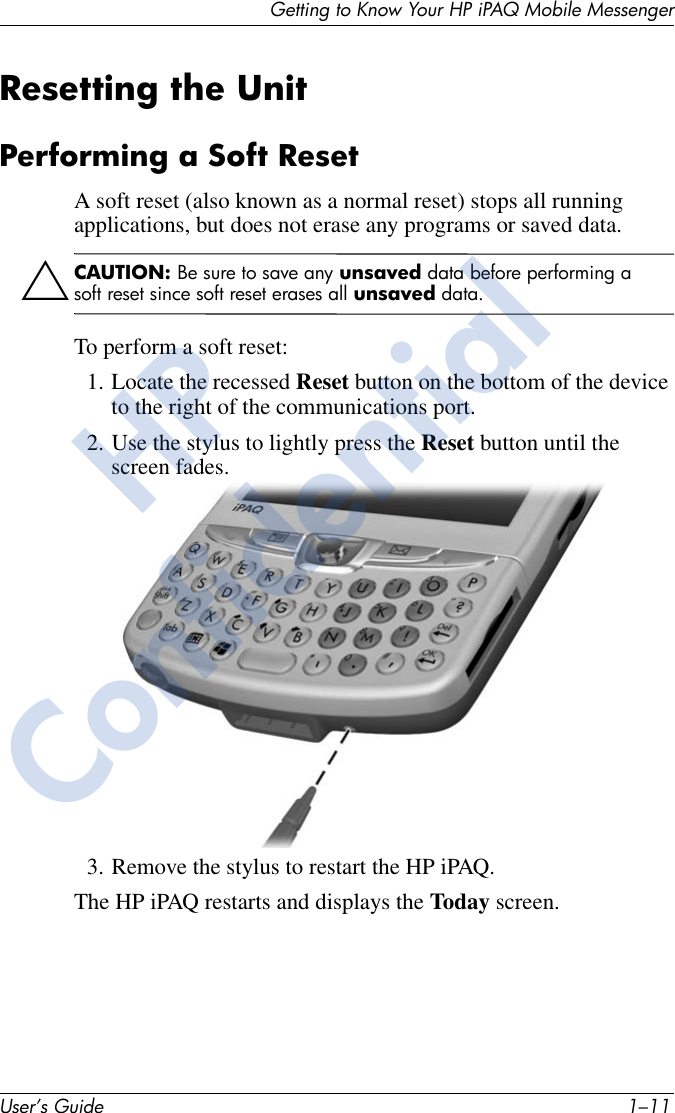
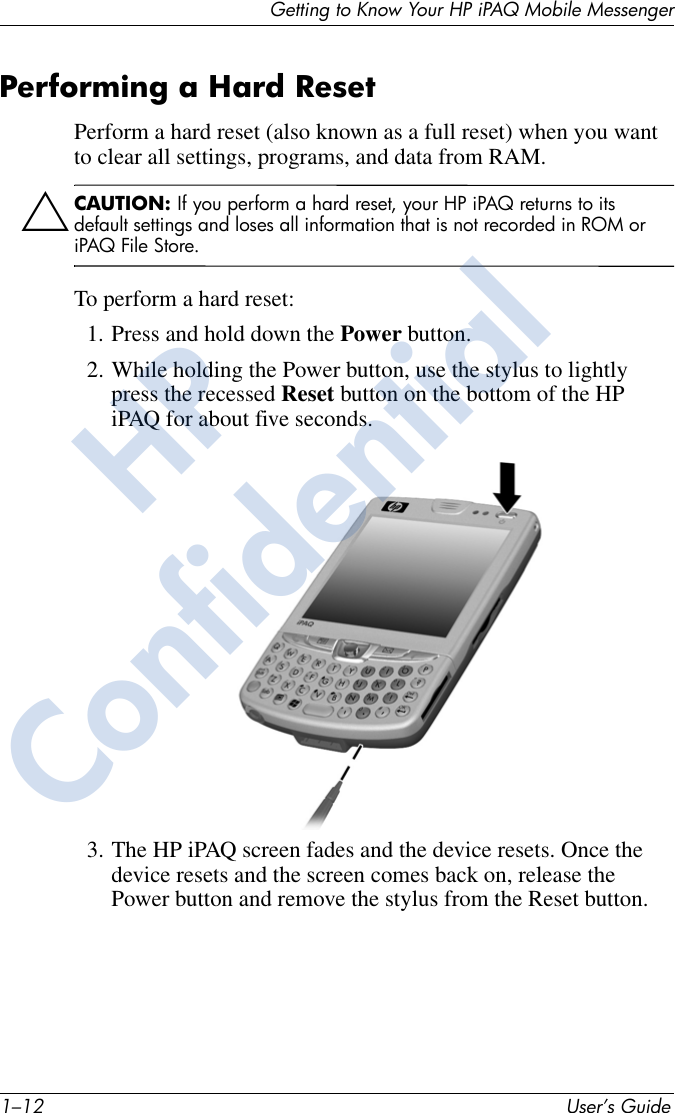
>
HTC
>
HHH06C User Manual
User Manual
Navigation menu
Upload a User Manual
Namespaces
Wiki Guide
HTML
PDF
Info
Views
User Manual
Discussion / Help
Navigation
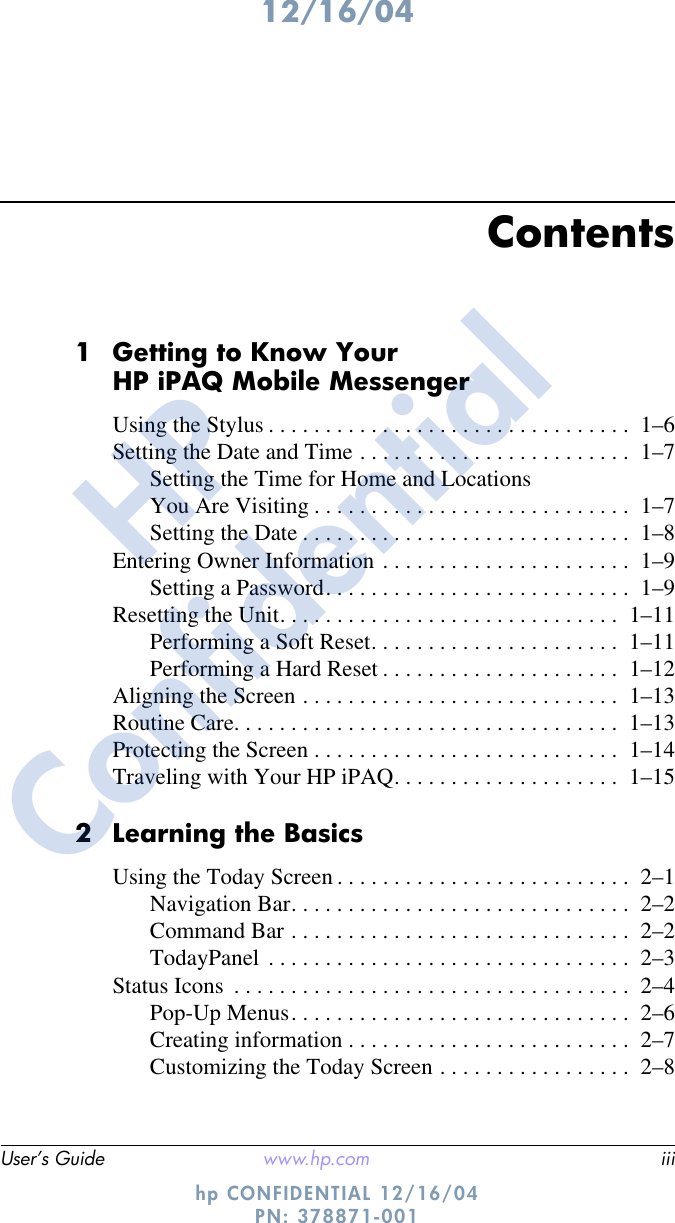

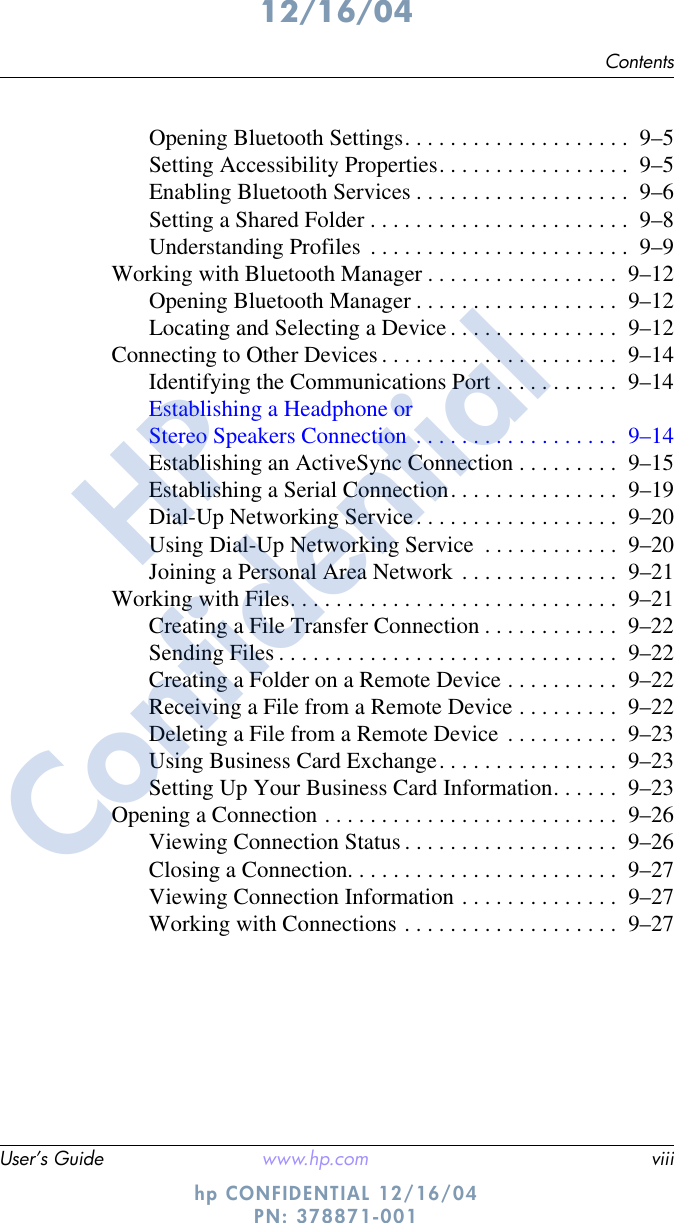


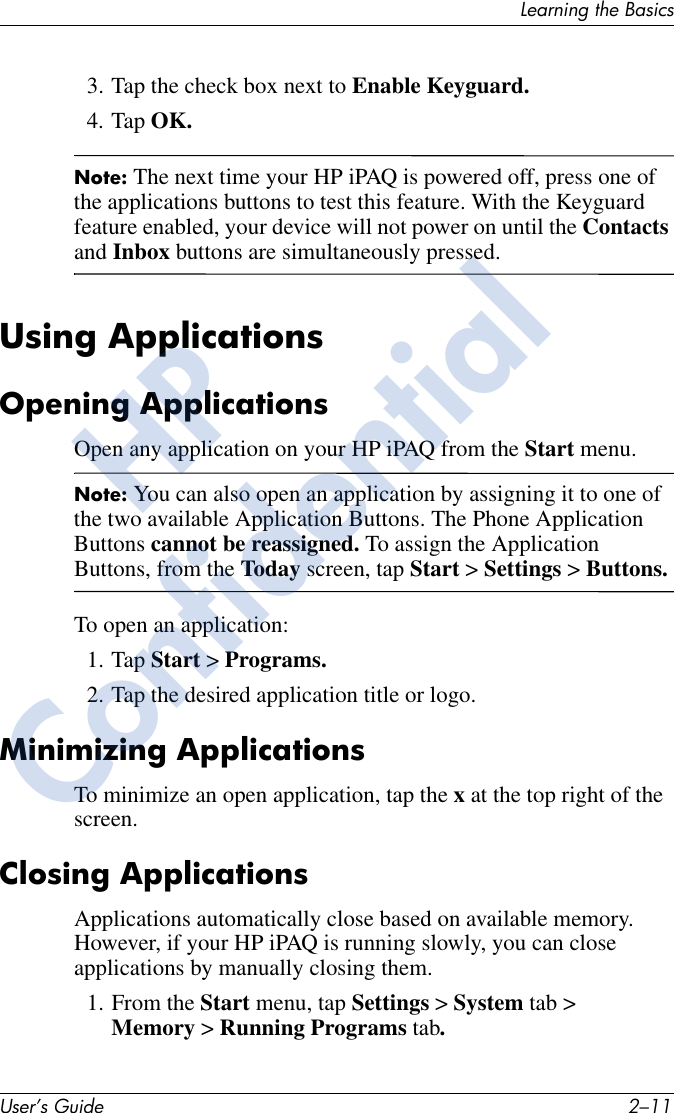
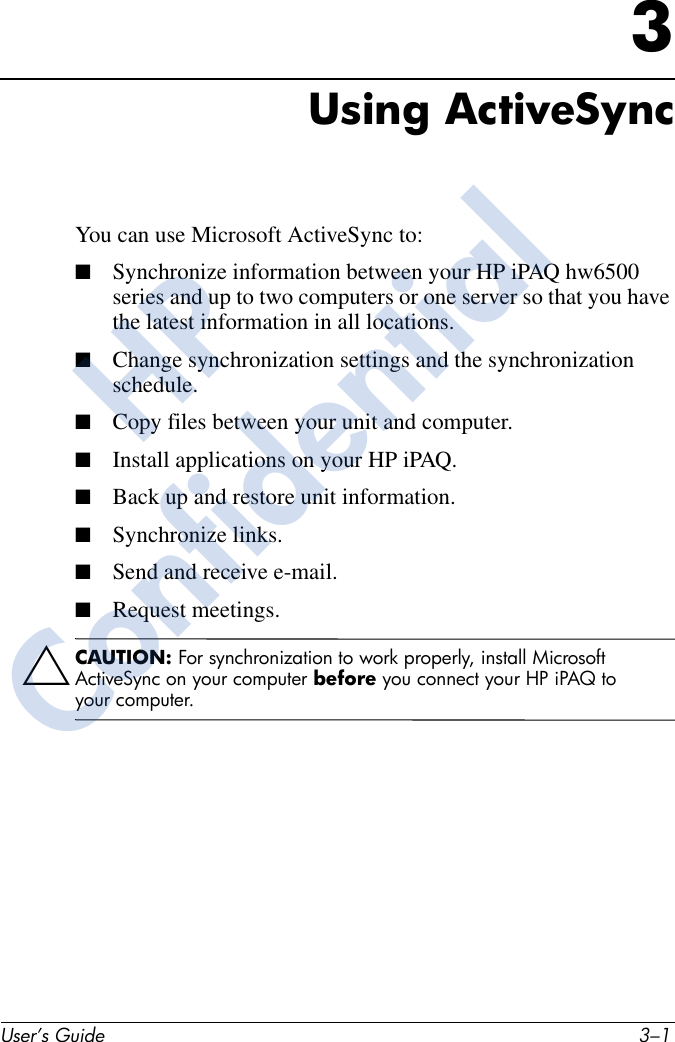
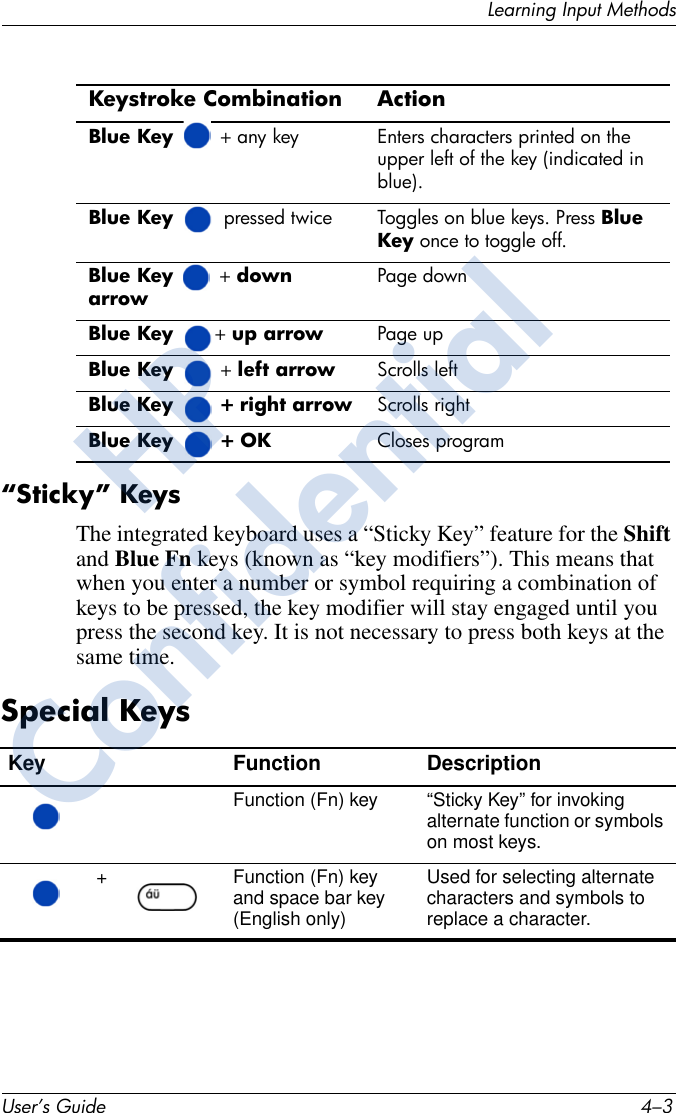
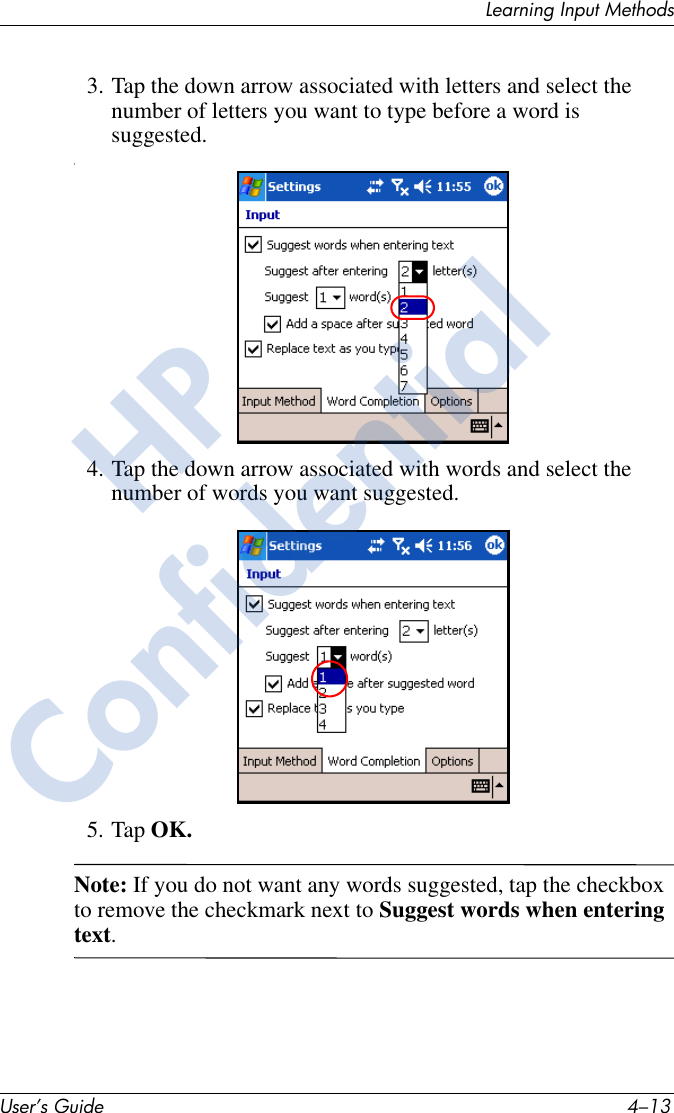
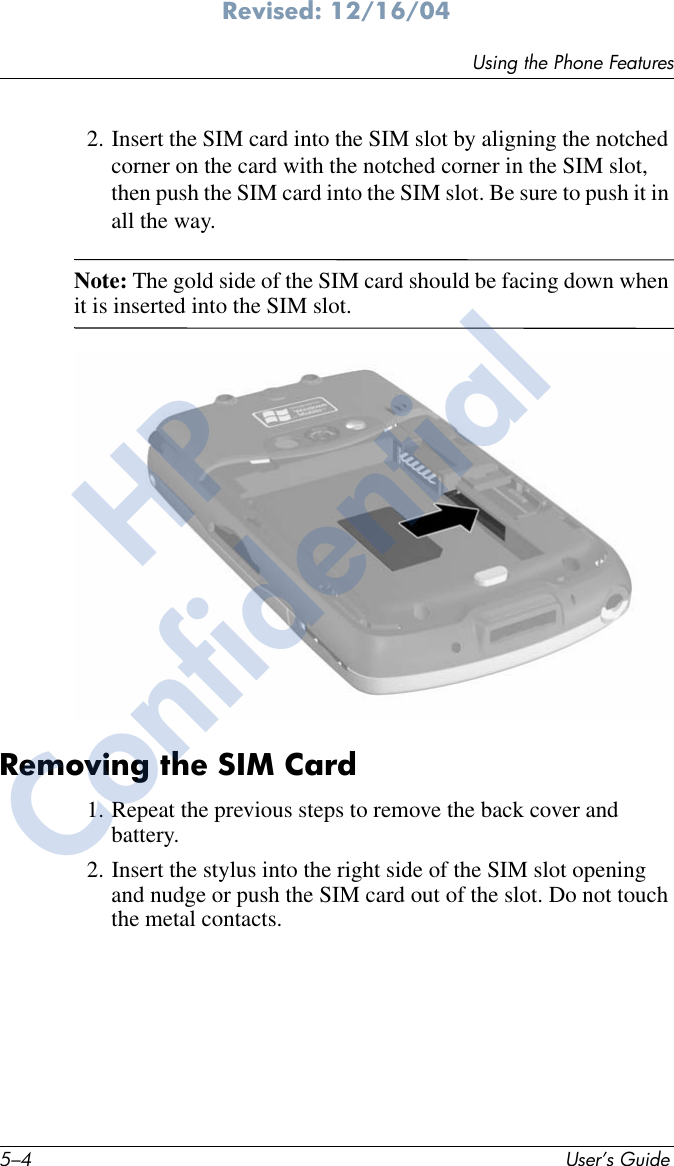
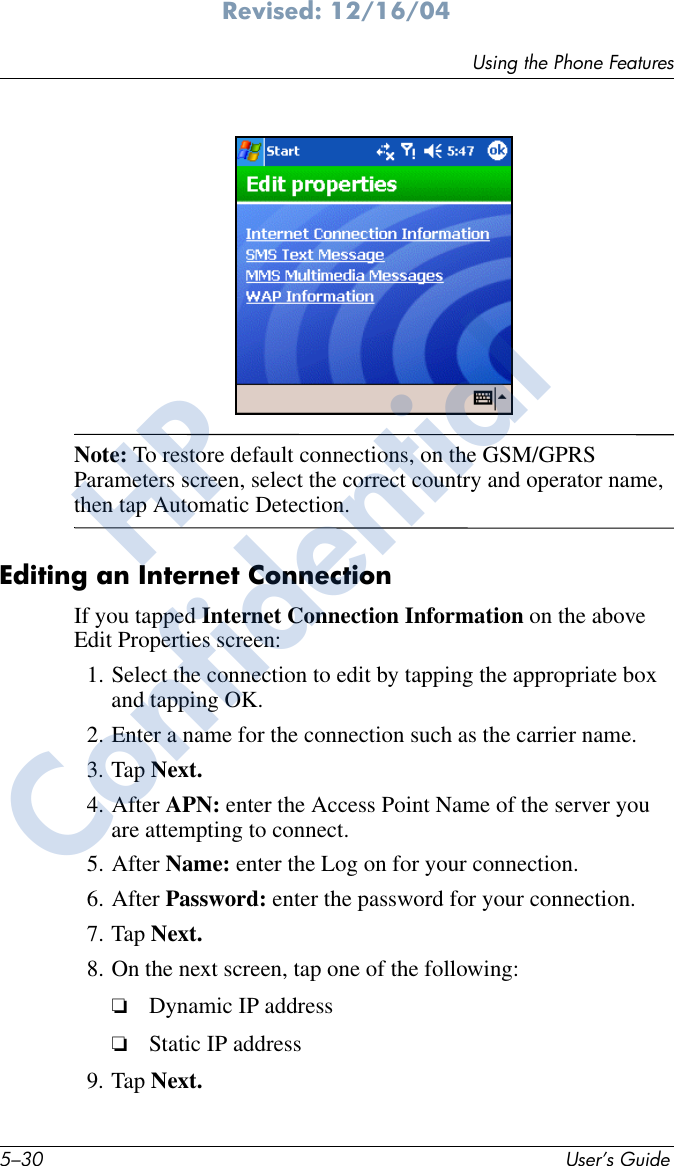
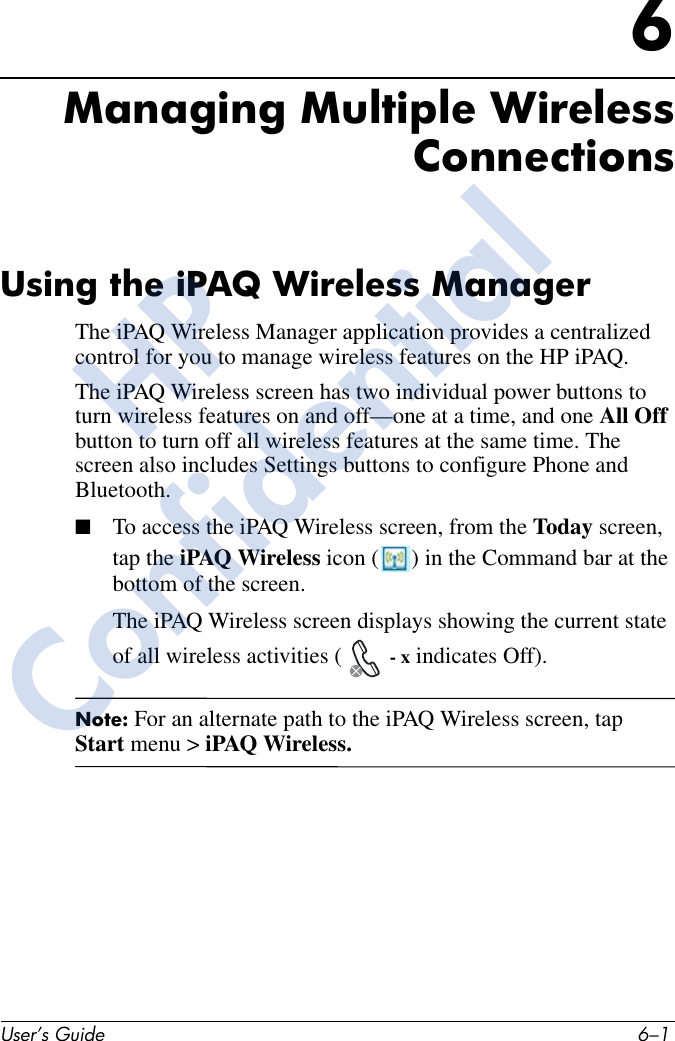
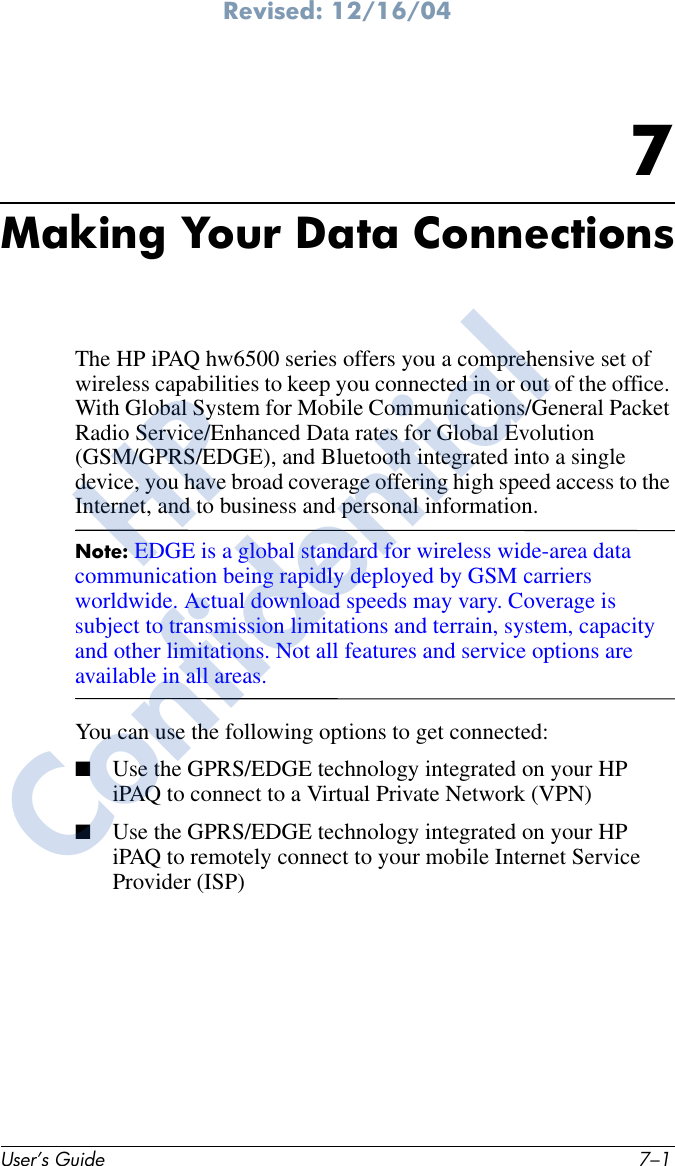
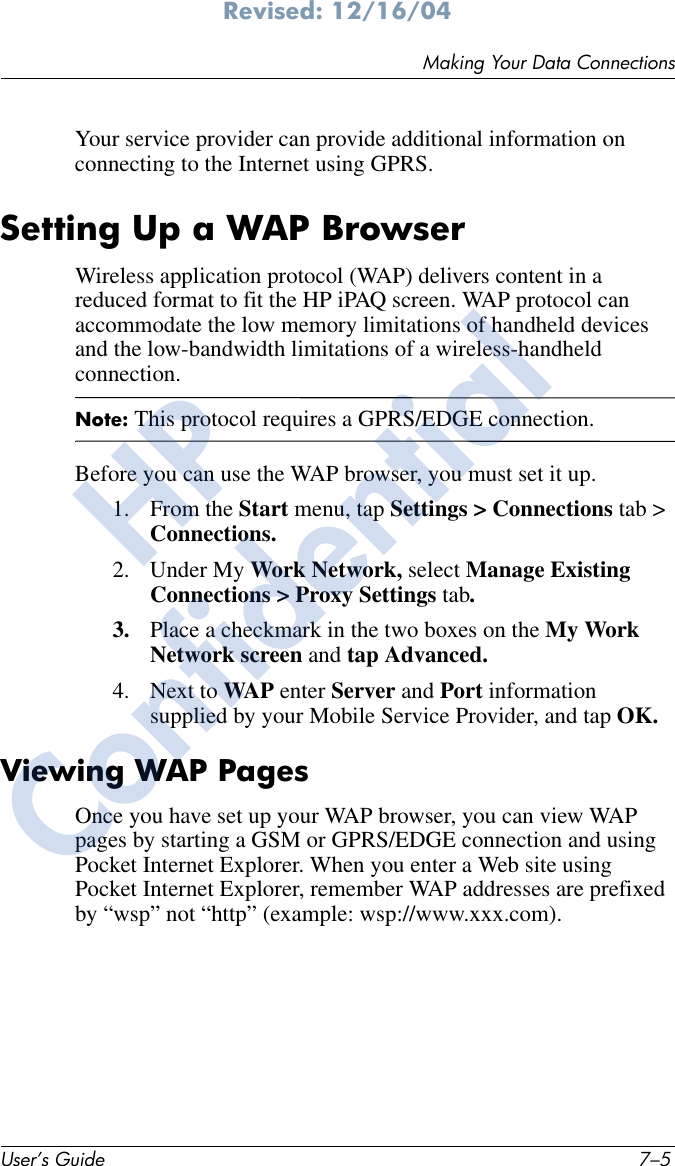
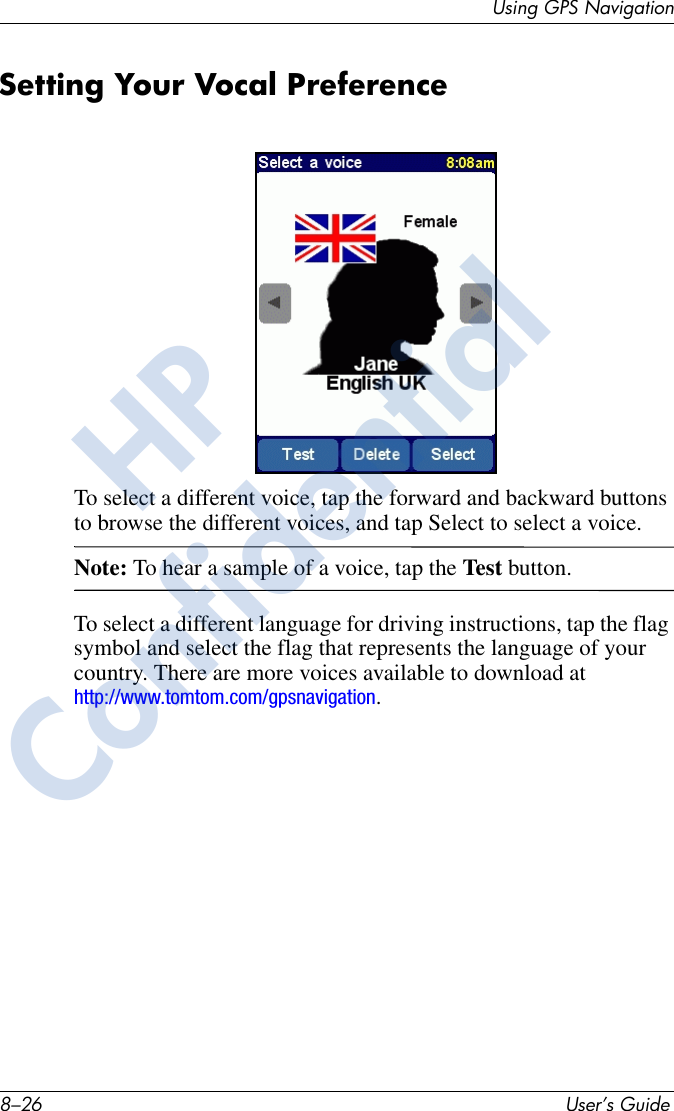
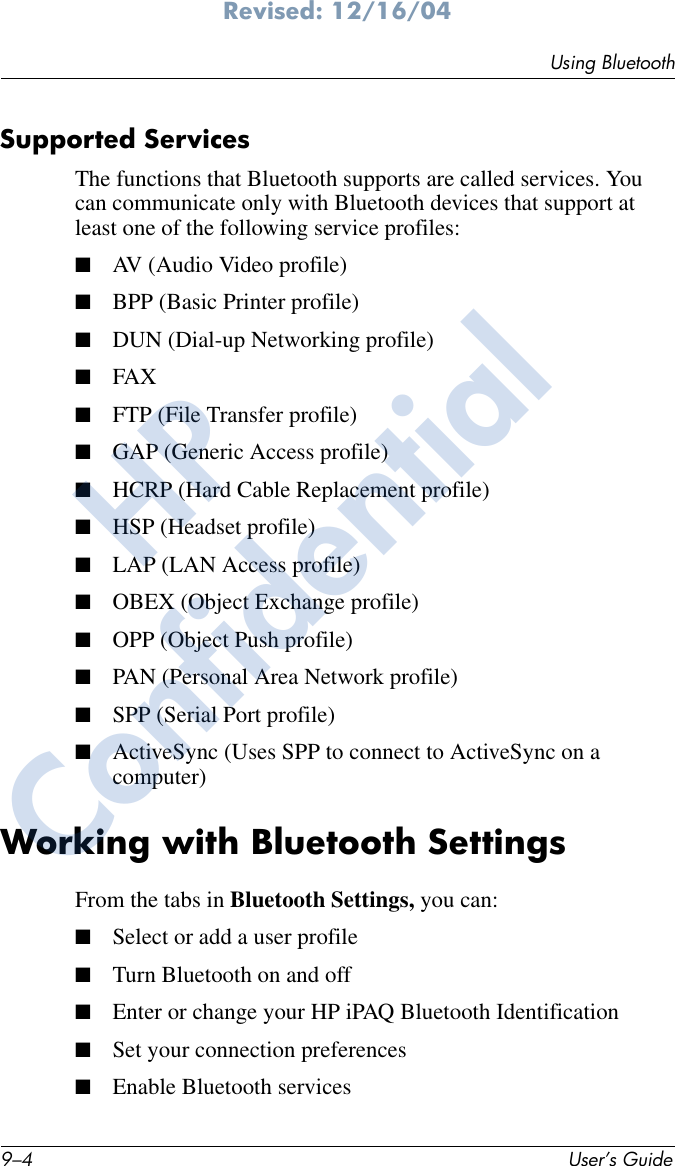
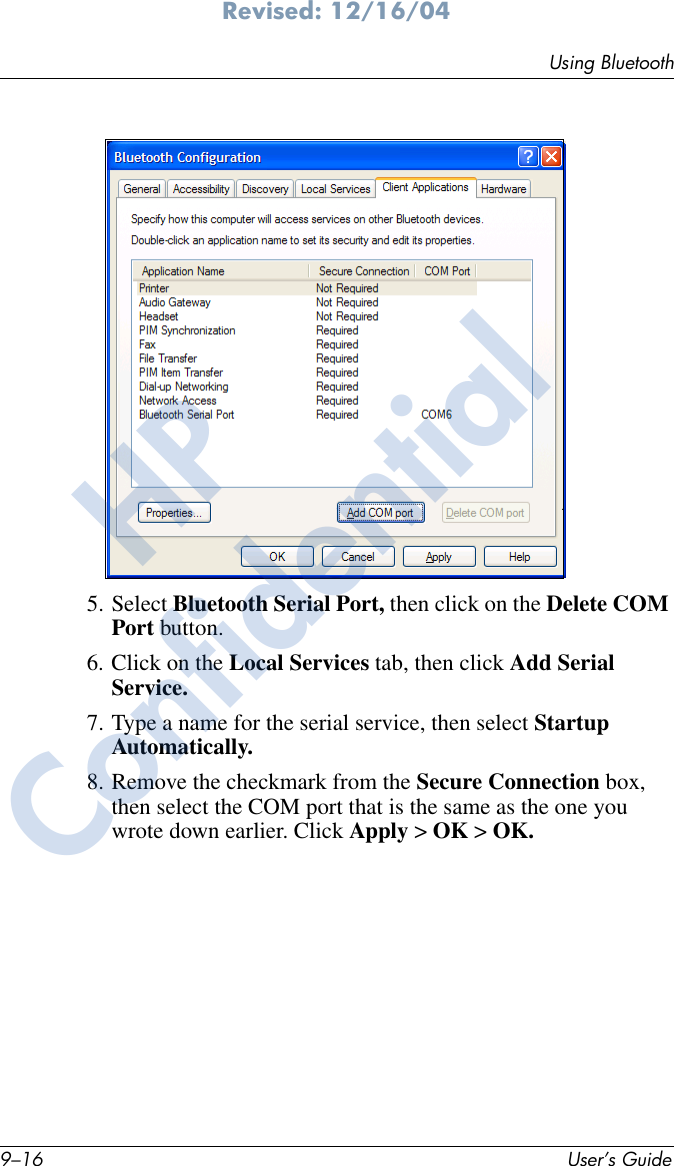
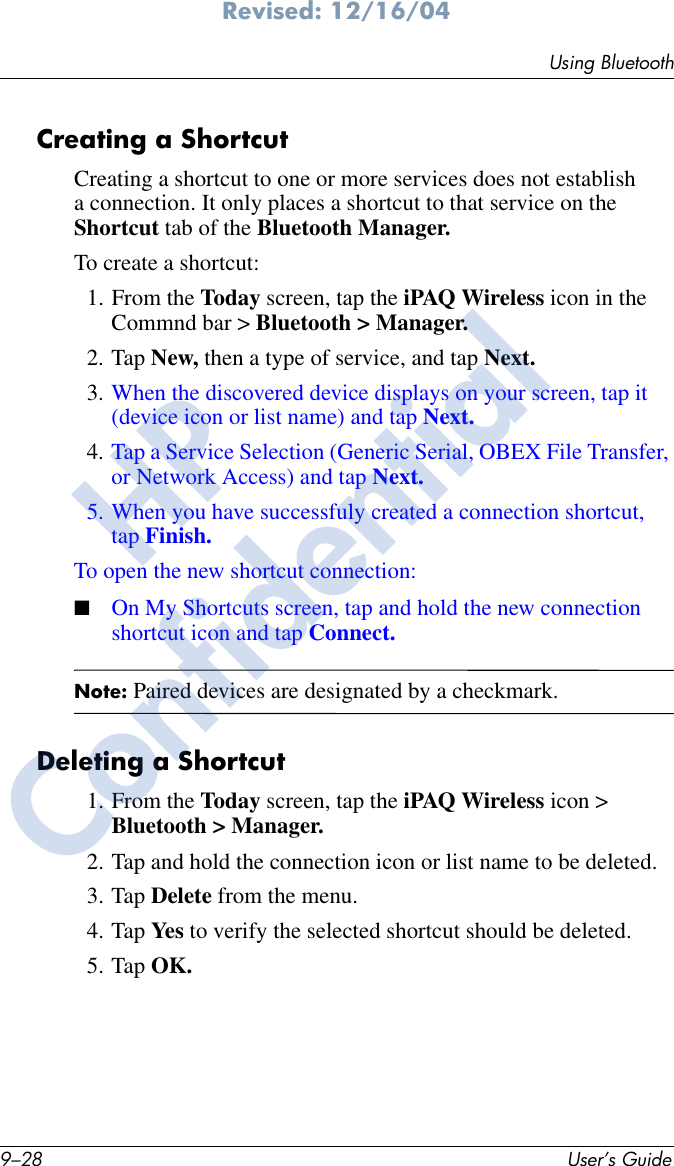
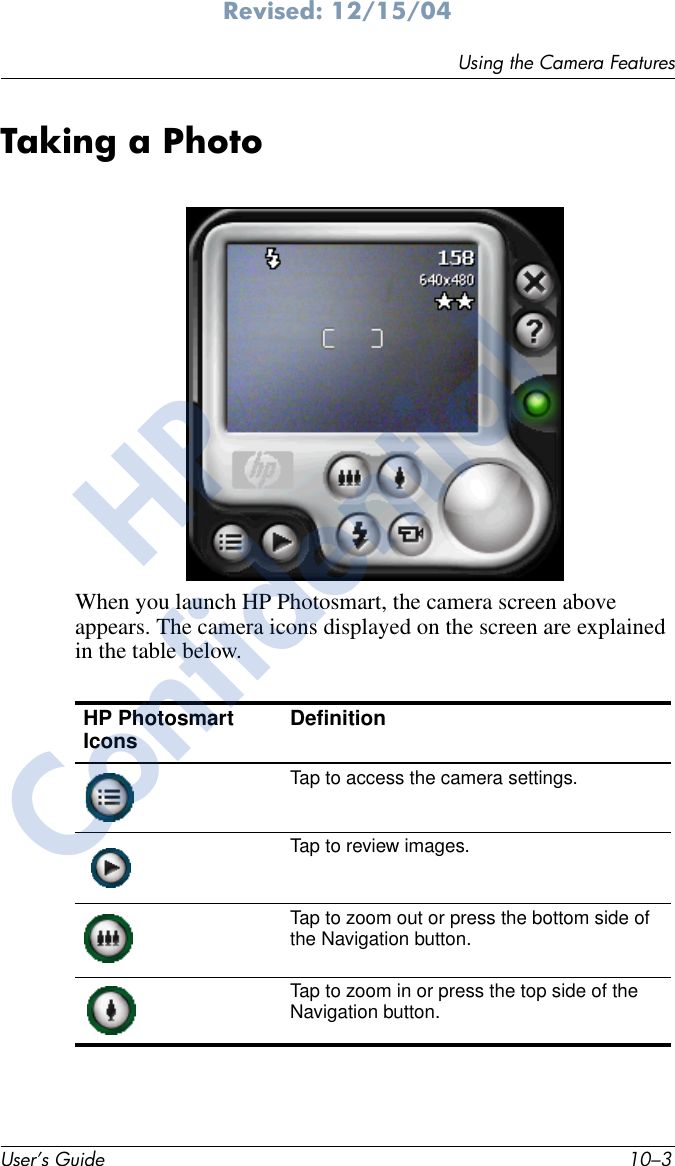
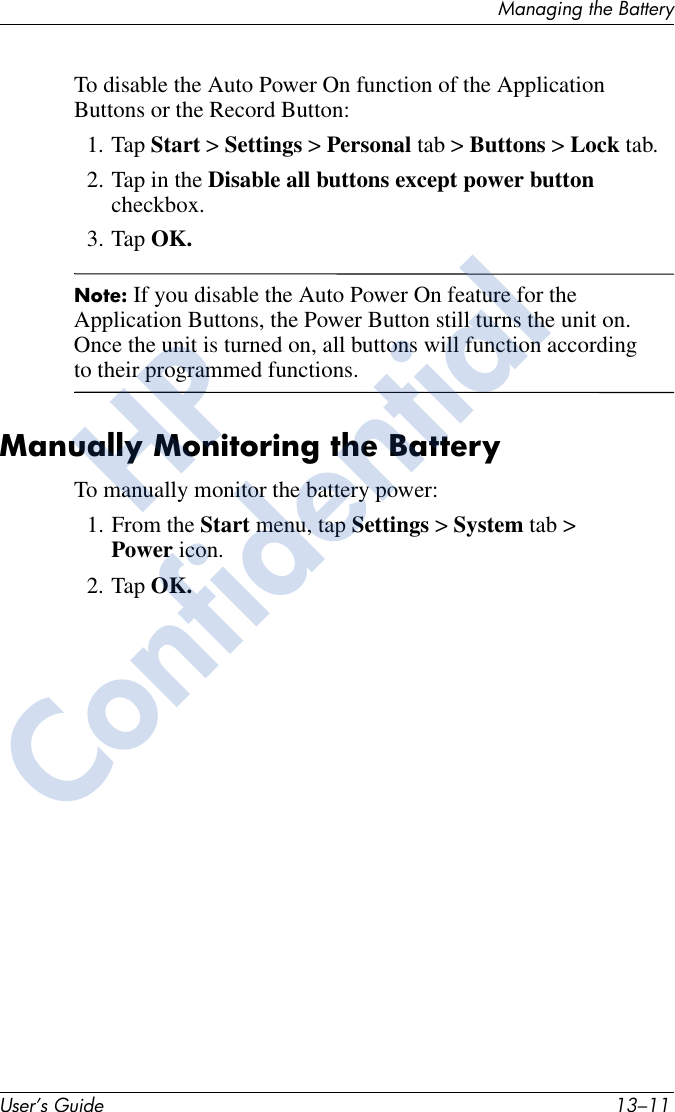
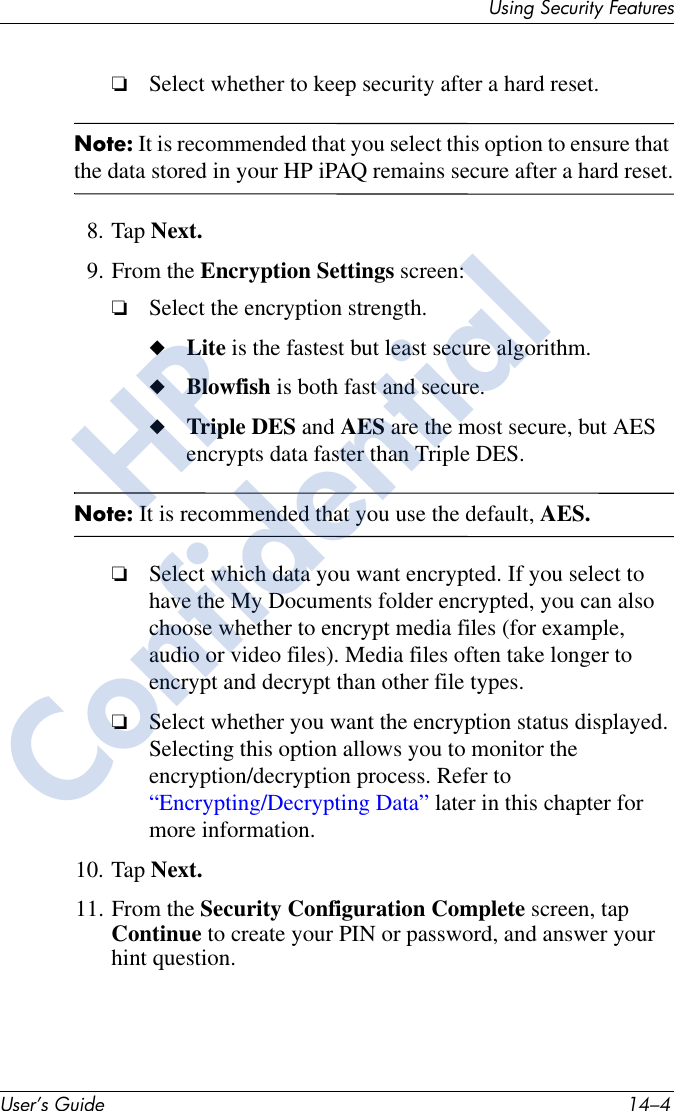
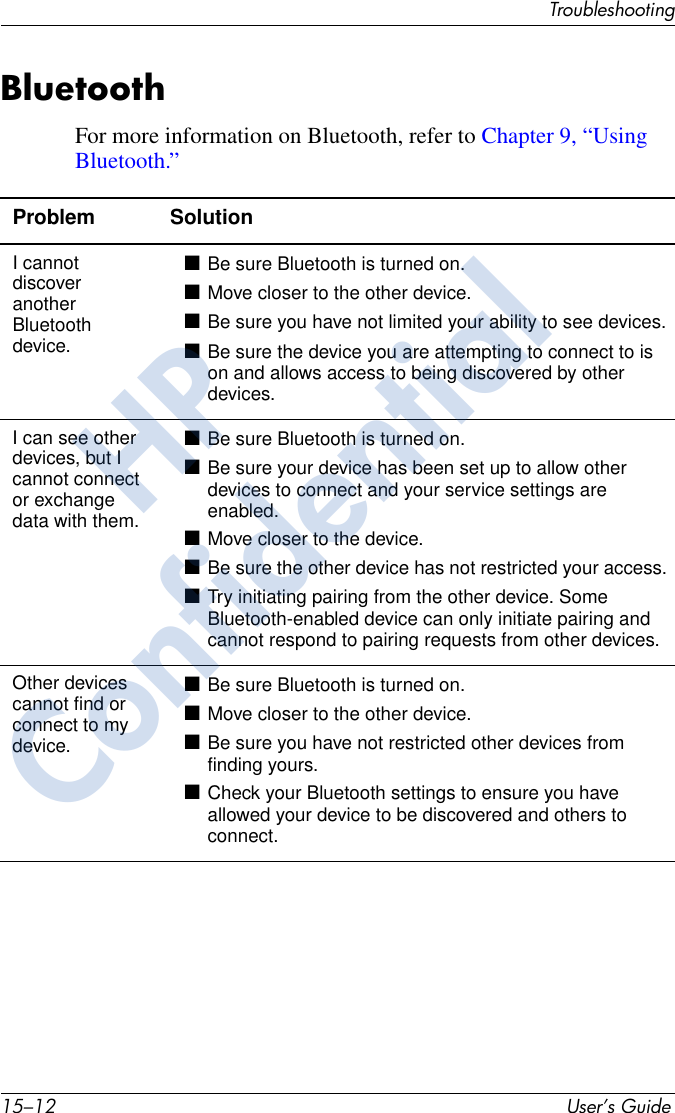
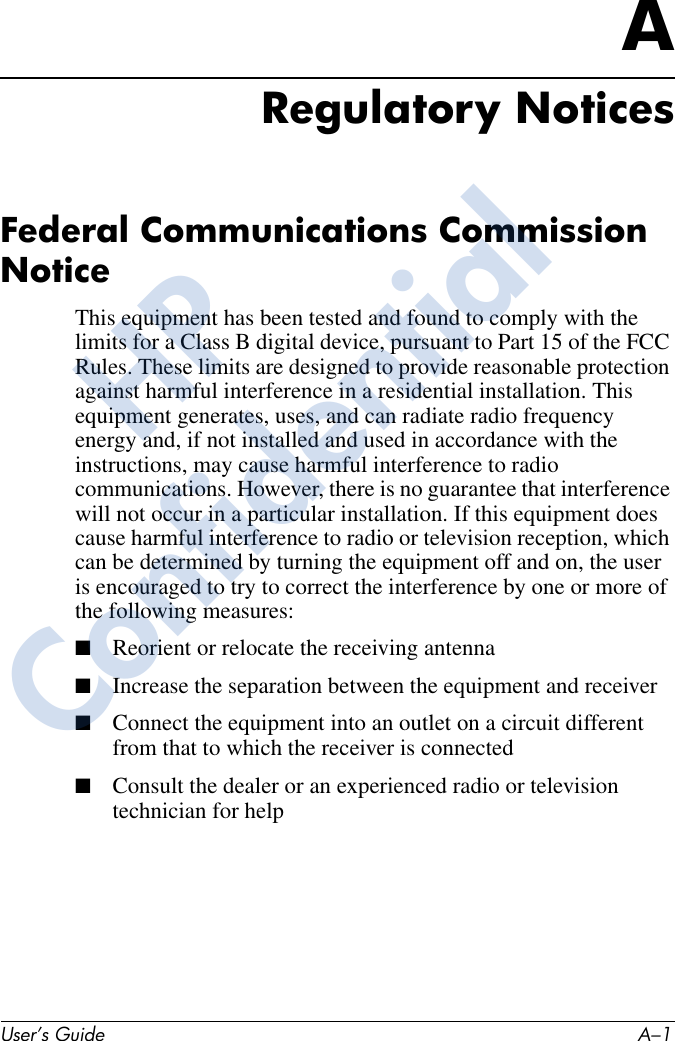
![4–6 User’s GuideLearning Input MethodsOriginal Character Modified Character pPrRsStTuUyYzZ$/“()Special Character Table (Continued)þ ¶þ ¶®®ş š ߪ Š ßţŢù ú û ü űÙ Ú Û Ü ŰýÝź żŹ Ż€ £ ¥\|\|\|' « »[ { < «] } > »HPConfidential](https://usermanual.wiki/HTC/HHH06C/User-Guide-515171-Page-57.png)


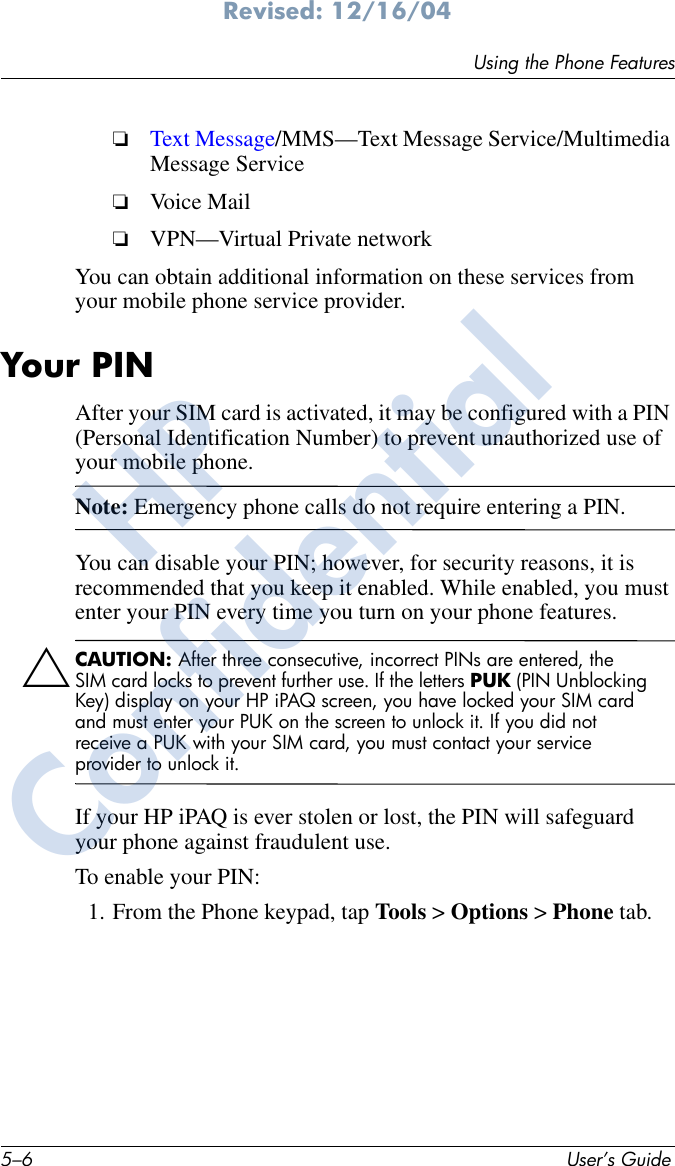

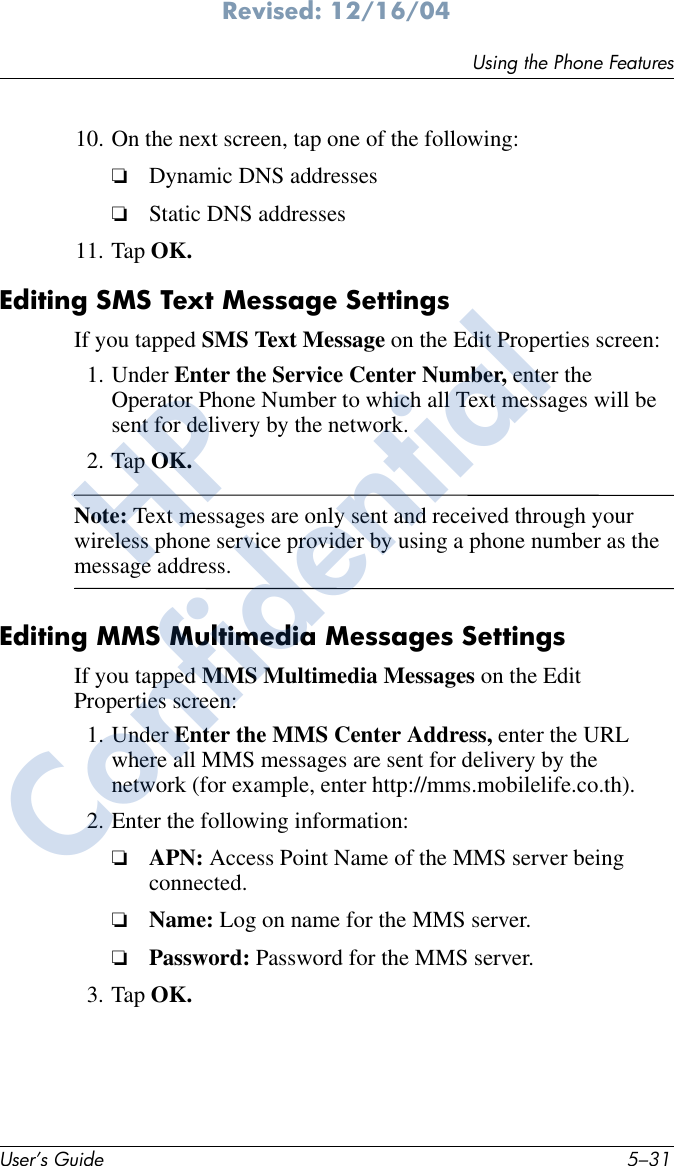

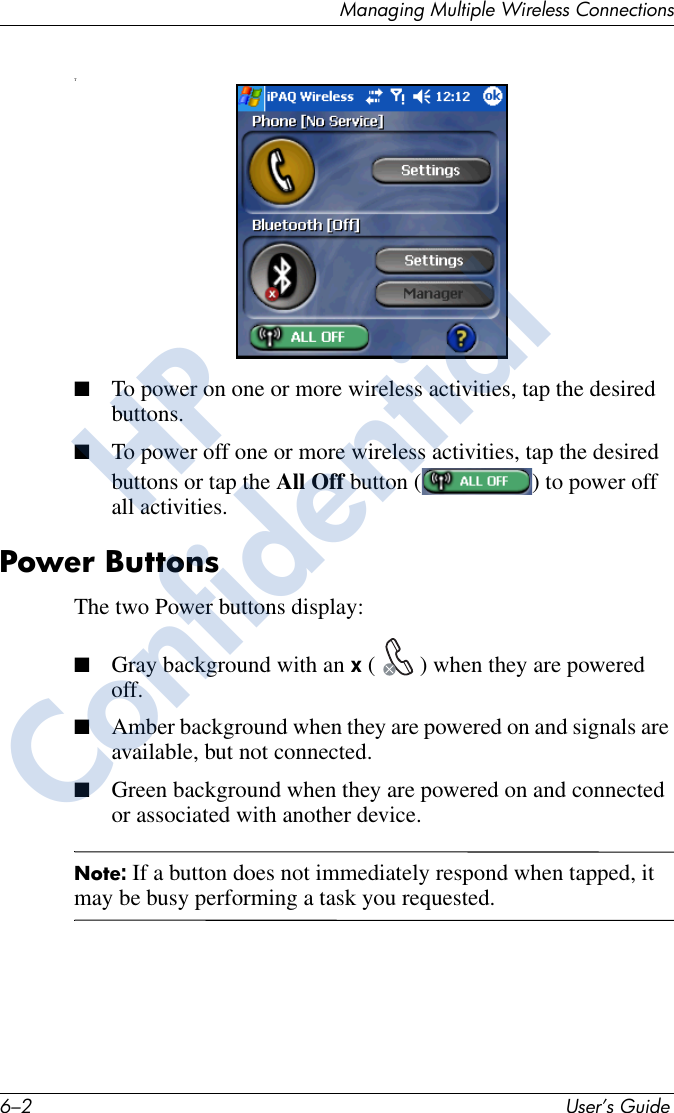
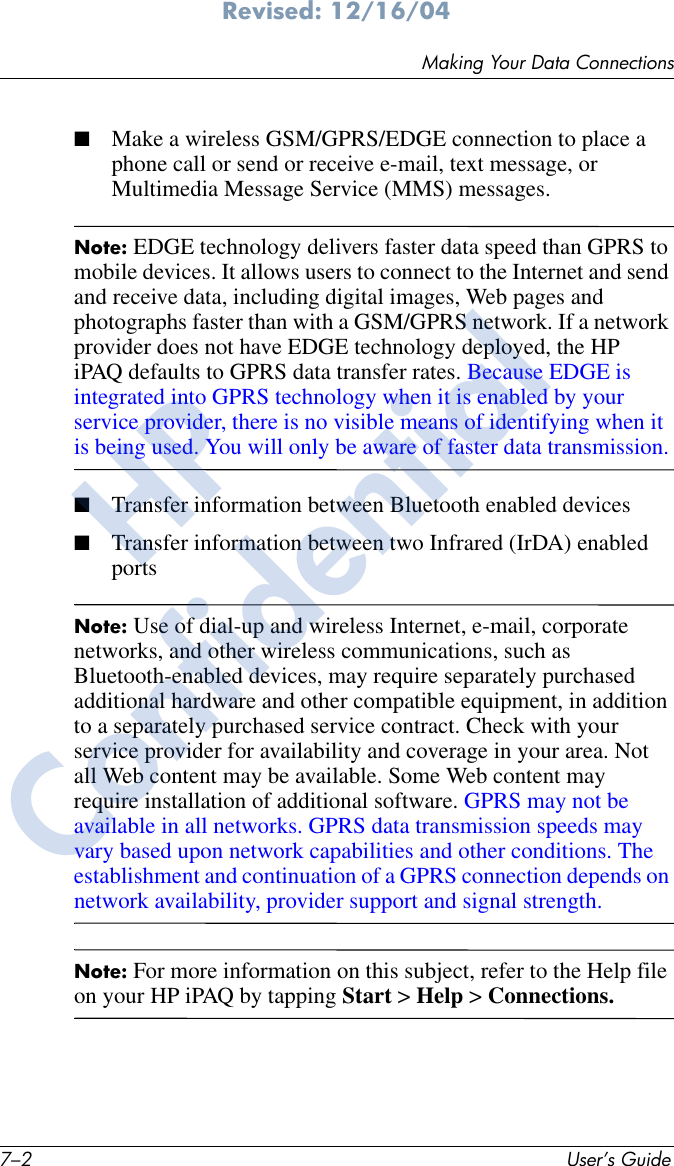
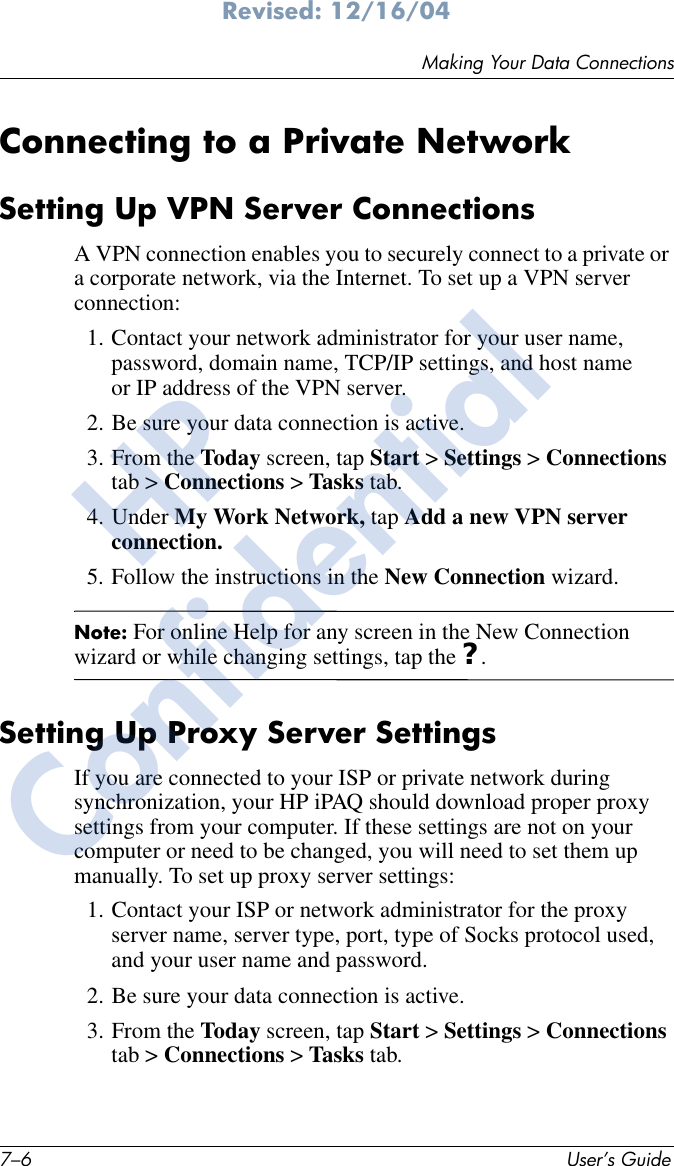

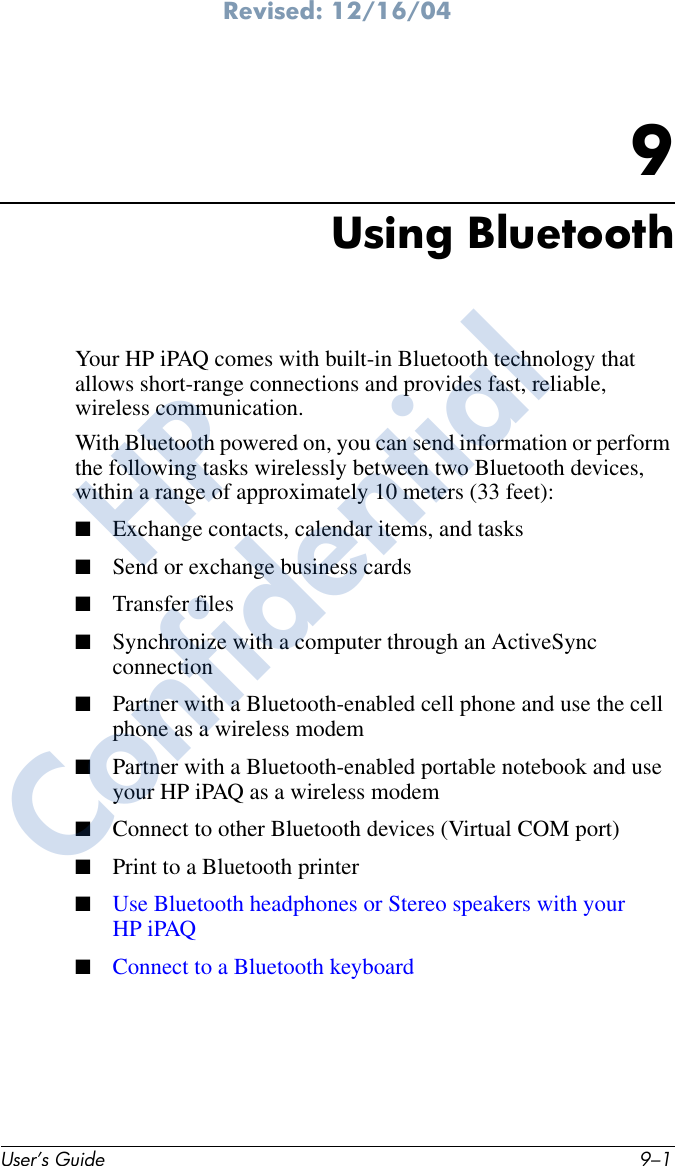
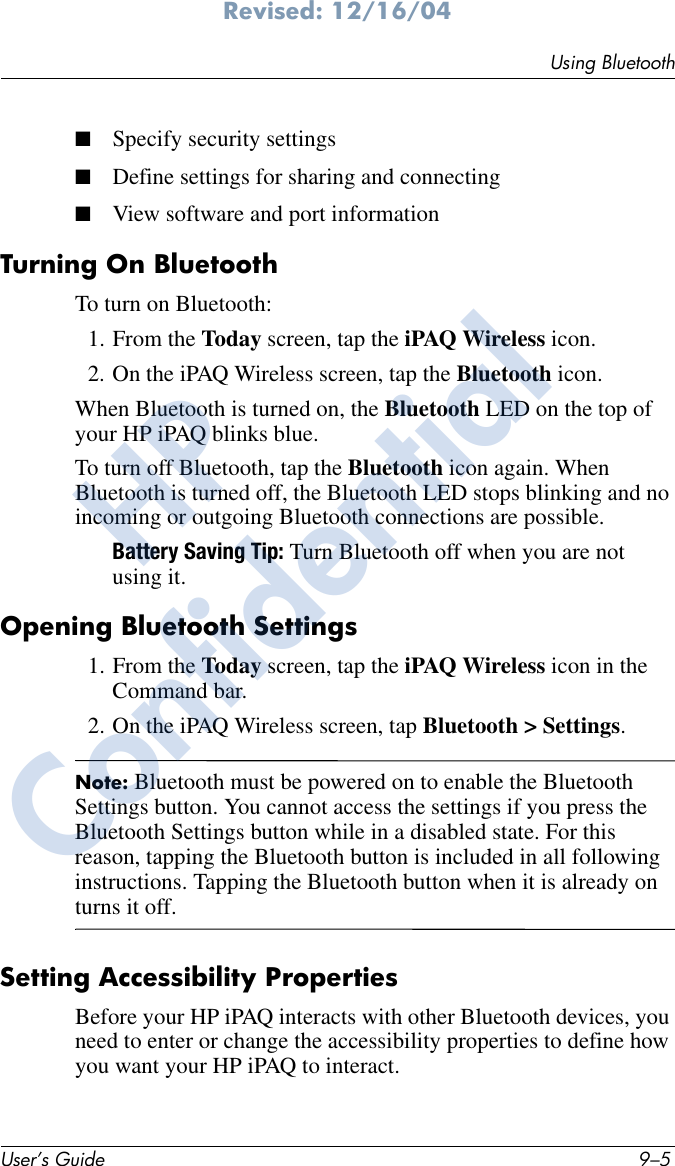
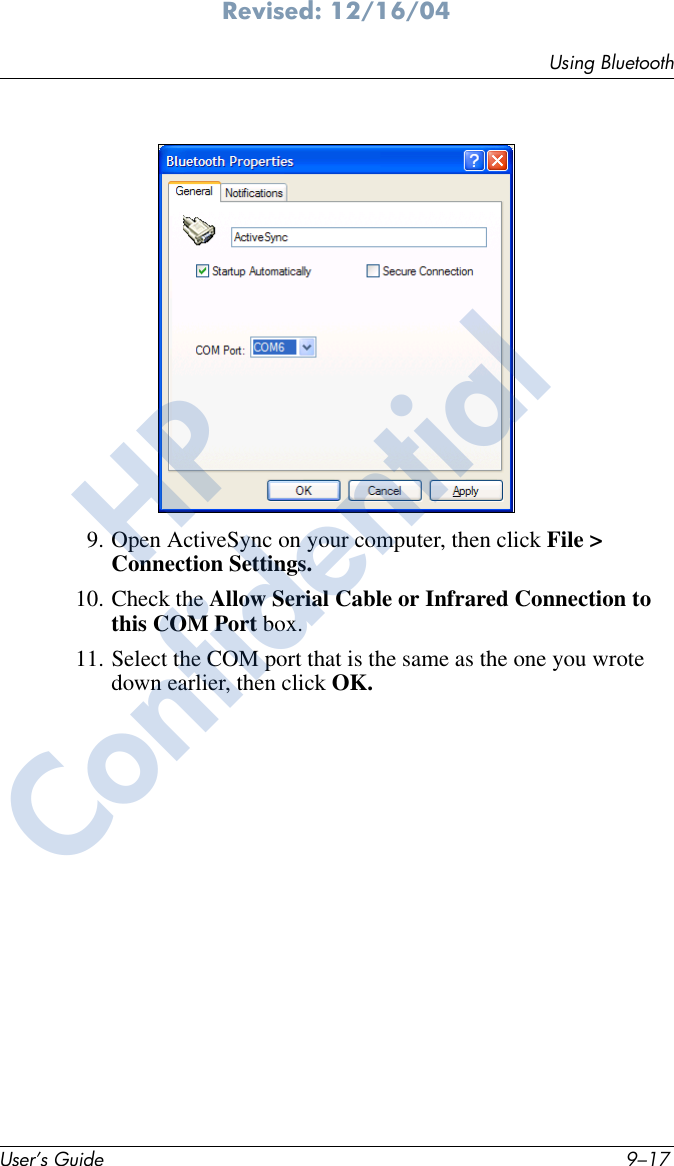
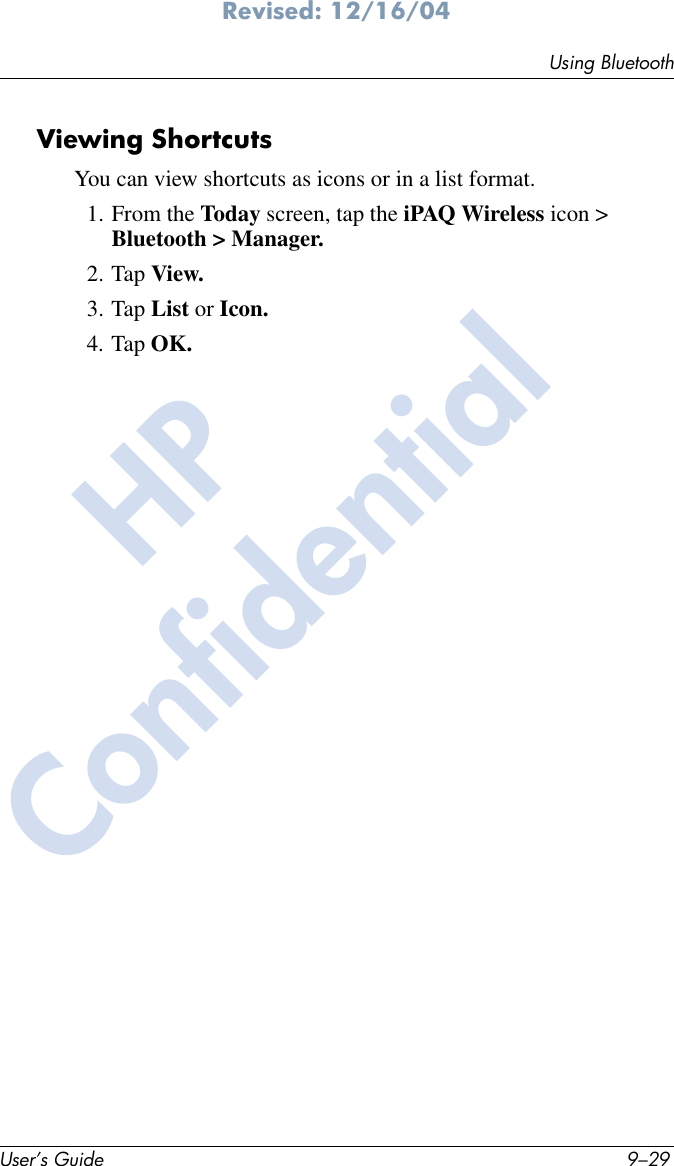
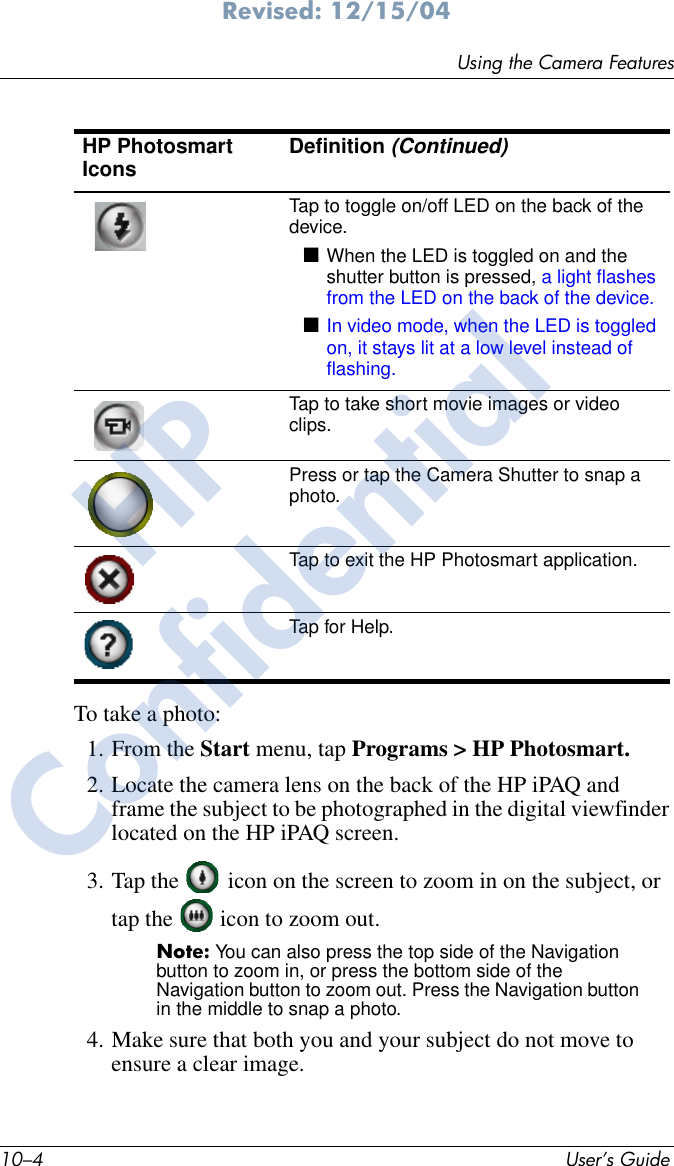


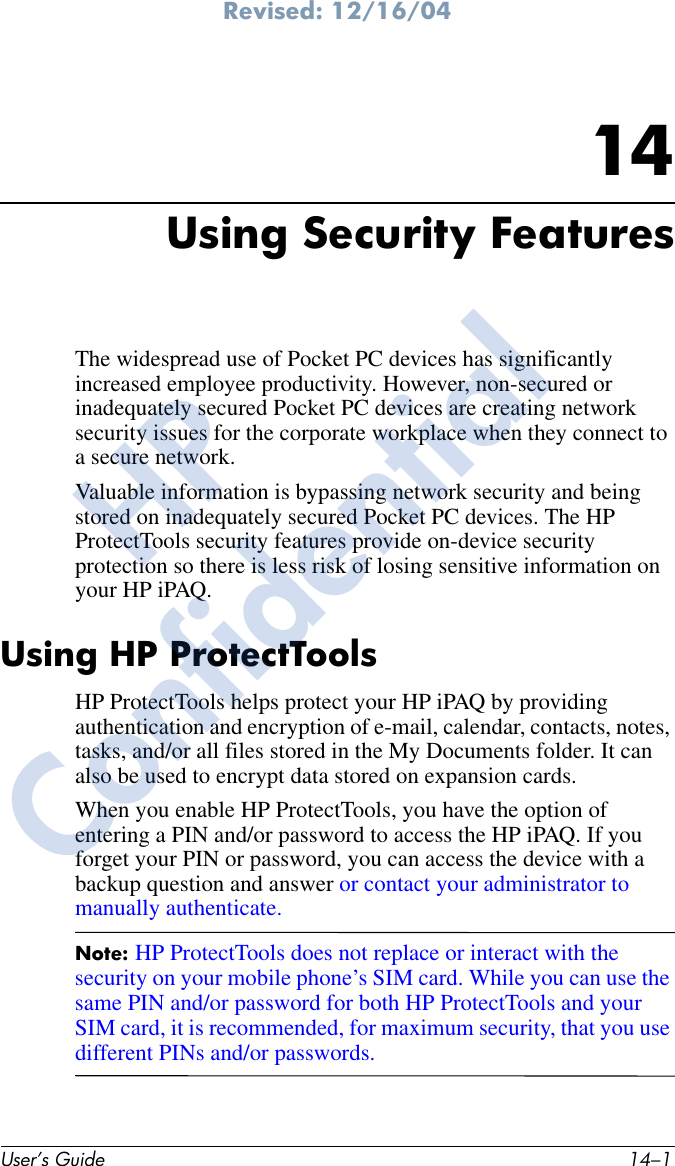
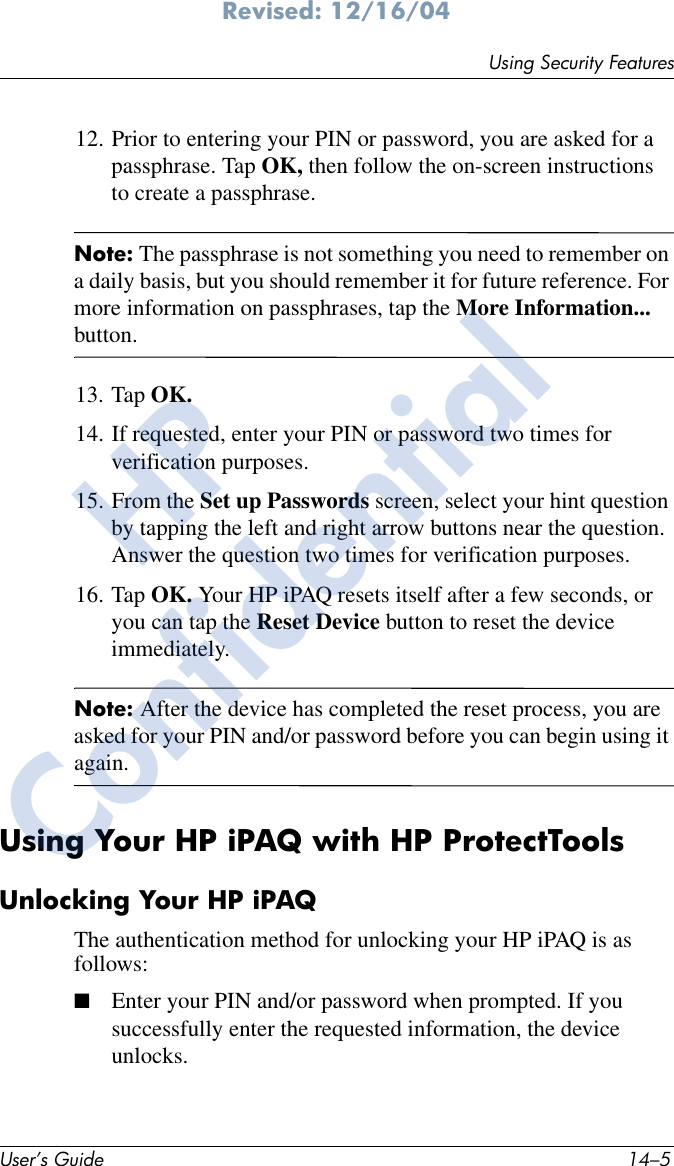


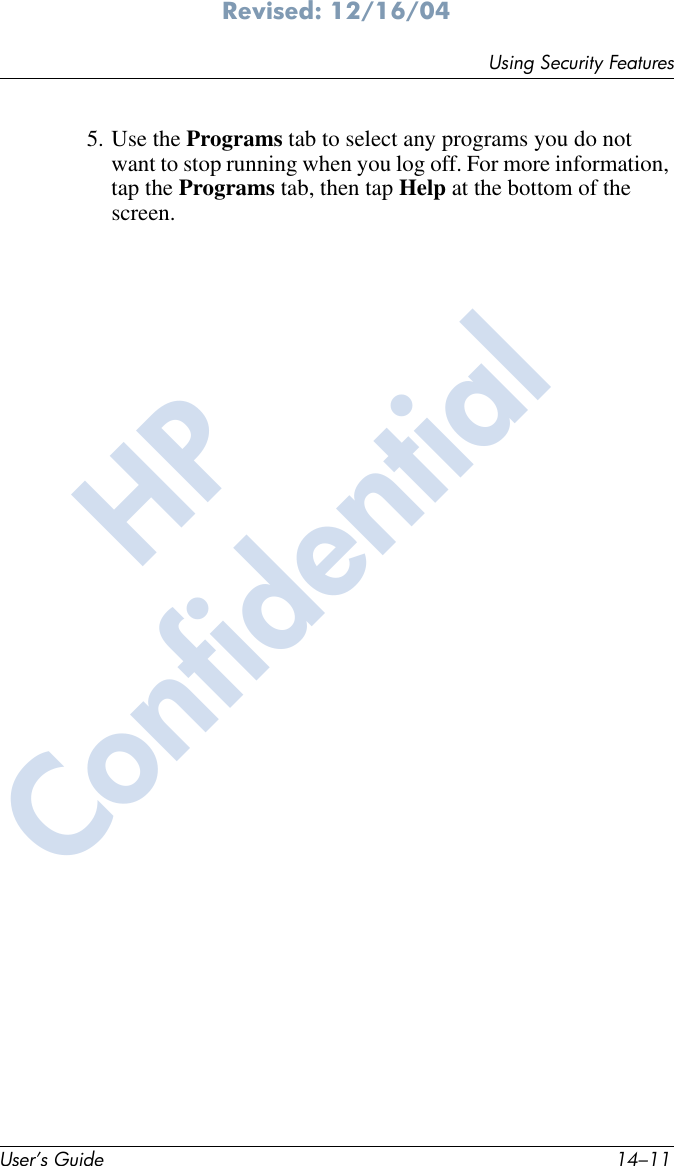

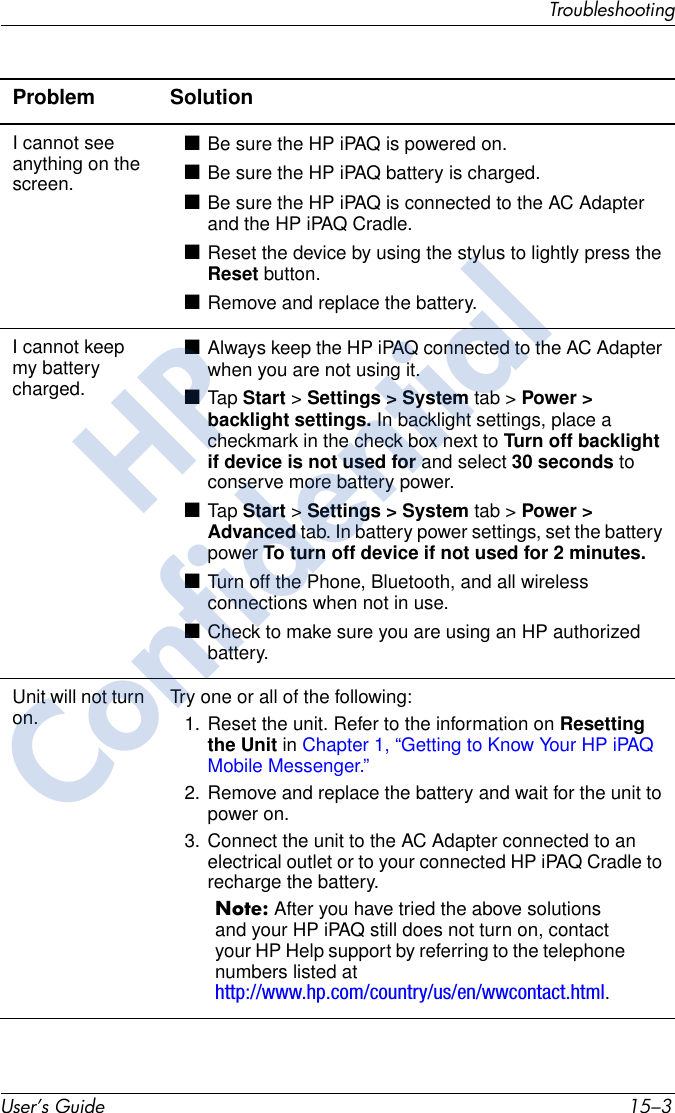
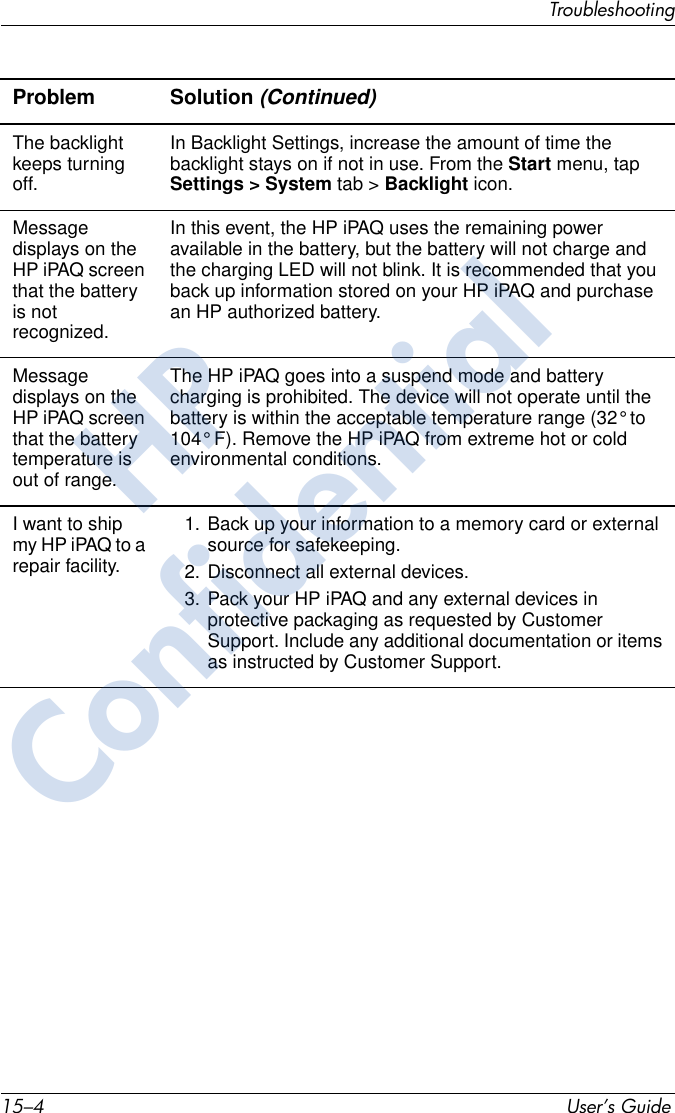
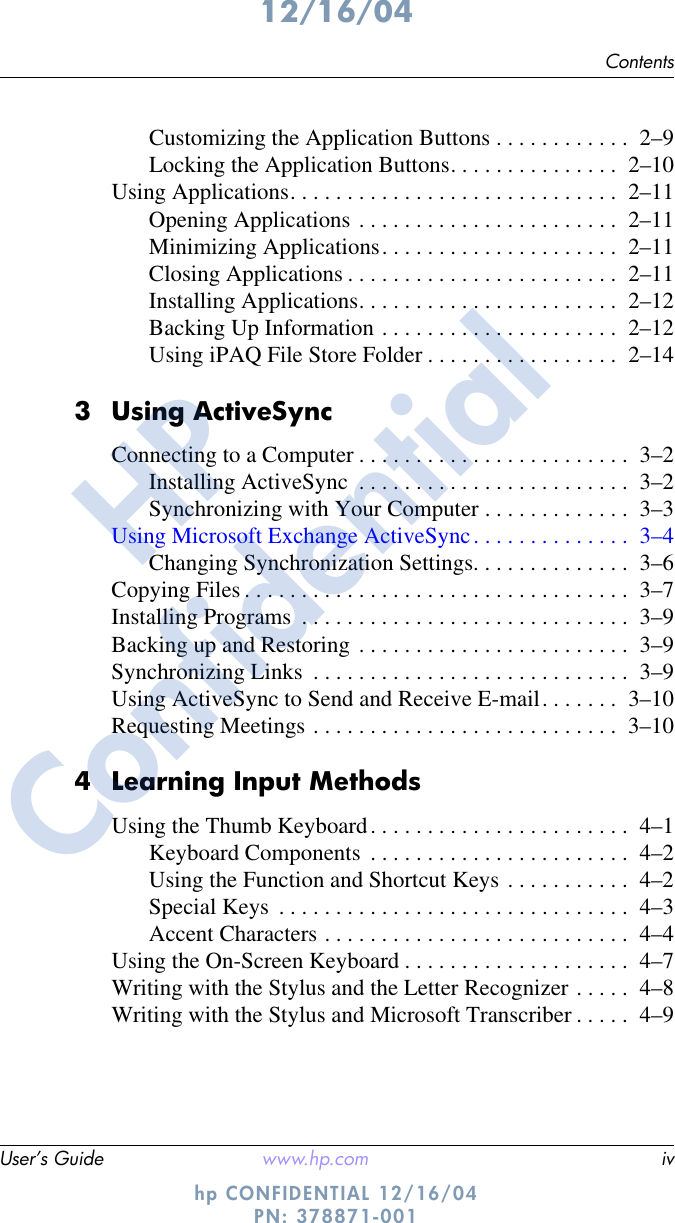
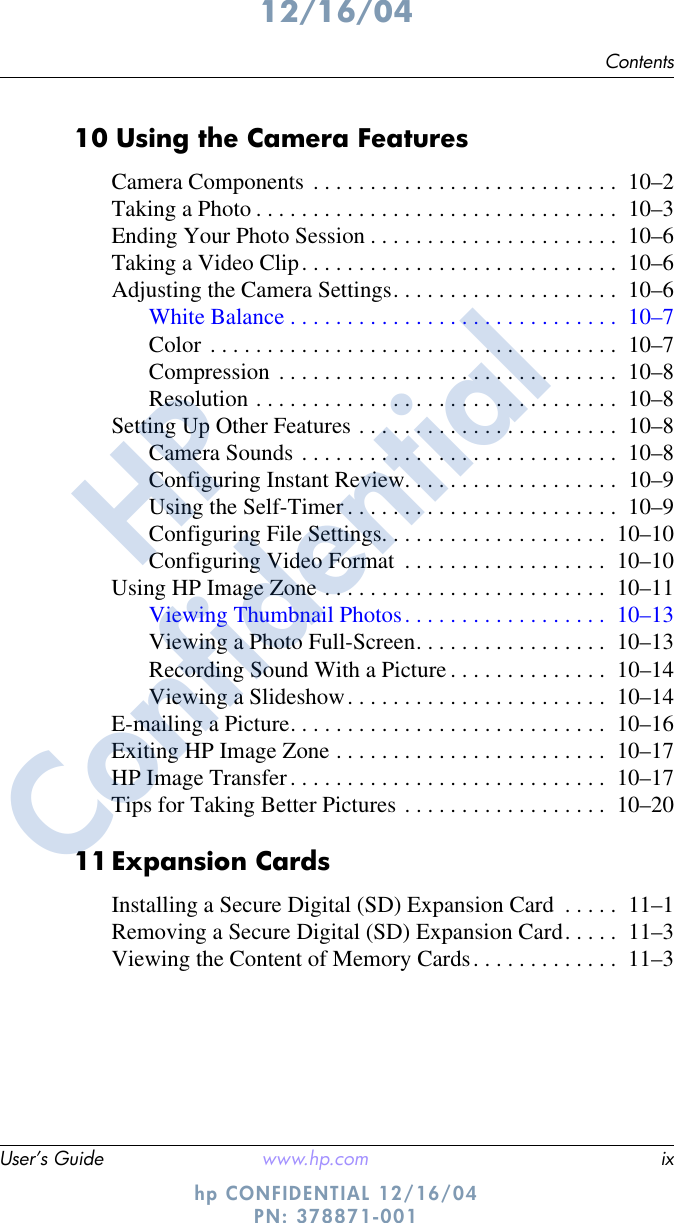
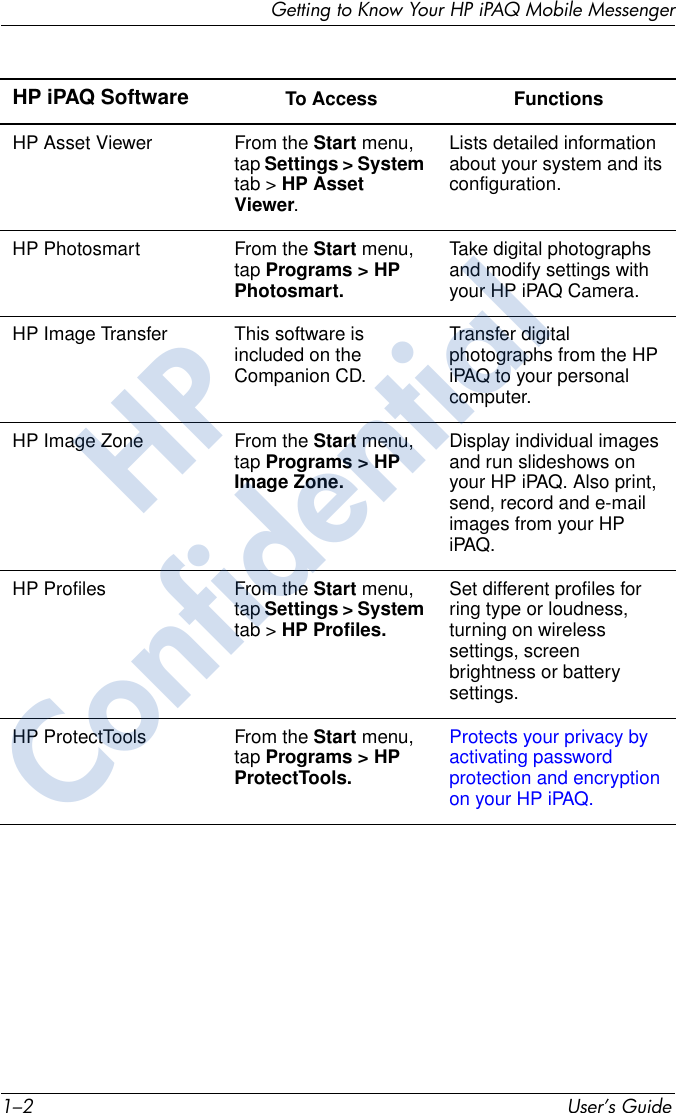
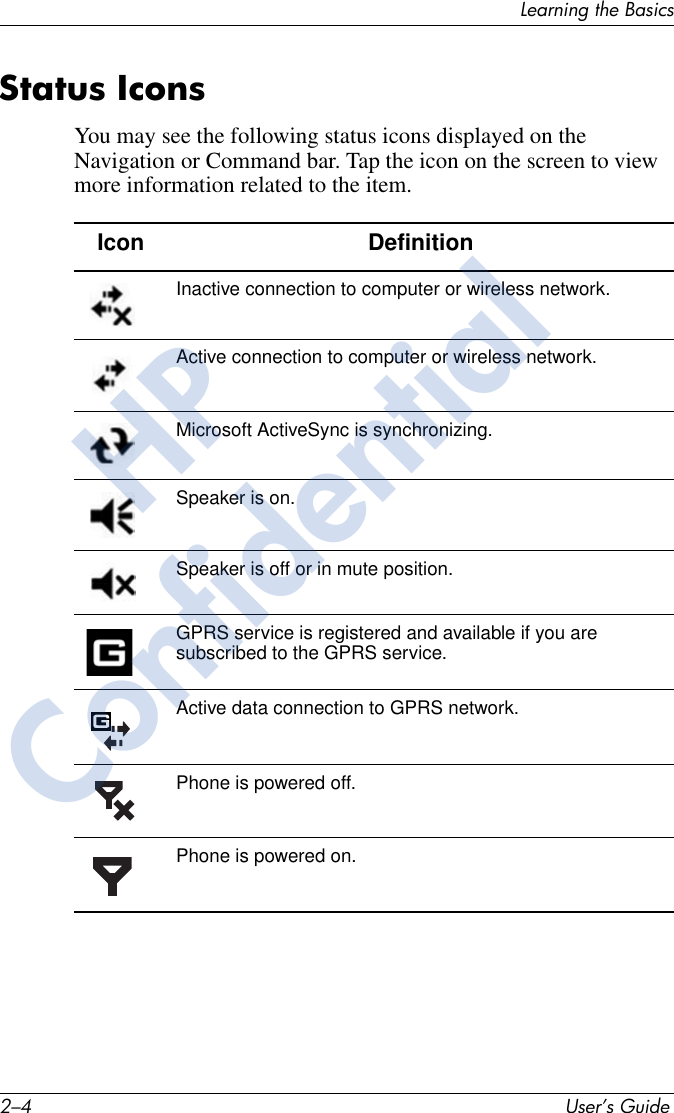
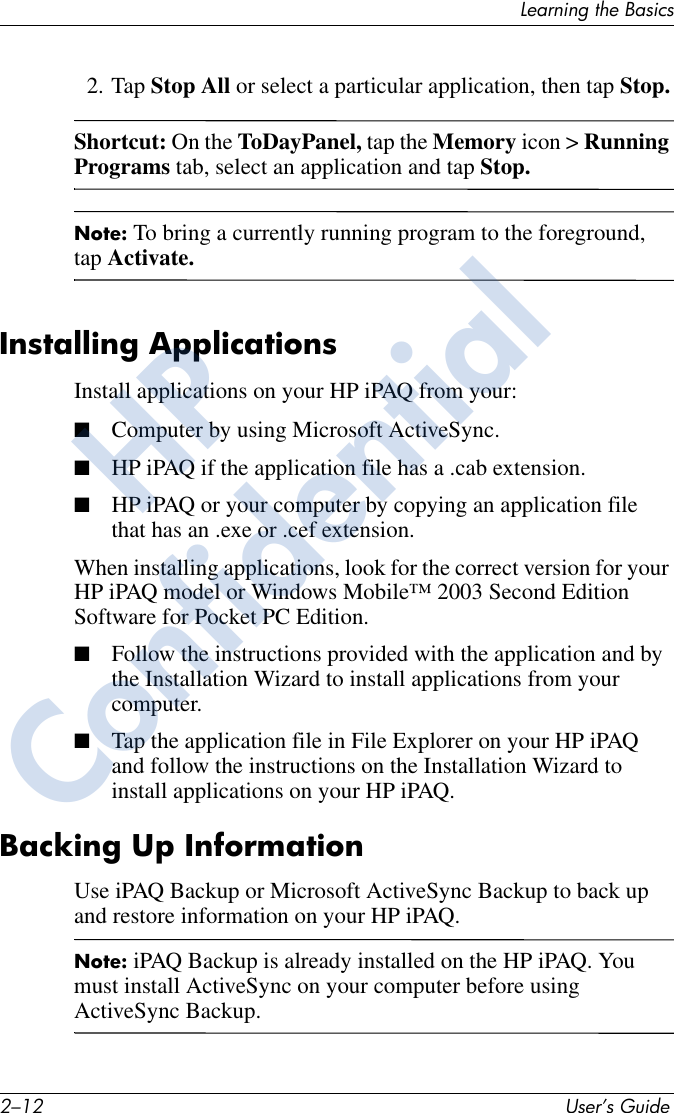
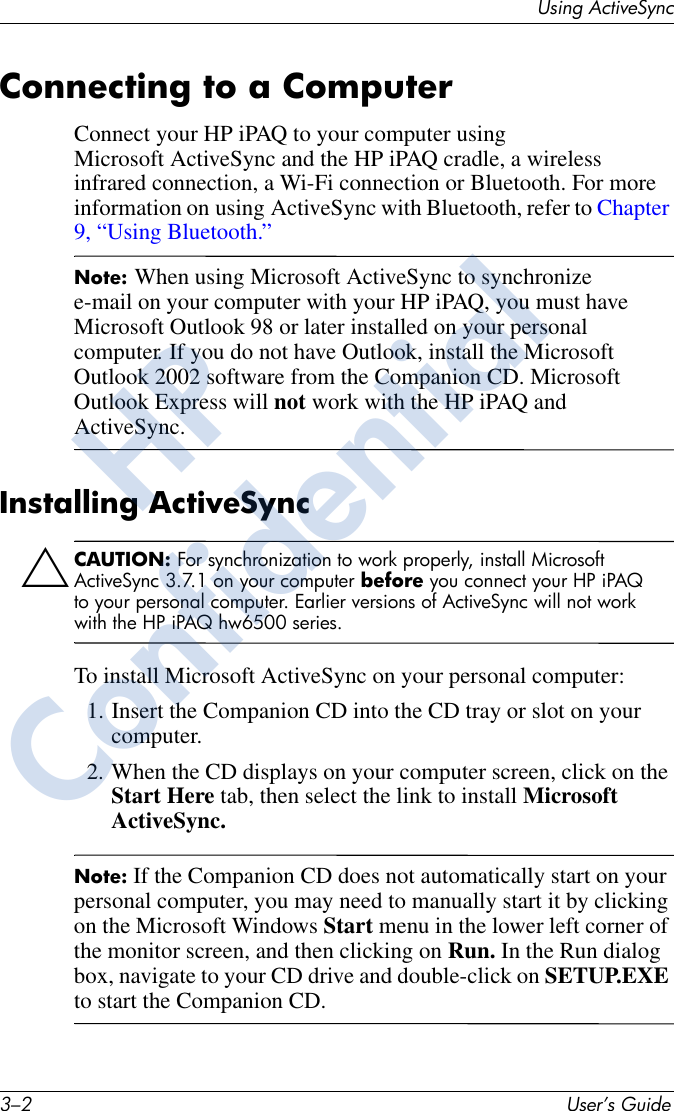
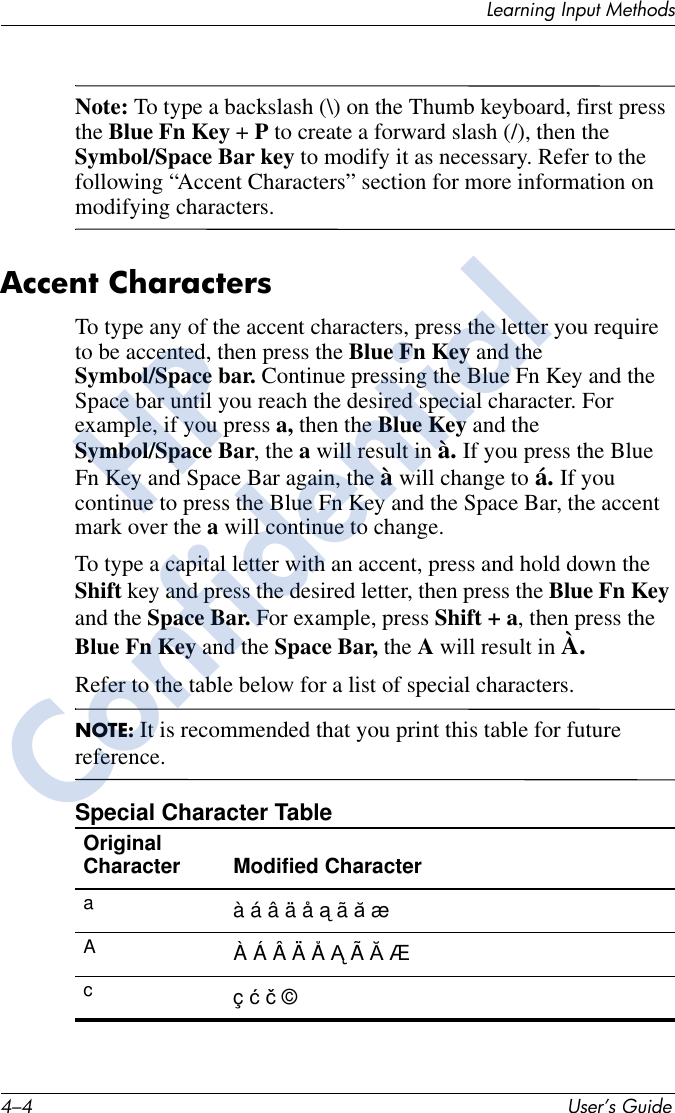
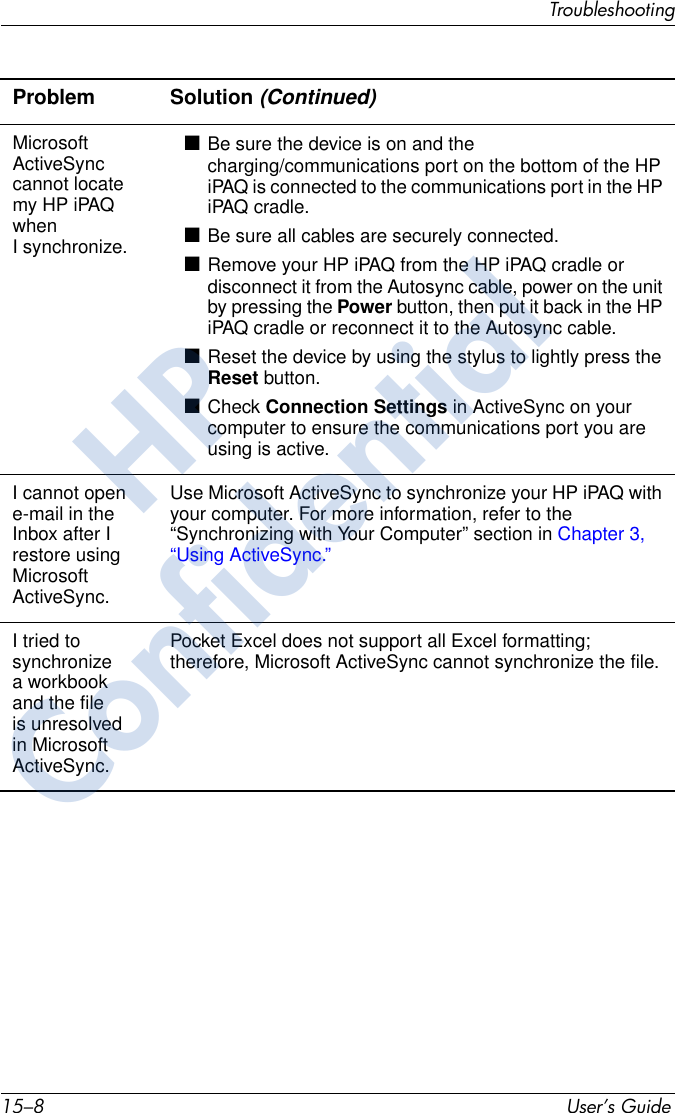
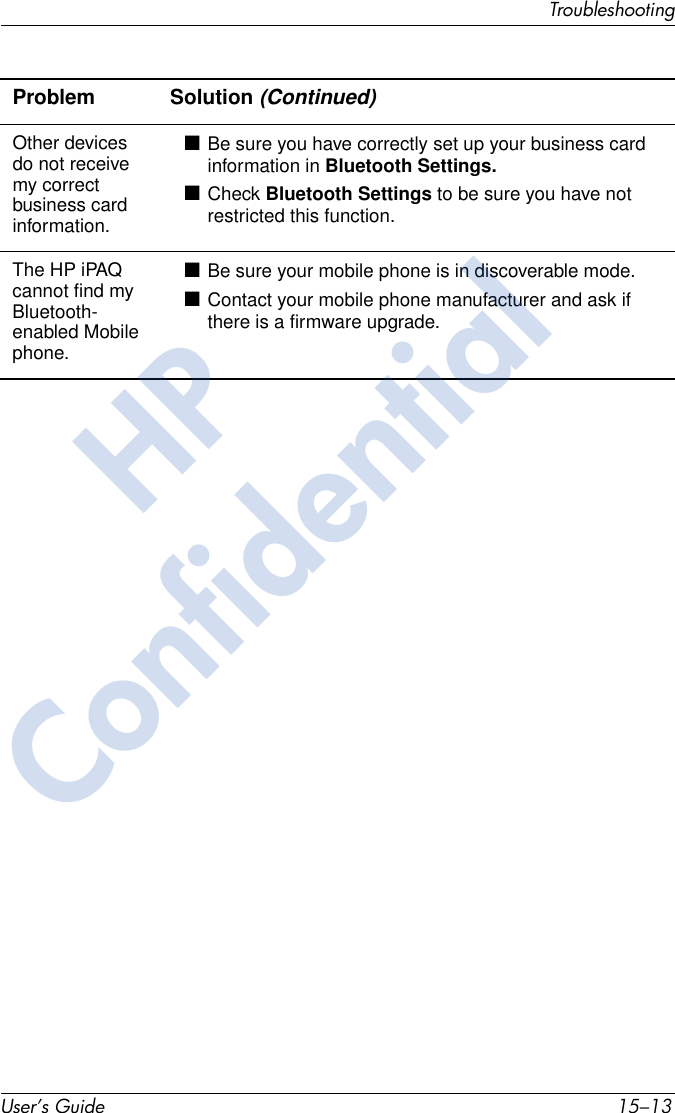
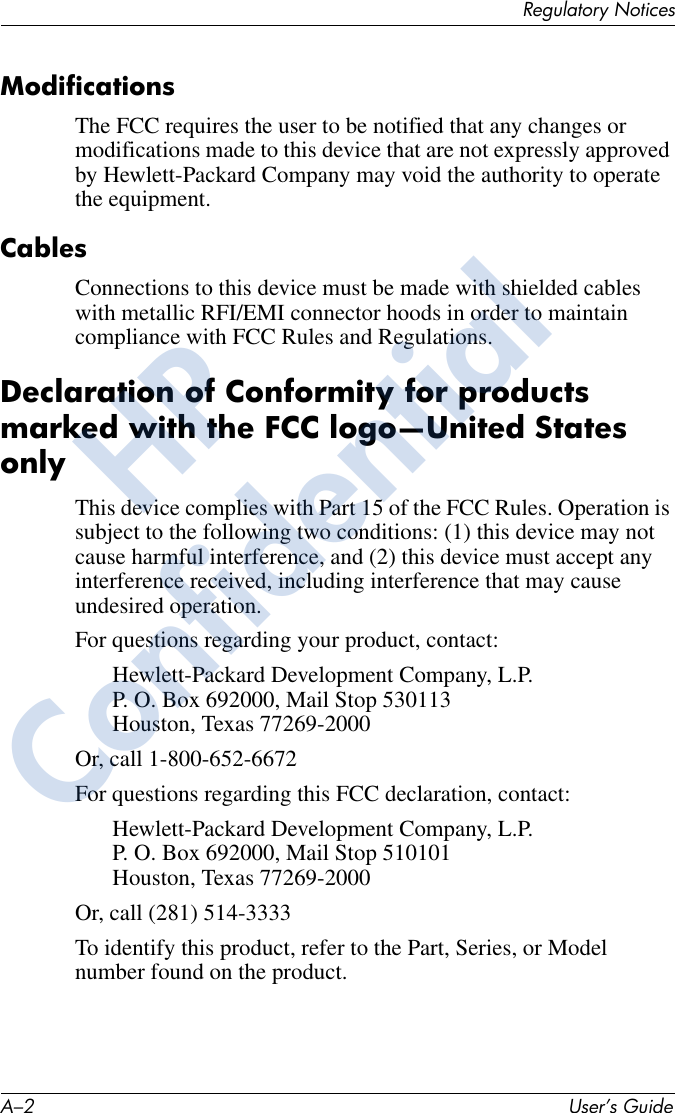
![TroubleshootingUser’s Guide 15–5I cannot connect to a network. ■Be sure you have added the necessary server information.■Be sure the network you are attempting to connect to is available and not busy.■Check the signal strength.■Be sure your user name and password are correct.■Tap Start > Settings > Connections tab > Connections and check your connection settings. Tap OK when you are finished to save your changes.■Be sure the IP Address is correct.■Reset the device by using the stylus to lightly press the Reset button.■Check with your service provider for current connection problems.■Run the self-test diagnostics.When I try to open the Inbox, I receive an error or the application hangs.■Check to see if your wireless application is turned on and you are receiving a wireless signal.■Check to see if your SIM card is inserted in your HP iPAQ. ■Limit the number of e-mail services you create.I cannot configure the Calendar.Tap Start > Help > Calendar and tap on the subjects listed under How To for information on configuring the Calendar settings.I get an error when I try to record a note in Calendar or in Tasks.Try using a more compressed recording format in Calendar or Tasks (8,000 Hz, Mono [8 KB/s] is the most compressed format available). To switch to a more compressed recording format, from the Today screen, tap Start > Settings > Input > Options tab.I want to see the current date. 1. From the Today screen, tap Start > Calendar.2. Tap the Go-to-Today icon to see today’s date.I cannot see all my appointments.Be sure the appointment you created is in the selected category.Problem Solution (Continued)HPConfidential](https://usermanual.wiki/HTC/HHH06C/User-Guide-515171-Page-237.png)
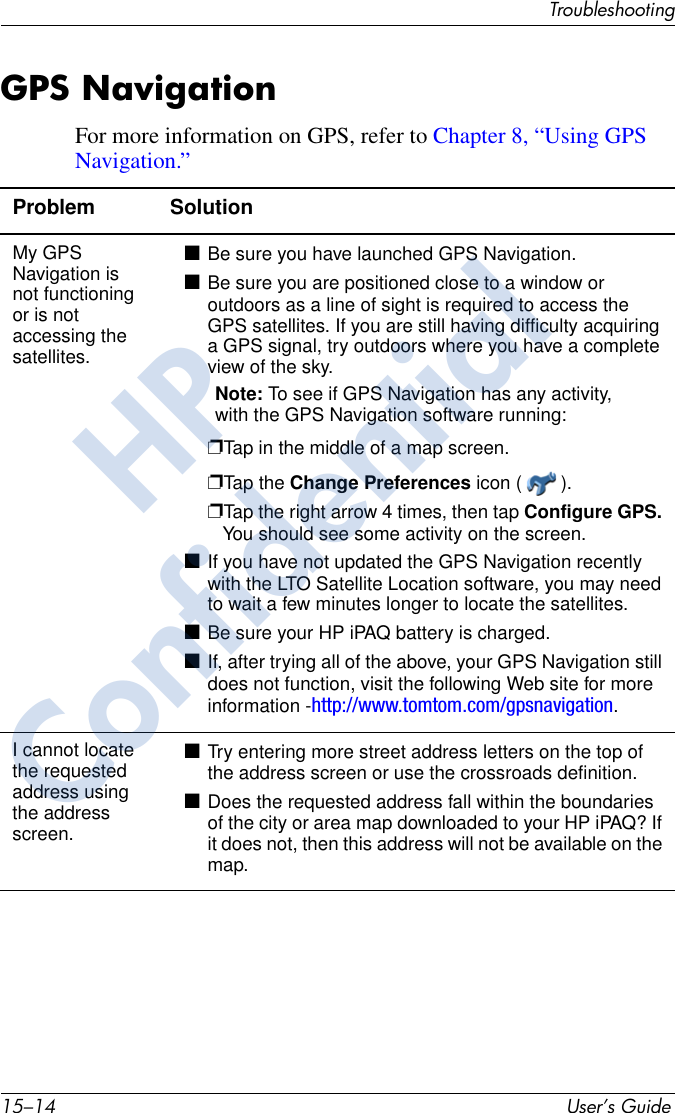

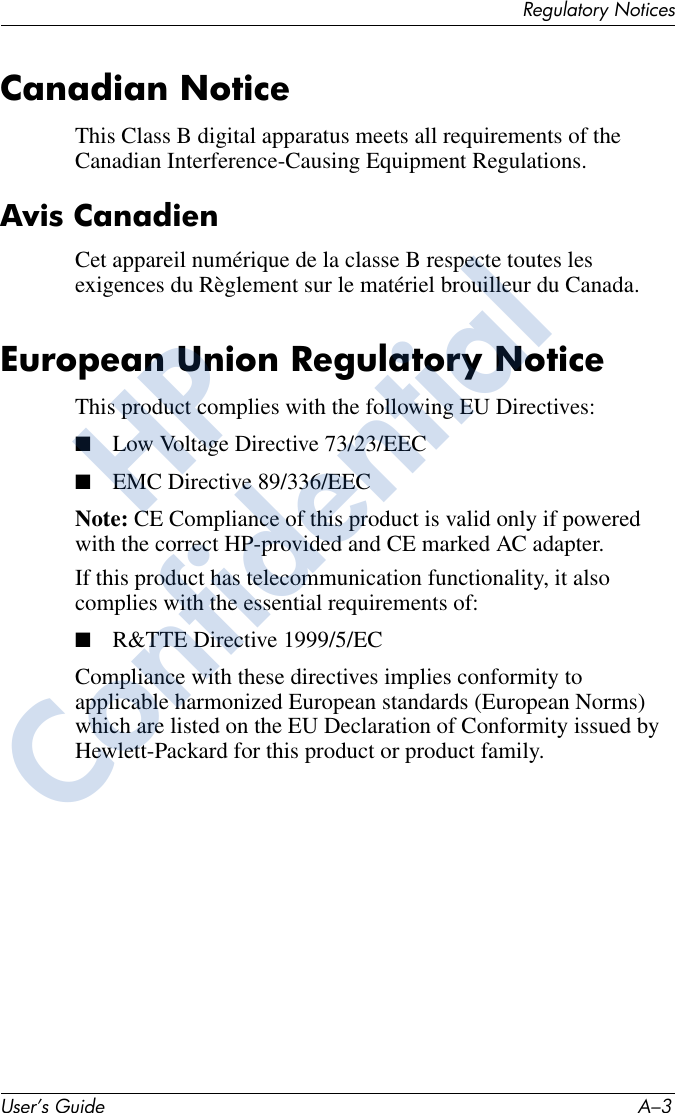


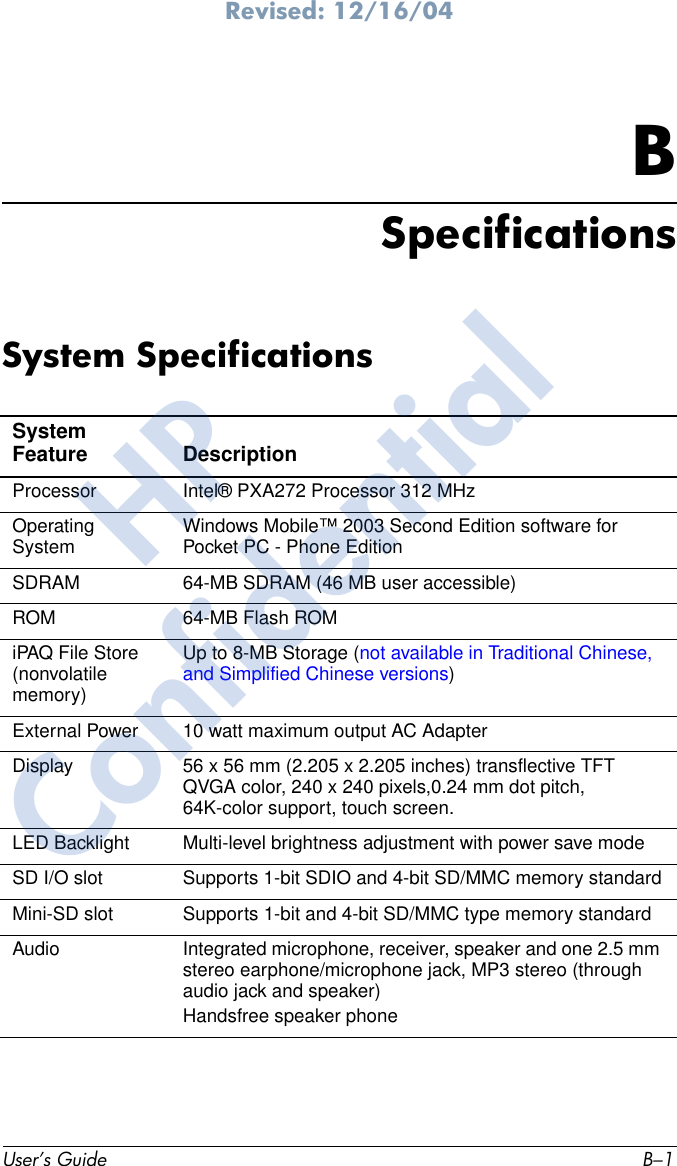
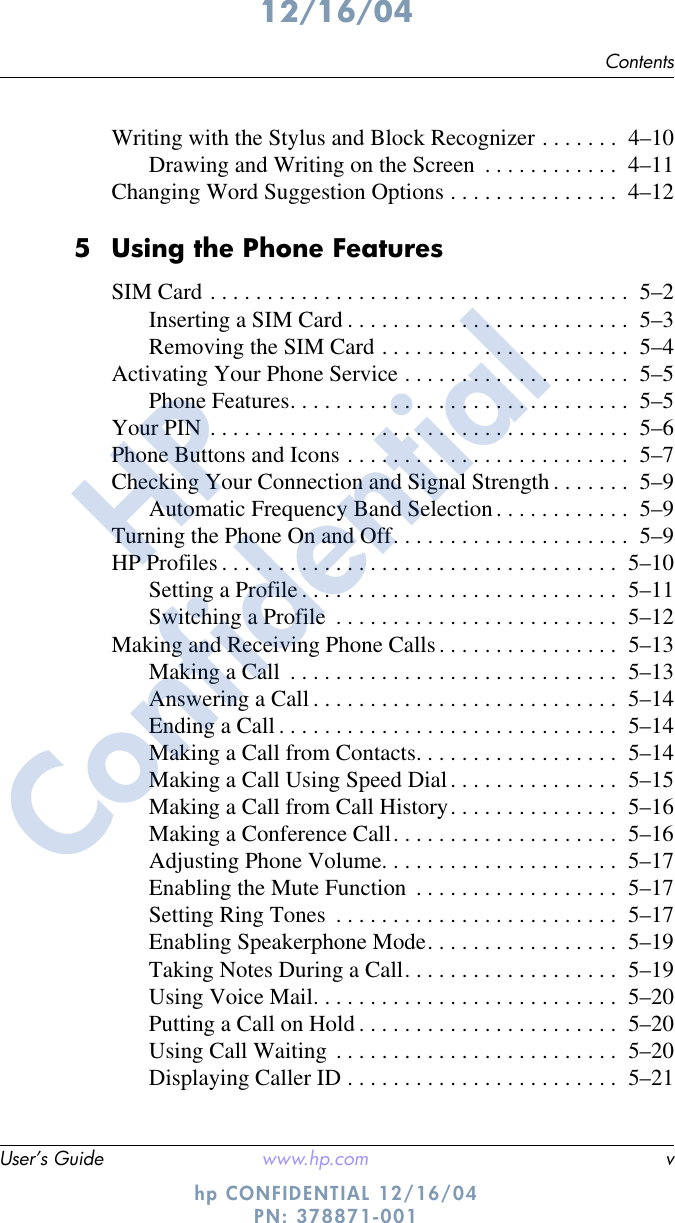
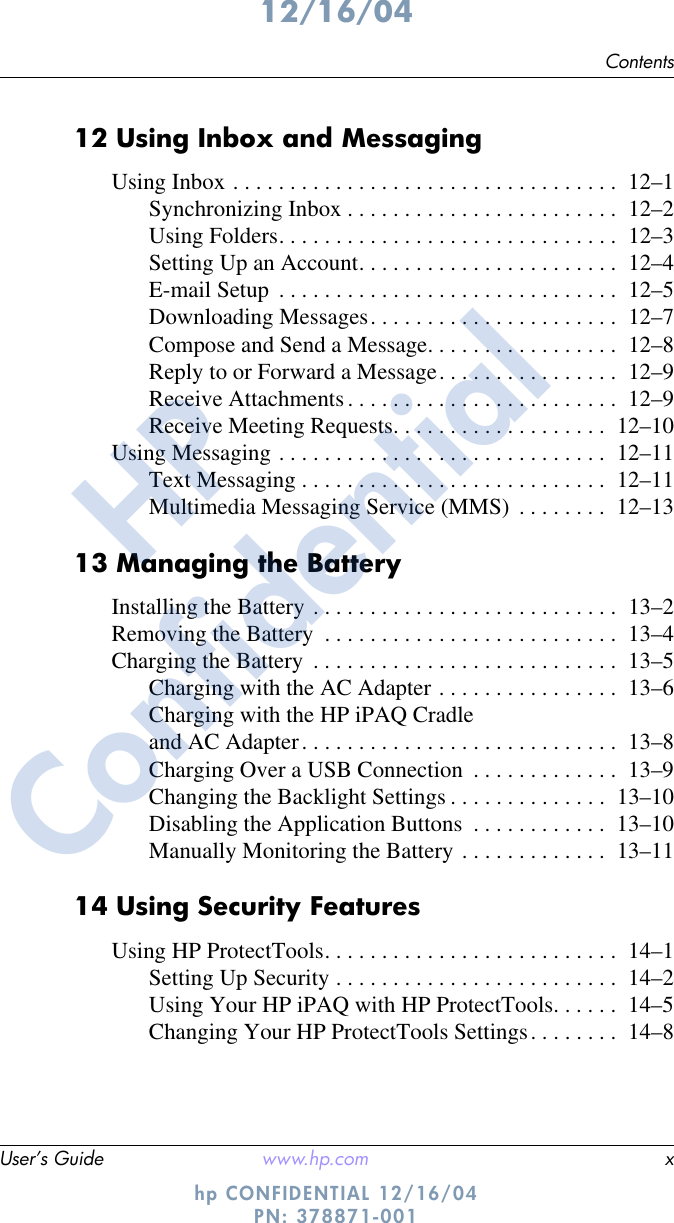
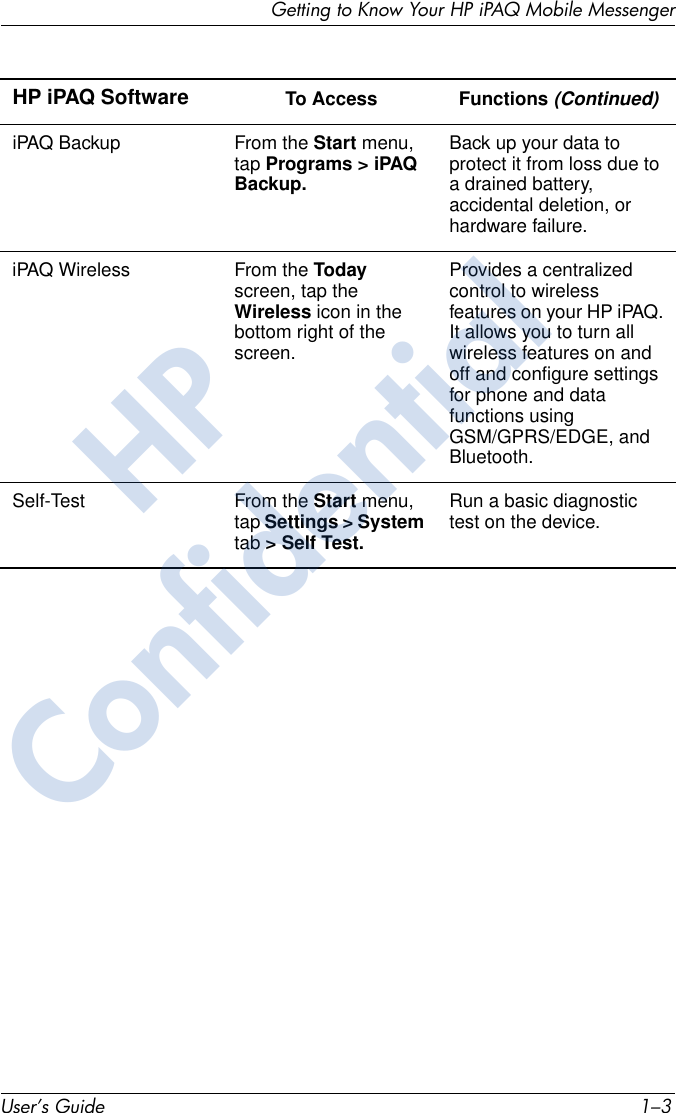
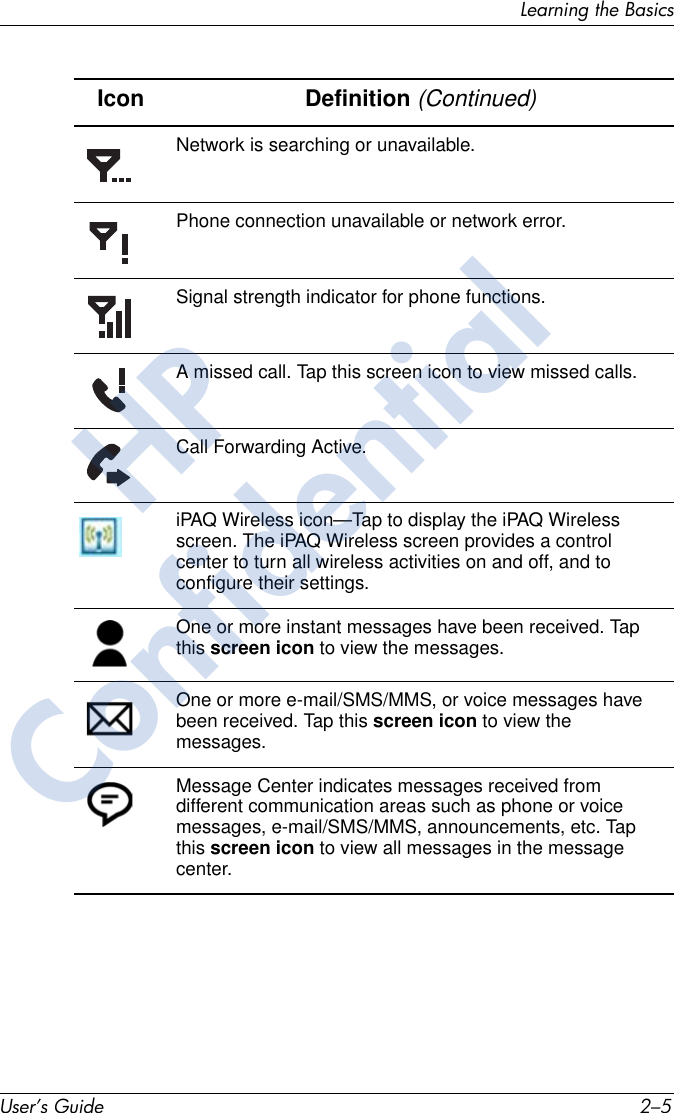
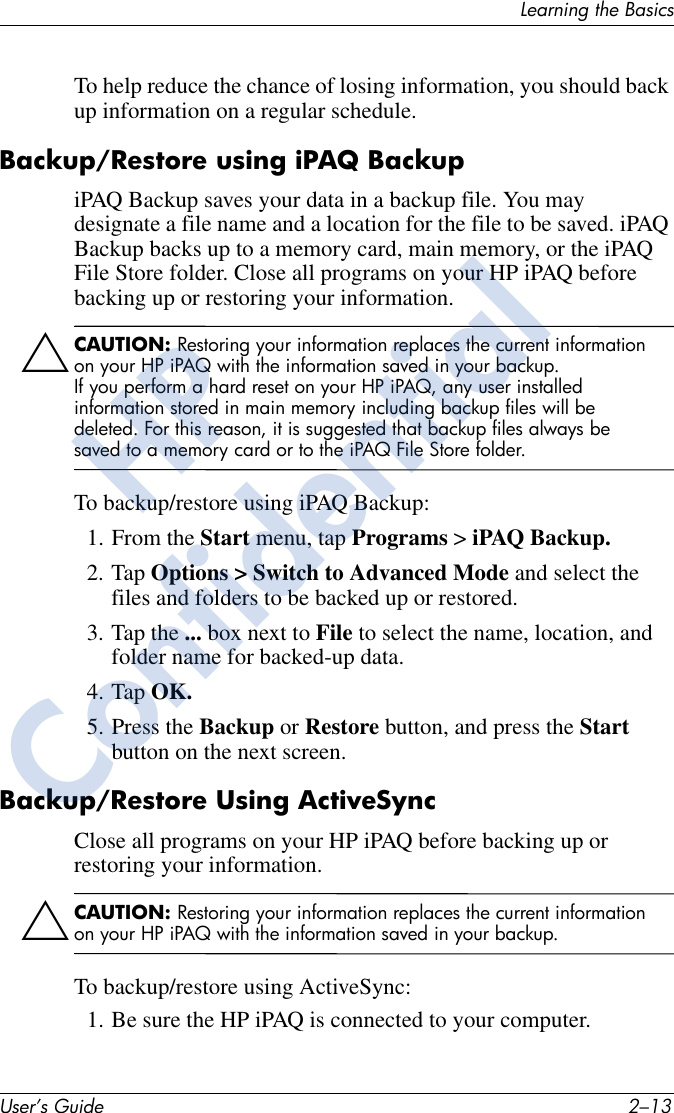
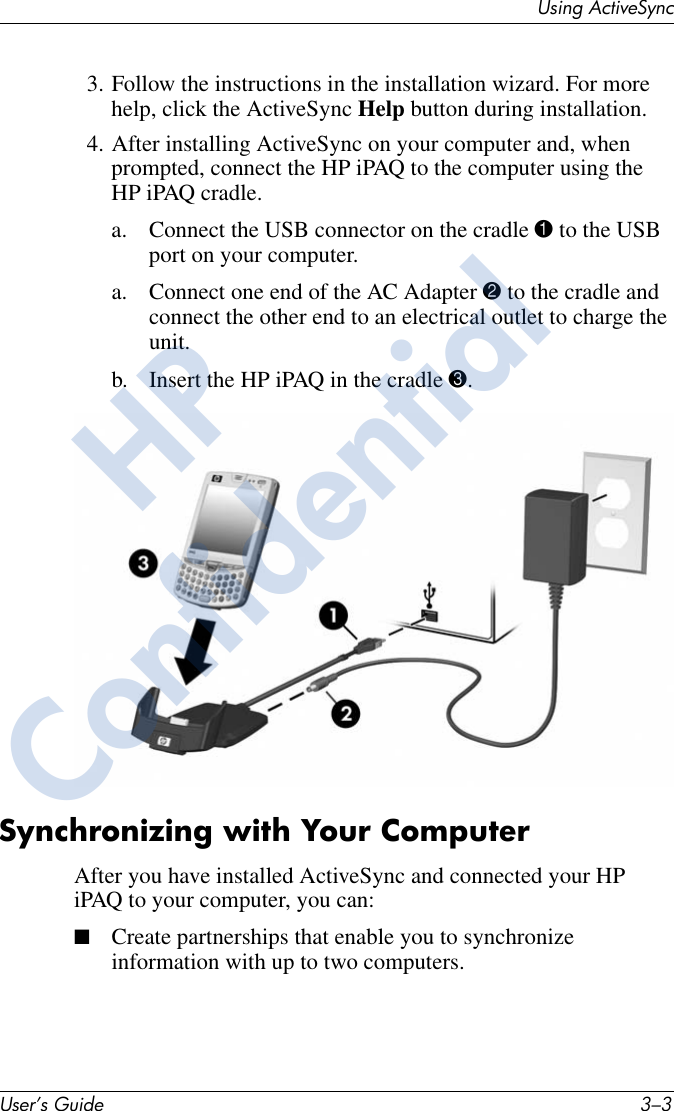
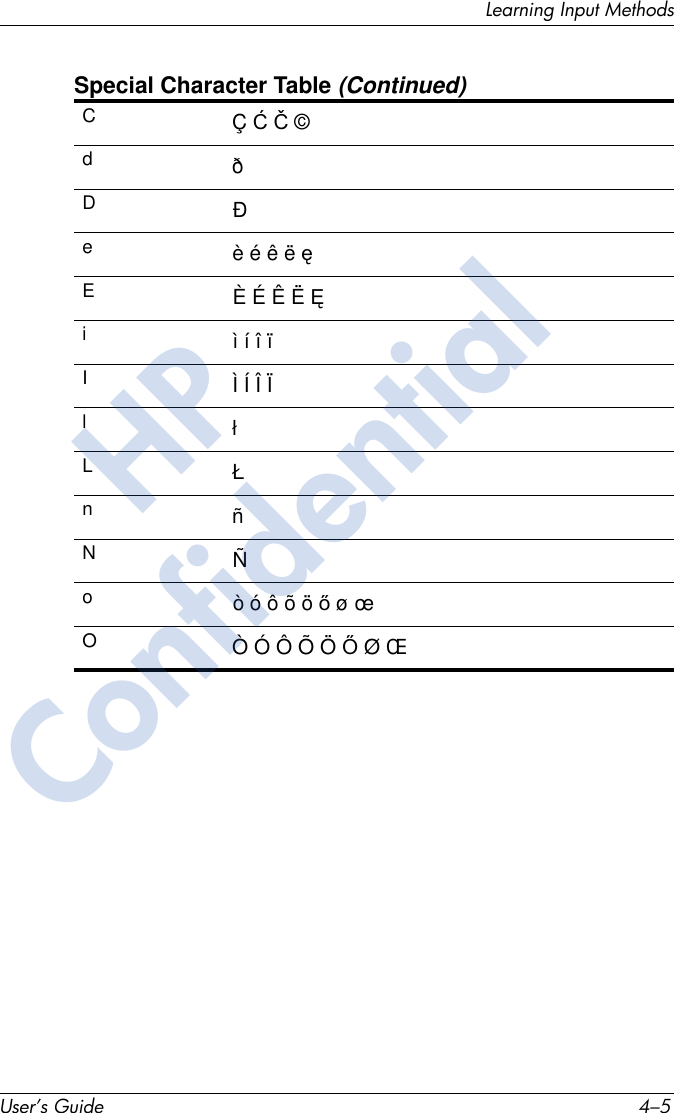
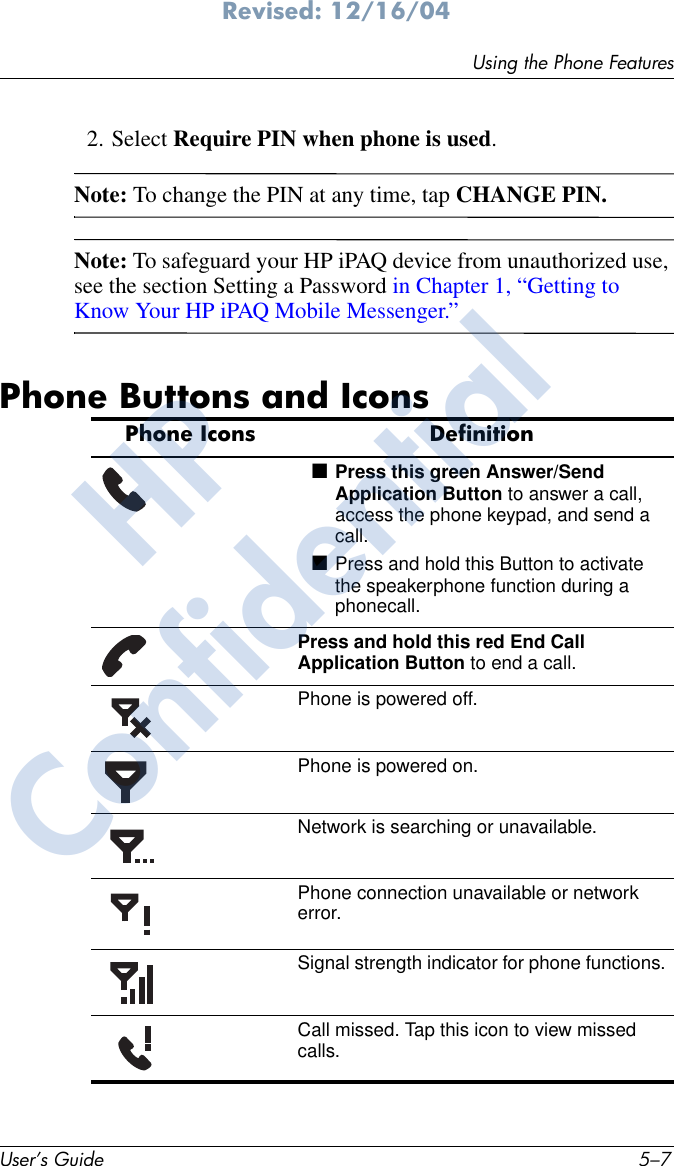
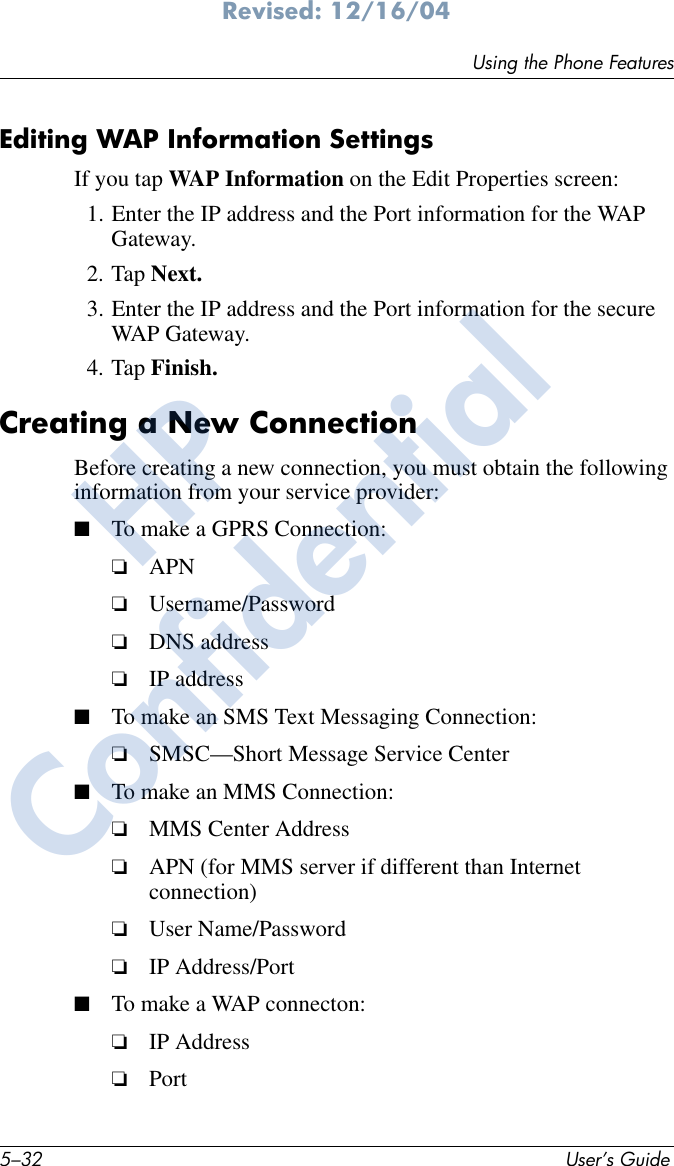
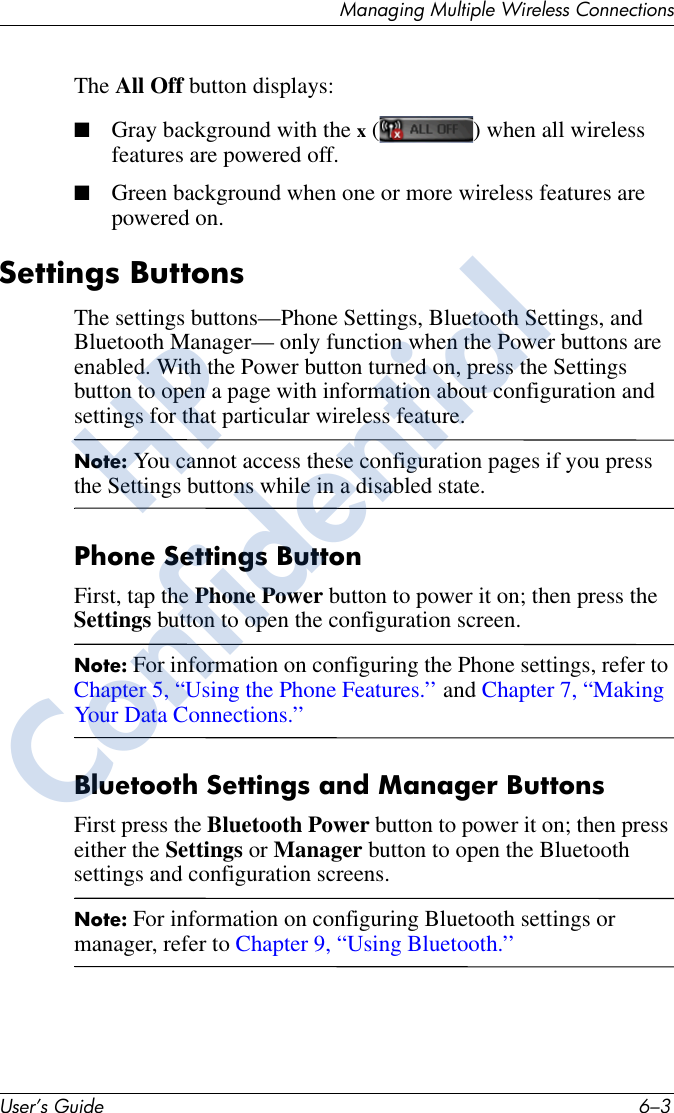
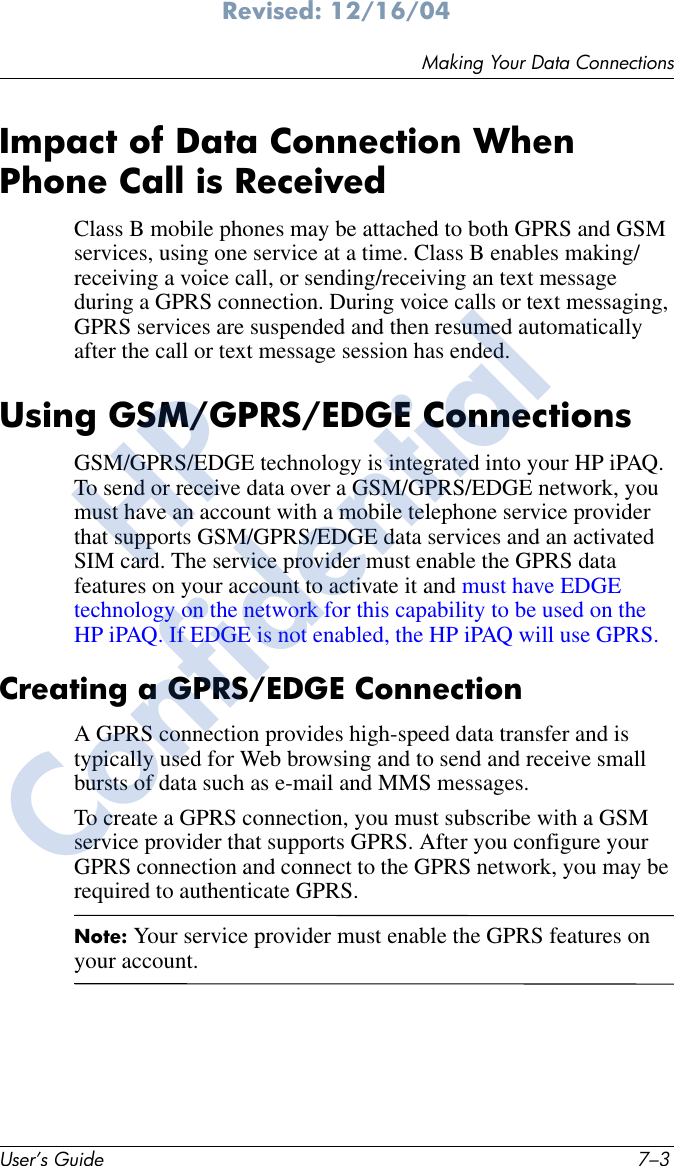
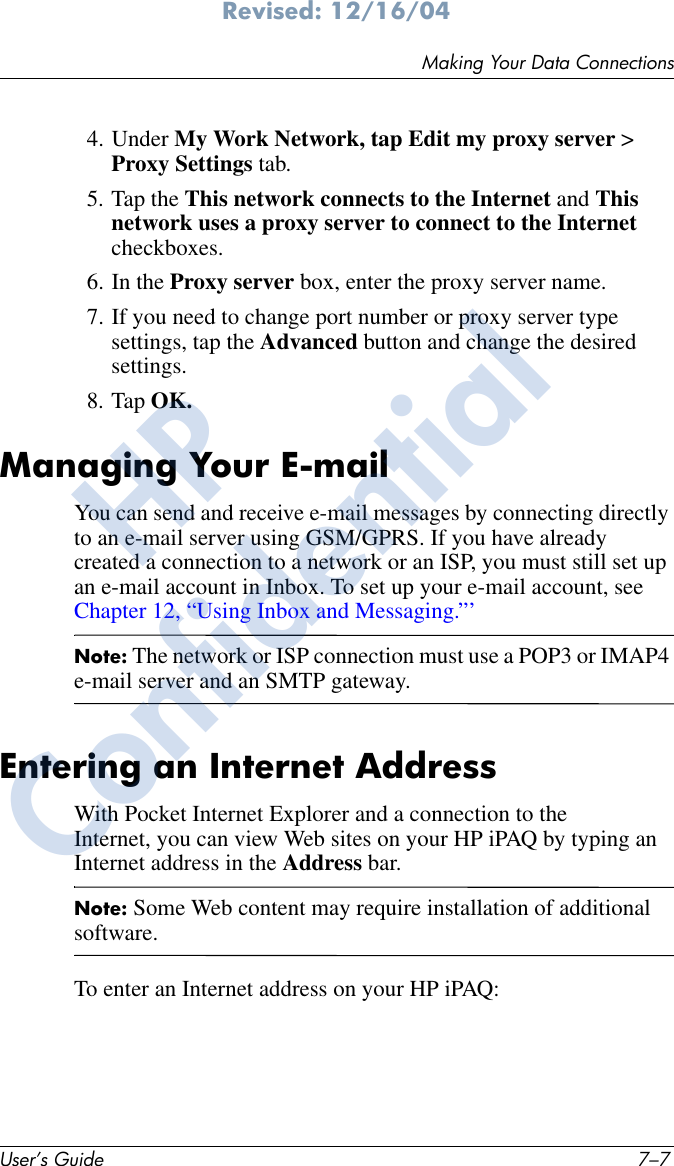
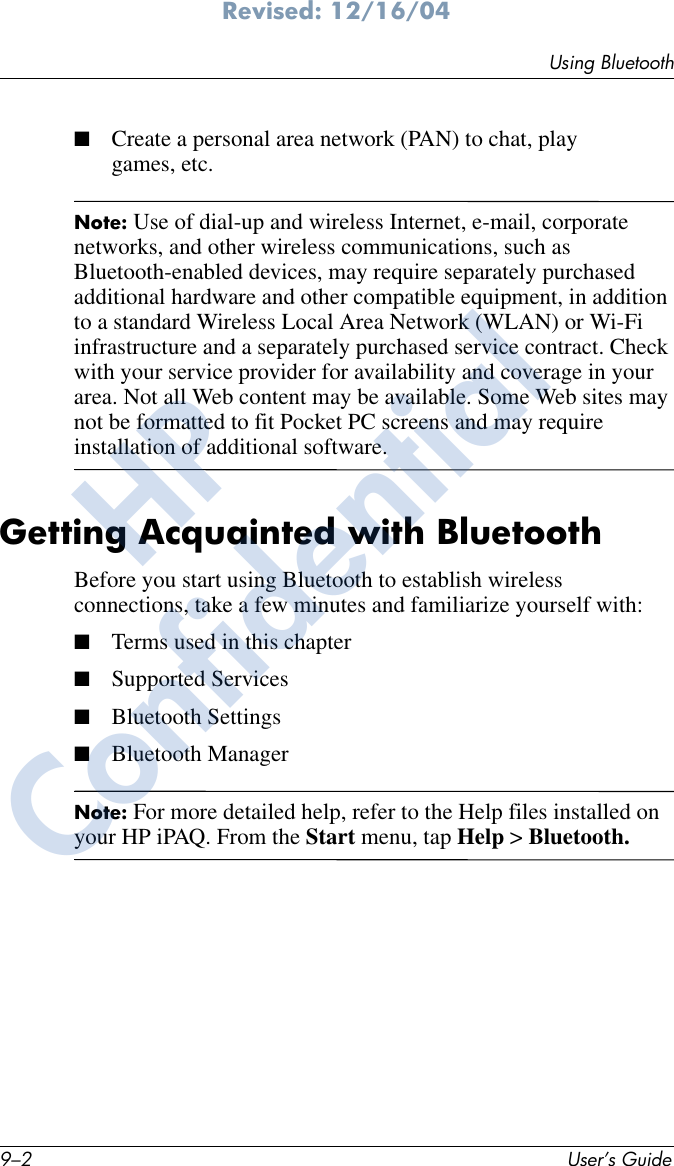
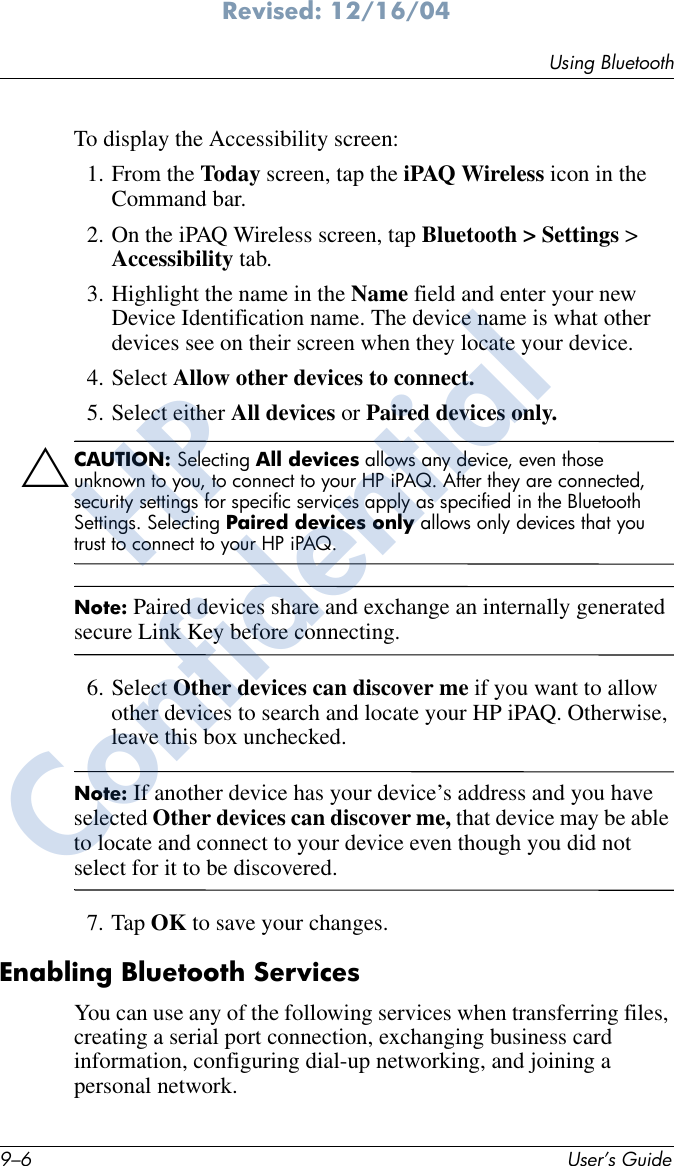
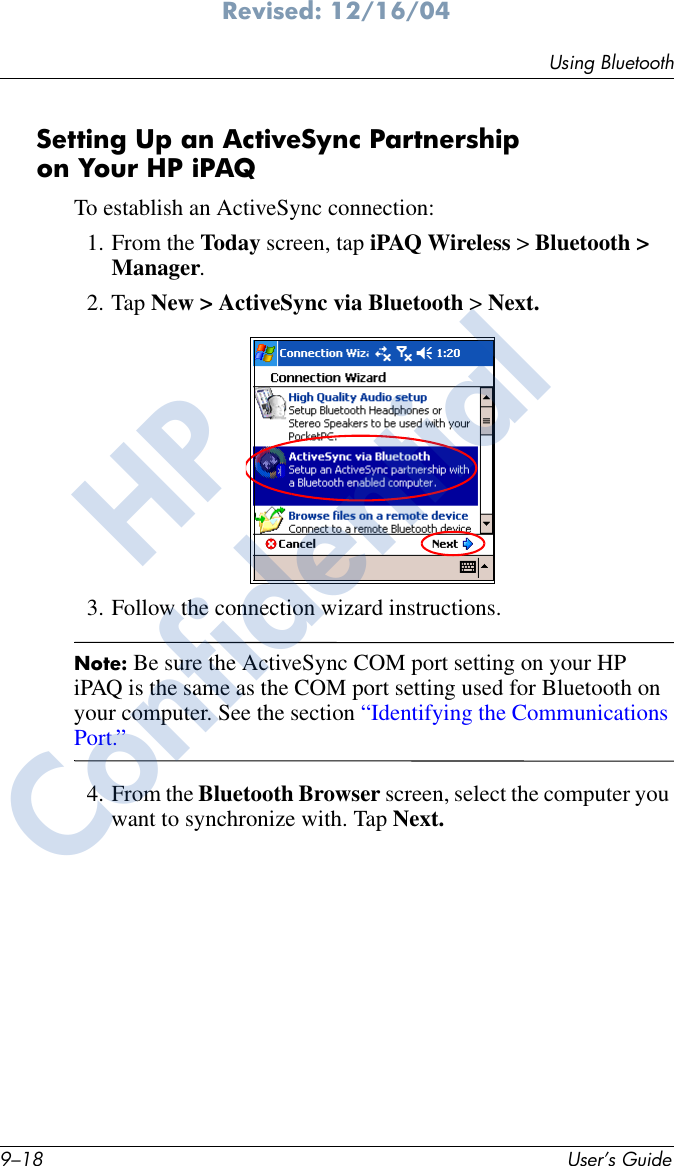
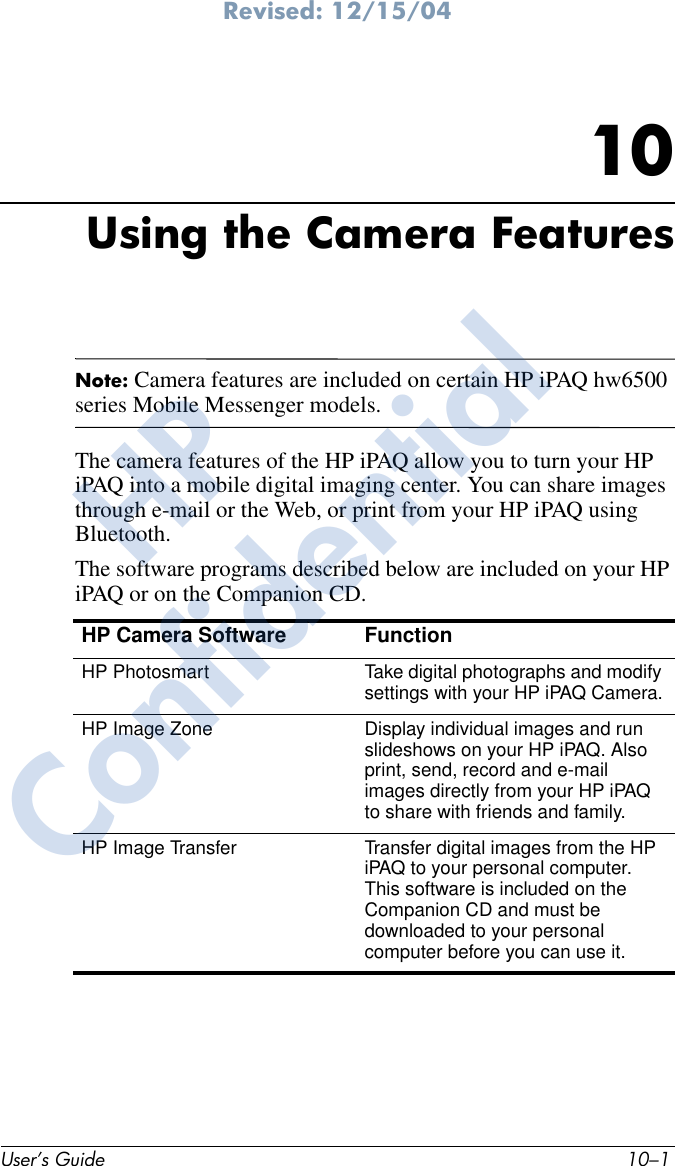
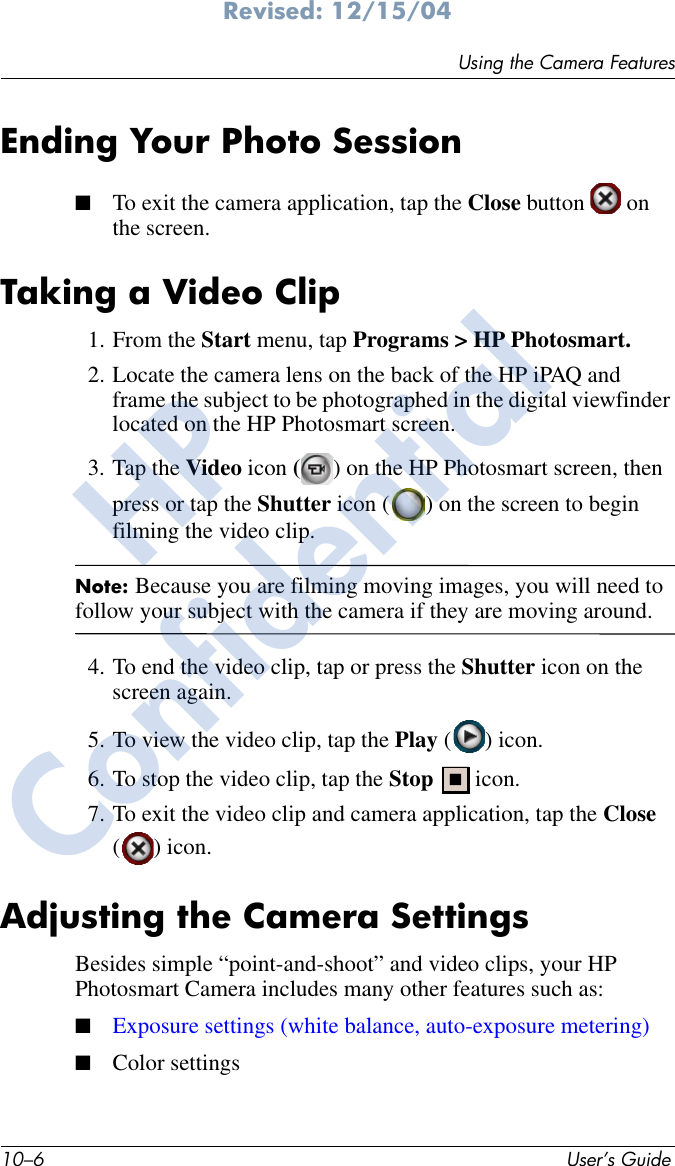
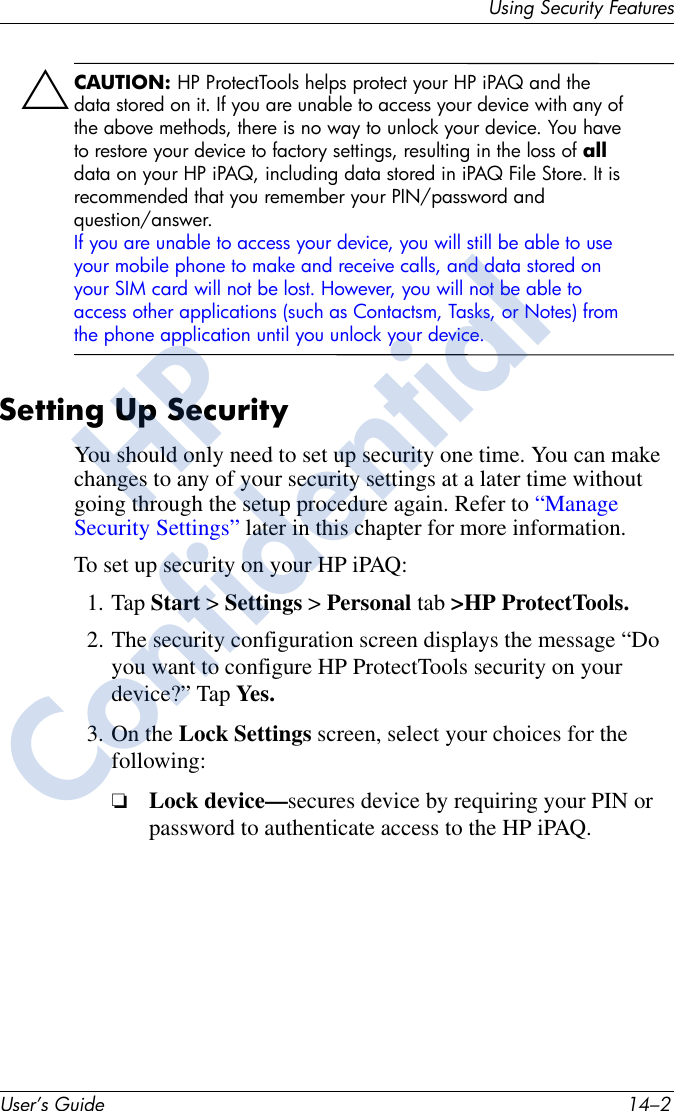
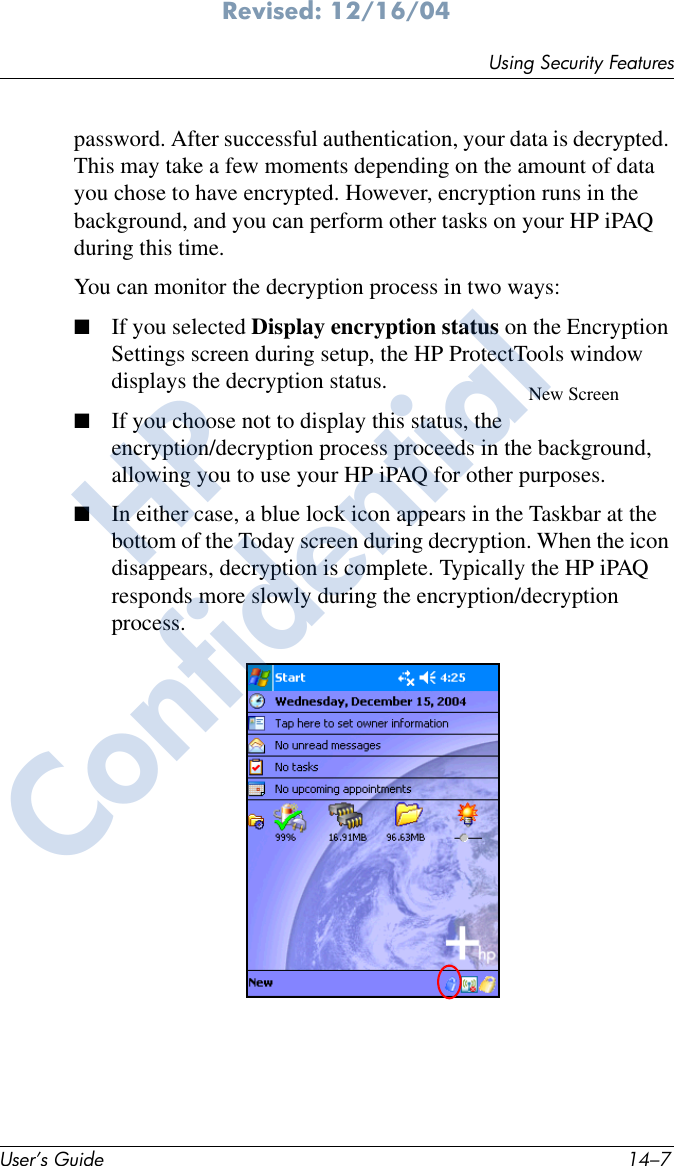
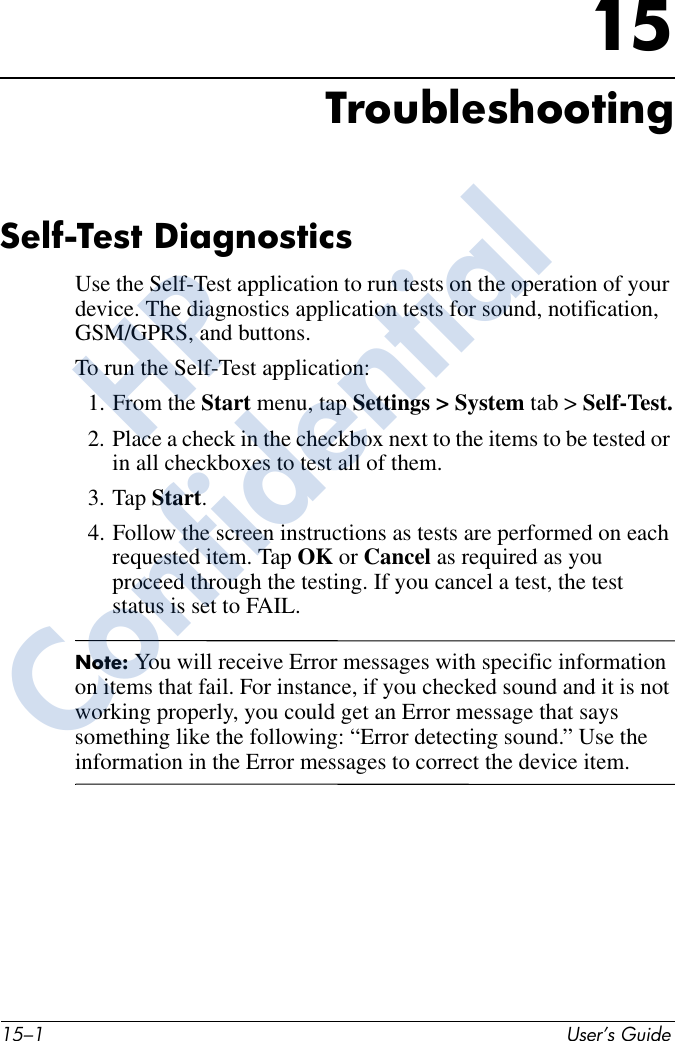
![B–2 User’s GuideSpecificationsCamera Built-in SXGA 1.2MP with LED flash, 640 x 480 resolution, JPEG and 3GP format, support for still image, and video playback, H.263 & MPEG4 (not included with all models)Keyboard Integrated QWERTY Thumb Keyboard with 26 LED backlit alpha-numeric keys, one Function key, and two application buttons - Calendar and Start menu buttons.Wired Ear Bud Headset 2.5 mm plug with single earbud - Included in box. Antenna InternalBluetooth Class II device; up to 4 dBm transmit, typical 10 meter range (approximately 33 feet) - High-speed, low-power, short-range wireless communication with other Bluetooth devicesInfrared (IrDA) Serial IrDA SIR, data transfer up to 115.2 Kb per secondSIM Card 3V, SIM standards, Phase 1, 2, 2+, CPHS, SIM ToolkitGSM / GPRS / EDGE TechnologyGlobal voice and data wireless network (Global System for Mobile Communications [GSM], General Packet Radio Services [GPRS], Enhanced Data rates for Global Evolution [EDGE]GSM voice features Half Rate, Full Rate, Enhanced Full Rate, Adaptive Multi-Rate (HR,FR/EFR/AMR) Echo cancelation and noise reductionFull duplex hands-freeGSM Data Circuit Switched Data - GSM Transparent and non-transparent (NT) dataV.42bix data compression for GSM NT dataGPRS Data Features Class B GPRS Multi slot Class 10, QuadbandCoding Schemes: CS1 to CS4, Network Mode 1-4EDGE Features Class 10, Support for E-GPRS coding schemes MCS1 to MCS9 in both the uplink and downlinkSystem Feature Description (Continued)HPConfidential](https://usermanual.wiki/HTC/HHH06C/User-Guide-515171-Page-262.png)
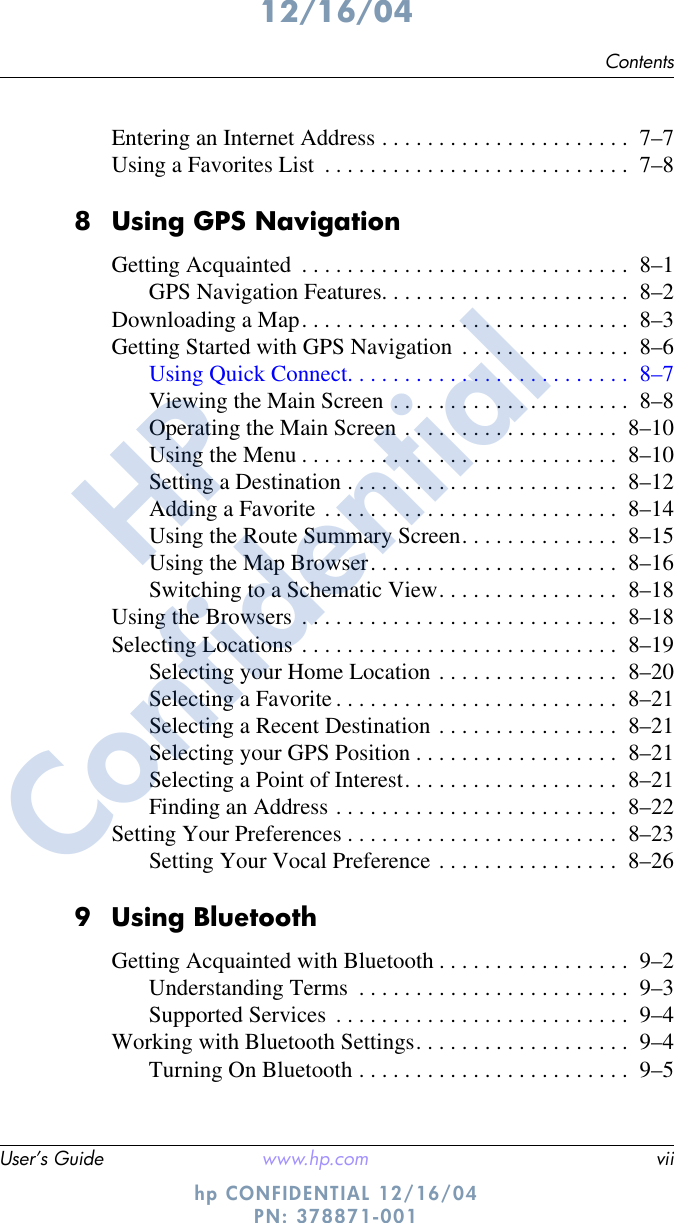
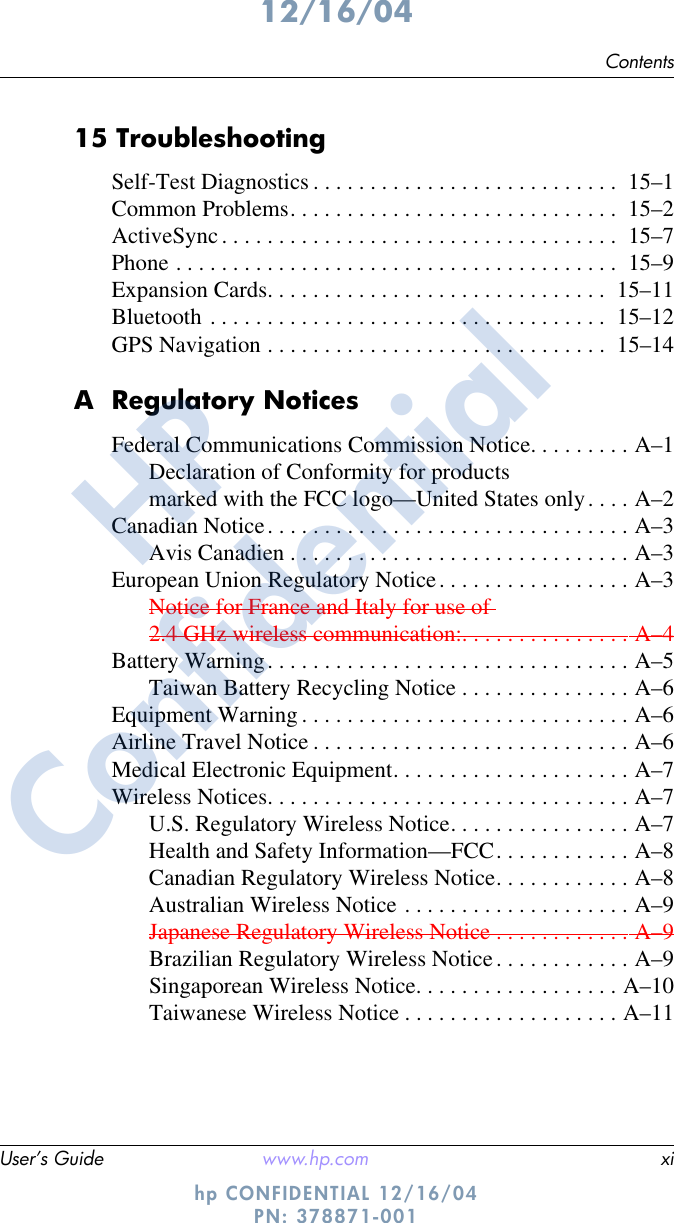
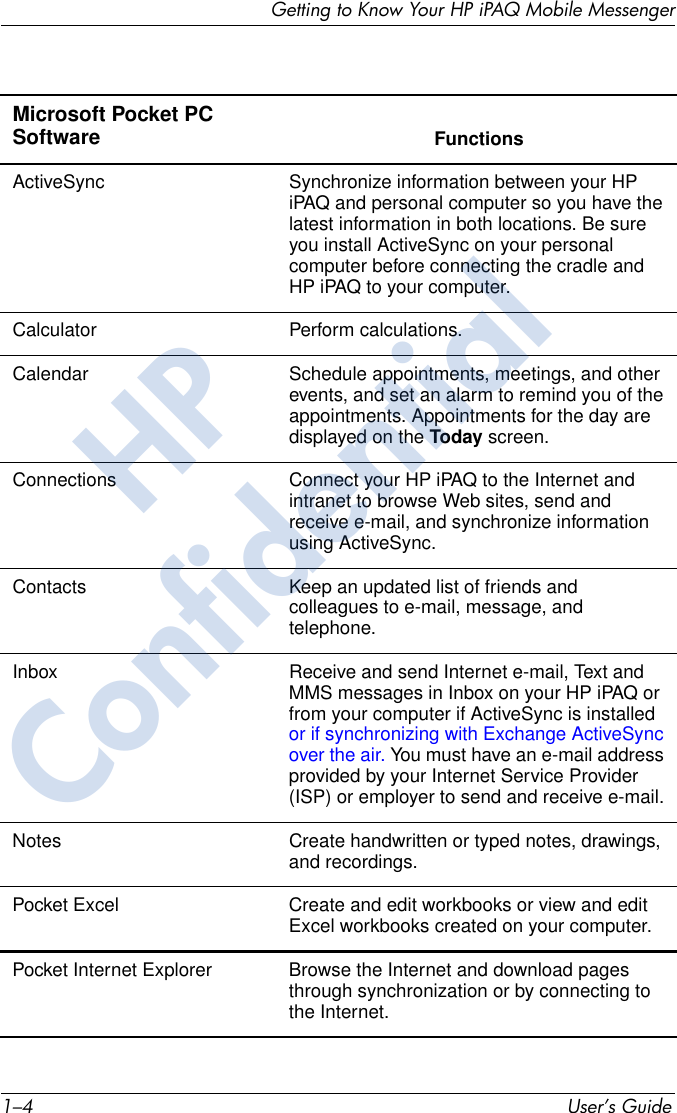
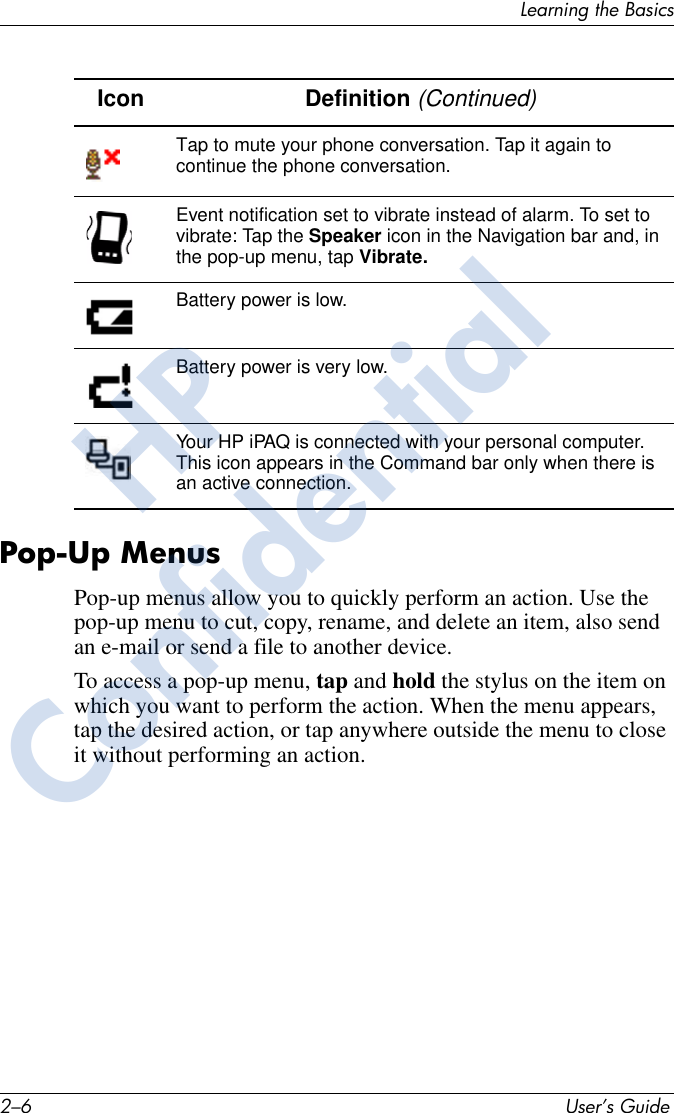
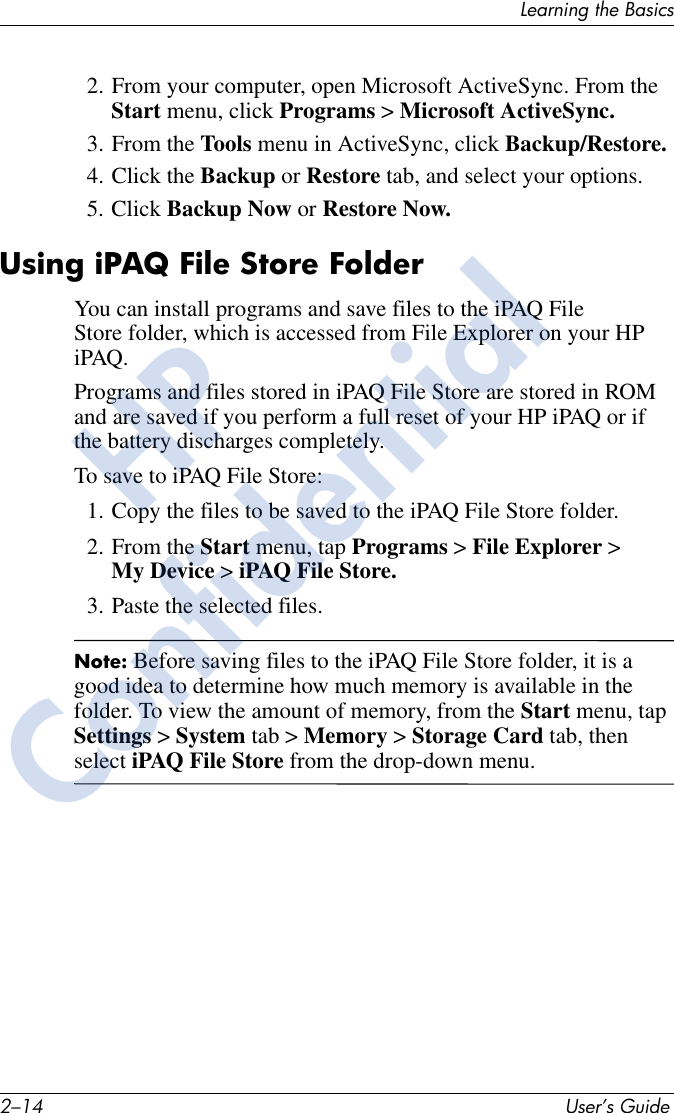
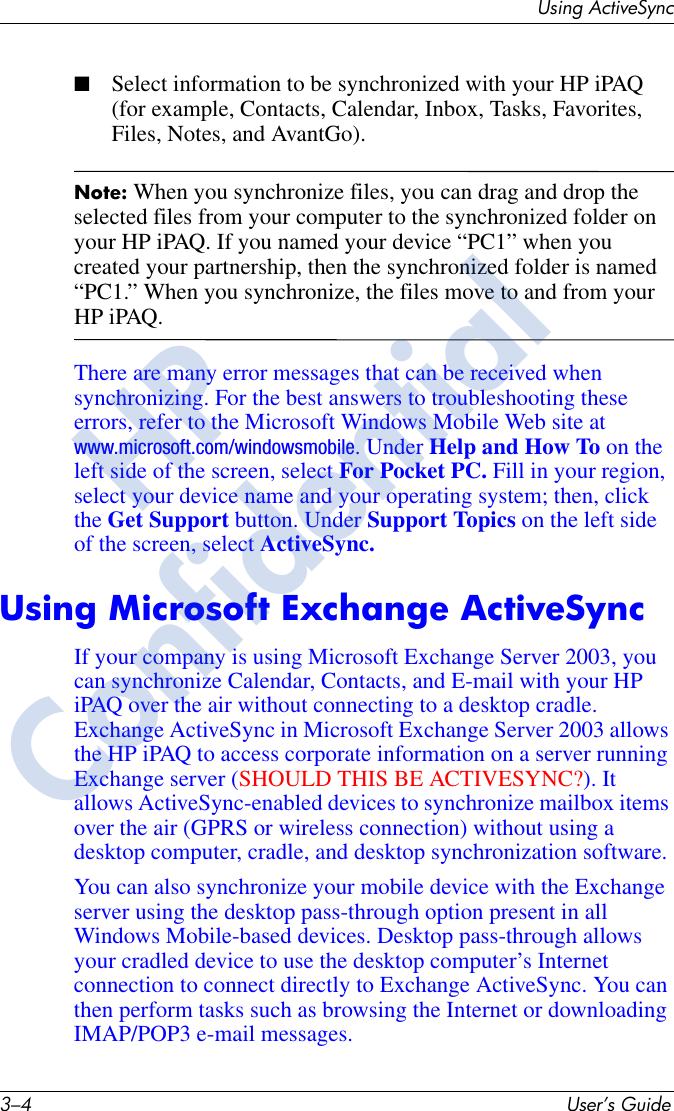
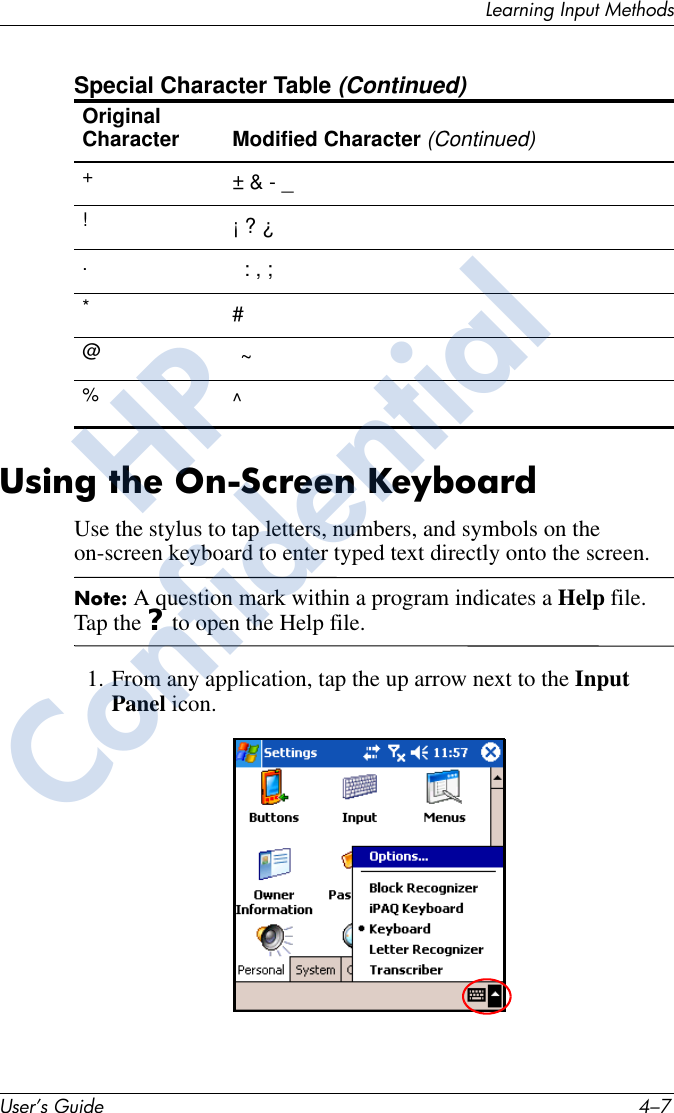
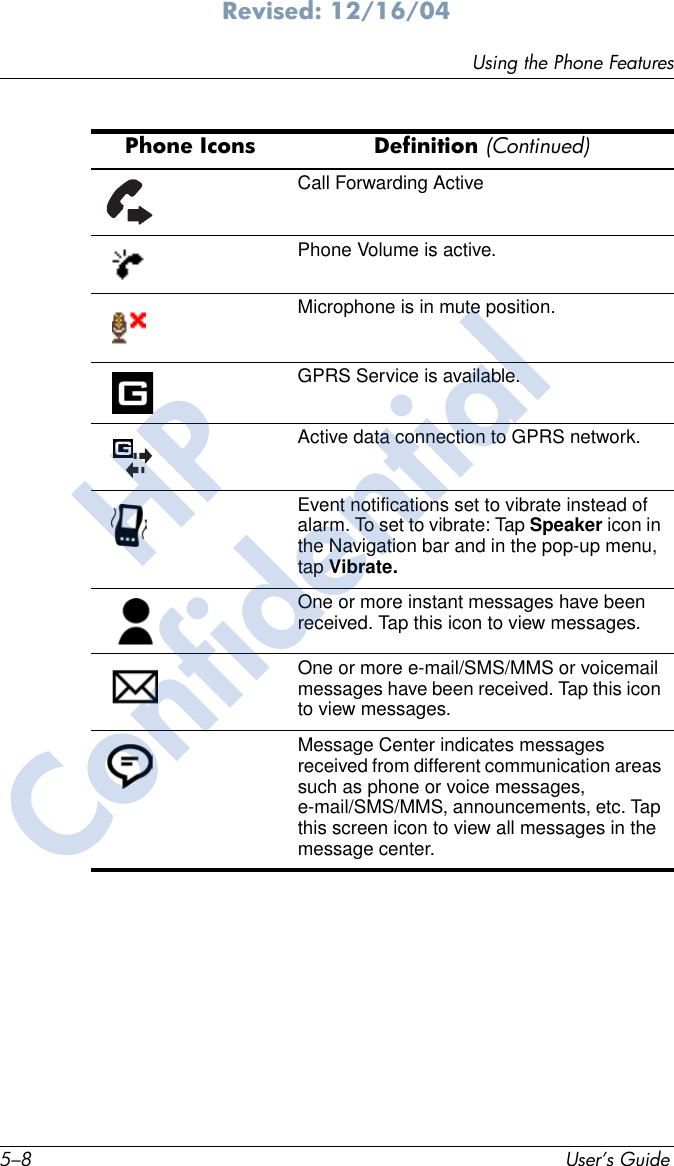
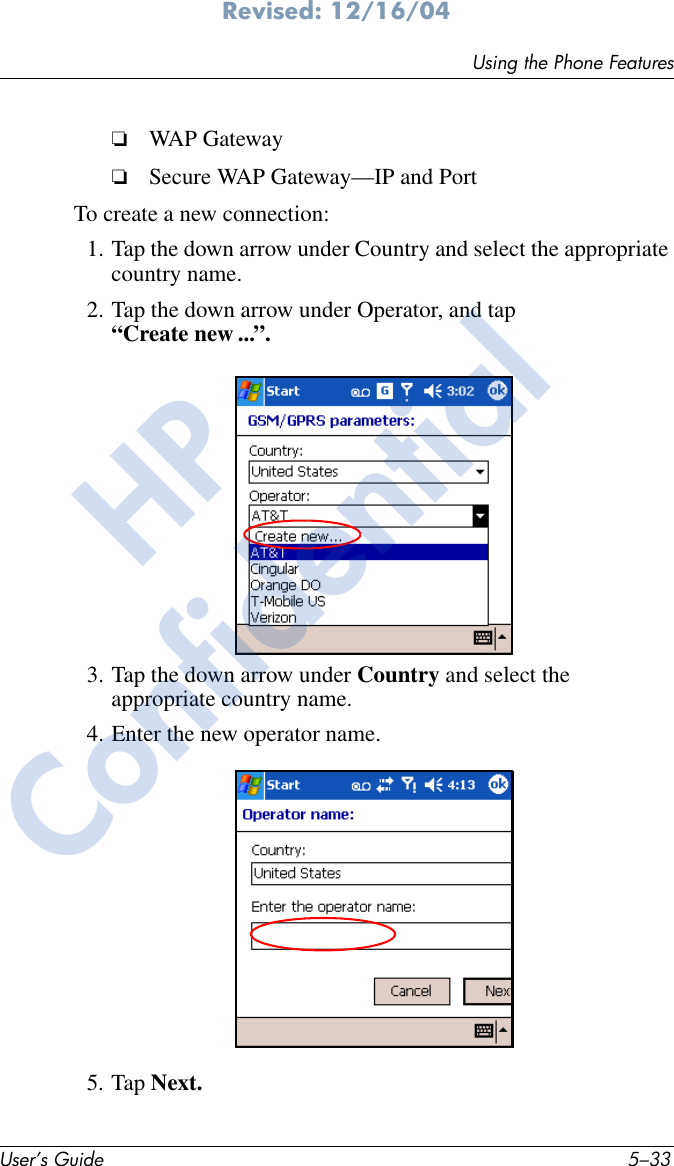
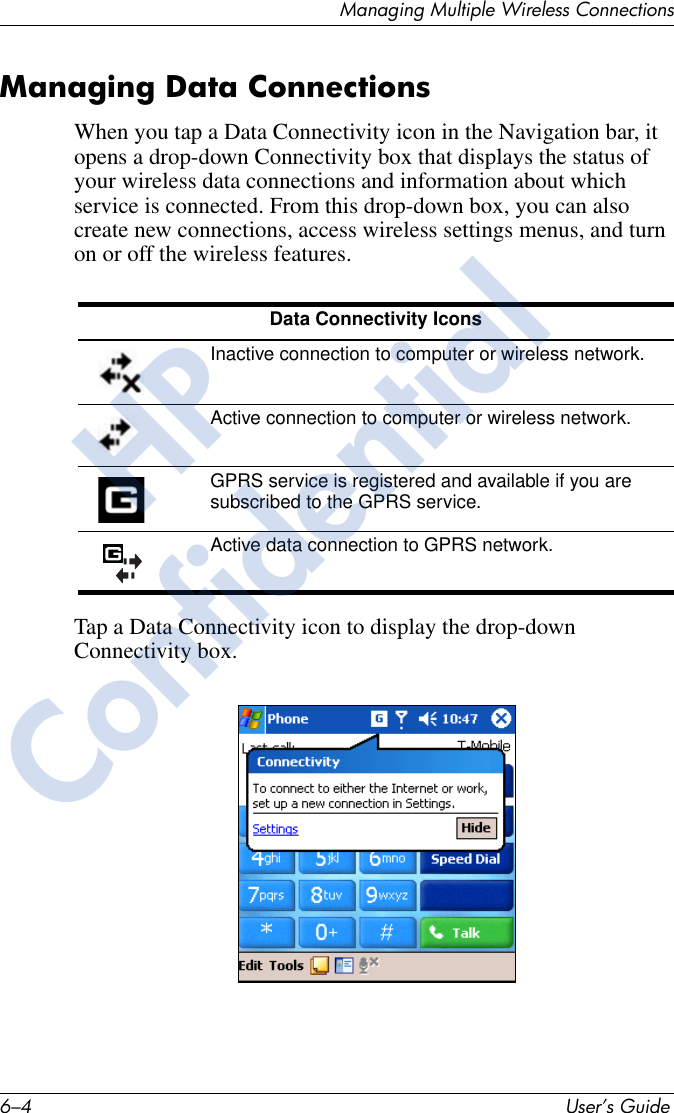
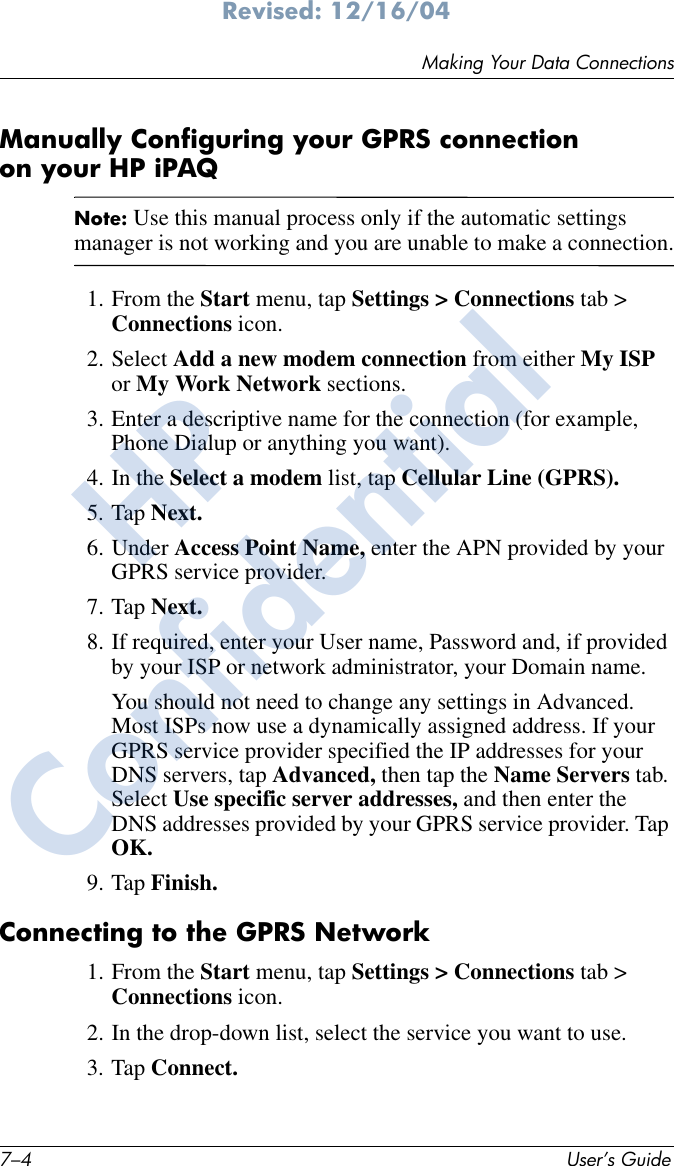
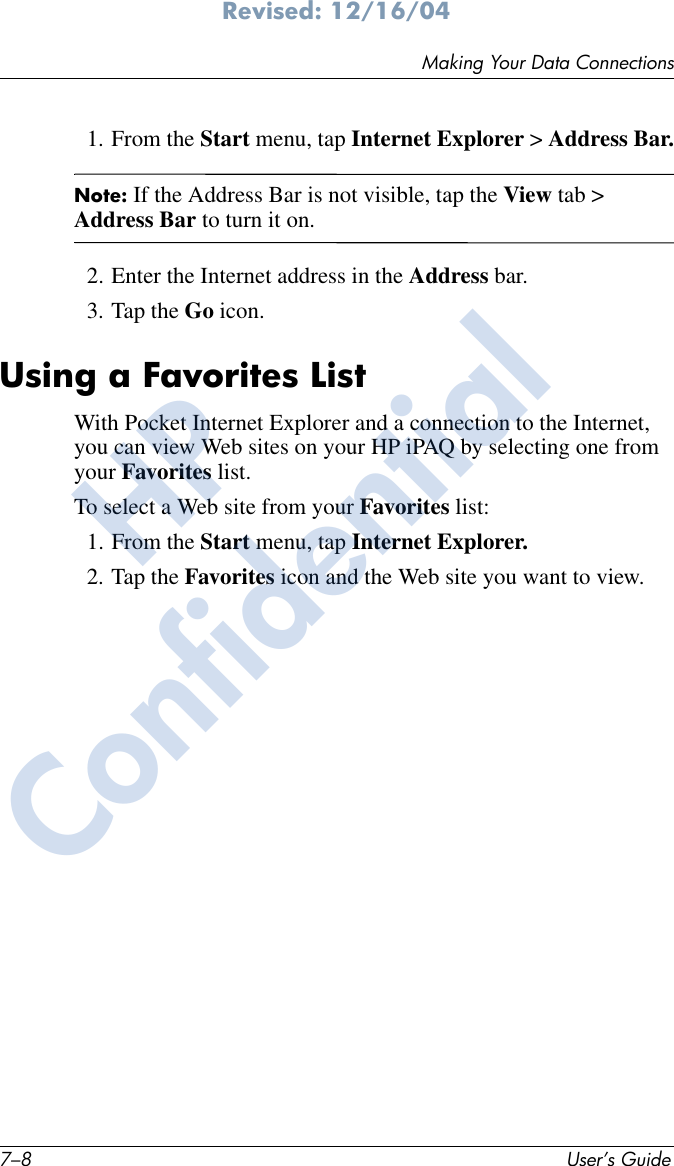
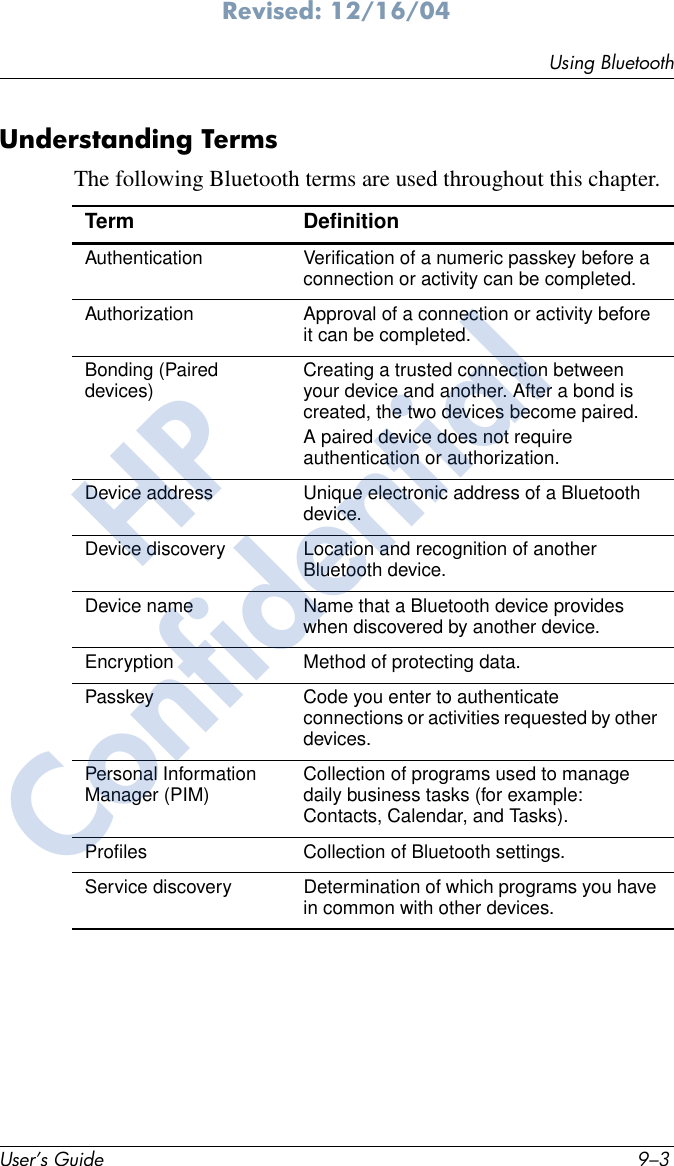
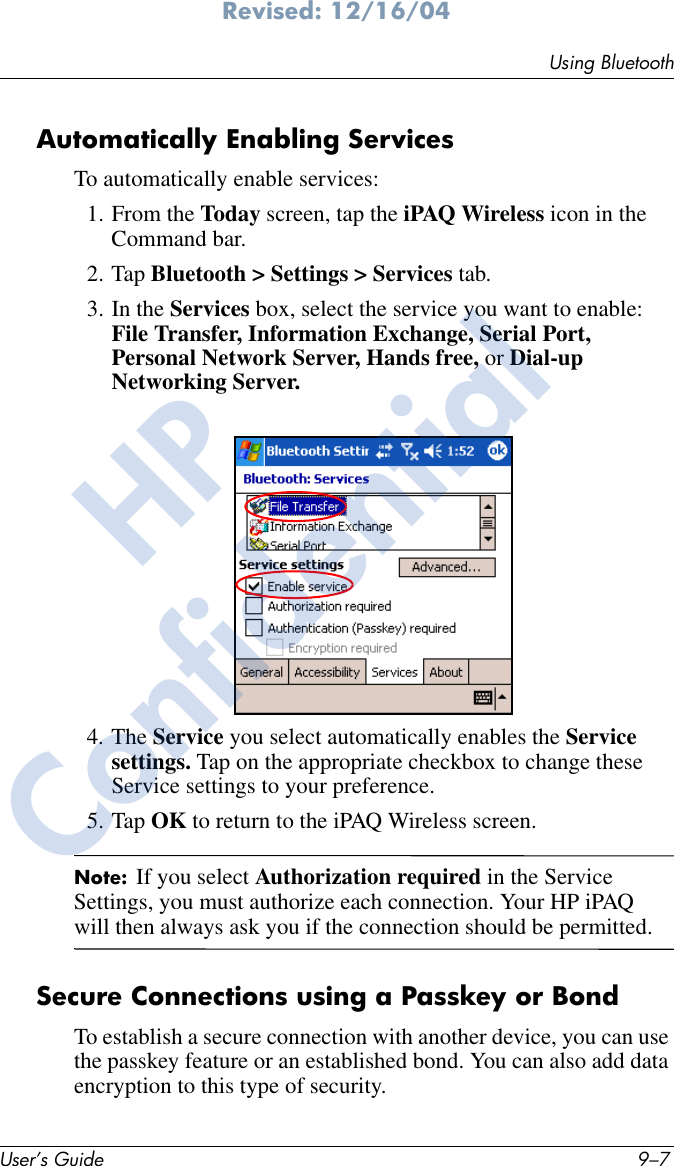
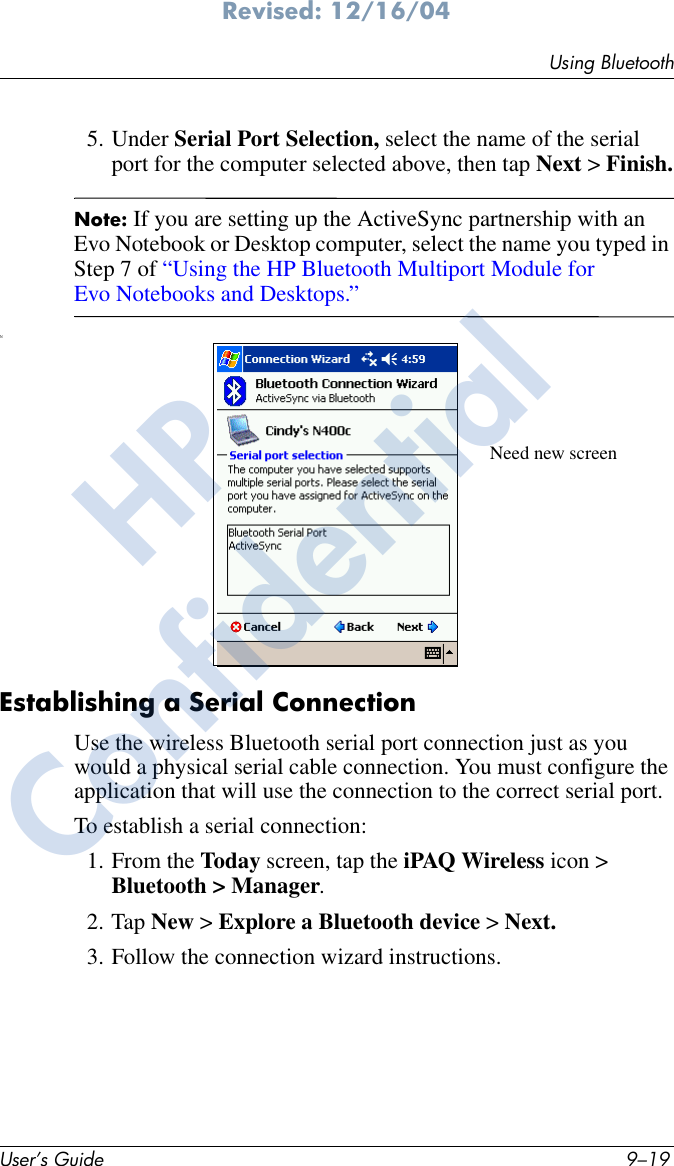
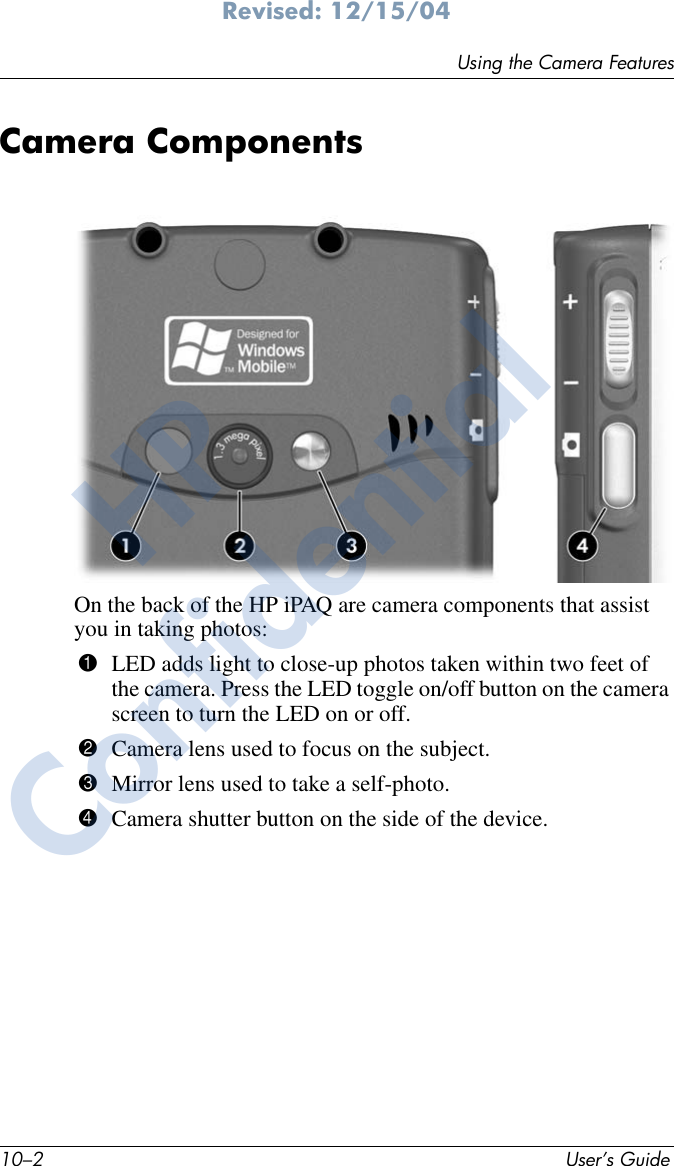
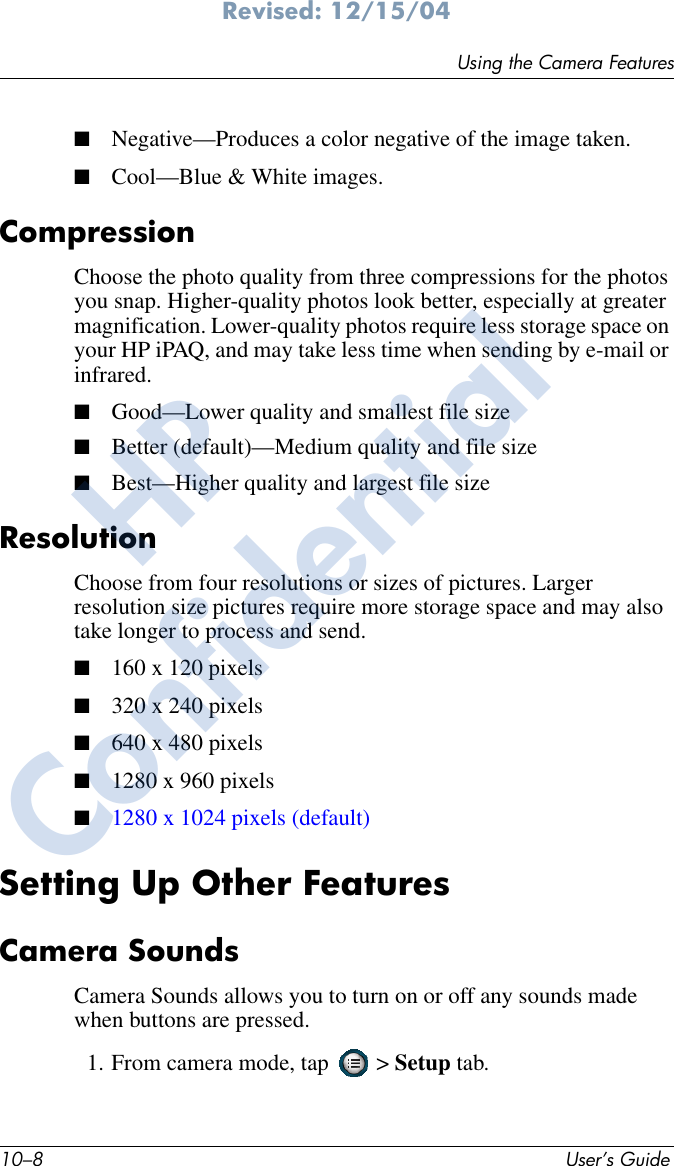
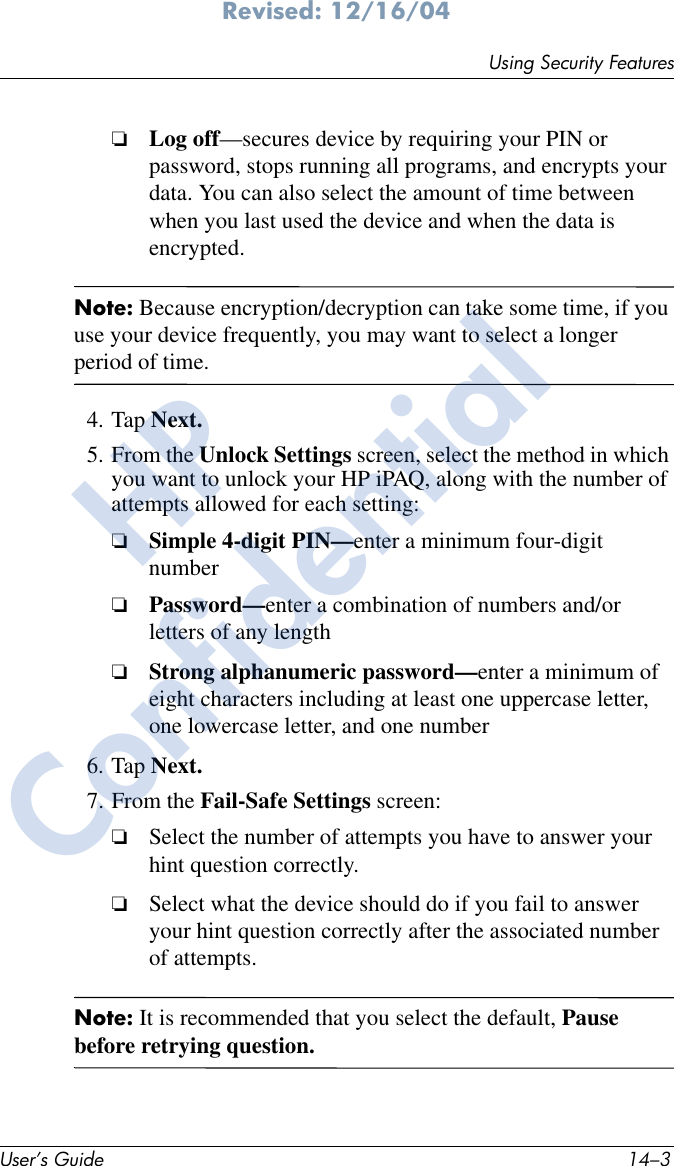
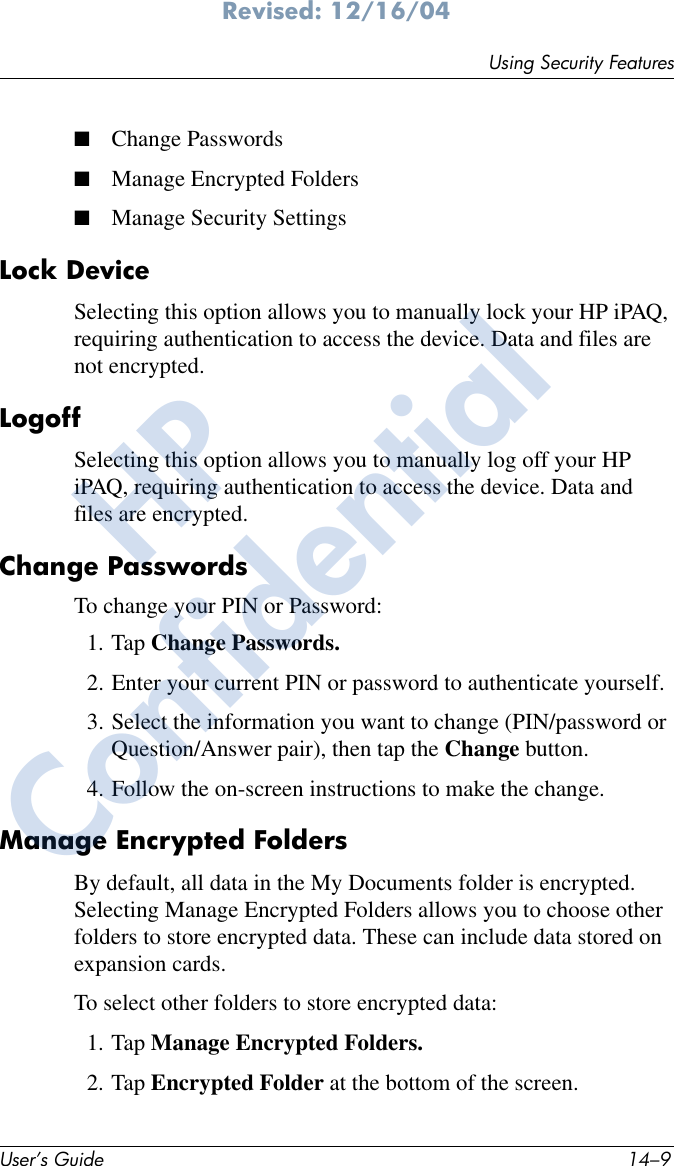
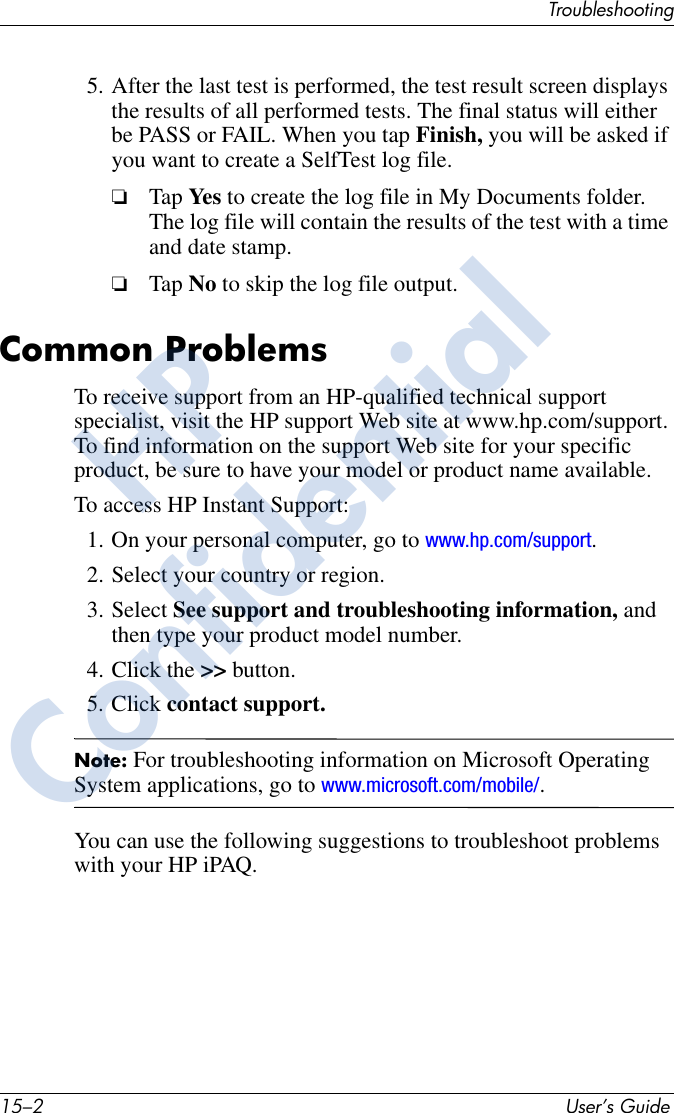
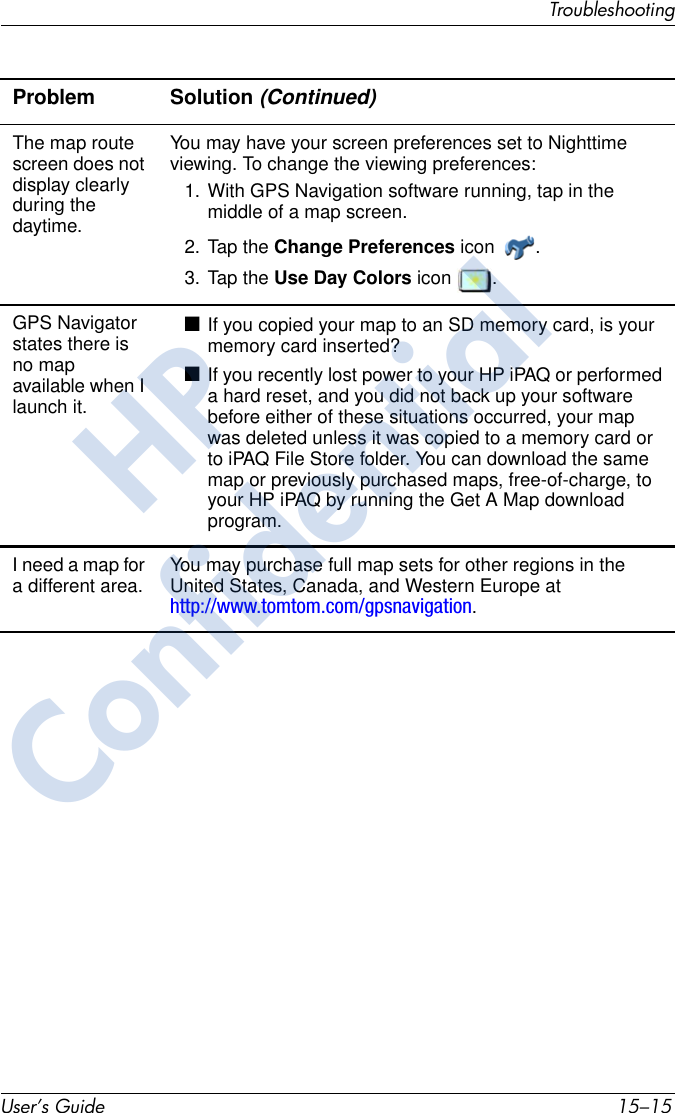
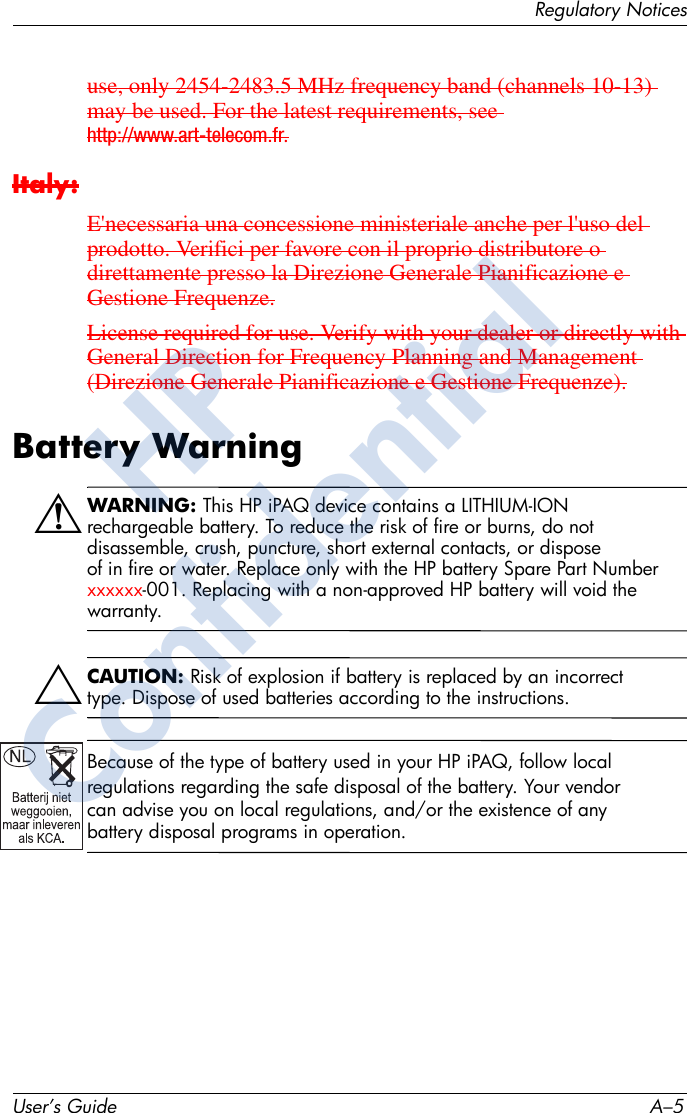
![SpecificationsUser’s Guide B–3Revised: 12/16/04GSM / GPRS / EDGE Technology(Continued)Global voice and data wireless network (Global System for Mobile Communications [GSM], General Packet Radio Services [GPRS], Enhanced Data Rates for Global Evolution [EDGE]Circuit Switched Data Normal Single Slot GSM Circuit Switched Data @ 9.6 Kbps Transparent and Non-Transparent dataHigh Speed Circuit Switched Data (HSCSD) multi-slot GSM data calls of maximum uplink/downlink speeds of 43.2Kbps/14.4Kbps or 28.8Kbps/28.8KbpsSupplementary Services SupportedCall Forwarding, Call Barring, Multiparty, Calling Line Identity, Call Waiting and Call HoldUnstructured Supplementary Service DataUSSD Phase 2 (MO & MT)Encryption GEA1Authentication Password Authentcation Protocol (PAP) or Challenge Authentication Protocol (CHAP)Messaging Services ■Text messaging for GSM, both mobile-oriented and mobile-terminated■MMS (Multimedia Message Service)■Cell BroadcastRing Tones file formats MIDI Type 0, WMA, WAVSystem Feature Description (Continued)HPConfidential](https://usermanual.wiki/HTC/HHH06C/User-Guide-515171-Page-263.png)