HTC MAPL100 SMART PHONE User Manual
HTC Corporation SMART PHONE Users Manual
UserManual.wiki
>
HTC
>
MAPL100 User Manual
Users Manual
Navigation menu
Upload a User Manual
Namespaces
Wiki Guide
HTML
PDF
Info
Views
User Manual
Discussion / Help
Navigation


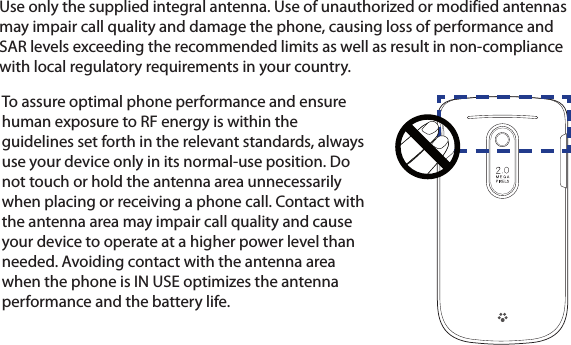

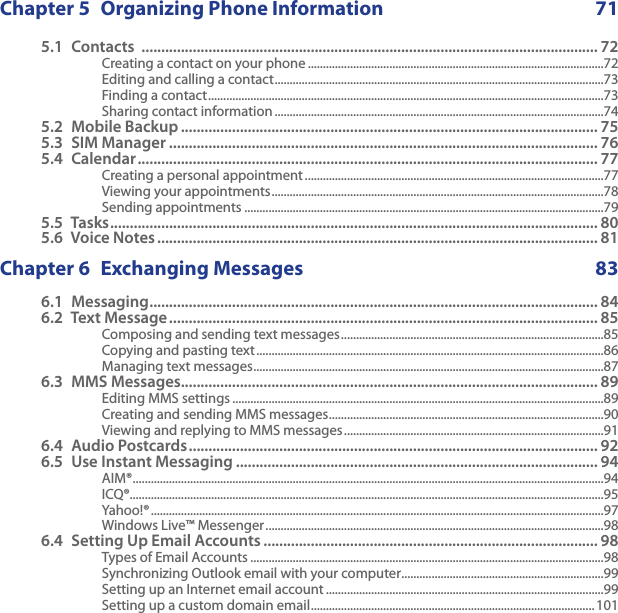


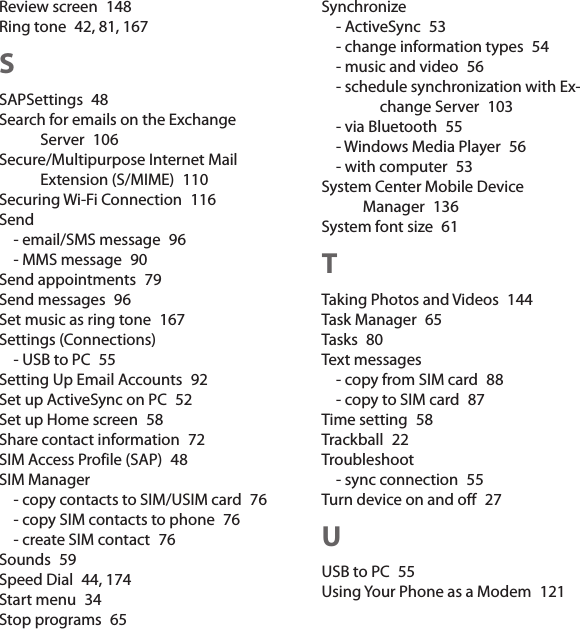
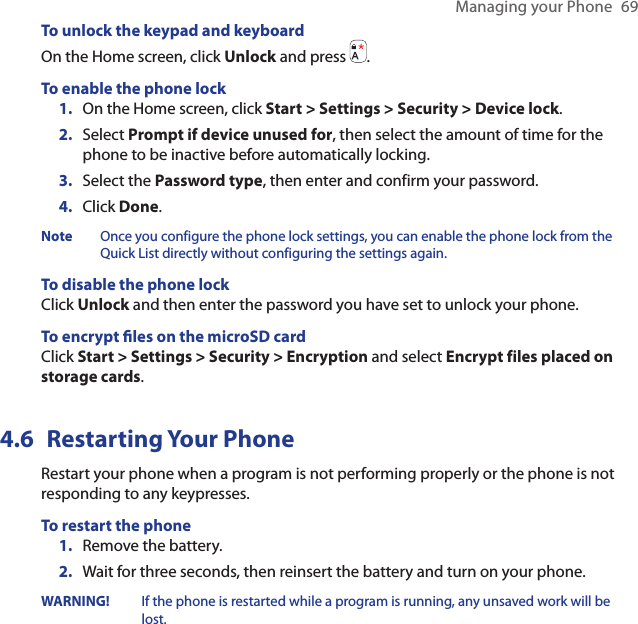
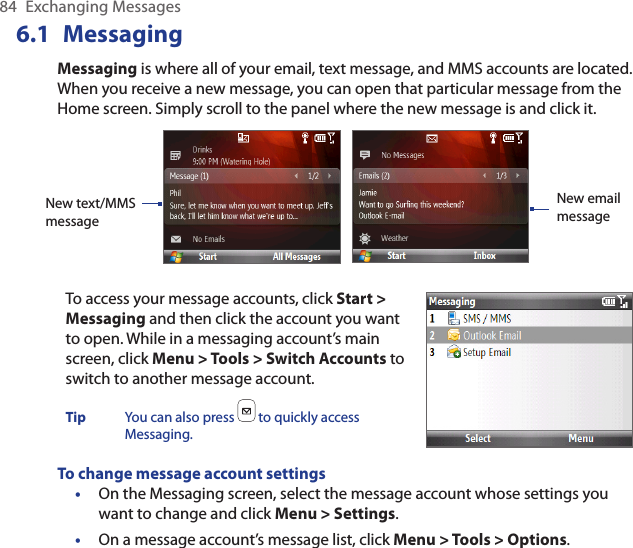
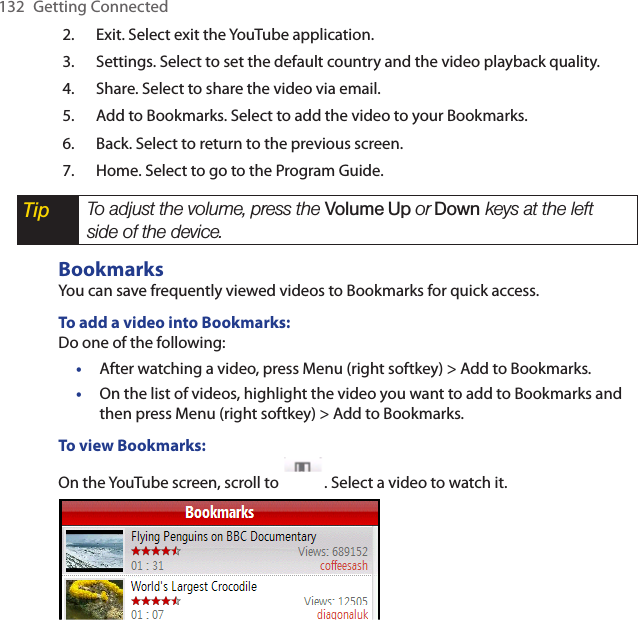
![Managing your Phone 654.2 Copying and Managing FilesYou can copy files between your phone and computer, or copy files to a storage card installed on your phone. You can also efficiently manage your files and folders using File Explorer.To copy les using Windows Mobile Device Center/ActiveSync to the PCConnect your phone to your PC. In Windows Mobile Device Center, click File Management > Browse the contents of your device. Or In ActiveSync on your PC, click Explore. This opens the Mobile Device folder for your phone. Browse your phone for files that you want to copy to your PC.Select and copy the files [Ctrl + C] and then paste them [Ctrl+V] to the destination folder in the PC.Copying a file results in separate versions of a file on your phone and PC. Changes made to one file will not affect the other since the files are not synchronized. To manage les to your phone using File ExplorerFile Explorer provides many easy-to-use features for file and folder management.To start File ExplorerFile Explorer lets you browse and manage the contents of your phone. The root folder on the phone is named My Device, and contains the following folders: My Documents, Program Files, Windows, and more.Click Start > Applications > File Explorer.Click a folder or file to open it.To return to an upper level folder, click Up and select the folder.1.2.3.4.1.2.3.](https://usermanual.wiki/HTC/MAPL100/User-Guide-1091313-Page-65.png)
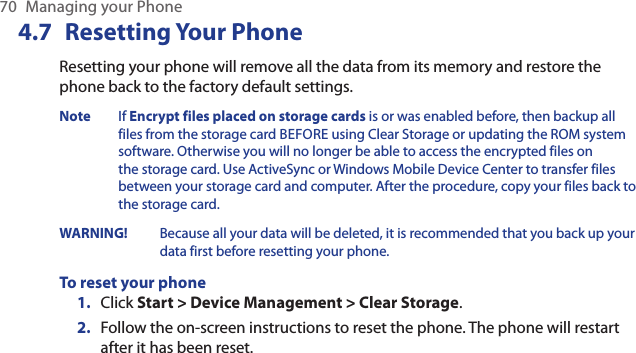


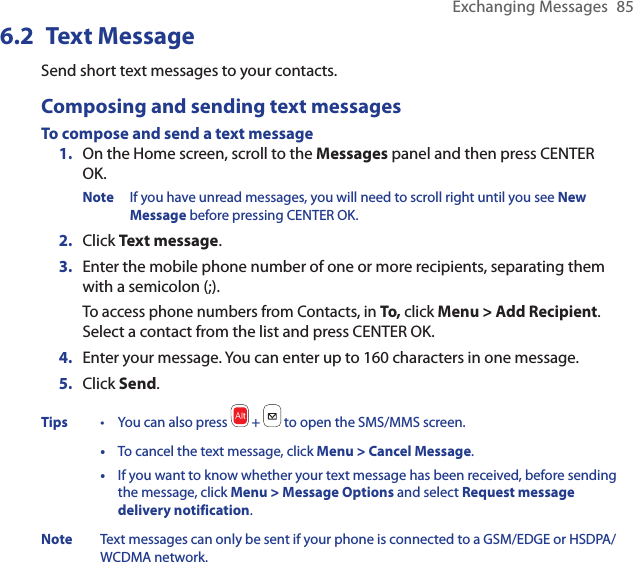

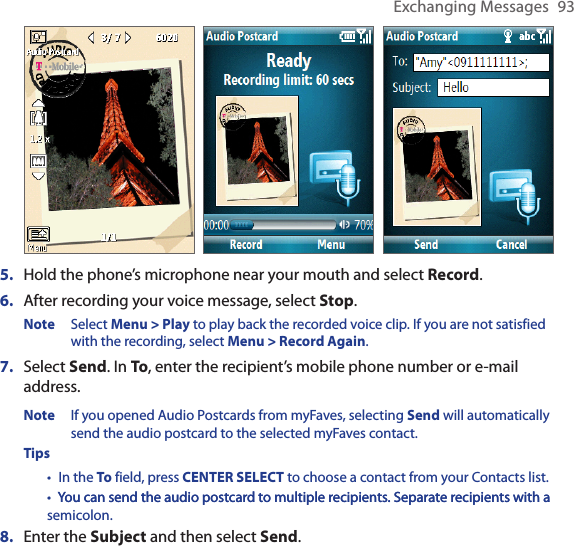


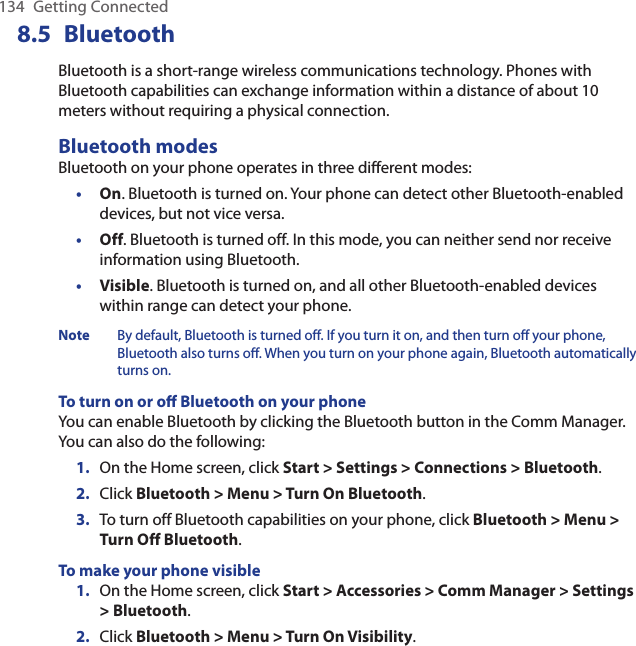
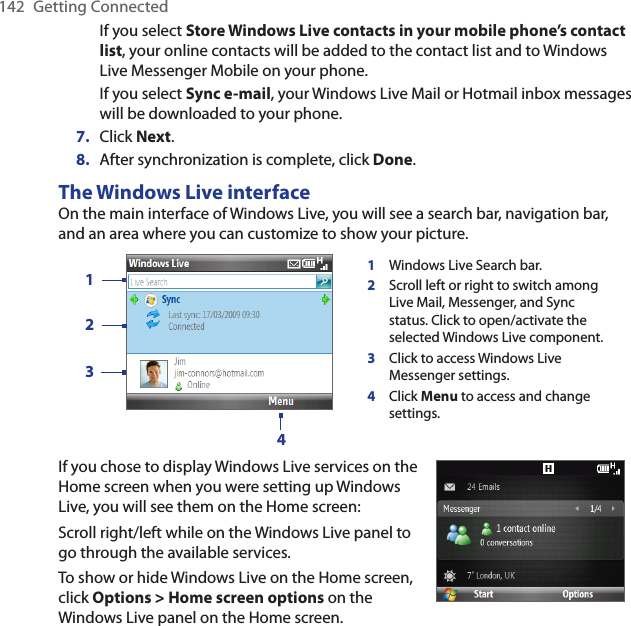

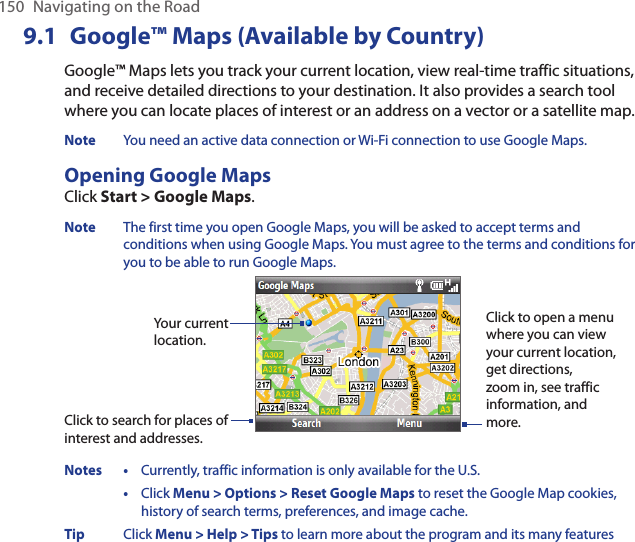
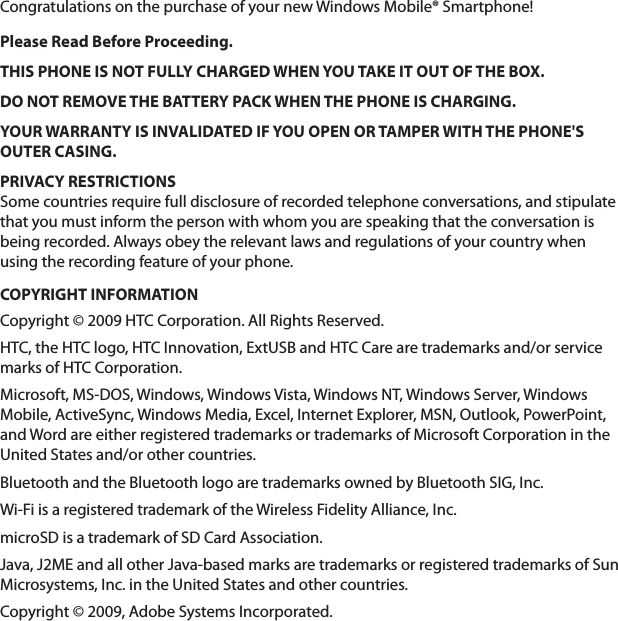
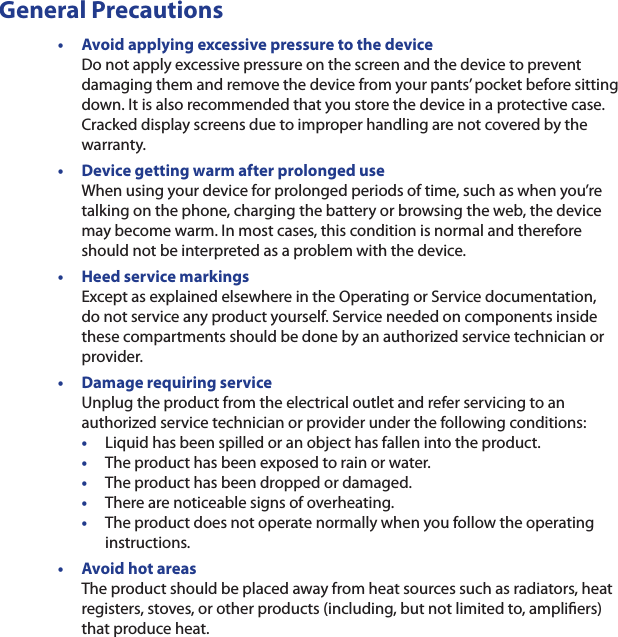
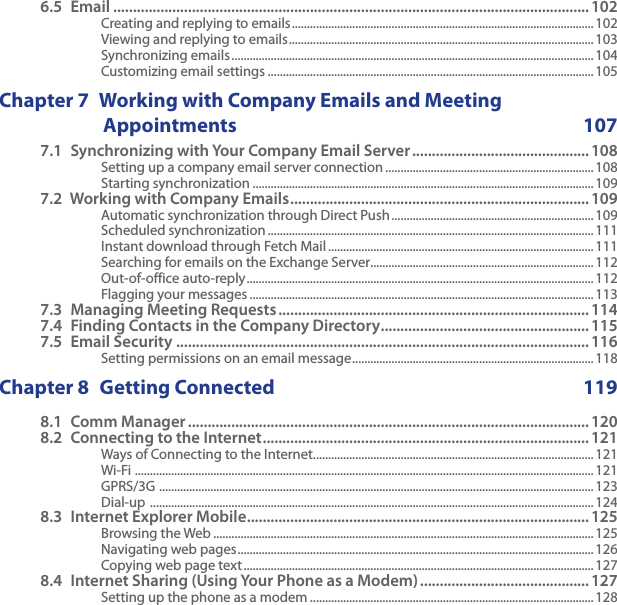
![Navigating on the Road 151Searching for places of interestYou can search and locate a place of interest using Google Maps. Google Maps also shows the contact information and gives directions on how to get to the place of interest from your current location.Note You can also search for keywords, addresses, and postal codes. On the Google Maps screen, click Search.Enter the place of interest you want to go to (for example, museum of modern art), then click Search.In the search results list, click an item to view its contact information. 4. On the Address tab, you can:Click the web address to open the web site of the place of interest. Note This information only appears when the web site of the place of interest is available.Click the [phone number] to call the place of interest that you have selected.Click Directions to here or Directions from here to get directions on how to get to the place of interest from your current location or vice versa. Click Send as text message to send the contact information via SMS.Click Search nearby to search for other places of interest near your current location.For more information about Google Maps, go to: http://www.google.com/gmm/index.html. 1.2.3.•••••](https://usermanual.wiki/HTC/MAPL100/User-Guide-1091313-Page-151.png)
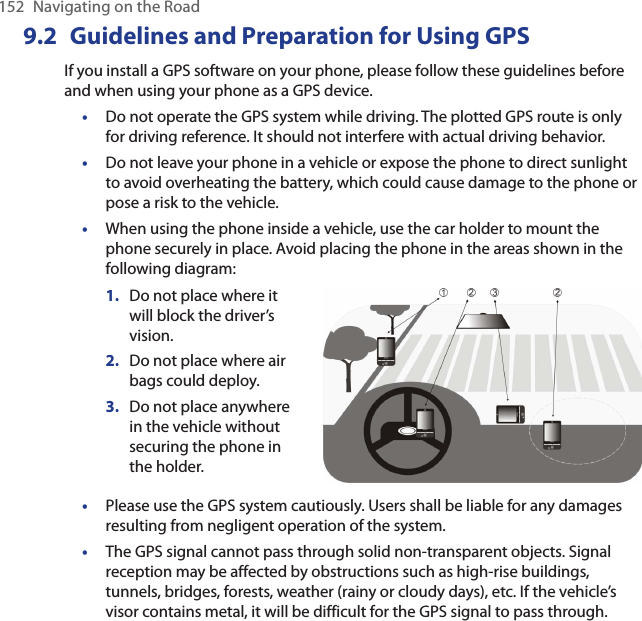


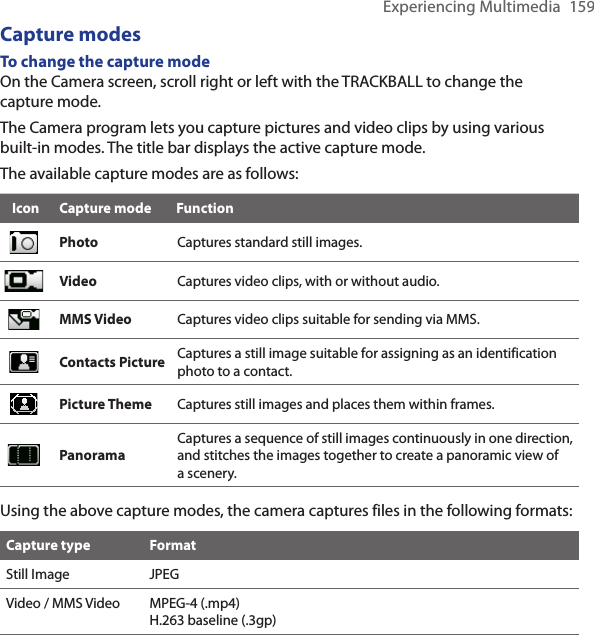
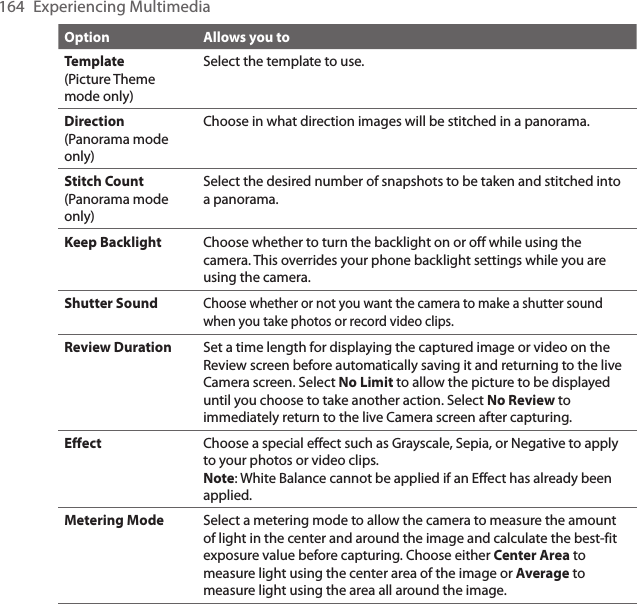
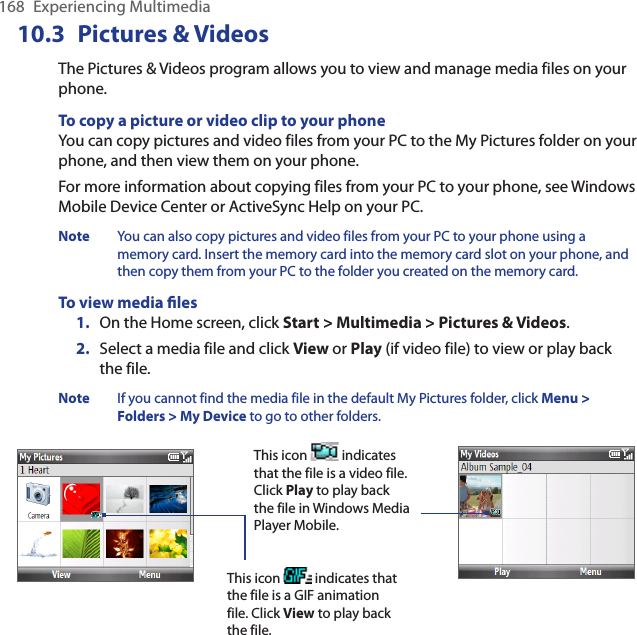
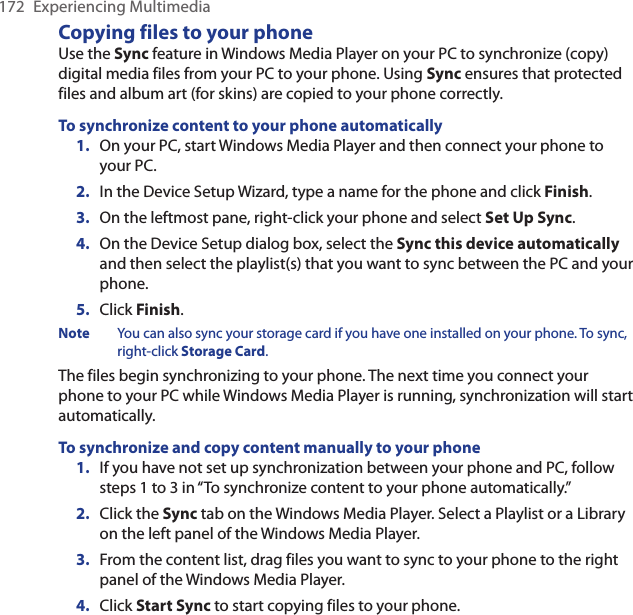
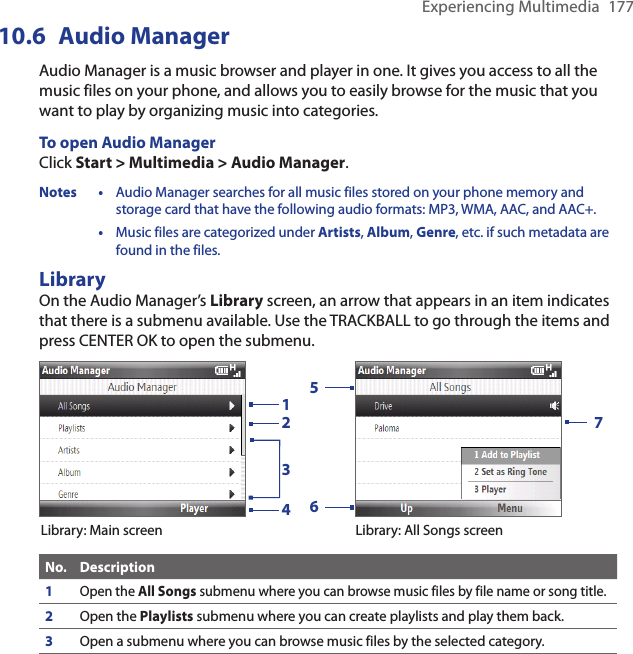
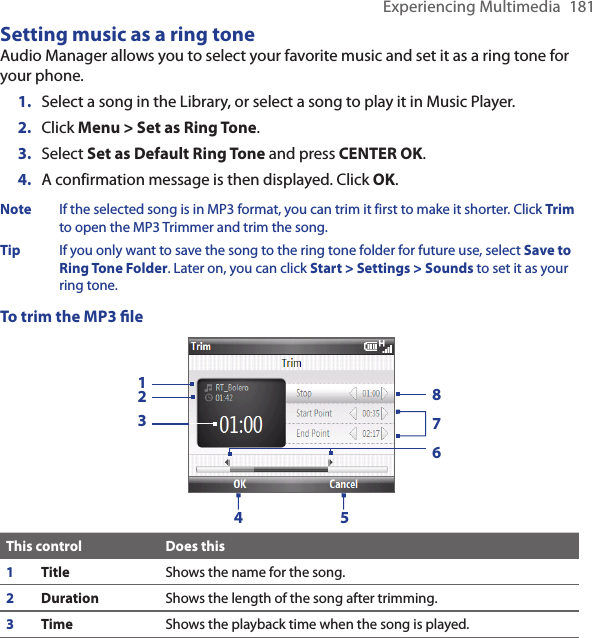
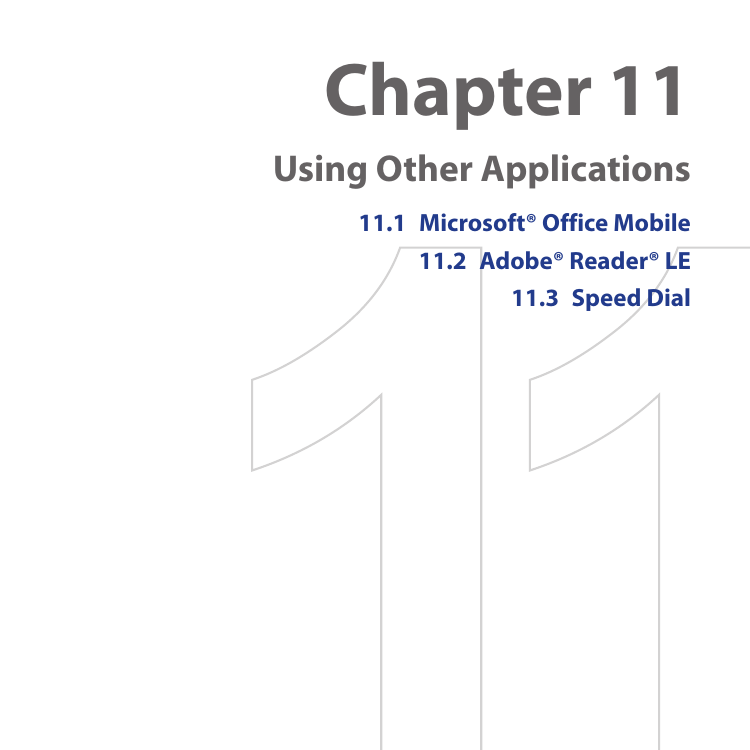
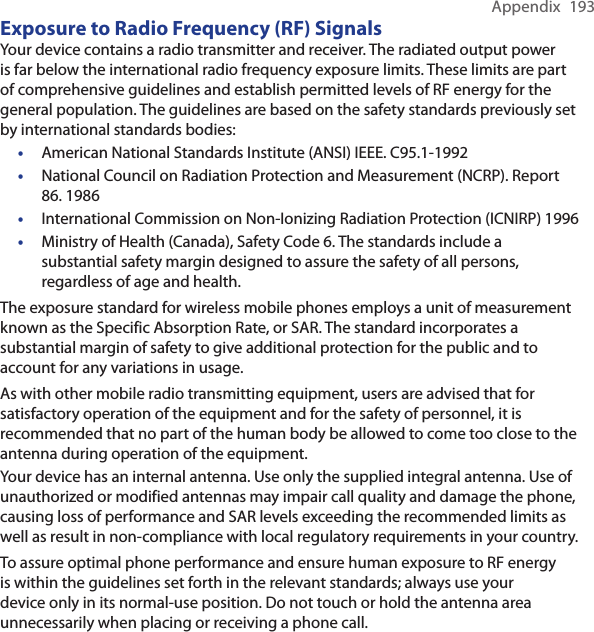
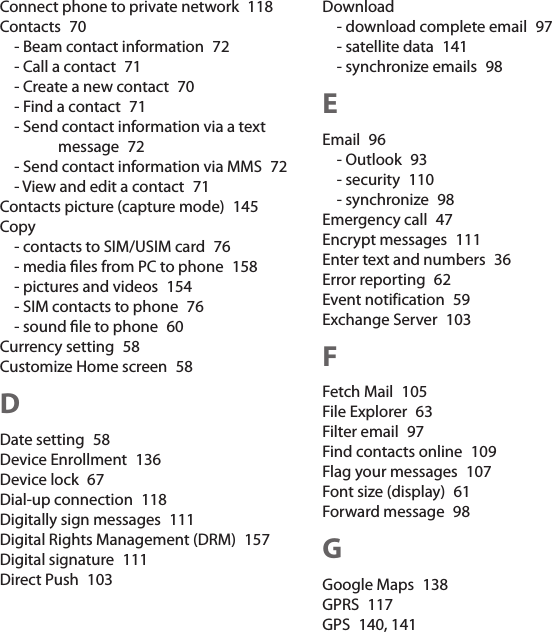
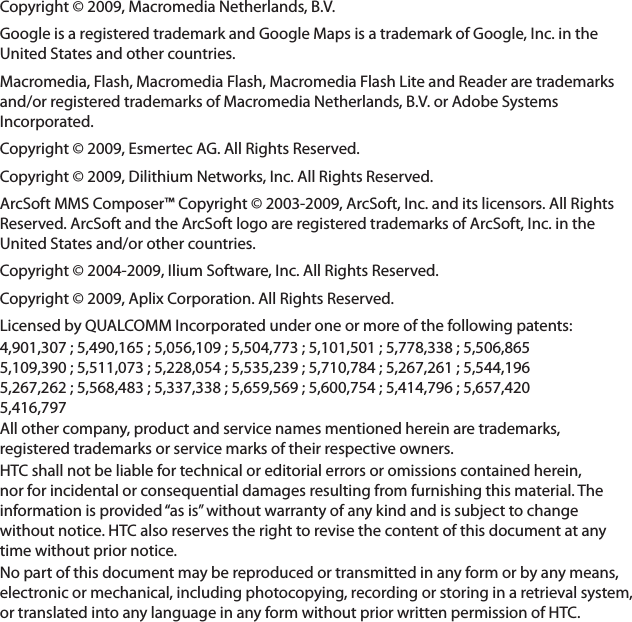
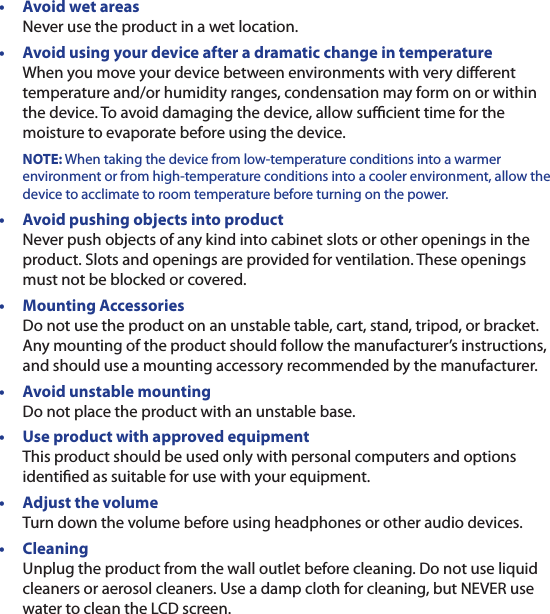
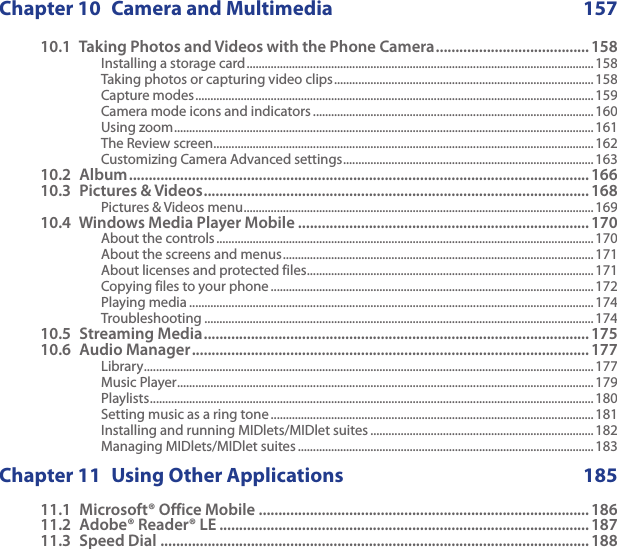
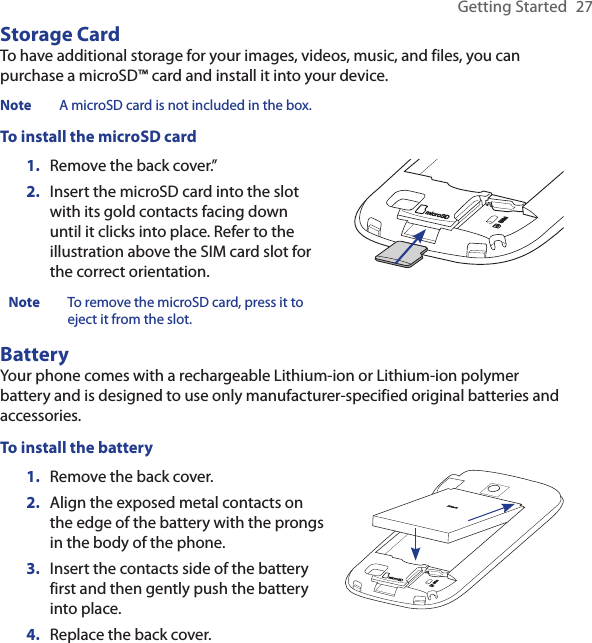
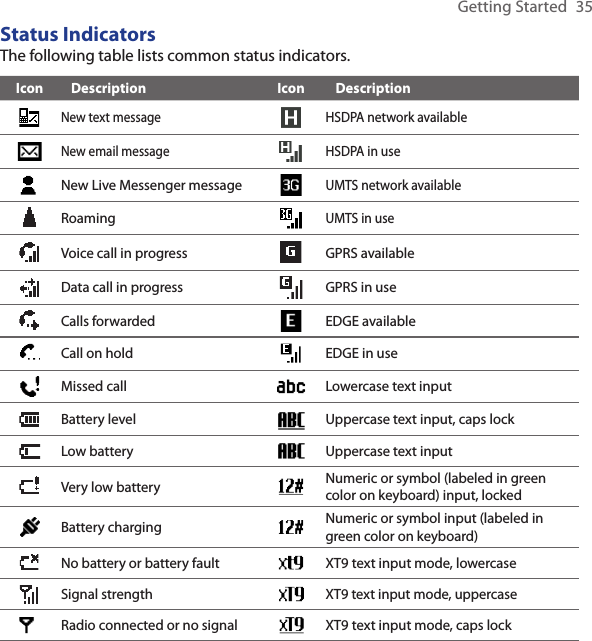
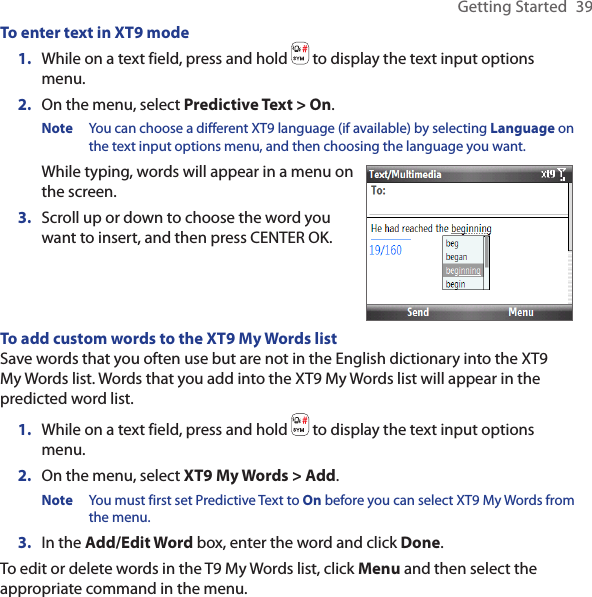
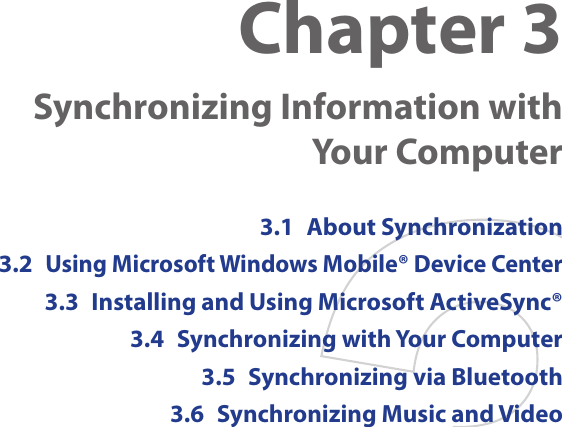
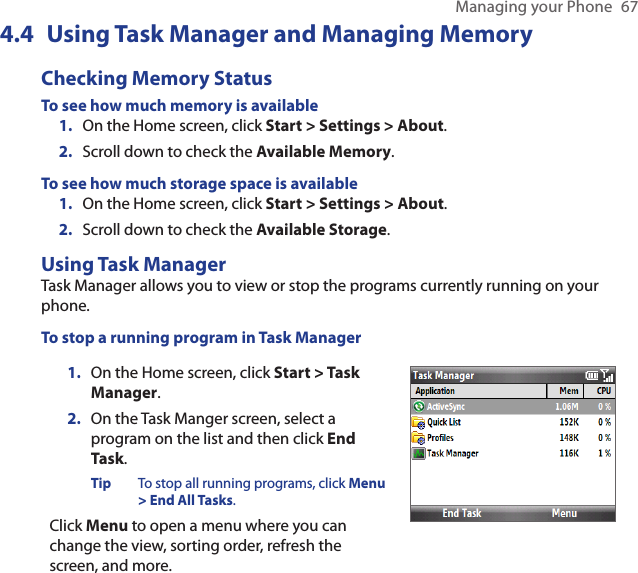
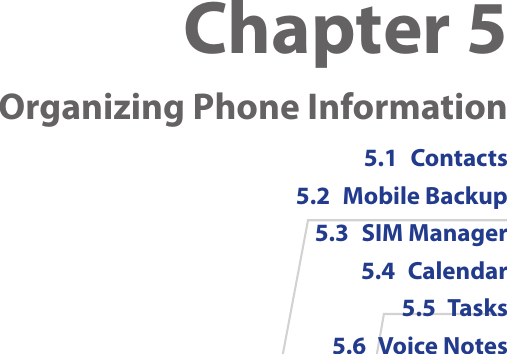
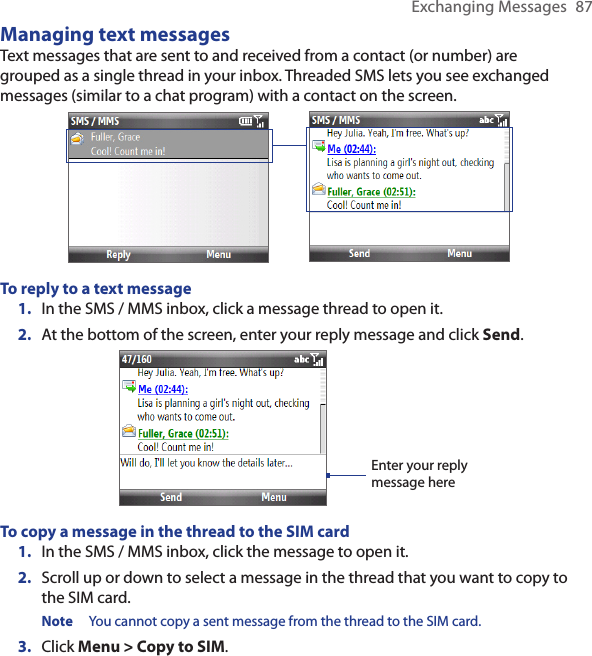
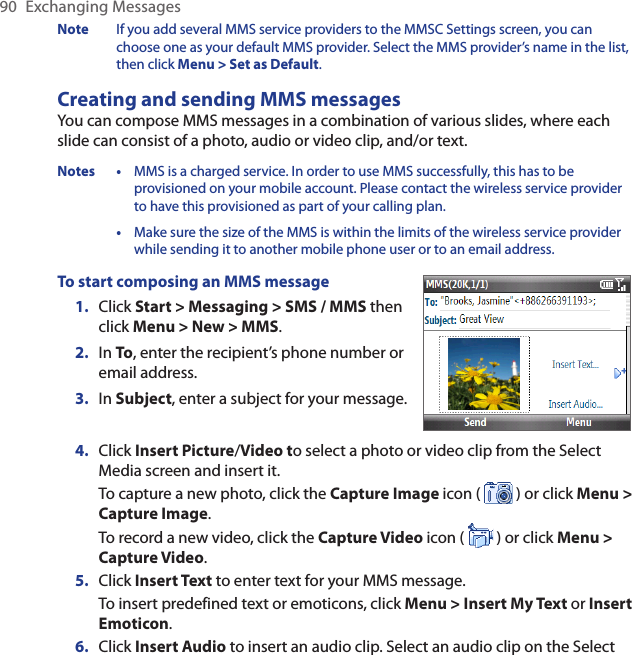
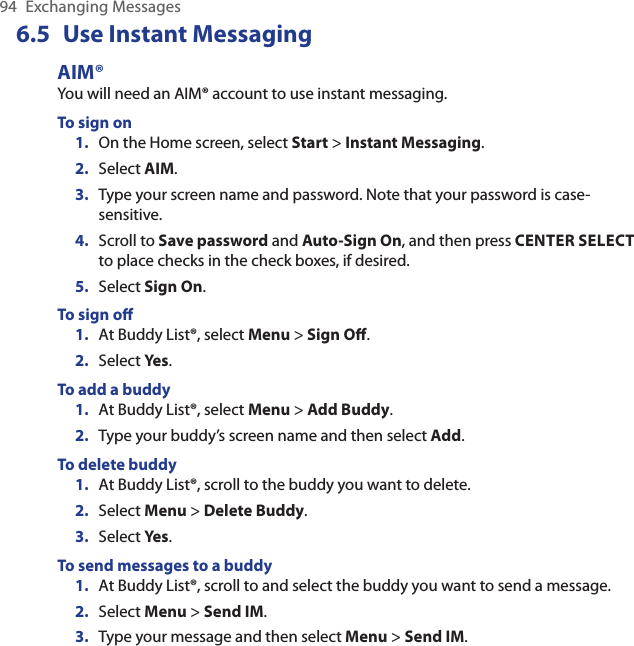
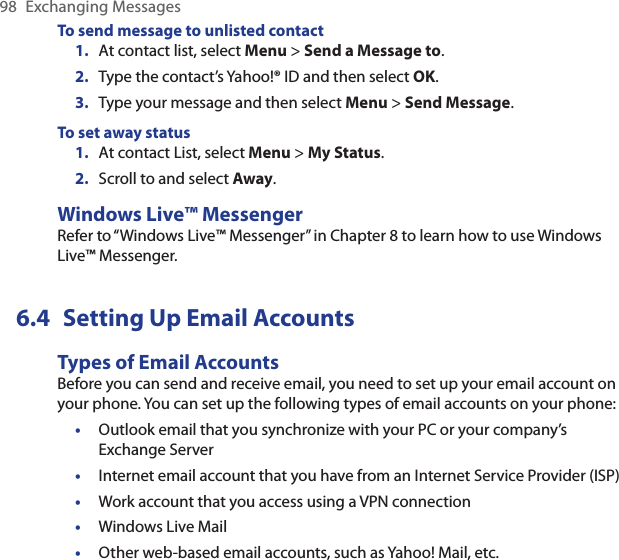
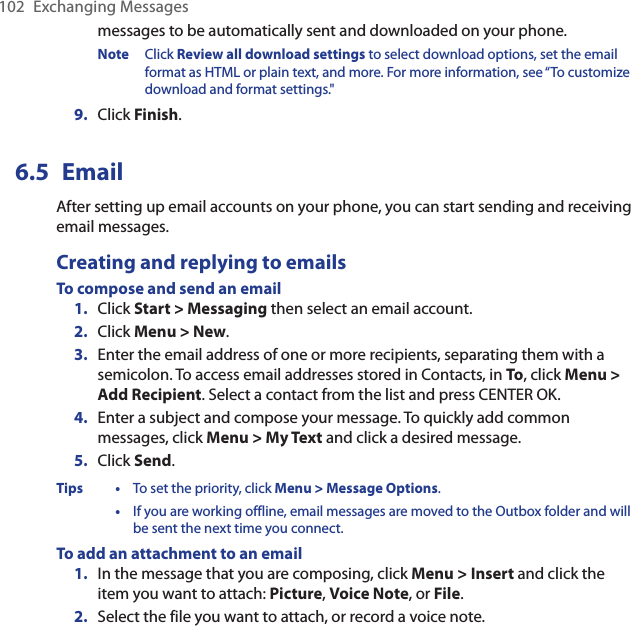
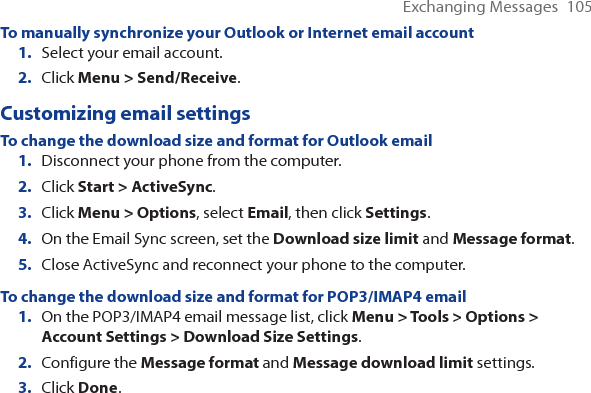
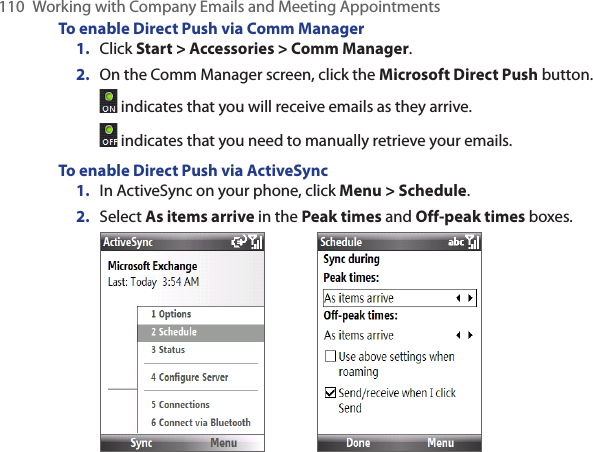
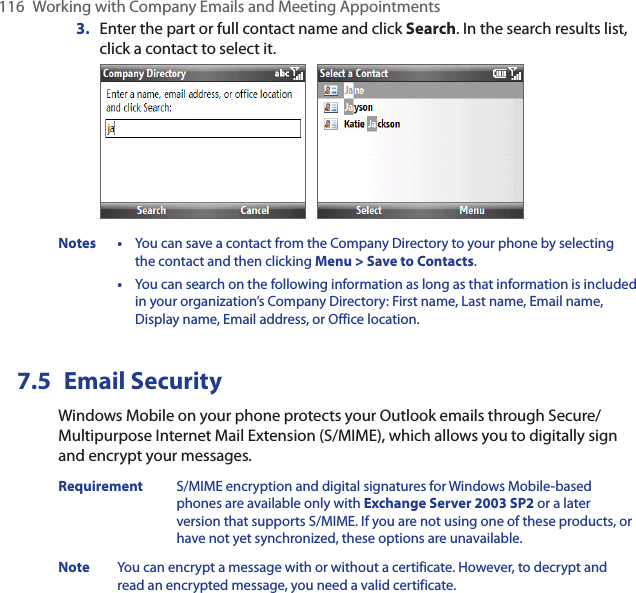
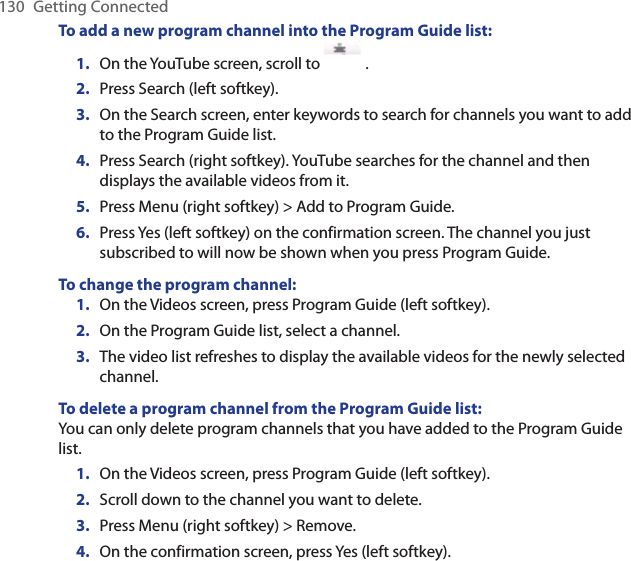
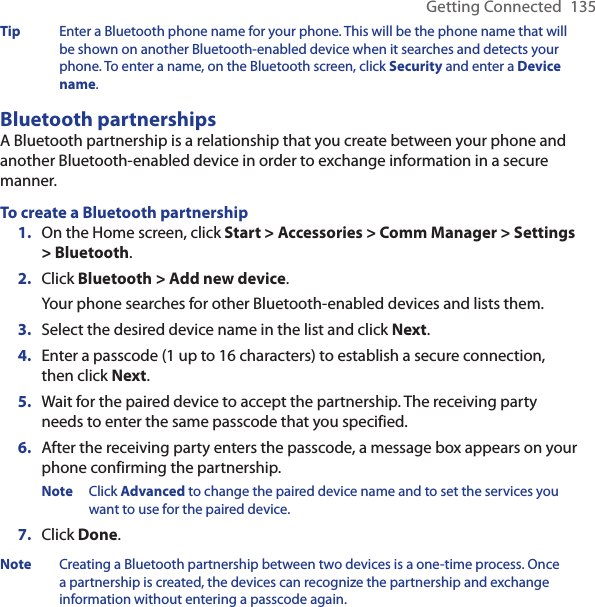
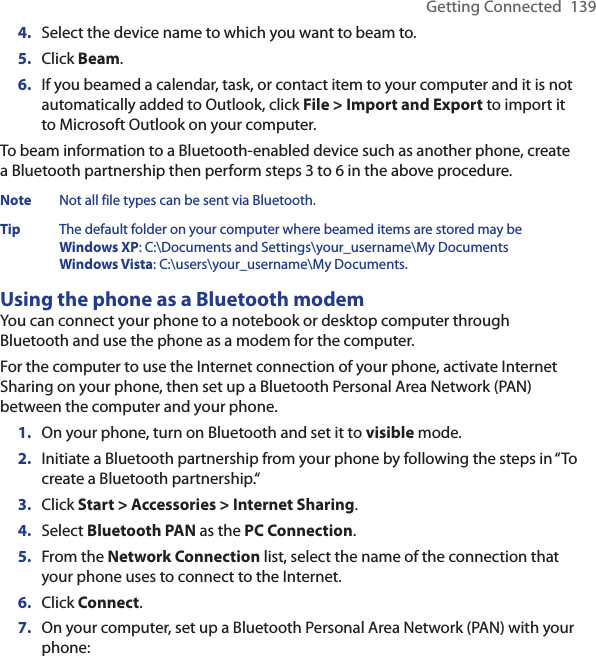
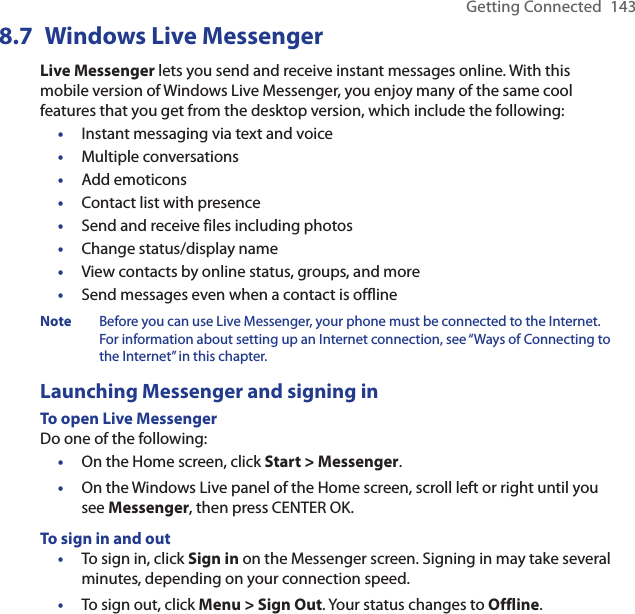
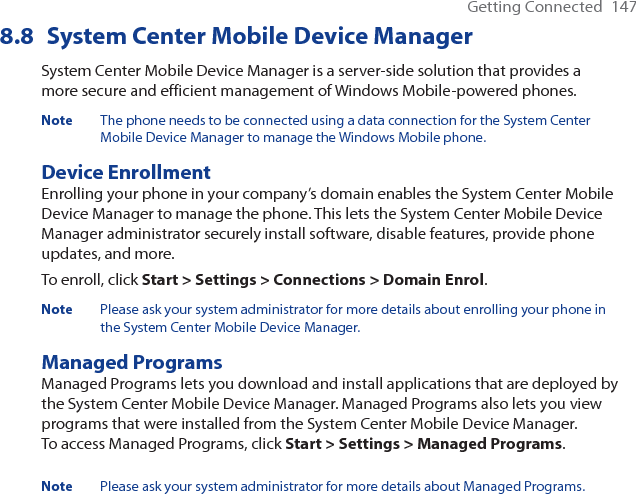
![160 Experiencing MultimediaCamera mode icons and indicatorsThe camera icons and indicators disappear after a few seconds if there is no user interaction. Scroll the TRACKBALL, press any key on the keypad, or press the left/right SOFT KEYS to display the icon indicators again.The Camera [Photo] screen1 Indicates the current zoom ratio. Scroll up or down to increase or decrease the zoom level. 2 Indicates the current capture mode.3 Depending on the capture mode, this shows the remaining available number of pictures that you can take or remaining duration that can be recorded. While recording video, this shows the recorded duration.4 Click to open the Camera settings menu.5 Click to open Album.32145The Camera [Video] screen6 The Recording Status indicator blinks while video recording is in progress.6](https://usermanual.wiki/HTC/MAPL100/User-Guide-1091313-Page-160.png)
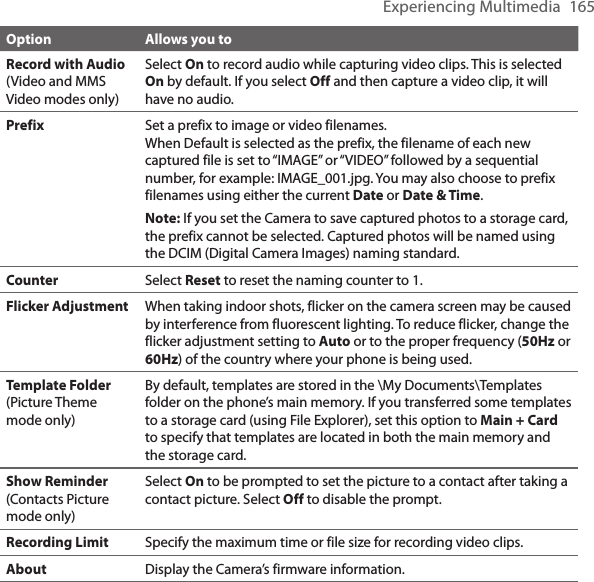
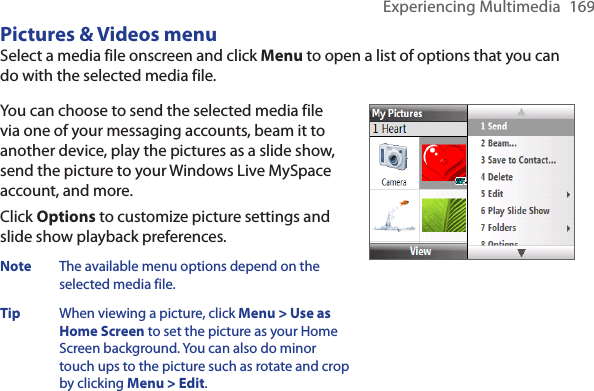
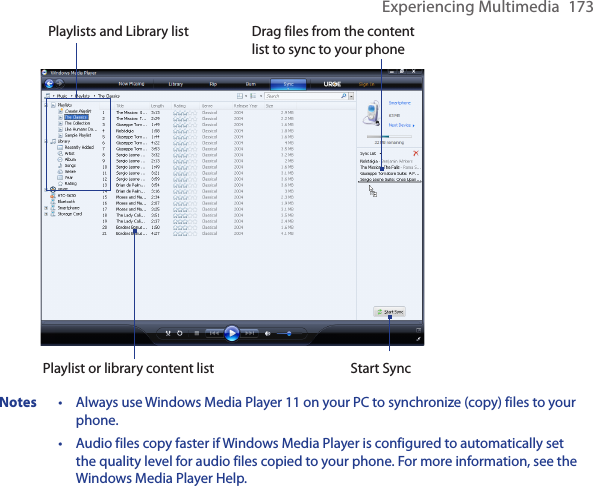
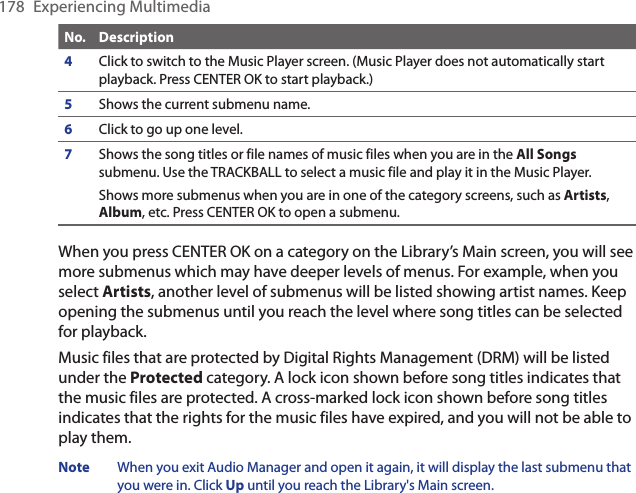
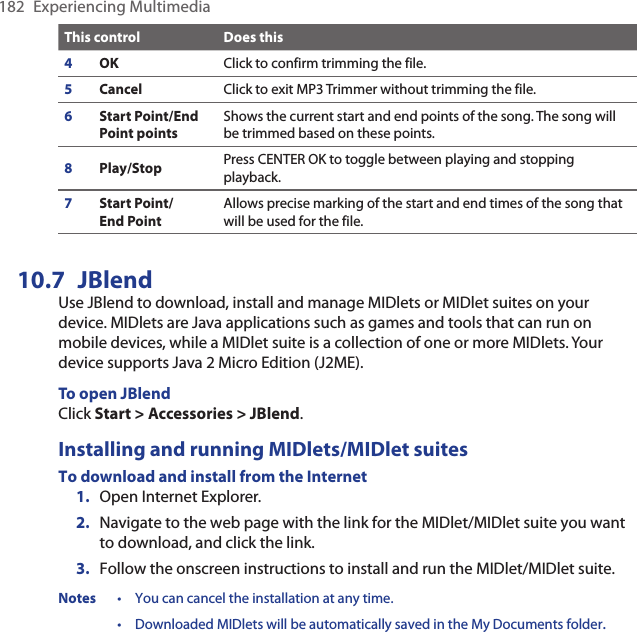
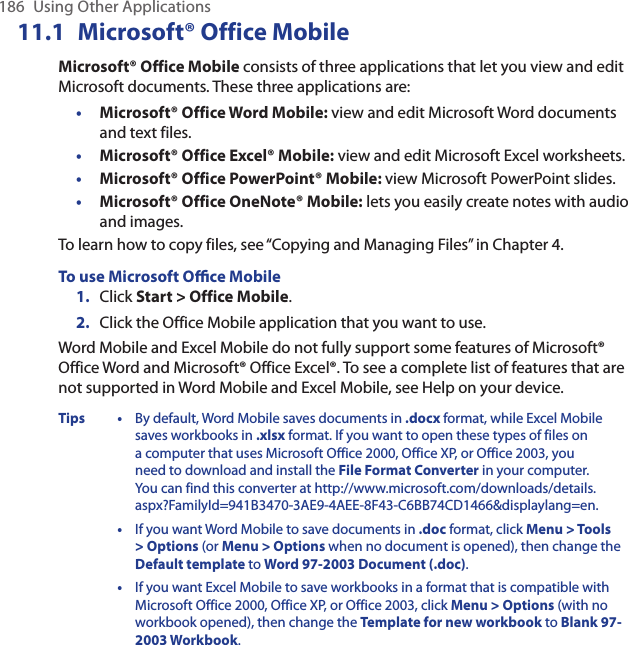
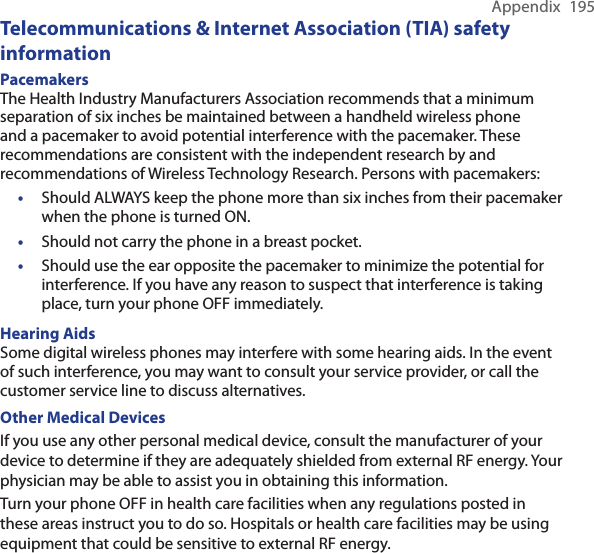
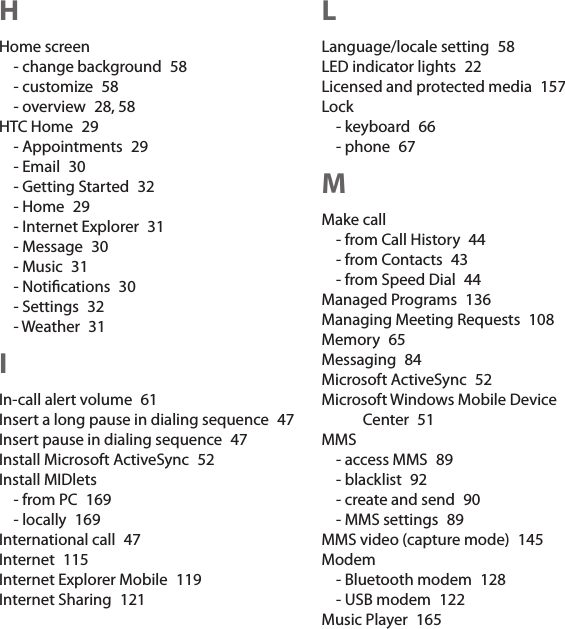
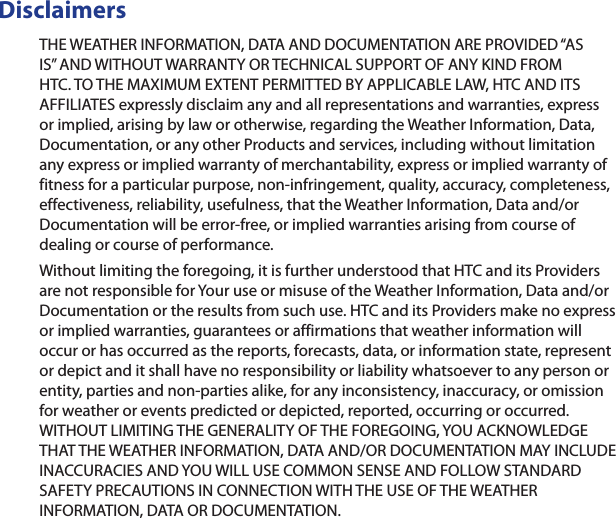
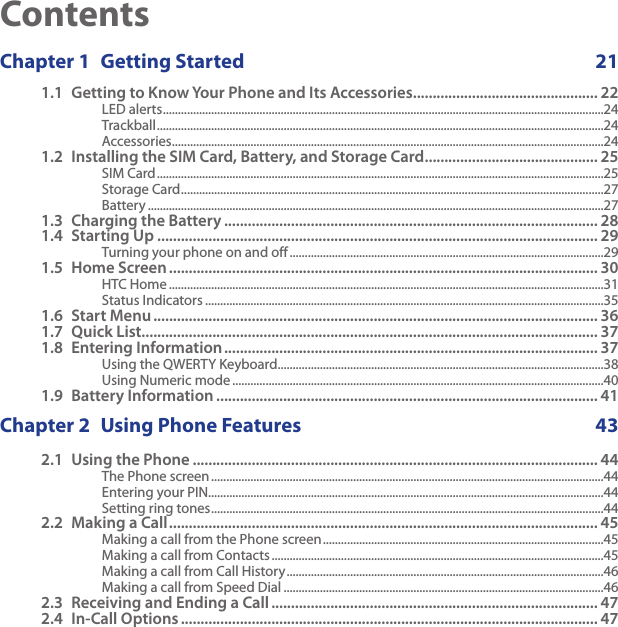
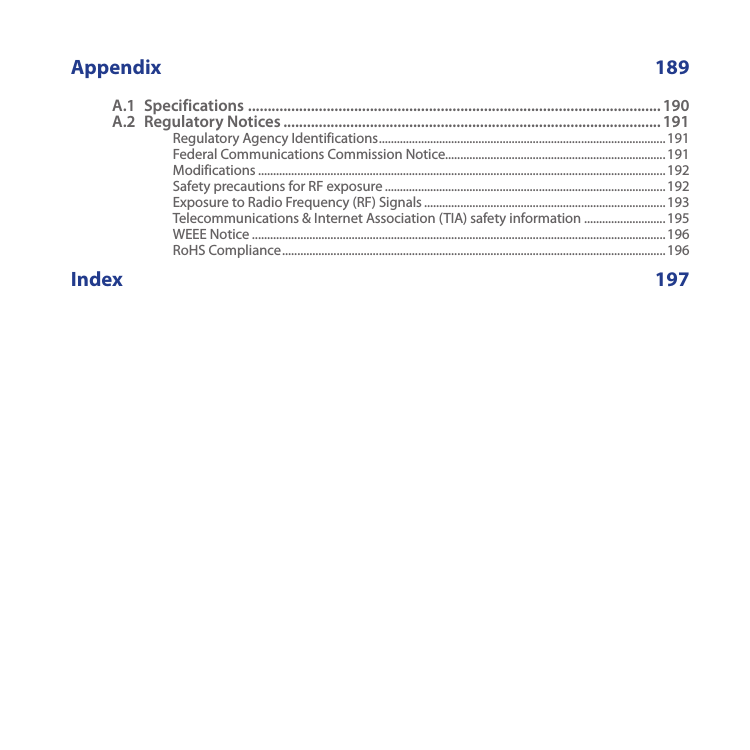
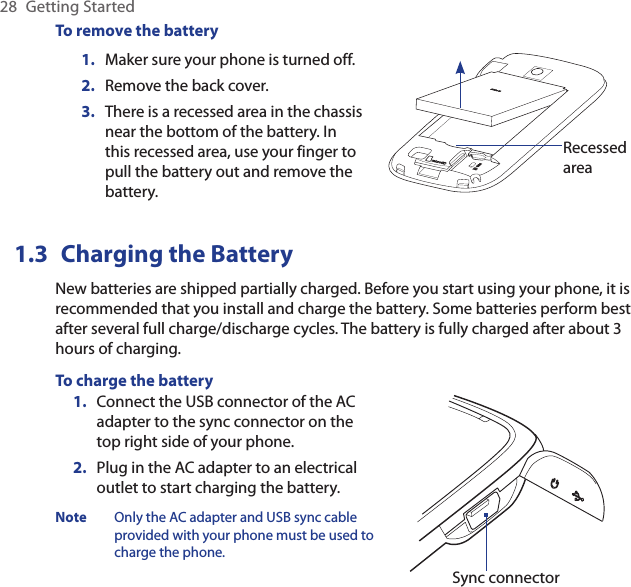
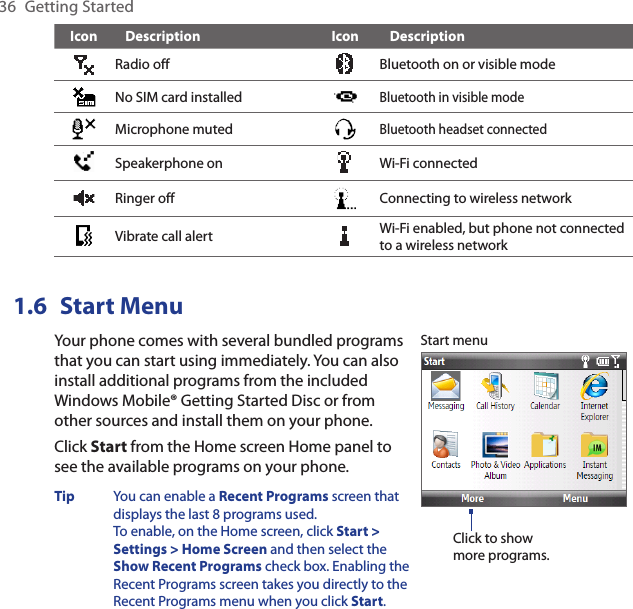
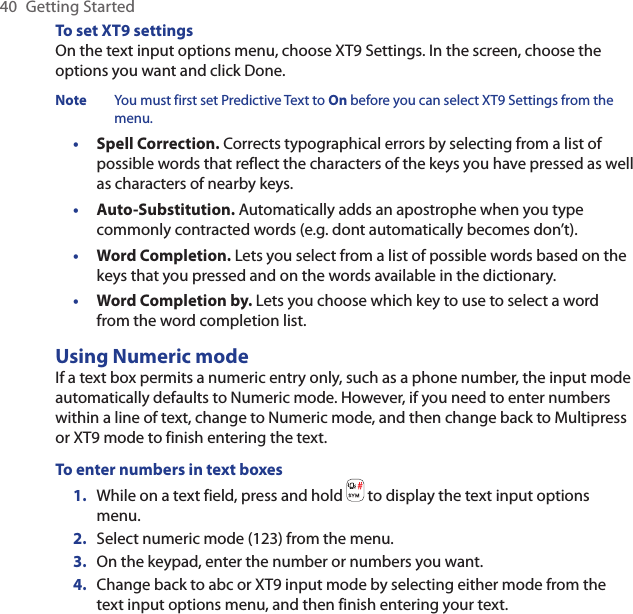
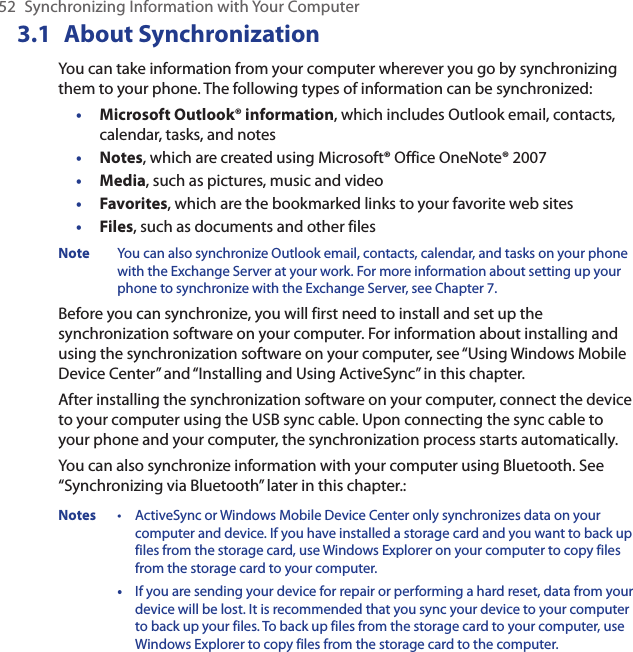
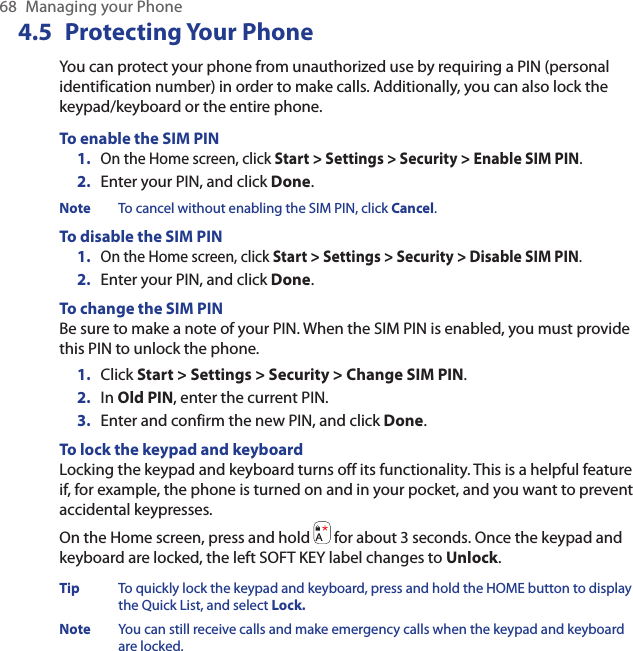
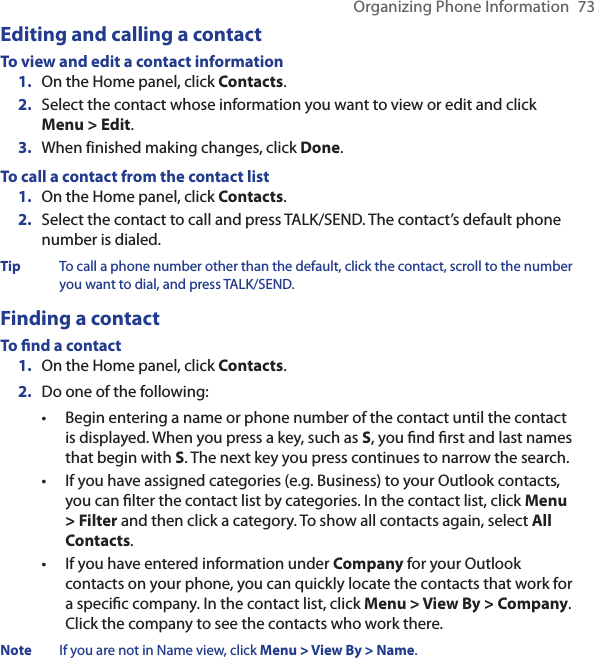
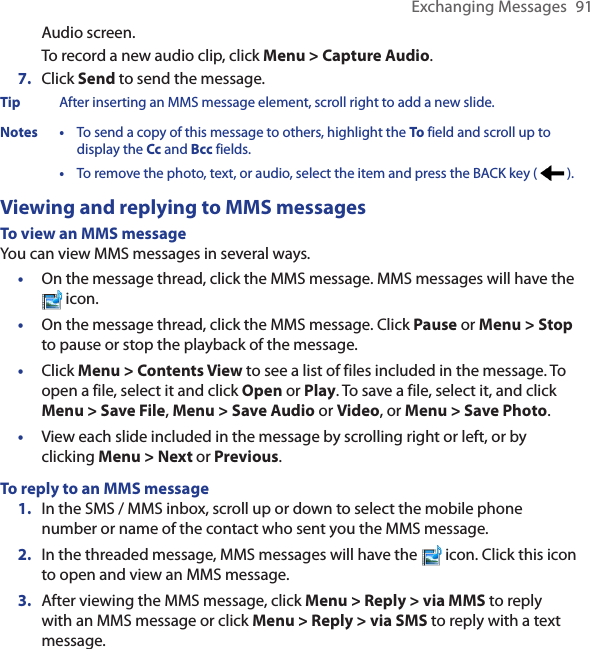
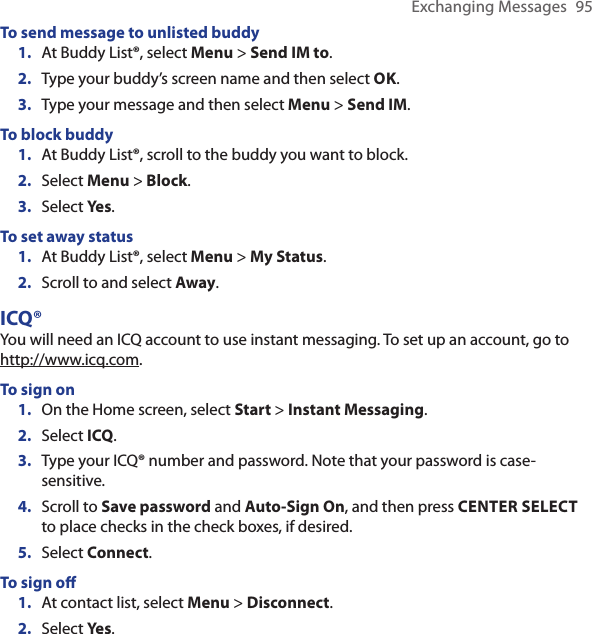
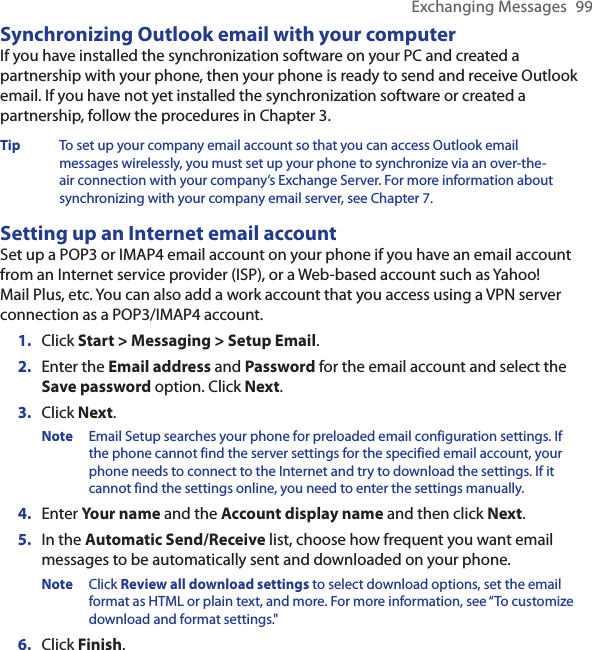
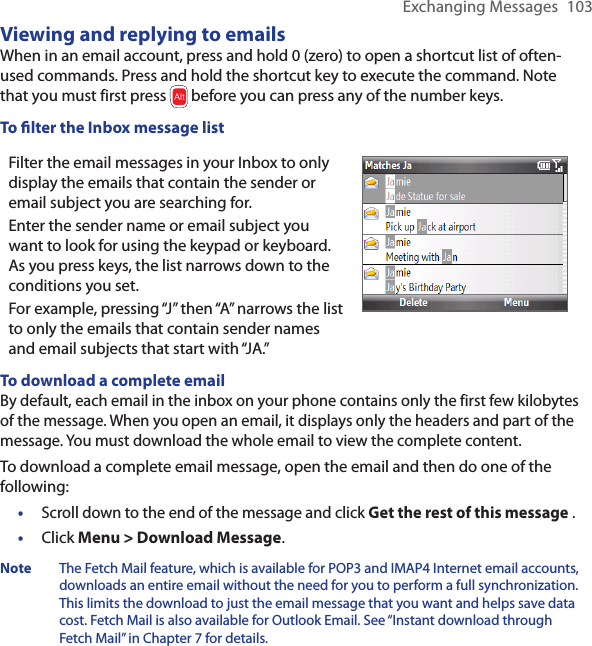
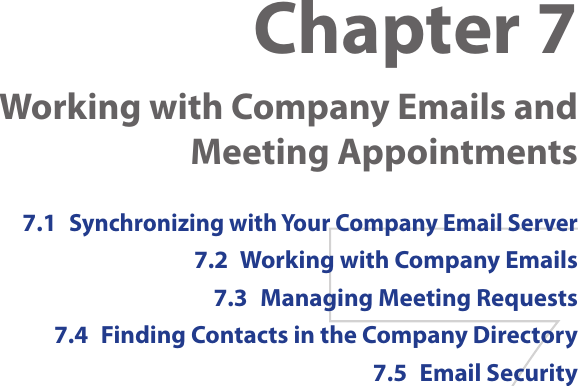
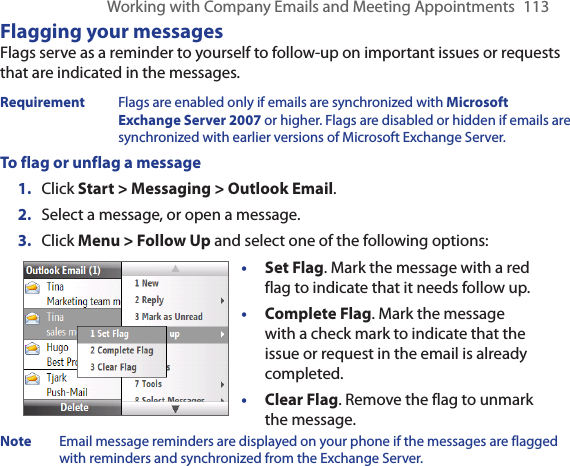
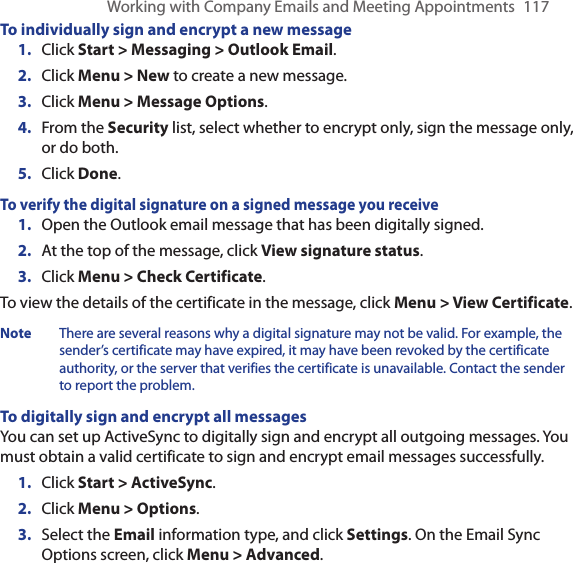
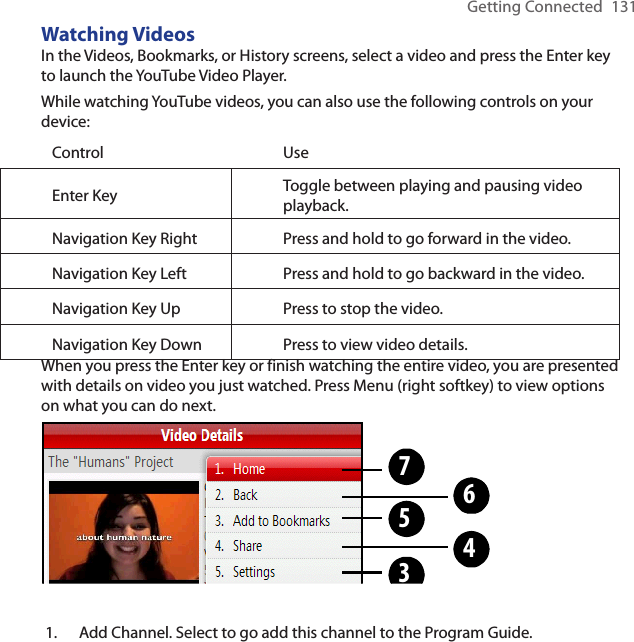
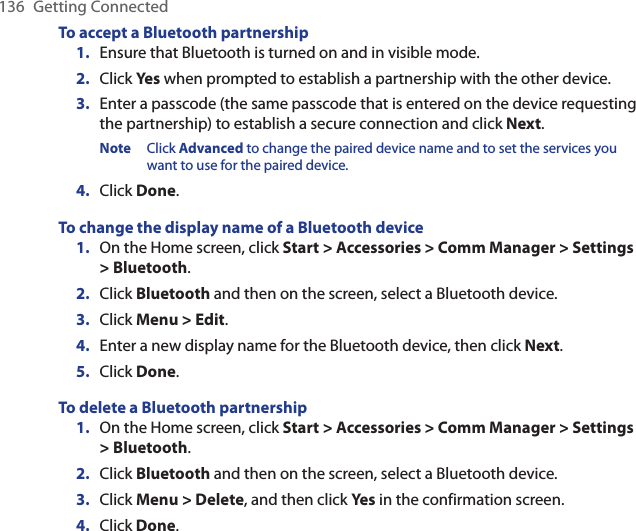
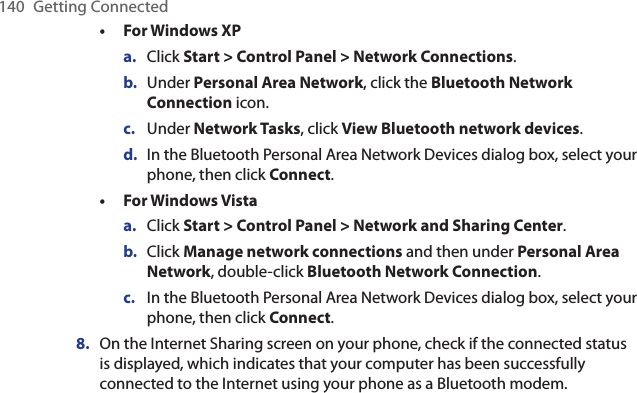
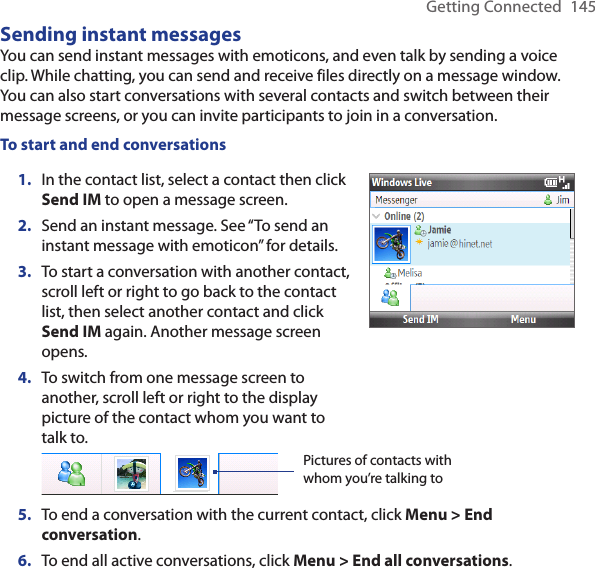
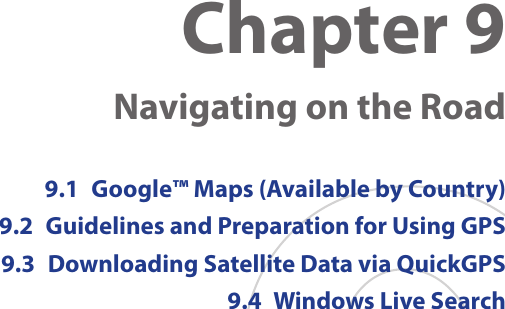
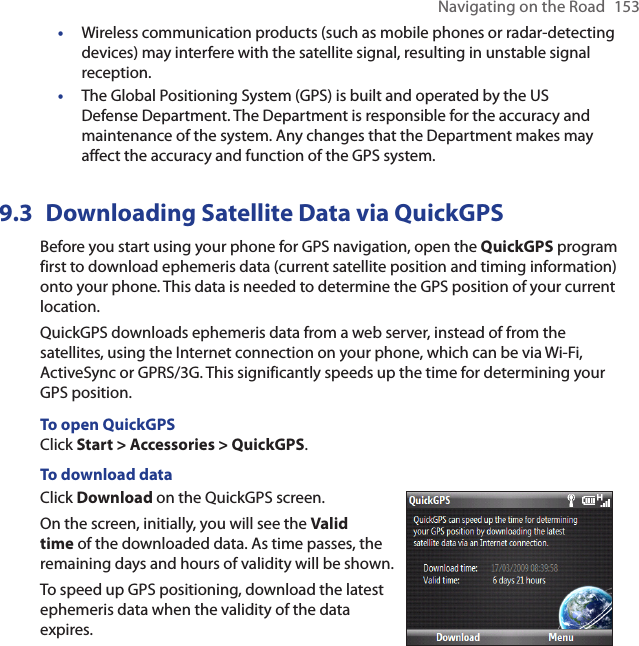
![Experiencing Multimedia 161The Camera [Picture Theme] screen77 Displays the current and total number of photos that can be taken using the selected template.Using zoomBefore capturing a still image or a video clip, you can first zoom in to make the object in focus move closer, and you can zoom out to make the object move farther away. In all capture modes, scroll up with the TRACKBALL to zoom in, scroll down to zoom out.The camera zoom range for a picture or video depends on the capture mode and capture size. Also, please note the capture sizes available for certain capture formats also vary from one capture mode to another.](https://usermanual.wiki/HTC/MAPL100/User-Guide-1091313-Page-161.png)