HTC PB74100 Pocket PC Phone User Manual PB74100 UM FCC 090925
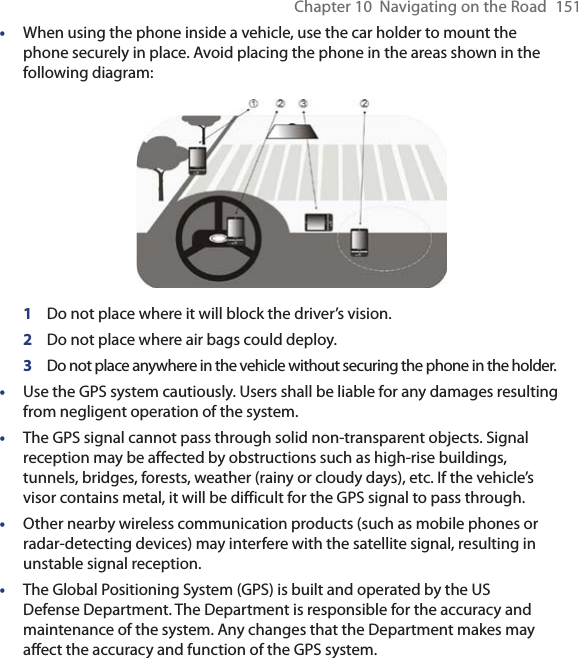
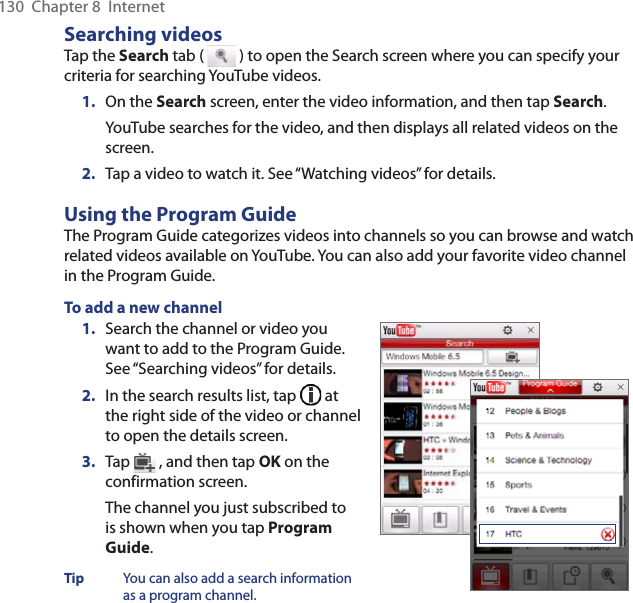
HTC Corporation Pocket PC Phone PB74100 UM FCC 090925
UserManual.wiki
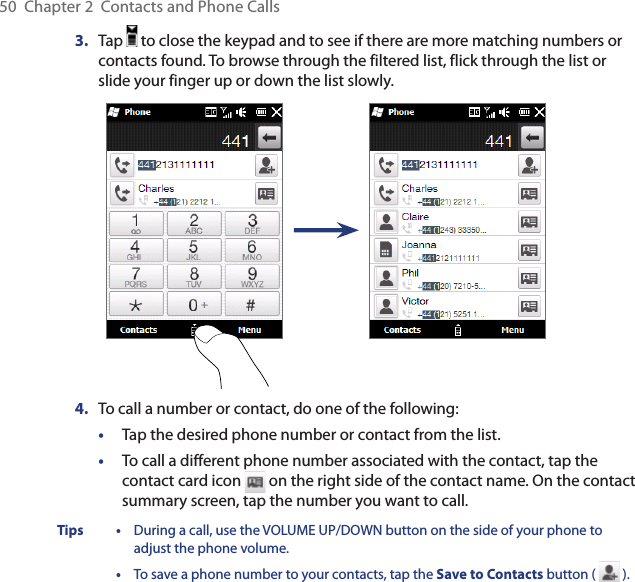
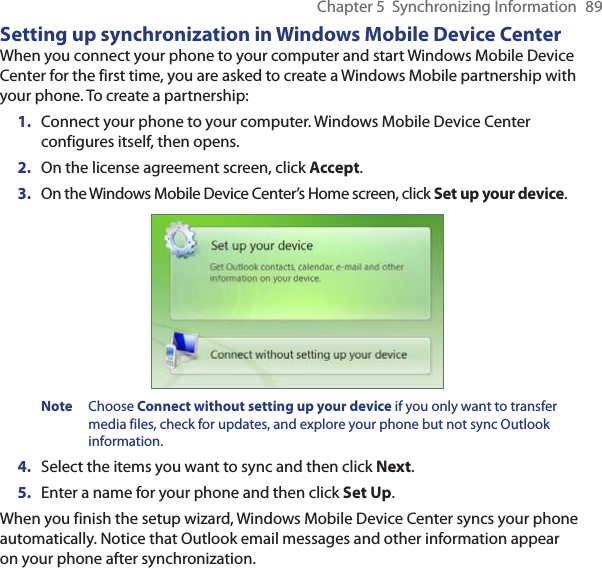
>
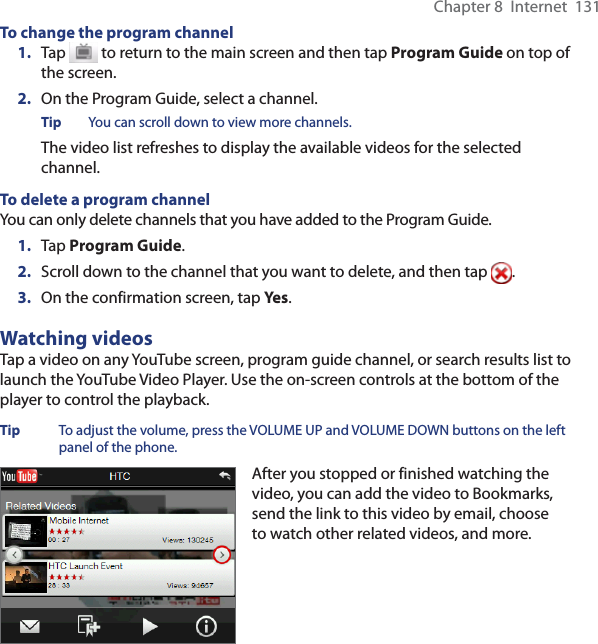
HTC
>
PB74100 User Manual
Users Manual
Navigation menu
Upload a User Manual
Namespaces
Wiki Guide
HTML
PDF
Info
Views
User Manual
Discussion / Help
Navigation


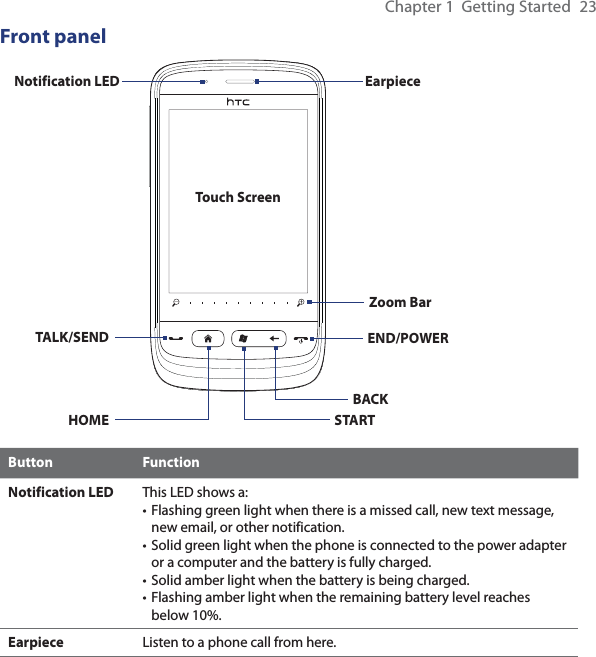

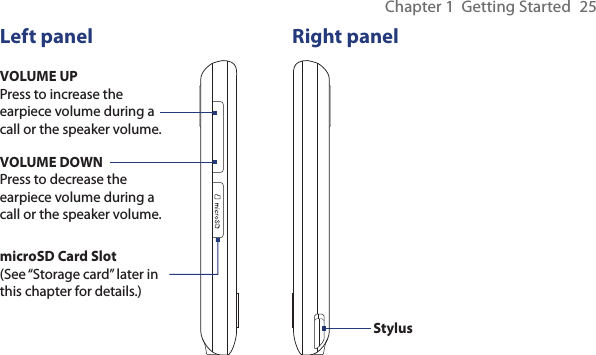
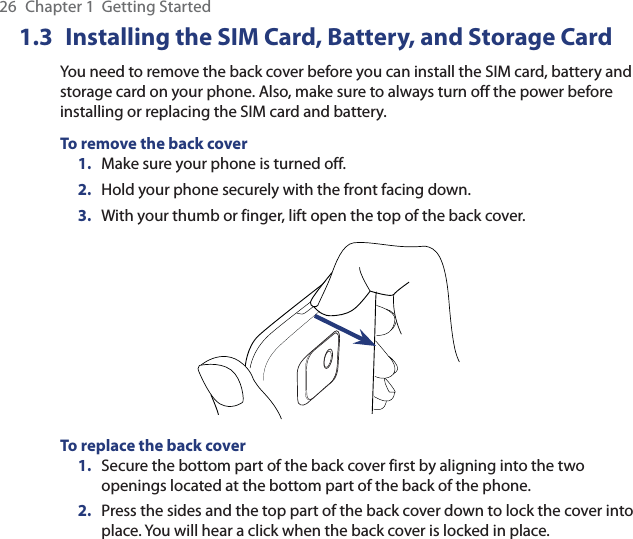
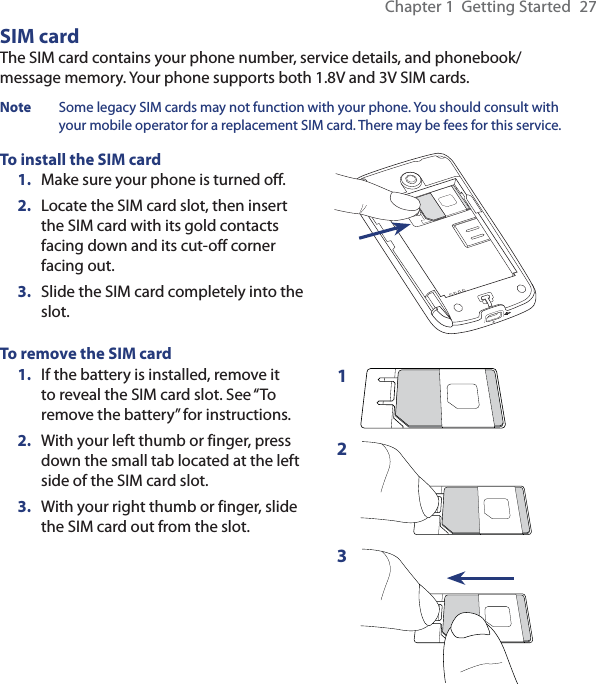


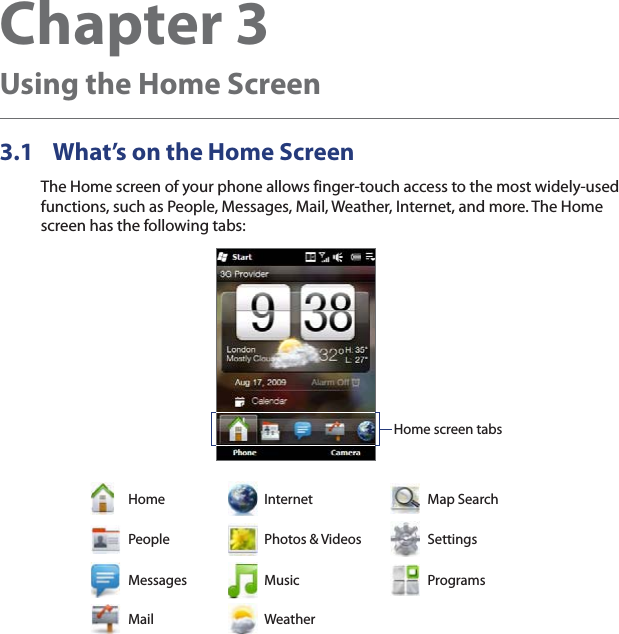
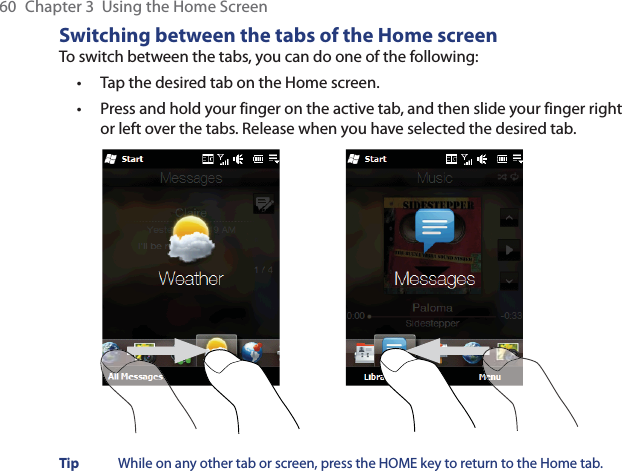
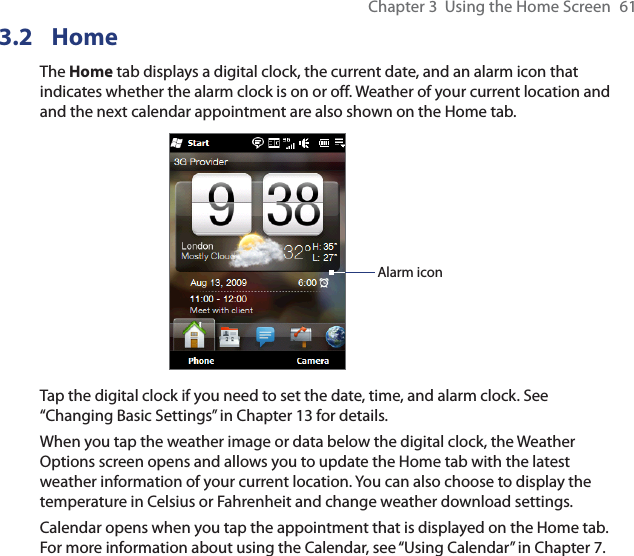
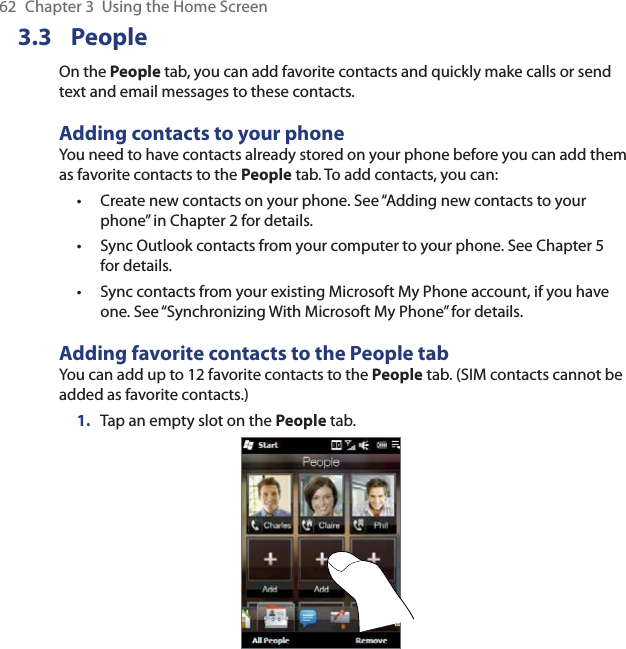


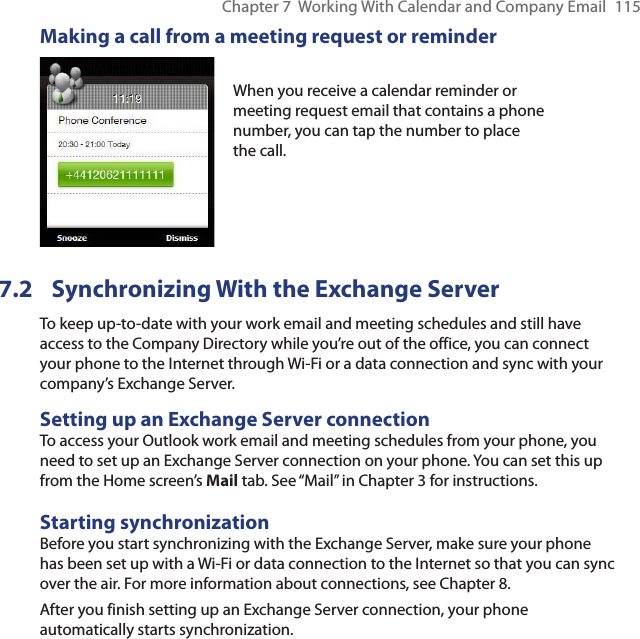


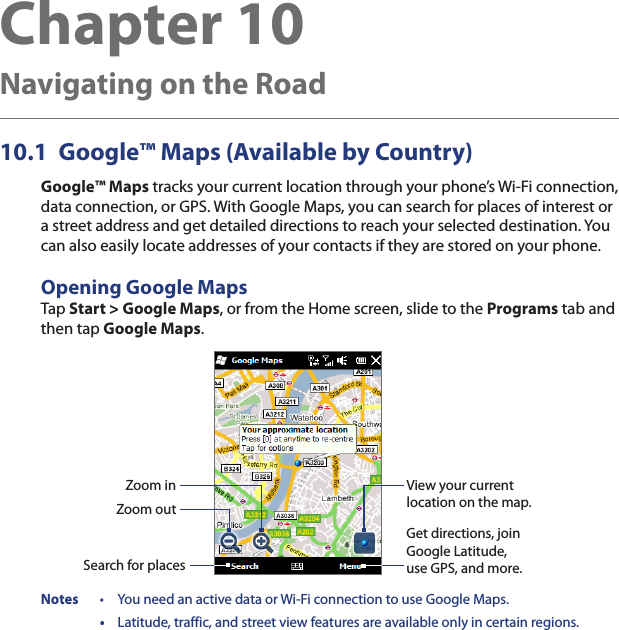
![Chapter 10 Navigating on the Road 149Searching a place of interestGoogle Maps lets you search and locate a place of interest, shows the information for that place, and gives directions on how to get there from your current location.1. On the Google Maps screen, tap Search.2. Enter the name, address, or postal code of the place on the search field and then tap OK.3. In the search results list, tap the place to view its address, phone number, and other details. 4. On the Address tab, tap:• The [phone number] to call the place of interest.• The Web address (if available) to go to the website of the place of interest.• Get directions to get directions to the place of interest from your current location.• Street view (available by country) to display a street view of the place of interest, when available.](https://usermanual.wiki/HTC/PB74100/User-Guide-1177291-Page-149.png)