HTC PB81120 POCKET PC PHONE User Manual 1
HTC Corporation POCKET PC PHONE Users Manual 1
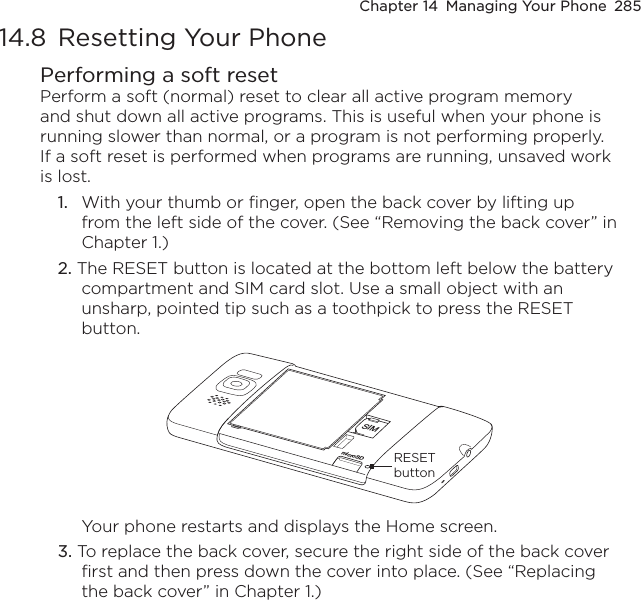
UserManual.wiki
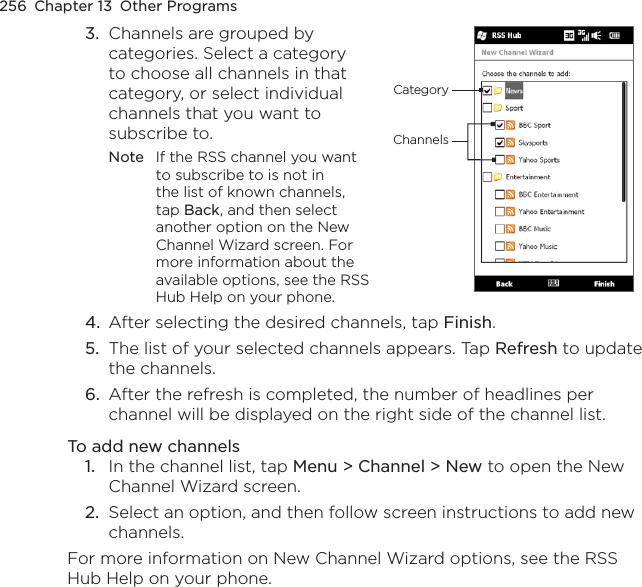
>
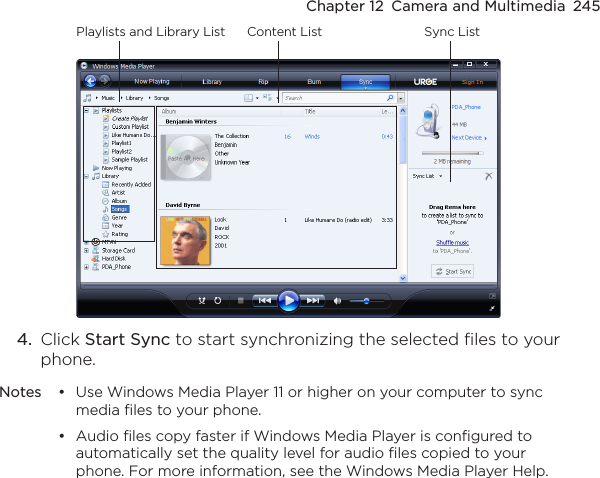
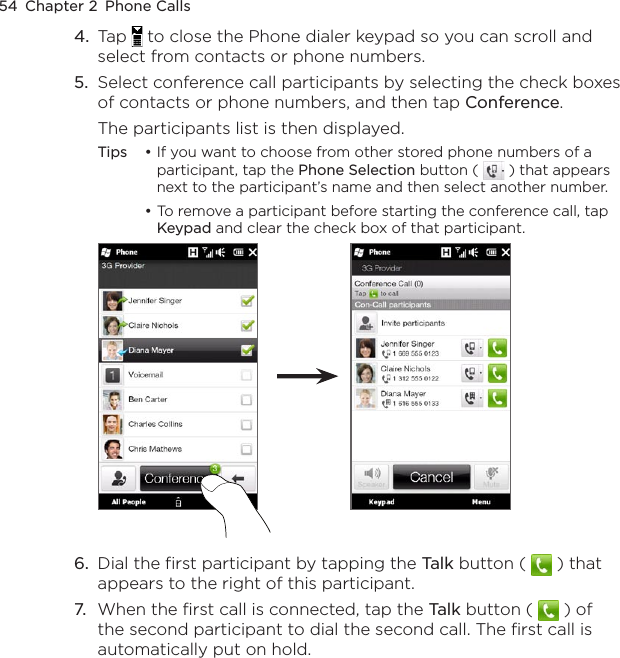
HTC
>
PB81120 User Manual
>
Users Manual 1
Contents
1.
Users Manual 1
2.
Users Manual 2
Users Manual 1
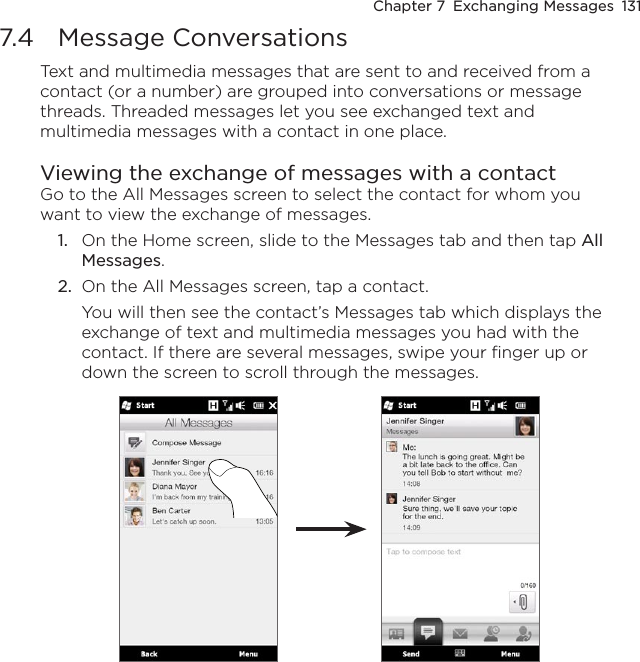
Navigation menu
Upload a User Manual
Namespaces
Wiki Guide
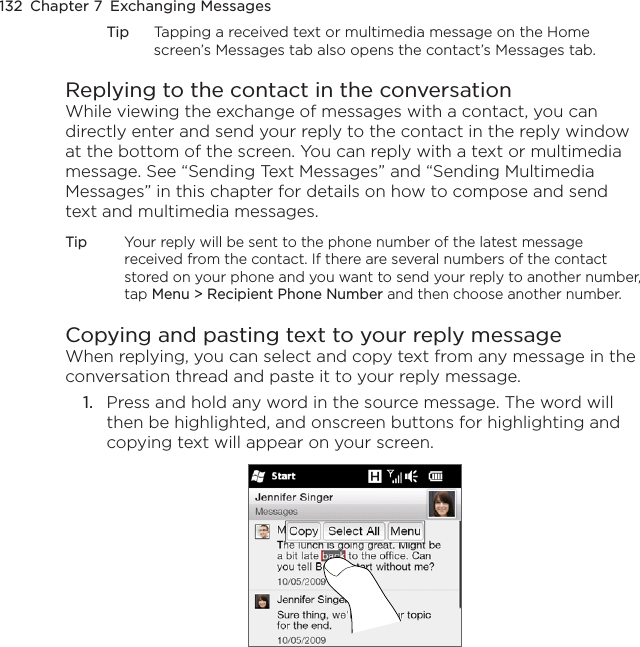
HTML
PDF
Info
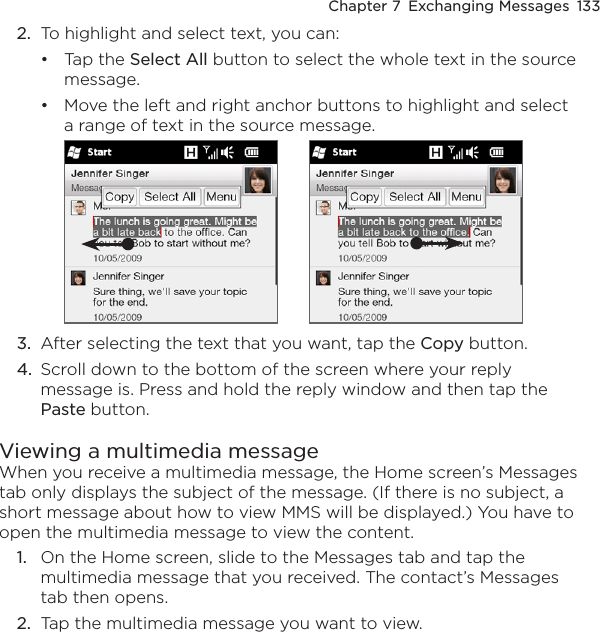
Views
User Manual
Discussion / Help
Navigation


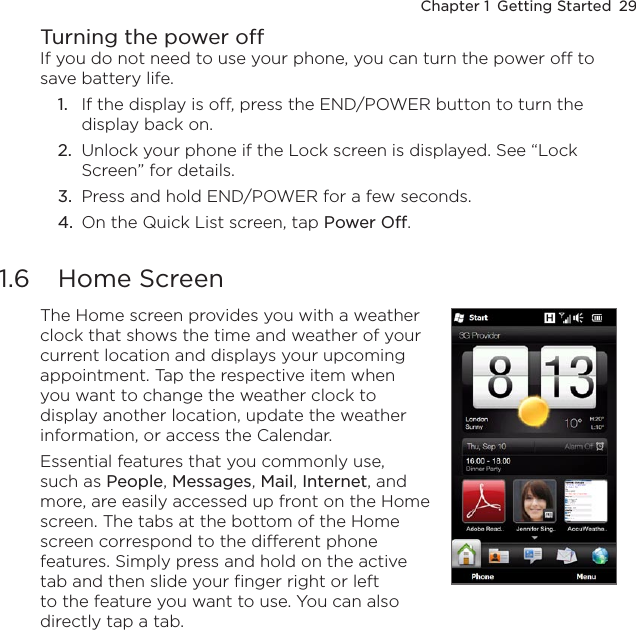
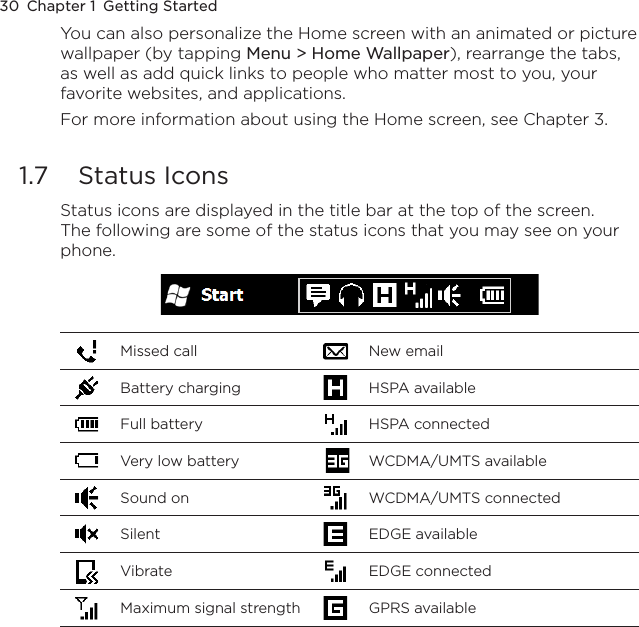
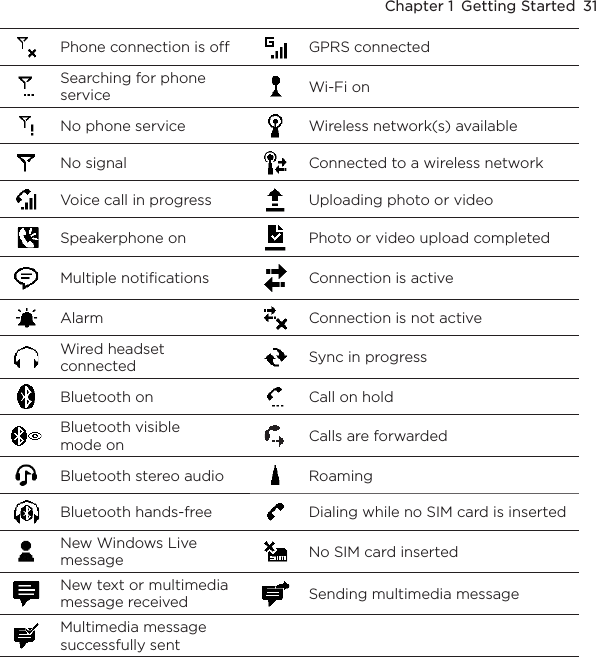


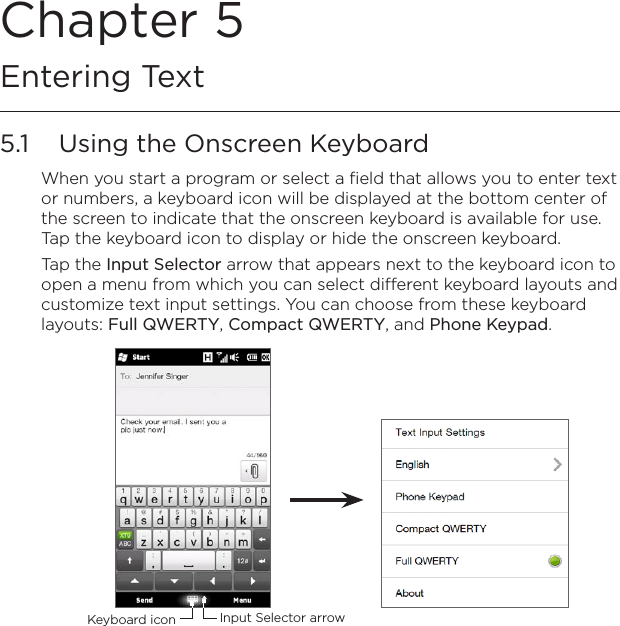

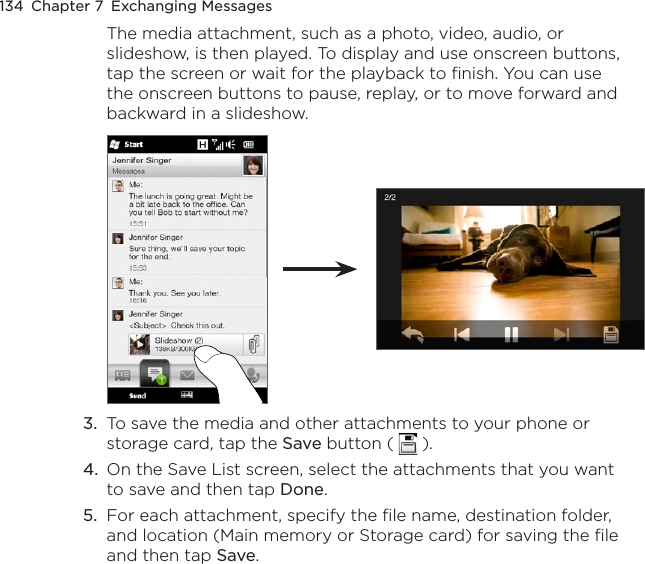


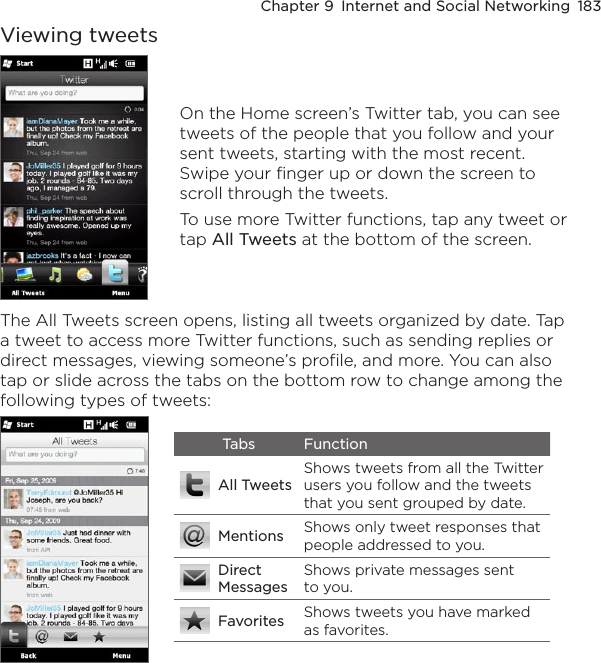


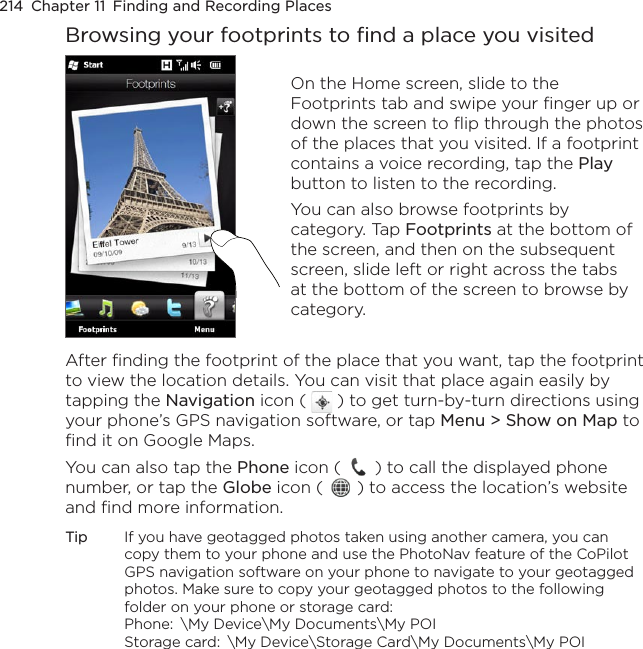

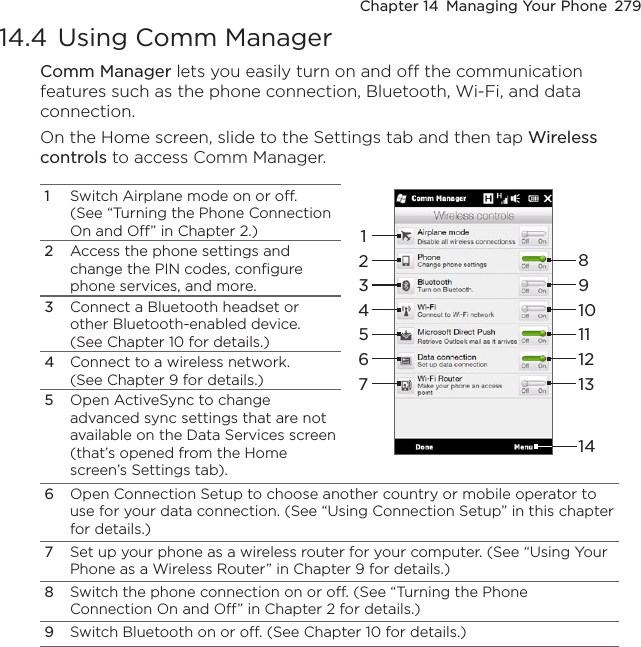
![Chapter 11 Finding and Recording Places 2172. Enter the name, address, or postal code of the place on the search field and then tap OK.3. In the search results list, tap the place to view its address, phone number, and other details. 4. On the Address tab, tap:The [phone number] to call the place of interest.The Web address (if available) to go to the website of the place of interest.Get directions to get directions to the place of interest from your current location.Street view (available by country) to display a street view of the place of interest, when available.Save as favorite to add the place of interest to your list of favorite places. To access your favorite places, on the Google Maps screen, tap Menu > Favorites.•••••](https://usermanual.wiki/HTC/PB81120.Users-Manual-1/User-Guide-1223007-Page-217.png)