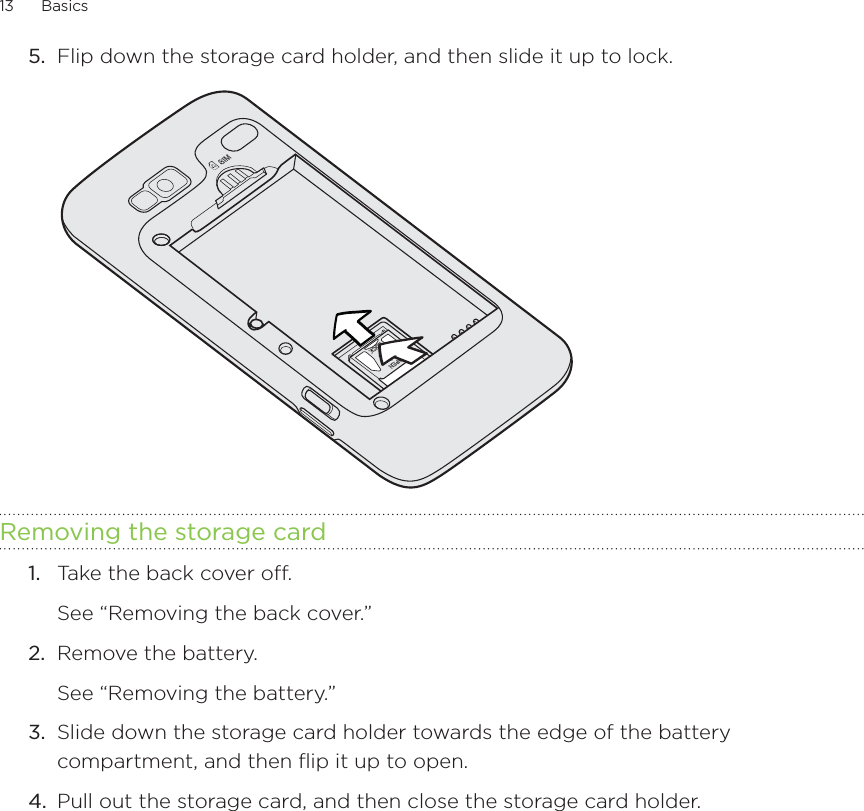
HTC PC10110 SMARTPHONE User Manual
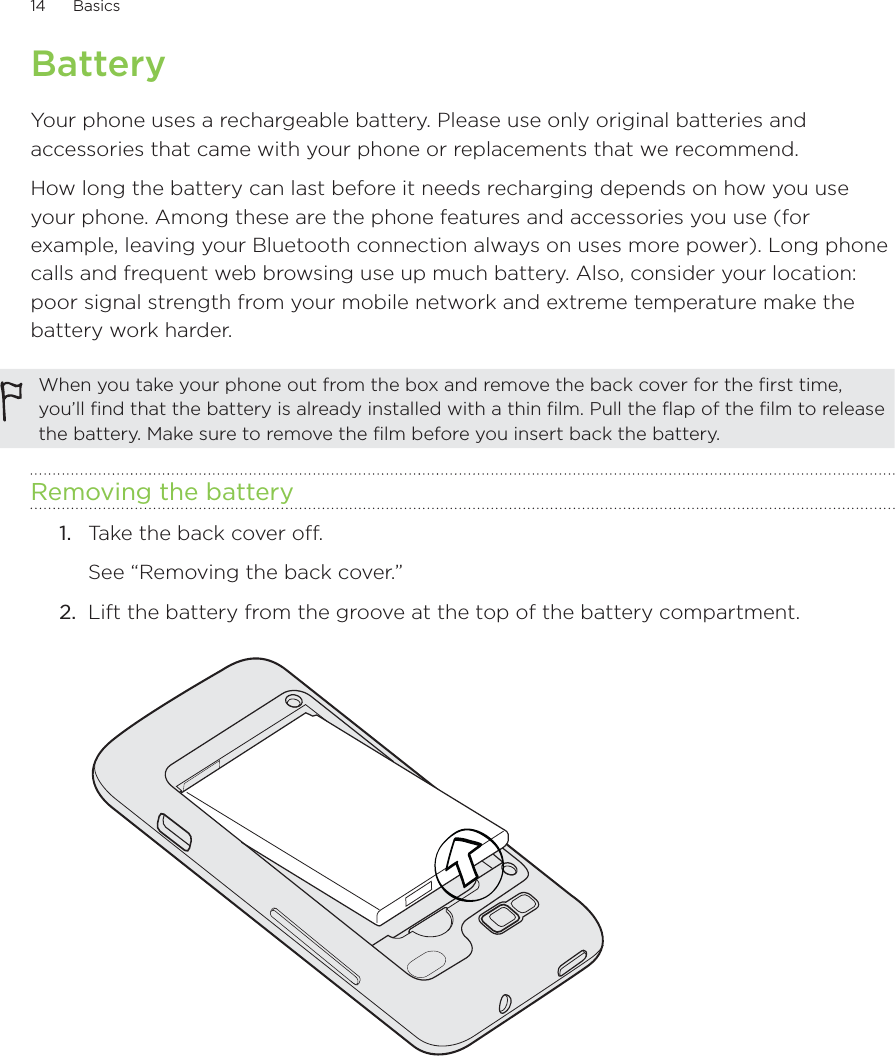
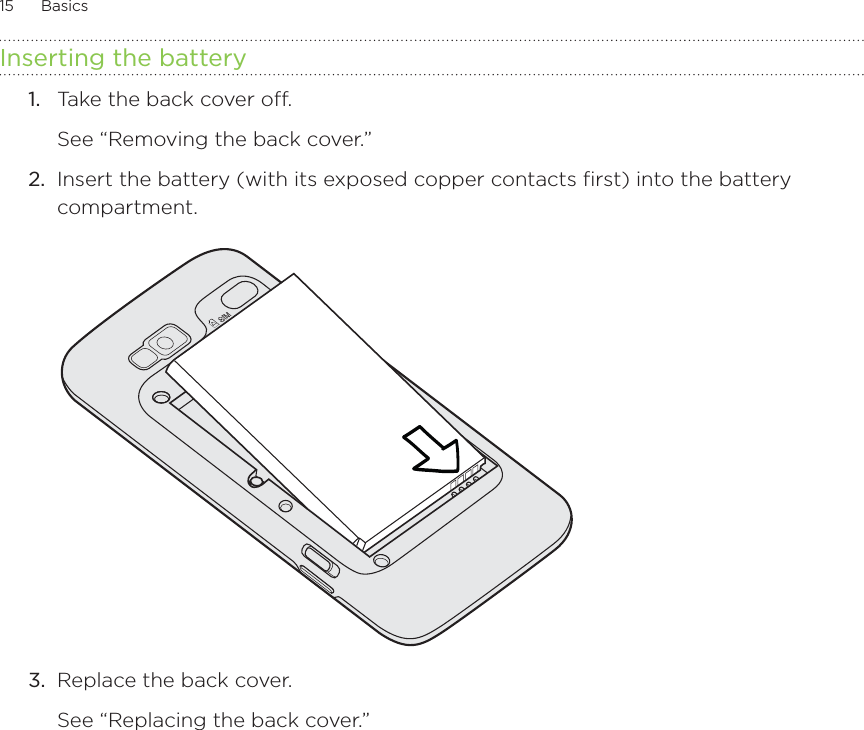
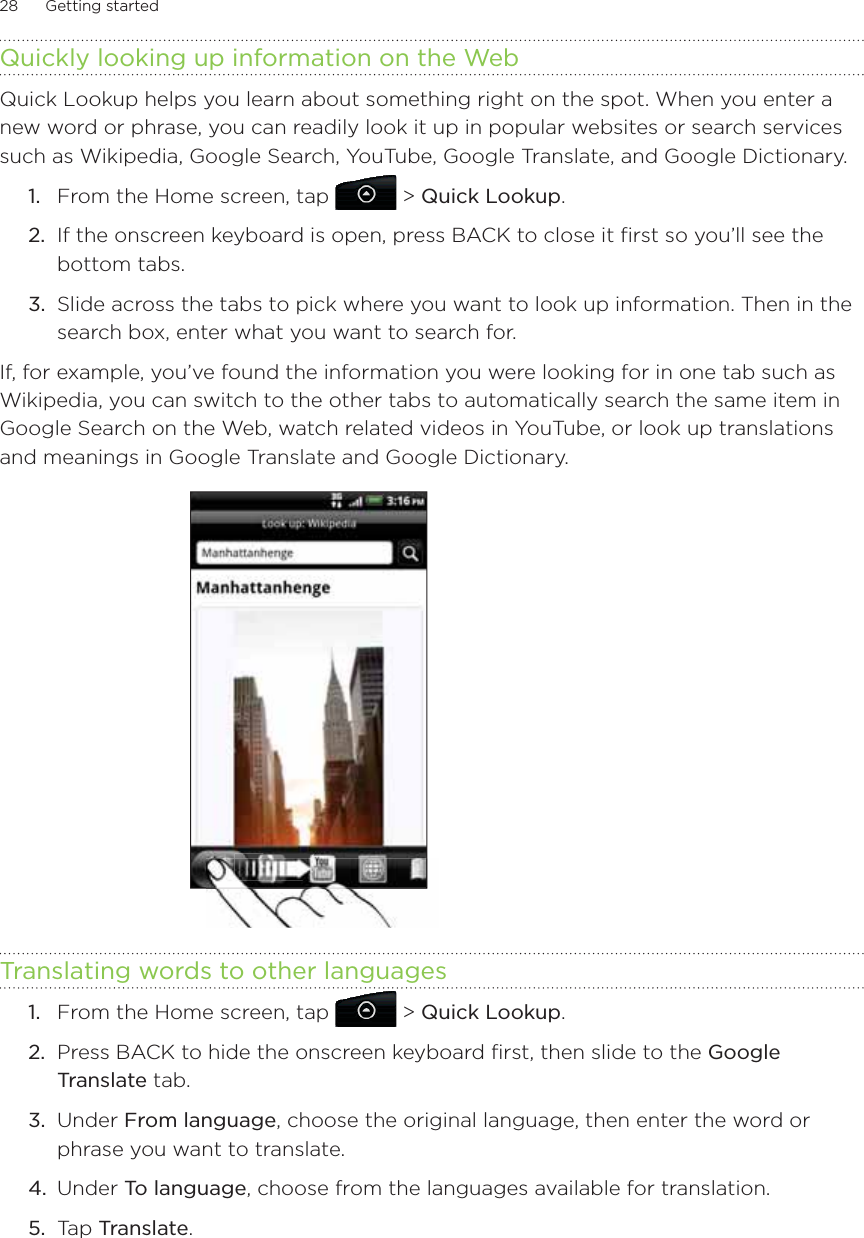
HTC Corporation SMARTPHONE
UserManual.wiki
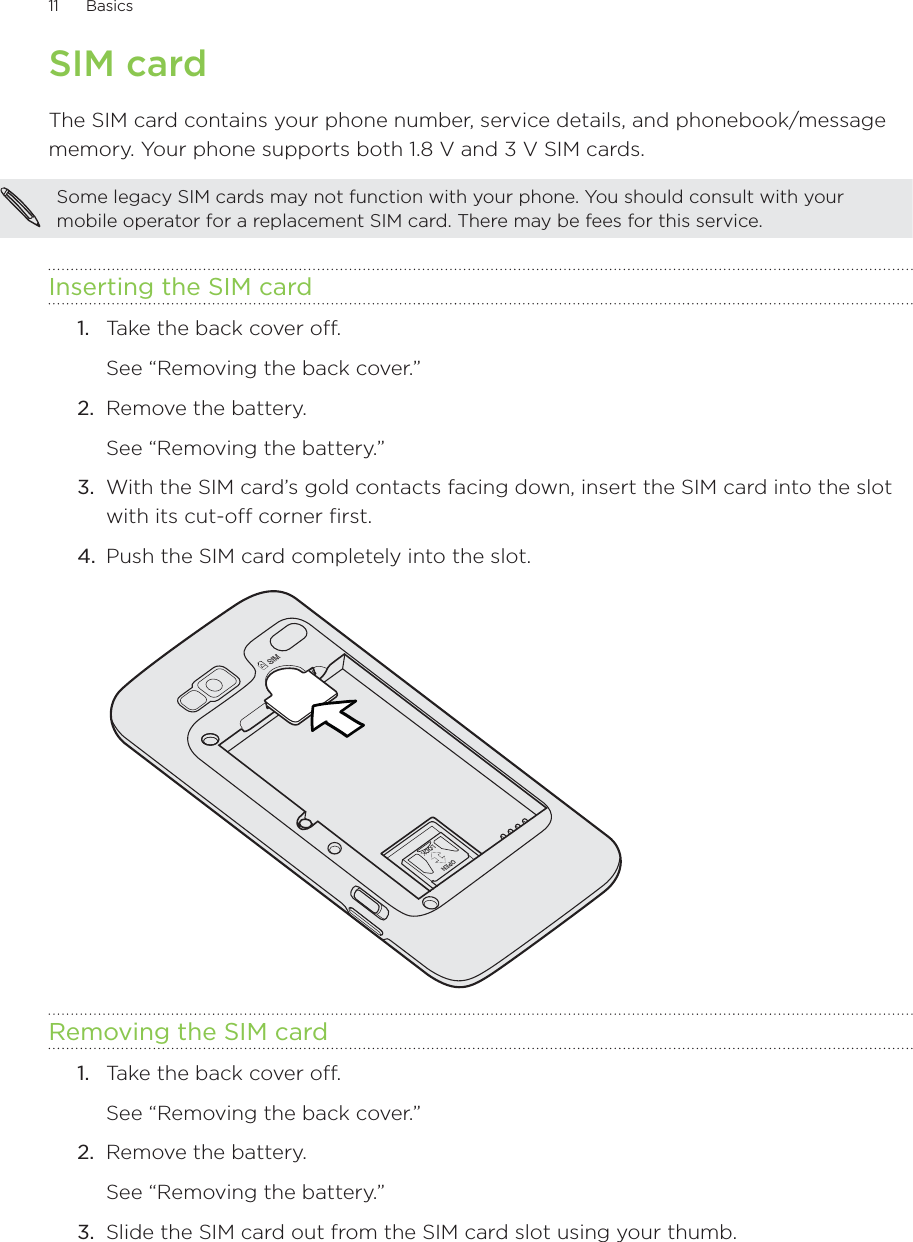
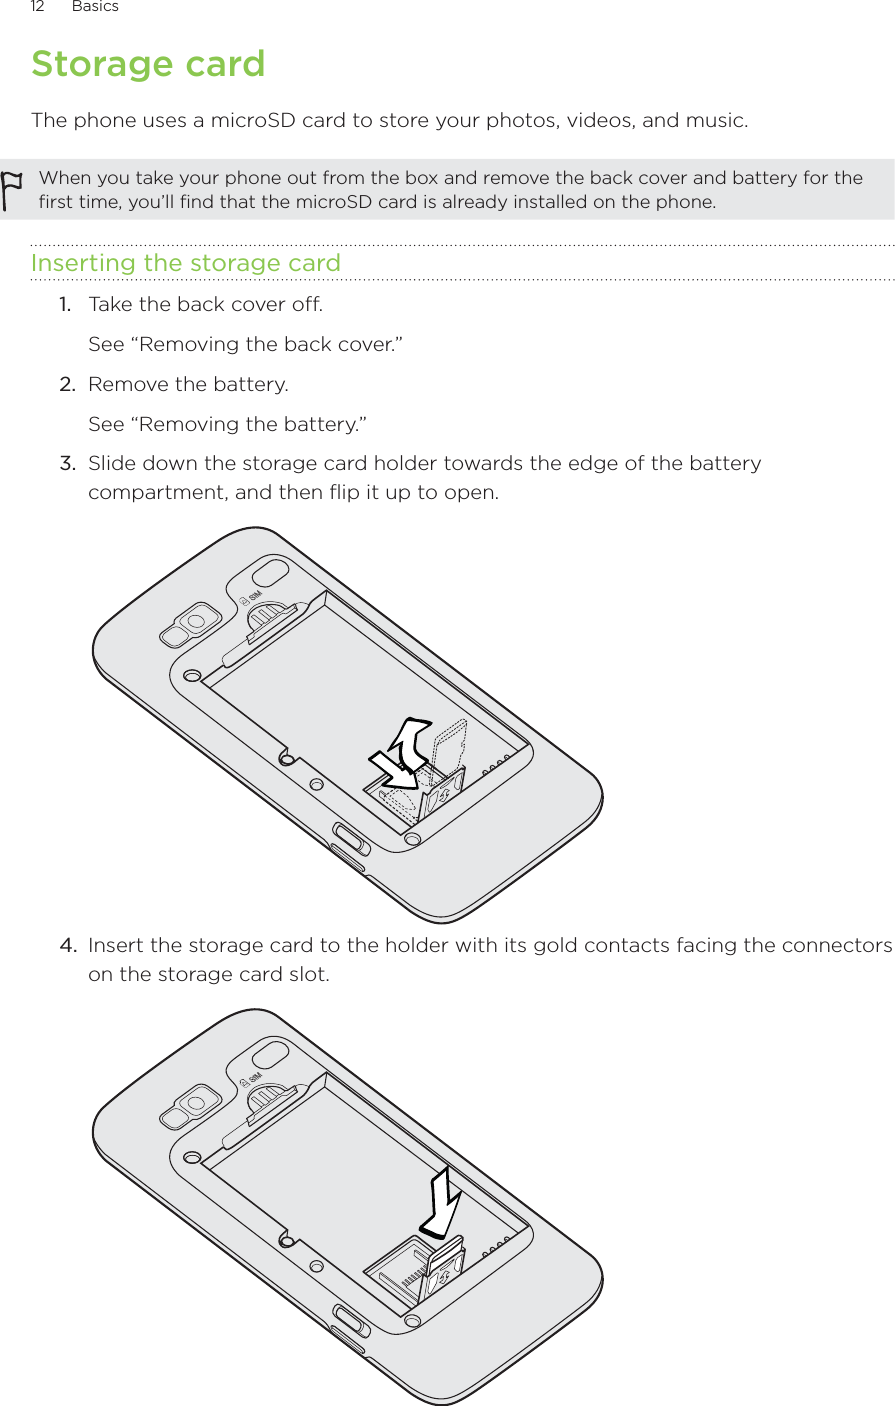
>
HTC
>
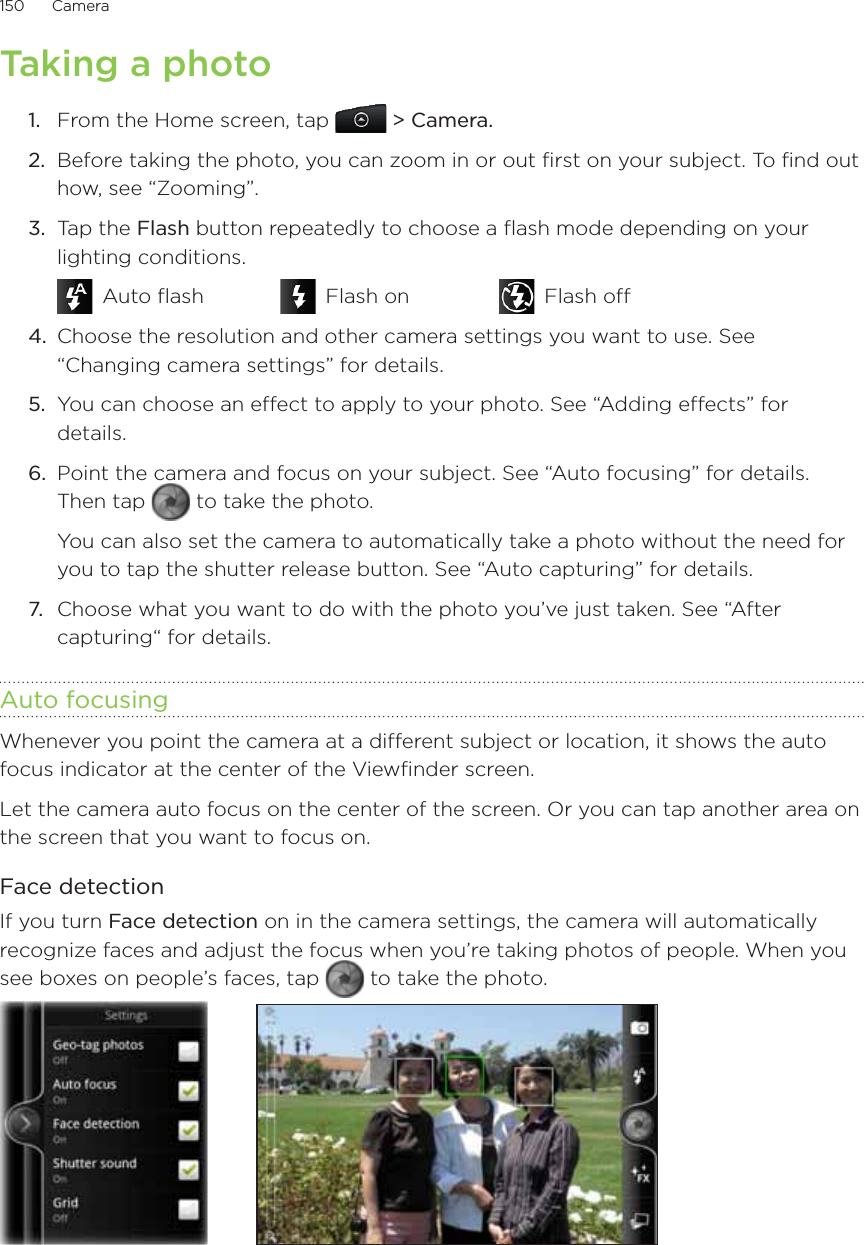
PC10110 User Manual
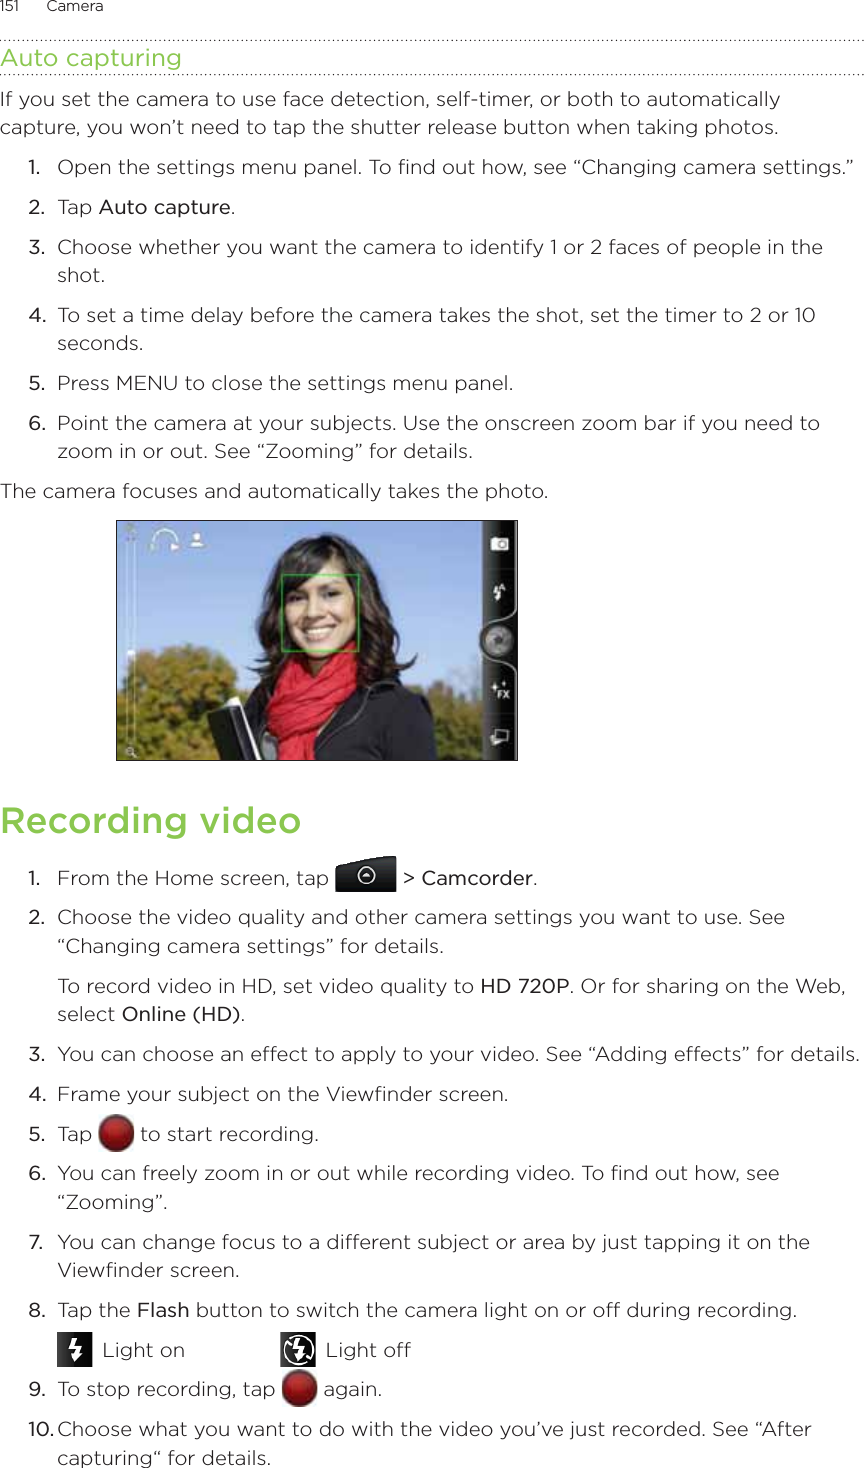
>
USERS MANUAL
Contents
1.
SAFETY REGULATORY GUIDE
2.
USERS MANUAL
3.
USER MANUAL
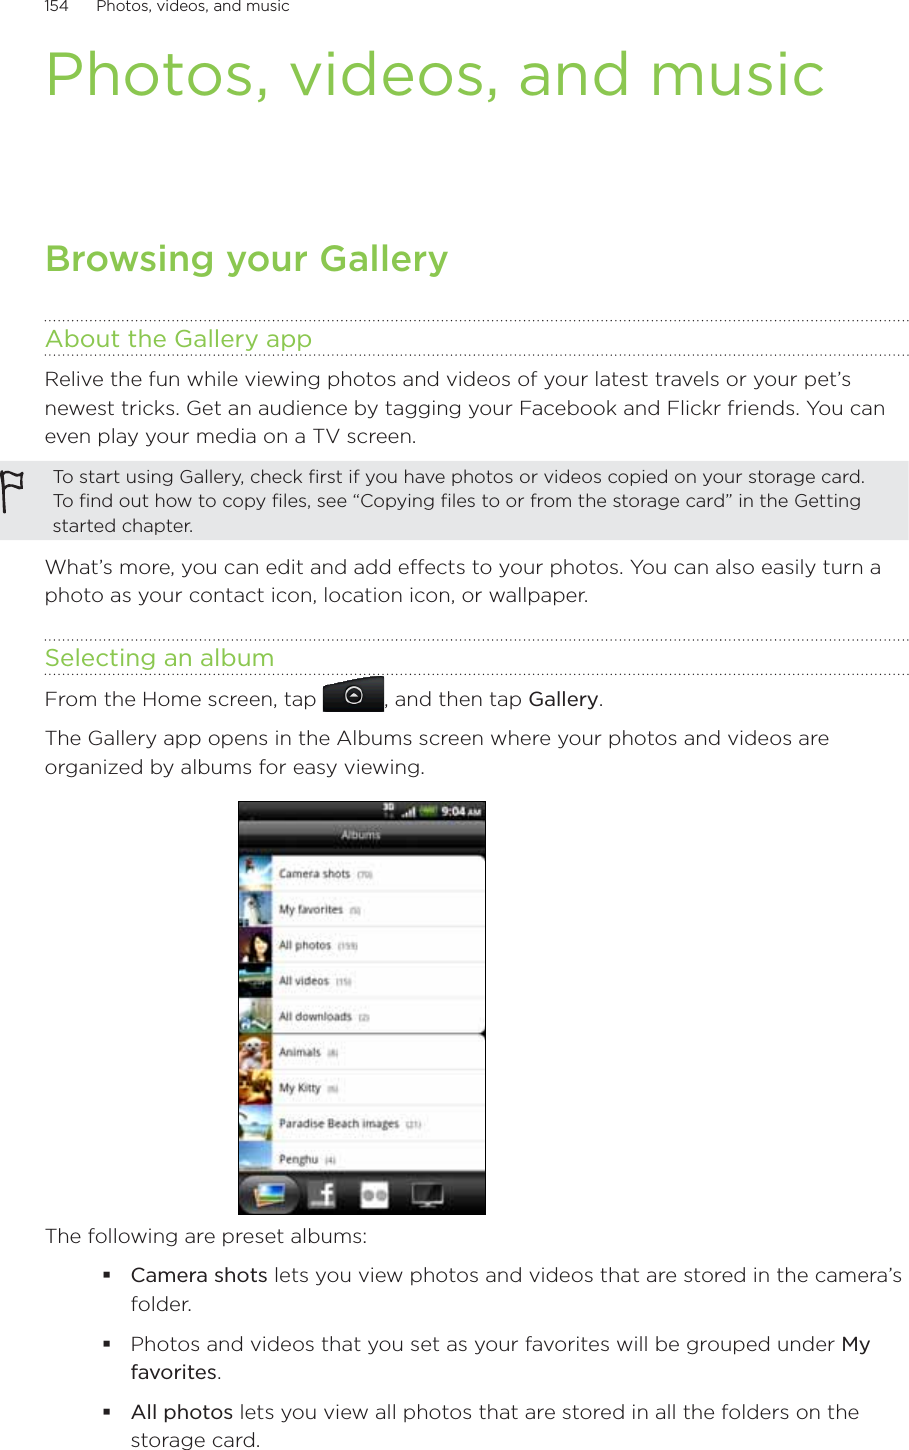
USERS MANUAL
Navigation menu
Upload a User Manual
Namespaces
Wiki Guide
HTML
PDF
Info
Views
User Manual
Discussion / Help
Navigation

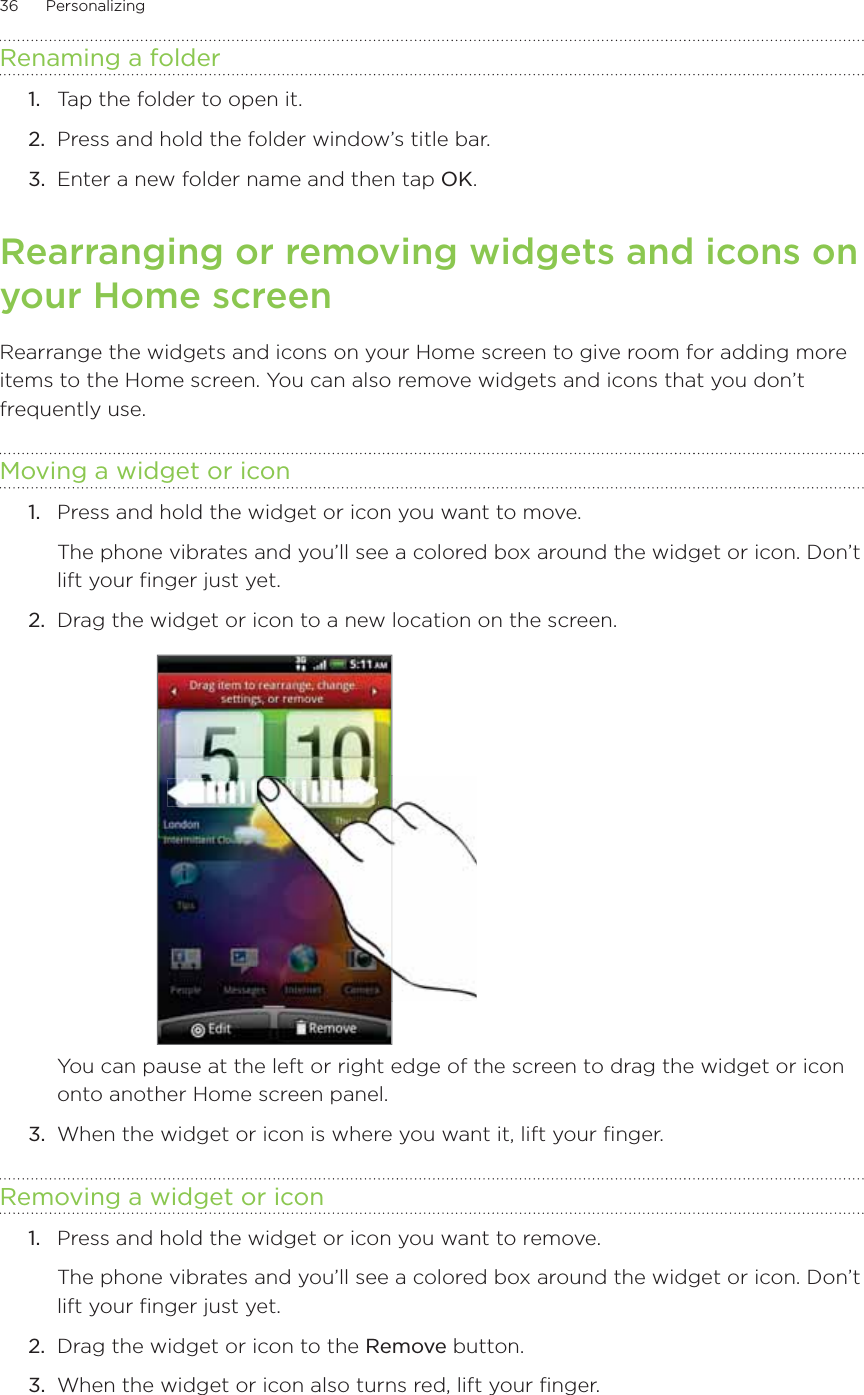


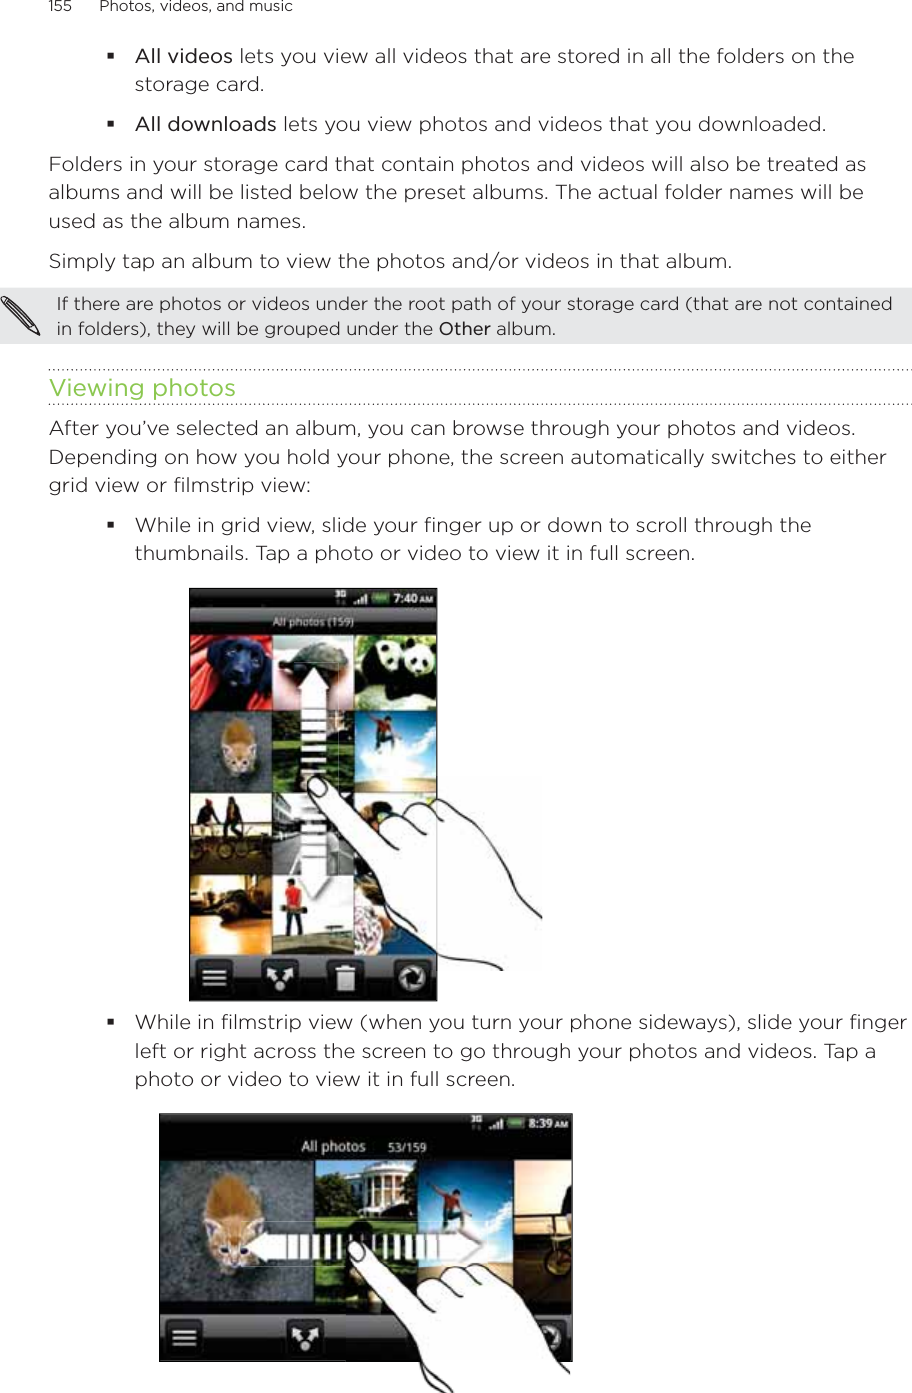
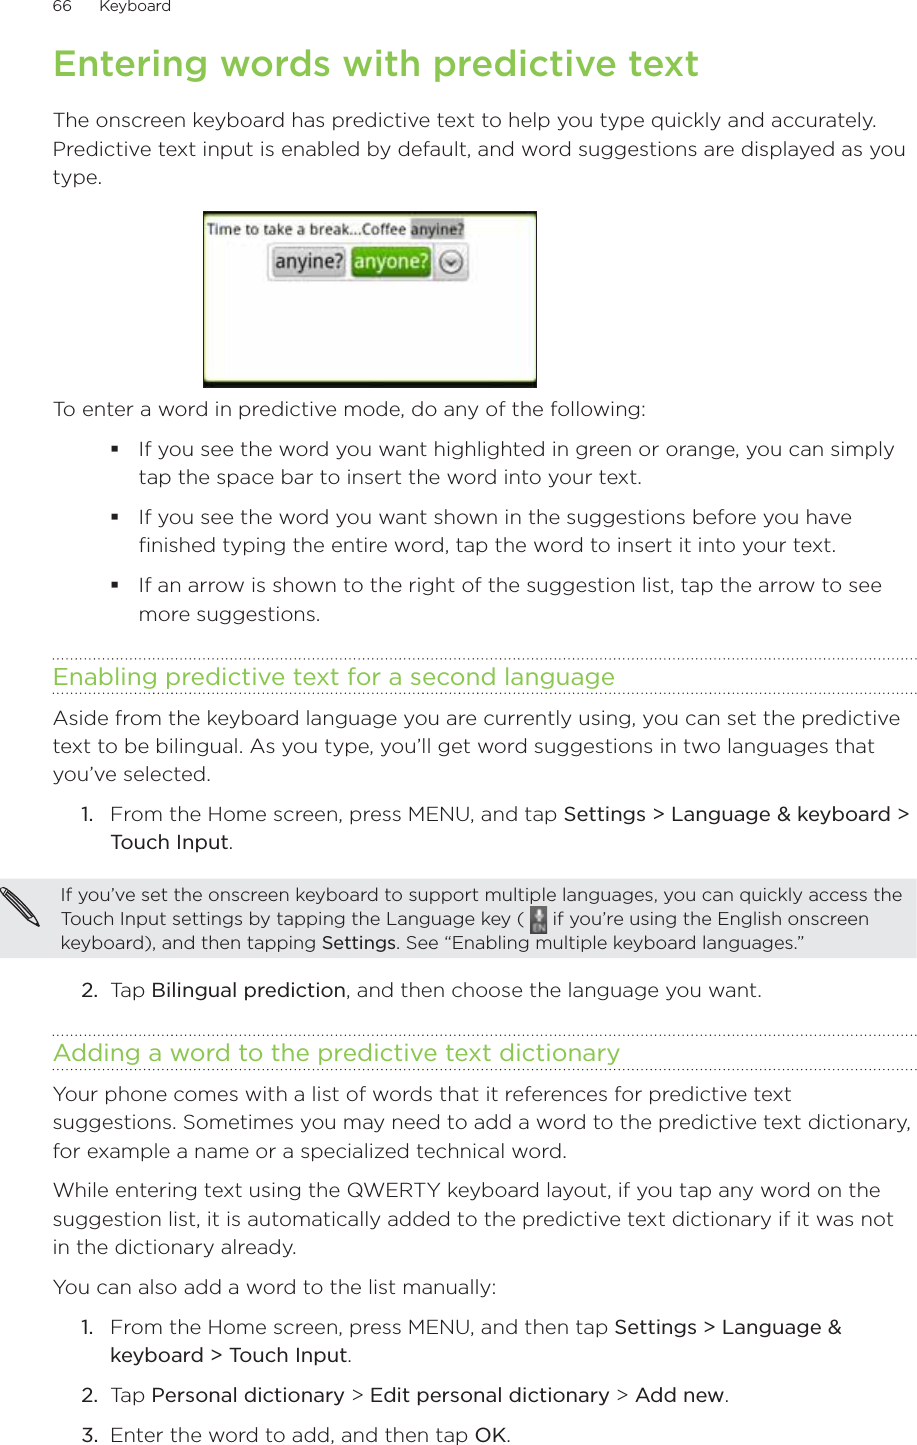
![59 People Editing a contact’s informationFrom the Home screen, tap > People.On the All tab, press and hold the contact, and then tap Edit contact.You cannot edit the contact information of a Facebook friend.3. Enter the new information for the contact.4. Tap Save.Sending contact information as a vCardShare the contact information on your phone in different ways such as a text or multimedia message, email, and Bluetooth. To find out about how to send through Bluetooth, see the Bluetooth chapter. Sending someone’s contact informationFrom the Home screen, tap > People.On the All tab, press and hold the name of the contact (not the icon or photo) whose contact information you want to send, and then tap Send contact as vCard.You cannot send contact information that’s from your Facebook account.3. Choose how you want to send it.4. Select the contact details you want to share, and then tap Send.Sending your contact informationFrom the Home screen, tap > People.On the All tab, tap [Your name] My contact card.Press MENU, then tap Send my contact info.Choose how you want to send it.5. Select the contact details you want to share, and then tap Send.1.2.1.2.1.2.3.4.](https://usermanual.wiki/HTC/PC10110.USERS-MANUAL/User-Guide-1343978-Page-59.png)


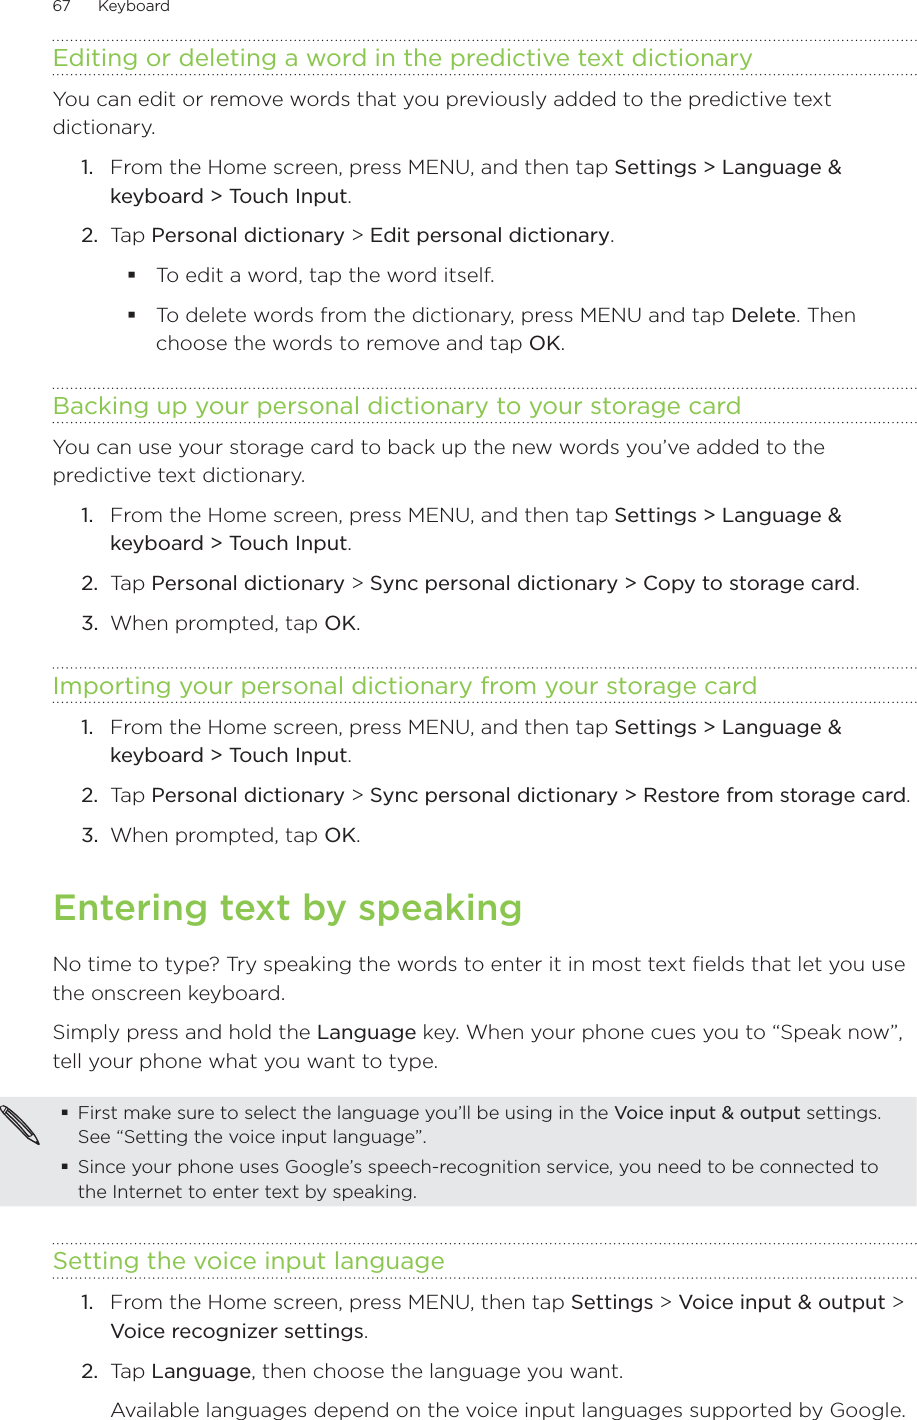
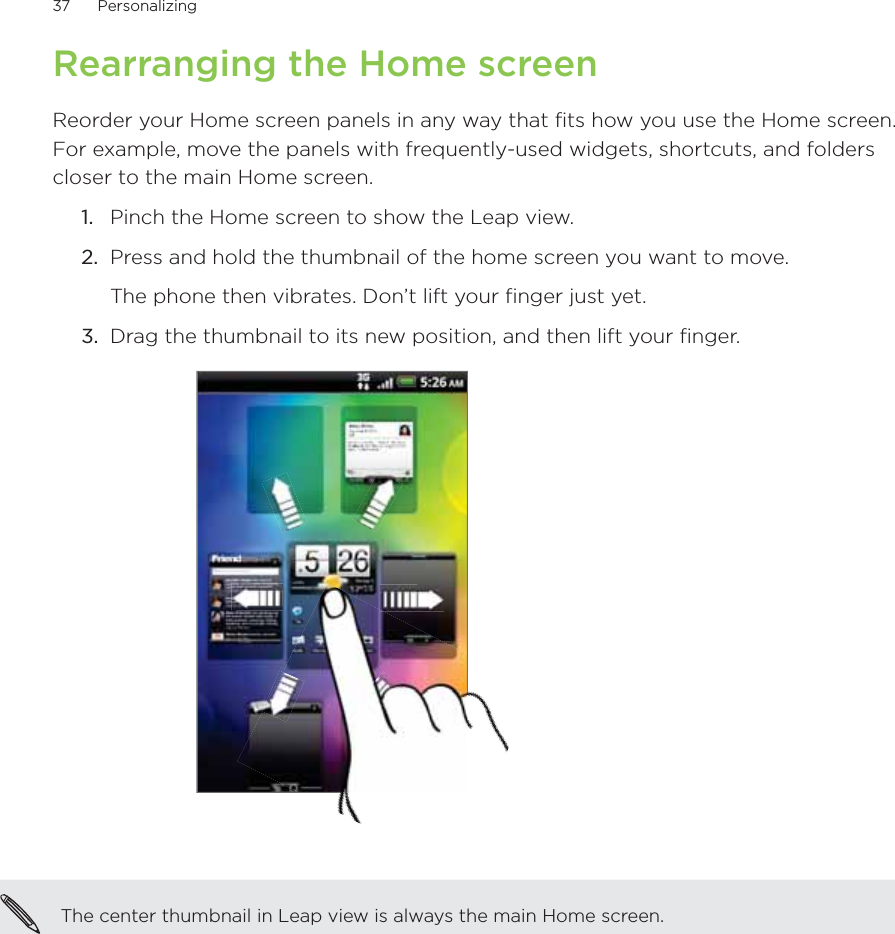
![76 Messages Viewing and saving an attachment from a multimedia messageIf you are concerned about the size of your data downloads, check the multimedia message size first before you download it.When Auto-retrieve in MMS settings is disabled, only the message header is downloaded. To download the entire message, tap the Download button at the right side of the message. To find out more about message settings, see “Setting message options.”If there’s a media attachment such as a photo or video in a received message, tap it to view the content.If the attachment is a contact (vCard), tap it to view the contact information, then tap Save to add to your contacts. Open the People app to view the contact. See the People chapter. If the attachment is an appointment or event (vCalendar), tap it and then choose the calendar where to save it. Tap Import. Open the Calendar app to view the appointment or event. See the Calendar chapter.To save the attachment to your storage card, press and hold the multimedia message, and then tap Save [attachment type] on the options menu.Viewing push messagesPush messages contain a web link. Often, the link will be to download a file that you have requested, for example a ringtone.When you receive a push message, a notification icon is displayed in the status bar. Opening and reading a new push messagePress and hold the status bar, and then slide the status bar down to open the Notifications panel.Tap the new message.Tap Visit website. Viewing all your push messagesFrom the Home screen, tap > Messages.Press MENU, and then tap Push messages.1.2.3.1.2.](https://usermanual.wiki/HTC/PC10110.USERS-MANUAL/User-Guide-1343978-Page-76.png)

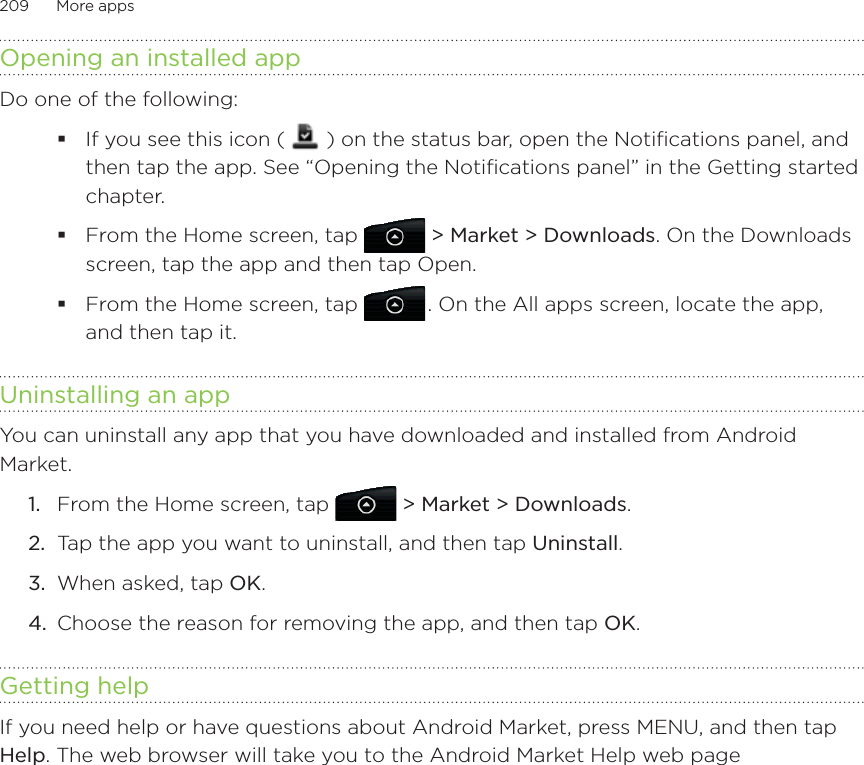
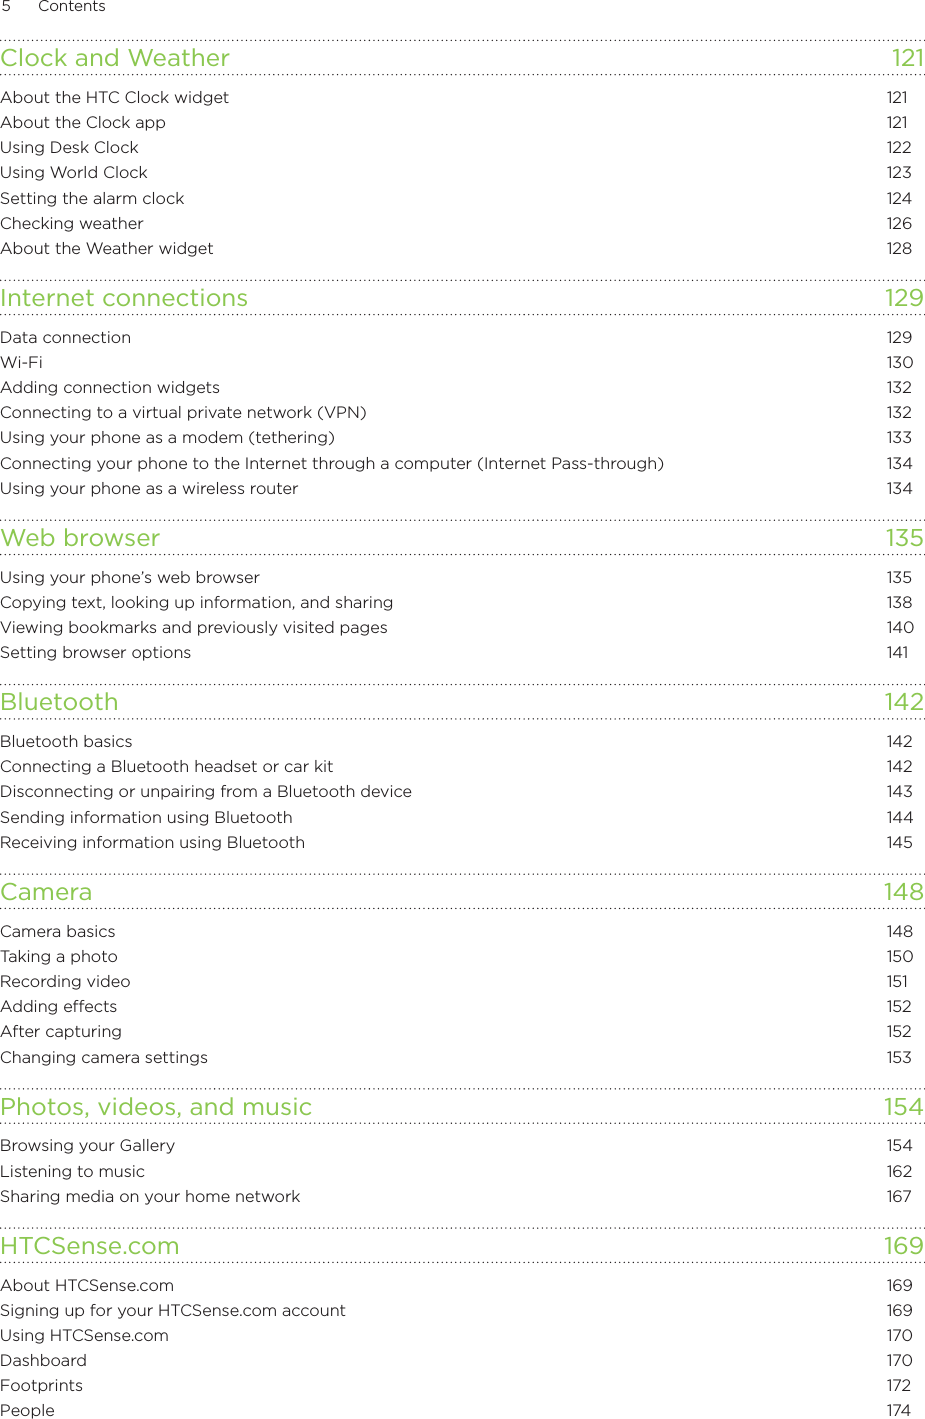
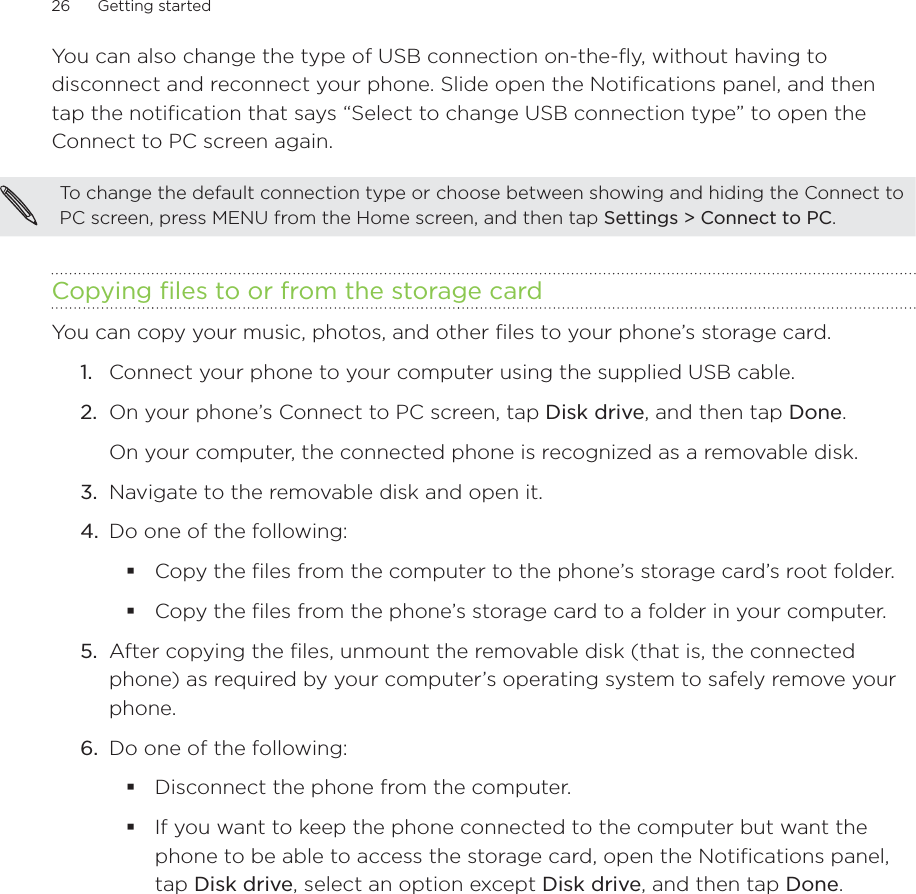
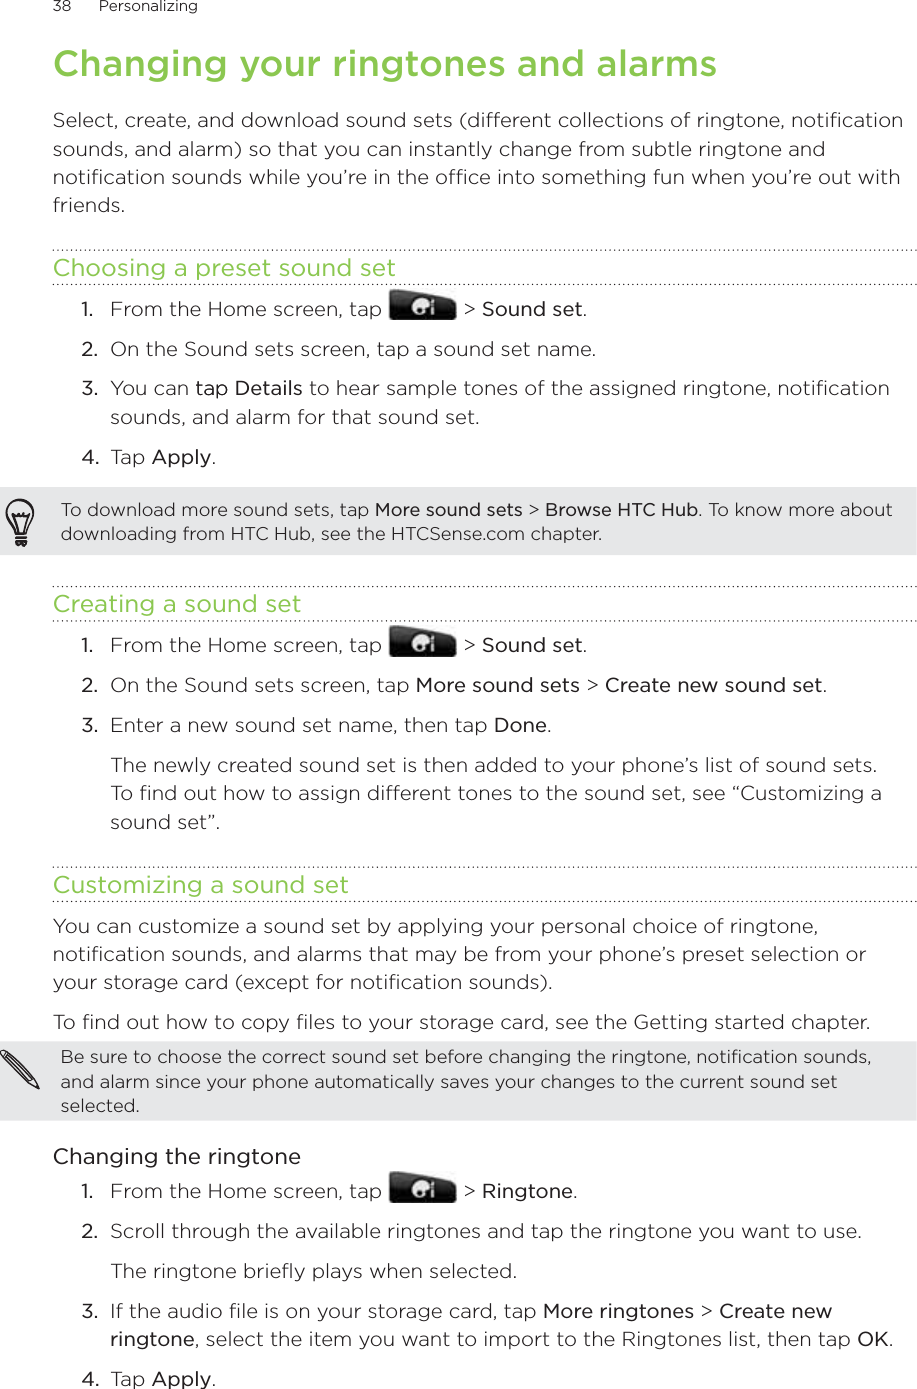
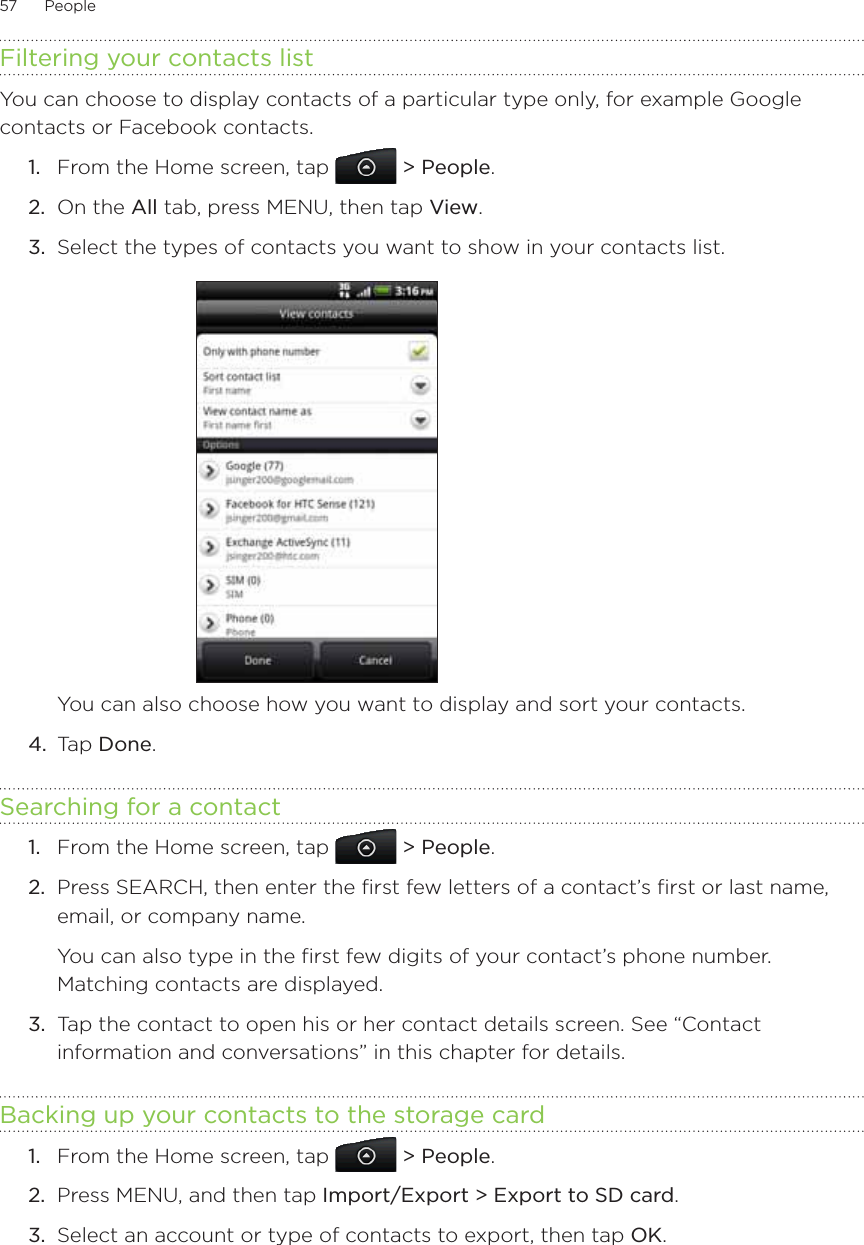
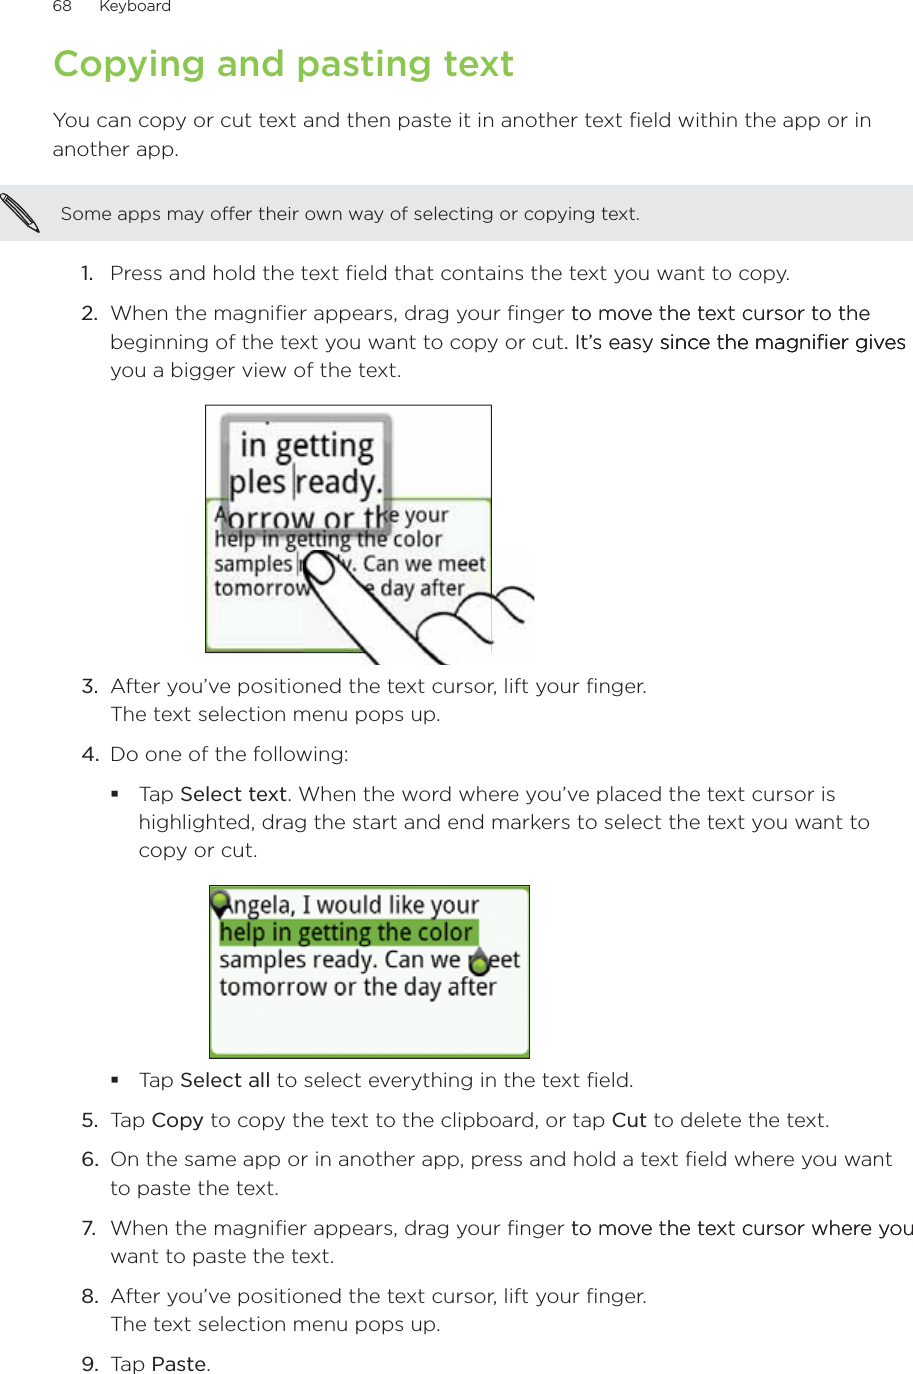
![93 Social Using PeepFrom the Home screen, tap > Peep. Peep opens in the All tweets tab.456712381 Tap in this area to compose and send a tweet.2 Tap a person’s name to check profile details and all of his or her tweets.3 If you have linked the contact in People, tap the photo or icon to open a menu where you can quickly choose how to communicate with the contact.4 Press and hold a tweet to open an options menu to reply, send a direct message, retweet, and more.5 All tweets tab. View all the tweets from people you follow and tweets that you have posted.6 Mentions tab. View all tweets that mention your username using the “@[your username]” convention.7 Direct message tab. View all private/direct messages that you have received or sent.8 Favorites tab. View tweets that you have marked as favorites.Sending a tweetOn the All tweets tab, tap the box that says “What’s happening?”.Type your tweet.Add a picture or location to your tweet.Tap to post a picture from Gallery or Camera to your default photo hosting site and add the link to the picture in your tweet.Tap to insert your location into the tweet. You can choose to add a map link, insert your location name, or insert your position coordinates.4. Tap Update.1.2.3.](https://usermanual.wiki/HTC/PC10110.USERS-MANUAL/User-Guide-1343978-Page-93.png)


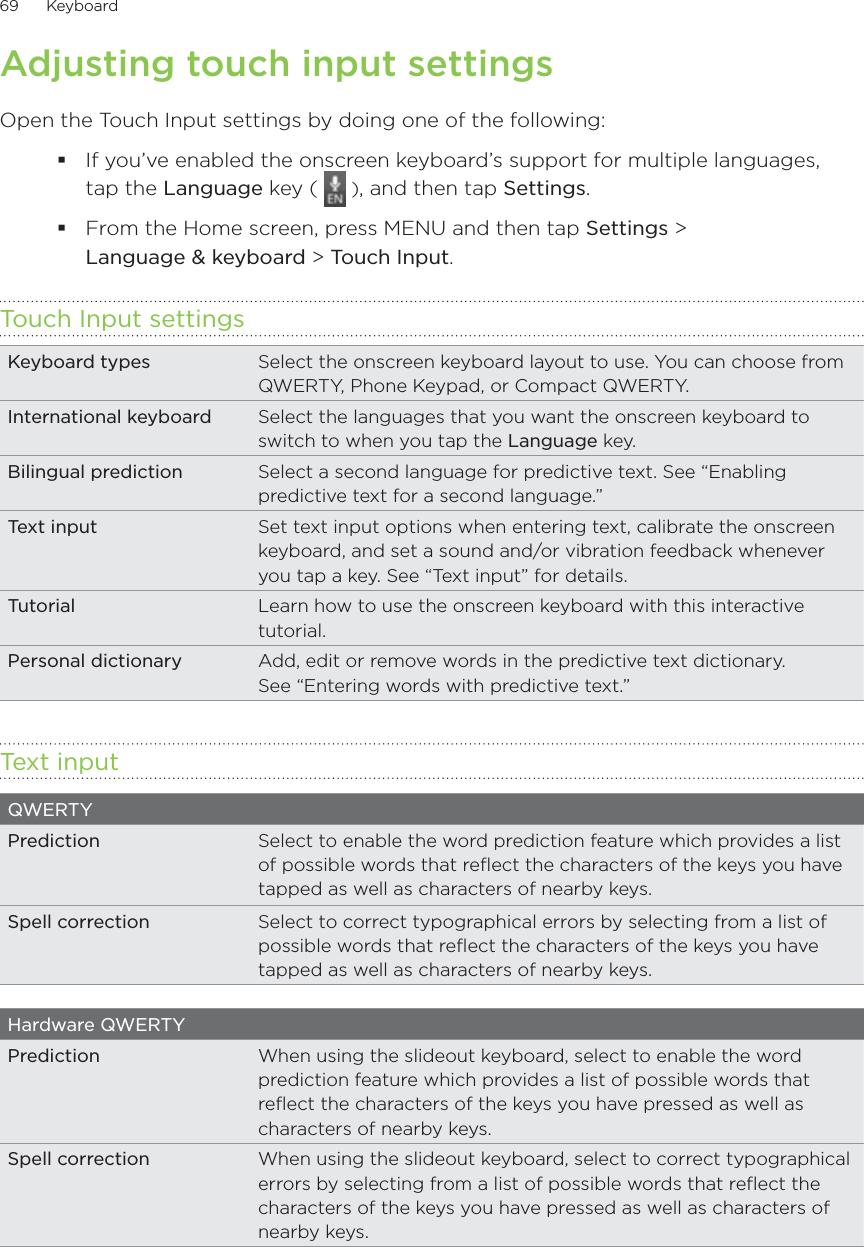
![145 Bluetooth 3. Turn on Bluetooth if you’re asked to do so. 4. If you haven’t paired with the receiving device before, tap Scan for devices.5. Tap the name of the receiving device. 6. If prompted, accept the pairing request on your phone and the receiving device. Also enter the same passcode on both your phone and the other device, or confirm the auto-generated passcode.7. On the receiving device, accept the file.Where sent information is savedWhen you send information from your phone using Bluetooth, the location where it’s saved depends on the type of information and the receiving device.If you send a calendar event or contact, it is normally added directly to the corresponding app on the receiving device. For example, if you send a calendar event to a compatible phone, the event is shown in that phone’s calendar app.If you send another file type to a Windows computer, it is normally saved in the Bluetooth Exchange folder within your personal document folders.On Windows XP, the path may be: C:\Documents and Settings\[your username]\My Documents\Bluetooth ExchangeOn Windows Vista, the path may be: C:\Users\[your username]\DocumentsOn Windows 7, the path may be: C:\Users\[your username]\My Documents\Bluetooth Exchange FolderIf you send a file to another device, the saved location may depend on the file type. For example, if you send an image file to another mobile phone, it may be saved in a folder named “Images.”Receiving information using BluetoothYour phone is capable of receiving a wide variety of file types with Bluetooth, including photos, music tracks, and documents such as PDFs.The first time you transfer information between your phone and another device, you need to enter or confirm a security passcode. After that, your phone and the other device are paired, and you will not need to exchange passcodes to transfer information in the future. To receive files using Bluetooth, you need to have a microSD card on your phone.From the Home screen, press MENU, and then tap Settings > Wireless & networks > Bluetooth settings. If the Bluetooth check box is not selected, select it to turn Bluetooth on. Select the Discoverable check box. 1.2.3.](https://usermanual.wiki/HTC/PC10110.USERS-MANUAL/User-Guide-1343978-Page-145.png)