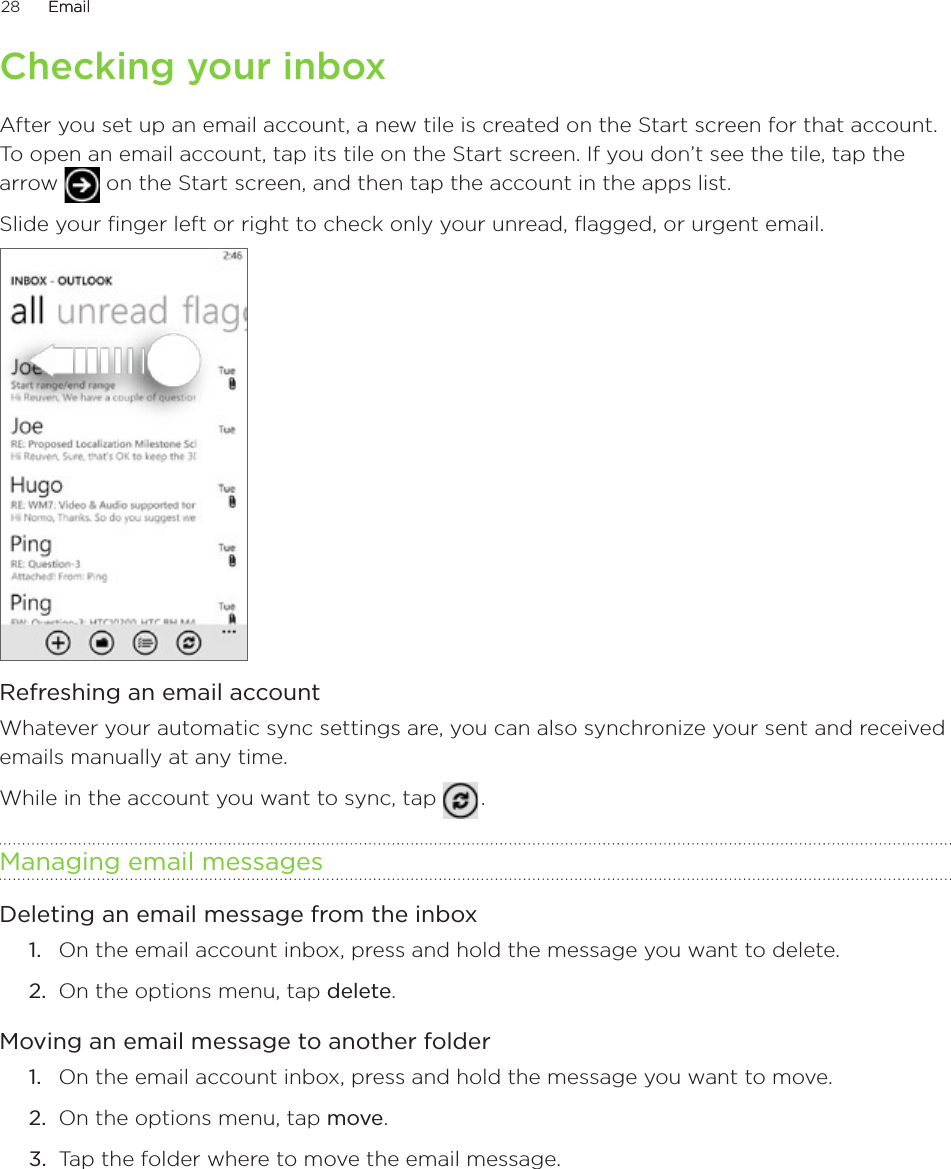
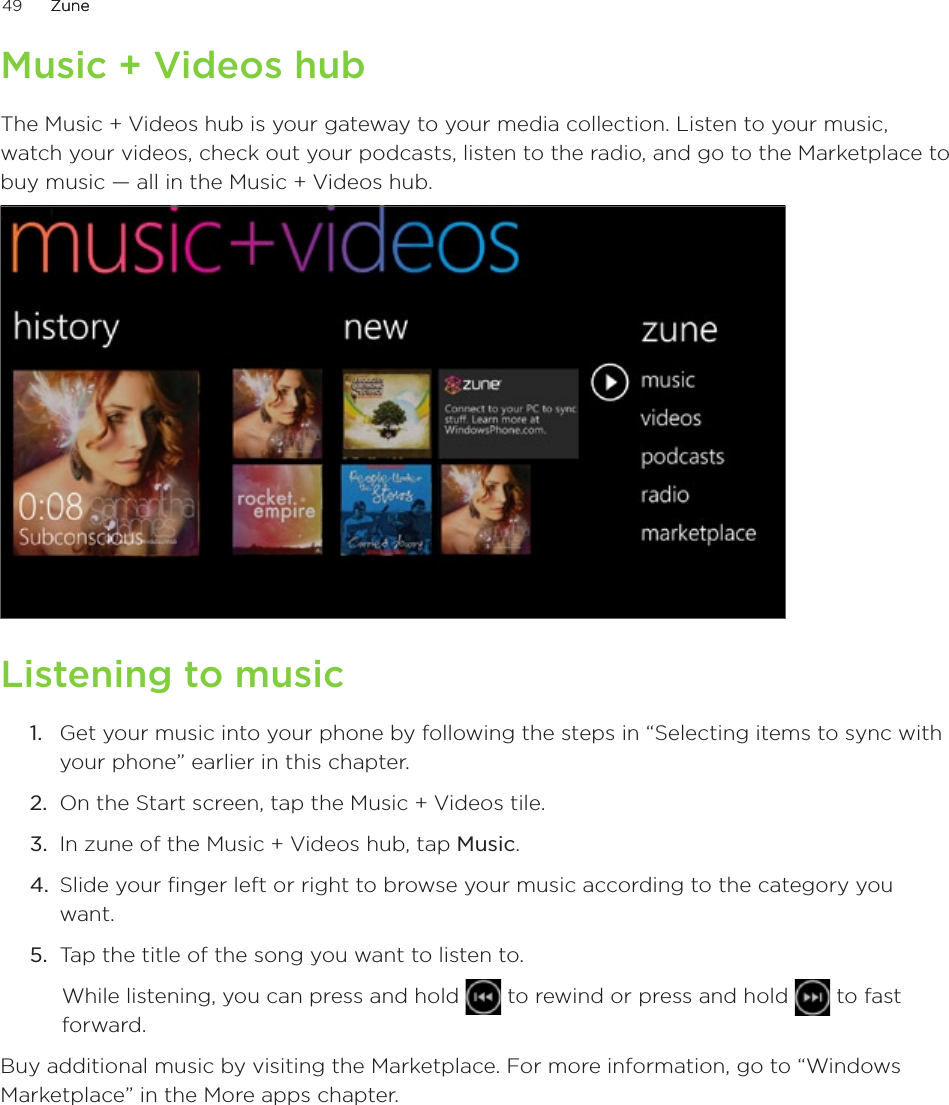
HTC PC93100 Windows Phone User Manual 1 of 2

HTC Corporation Windows Phone 1 of 2

Contents

User Manual 1 of 2

User guide
2            Icons used in this guideIn this user guide, we use the following symbols to indicate useful and important information:This is a note. It might give extra information that’s only applicable in certain situations. Or explain a specific feature in a bit more detail. This is important info. Stuff you really need to know to accomplish a task or get a feature to work properly.This is a tip. It might provide an alternative way to do something or tell you about a special option you might find useful.  This is a safety precaution. Read these carefully to avoid any potential problems when using your phone. Want more info?For other helpful resources, go to www.htc.com/support. Please also read the Safety and regulatory guide that’s included in the box.For additional information about your phone, go to windowsphone.com. Note: Certain Microsoft services/features may not be available in your country or region.
3      Contents      ContentsGetting startedSetting up your phone for the first time  6Start screen  6Accessing apps and settings  7Hubs  7Sleep mode  7Unlocking the screen  8Changing your lock screen wallpaper  8Status icons  9Adjusting the volume  9Searching  10Interacting with your phone by speaking  10Setting up an account  10Changing the ringtone  11Changing the theme  11Phone callsMaking calls  12Receiving calls  13Using in-call options  13Using call history  15Call services  16Turning Flight mode (Airplane mode) on or off   16PeopleAbout the People hub  17Viewing your contacts list and feeds  17Adding a new contact  18Merging contact information  19Editing, searching, and deleting  19Your Me tile  20KeyboardUsing the onscreen keyboard  22Entering words with predictive text  23Changing keyboard settings  23MessagingAbout Messaging  24Sending a text message  24Sending a picture message  25Viewing and replying to a message  25Managing message conversations  26
4      Contents      EmailAdding a POP3/IMAP email account  27Adding a Microsoft Exchange Server account  27Checking your inbox  28Sending an email message  29CalendarAbout Calendar  31Creating a calendar appointment  31Changing calendar views  32Viewing, editing or deleting an appointment  33Viewing, dismissing, or snoozing appointment reminders  33Displaying and synchronizing calendars  34Getting connectedData connection  35Wi-Fi  36Using your phone’s web browser  37Bluetooth  40CameraCamera basics  42Taking a photo  43Capturing a video  43After capturing  44Camera settings  44PicturesAbout the Pictures hub  45Viewing photos and videos  46Touching up your photos  46Sending your photos  46Sharing your photos on the Web  47ZuneSynchronizing your computer and phone  48Music + Videos hub  49Listening to music  49Watching videos  50Listening to or watching your podcasts  50Listening to the radio  50Maps and locationTurning on location services  51Bing Maps  51HTC HubAbout the HTC Hub  55
5      Contents      More appsMicrosoft Office Mobile 2010  60Windows Marketplace  61Games  61SecurityProtecting your phone with a password  62Protecting your phone through the Web  62SettingsSettings on your phone  64Changing display settings  65Changing sound settings  65Checking information about your phone  66Changing the phone language  66Update and resetUpdating the phone software  67Restarting or factory resetting your phone  67Trademarks and copyright  69Index  70
6      Getting startedGetting started      Getting startedSetting up your phone for the first timeWhen you switch on your phone for the first time, you’ll be asked to set some options such as your time zone and your Window Live ID. Just follow the onscreen instructions and you’ll be up and running with your phone in no time. Start screenUp front on the Start screen, you get to see at a glance Windows® Phone live tiles that continuously update and show what’s most personal to you. You’ll see things like your photo album, XBOX LIVE, how many new messages and email you have, and more.Simply swipe your finger up or down to scroll through the tiles on the Start screen.Rearranging the tiles on the Start screenPress and hold the tile you want to move until it floats.Drag the tile to the position where you want to place it. Pause at the top or bottom edge of the screen to drag the tile to the extended Start screen.When the tile is where you want it, tap the tile to dock it. Pinning items to the Start screenYou can pin just about anything you want to the Start screen: apps, pictures, songs, shortcuts, and even contacts. For example, when you pin a contact to the Start screen, you’ll get all of that person’s updates—feeds, email, text messages, and call notifications—right from that tile.1.2.3.
7      Getting startedGetting started      To pin something, let’s say a contact, to the Start screen, press and hold it until a menu appears, and then tap pin to start.Unpinning a tileOn the Start screen, press and hold the tile you want to remove, and then tap   .Accessing apps and settingsEasy. On the Start screen, just tap   or slide your finger left.HubsSimplify your everyday tasks with hubs. Instead of going in and out of various apps, hubs simplify things by tying together related experiences. For example, in the People Hub, not only can you see all your contacts but you can also check status updates from your Facebook friends. Check out the other cool hubs on your phone such as Office, Pictures, Music + Videos, and more.Sleep modeSleep mode saves battery power by putting your phone into a low power state while the display is off. It also stops accidental button presses when the phone’s in your bag or pocket. You’ll still receive messages and calls though.Switching to Sleep modePress the POWER button to turn off the display and switch your phone to Sleep mode. Your phone also automatically goes into Sleep mode when it’s idle for a while.
8      Getting startedGetting started      Waking up from Sleep modeYour phone automatically wakes up when you have an incoming call. To wake it up manually, press the POWER button. You’ll need to unlock the screen.Unlocking the screenWhen you see the lock screen, press the bottom of the screen and then slide your finger up to unlock the screen or answer an incoming call.     If you’ve set up a phone password, you’ll need to enter the it to unlock the screen.  To find out how to enable the phone password, see “Protecting your phone with a password” in the Security chapter.Changing your lock screen wallpaperBrowse the collection of wallpapers available on your phone or choose from photos that you have taken with the camera.On the Start screen, tap   .Tap Settings > lock & wallpaper > change wallpaper.Choose whether to select from preset wallpapers, camera photos, or a photo album.Select the photo you want to use as your lock screen wallpaper.If the photo you selected is bigger than the allowable wallpaper size, crop the photo first. Drag the photo and position the part that you want to be your wallpaper inside the crop box, and then tap   . 1.2.3.4.5.
9      Getting startedGetting started      Status iconsYou can tell a lot about your phone by checking the icons in its status bar.Simply tap the top of the screen to show the status icons. The status icons disappear after a few seconds.Here’s some of the icons you might see and what they mean:Signal strength 3G connectionBattery is charging GPRS connectionBattery is full EDGE connectionBattery state unknown HSPA connectionAirplane mode is turned on Wi-Fi enabled but not connected to a Wi-Fi networkRoaming Connected to a Wi-Fi networkCalls are being forwarded based on the network settings.Connected to a Bluetooth headsetPhone set to silent Phone set to vibrate only displays connection status, not signal strength. To find out how to view Wi-Fi network signal strength, see “Wi-Fi” in the Getting connected chapter. Adjusting the volumePress the VOLUME UP or VOLUME DOWN button to adjust the volume to your desired level. The volume bar appears on top of the screen and shows the volume level.On the volume bar, tap the icon on the right to quickly switch to ring or vibrate.  If you want to have silent as an option, you need to turn off vibrate on your phone.  See “Changing sound settings” in the Settings chapter to find out how to turn off vibrate.
10      Getting startedGetting started      SearchingSearching the WebOn the Start screen, press SEARCH. The Bing™ search screen opens.Tap the search box, enter what you want to search for, and then tap   on the keyboard. You’ll then see a list of matched items onscreen.Tap the category below the search box (for example, local) or swipe left or right on the screen to check the other results for the other categories.Use your voice to do a search by tapping the microphone icon inside the search box. Searching within an appIn some apps like People, Maps, and Marketplace, you can do a search within those apps. Simply open the app, and then press SEARCH. Interacting with your phone by speakingFrom anywhere on your phone, press and hold START to bring up Tell Me, which lets you use your voice to call people, start apps, and search the web.To make a phone call, you’d say “Call Jennifer Singer, mobile.”To start an app, like Calendar, say “Open Calendar.”To search for something, just tell the phone what you want, like “Find pizza parlors,” and Bing will look for an answer. If you’re not sure, say “What can I say?”Setting up an accountSet up your Windows Live, Microsoft Outlook, Facebook, and other accounts so you can sync information and receive updates from these accounts on your phone. On the Start screen, tap   .Tap Settings > email & accounts.Tap add an account, and then tap the type of account you want to set up.Enter your email address and password, and then tap sign in.1.2.3.1.2.3.4.
11      Getting startedGetting started      Changing the ringtoneChoose from the available selections of ringtones on your phone.On the Start screen, tap   .Tap Settings > ringtones & sounds.Tap the Ringtone box.Listen to a ringtone by tapping the play icon beside its name.Tap the name of the ringtone that you want to use.Changing the themeFeeling a little blue? You can change the theme of your phone to match your mood for the day.On the Start screen, tap   .Tap Settings > theme.Select the Background and Accent color to fit your mood by tapping their respective boxes.1.2.3.4.5.1.2.3.
12      Phone callsPhone calls      Phone callsMaking callsOn the Start screen, tap the Phone tile.2.  Tap   .3.  Dial the number you want to call, and then tap call. Making an emergency callAfter turning on your phone, tap emergency call on the screen.If you tapped close on the screen, you can still open the phone dialer by tapping the Phone tile on the Start screen, and then tapping   . 2.  Dial the international emergency number for your locale (for example, 911),  and then tap call.1.1.
13      Phone callsPhone calls      Receiving callsWhen you receive a phone call from a contact, the Incoming call screen appears and displays the caller ID icon, name, and phone number of the calling party. When you receive a phone call from someone who is not stored in People, only the default caller ID icon and phone number appear on the Incoming call screen.Answering or rejecting an incoming call    If To answer the call To reject the callDisplay is on Tap answer. Tap ignore.Display is off When the lock screen appears, slide up from the bottom of the lock screen, and then tap answer.When the lock screen appears, slide up from the bottom of the lock screen, and then tap ignore.Muting the ringing sound without rejecting the callDo one of the following:Press the VOLUME DOWN or VOLUME UP button.Press the POWER button.Place the phone face down on a leveled surface.If the phone is already facing down, the phone will still ring when there are subsequent incoming calls. Using in-call optionsWhen a call is in progress, use the buttons onscreen to mute or unmute the microphone or to turn on or off the speakerphone. You can also press MENU and choose whether to add a call, place the call on hold, mute the microphone, and more.
14      Phone callsPhone calls      Putting a call on holdTap   .Tap hold. Tap hold again to resume the call.Switching between callsIf you’re already on a call and accept another call, you can choose to switch between the two calls.1.  When you receive another call, tap answer to accept the second call, and to put the first call on hold.2.  To switch between the calls, tap the bar at the top of the screen.3.  To end the current call and return to the other call, tap end call.Setting up a conference callConference calling with your friends, family, or coworkers is easy. Make the first call  (or accept a call), and then simply dial each subsequent call to add to the conference.Make a call to the first conference call participant.When connected, tap   , and then tap add call, and then dial the number of the second participant. The first participant is put on hold when you dial the second participant.When connected to the second participant, tap merge calls.To add another participant to the conference call, tap add call, and then dial the number of the contact you want to invite to the conference call. 5.  When connected, tap merge calls to add the participant to the conference call. When you want to talk to a person in the conference call in private, tap private. 6.  When finished, tap end call.Turning the speakerphone on or off during a callTap   .Tap speaker. Tap speaker again to turn off the speakerphone.Make sure you don’t have the phone against your ear when you have the speakerphone on. It may damage your hearing. 1.2.1.2.3.4.1.2.
15      Phone callsPhone calls      Muting the microphone during a callTap   .Tap mute. Tap mute again to turn on the microphone.Ending a call On the screen, tap end call.If the phone display is off, press POWER to turn on the screen so you can tap end call. Using call historyUse the call history to check missed calls, your dialed numbers and received calls.Checking calls in the call historyOn the Start screen, tap the Phone tile.Tap a name or number in the list to go to a screen where you can select to call the number, view the contact information (if the number is stored in your contacts list), save the contact information (if the number is not stored in your contacts list), or send a text message.Adding a new phone number to your contacts from call historyOn the Start screen, tap the Phone tile.Tap the number you want to save to your contacts.At the bottom of the screen, tap  .Tap new contact.Edit the number if you need to, select the phone number type, and then tap   .Enter the contact name and other information. The phone number is automatically added for you. Tap  .To find out how to add new contacts or edit the contact information, see the People chapter. 1.2.1.2.1.2.3.4.5.6.7.
16      Phone callsPhone calls      Clearing the call history listOn the call history screen, you can do the following:To remove a name or number from the list, press and hold it, and then tap delete item.To clear the entire list, tap ... , and then tap delete all.Call servicesYour phone can directly link to the mobile phone network, and enable you to access and change the settings of various phone services for your phone. Call services may include call forwarding, call waiting, voicemail, and more. Contact your mobile operator to find out about the availability of call services for your phone.To open call services, tap the Phone tile on the Start screen, tap ... , and then tap call settings.My phone number Displays your phone number. Voicemail number Shows the current voicemail service being used. Tap to change the voicemail number.Show my caller ID to Tap the box to set who can see your phone number when you call.Call forwarding Turn on or off call forwarding. When you turn on call forwarding, enter the phone number to forward your calls to.International assist Turn on or off international assist.Turning Flight mode (Airplane mode) on or off In many countries, you are required by law to turn off the phone while on board an aircraft. A way to turn off the phone function is to switch your phone to Flight mode (Airplane mode). When you enable Flight mode, all wireless radios on your phone are turned off, including the call function, data services, Bluetooth, and Wi-Fi.On the Start screen, tap   .Tap Settings > airplane mode.Tap the Status switch to turn it on or off.When you disable airplane mode, the call function is turned back on and the previous state of Bluetooth and Wi-Fi is restored.1.2.3.
17      PeoplePeople      PeopleAbout the People hubWhen you set up your email and other accounts on your phone, your contacts are imported automatically into your People hub. You’ll be able to see contacts from your Windows Live, Facebook, as well as other email accounts like Google and Outlook (Microsoft Exchange ActiveSync).Your friends’ Windows Live and Facebook feeds also appear in your People hub. Their photos show up in your Pictures hub, and your own feeds pop up in your Me tile.If you haven’t set up your email or Facebook account yet, see “Setting up an account” in the Getting started chapter.Viewing your contacts list and feedsTo open the People hub, tap the People tile on the Start screen.In all of the People hub, you’ll see all contacts that you’ve created on your phone as well as contacts that are synchronized with your email and Facebook accounts.If you’re signed in to your Windows Live and/or Facebook accounts, swipe to the left to see updates from your friends.
18      PeoplePeople      If you signed in to your Windows Live account when you first set up the phone, your contacts from those accounts will appear in the contacts list when you first open People.Contact informationWhen you tap a contact on the People hub, the profile screen opens, showing you the person’s contact details. You can call, send text, or send an email to the contact from the profile screen.Call, send a message, or send an email to that contact in the profile page. Slide your finger left to see what’s new with that contact. You’ll only see updates when you are signed in to your Windows Live and/or Facebook accounts and the person is also your friend in Windows Live and/or Facebook.      Adding a new contactOn the Start screen, tap the People tile.2.  In all of the People hub, tap   .3.  Select the Account, for example Windows Live. This determines which account the contact will sync with. 4.  Enter information by tapping an item.5.  Tap   when you’re done.1.
19      PeoplePeople      Merging contact informationIf you have the same contacts stored in your phone and online accounts such as Windows Live and Facebook, your phone will try to link them as one automatically. If it doesn’t, you can manually link them so that you won’t have duplicated entries in your contacts list.On the Start screen, tap the People tile.In all of the People hub, tap the name of the contact you want to link.At the bottom of the screen, tap   . The link icon may look a little different depending if the contact is already linked to other contacts.4.  Do one of the following:Under suggested links (if available), tap the contact to link to that contact’s account.Tap choose a contact to select a contact from your People list to link to.Breaking the contact information link between contactsOn the Start screen, tap the People tile.In all of the People hub, tap the name of the contact whose contact information link you want to break.Tap unlink. Editing, searching, and deletingEditing a contact’s informationOn the Start screen, tap the People tile.In all of the People hub, press and hold the contact, and then tap edit.3.  Enter the new information for the contact. If the contact is linked to another account on your phone, you can choose to edit the contact information on the other account by tapping edit [name of account].4.  Tap  .1.2.3.1.2.3.1.2.
20      PeoplePeople      Searching for a contactOn the Start screen, tap the People tile.Press SEARCH.In the search bar, enter the first few letters of the first or last name of the contact you are looking for. Matching contacts are displayed.4.  Tap the contact to open his or her contact details screen. See “Contact information” in this chapter for details.Looking for your contacts that start with the letter M? Tap the letter box, for example   , to go to a particular letter on your contacts list. Deleting a contactYou cannot delete Facebook contacts on your phone. On the Start screen, tap the People tile.In all of the People hub, press and hold the contact, and then tap delete.When you’re asked to confirm, tap delete. Your Me tileWhen you sign in to your Windows Live and/or Facebook account, your Me tile is automatically created on the Start screen. Tap your Me tile on the Start screen (or in all of the People hub) and check status updates you have posted, comments you have received, and pics that you have uploaded to your Windows Live and/or Facebook accounts. 1.2.3.1.2.3.
21      PeoplePeople      While on the Me screen, you can tap:Your status message to the right of your photo to post a new status message.Your photo to change it.A photo to view it.  An entry to add comments or reply to a comment. 
22      �eyboard�eyboard      KeyboardUsing the onscreen keyboardWhen you start an app or select a box that requires text or numbers, the onscreen keyboard becomes available.After entering your text, press BAC� to close the keyboard. To open and use it again, tap a text box.Entering textDepending on the app you’re in, you may see a slightly different keyboard layout. Use the following keys while entering text:Some keys have multiple characters or accents associated with them. Press and hold the key to see the available characters and accents.This is the Shift key. Tap to enter an uppercase letter. The next letter you type will be uppercase. Press and hold to turn on caps lock. Tap to switch to the numeric and symbol keyboard.While in the numeric and symbol keyboard, tap to show more symbols.Tap to switch back to the alphabet keyboard.Tap to switch to a different language keyboard. Available keyboard languages depends upon the phone version you have. This key may not be present in phones with only one keyboard language. See “Enabling other keyboard languages” for more details.This is the Enter key. Tap to create a new line.This is the Backspace key. Tap to delete the previous character.This is the Smiley key (Only available when writing an a text or picture message). Tap to enter smileys.Moving the cursorWhile entering text, press and hold the text box. A floating cursor appears   .Drag the cursor to the position that you want, and then release your finger. 1.2.
23      �eyboard�eyboard      Changing to the landscape keyboardWhen entering text, you can choose to use the landscape orientation of the keyboard.Turn your phone sideways to use a larger keyboard that lets you type easily using your thumbs.Enabling other keyboard languagesYou can choose to show other keyboard languages on the keyboard. The availability of this feature and the languages available to choose from may depend on the version of phone you have.On the Start screen, tap   .Tap Settings > keyboard.  Tap the Keyboard languages box.Select the keyboard languages you want to show, and then tap  .Entering words with predictive textThe keyboard has predictive text to help you type quickly and accurately. Predictive text input is enabled by default, and word suggestions are displayed as you type.To enter a word in predictive mode, do any of the following:If you see the word you want in bold, you can simply tap the space bar to insert the word into your text.If you see the word you want shown in the suggestions before you have finished typing the entire word, tap the word to insert it into your text.Slide left on the suggestion bar to see more words.Changing keyboard settingsOn the Start screen, tap   .Tap Settings > keyboard.Clear the check box of the options that you don’t want. 1.2.3.4.1.2.3.
24      MessagingMessaging      MessagingAbout Messaging�eep in touch with important people in your life. Use the Messaging application to compose and send text and picture messages.On the Start screen, tap the Messaging tile.On the conversations screen, all your sent and received messages are neatly grouped into conversations, by contact name or phone number. You can:Scroll up or down the list of conversations by swiping your finger on the screen.Tap a contact name or number to view the exchange of messages.Sending a text messageIf you exceed the limit on the number of characters for a single text message, your text message will be delivered as one but will be billed as more than one message. On the Start screen, tap the Messaging tile.On the conversations screen, tap   . 3.  Fill in one or more recipients. You can:Enter complete phone numbers directly in the To field. Use the semicolon to separate recipients.Enter the first few letters of a contact name. As you enter, matching names with phone numbers from your stored contacts are displayed. Tap a contact that you want.Tap   to the right of the recipient field, and then tap the contact that you want and choose which phone number to send to..4.  Tap the box that says “type a message”, and then enter your message.5.  Tap   to send the message.1.2.
25      MessagingMessaging      Sending a picture messageTo send a picture message, start by creating a new text message, and then attach a photo to include it.On the Start screen, tap the Messaging tile.On the conversations screen, tap   . 3.  Fill in one or more recipients. You can:Enter complete phone numbers or email addresses directly in the To field. Use the semicolon to separate recipients.Enter the first few letters of a contact name. As you enter, matching names with phone numbers and email addresses from your stored contacts are displayed. Tap a contact’s number or email address.Tap   to the right of the recipient field, and then select the phone number of a contact to whom you want to send the message.4.  Tap   and then select a photo you want to send. Tap   to take a photo and insert it as the attachment. 5.  Enter your message.6.  Tap   to send the message.Viewing and replying to a messageWhen you receive a new message, the phone plays an alert sound (if set) and displays the message briefly at the top of the screen. 1.  To open and read the message, you can:Tap the message bar at the top of the screen.Open the Messaging app to access and read the message.2.  Enter your reply, and then tap   .1.2.
26      MessagingMessaging      Managing message conversationsDeleting a conversationOn the conversations screen, press and hold a contact (or phone number) whose messages you want to delete, and then tap delete.When you’re asked to confirm, tap delete.Deleting a messageOn the conversations screen, tap a contact (or phone number) to display the exchange of messages with that contact.Press and hold the message that you want to delete.3.  Tap delete on the options menu.4.  When you’re asked to confirm, tap delete.   Forwarding a messageOn the conversations screen, tap a contact (or phone number) to display the exchange of messages with that contact.Press and hold the message that you want to forward. 3.  Tap forward on the options menu.4.  Fill in the recipient’s name.5.  Tap   to send the message.1.2.1.2.1.2.
27      EmailEmail      EmailAdding a POP3/IMAP email accountOn the Start screen, tap   .Do one of the following:If you haven’t set up any accounts yet, tap Email setup on the Start screen.Open Settings, and then tap email & accounts > add an account.3.  Tap Settings > email & accounts > add an account.4.  Tap the type of account you want to set up.If you don’t see the account type that you want, tap other account or advanced setup. The advanced setup requires you to enter the incoming and outgoing server settings so have them ready if you choose this option.5.  Enter the email address and password for the account.6.  Tap sign in. Adding a Microsoft Exchange Server accountOn the Start screen, tap   .Do one of the following:If you haven’t set up any accounts yet, tap Email setup on the Start screen.Open Settings, and then tap email & accounts > add an account.3.  Tap Settings > email & accounts > add an account.4.  Tap Outlook. 5.  Enter the Exchange ActiveSync account details, and then tap sign in. Your corporate Exchange Server must support auto-detect for the phone to automatically set up the Exchange ActiveSync account. If your corporate Exchange Server does not support auto-detect, you’ll need to enter your Exchange Server settings. Ask your Exchange Server administrator for details.1.2.1.2.
28      EmailEmail      Checking your inboxAfter you set up an email account, a new tile is created on the Start screen for that account. To open an email account, tap its tile on the Start screen. If you don’t see the tile, tap the arrow   on the Start screen, and then tap the account in the apps list.Slide your finger left or right to check only your unread, flagged, or urgent email. Refreshing an email accountWhatever your automatic sync settings are, you can also synchronize your sent and received emails manually at any time.While in the account you want to sync, tap   .Managing email messagesDeleting an email message from the inboxOn the email account inbox, press and hold the message you want to delete.On the options menu, tap delete.Moving an email message to another folderOn the email account inbox, press and hold the message you want to move.On the options menu, tap move.Tap the folder where to move the email message.1.2.1.2.3.
29      EmailEmail      Selecting multiple email messages from the inbox to delete or move1.  On the email account inbox, do one of the following:Tap   .Tap the area to the left of an email.2.  Tap the check boxes of email messages you want to delete or move to another folder.3.  Tap   to delete them or tap   to move them to a different folder.Sending an email messageOpen the email account that you want to use to send your email. On the email account inbox, tap   .Fill in one or more recipients. You can:Enter email addresses directly in the To field. If you’re sending the email to several recipients, separate the email addresses with a semicolon. As you enter email addresses, any matching addresses from your contacts list are displayed. Tap a match to enter that address directly.Tap   to the right of the recipient field, and then select a contact to whom you want to send the message. Tap   again to add more recipients.4.  Enter the subject, and then compose your message. Tap the space below the subject line to compose your message.5.  To add an attachment, tap   . You can only attach photos. 6.  Tap   to send the message immediately, or tap   > Save to send it later.Resuming a draft email messageIn the email account inbox, tap   , and then tap drafts.Tap the message.When you finish editing the message, tap   .1.2.3.1.2.3.
30      EmailEmail      Reading and replying to an email messageOn the Start screen, tap the email account tile.On the email account inbox, tap the email you want to read.Tap   , and then tap reply, reply all, or forward.Setting the priority for an email messageWhile composing the message, tap ... .2.  Tap priority.3.  Select the priority for the message.If you selected high or low priority, the priority appears below the subject line of the message.Flagging an emailOn the Start screen, tap the email account tile.On the email account inbox, press and hold the email you want to flag.On the options menu, tap set flag.After flagging an email, you can choose to remove the flag or mark the flagged email as complete. Press and hold the flagged email, and then tap complete flag or clear flag.Changing email account settingsOn the Start screen, tap the email account tile.Tap ... , and then tap settings.3.  Tap sync settings.4.  Set the options you want, and then tap done.5.  Choose if you want to add a signature to sent messages, and then tap done.Deleting an email accountOn the Start screen, tap   .Tap Settings > email & accounts.Press and hold the email account you want to delete, and then tap delete.  1.2.3.1.1.2.3.1.2.1.2.3.
31      CalendarCalendar      CalendarAbout CalendarUse your phone’s Calendar to create and manage your appointments. You can also set up your phone to stay in sync with the following types of calendars:On your phone, sign in to your Windows Live account so you’ll be able to sync your phone’s Calendar with your Windows Live Calendar online. If you haven’t signed in to your Windows Live account yet, see the Getting started chapter to find out how to sign in.If you have a Microsoft Exchange ActiveSync account and you have added it on your phone, you can sync your phone’s Calendar with your Exchange Server calendar appointments.If you have a Google account and you have added it on your phone, you can sync your phone’s Calendar with your Google Calendar. Creating a calendar appointmentYou can create appointments that appear on your phone only, or appointments that sync with your online account calendars such as in Windows Live or Exchange Server.1.  On the Start screen, tap the Calendar tile.2.  In day or agenda view, tap   .3.  If you have more than one calendar, select an Account in which to add the appointment:4.  Enter the appointment details.5.  Scroll down to the bottom of the screen, and tap more details to set a reminder, appointment occurrence, notes, and more.6.  Tap   when you’re done.The Calendar tile on the Start screen will show your upcoming appointment.
32      CalendarCalendar      Sending an invitationYou can use Calendar to schedule a meeting or an appointment and invite people to attend it. An invitation email will be sent to them from the account that you choose. 1.  Open Calendar and create a new appointment. For the steps, see “Creating a calendar appointment.”2.  Add details, such as date and time, location, and more. Remember to choose the Account to use for sending the invitation email3.  Tap more details, scroll down the screen, and then tap add someone.4.  Invite required and optional attendees. Tap add someone, then tap the name of the person to invite.You can only invite contacts that are stored or synchronized on your phone.5.  Tap   when you’re done.Changing calendar viewsWhen you open Calendar, it displays the day view by default. You can also display the Calendar in agenda or month view. Day and Agenda viewsDay view displays a list of the appointments of one day. Agenda view lists all your appointments in chronological order. The color bars on the right side of the appointments in Agenda view indicate the type of calendar in which the appointments are part of. To find out what each color represents,  tap ... , and then tap calendars. Change the color by tapping the color box.When in Day view, slide up or down the screen to view earlier or later days.Month viewIn Month view, you’ll see text on days that have appointments. To switch to Month view,  tap   .When in Month view:Tap a day to view the appointments of that day.Slide your finger up or down the screen to view earlier or later months.To change from month to day or agenda view, press BAC�.
33      CalendarCalendar      Viewing, editing or deleting an appointmentYou can view, edit, or delete appointments you’ve created. Viewing the details of an appointment1.  On the Start screen, tap the Calendar tile.2.  In day or agenda view, tap the appointment.Editing an appointment1.  On the Start screen, tap the Calendar tile.2.  In day or agenda view, press and hold the appointment, and then tap edit to open it.3.  Make your changes to the appointment.4.  When you’re done editing, tap   .Deleting an appointmentThere are two ways to delete an appointment.In day or agenda view, press and hold an appointment and then tap delete.While viewing an appointment, tap   .If the appointment repeats, you’ll be asked whether you want to delete just that occurrence or all occurrences in your Calendar.Viewing, dismissing, or snoozing appointment remindersIf you have set a reminder for an appointment, your phone will play the alert sound and display a reminder message about the upcoming appointment.On the reminder message, tap snooze to snooze or tap dismiss to dismiss the appointment reminder.
34      CalendarCalendar      Displaying and synchronizing calendarsYou can choose which calendars to show or hide on your phone’s Calendar, and which ones to keep synchronized.Showing or hiding calendarsIn day or agenda view, tap ... , and then tap calendars.2.  Tap the on switch for the calendar that you want to hide.The calendars are kept synchronized on your phone, whether or not you hide them.Choosing which calendars are synchronized on your phoneYou can choose which calendars to keep synchronized on your phone or which ones to stop synchronizing.Stop synchronizing a calendarOn the Start screen, tap   .Tap Settings > email & accounts.Tap the account whose calendar you want to stop synchronizing with your phone.Clear the Calendar check box.  Tap   .1.1.2.3.4.5.
35      Getting connectedGetting connected      Getting connectedData connectionYour phone will be automatically set up to use your mobile operator’s data connection when you turn on your phone for the first time.Adding an access pointBefore you add a new data connection on your phone, obtain the access point name and settings (including username and password if required) from your mobile operator.On the Start screen, tap   .Tap Settings > cellular.Tap add apn.Enter the APN, user name, and password. Tap   .Setting up your data connection using Connection SetupYou can automatically set up your data connection. To find out how to use Connection Setup, refer to “Connection Setup” in the HTC apps chapter.Turning the data connection on or offTurning your data connection off can help optimize your battery life. It can also save money on data charges. However, when your data connection is turned off, you may not always receive automatic updates to your email and other synchronized information. On the Start screen, tap   .Tap Settings > cellular.Tap the Data connection On/Off switch.If you just want to use a GPRS or EDGE connection, tap the 3G On/Off switch to turn off 3G.1.2.3.4.5.1.2.3.
36      Getting connectedGetting connected      Enabling data roamingData roaming lets you connect to your mobile operator’s partner networks and access data services when you are out of your mobile operator’s coverage area.Using data services while roaming will be costly. Check with your mobile operator for data roaming rates before you use data roaming. On the Start screen, tap   .Tap Settings > cellular.Tap the Data roaming options box, and then tap Roam.Wi-FiTo use Wi-Fi on your phone, you need access to a wireless access point or “hotspot”. The availability and strength of the Wi-Fi signal will vary depending on objects, such as buildings or simply a wall between rooms, the Wi-Fi signal has to pass through.Turning Wi-Fi on and connecting to a wireless networkOn the Start screen, tap   .Tap Settings > Wi-Fi.Tap the On/Off switch to turn it on. The phone then scans for the network names and security settings of detected Wi-Fi networks are displayed in the Wi-Fi networks section. The signal strength for each Wi-Fi network is also displayed.Tap the Wi-Fi network you want to connect to.If you selected an open network, your phone will automatically connect to the network. If you selected a network that is secured with WEP, enter the password and then tap done.Depending on the network type and its security settings, you may also need to enter more information.You cannot manually add a Wi-Fi profile.When your phone is connected to a wireless network, the Wi-Fi icon (   ) appears for a brief moment on the status bar. The next time your phone connects to a previously accessed secured wireless network, you won’t be asked to enter the key or other security information again, unless you reset your phone to its factory default settings.1.2.3.1.2.3.4.
37      Getting connectedGetting connected      Using your phone’s web browserYou must have an active data connection or Wi-Fi connection to access the Internet.Opening the browserOn the Start screen, tap the Internet Explorer tile to start surfing the Web.Going to a web pageOn the browser screen, tap the URL box on top of the screen.2.  Enter the web page address using the keyboard. 3.  Tap   on the keyboard.Changing the screen orientationThe phone automatically changes the screen orientation depending on how you’re holding your phone. Turn your phone sideways to display the web browser in landscape orientation and in full screen. When in landscape orientation, you won’t be able to enter a URL.Browsing full versions of all web sitesSome web sites display a mobile version of their pages on phone web browsers. You can choose to view the full version of all pages, even for these sites.From the browser screen, while holding the phone in portrait orientation, tap ... , tap settings, and then select Desktop version.Navigating on a web pageYou can swipe your finger on the screen to navigate and view other areas of the web page.1.
38      Getting connectedGetting connected      Zooming in or out on a web pageTap the screen twice quickly to zoom in, then tap the screen twice quickly again to zoom out. You can also use your fingers to spread or pinch the screen to zoom in or out.Selecting a link in a web pageYou can tap a link with your finger to open it, or press and hold a link for more options.Link What to doWeb page address (URLs)Tap the link to open the web page.Press and hold the link to open a menu that allows you to open the page in a new tab or share the link via text message or email.Email address Tap to send an email message to the email address..Opening a new browser tabOpen multiple browser tabs to make it easier for you to switch from one web site to another. You can open up to 6 browser tabs.While viewing a web page in portrait orientation, tap   .Tap   . A new browser tab opens.Switching between browser windowsWhile viewing a web page in portrait orientation, tap   .Select the browser window you want to view by tapping the window you want to open.Finding text within a web pageWhile viewing a web page, tap ... , and then tap find on page.2.  Enter the search item, and then tap the Enter key on the keyboard. The search item is highlighted if found.3.  Tap   or   to go to the previous or next matching item.1.2.1.2.1.
39      Getting connectedGetting connected      Bookmarking a web pageWhile viewing a web page in portrait orientation, tap   .Edit the bookmark name if needed, and then tap ok.Opening a bookmarkQuickly view the pages that you access most often.While viewing a web page in portrait orientation, tap   .In favorites, tap the bookmark you want to open.Editing a bookmarkWhile viewing a web page in portrait orientation, tap   .In favorites, press and hold the bookmark you want to edit, and then tap edit.Enter your changes, and then tap ok.Viewing a previously visited pageWhile viewing a web page in portrait orientation, tap   .Slide your finger left to go to history.Tap the page you want to open.Clearing the list of previously visited pagesWhile viewing a web page in portrait orientation, tap   .Slide your finger left to go to history, and then tap   .Tap delete. Setting browser optionsCustomize the web browser to suit your browsing lifestyle. Set display, privacy, and security options when using the web browser.From the browser screen, tap ... , and then tap settings.1.2.1.2.1.2.3.1.2.3.1.2.3.
40      Getting connectedGetting connected      BluetoothTurning Bluetooth onTurning Bluetooth on also makes the phone discoverable. On the Start screen, tap   .Tap Settings > Bluetooth.Tap the On/Off switch.Your device is automatically made discoverable, and searches for Bluetooth devices within range. Turn off Bluetooth when not in use to conserve battery power, or in places where using a wireless device is prohibited, such as on board an aircraft and in hospitals.What Bluetooth profiles does my phone support?Your phone supports A2DP, PBAP, HFP, HSP, and AVRCP.Connecting a Bluetooth headset or car kitYou can listen to music over a Bluetooth stereo headset, or have hands-free conversations using a compatible Bluetooth headset or car kit. It’s the same procedure to set up stereo audio and hands-free.For you to listen to music with your headset or car kit, the headset or car kit must support the A2DP Bluetooth profile.Before you connect your headset, you need to make it discoverable so your phone can find it. You can find out how to do this by referring to your headset manual.Make sure that the headset is discoverable.On the Start screen, tap   .Tap Settings > Bluetooth.If the Bluetooth switch is off, tap it to turn on Bluetooth. Your phone will start to scan for Bluetooth devices within range.When you see the name of your headset displayed, tap the name. Your phone then automatically tries to pair with the headset.If automatic pairing fails, enter the passcode supplied with your headset.When the Bluetooth headset or car kit establishes a connection to your phone, the Bluetooth connected icon   is displayed on the status bar for a brief moment. You can check the connection status below the hands-free headset or car kit name. Depending on the type of headset or car kit you have connected, you can then start using the headset or car kit to listen to music and/or make and receive phone calls. 1.2.3.1.2.3.4.5.6.
41      Getting connectedGetting connected      Reconnecting a headset or car kitNormally, you can easily reconnect your headset by switching on Bluetooth on your phone, and turning on the headset. However, you might have to connect manually if your headset has been used with another Bluetooth device.Make sure that the headset is set to discoverable.On the Start screen, tap   .Tap Settings > Bluetooth.If the Bluetooth switch is off, tap it to turn on Bluetooth. Tap the headset’s name in the Bluetooth devices section.If you’re asked to enter a passcode, try 0000 or 1234, or consult the headset/car kit documentation to find the passcode.If you still cannot reconnect to the headset or car kit, follow the instructions in “Unpairing from a Bluetooth device”, and then follow the steps under “Connecting a Bluetooth headset or car kit”Disconnecting or unpairing from a Bluetooth deviceDisconnecting a Bluetooth deviceOn the Start screen, tap   .Tap Settings > Bluetooth.On the list of Bluetooth devices, tap the device to disconnect from it. Tap the device again on the list to connect to it. Unpairing from a Bluetooth deviceYou can make your phone forget its pairing connection with another Bluetooth device.  To connect to the other device again, you may need to enter or reconfirm a passcode.On the Start screen, tap   .Tap Settings > Bluetooth.On the list of Bluetooth devices, press and hold the device to unpair. Tap Delete.1.2.3.4.5.6.1.2.3.1.2.3.4.
42      CameraCamera      CameraCamera basicsWhether traveling for business or fun, enjoy taking photos and videos of your trip and encounters with your phone’s camera.To open the camera, press CAMERA, or tap   on the Start screen and then tap Camera. When you open the camera app for the first time, it will ask you if you want to share the location of your phone. This will add a location tag to your captured photos so you’ll know where they were taken.Viewfinder screenThe camera displays in landscape view only. You’ll find the following controls on the Viewfinder screen:Tap to switch between Photo and Video modes.Tap to zoom in or out.Tap to open the camera settings. See “Camera settings” in this chapter for details.ZoomingBefore taking a photo or video, you can first use the onscreen zoom buttons to zoom in or out of your subject.Simply press the + or - buttons onscreen to zoom in or out.
43      CameraCamera      Taking a photoOn the Start screen, tap   .Tap Camera.Before taking the photo, you can zoom in first on your subject. See “Zooming” to find out how.4.  Tap   , and then select a camera flash mode depending on your lighting conditions.5.  Frame your subject on the Viewfinder screen.6.  Press CAMERA to take the photo.7.  Choose what you want to do with the photo you’ve just taken. See “After capturing“ for details.Camera flash doesn’t turn on?Using the flash eats up much battery power. To save battery power, the camera disables the flash (even when you have set the camera flash mode to Auto flash or Flash on) when one of the following occurs:You have an incoming callThe flash will be disabled temporarily when you have an incoming call. After the call ends, you’ll be able to use the flash again.If you have set the flash to Flash on, it turns back on after you answer and end the call.Cold weather may lower battery performance which affects the flashTo make sure the camera has enough battery life to power up the flash, keep your phone warm. When not in use, put the phone inside your jacket to keep it warm, and try to avoid sudden temperature changes that may affect battery performance.Capturing a videoOn the Start screen, tap   .Tap Camera.On the Viewfinder screen, tap   to switch to video mode.Before you start capturing, you can zoom in first on your subject. See “Zooming” to learn how.Tap   and then choose whether to turn the flashlight on or off while capturing video.Frame your subject on the screen.Press CAMERA to start capturing video. Press it again to stop capturing.Choose what you want to do with the video you’ve just captured. See “After capturing“ for details.1.2.3.1.2.3.4.5.6.7.8.
44      CameraCamera      After capturingAfter capturing a photo or video, slide your finger from left to right to see the photo or video you’ve just captured. Press and hold the photo or video so you can:add to favorites(Photo mode only) Add the photo to your favorites in the Pictures application.delete Delete the photo or videoupload to SkyDrive / upload to Facebook (Photo mode only)upload to SkyDrive: upload the photo to your SkyDrive online storage. You need to be signed in to your Windows Live account to upload to SkyDrive.upload to Facebook: upload the photo to your Facebook page. You need to be signed in to your Facebook account to upload to Facebook.share (Photo mode only) Send the photo to your friends using Messaging or email.use as wallpaper (Photo mode only) Use the photo as your lock screen wallpaper.Camera settingsTo check and change your camera settings, tap   on the Viewfinder screen, and then tap an item.Effect Apply a special effect to your captured photos or videos.Resolution Select a photo or video resolution to use for capturing.Quality (photo mode only)Select the quality to use for capturing photos.Scenes (photo mode only) Choose a scene that matches the subject or environment that you’re capturing.Flicker adjustment When taking indoor shots under fluorescent lighting, keep this setting on Auto or change it to the proper frequency (50Hz or 60Hz) of the power in your country to reduce flicker.Metering mode Set how the camera measures the amount of light to calculate the best exposure:Center area mode allows the camera to measure light in the center.Average mode allows the camera to measure light in the whole photo.Restore to default Change the camera back to default settings.
45      PicturesPictures      PicturesAbout the Pictures hubUsing the Pictures hub, you can view photos and watch videos that you’ve taken with your phone’s camera, downloaded, or synchronized with your phone. You can also take a look at your photos on your Windows Live and Facebook accounts.To open the Pictures hub, tap the Pictures tile on the Start screen.After opening the Pictures hub, slide to the left to check out recent photos and photos on Facebook and Windows Live.Changing the Pictures hub wallpaperOn the Start screen, tap the Pictures tile.Press and hold the text pictures on top of the screen.Tap change background. 1.2.3.
46      PicturesPictures      Viewing photos and videosChoose how you want to browse through your photos and videos (all, date, favorites).Select an album to view.Tap a photo or video to view it in full screen.Viewing photos and videos in landscape orientationThe photo orientation adjusts to how you hold your phone. Turn your phone sideways to view a photo in landscape mode.Video is always displayed in landscape mode when you play it. Use the onscreen controls to play, pause, or stop the video.Zooming in or out on a photoYou can also use pinch zooming. Press your thumb and index finger on the screen and then spread your fingers apart to zoom in. Pinch your fingers together to zoom out.Zooming in Zooming out  Touching up your photosApply touch up work to your photos with the Photo Enhancer. See “Photo Enhancer” in the HTC apps chapter to learn how to touch up your photos.Sending your photosUsing the Pictures hub, you can send photos via email or picture message.Sending a photo by emailOn the Start screen, tap the Pictures tile.Tap all.Tap the album where the photo you want to share is in.Press and hold the photo you want to send, and then tap share.Select the email account you want to use to send the photo.Compose your message and then tap   .1.2.3.1.2.3.4.5.6.
47      PicturesPictures      Sending a picture messageOn the Start screen, tap the Pictures tile.Tap all.Tap the album where the photo you want to share is in.Press and hold the photo you want to send, and then tap share.Tap Messaging. The photo is automatically added into the message.Compose your message and then tap   .Sharing your photos on the WebUsing the Pictures hub, you can share your photos on Facebook and upload your photos to your Windows Live SkyDrive.You can also use the camera app to share a photo right after you’ve captured it. See the Camera chapter.Sharing photos on FacebookYou need to be logged in to your Facebook account to be able to upload photos.On the Start screen, tap the Pictures tile.Tap all.Tap the album where the photo you want to share is in.Press and hold the photo you want to send, and then tap share > upload to Facebook.If you want to enter a caption, tap the add a caption box, and then enter your caption. After entering the caption, tap   . Uploading a photo to your SkyDriveYou need to be logged in to your Windows Live account to be able to upload photos.On the Start screen, tap the Pictures tile.Tap the album where the photo you want to share is in.Press and hold the photo you want to send, and then tap share > upload to SkyDrive.If you want to enter a caption, tap the add a caption box, and then enter your caption. After entering the caption, tap   .   1.2.3.4.5.6.1.2.3.4.5.6.1.2.3.4.5.
48      ZuneZune      ZuneSynchronizing your computer and phoneYou’ll need the Zune® software to get your music, videos, and podcasts from your computer to your phone. Use it to sync these stuff between your computer and phone. If you don’t have the Zune software on your computer yet, go to www.zune.net to download and  install it. Setting up Zune to sync your computer and phoneConnect your phone to your computer using the supplied USB cable. Zune automatically opens on your computer, if you haven’t opened it.Wait for Zune to recognize your phone, and then follow the onscreen instructions to set it up.Selecting items to sync with your phoneAfter setting up Zune on your computer, choose what you want to sync with your phone.Connect your phone to your computer using the supplied USB cable. Zune automatically opens on your computer, if you haven’t opened it.Click collection on top of the Zune screen.Choose the type of media (for example, Music) you want to sync to your phone.Choose the items you want to sync with your phone, and then drag them to the phone icon (   ) at the bottom-left corner of the Zune screen.1.2.1.2.3.4.
49      ZuneZune      Music + Videos hubThe Music + Videos hub is your gateway to your media collection. Listen to your music, watch your videos, check out your podcasts, listen to the radio, and go to the Marketplace to buy music — all in the Music + Videos hub.Listening to musicGet your music into your phone by following the steps in “Selecting items to sync with your phone” earlier in this chapter.On the Start screen, tap the Music + Videos tile.In zune of the Music + Videos hub, tap Music.Slide your finger left or right to browse your music according to the category you want.Tap the title of the song you want to listen to. While listening, you can press and hold   to rewind or press and hold   to fast forward. Buy additional music by visiting the Marketplace. For more information, go to “Windows Marketplace” in the More apps chapter. 1.2.3.4.5.
50      ZuneZune      Turning on repeat or shuffleWhile playing a song, tap the album cover to loop or shuffle the songs in the album. You can also rate the album.Controlling music playback from the status barWhen you exit the music player, you can still control music playback from the status bar. To show the playback controls on the status bar, press the VOLUME UP or VOLUME DOWN button.Watching videosGet your videos into your phone by following the procedure in “Selecting items to sync with your phone” earlier in this chapter.On the Start screen, tap the Music + Videos tile.In zune of the Music + Videos hub, tap videos.Slide your finger left or right to browse through your videos according to the category you want.Tap the title of the video you want to watch.Listening to or watching your podcastsGet your podcasts into your phone by following the steps in “Selecting items to sync with your phone” earlier in this chapter.On the Start screen, tap the Music + Videos tile.In zune of the Music + Videos hub, tap podcasts.Slide your finger left or right to go to your audio or video podcasts.Tap the title of the podcast you want to watch or listen to.Listening to the radioYou need to connect a headset first to the audio jack of your phone to use the radio. The radio uses the stereo headset as the radio antenna,On the Start screen, tap the Music + Videos tile.In zune of the Music + Videos hub, tap radio. Slide your finger left or right to go to the radio station you want to listen to.Add the radio station to your favorites by tapping   . Access your favorite radio stations by tapping   . The radio plays in the background even if you exit the radio screen. If you do not want to continue listening to the radio, tap   before exiting.  1.2.3.4.5.1.2.3.4.5.1.2.3.4.
51      Maps and locationMaps and location      Maps and locationTurning on location servicesIn order to find your location on your phone, you need to enable location sources.On the Start screen, tap   .Tap Settings > location.Tap the Location services On/Off switch to turn it on. Bing MapsBing Maps lets you track your current location, view real-time traffic situations, and receive detailed directions to your destination. You need an active mobile data or Wi-Fi connection to use Bing Maps.Real-time traffic information is only available in some areas.Viewing locations in Bing MapsFinding your locationTo find your location with Bing Maps, you need to enable location sources. To find out how, see “Turning on location services” in this chapter.On the Start screen, tap   .Tap Maps.Tap   .Moving on the mapSwipe your finger on the screen to view other areas of the map.Zooming in or out of a mapYou can:Spread your thumb and index finger across the map to zoom in.Pinch your thumb and index finger on the map to zoom out.1.2.3.1.2.3.
52      Maps and locationMaps and location      Getting an address and additional information for a location1.  Press and hold a location on the map. A balloon opens over the location with the address. 2.  Tap the balloon to see more information.You can get directions to the location, pin the location to the Start screen, share the location via text message or email, and more.Clearing the mapAfter you get directions or search on a map, you can clear away the various markers that such activities have drawn on the map.While viewing a map, tap ... , and then tap clear map.Switching to aerial viewView satellite imagery by switching to aerial view. While viewing a map, tap ... , and then tap aerial view on. Searching for locations and placesIn Bing Maps, you can search for a location, such as an address, landmark, name of an establishment, or a city.While viewing a map, tap  .Enter the address, landmark, or city you want to search in the search box. Tap   on the keyboard.1.2.3.
53      Maps and locationMaps and location      Viewing search resultsThe search results will be displayed as markers on the map. After tapping the balloon that shows the location that you want, you’ll see its address, rating, nearby places, and reviews, if available.To see the results as a list, tap ... while viewing a map, and then tap results list.Getting directionsGet detailed directions to your destination. Bing Maps can provide directions for travel by foot or car.While viewing a map, tap   .Use your current location as the starting point, or enter a location from where to start in the first text box. Then, enter your destination in the second text box.Tap   on the keyboard.The next screen displays the directions to your destination in a list.Scroll up on the list to see the rest of the instructions.1.2.3.4.
54      Maps and locationMaps and location      Checking traffic conditionsTraffic information is available only in selected areas. You can choose to show real-time traffic conditions on a map. Traffic conditions are displayed over roads as color-coded lines. Each color represents how fast the traffic is moving. To show traffic conditions, tap ... while viewing a map, and then tap show traffic.
55      HTC HubHTC Hub      HTC HubAbout the HTC HubGet more out of your phone with apps from us. Check out the HTC Hub and see what we have in store for you. The built-in Weather app shows the weather in rich 3D animation for your location or in cities that you select, and provides a forecast for coming days. Apps ranging from fun games to management tools are just a tap away. Some apps you see in HTC Hub are not really on your phone yet. Tapping such an app takes you to Marketplace and lets you download it to HTC Hub.  Opening HTC HubOpen HTC Hub from the Start screen by tapping   and then tapping HTC Hub. The HTC Hub main page displays your current date, time, and location, as well as the weather for your location. Tap the weather image to open the Weather app and check for more weather forecasts.You’ll also see a list of featured apps from HTC. Tap   to refresh the list.Downloading appsYou need to be connected the Internet using a data connection or Wi-Fi to download apps.On the Start screen, tap   .Tap HTC Hub. Tap Get more.Tap the app you want to open or download.If the app is preloaded in your phone, you’ll also see it in the apps list. 1.2.3.4.
56      HTC HubHTC Hub      WeatherShould I bring an umbrella today? Check what the weather’s like before you head out. Checking the weatherOn the Start screen, tap   .Tap HTC Hub. The weather for your current location is displayed on the weather clock.Tap the weather image to open the Weather screen.Swipe your finger up or down the screen to check the weather in other cities.Not seeing your current location’s weather forecast? Check if you have Location services turned on in Settings. Adding a city On the Weather screen, tap   .Enter the city you want to add. As you enter text, a list of possible locations are shown based on the letters you entered.Tap the city to select it.Deleting a city from the listOn the Weather screen, tap ... > edit locations.Tap the red circle beside the city you want to delete.Tap done.Changing the order of cities on the Weather screenOn the Weather screen, tap ... > edit locations.Press and hold   at the end of the item you want to move. When the row is highlighted, drag it to its new position, then release.Tap done. Changing the temperature scaleOn the Weather screen, tap ... > settings.Under Temperature scale, choose Fahrenheit or Celsius.CalculatorHold the phone upright and you get a basic calculator. Turn your phone to the side and you get a scientific calculator.Connection SetupSet up your phone’s data connection based on your mobile operator that you select. Connection Setup is only available on selected versions of the phone. If your phone has pre-configured settings installed for a certain mobile operator, Connection Setup will be absent. 1.2.3.4.1.2.3.1.2.3.1.2.3.1.2.
57      HTC HubHTC Hub      Automatically setting up your data connectionOn the Start screen, tap   .Tap HTC Hub. Tap Get more.Tap Connection Setup. Connection Setup automatically configures your phone’s settings. If you see more than one mobile operator, you can select your mobile operator. Tap   .If Connection Setup does not automatically configure your mobile phone settings, you can manually configure the settings.  Tap ... > manual select, .choose the Country or Operator you want to use, and then tap  .ConverterHow many pounds are there in a kilo again? Use Converter to convert weight, length, volume, and even currency.ListForgot to buy the toothpaste again? Make sure you don’t forget next time by using List to jot down the things you need to get from the grocery.LoveHe loves me, he loves me not, he loves me!!! See whether that special someone is feeling the same way as you are.NotesNote to self – pick up flowers for wife before going to dinner. Use Notes to tack short reminders to yourself. Creating a noteOn the Start screen, tap   .Tap HTC Hub. Tap Get more.Tap Notes.Tap    . You can also tap the stack of notes at the lower-left of the screen to create a new note.  Enter your note, and then tap   . 1.2.3.4.5.1.2.3.4.5.6.
58      HTC HubHTC Hub      Editing a noteOn the Note screen, tap   .You can also slide your finger left while on the cork board to go to the List view. Tap a note to open it, and tap the note again to edit it.  Moving a note to another position on the cork boardOn the cork board, press and hold a note until it floats.Drag the note to the new position on the cork board, and then tap the note to dock it. Deleting a noteDo one of the following:On the cork board, tap the note you want to delete, and then tap   .Go to List view, press and hold the note you want to delete, and then tap delete.Deleting multiple notesOn the Note screen , tap   to see your notes in List view.Tap    , Select the notes you want to delete, and then tap done.Photo EnhancerPhotos need a bit of touch-up? Use one of the available photo enhancements to touch up your photos. The original photos are not touched. They’re saved as new files after you make your changes. On the Start screen, tap   .Tap HTC Hub. Tap Get more.Tap Photo Enhancer.Tap Choose Picture.Open the album where the photo you want to edit is located, and then tap the photo.Slide your finger left across the top of the screen to choose the effect you want to apply to the photo.Tap    . The enhanced photo is saved in another album called Saved Pictures. Sound EnhancerGet that surround sound feeling when you’re watching videos or listening to music on your phone.On the Start screen, tap   .Tap HTC Hub. Tap Get more.1.2.1.2.1.2.3.1.2.3.4.5.6.7.8.1.2.3.
59      HTC HubHTC Hub      Tap Sound Enhancer.Tap Audio and Video to set the sound option you want to use. You can choose from No effects, Dolby Mobile, or SRS enhancement. For Audio, If you’re using a headset, you can also choose from various preset equalizer settings. (Dolby, SRS, and equalizer are not available when you’re using a Bluetooth stereo headset.)StocksGet updates for the stocks you are following. Checking your stocksOn the Start screen, tap   .Tap HTC Hub. Tap Get more.Tap Stocks.Tap a stock to see its trading history. Swipe your finger up on the list of stocks to see more.Adding a stock quote or stock market indexOn the Stocks screen, tap   .Enter the stock quote or stock market index on the text field, and then tap  .On the results list, tap the stock quote or stock market index you want to add.Deleting a stock quote or indexOn the Stocks screen, tap ... > edit.Tap the red circle beside the item you want to delete.Tap done.Changing the stock list orderOn the Stocks screen, tap ... > edit.Press and hold   at the end of the item you want to move. When the row is highlighted, drag it to its new position, then release.Tap done.  4.5.1.2.3.4.5.1.2.3.1.2.3.1.2.3.
60      More appsMore apps      More appsMicrosoft Office Mobile 2010The Microsoft® Office hub consists of the following apps:Microsoft OneNote Mobile 2010 lets you keep track of stuff at home, school, or work — your big ideas, shopping lists, meeting notes, projects, you name it.Microsoft® Word Mobile 2010 lets you create and edit documents on your phone.Microsoft® Excel® Mobile 2010 lets you create, view, and edit Excel spreadsheets on your phone.Microsoft® PowerPoint® Mobile 2010 lets you view (not create) and edit slideshow presentations on your phone.SharePoint Workspace lets you view, edit, and download documents stored on Microsoft SharePoint Server 2010.Currently, you can’t copy Office documents into your phone from your computer.  If you want to get your Word, Excel, or PowerPoint file into your phone, send it as an email attachment to one of the email accounts you have set up on your phone. From there, you can tap the attachment to open it on your phone. To find out how to set up an email account, see “Setting up an account” in the Getting started chapter. 
61      More appsMore apps      Using Microsoft Office MobileOn the Start screen, tap   .Tap Office.Select the Office app you want to use. Scroll left to see the other Office apps.Windows MarketplaceOn Windows® Marketplace, it’s easy to download and purchase new apps, games, and music that fit your needs and make your phone truly personal. A wide range of free and premium programs is available, from games to powerful business apps.  You can also preview and purchase songs on the Marketplace. To open Marketplace on your phone, tap   on the Start screen, and then tap Marketplace.GamesSign in to XBox Live® and get access to a ton of games. To open Games on your phone, tap the Games tile on the Start screen. 1.2.3.
62      SecuritySecurity      SecurityProtecting your phone with a passwordYou can secure your phone by requiring a password every time your phone is turned on or every time it wakes up from sleep mode (screen is off).On the Start screen, tap   .Tap Settings > lock & wallpaper.Tap the Password On/Off switch.Enter the password in both the New password and Confirm password boxes.Tap done.Protecting your phone through the WebIt’s a nightmare when you lose your phone especially if there’s sensitive information on it. Luckily, by going to www.windowsphone.live.com on your computer, you can find your phone’s location, lock it, make it ring, and even erase the contents on your phone through a web browser. Two things to keep in mind. One, before you go to the windowsphone.live.com website, make sure you are signed in to your Windows Live account on your phone. Two, make sure to sign in to Windows Live on your computer using the same Windows Live ID you used on the phone.   For you to be able to find and control your phone from your computer web browser, make sure your phone is connected to the Internet through a Wi-Fi or data connection. 1.2.3.4.5.
63      SecuritySecurity
64      SettingsSettings      SettingsSettings on your phoneControl and customize phone settings on the Settings screen.On the Start screen, tap   .Tap Settings.Slide your finger left or right to access the system or application settingsSystem settingsringtones & sounds Turn on or off ringer and vibrate.Choose sounds to use for your phone ringtone and notifications.Choose which events to play a notification sound. theme Set the background and accent color to use.airplane mode Turn on or off airplane mode.Wi-Fi Set up your Wi-Fi connection.Bluetooth Manage your Bluetooth connections.email & accounts Set up accounts such as Windows Live, Outlook (Exchange ActiveSync), Facebook, and more. Setting up accounts lets your phone sync information with those accounts.lock & wallpaper Change your lock screen wallpaper, set the screen time out, and set up a password for your phone. location Choose whether to allow or prevent apps on your phone from accessing your current location.cellular Turn on or off your data connection, choose whether to enable data roaming, and add/edit your data connection APN.date & time Choose to set the date and time automatically or manually and choose how you want the time displayed.brightness Set the screen brightness. keyboard Choose the options you want for the onscreen keyboard. region & language Set the regional format to use for displaying and searching information.speech Choose the options you want when using voice to interact with your phone. find my phone If you’re not signed in to a Windows Live account, set up your phone to communicate with a web browser. If you’re already signed in, change the settings on how your phone can be found. phone update Choose if you want to be notified when there is an update available and how you want to check for updates.about Check information about your phone. You can also do a factory reset of your phone. feedback Choose if you want your phone to send feedback to Microsoft and whether to allow the use of data connection when sending. Note that if Use my cellular data connection to send feedback is selected, you may have to pay additional fees if feedback is enabled.1.2.3.
65      SettingsSettings      Applications settingsCheck or change the settings for some apps on your phone. Tap the app name on the list to see what settings are available. Changing display settingsSetting the screen brightness manuallyOn the Start screen, tap   .Tap Settings > brightness. Tap the Automatically adjust On/Off switch to turn it off. Select the Level to use.Adjusting the time before the screen turns offAfter a period of inactivity, the phone screen turns off to save battery power. You can set the idle time before the screen turns off.On the Start screen, tap   .Tap Settings > lock & wallpaper. Tap the Screen time-out box, and then select the time before the screen turns off.Changing sound settingsSwitching between silent and vibrate modesOn the Start screen, tap   .Tap Settings > ringtones & sounds. Tap the Vibrate On/Off switch to turn off vibrate.With Vibrate on, your phone will go to vibrate mode when you lower the sound volume down to zero. When Vibrate is off, the phone will go to silent mode when you set the volume to zero. Switching between silent, vibrate, and normal modesChange from normal mode to vibrate or silent mode by pressing the VOLUME DOWN button until the volume level reaches zero.Change back to normal mode by pressing the VOLUME UP button.Choosing the notification soundYou can choose a sound that you want for notifications.On the Start screen, tap   .Tap Settings > ringtones & sounds. Tap the box of the notification you want to change, and then choose the sound to use.1.2.3.4.1.2.3.1.2.3.1.2.3.
66      SettingsSettings      Checking information about your phoneOn the Start screen, tap   .Tap Settings > about. Changing the phone languageWhen you turn your phone on for the first time, you are asked to select the language you would like to use. You can also change the language on the fly whenever you like. Changing the language adjusts the keyboard layout, date and time formatting, and more. The languages available to choose from may depend on the version of phone you have.On the Start screen, tap   .Tap Settings > region & language.Tap the Display language box, and then select the display language you want.Tap Tap here to accept changes and restart your phone.1.2.1.2.3.4.
67      Update and resetUpdate and reset      Update and resetUpdating the phone softwareFrom time to time, updates for your phone may be available. Your phone can check and then notify you if there’s a new update. Setting the phone to notify you when an update is availableOn the Start screen, tap  .Tap Settings > phone update.Select the Notify me when new updates are found check box. Choose whether to allow the use of your phone’s data connection to check for updates.When you are notified of an available update, connect your phone to your computer using the supplied USB cable to download and install the update using the Zune software.Your computer needs to be connected to the Internet to download the update. Restarting or factory resetting your phoneIf your phone becomes unresponsive or sluggish, try restarting your phone and see if that helps. In case your phone has a persistent problem that cannot be solved, the last resort is to do a factory reset.Restarting your phone (soft reset)If your phone is running slower than normal, an app is not performing properly, or your phone becomes unresponsive, try restarting your phone and see if that helps solve the problem.To restart your phone, simply turn it off and back on. If pressing and holding the POWER button doesn’t work, then remove the battery, wait for a few seconds, reinsert the battery, and then turn the phone on.1.2.3.4.
68      Update and resetUpdate and reset      Performing a factory reset (hard reset)If you’re passing your phone on to someone else or your phone has a persistent problem that cannot be solved, you can do a factory reset (also called a hard reset). This returns your phone to the state it was in before the first time you turned it on.Factory reset is not a step to be taken lightly. It will permanently delete all your data and customized settings, and will also remove any apps you’ve downloaded and installed. Be sure to back up any data and files you want to keep before you do a factory reset.Performing a factory reset via settingsThe most convenient way to do a factory reset is via the phone settings.On the Start screen, tap  .Tap Settings > about phone.Tap reset your phone, and then tap yes.Performing a factory reset using phone buttonsIf you cannot turn on your phone or access the phone settings, you can still perform a factory reset by using the buttons on the phone.With the phone turned off, press and hold the VOLUME UP and DOWN buttons, and then briefly press the POWER button. Wait for the screen to show the instructions on how to do the factory reset, and then release the VOLUME UP and DOWN buttons.Follow the instructions onscreen to factory reset your phone.1.2.3.1.2.3.
69      Trademarks and copyrightTrademarks and copyright      Trademarks and copyrightCopyright © 2010 HTC Corporation. All Rights Reserved.The HTC logo, the HTC quietly brilliant logo, HTC 7 Mozart, and HTC Care are trademarks and/or service marks of HTC Corporation.Microsoft, Windows, Windows XP, Windows Vista, Windows Phone, Windows Marketplace, Outlook, Zune, Bing, and XBox are either registered trademarks or trademarks of Microsoft Corporation in the United States and/or other countries.Google is a trademark of Google, Inc.Bluetooth and the Bluetooth logo are trademarks owned by Bluetooth SIG, Inc.Wi-Fi is a registered trademark of the Wireless Fidelity Alliance, Inc.Java, J2ME and all other Java-based marks are trademarks or registered trademarks of Sun Microsystems, Inc. in the United States and other countries.Facebook is a trademark of Facebook, Inc.Dolby Mobile is a trademark of Dolby Laboratories.All other company, product and service names mentioned herein are trademarks, registered trademarks or service marks of their respective owners.HTC shall not be liable for technical or editorial errors or omissions contained herein, nor for incidental or consequential damages resulting from furnishing this material. The information is provided “as is” without warranty of any kind and is subject to change without notice. HTC also reserves the right to revise the content of this document at any time without prior notice.No part of this document may be reproduced or transmitted in any form or by any means, electronic or mechanical, including photocopying, recording or storing in a retrieval system, or translated into any language in any form without prior written permission of HTC.
70      Index      IndexAAccess point  35Adding a new contact  18Airplane mode  16Answering an incoming call  13BBing Maps  51Bluetooth  40- connecting headset or car kit  40Browser  37CCalendar  31- creating an appointment  31- sending an invitation  32Caller ID  13Call history  15Call services  16Camera  42Capturing video  43Changing the phone language  66Changing the ringtone  11Checking information about your phone  66Conference call  14Connection Setup  35, 56Contacts  18DData connection  35Deleting contacts  20EEditing a contact’s information  19Email  27- deleting  28- Exchange ActiveSync  27- POP3/IMAP account  27- sending  29- sending photos or videos  46- settings  30Ending a call  15Exchange ActiveSync  27FFacebook- sharing photos  47Factory reset  67Flash (camera)  43Flight mode  16HHTC Hub  55Hubs  7IInteracting with your phone by speaking  10K�eyboard  22- moving the cursor  22LLinking contact information  19Location services  51Lock screen wallpaper  8MMaps  51Marketplace  61Merging contact information  19Messaging  24Me tile  20Mobile network connection  35Muting the microphone  15NNotification sound  65OOffice Mobile  60
71      Index      PPeople  17Phone- making an emergency call  12- making calls  12- phone dialer  12Photo capture  43Pictures  45POP3/IMAP  27Predictive text  23Putting a call on hold  14RRejecting an incoming call  13SSearching  10Searching for a contact  20Sending- email  29- picture message  25- text message  24Settings  64- camera  44Setting up an account  10Setting up your phone for the first time  6SkyDrive- uploading photos  47Sleep mode  7SMS  24Sound volume  9Speakerphone  14Start screen  6Switching between calls  14Synchronizing your computer and phone  48TTaking a photo  43Text message  24Tiles  6UUpdating the phone software  67VVideo capture  43Videos  46Viewfinder screen (Camera)  42Viewing photos and videos  46Volume  9WWeb browser  37Wi-Fi  36ZZooming- camera  42- in and out of a photo  46- web browser  38Zune  48

Navigation menu