HTC PG09410 LTE BAND 4/17 TABLET COMPUTER User Manual 1
HTC Corporation LTE BAND 4/17 TABLET COMPUTER Users Manual 1
UserManual.wiki
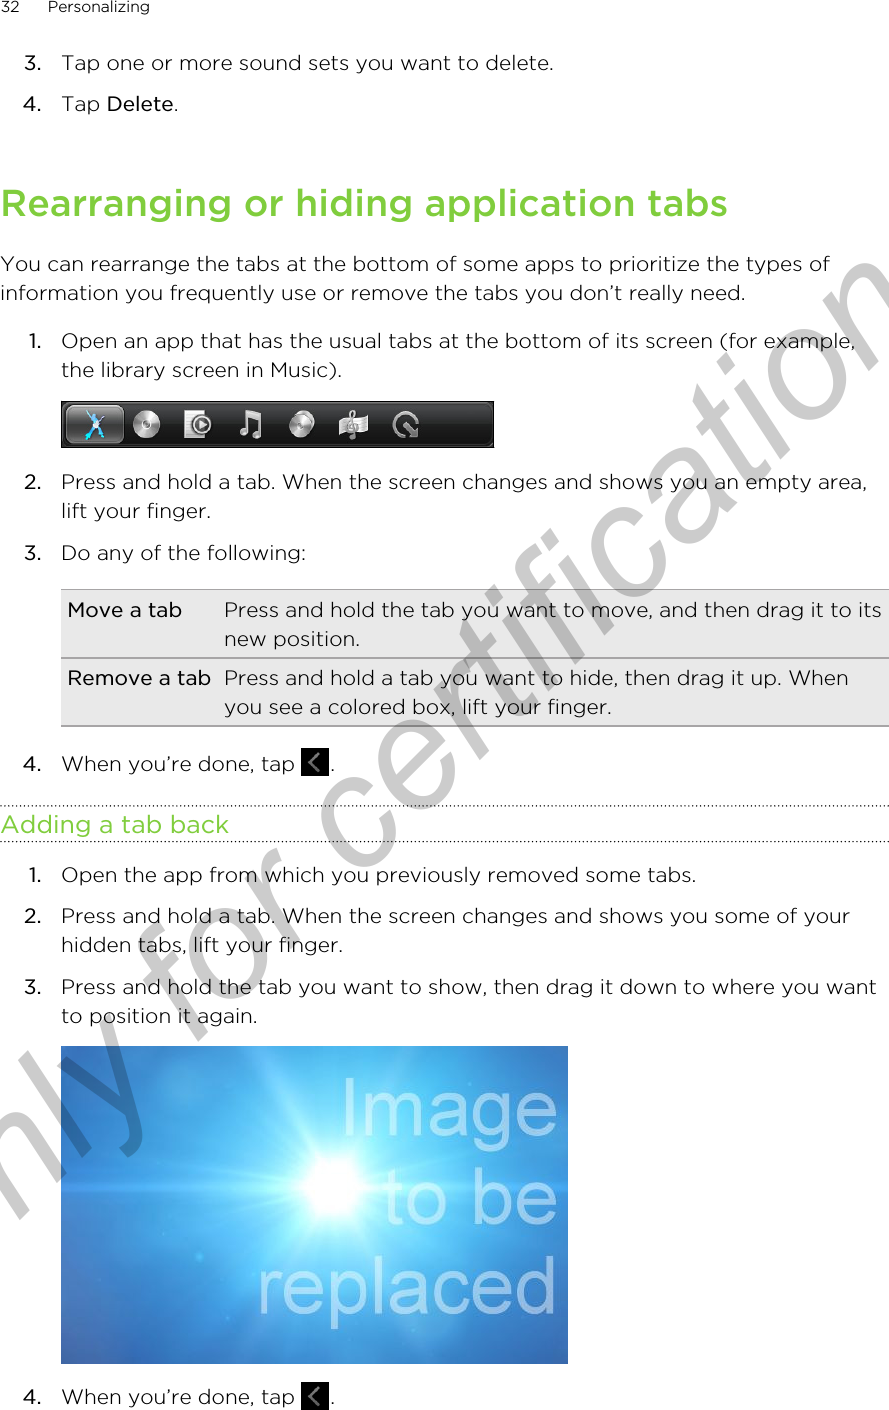
>
HTC
>
PG09410 User Manual
>
Users Manual 1
Contents
1.
Users Manual 1
2.
User Manual 1
3.
Users Manual 2
Users Manual 1
Navigation menu
Upload a User Manual
Namespaces
Wiki Guide
HTML
PDF
Info
Views
User Manual
Discussion / Help
Navigation

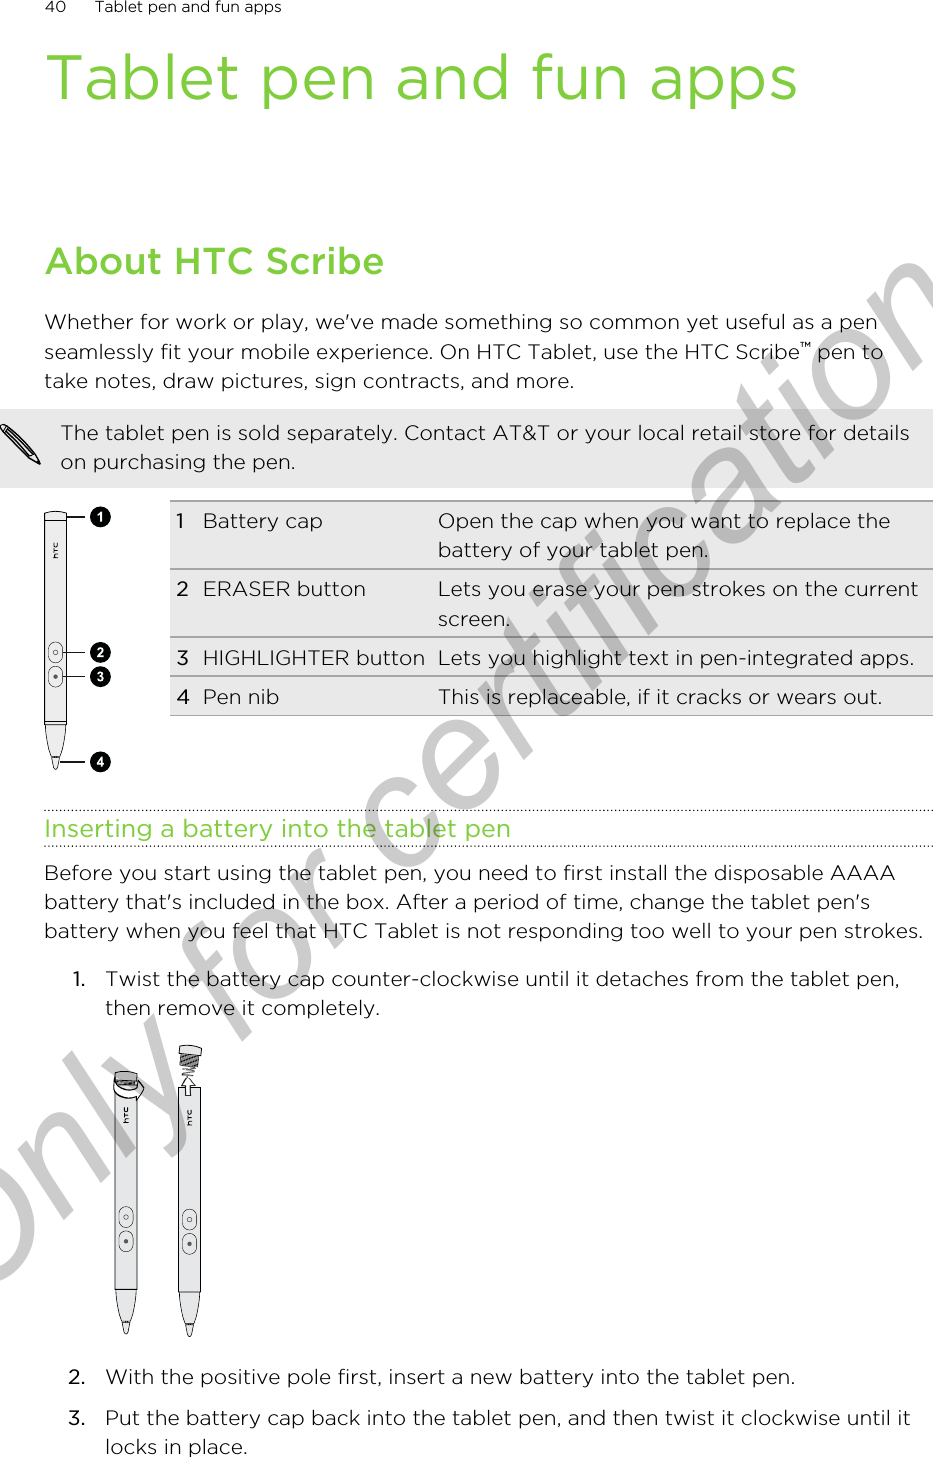


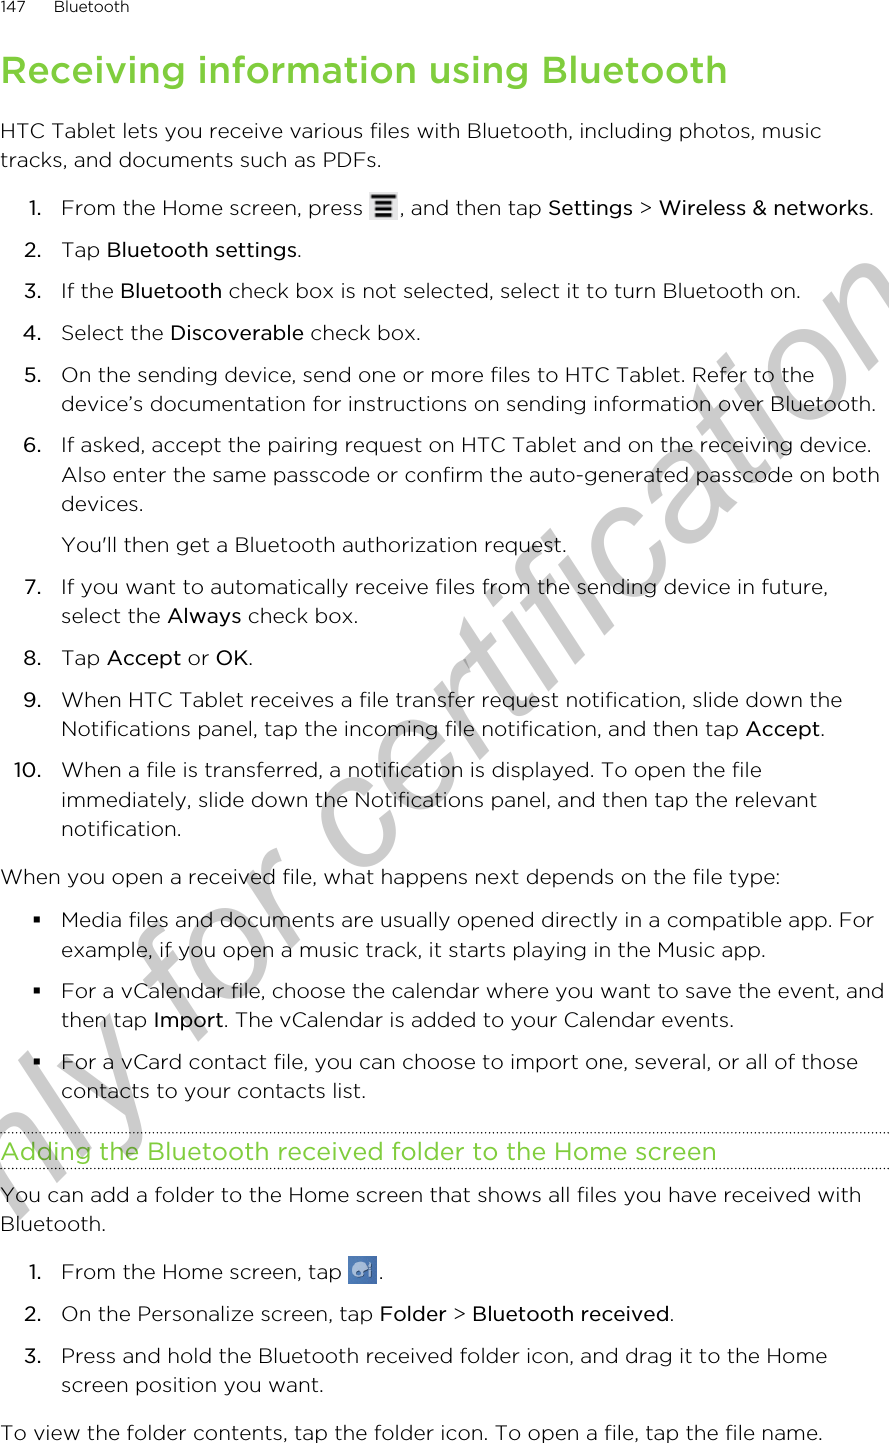
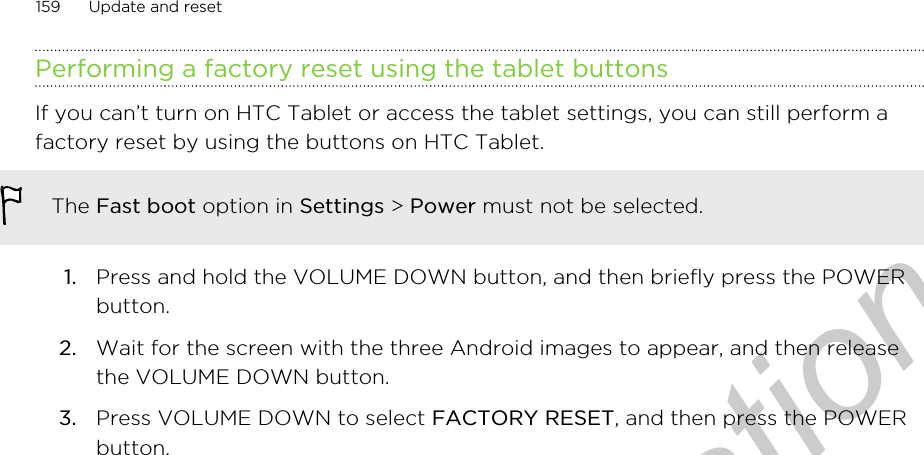
![About the Friend Stream widgetUse the Friend Stream widget so you can easily update your status and view otherpeople’s status updates right on the Home screen. If you want to keep up with justone person's Facebook updates, you can add the Friend Channel widget. You can findit in the Friend Stream widget layout options.Tweeting in Friend StreamIn Friend Stream, tap the bar at the top of the screen (for example, All networks), andthen tap Twitter.Tap to compose and send a tweet.Tap a person’s name to check profile details and all of his or hertweets.If you have linked the contact in People, tap the photo or icon toopen a menu where you can quickly choose how to communicatewith the contact.Press and hold a tweet to open an options menu to reply, send adirect message, retweet, and more.View all the tweets from people you follow and tweets that you haveposted.View all tweets that mention your username using the “@[yourusername]” convention.View all private/direct messages that you have received or sent.View tweets that you have marked as favorites.Sending a tweet1. On the All tweets tab, tap the text box that says What's happening.2. Type your tweet.81 SocialOnly for certification](https://usermanual.wiki/HTC/PG09410.Users-Manual-1/User-Guide-1501112-Page-81.png)
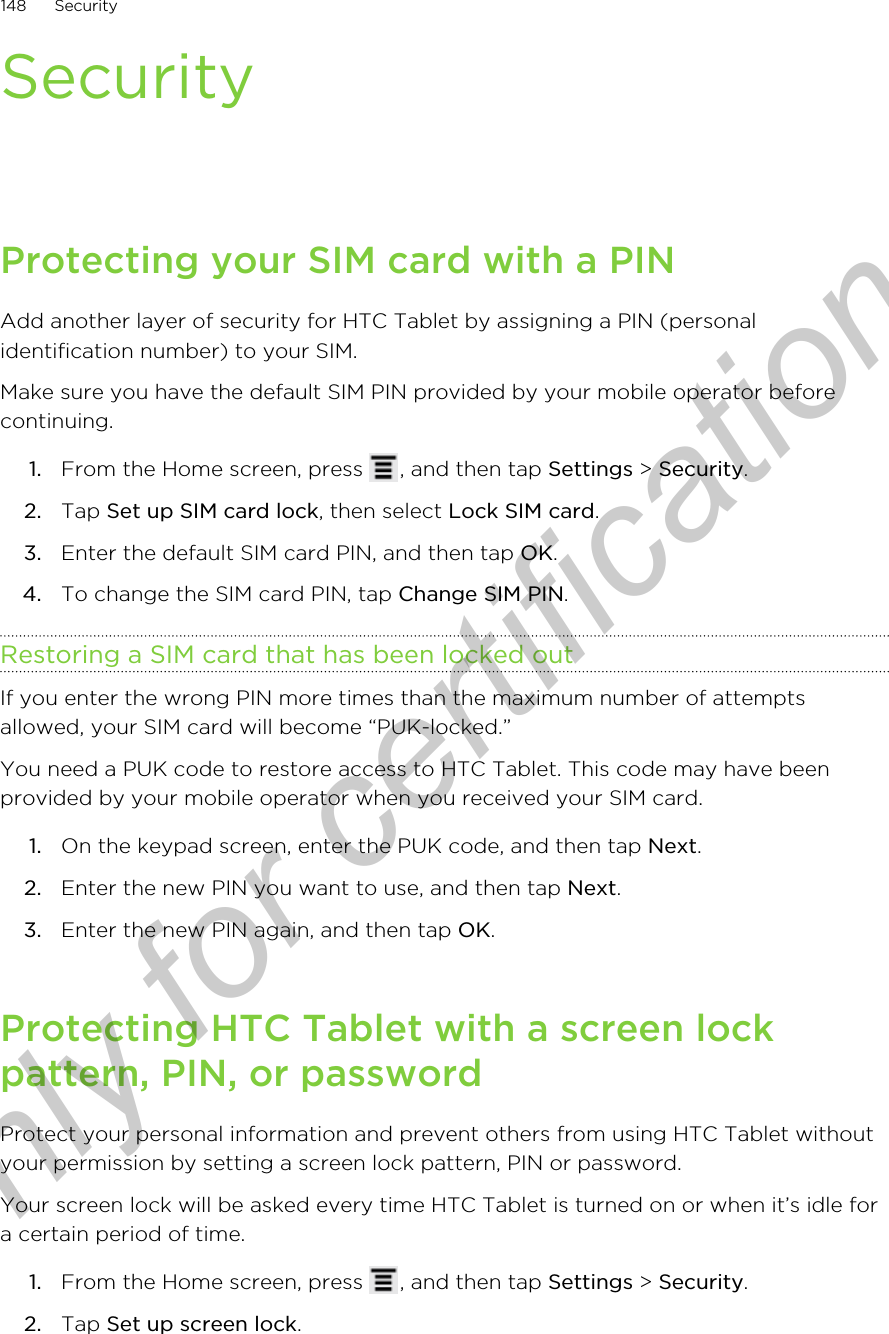
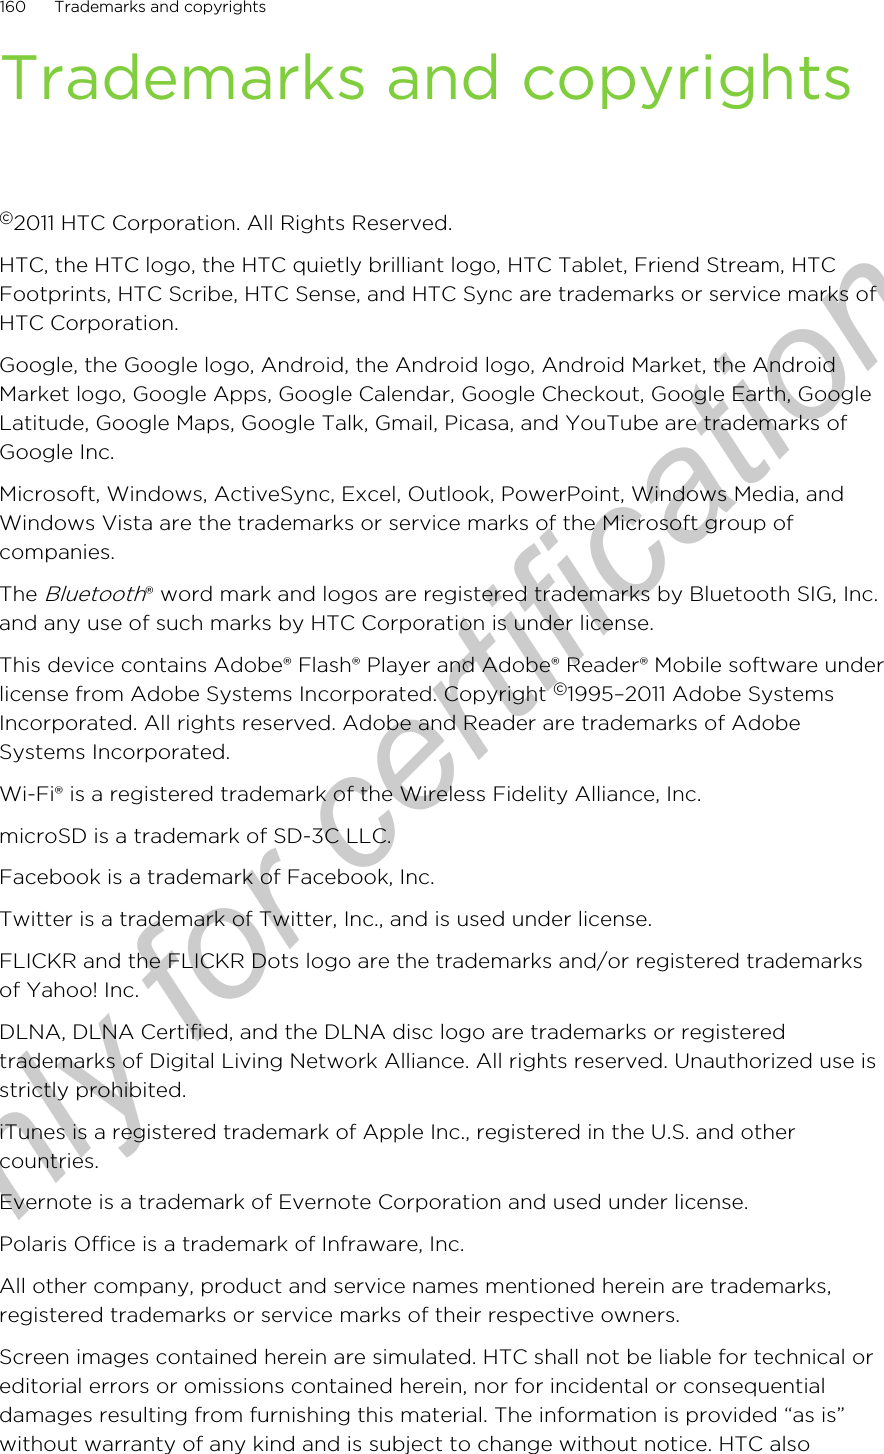
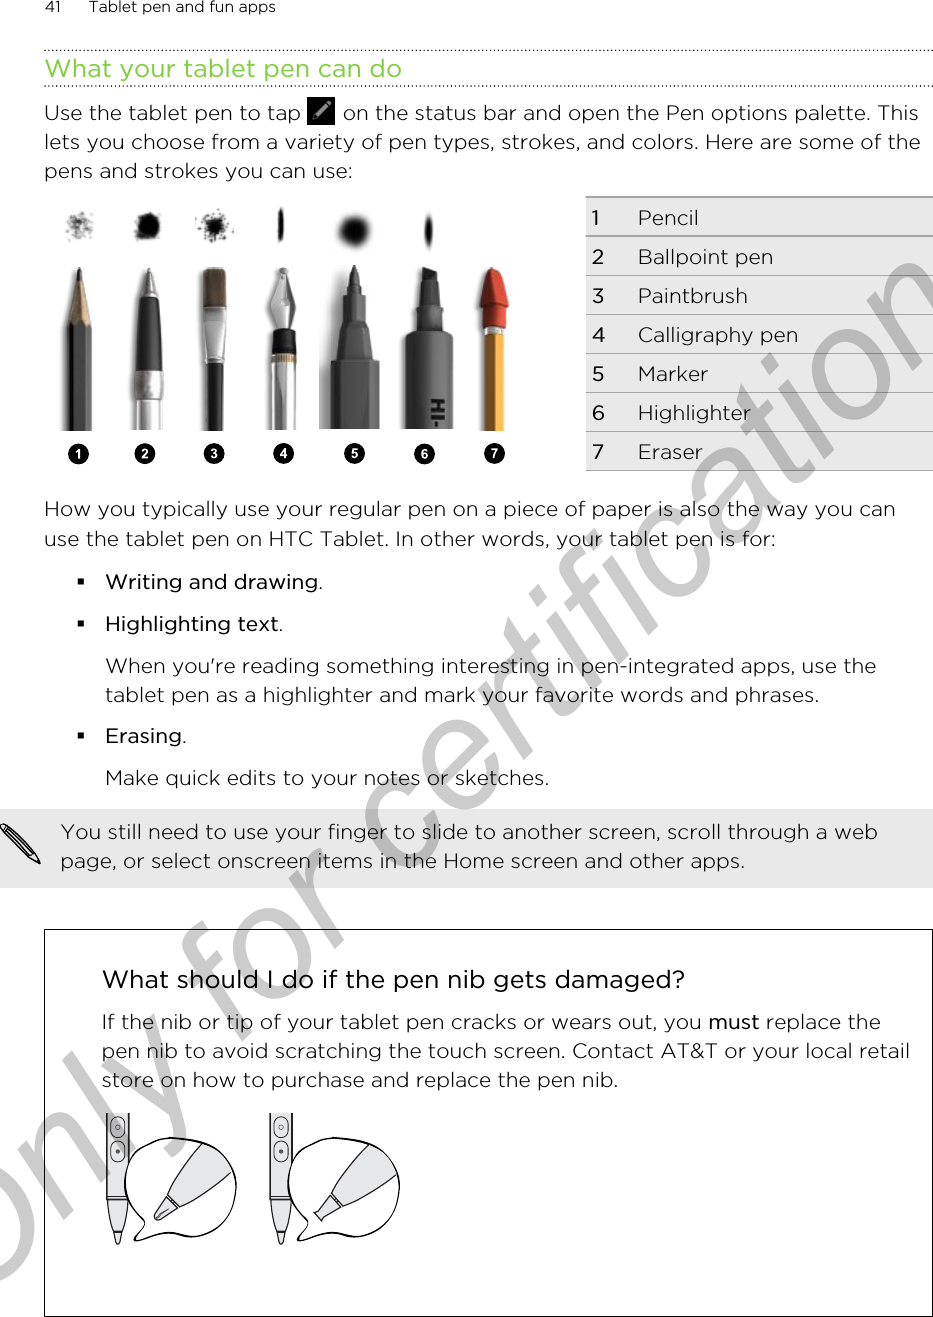
![Chatting with a friend1. In Google Talk, tap a friend in the Friends list.2. Enter your message in the text box.3. While chatting, tap [_], and then choose any of these options:Go off the record Your Google Talk messages are stored in the Chats folder ofyour Gmail account. Tap this option if you don’t want tostore your chat messages.Friend info View your friend’s contact details.Add to chat Add another friend to your chat.Chatting by voice or videoIf your friends use Google Talk on a device with a microphone or camera, you canchat with them by voice and video.Set your online status available for voice or video chats. Tap your profile in theFriends list, and then select the Allow voice and video chats option.1. In Google Talk, tap a friend in the Friends list.2. Do one of the following:§Tap [_] to start a voice chat.§Tap [_] to start a video chat.3. During a video chat, you can:§Tap the screen to reveal the onscreen chat controls.§Press VOLUME UP and VOLUME DOWN to adjust the volume level.4. When you’re done with the voice or video chat, tap End Chat.83 SocialOnly for certification](https://usermanual.wiki/HTC/PG09410.Users-Manual-1/User-Guide-1501112-Page-83.png)
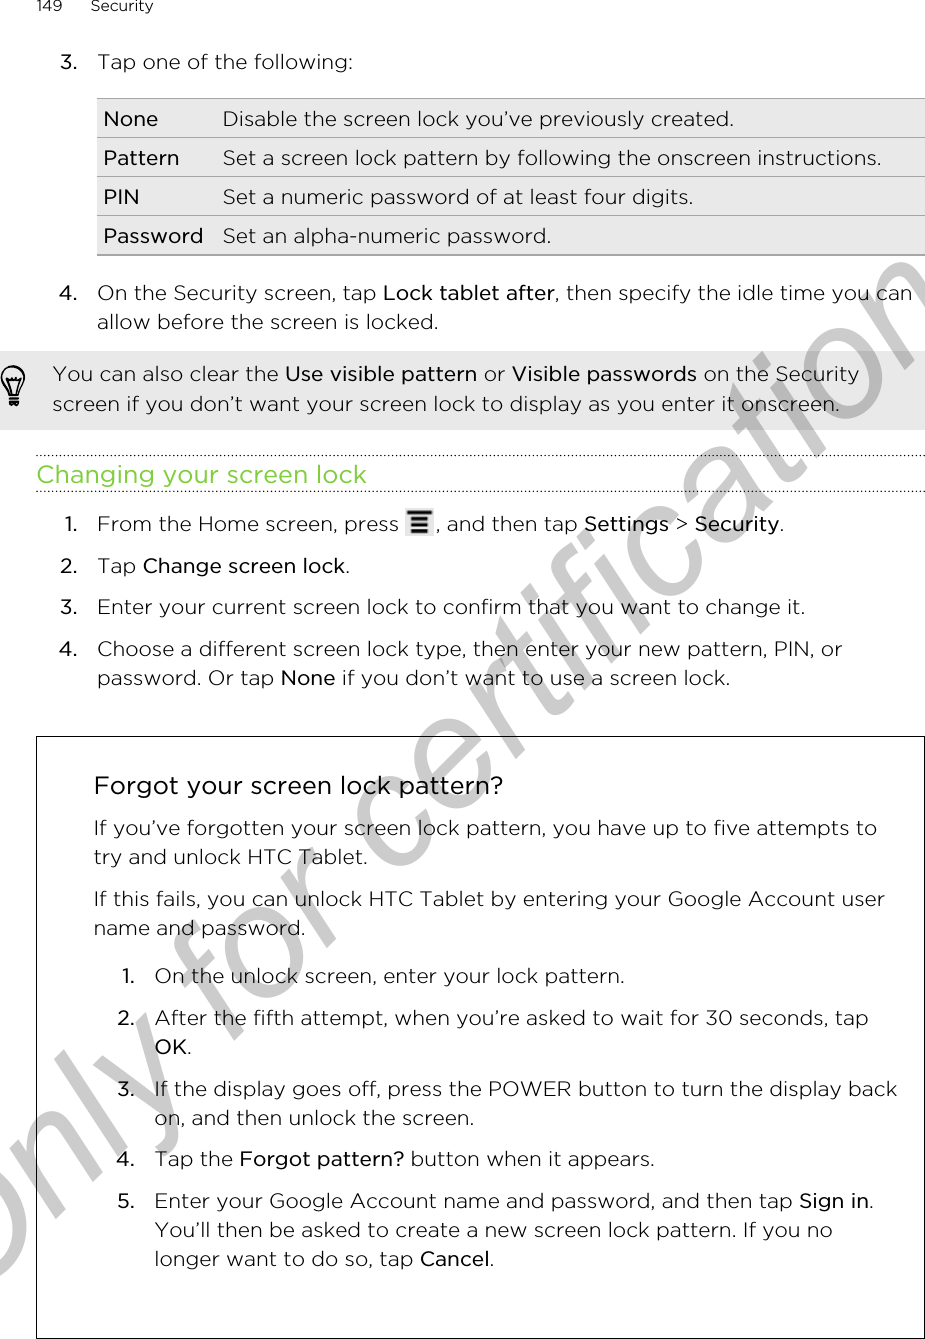
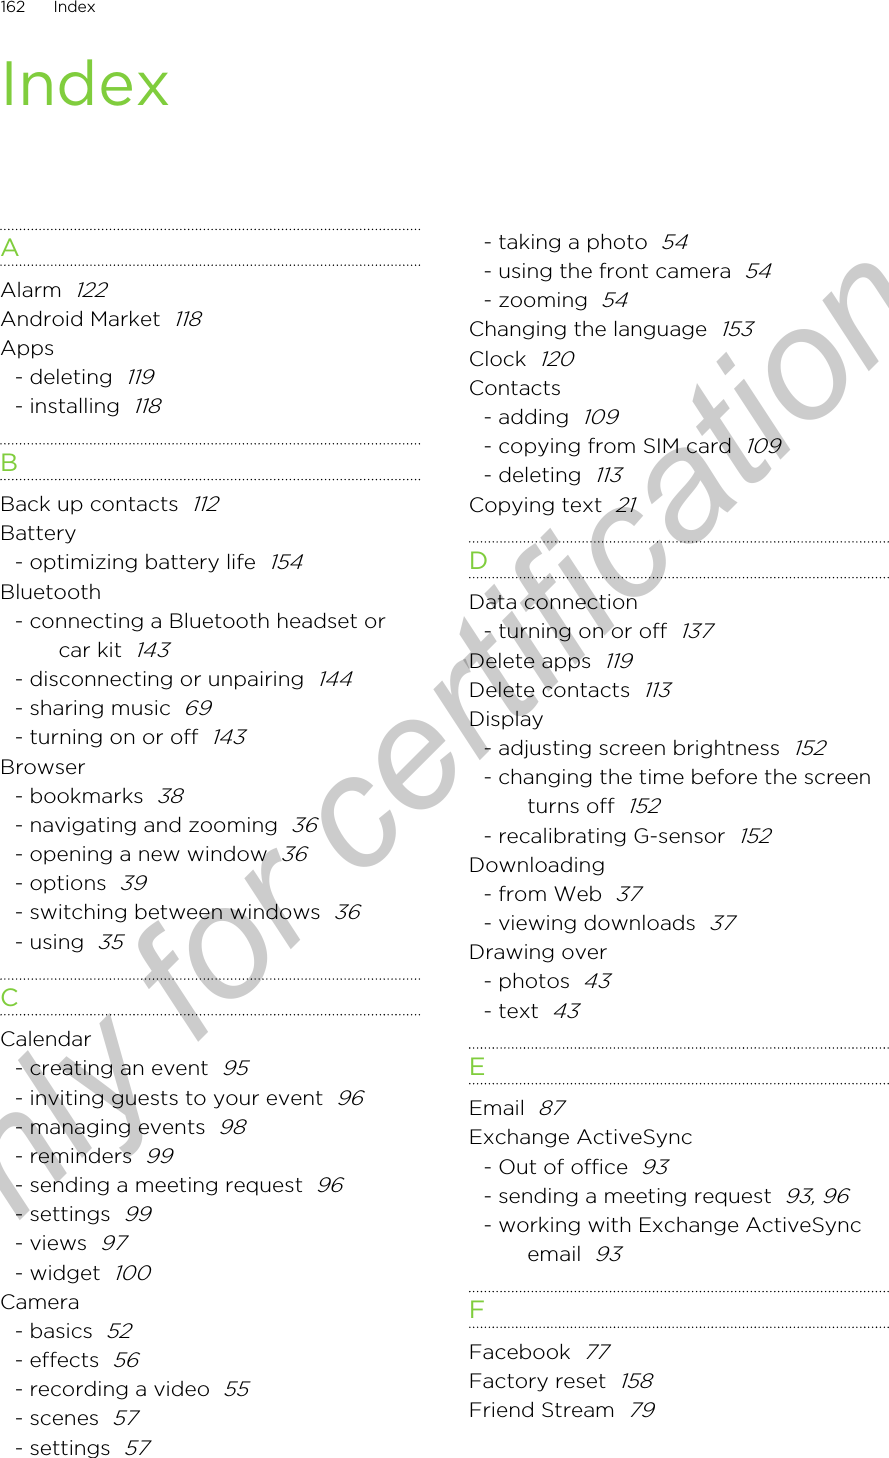
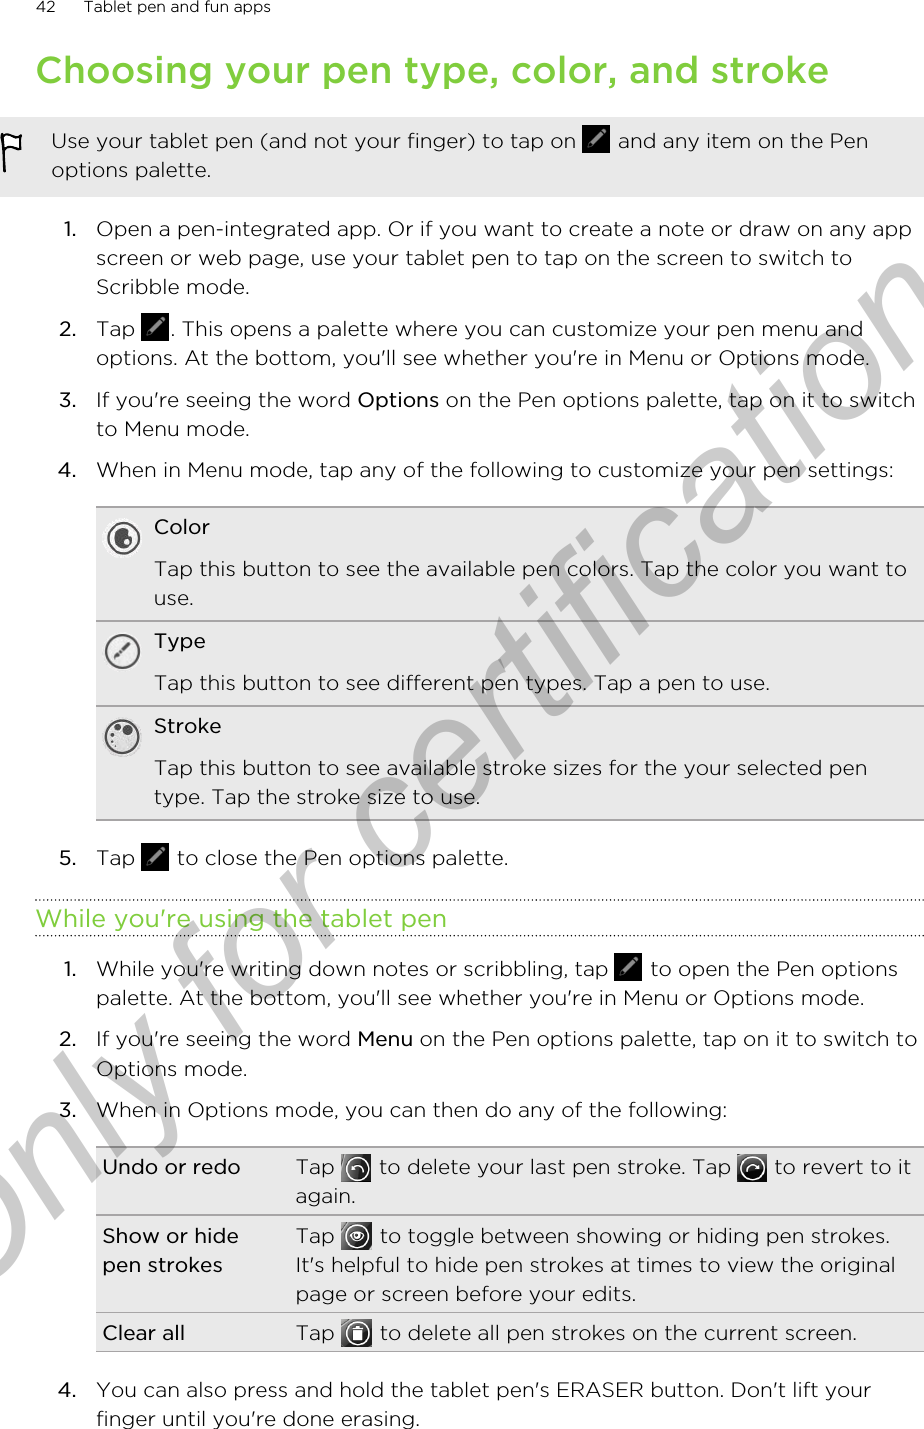
![Adding and managing friendsThe Friends list is where you add and manage your friends in Google Talk.In Google Talk's Friends list, you can:Invite a friend 1. Tap [_].2. Enter the Google Talk ID or Gmail address of the friend you wantto add.3. Tap Send invitation.View allfriendsInitially, only those friends that you often chat with — the mostpopular — are shown in the Friends list.§To view all your friends, tap > All friends.§To view only friends that you often chat with, tap > Mostpopular.Make a friendpopular 1. Tap a friend, and then tap > Friend info2. Tap Show in Friends list, and then select an option you want.Block a friend You can block a friend from sending you messages. When blocked,your friend is removed from the Friends list and is added to theBlocked friends list.Tap a friend, and then tap > Block friendUnblock afriend 1. Tap > Settings.2. Tap Blocked friends, and then tap the friend to unblock.Changing settings or signing outIn Google Talk's Friends list, tap , and then select one of the following:§Settings to change the app and notification settings.§Sign out to sign out.84 SocialOnly for certification](https://usermanual.wiki/HTC/PG09410.Users-Manual-1/User-Guide-1501112-Page-84.png)
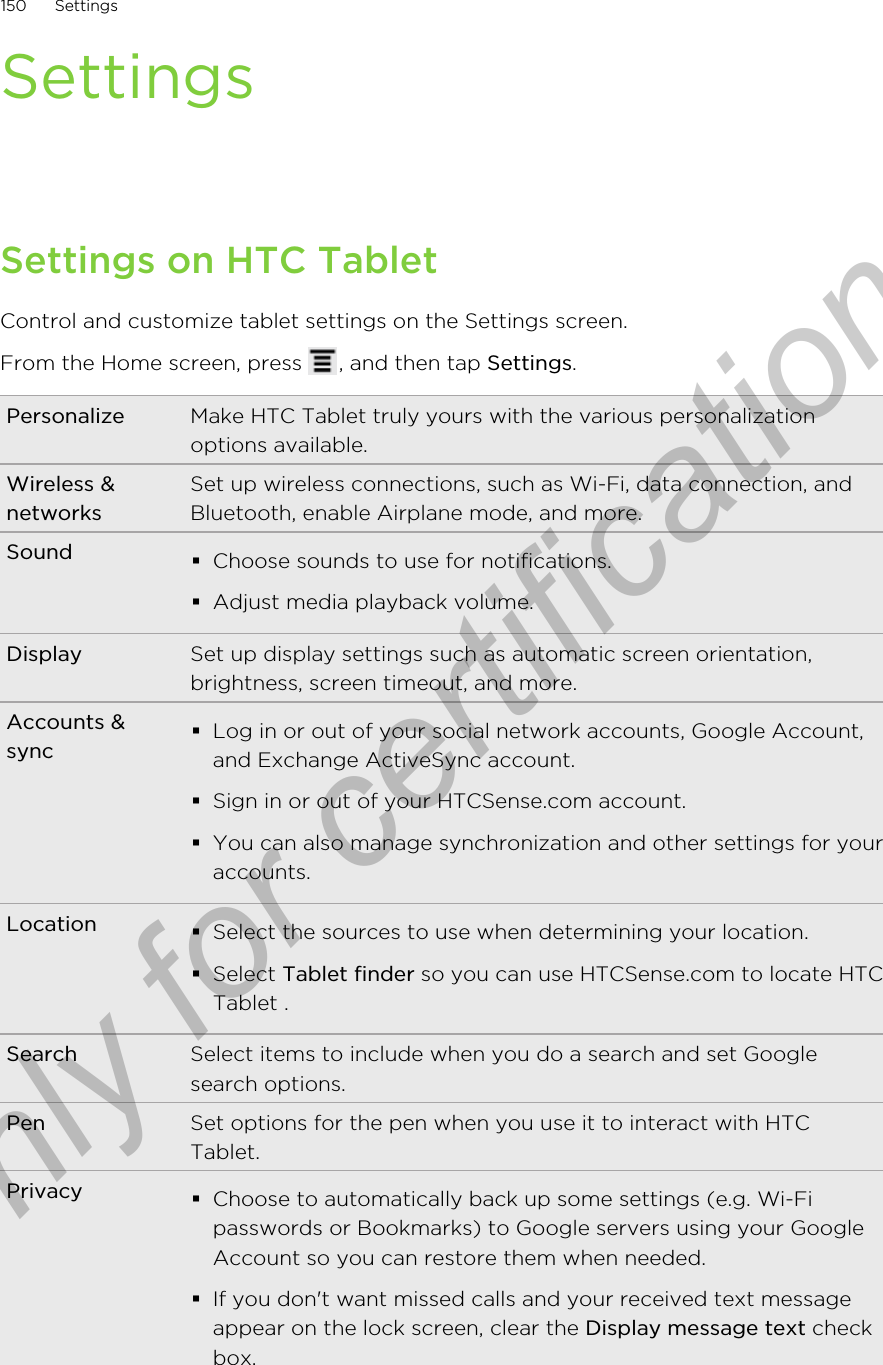
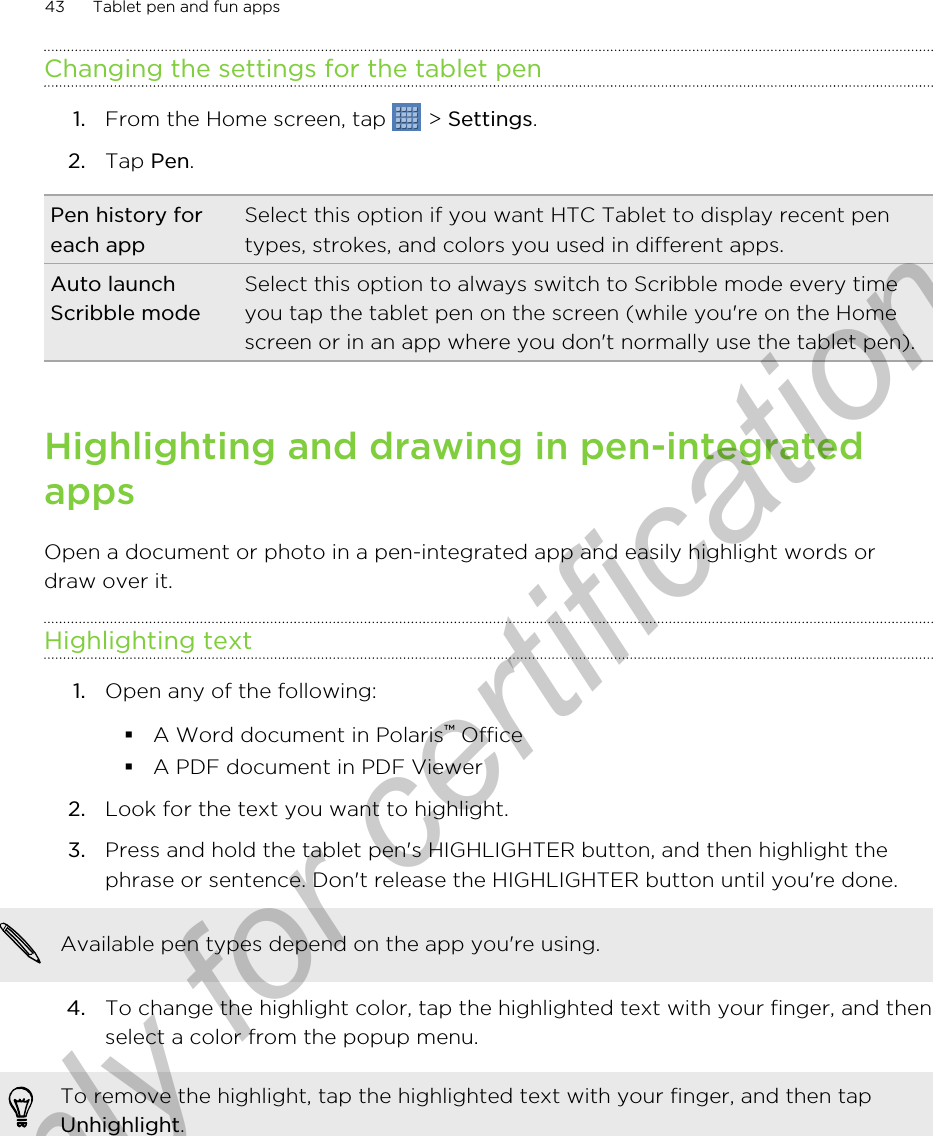
![EmailGmailUsing GmailWhen you first set up HTC Tablet, make sure you sign into your Google Account touse Gmail. If you didn’t do so, go to the Accounts & sync setting to sign in.You can also set up more than one Google Account on HTC Tablet, and then switchbetween accounts in Gmail.Viewing your Gmail InboxAll your received emails are delivered to your Inbox.From the Home screen, tap > Gmail. Gmail opens with a scrolling list of your labels(such as Sent, Drafts, or your created label) on the left and your Inbox on the right.Switch to your otherGmail accountTap the current account name, and then tap anotheraccount you want to switch to.Refresh the Inbox Tap [_].Archive or deletemultiple conversationsSelect one or more empty boxes before the emails orconversations, and then tap any of the following:§Change labels to tag another label to the selected items.§[_] to mark the items as unread or read.§[_] (star the items), [_] (archive), or [_] (delete).85 EmailOnly for certification](https://usermanual.wiki/HTC/PG09410.Users-Manual-1/User-Guide-1501112-Page-85.png)
![Sending a new message1. In the Gmail inbox, tap [_].2. If you’ve set up multiple Google Accounts on HTC Tablet, choose which Gmailaddress you want to use for sending your email. Tap the box that shows yourcurrent Gmail address, and then tap another address that you want to use forsending.3. Enter the message recipient’s email address in the To field. If you are sendingthe email to several recipients, separate the email addresses with a comma.If you want to send a carbon copy (Cc) or a blind carbon copy (Bcc) of the email toother recipients, tap + Cc/Bcc.4. Enter the email subject, and then compose your email.5. If you want to attach a picture, tap [_].6. Locate and then tap the picture you want to attach.7. After composing your message, tap Send. While composing the message, tap Save Draft. Or tap to discard the message.Replying to or forwarding an email message1. In the Gmail inbox, tap the email message or conversation.2. To reply to the sender, tap . Or, tap [_] (Reply all) or [_] (Forward).3. Do one of the following:§If you selected to reply or reply all, enter your reply message.§If you selected forward the message, specify the message recipients.Tap Respond inline if you want to interleave your new message with the receivedemail. But this removes any attachments or formatting in the original email.4. Tap Send.Getting helpTo find out more about using Gmail, tap > Help. The web browser will take you tothe Google Mobile Help site.86 EmailOnly for certification](https://usermanual.wiki/HTC/PG09410.Users-Manual-1/User-Guide-1501112-Page-86.png)
![Working with Exchange ActiveSync emailYou can read, reply, send, and manage your work email in the same easy way as witha POP3/IMAP account. In addition, you can also use some powerful Exchangefeatures.Flagging an email§While viewing the inbox, tap the white flag icon that appears on the right ofan email message. The icon turns red after you flagged the email.§While reading an email, you can also tap the flag icon in the email.Setting your Out of the office status1. Switch to your Exchange ActiveSync account.2. Tap > Out of the office.3. Under I am currently, tap [_], and then select Out of the office.4. Set the dates and times for the period when you will be out of the office.5. Enter the auto-reply message.6. Tap Save.Sending a meeting request1. Switch to your Exchange ActiveSync account.2. Tap > New meeting invitation.3. Enter the meeting details.4. Tap Send.Changing email account settings1. Switch to the email account whose settings you want to change.2. Tap > Settings.3. Select from the following:Account settings Change the email account settings such as the name,email address, password, and description.General settings Set the font size when reading emails, enable, disable orset the signature, set the account as the default emailaccount, and set where to save email attachments.Send & Receive Set the sync settings for incoming and outgoing emailssuch as maximum size limit, update schedule, and more.93 EmailOnly for certification](https://usermanual.wiki/HTC/PG09410.Users-Manual-1/User-Guide-1501112-Page-93.png)
![Searching for a locationIn Google Maps, you can search for a location, such as an address or a type ofbusiness or establishment (for example, museums).1. In Maps, enter the place you want to search for in the search box.2. Tap to search for the location you entered or tap a suggested search item.The search results are displayed as markers on the map.3. Scroll through the Results panel, and then tap an item from the list to see thelocation details. Details about the selected location displays on the screen.4. Tap the onscreen buttons to view the location on a map, get directions, view thelocation in Street View, if available, and more. Scroll down the screen to viewmore options.5. Tap to return to the Results panel and view other suggested locations. Ortap X to close the Results panel.Clearing the mapAfter searching on a map, you can clear away the various markers drawn on it.Tap > Clear Map.Searching for a place of interest near youUse Places to find places of interest near your current location. Google Maps locatescommon places that you would want to find, such as the nearest gas station or ATMkiosk.Before using Places, you need to enable location sources.1. In Maps, tap [_].2. Tap the type of place you want to search.3. Do any of the following:§When one or two places of interest are found, the search results aredisplayed as markers on the map. You can tap the marker, and then tap theballoon to view more information about the place.§When several places are found, the search results display in a list. Tap aplace to view more information.103 Maps and locationOnly for certification](https://usermanual.wiki/HTC/PG09410.Users-Manual-1/User-Guide-1501112-Page-103.png)
![Getting directionsGet detailed directions to your destination. Google Maps can provide directions fortravel by foot, public transportation, or car.1. While viewing a map, tap [_].2. Do any of the following:§Use your current location as the starting point, or enter a location fromwhere to start in the first text box. Then enter your destination in thesecond text box.§Tap to select an address from your contacts or a point that you tap on amap.3. Choose how you want to get to your destination by tapping the car, publictransit, or walk button.4. Tap Go. The next screen displays the directions to your destination in a list.If the place you’ve set as your destination has several locations available, choosewhich one to go to.5. Tap an item to view the directions on the map.6. Tap the arrow buttons on the map to follow the directions.When you’re finished viewing or following the directions, tap > Clear Map to resetthe map. Your destination is automatically saved in the Google Maps history.104 Maps and locationOnly for certification](https://usermanual.wiki/HTC/PG09410.Users-Manual-1/User-Guide-1501112-Page-104.png)

![SnoozedurationSet how long to snooze between alarms.Side buttonbehaviorChoose what happens to the alarm when pressing the side button(VOLUME UP/VOLUME DOWN). You can set the button to snooze,dismiss the alarm, or disable the button. The side button works onlywhen the screen is not locked.Checking WeatherUse the Weather app and widget to check the current weather and weather forecastsfor the next few days. In addition to your current location, you can view weatherforecasts for other cities around the globe. Your settings in the Weather app alsocontrol the weather information that is shown in the Clock and Calendar.For HTC Tablet to detect your current location and display your local weather inthe Weather app and widget as well as in Clock and Calendar:§You need to connect to the Internet.§Location services must be enabled. If you didn't enable it when you first set upHTC Tablet, you can do so in Settings > Location.1. From the Home screen, tap > Weather. You'll see your current weather and weather information such as thetemperature, approximate time of sunset, and more. You can check weatherforecasts for the current day and the upcoming days.2. While viewing forecasts, you can:§Slide up or down the list of cities, and then tap a city to view its weatherforecasts.§Tap to update the weather information at any time.§Tap [_] to see a full screen animation of your current weather and weatherinformation.Adding a city to the Weather screenAdd more cities to the Weather screen so you can instantly check the weatherforecasts in these cities. In addition to your current location, the Weather screen candisplay up to fifteen cities.1. On the Weather screen, tap .2. Enter the location you want to add. As you type, the list is filtered to show thepossible locations based on the letters you entered.3. Tap the desired city to select it.123 Android Market and other appsOnly for certification](https://usermanual.wiki/HTC/PG09410.Users-Manual-1/User-Guide-1501112-Page-123.png)
![3. While watching a video, you can:§Tap the video screen to pause, resume playback, or drag the slider to jumpto a different part of the video.§Tap the video screen to see the onscreen controls, and then tap [_] towatch the video in full screen.§See related videos or check out what other viewers think.§Tap the thumbs-up or thumbs-down icon to add your video rating.§Tap to see other options.4. Tap [_] to return to the YouTube main screen.Searching for videos1. On the YouTube main screen, tap Search YouTube.2. Enter a search keyword.3. Scroll through the results and tap a video to watch it. You also have the option to show results that were just recently posted. Tap Alltime, and then select a time period you want.Clearing the search history1. On the YouTube main screen, tap > Settings.2. Tap Search settings > Clear search history, and then tap OK when prompted.Sharing a video link1. On the video’s watch screen, tap Share.2. Choose how you want to share the video link from the available options.Sharing your videos on YouTube1. From the Home screen, tap > YouTube.2. Tap Your Channel > Upload.3. Select the video you want to share.4. Enter a title, description, and then tap More details to add tags for your video.5. Set the privacy level.6. Tap Upload.129 Android Market and other appsOnly for certification](https://usermanual.wiki/HTC/PG09410.Users-Manual-1/User-Guide-1501112-Page-129.png)


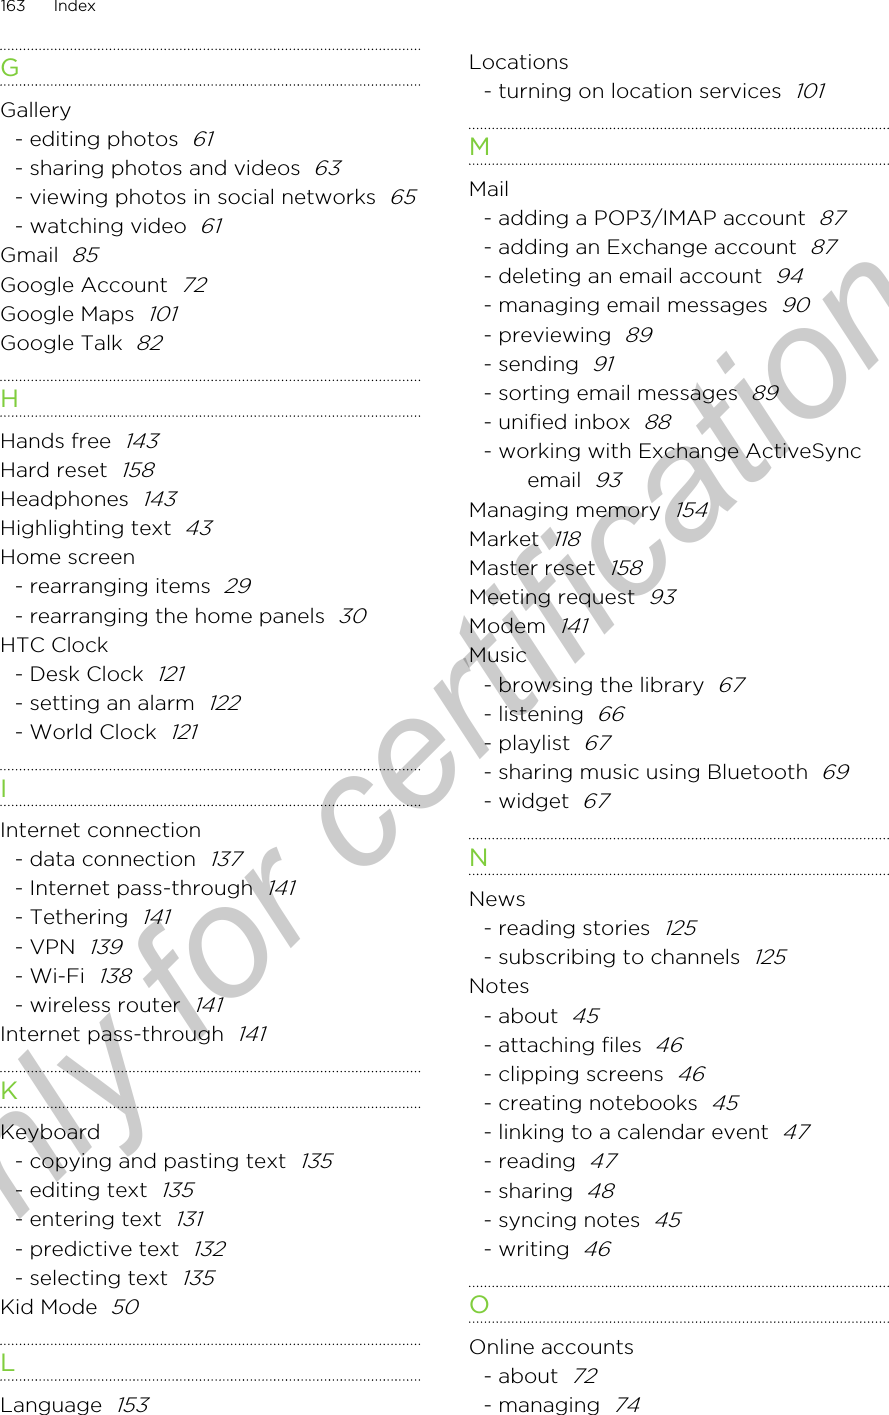
![Contact 1. On the People app, tap a contact to view the contact'sdetails.2. Press and then tap Send contact.3. Tap the down arrow icon, and then select Bluetooth.4. Choose which details to share, and then tap Send.Calendarappointment oreventIn Day view, Agenda view, or Week view, press and holdthe event, and then tap Share vCalendar > Bluetooth.Music track With the track displayed on the Music app’s Now playingscreen, press , and then tap Share > Bluetooth.Voice recording On the main Voice Recorder screen, tap , and then tapBluetooth.3. Turn on Bluetooth if you’re asked to do so.4. If you haven't paired with the receiving device before, tap Scan for devices.5. Tap the name of the receiving device.6. If prompted, accept the pairing request on HTC Tablet and on the receivingdevice. Also enter the same passcode or confirm the auto-generated passcodeon both devices.7. On the receiving device, accept the file.Where sent information is savedWhen you send information using Bluetooth, the location where it's saved depends onthe type of information and the receiving device.If you send a calendar event or contact, it is normally added directly to thecorresponding application on the receiving device. For example, if you send acalendar event to a compatible phone, the event is shown in that phone’s calendarapplication.If you send another file type to a Windows computer, it is normally saved in theBluetooth Exchange folder within your personal document folders.§On Windows XP, the path may be: C:\Documents and Settings\[yourusername]\My Documents\Bluetooth Exchange§On Windows Vista, the path may be: C:\Users\[your username]\Documents§On Windows 7, the path may be: C:\Users\[your username]\My Documents\Bluetooth Exchange FolderIf you send a file to another device, the saved location may depend on the file type.For example, if you send an image file to another mobile phone, it may be saved in afolder named “Images”.146 BluetoothOnly for certification](https://usermanual.wiki/HTC/PG09410.Users-Manual-1/User-Guide-1501112-Page-146.png)