HTC PG41200 Tablet User Manual Sprint Express UG
HTC Corporation Tablet Sprint Express UG
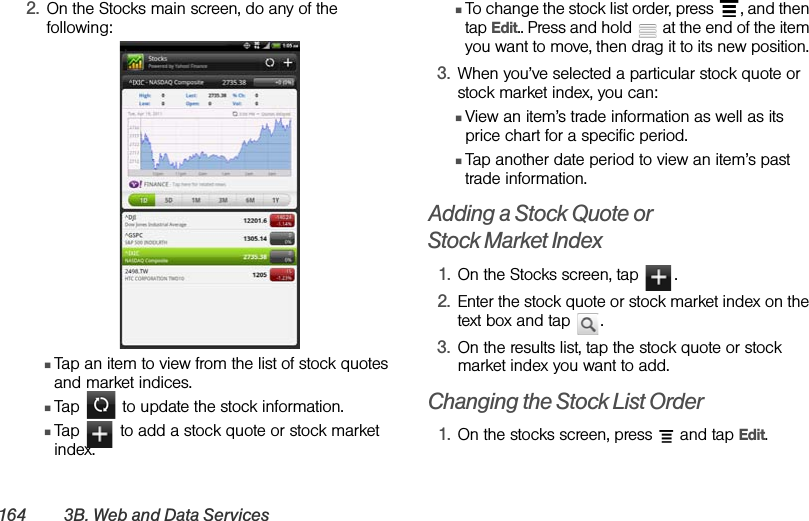
UserManual.wiki
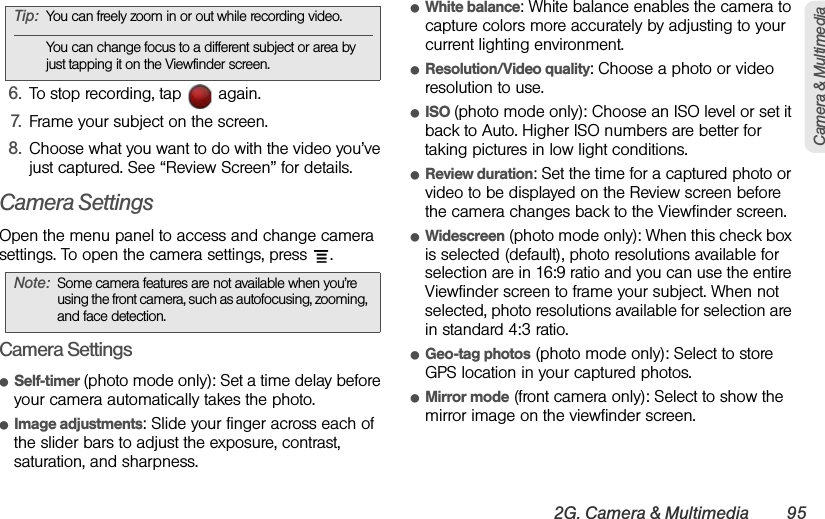
>
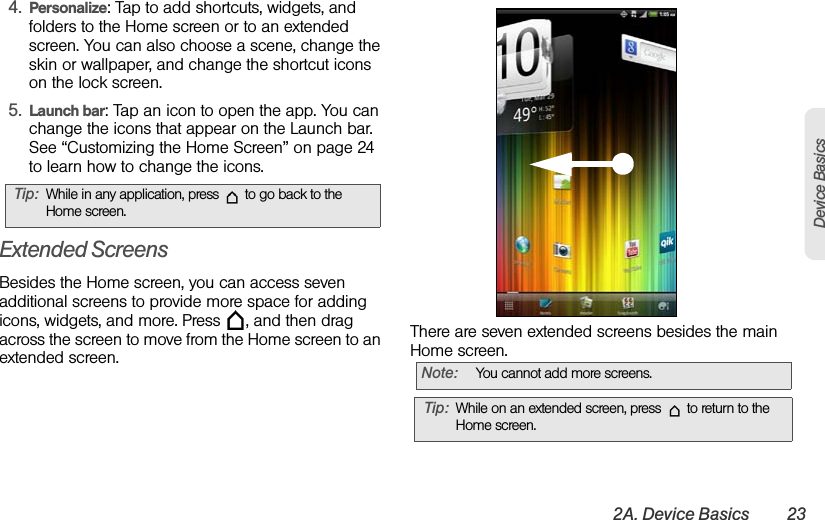
HTC
>
PG41200 User Manual
Users Manual
Navigation menu
Upload a User Manual
Namespaces
Wiki Guide
HTML
PDF
Info
Views
User Manual
Discussion / Help
Navigation


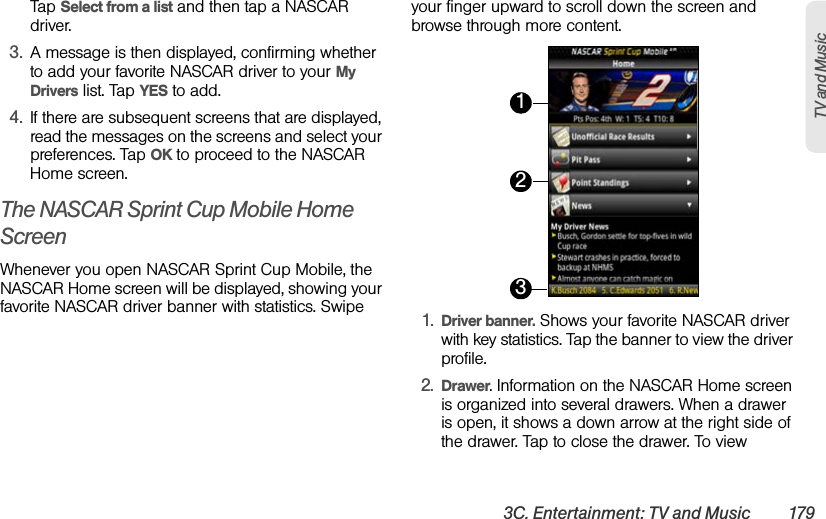
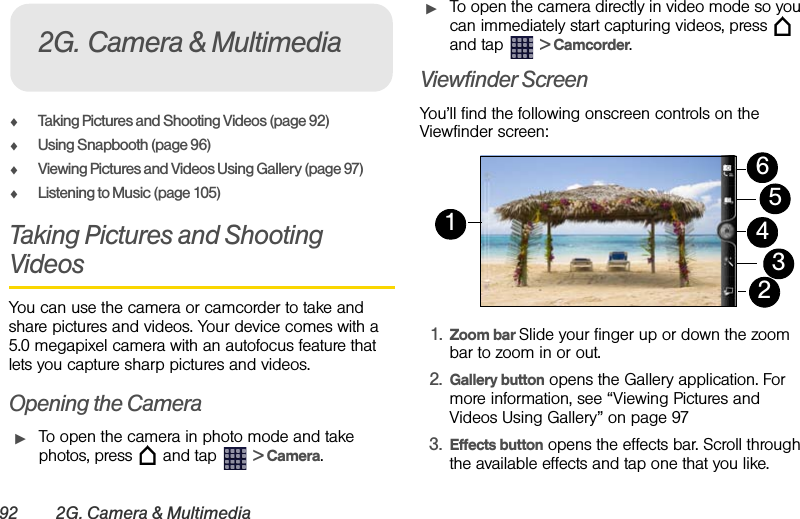
![50 2C. PeopleEditing an Entry in People1. Display an entry in People. (See “Displaying an Entry in People” for details.)2. Scroll down the screen and tap Edit.3. Under the Phone section, tap the number you want to edit.4. Edit the number using the keypad.5. Tap Save. Assigning a Picture to an EntryAssign a picture to display when a specified contact calls you.1. Display an entry in People. (See “Displaying an Entry in People” for details.)2. Scroll down the screen and tap Edit.3. Tap at the top-left corner of the screen.4. Tap Gallery, Camera, or Snapbooth.ⅢIf you selected Gallery, select an album to find the picture, tap the picture you want to use, crop the picture, and tap Save.ⅢIf you selected Camera, the camera will launch and you will use it to take a new picture. (See “Taking Pictures and Shooting Videos” on page 92.)ⅢIf you selected Snapbooth, the Snapbooth application will launch and you will use it to take a new picture. (See “Using Snapbooth” on page 96)5. Tap Save. Note: You cannot edit the contact information of a Facebook or Twitter friend.Tip: Tap the Number type (for example, [ ], to change the type of number).Tap X at the right side of a number to delete it. Note: You cannot edit the contact information of a Facebook or Twitter friend.](https://usermanual.wiki/HTC/PG41200/User-Guide-1480868-Page-62.png)


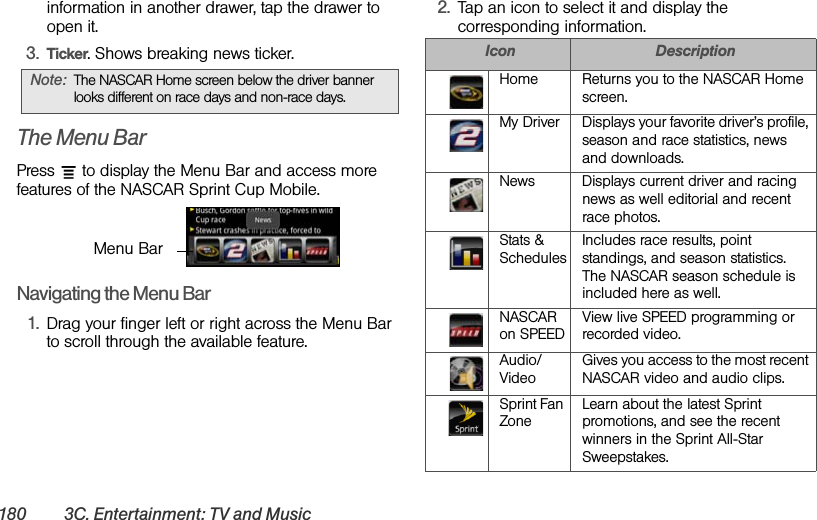
![2H. Bluetooth 113BluetoothⅢMusic track. With the track displayed on the Now playing screen, press , and then tap Share > Bluetooth.ⅢVoice recording. On the main Voice Recorder screen, tap , and then tap Bluetooth.4. If you are prompted to turn on Bluetooth, tap Yes.5. Tap the name of the receiving device.6. If prompted, accept the connection on the receiving device, and enter the same passcode on both your device and the other device, or confirm the auto-generated passcode.7. On the receiving device, accept the file.Where sent information is savedThe location where the information is saved depends on the type of information and the receiving device.If you send a calendar event or contact, it is normally added directly to the corresponding application on the receiving device. For example, if you send a calendar event to a compatible phone, the event is shown in that phone’s calendar application.If you send another file type to a Windows computer, it is normally saved in the Bluetooth Exchange folder within your personal document folders.ⅢOn Windows XP, the path may be: C:\Documents and Settings\[your username]\My Documents\Bluetooth Exchange.ⅢOn Windows Vista, the path may be: C:\Users\[your username]\Documents.ⅢOn Windows 7, the path may be: C:\Users\[your username]\My Documents\Bluetooth Exchange FolderIf you send a file to another device, the saved location may depend on the file type. For example, if you send an image file to another wireless device, it may be saved in a folder named “Images.”Receiving Information From Another DeviceYour device is capable of receiving a wide variety of file types with Bluetooth, including photos, music tracks, and documents such as PDFs.1. Press > , and then tap Settings > Wireless & networks > Bluetooth settings.](https://usermanual.wiki/HTC/PG41200/User-Guide-1480868-Page-125.png)