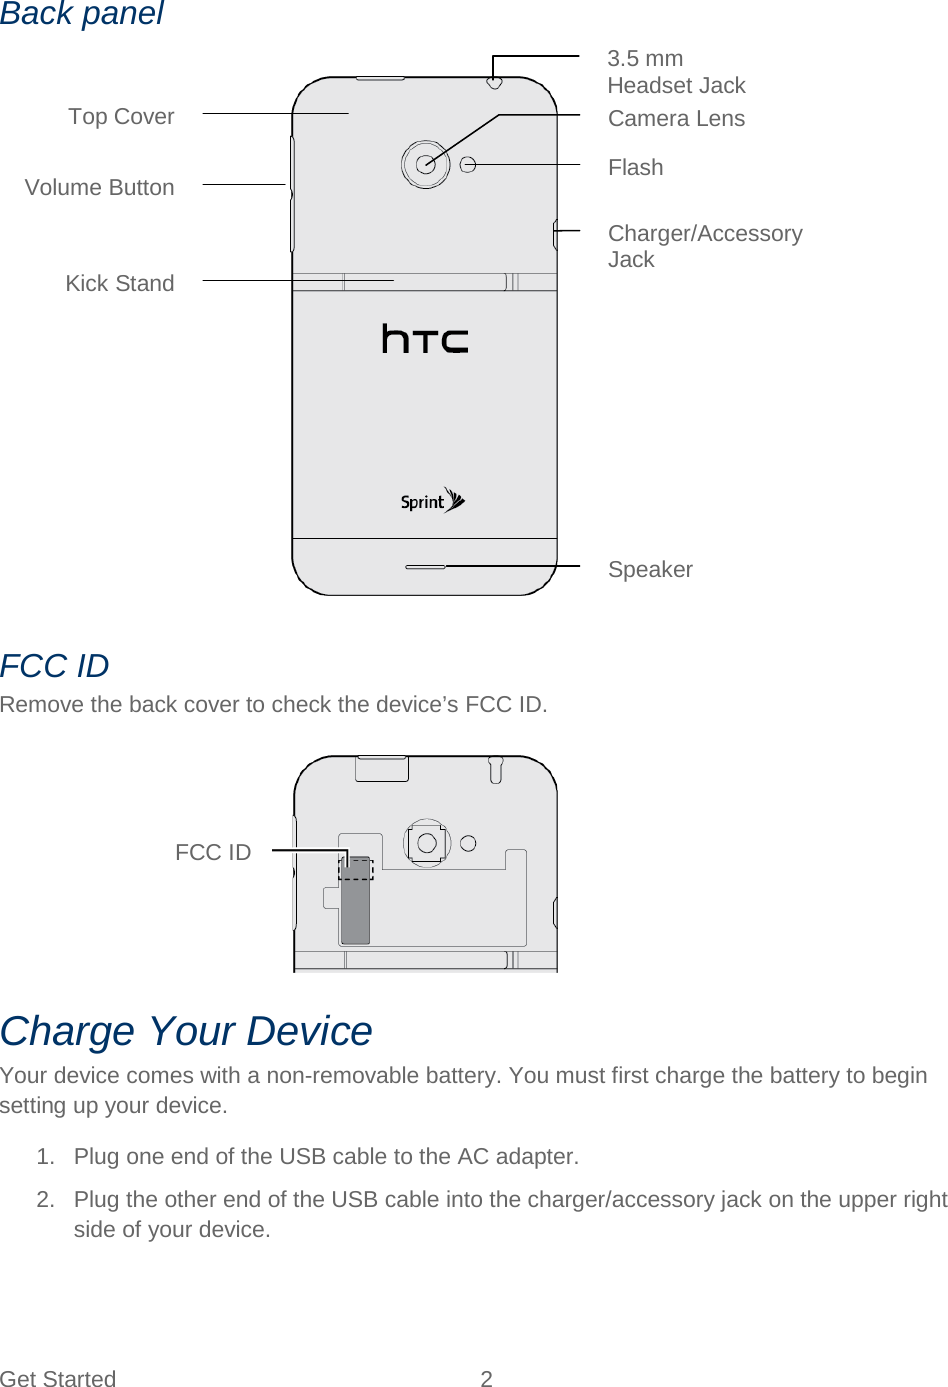
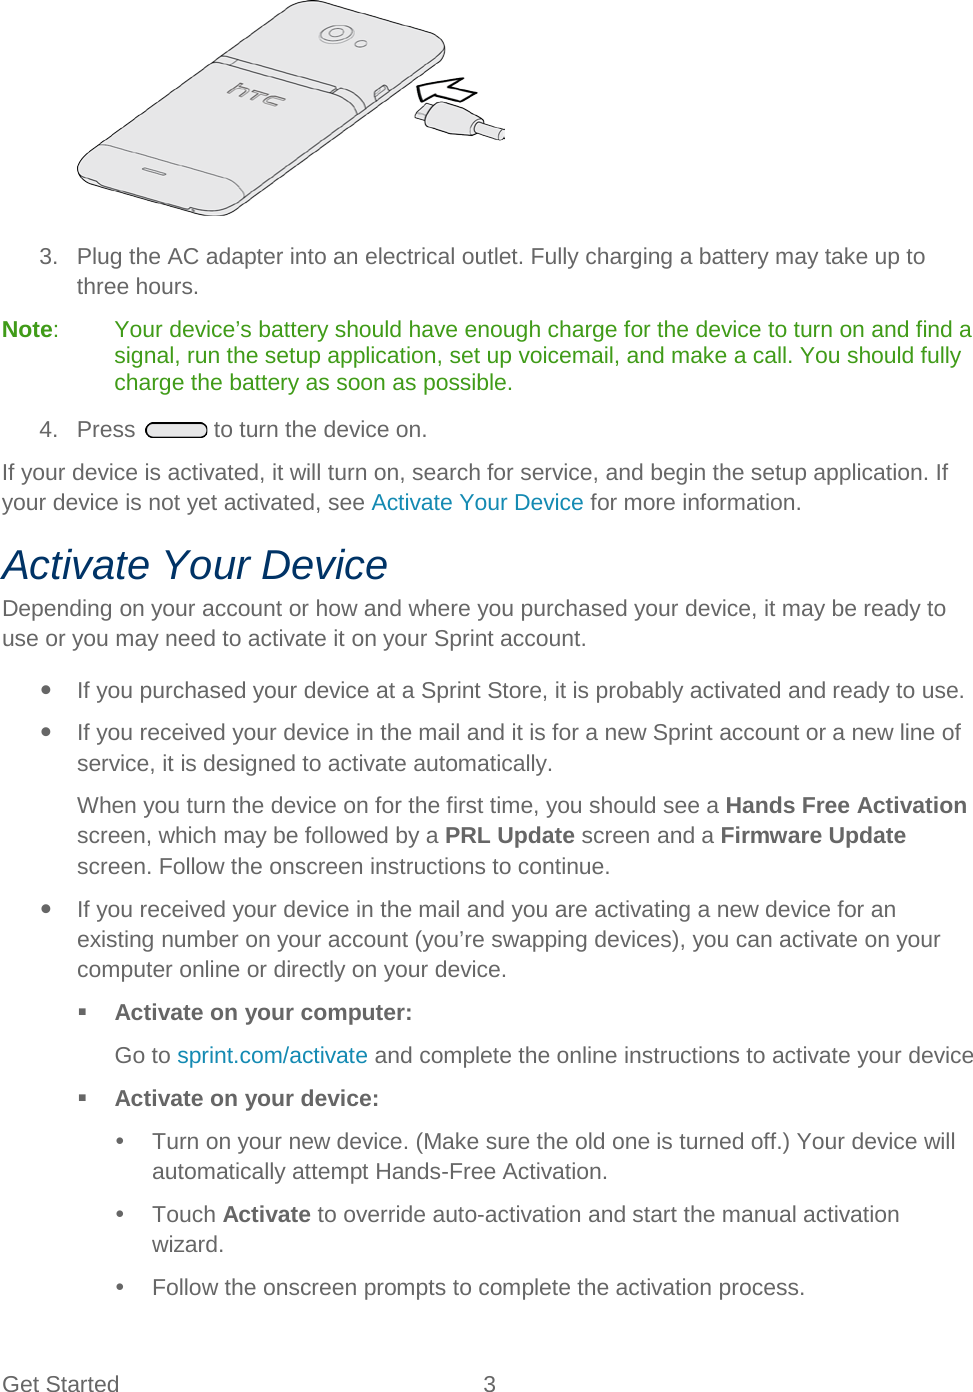
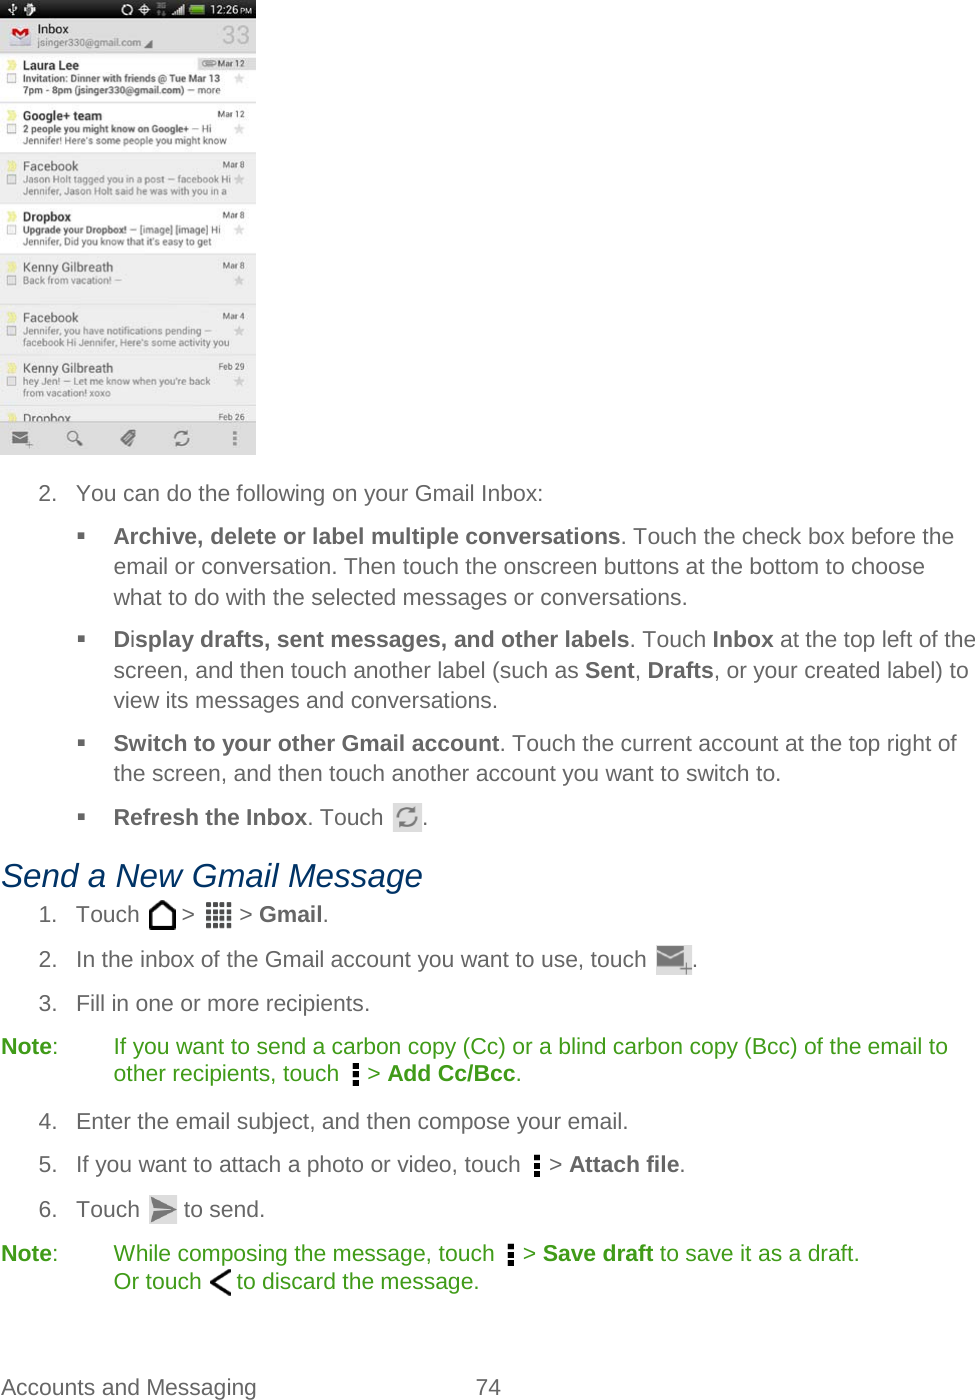
HTC PJ75100 SMARTPHONE User Manual
HTC Corporation SMARTPHONE Users Manual
UserManual.wiki
>
HTC
>
PJ75100 User Manual
>
Users Manual
Contents
1.
Users Manual Statement
2.
Users Manual
Users Manual
Navigation menu
Upload a User Manual
Namespaces
Wiki Guide
HTML
PDF
Info
Views
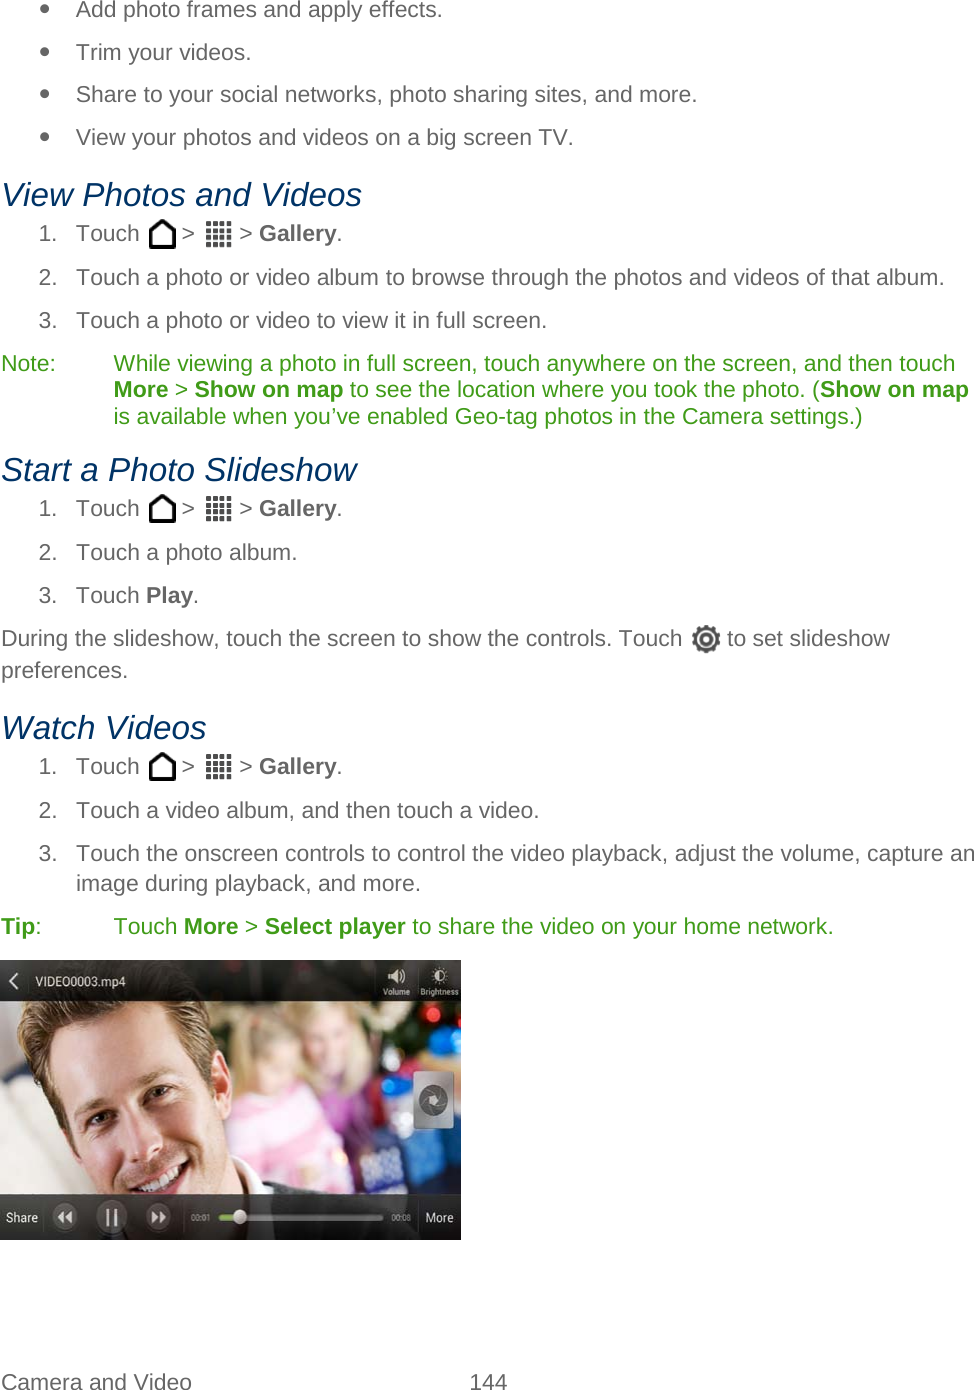
User Manual
Discussion / Help
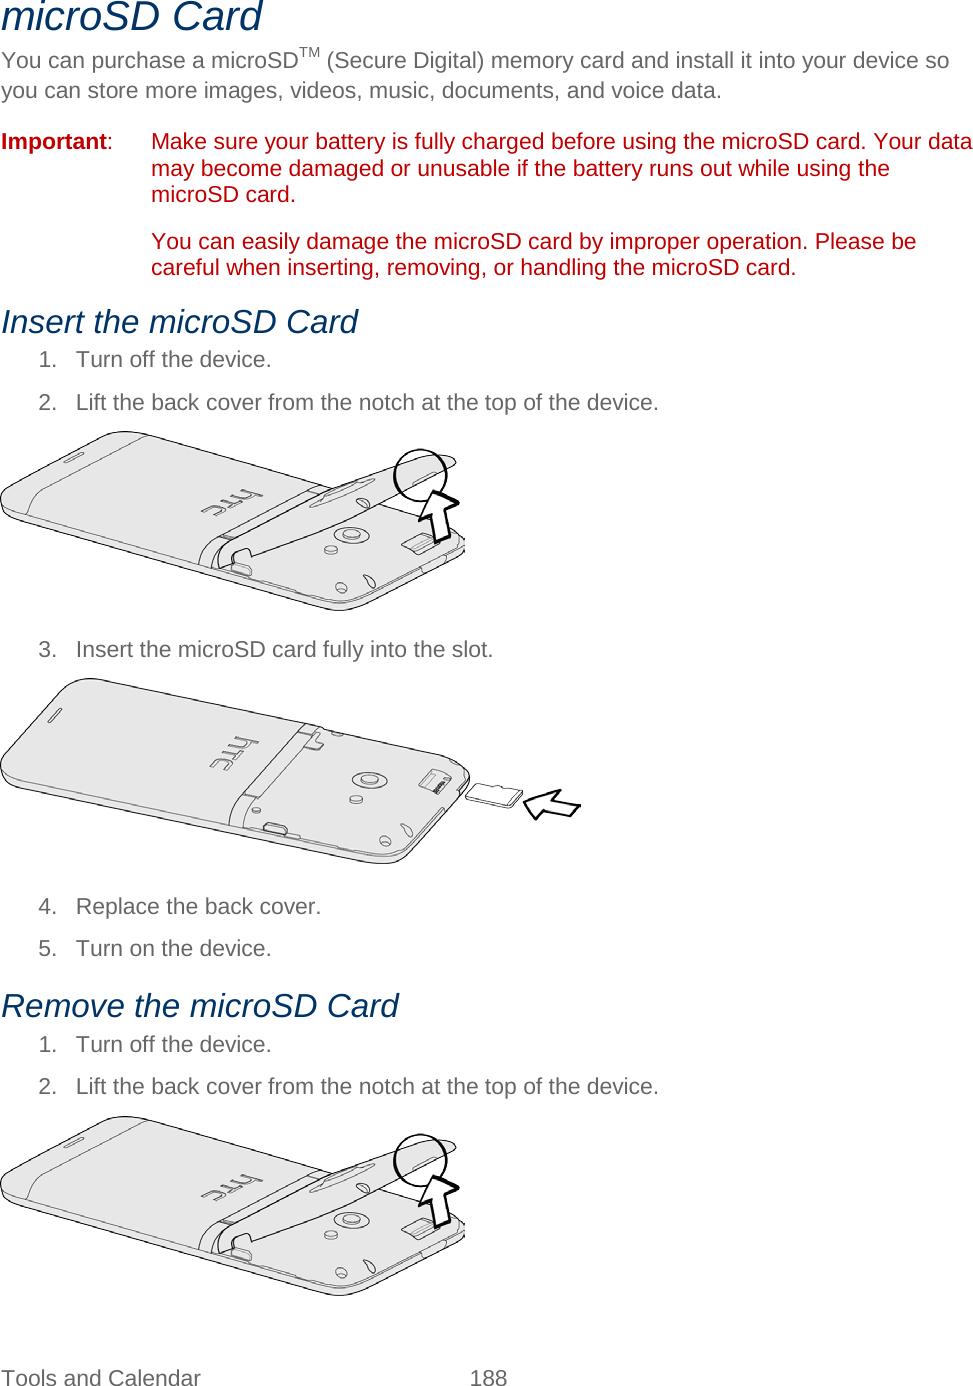
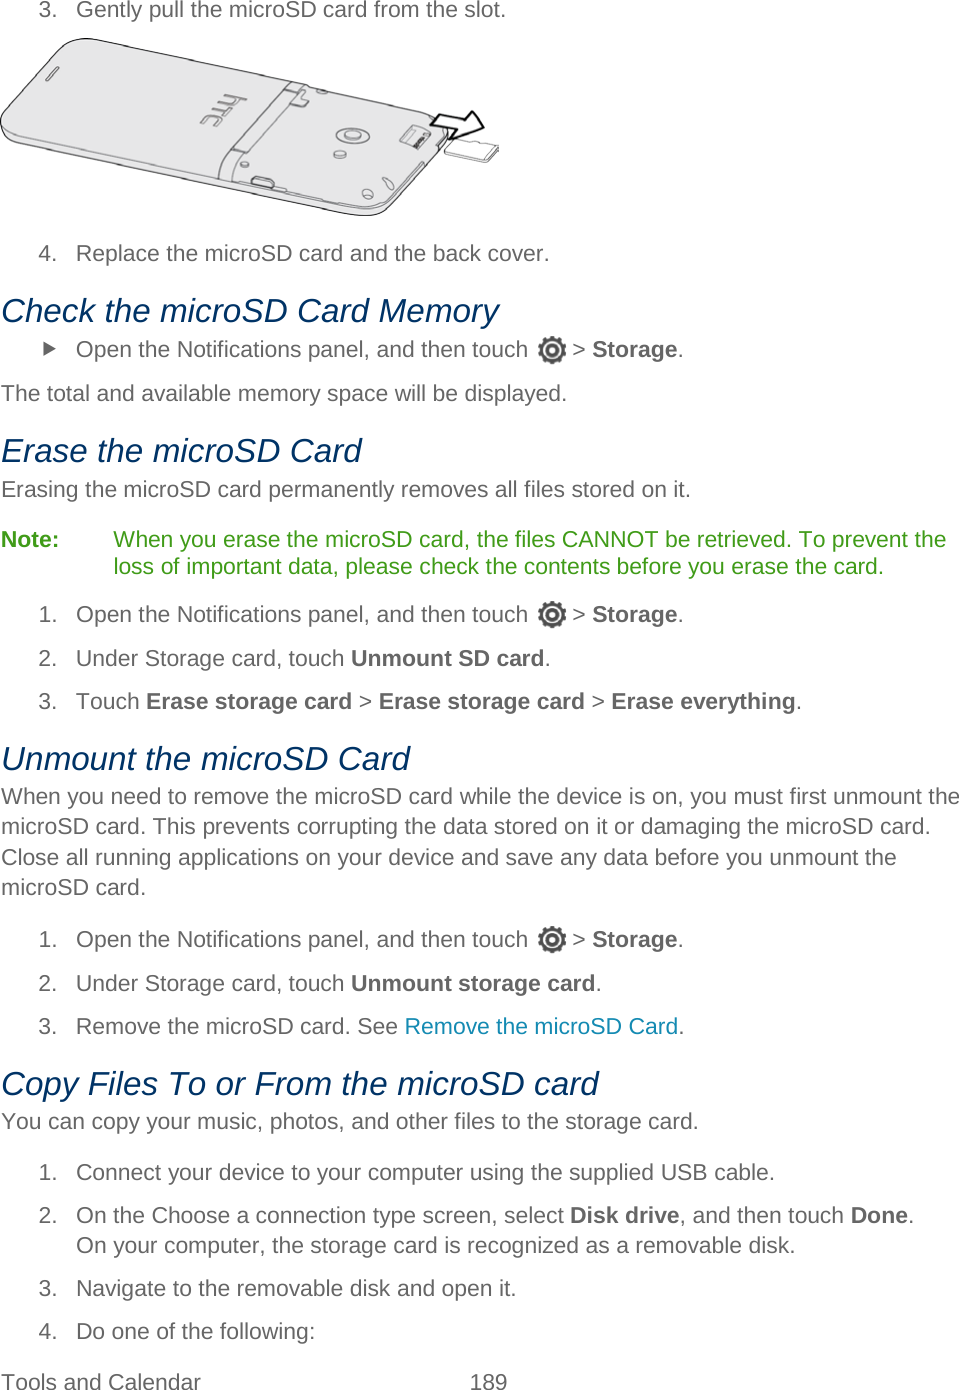
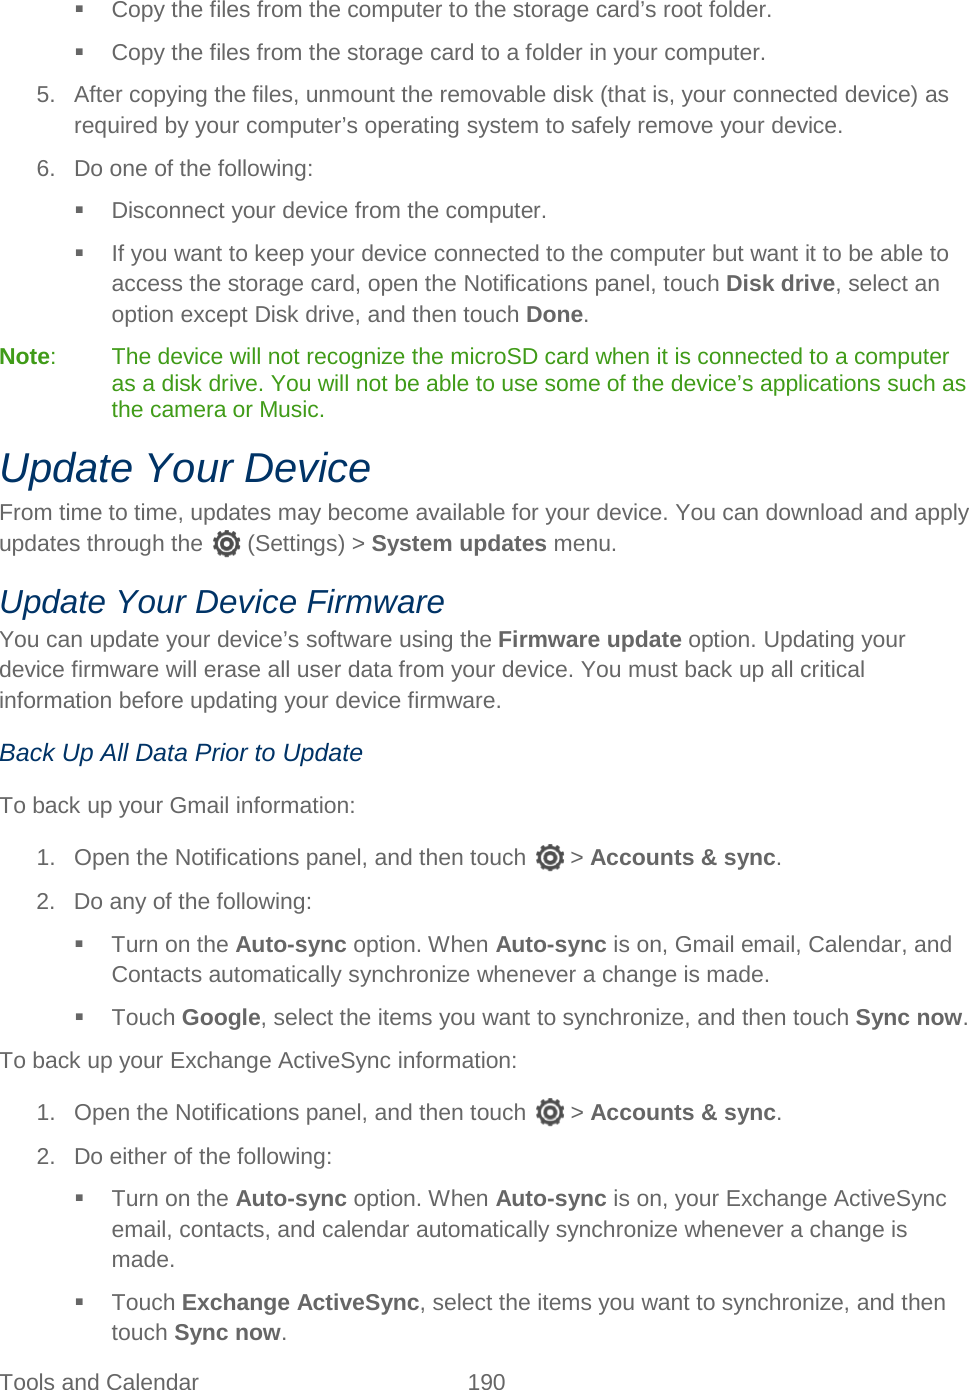
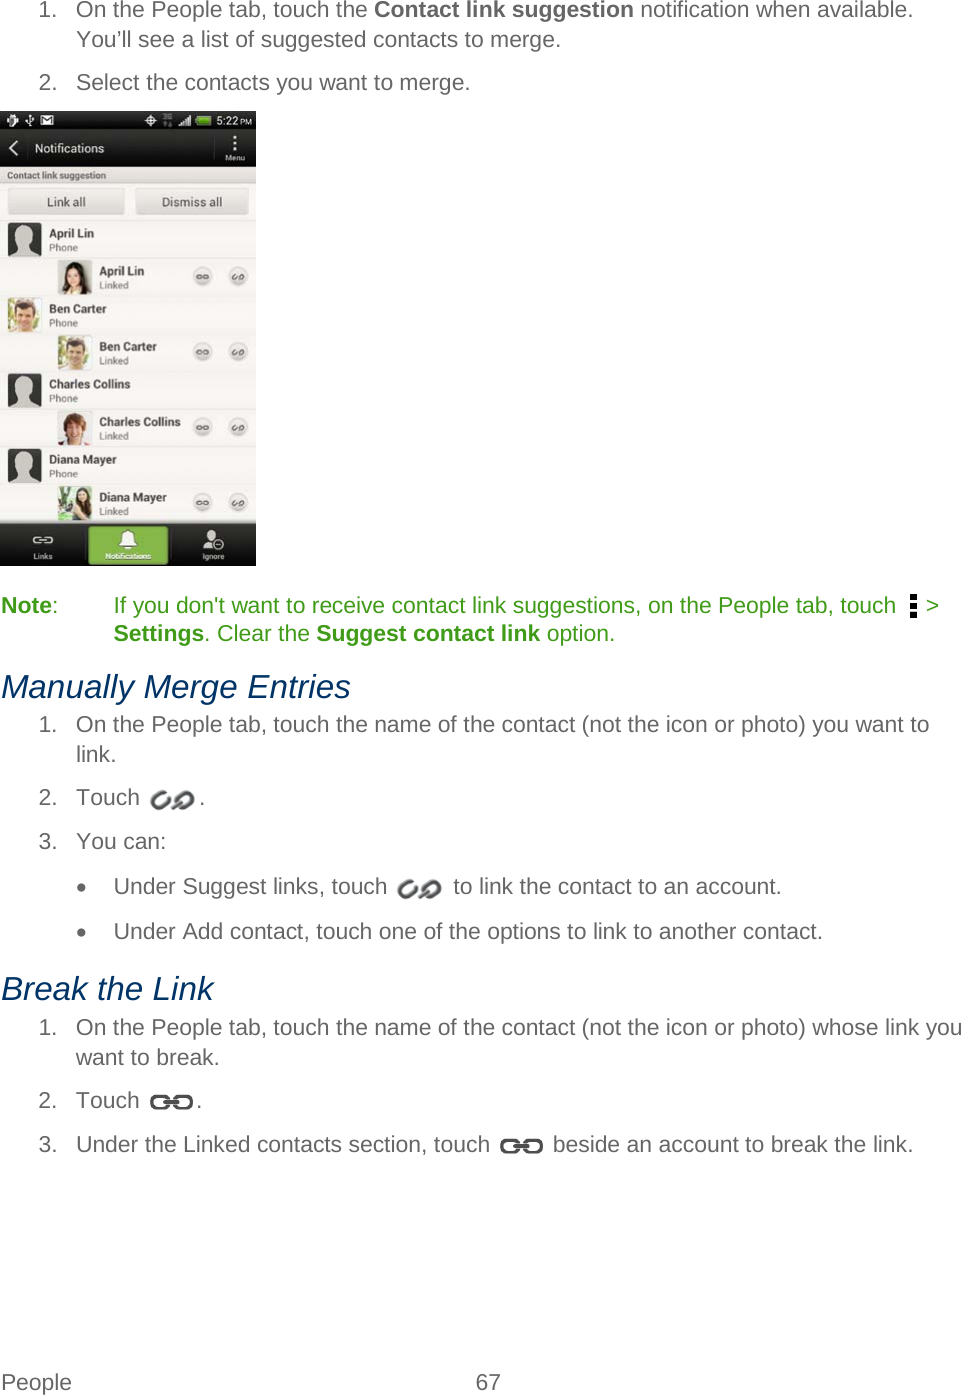
Navigation


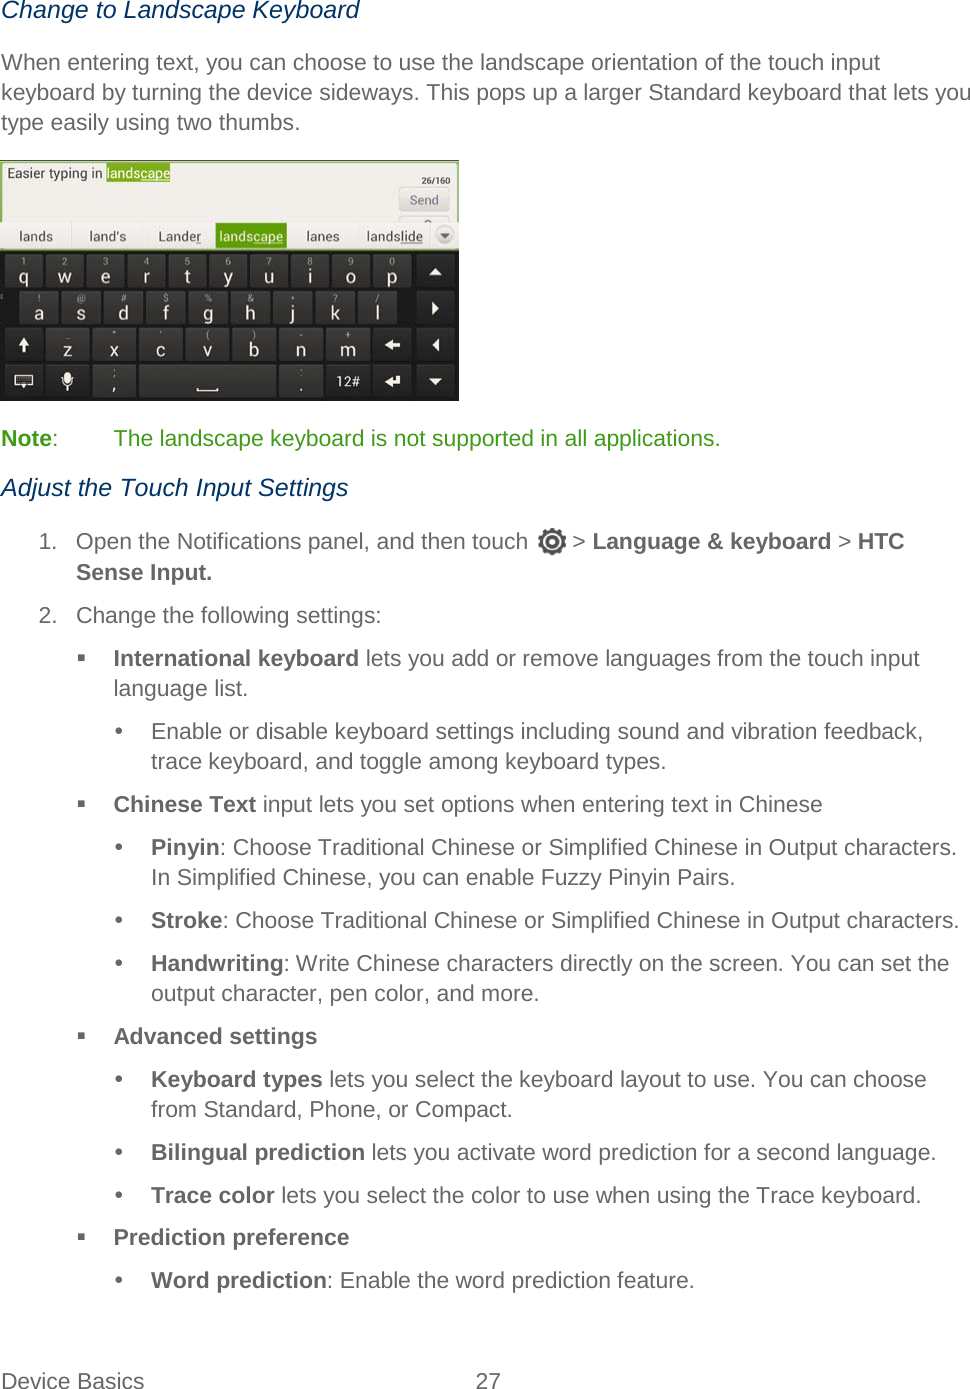
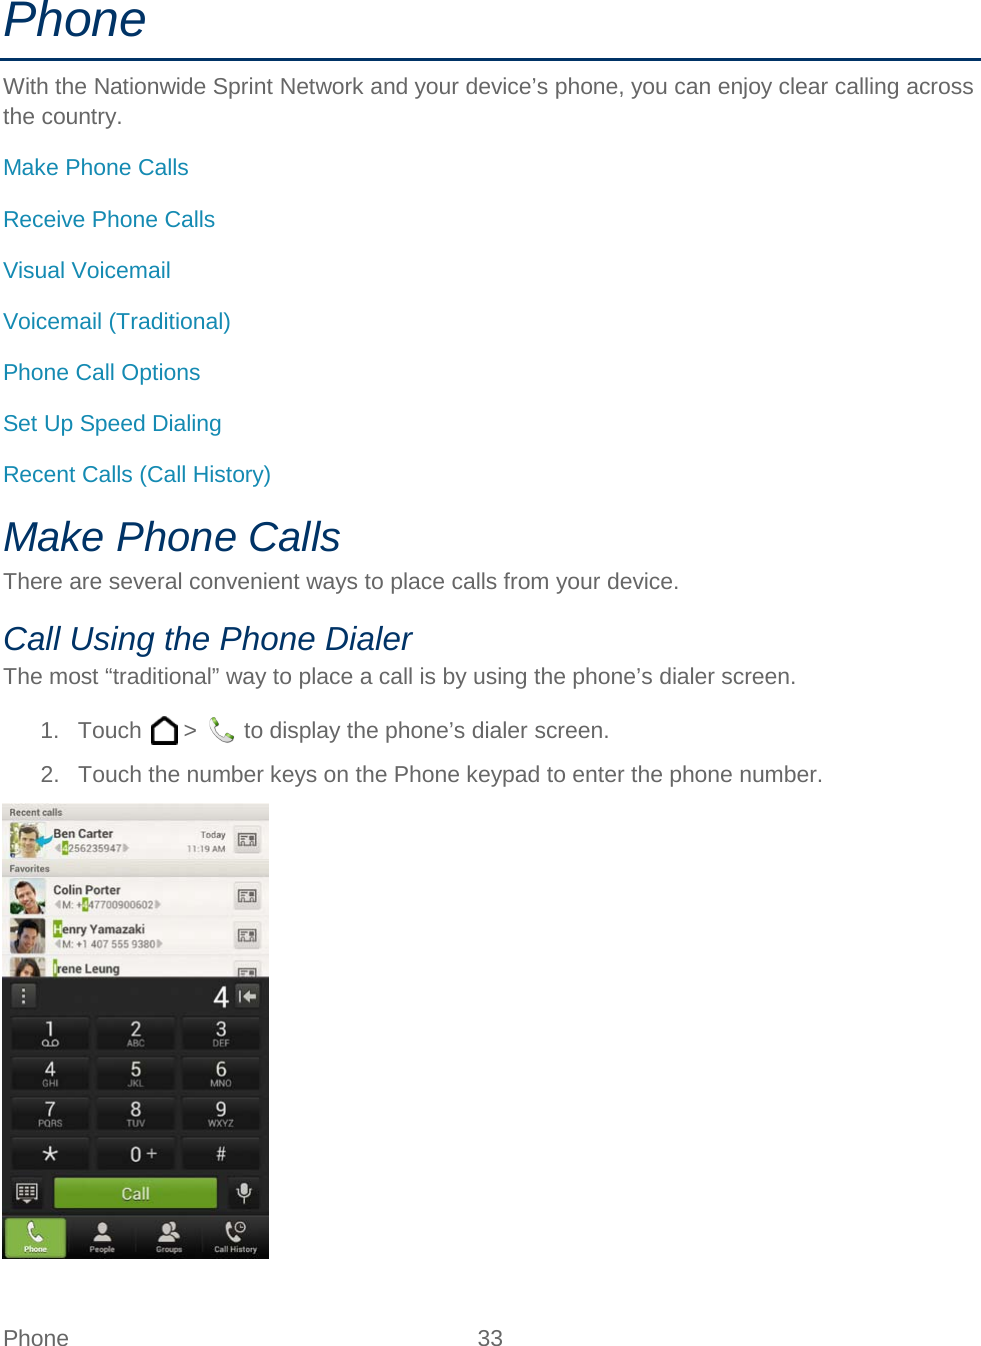
![Phone 34 3. As you enter digits, Smart Dial searches for contacts that match. If you see the number you want to dial, touch it to place the call immediately without entering the rest of the number. 4. If you enter an incorrect digit, touch to erase it. To erase the entire number, touch and hold . Tip: Touch to close the Phone keypad and to see if there are more matching numbers or contacts. To browse through the filtered list, flick through the list or slide your finger up or down the list slowly. 5. Touch Call to call the number. 6. To end the call, touch End call. Call From Call History 1. Touch > . 2. Touch the Call history tab. 3. Touch an entry on the Call history list to place a call to that entry. Note: You cannot make calls from History to entries identified as No ID or Restricted. Tip: Touch and hold an entry in the Call history list to open the options menu where you can select to view the contact information (if number is stored in People), edit the number before you redial, send a text message, or delete the entry from the call history list and more. Call From People 1. Touch > > People. 2. Touch the contact you want to call to open the Contact details screen. 3. Touch Call [number type] to place a call. For additional information, see People. Call Using a Speed Dial Number Speed dial numbers let you dial numbers by touching and holding a single number on the Phone keypad. See Set Up Speed Dialing for information on assigning speed dial numbers. 1. Touch > to display the phone dialer’s screen. 2. Touch and hold the speed dial key on the Phone keypad. The display confirms that you have dialed the number when it shows “Dialing” on the upper right side of the screen. Call a Number in a Text Message or Email Message While viewing a text message or email message, you can place a call to a number that is in the body of the message.](https://usermanual.wiki/HTC/PJ75100.Users-Manual/User-Guide-1671756-Page-45.png)


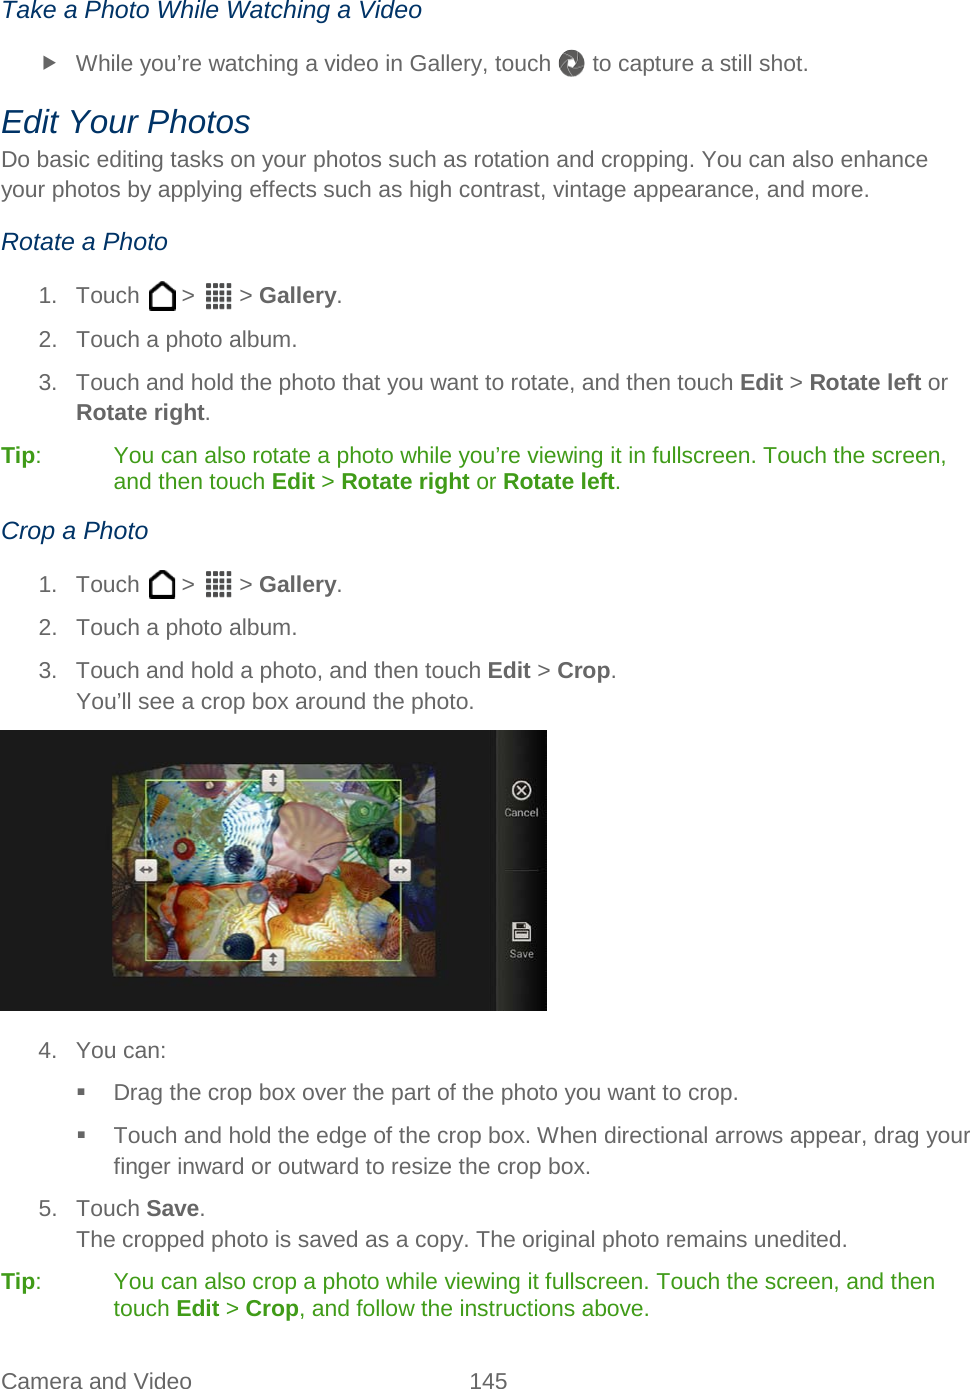

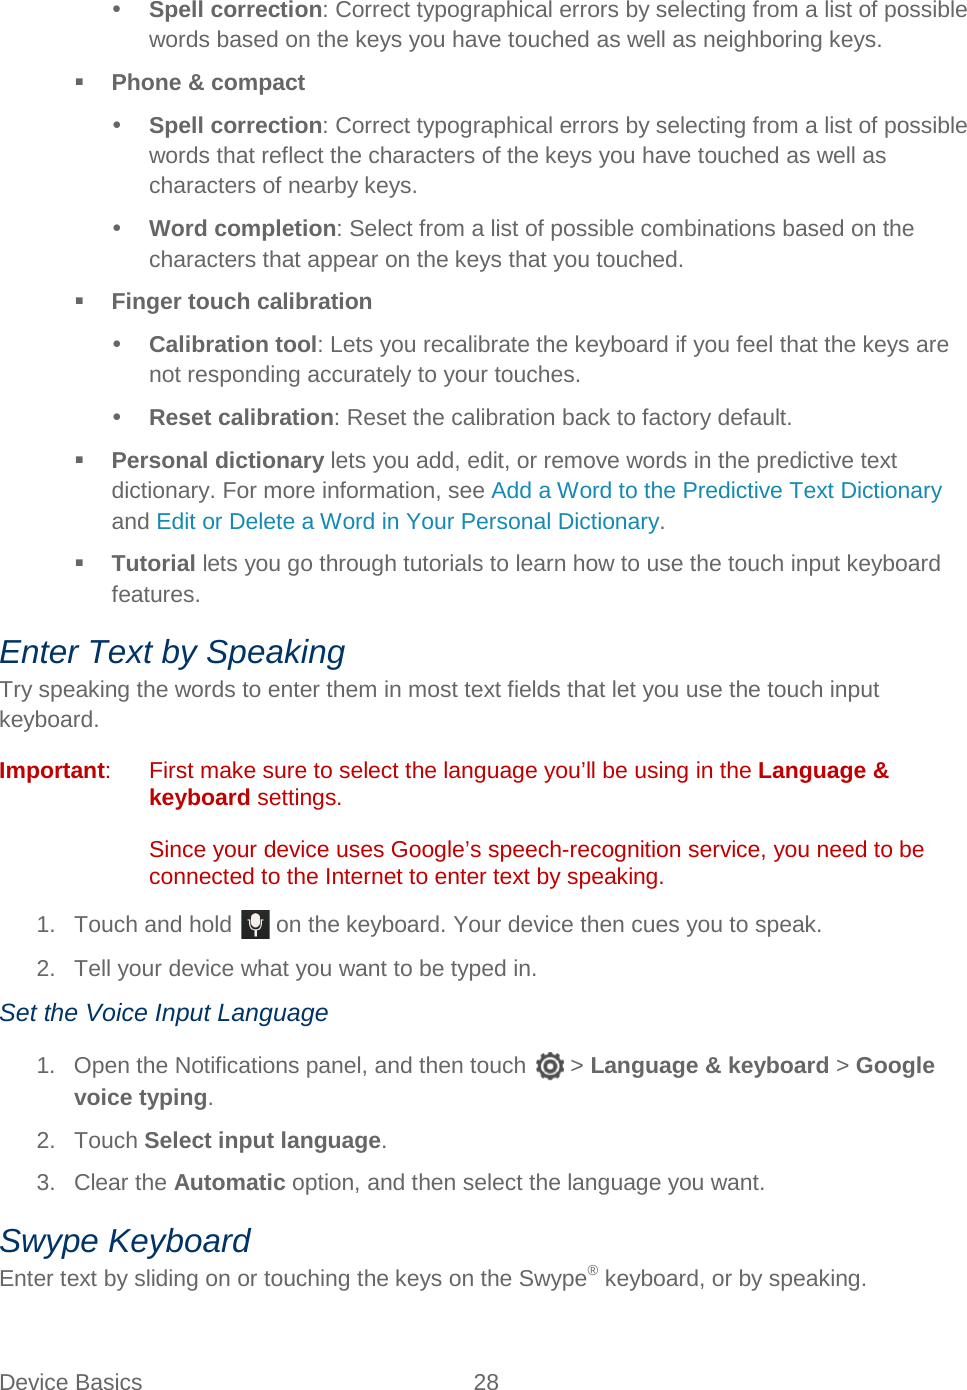
![Tools and Calendar 182 Call [contact name] to call a person stored in your contacts list. Dial [contact number] to dial a spoken phone number. Note: When dialing a phone number, numbers can be three digits (for example, 911), seven digits (for example, 555-1234), or ten digits (for example, 222-555-1234). 3. Touch OK to confirm or Cancel to cancel the command; or choose from a menu if ASR is not sure what you would like to do. Open Applications With ASR You can jump directly to many applications by saying “Open” followed by the application name. 1. Touch > > Voice Dialer. 2. After the beep, say Open [application name]. 3. Touch OK to confirm or Cancel to cancel the command; or choose from a menu if ASR is not sure what you would like to do. Voice Recorder Use Voice Recorder to capture information during lectures, interviews, or even to create your own audio log. 1. Touch > > Voice Recorder. 2. Hold the microphone near the sound source. 3. Touch to start recording a voice clip. Note: Voice Recorder can run in the background while you do other things on your device, except when you open other applications that also use audio functions. 4. Touch to stop recording. 5. Type a name for the voice clip and touch Save. To play back the voice clip, touch . Tip: To show options for deleting or renaming the voice clip, touch . Set a Voice Clip as a Ringtone 1. Touch > > Voice Recorder. 2. On the Voice Recorder screen, touch . 3. Touch and hold the voice clip you want to set as a ringtone, and then touch Set as ringtone.](https://usermanual.wiki/HTC/PJ75100.Users-Manual/User-Guide-1671756-Page-193.png)
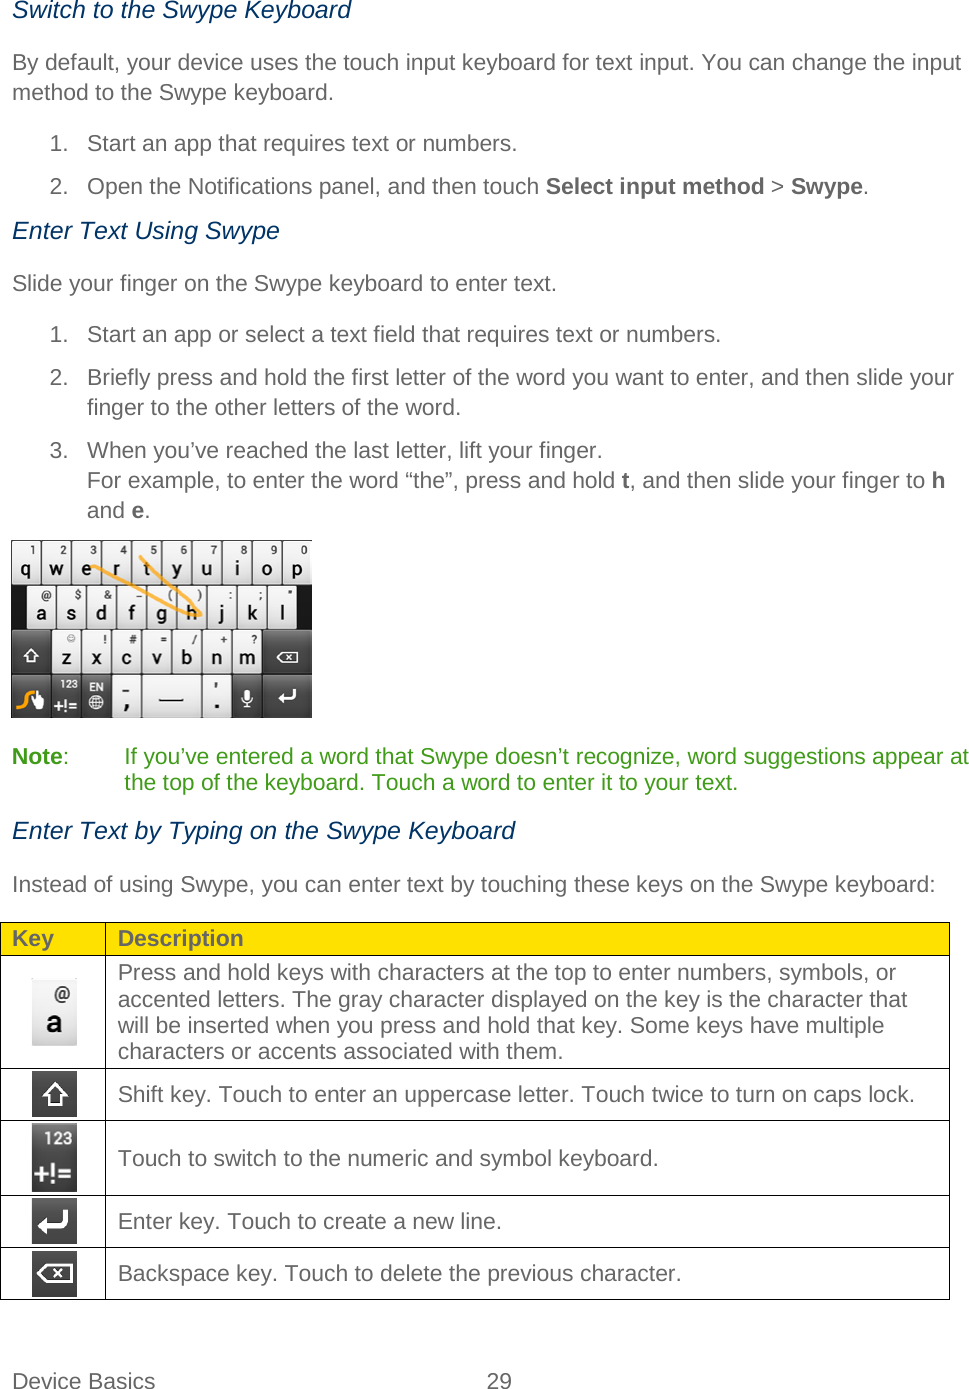
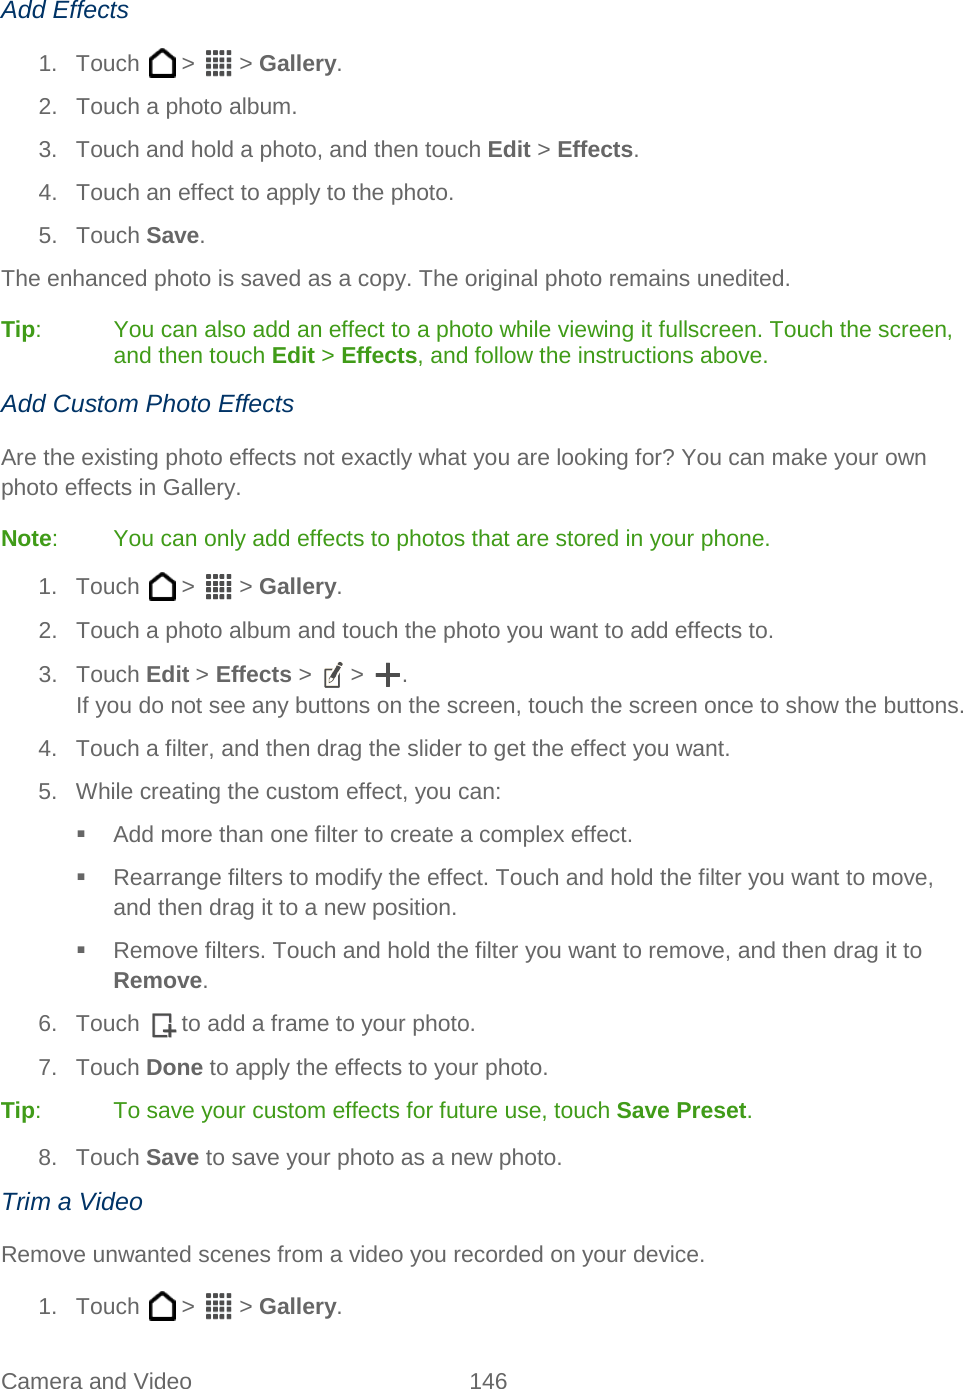
![Tools and Calendar 186 On Windows XP, the path may be: C:\Documents and Settings\[your username]\My Documents\Bluetooth Exchange On Windows Vista, the path may be: C:\Users\[your username]\Documents On Windows 7, the path may be: C:\Users\[your username]\My Documents\Bluetooth Exchange Folder If you send a file to another device, the saved location may depend on the file type. For example, if you send an image file to another wireless phone, it may be saved in a folder named “Images.” Receive Information Using Bluetooth Your device lets you receive a various files with Bluetooth, including photos, music tracks, contact info, calendar events, and documents such as PDFs. Important: Refer to the device’s documentation for instructions on sending information over Bluetooth. 1. Open the Notifications panel, and then touch . 2. If Bluetooth is off, touch the Bluetooth On/Off switch to turn it on 3. Touch Bluetooth. The Bluetooth screen opens. 4. Touch your device’s Bluetooth name near the top of the screen to make your device visible to nearby Bluetooth devices. 5. On the sending device, send one or more files to your device. 6. If asked, accept the pairing request on your device and the receiving device. Also, you may be prompted to enter the same passcode or confirm the auto-generated passcode on both devices. You’ll then get a Bluetooth authorization request. 7. Touch Pair. 8. When your device receives a file transfer request notification, slide the Notifications panel down, touch the incoming file notification, and then touch Accept. 9. When a file is transferred, a download notification is displayed. Slide the Notifications panel down, and then touch the relevant notification. When you open a received file, what happens next depends on the file type: Media files and documents are usually opened directly in a compatible application. For example, if you open a music track, it starts playing in the Music application. For a vCalendar file, select the calendar where you want to save the event, and then touch Import. The vCalendar is added to your Calendar events. (For more information, see Calendar)](https://usermanual.wiki/HTC/PJ75100.Users-Manual/User-Guide-1671756-Page-197.png)