HTC TND Smartphone User Manual Tornado Douton1 5 UM Generic English indb
HTC Corporation Smartphone Tornado Douton1 5 UM Generic English indb
HTC >
Contents
- 1. User Manual
- 2. User Manual for Quick Start
- 3. User Manual Generic
User Manual

User Manual

2
Congratulations on the purchase of your new Windows Mobile™
Smartphone
!
Microsoft, MS-DOS, Windows, Windows NT, Windows Server,
Windows Mobile, ActiveSync, Excel, Internet Explorer, MSN,
Outlook, PowerPoint, and Word are either registered trademarks
or trademarks of Microsoft Corporation in the United States and/or
other countries.
Please read before operating your device.
THE DEVICE IS NOT CHARGED WHEN YOU TAKE IT OUT OF THE
BOX.
DO NOT REMOVE THE BATTERY PACK WHEN THE DEVICE IS
CHARGING.
WHEN INSERTING YOUR SIM CARD, MAKE SURE THE DEVICE
IS POWERED OFF, AND THAT THE SIM CARD SNAPS INTO THE
SOCKET SECURELY.
YOUR WARRANTY IS INVALIDATED IF YOU OPEN OR TAMPER
WITH THE DEVICE’S OUTER CASING. (For more information, see the
enclosed warranty statement.)
EXPLOSIVE ATMOSPHERES
When in any area with a potentially explosive atmosphere or where
flammable materials exist, the product should be turned off and the
user should obey all signs and instructions. Sparks in such areas could
cause an explosion or fire resulting in bodily injury or even death. Users
are advised not to use the equipment at refueling points such as service
or gas stations. Users are reminded of the need to observe restrictions
on the use of radio equipment in fuel depots, chemical plants or where
blasting operations are in progress. Areas with a potentially explosive
atmosphere are often, but not always, clearly marked. These include
fueling areas, below deck on boats, fuel or chemical transfer or storage
facilities, and areas where the air contains chemicals or particles, such
as grain, dust, or metal powders.

3
Contents
Chapter 1 Getting Started
1.1 The Home Screen ............................................8
1.2 Status Indicators and Program Icons ............9
1.3 Using the Start Menu .....................................12
1.4 Using the Quick List ......................................12
1.5 Entering Information .....................................13
1.6 Battery Information .......................................16
Chapter 2 Using Phone Features
2.1 Using the Phone ............................................20
2.2 Making a Call .................................................21
2.3 Receiving a Call .............................................25
2.4 In-Call Options ...............................................25
2.5 Additional Dialing Information .....................27
2.6 Using Voice Tags ...........................................29

4
Chapter 3 Synchronizing your Phone
3.1 About ActiveSync ..........................................32
3.2 Setting Up ActiveSync ..................................32
3.3 Synchronizing Information ...........................33
3.4 Synchronizing via Infrared and Bluetooth ..36
3.5 Synchronizing Music, Video,and Pictures ..37
Chapter 4 Managing your Phone
4.1 Personalizing your Phone ............................40
4.2 Adding and Removing Programs .................46
4.3 Using Task Manager
and Managing Memory .................................48
4.4 Managing and Backing Up Files ..................49
4.5 Protecting your Phone ..................................54
4.6 Resetting your Phone ...................................56
Chapter 5 Getting Connected
5.1 Connecting to the Internet ............................58
5.2 Using Internet Explorer Mobile ....................61
5.3 Using Bluetooth .............................................64
5.4 Using Modem Link .........................................68
5.5 Using Wireless Manager ...............................73

5
Chapter 6 Exchanging Messages and
Using Outlook
6.1 Using E-mail and Text Messages .................78
6.2 Using MMS Messages ...................................84
6.3 Using Pocket MSN Messenger .....................90
6.4 Using Calendar ..............................................92
6.5 Using Contacts .............................................93
6.6 Using Tasks ....................................................96
6.7 Using Voice Notes .........................................97
Chapter 7 Experiencing Multimedia
7.1 Using Camera and Camcorder ...................100
7.2 Using Pictures & Videos .............................108
7.3 Using Windows Media Player .....................112
7.4 Using MIDlet Manager .................................124
Appendix
A.1 Regulatory Notices ......................................130
A.2
PC Requirement to Run ActiveSync 4.x ..........137
A.3 Specifications ..............................................137
A.4 Index .............................................................140

6

Chapter 1
Getting Started
1.1 The Home Screen
1.2 Status Indicators and Program Icons
1.3 Using the Start Menu
1.4 Using the Quick List
1.5 Entering Information
1.6 Battery Information

8
1
Getting Started
1.1 The Home Screen
The Home screen displays important information, such
as upcoming appointments, status indicators, the current
date, time, and profile, and icons of programs that you have
recently used. You can open a program directly by selecting
its icon and pressing ENTER.
•
To access the Home screen from anywhee, press
HOME.
•
To customize the Home screen display, including the
background, click
Start
>
Settings
>
Home Screen
.
7Click to open the Messages folder.
8. Click to display all program icons.
9. Displays notifications, such as missed calls or new messages.
10. Displays the GPRS or GSM network status.
11. Displays the power status.
12. Displays the network signal strength.
13. Click to open Contacts, Call History, or Messages.
1. Select a recently-used
program, and open it
directly from the Home
screen.
2. Displays the name of your
wireless service provider.
3. Displays the current date
and time.
4. Click to view the details of a
missed call.
5. Click to see the time of your
next appointment.
6. Displays the current profile.
Click to change the profile.
Home Screen
2
1
3
4
5
6
7
8
12
13
9 10 11
9
1
Getting Started
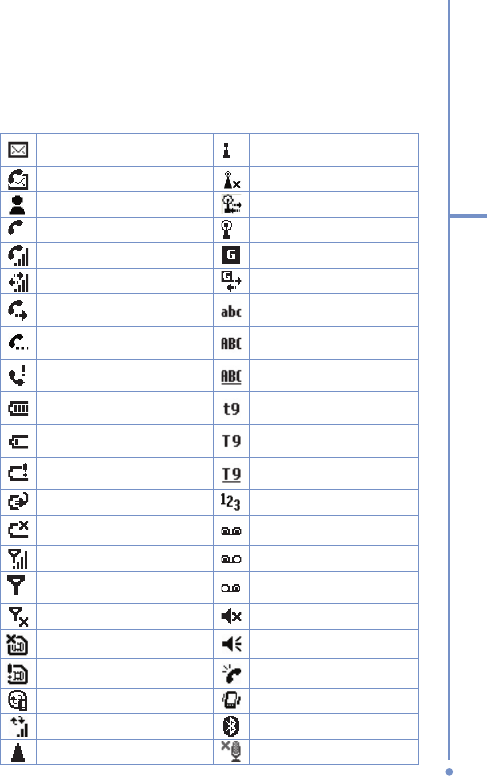
1.2 Status Indicators and Program Icons
The following table lists common status indicators and their
meanings.
New e-mail or text message
(SMS, Short Message Service)
Wi-Fi on
New voice mail Wi-Fi off
New instant message Wi-Fi connected
Voice call Wi-Fi data call
Voice call in progress GPRS available
Data call in progress GPRS connected
Calls forwarded Multipress text input
mode, lowercase
Call on hold Multipress text input
mode, uppercase
Missed call Multipress text input
mode, caps lock
Battery level T9 text input mode,
lowercase
Low battery
T9 text input mode,
uppercase
Very low battery T9 text input mode, caps
lock
Battery charging Numeric input mode
No battery or battery fault Voice mail at both lines
Signal strength Voice mail at line 1
Radio connected or no
signal Voice mail at line 2
Radio off Ringer off
No SIM card installed Ringer on
SIM card with fault Phone volume
Sync error Vibrate call alert
Synchronization in progress Bluetooth
Roaming Microphone muted
10
1
Getting Started
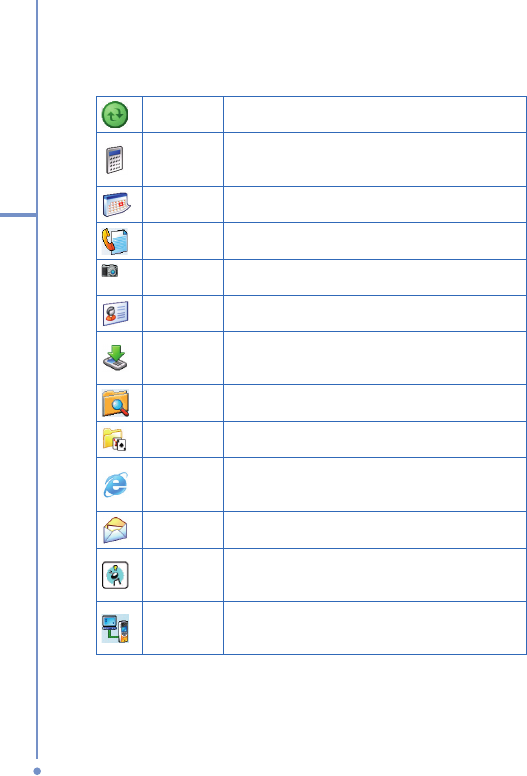
The following table lists icons
of the programs that are
already installed on your phone.
ActiveSync Synchronizes information between your phone
and a PC.
Calculator
Performs basic arithmetic and calculations,
such as addition, subtraction, multiplication,
and division.
Calendar Keeps track of your appointments, and creates
meeting requests.
Call History Keeps track of all phone calls made, received,
and missed.
Camera Captures photos in various modes.
Contacts Keeps track of contact information.
Download
Agent
Provides information about the download
status and the downloaded content from the
Internet.
File
Manager
Lets you organize and manage files on your
phone.
Games Lets you play two games: Bubble Breaker and
Solitaire come with your phone.
Internet
Explorer
Allows you to browse Web and WAP sites, and
to download new programs and files from the
Internet.
Messaging Lets you send and receive e-mail and text
messages.
MIDlet
Manager
Lets you download and install Java-based
applications, such as games and tools, on your
phone.
Modem
Link
Lets you use your phone as an external
modem for a PC, connecting through a serial/
USB port or infrared.
11
1
Getting Started
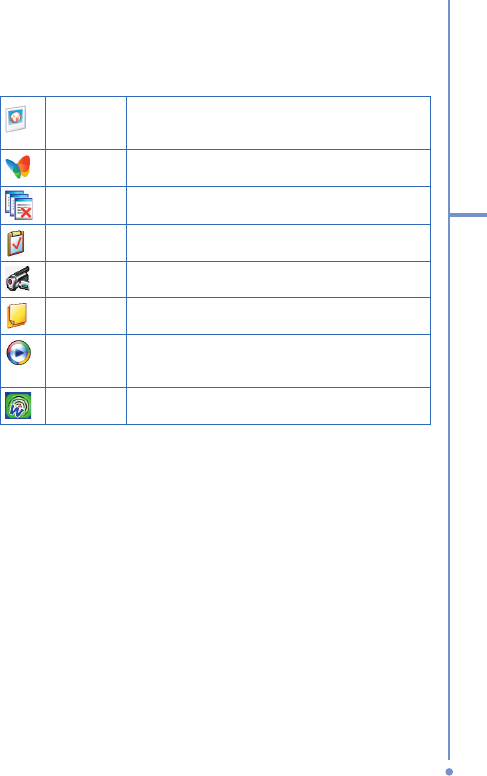
Pictures &
Videos
Collects, organizes, and sorts picture and
video files in the My Pictures folder on your
phone or on a storage card.
Pocket
MSN
Lets you send and receive instant messages
with your MSN Messenger contacts.
Task
Manager
Keeps track of your on-going programs.
Tasks Keeps track of your tasks.
Video Captures video clips in various modes and
duration.
Voice
Notes
Allows you to make short voice recordings.
Windows
Media
Player
Lets you play back video and audio files.
Wireless
Manager
Lets you manage the GPRS, Wi-Fi, and
Bluetooth connections on your phone.

12
1
Getting Started
1.3 Using the Start Menu
The Start menu is located at the bottom left corner of the
Home screen and displays various program icons that are
spread across one or more screens.
To see the available programs in the Start menu
•
On the Home screen, click
Start
.
•
To see more programs, click
Start
>
More
.
Start Menu
Your phone comes with several bundled programs that you
can start using immediately. You can also install additional
programs from the included Windows Mobile™ Getting
Started Disc.
1.4 Using the Quick List
The Quick List offers convenient access to a list of functions,
such as locking your phone, and keypad, turning on and
off flight mode, and choosing a different profile. For more
information about profiles, see Chapter 4.
To access the Quick List
1.
Briefl y press (press and quickly release) the POWER
button.
Please note that pressing and holding the POWER
button turns off the phone.
13
1
Getting Started
2.
Scroll through the list and select the desired option.
Then, do any of the following:
•
Click
Select
.
•
Press the ENTER button.
•
Press the related numeric key on the keypad.
3.
To exit the Quick List at any time, click
Cancel
.
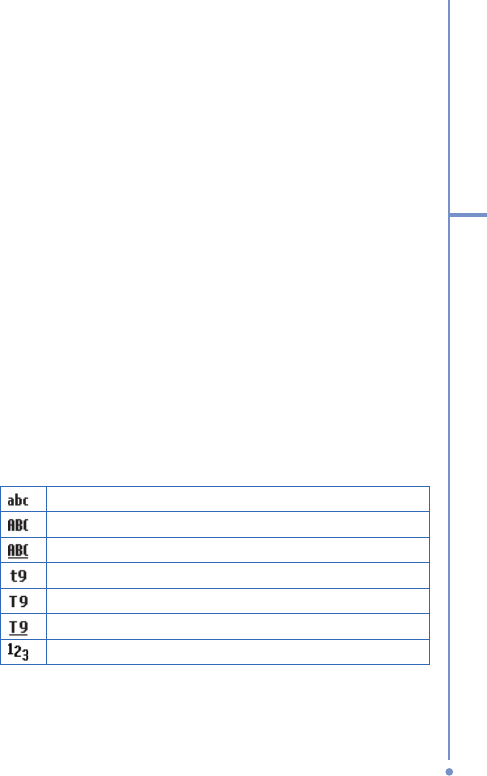
1.5 Entering Information
You can enter text and numbers by using the keypad. The
phone supports three input modes for entering text and
numbers: Multipress, T9, and Numeric. Multipress and T9
modes are used for entering text, and Numeric mode is used
for entering numbers.
When you select a field that requires entering text or
numbers, the phone automatically selects the appropriate
input mode. The status indicator on the top right side of the
display screen shows the input mode that you are currently
using.
Multipress text input mode, lowercase
Multipress text input mode, uppercase
Multipress text input mode, caps lock
T9 text input mode, lowercase
T9 text input mode, uppercase
T9 text input mode, caps lock
Numeric input mode
To change the input mode
1.
Press and hold the
*
key.
2.
On the menu, click the input mode you want.

14
1
Getting Started
Using Multipress mode
In Multipress mode, you enter a character by pressing the
numeric key on which the character appears.
To enter text in Multipress mode
•
To enter the fi rst character on the numeric key, press
once. To enter the second character on the numeric
key, press twice, and so on.
•
To enter character that are on the same numeric key,
pause after you enter the fi rst character.
•
To enter punctuation, press
1
repeatedly until you see
the punctuation you want.
To change the Multipress time out
You can change the length of time to pause between
keypresses on the same numeric key.
1.
On the Home screen, click
Start
.
2.
Click
Settings
>
More
>
Accessibility
.
3.
In
Multipress time out
, select the length of the pause
between keypresses.
Using T9 mode
To form a word in T9 mode, press the numeric keys that
contain the letters you want. As you enter letters, T9
analyzes your keypresses and attempts to complete the
word. For example, to enter the word “shoe,” press 7, 4, 6, 3.
To enter text in T9 mode
1.
Press and hold the
*
key.
2.
On the menu, click
T9
.
3.
Do any of the following:
•
Enter letters by pressing the keys on which the
letters appear. Press a key only once for each letter.
If there is more than one choice in the T9 dictionary
for your entry, a list of available words is displayed.

15
1
Getting Started
•
Press the
#
key to enter a space after the word as
entered, or click one of the available words and the
space is added automatically.
•
If you do not see the desired word, click
Add
Word?
from the list, and then enter the word using
Multipress.
•
To enter punctuation, press
1
, and select from a list
of common punctuation.
Using Numeric mode
If a text box permits a numeric entry only, such as a phone
number, the input mode automatically defaults to Numeric
mode. However, if you need to enter numbers within a line
of text, change to Numeric mode, and then change back to
Multipress or T9 mode to finish entering the text.
To enter numbers in text boxes
1.
Press and hold the
*
key to change to Numeric mode.
2.
On the keypad, enter the number or numbers you
want.
3.
Change back to Multipress or T9 input mode by
pressing and holding the
*
key, and then fi nish entering
your text.
More text entry tasks
In both Multipress and T9 modes, the first letter of a
sentence is by default capitalized.
To change between uppercase, lowercase, and caps lock
•
Press the
*
key to change between uppercase,
lowercase, and caps lock within a text input mode.

16
1
Getting Started
To delete characters
•
To backspace and delete a single character in any
input mode, press BACK.
•
To backspace and delete an entire text or numeric fi eld
in any input mode, press and hold BACK.
To enter a space
•
In Multipress or T9 mode, press the # key.
To enter a symbol
1.
Press and hold the * key.
2.
On the menu, click
Symbols
to display the Symbol
page.
3.
Select the symbol you want and press ENTER.
To start a new line
In a multi-line text box such as the notes area of a contact or
a calendar appointment, do the following:
•
In any input mode, press ENTER.
To enter the plus sign for international calls
•
In a numeric entry box, press and hold
0
.
1.6 Battery Information
Battery performance depends on many factors, including
your wireless service provider’s network configuration, signal
strength, the temperature of the environment in which you
operate your phone, the features and/or settings you select
and use, items attached to your phone’s connecting ports,
and your voice, data, and other program usage patterns.
Battery life estimates (approximations):
•
Talk time: 5 hours
•
GPRS/Internet browsing: 2 hours
•
Standby time: 250 hours
17
1
Getting Started
To reduce risk of fire or burns:
•
Do not attempt to open, disassemble, or service the
battery pack.
•
Do not crush, puncture, short external contacts, or
dispose of in fi re or water.
•
Do not expose to temperatures above 60˚C (140˚F).
•
Replace only with the battery pack designated for this
product.
•
Recycle or dispose of used battery as stipulated by
local regulation.
To check the battery power
•
On the Home screen, click
Start
>
Settings
>
Power
Management
.
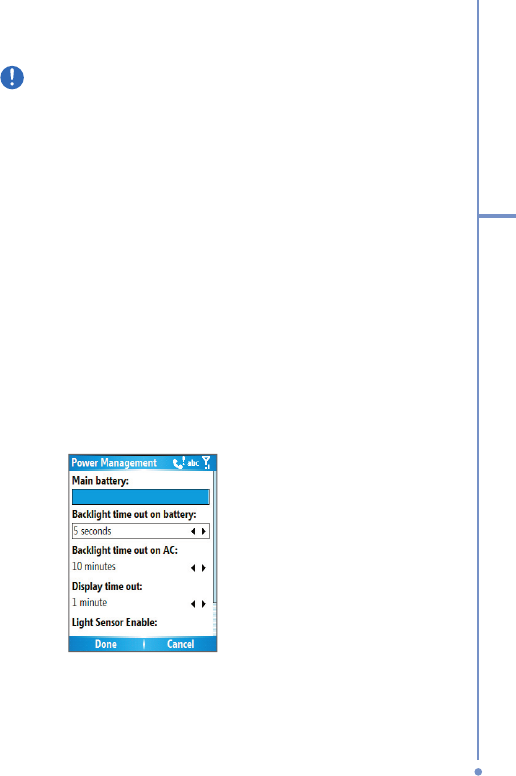
To optimize the power performance
•
On the Home screen, click
Start
>
Settings
>
Power
Management
, and adjust the backlight, display, and
light sensor settings.
Power Management

18
1
Getting Started
To manage a low battery
When the low-battery warning appears, do the following:
1.
Immediately save your current data.
2.
Synchronize with your PC to charge the battery.
3.
Turn off your phone.
For information about charging the battery, see the
Quick
Start Guide
.

Chapter 2
Using Phone Features
2.1 Using the Phone
2.2 Making a Call
2.3 Receiving a Call
2.4 In-Call Options
2.5 Additional Dialing Information
2.6 Using Voice Tags

20
2
Using Phone Features
2.1 Using the Phone
You can use your phone to make, receive, and keep track
of calls, and send text messages (SMS, Short Message
Service) and MMS (Multimedia Messaging Service)
messages. You can also dial a phone number directly from
Contacts, and easily copy SIM contacts to Contacts on the
phone.
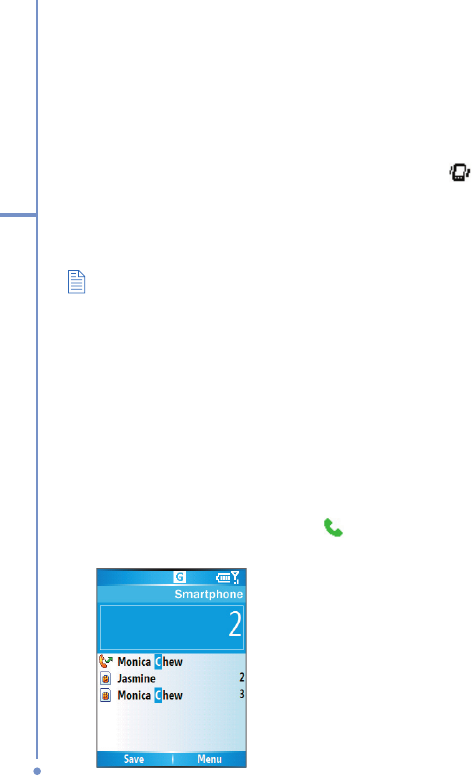
The Phone screen
From the Phone screen, you can open, call, or find a
contact, and even save a new number in Contacts. To
access the Phone screen, do any of the following:
•
Press TALK (
).
•
Directly enter the phone number by pressing numeric
keys on the keypad.
Enter your PIN
Most Subscriber Identity Module (SIM) cards are preset with
a personal identification number (PIN) that is provided by
your wireless service provider. You need to enter the PIN
whenever you use your phone.
1.
On the Home screen, click
Start
>
Settings
>
Security
>
Enable SIM PIN
.
2.
Enter the preset PIN provided by your wireless service
provider.
3.
Click
Done
.
If your PIN is entered incorrectly three times, the SIM card will be
blocked. If this happens, you can unblock it with the PIN Unblocking
Key (PUK) obtained from your wireless service provider.
Set ring tones
You can choose how to be notified for incoming calls,
reminders, new messages, alarms, and more.

21
2
Using Phone Features
Phone
22
2
Using Phone Features
To set a ring tone for incoming calls
1.
On the Home screen, click
Start
>
Settings
>
Sound
s
.
2.
In the Ring tone list, select a ring tone.
3.
Click
Done
.
If you select Vibrate, the sound is muted and the phone will
vibrate when you receive a call. The Vibrate icon (
If you select Vibrate, the sound is muted and the phone will
vibrate when you receive a call. The Vibrate icon (
)
appears in the title bar. Selecting None in the Ring tone
list mutes the phone. For more information about sounds,
see “Choose how to be notified about events or actions” in
Chapter 4.
To adjust the earpiece volume during a call, press the VOLUME
control on the phone side panel. Adjusting the volume at any other
time can affect the ring, notification, and MP3 sound levels.
2.2 Making a Call
With your phone, you can make calls from the Home screen,
the Phone screen, from Contacts, Speed Dial, Call History,
or SIM Contacts (contacts stored on your SIM card).
Make a call from the Home screen
•
Enter the phone number by pressing keys on the
keypad, and press TALK (
Enter the phone number by pressing keys on the
).
Press the BACK button if you need to backspace.

23
2
Using Phone Features
You will notice that when you press a numeric key on the keypad,
a list of names and numbers is displayed as your phone searches
Contacts, Call History, Speed Dial, and your SIM card to find a
matching name or number. For example, when you press a number
such as 5, names that begin with J, K, and L will be displayed as
well as phone numbers that start with 5. The next number you press
continues to narrow the search. When you see the name of the
person you want to call, select it, and press TALK ( ).
Make a call from Contacts
1.
On the Home screen, click
Start
>
Contacts
.
2.
Select the desired contact, and press TALK (
).
You can also select the desired contact in the contact list,
and press the ENTER button twice (once to view the contact
details, and once to dial the associated number).
To specify the number to dial
By default, the mobile telephone number (m) of a contact is
dialed when you make a call from Contacts; however, you
can choose to dial a different phone number.
1.
On the Home screen, click
Start
>
Contacts
.
2.
Select the contact.
3.
Press NAVIGATION left or right. The letter representing
the number changes to m (mobile), w (work), or h
(home).
You can also select a contact in the contact list, and press
ENTER to view details and different numbers associated
with the contact. Select a number and press TALK (
) or
press ENTER to dial the number.
You may also access the contact list by clicking Contacts on the
Home Screen.
To view or edit information associated with the selected contact, click
Menu > Edit.
To save a contact on your SIM card, click Menu > Save to SIM.

24
2
Using Phone Features
Make a call from Call History
1.
On the Home screen, click
Start
>
Call History
.
2.
Select a name or number, and press TALK (
).
In the Call History screen, press ENTER to view
details, such as the dialed, missed, or received call,
call duration, date, and time. Pressing ENTER again
dials the associated number.
To customize calls
You can select various options on the Call History screen to
customize and filter the calls made, received, or missed.
•
To fi nd a name or number in Contacts, click
Menu
>
Find Contact
.
•
To send a text message, click
Menu
>
Send Text
Message
.
•
To send an e-mail, click
Menu
>
E-mail
.
•
To fi nd the duration of a call, click
Menu
>
View
Timers
.
•
To remove a call or number from Call History, click
Menu
>
Delete
.
•
To remove the list of calls or numbers from
Call
History
, click
Menu
>
Delete List
.
•
To save a name or number in Contacts, click
Menu
>
Save to Contacts
.
•
To categorize the call or number into various call types,
click
Menu
>
Filter
.
You can also save a number in Contacts by clicking Save on the Call
History screen.
Make a call from Speed Dial
You can create speed dial entries for frequently-called
numbers or frequently-accessed items so you can dial a
number or access an item by pressing a single key. For
example, if you assign location 2 to a contact in Speed Dial,

25
2
Using Phone Features
you can simply press and hold 2 on the Phone keypad to
dial the contact’s number. Speed dials can be created only
for numbers that are stored in Contacts.
To create a speed dial entry for a contact
1.
On the Home screen, click
Start
>
Contacts
.
2.
Select a contact.
3.
Press ENTER to view the contact details.
4.
Click
Menu
>
Add to Speed Dial
.
5.
Enter appropriate details in Name, Value, and Keypad
assignment .
6.
Click
Done
.
To quit at any time during this process, click
Menu
>
Cancel
.
To create a speed dial entry for an item
1.
On the Home screen, click
Start
>
<Item>
.
2.
Click
Menu
>
Add Speed Dial
.
3.
Enter details in Name, Value, and Keypad assignment.
4.
Click
Done
.
To quit at any time during this process, click
Menu
>
Cancel
.
The first speed dial location is generally reserved for your voice mail.
Speed Dial uses the next available location by default. If you want to
place a number in a location that is already used, the new number
replaces the existing number.
To retrieve a voice mail message
•
On the Home screen, press and hold 1 to access your
voice mailbox, and follow the prompts to retrieve your
messages.
To delete a speed dial entry
•
In the Speed Dial list, click
Menu
>
Delete
.

26
2
Using Phone Features
2.3 Receiving a Call
When you receive a phone call, you have the option to
answer it or ignore it.
To answer or ignore an incoming call
•
To answer the call, click
Answer
, or press TALK
(
)
.
•
To ignore the call, click
Ignore
, or press END (
(
).
To end a call
•
Press END (
).
2.4 In-Call Options
Your phone provides various options for managing multiple
calls at the same time. You are notified when you have
another incoming call, and you have the choice of ignoring
or accepting the call. If you are already on a call and accept
the new call, you can choose to switch between the two
callers, or set up a conference call between all three parties.
In-Call Options
To answer another call
1.
Click
Answer
to take the second call and put the fi rst
Answer to take the second call and put the fi rst Answer
call on hold.
2.
To end the second call and return to the fi rst call, press
END (
).

27
2
Using Phone Features
To switch between calls
•
To switch between two calls, click
Swap
.
To set up a conference call
1.
Either put a call on hold and dial a second number, or,
answer a second incoming call during a call.
2.
Click
Menu
>
Conference
.
If the conference connection is successful, the word “Conference”
appears at the top of the screen.
To add additional persons to your conference call, click Menu > Hold,
enter the phone number, and then click
Resume
to return to the
call.
Not all service providers support conference call. Contact your
service provider for details.
To turn on and off the Speakerphone
The built-in Speakerphone allows you to talk hands-free or
lets other people listen to the conversation.
•
During a call, click
Menu
>
Speakerphone On
. The
icon appears at the top of the screen.
•
To turn off the Speakerphone during the call, click
Menu
>
Speakerphone Off
.
To avoid damage to your hearing, do not hold your phone against
your ear when the Speakerphone is turned on.
To mute a call
You can turn off the microphone during a call, so that you
can hear the caller but the caller cannot hear you.
•
During a call, click
Menu
>
Mute
.
When the microphone is turned off, the
icon appears on
the screen. Click
Menu
>
Unmute
to turn on the microphone
again.
28
2
Using Phone Features
2.5 Additional Dialing Information
Make an emergency call
•
Enter the appropriate emergency number for your
locale, and press TALK (
Enter the appropriate emergency number for your
).
Additional emergency numbers may be included in your SIM card.
Contact your service provider for details.
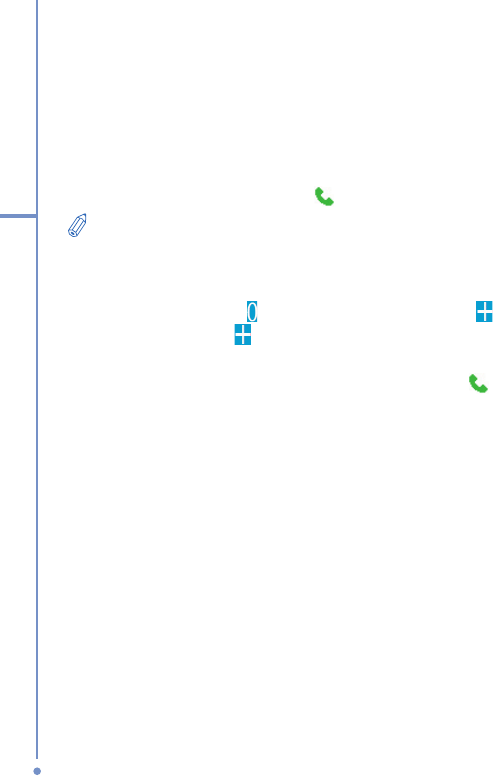
Make an international call
1.
Press and hold
on the phone keypad until the
sign
appears. The
replaces the international prefi x of the
country that you are calling.
2.
Enter the full phone number, and press TALK (
).
The full phone number includes country code, area
code (without the leading zero, if any), and phone
number.
Insert a pause in a dialing sequence
Some international calls require a pause in the dialing
sequence in order for the call to process successfully.
1.
On the Home screen, click
Start
>
Contacts
.
2.
Select the contact entry that contains the phone
number into which you want to insert a pause, and
press ENTER to open the contact card.
3.
Click
Menu
>
Edit
.
4.
Position the cursor on the phone number where you
want to insert a pause.
5.
Click
Menu
>
Insert Pause
.
The letter “p” will appear in the number to indicate
where the pause will occur in the dialing sequence.

29
2
Using Phone Features
6.
Click
Done
.
Insert a longer pause in a dialing sequence
Some phone numbers may require a longer pause than the
default pause in the dialing sequence. In these cases, you
can pause as long as you want, and manually continue the
dialing sequence.
1.
On the Home screen, click
Start
>
Contacts
.
2.
Select the contact entry that contains the phone
number into which you want to insert a longer pause,
and press ENTER to open the contact card.
3.
Click
Menu
>
Edit
.
4.
Position the cursor on the phone number where you
want to insert a longer pause.
5.
Click
Menu
>
Insert Wait
.
The letter “w” will appear in the number to indicate
where the longer pause (wait) will occur in the dialing
sequence.
6.
Click
Done
.
When you call a number that contains a longer pause, you must
press TALK ( ) to continue dialing.

30
2
Using Phone Features
2.6 Using Voice Tags
You can record a voice tag for a phone number, e-mail
address, or Web page address that is stored in Contacts.
Then, when you say the voice tag, your phone automatically
dials the associated phone number, opens an e-mail
message using the associated address, or goes to the
associated Web page.
To create a voice tag for a phone number, e-mail
address, or URL in Contacts
1.
On the Home screen, click
Start
>
Contacts
.
2.
Select the desired contact, and press ENTER to open
the contact card.
3.
Select the item to which you want to assign a voice
tag.
4.
Click
Menu
>
Add Voice Tag
.
5.
After the message/beep, begin recording the voice tag
(preferably one easy-to-recognize word).
5.
After the second beep, click
Menu
>
Add Speed Dial
.
The phone will play back the voice tag.
6.
Click
Done
to save the new voice tag.
To use the voice tag, on the Home screen, press and hold
the VOLUME down button on the left side of the phone
for three seconds. Say the word that you recorded. The
phone plays back the voice tag and then dials or opens the
associated item.
Chapter 3
Synchronizing your Phone
3.1 About ActiveSync
3.2 Setting Up ActiveSync
3.3 Synchronizing Information
3.4 Synchronizing via Infrared
and Bluetooth
3.5 Synchronizing Music,
Video,and Pictures

3.1 About ActiveSync
ActiveSync synchronizes information on your phone with
information on your PC such as Outlook content. ActiveSync
can also synchronize over a wireless or cellular network with
Exchange Server, if your company or service provider is
running Exchange Server with Exchange ActiveSync.
Specifically, you can use ActiveSync to:
•
Synchronize information such as Outlook e-mail,
contacts, calendar, or tasks information on your phone
with your PC, as well as pictures, video, and music.
•
Synchronize Outlook e-mail, contacts, calendar
appointments, and tasks on your phone directly with
Exchange Server so that you can stay up to date even
when your PC is turned off.
•
Copy fi les between your phone and your PC without
synchronizing.
•
Select which types of information are synchronized
and specify how much information is synchronized. For
example, you can choose how many weeks of past
calendar appointments to synchronize.
3.2 Setting Up ActiveSync
To install and set up ActiveSync on the computer
1.
Install ActiveSync on your PC, as described on
the Windows Mobile™ Getting Started Disc. After
Setup completes, the Synchronization Setup Wizard
automatically starts when you connect your phone to
the PC.
2.
Follow the instructions on the screen to complete the
wizard. In the Sync Setup Wizard, do one or both of
the following:
32
3
Synchronizing your Phone

•
Create a synchronization relationship between your
PC and the phone.
•
Configure an Exchange Server connection to
synchronize directly with Exchange Server. You
need to specify the Exchange Server address, user
name, password, and domain name. (Get these
information from your administrator).
3.
Choose the information types to synchronize.
When you finish the wizard, ActiveSync synchronizes your
phone automatically. Once synchronization completes, you
can disconnect your phone from your PC.
3.3 Synchronizing Information
When you connect your phone to the PC, ActiveSync will
immediately synchronize. While the phone is connected,
ActiveSync synchronizes every time you make a change on
either the PC or the phone.
To manually start and stop synchronization
1.
Connect your phone.
•
To synchronize local information on the PC, such
as Outlook information or media files, connect your
phone to the PC using Bluetooth, infrared (IR), or a
cable or cradle.
•
If you are synchronizing directly with Exchange
Server, you can use the connection to the PC to
access the network, or you can synchronize over a
cellular or Wi-Fi network without connecting to the
PC.
2.
In ActiveSync, click
Sync
.
3.
To end synchronization before it completes, click
Stop
.
33
3
Synchronizing your Phone

34
3
Synchronizing your Phone
ActiveSync synchronizes a limited amount of information
by default to save storage space on your phone. You can
change the amount of information that is synchronized by
performing the following steps.
To change which information is synchronized
1.
On the Home screen, click
Start
>
ActiveSync
.
2.
Click
Menu
, and click
Options
.
3.
Do one or more of the following:
•
Select the check box for the items you want to
synchronize. If you cannot select a check box, you
might have to clear the check box for the same
information type elsewhere in the list.
•
Clear the check box for any items you want to
exclude.
•
To customize synchronization of a computer, select
the computer name then click
Menu
>
Settings
.
•
To customize synchronization of a particular
information, select the information type then click
Settings
.
•
To stop synchronizing with one computer
completely, select the computer name and click
Menu
>
Delete
.
Outlook e-mail can be synchronized with only one computer.
Synchronizing with Exchange Server
To set up your phone to synchronize directly with Exchange
Server, you will need to get the name of the server and the
server domain name from your service provider or system
administrator. You must also know your Exchange user
name and password.
Before changing synchronization settings on the phone, disconnect it
from your PC.

35
3
Synchronizing your Phone
To synchronize directly with Exchange Server
1.
On the Home screen, click
Start
>
ActiveSync
>
Menu
>
Confi gure Server
. If you have not yet set up
synchronization with Exchange Server, this will say
Add Server Source
.
2.
In
Server address
, enter the name of the server
running Exchange Server, and click
Next
.
3.
Enter your user name, password, and domain name.
4.
If you want the phone to save your password so that
you will not need to enter it again when connecting,
select the
Save password
check box. Then, click
Next
.
5.
Select the check boxes of the types of information that
you want to synchronize with the Exchange Server.
6.
To customize synchronization of a particular
information, select the type of information then click
Menu
>
Settings
.
7.
To change the rules for resolving synchronization
confl icts, click
Menu
>
Advanced
.
8.
Click
Finish
.
You can also use the Sync Setup Wizard to set up the phone to
synchronize remotely with the Exchange Server. This wizard is
started when you connect your phone to your PC after installing
ActiveSync on the PC.
Synchronizing with multiple computers
If you have set up a synchronization relationship between
your phone and the PC, synchronization keeps Outlook
information up-to-date on both computers.
You can also set up your phone to synchronize with more
than one PC, or with a combination of one or more PCs
and Exchange Server. When synchronizing with multiple
computers, the items you synchronize will appear on all
of the computers with which they are synchronized. For

36
3
Synchronizing your Phone
example, if you have set up synchronization with two
PCs (PC1 and PC2), which have different items, and you
synchronize Contacts and Calendar on the phone with both
computers, the result is as follows:
Location
New state
PC1 All Outlook contacts and calendar appointments that
were on PC2 are now also on PC1.
PC2 All Outlook contacts and calendar appointments that
were on PC1 are now also on PC2.
Phone All Outlook contacts and calendar appointments from
both PC1 and PC2 are on the phone.
Outlook e-mail can be synchronized with only one computer.
3.4 Synchronizing via Infrared and
Bluetooth
You can connect your phone to the PC to synchronize using
the local wireless technologies, infrared (IR) and Bluetooth.
These technologies have similar but slightly different
requirements.
To synchronize with a PC via infrared
1.
Follow the instructions in ActiveSync Help on the PC
for setting up your PC to receive infrared beams.
2.
Line up the infrared (IR) ports according to the
instructions in the manufacturer’s documentation for
your phone so that they are unobstructed and within
close range.
3.
On the Home screen, click
Start
>
ActiveSync
.
4.
Click
Menu
>
Connect via IR
.
5.
Click
Sync
.

37
3
Synchronizing your Phone
To synchronize with a PC via Bluetooth
1.
Follow the instructions in ActiveSync Help on the
PC for confi guring Bluetooth on your PC to support
ActiveSync.
2.
On the Home screen, click
Start
>
ActiveSync
.
3.
Click
Menu
>
Connect via Bluetooth
. Ensure that the
phone and PC are within close range.
4.
If this is the fi rst time you have connected to this PC
via Bluetooth, you must complete the Bluetooth wizard
on the phone and set up a Bluetooth partnership with
the PC before synchronizing.
5.
Click
Sync
.
6.
When fi nished, click
Menu
>
Disconnect Bluetooth
.
To preserve battery power, turn off Bluetooth.
3.5 Synchronizing Music, Video,
and Pictures
If you want to take your music or other digital media with
you, ActiveSync works with Windows Media Player to
synchronize music, video, and pictures with your phone.
Other than selecting the media information type in
ActiveSync to be synchronized, all media synchronization
settings must be set in Windows Media Player. Before media
can be synchronized, you must do the following:
•
Install Windows Media Player Version 10 on the PC.
•
Connect your phone to the PC with a USB cable. If
the phone is currently connected using Bluetooth or
infrared, you must end that connection before media
can be synchronized.
•
Insert a 32-MB or larger storage card into your phone.
•
Set up a sync partnership between the storage card

38
3
Synchronizing your Phone
and Windows Media Player.
Change Media synchronization settings
Once you select the media information type in ActiveSync
to be synchronized, any of your favorite music, video, and
picture files in Windows Media Player playlists can be
synchronized by ActiveSync. All you have to do is set up
synchronization in Windows Media Player for those media
files.
To set up a sync relationship with a storage card
1.
On the PC, open Windows Media Player.
2.
Click the
Sync
tab.
3.
Select the storage card.
4.
Click
Set up Sync
.
For information about using Windows Media Player on the
phone, see “Using Windows Media Player” in Chapter 7.

Chapter 4
Managing your Phone
4.1 Personalizing your Phone
4.2 Adding and Removing Programs
4.3 Using Task Managerand
Managing Memory
4.4 Managing and Backing Up Files
4.5 Protecting your Phone
4.6 Resetting your Phone

40
4
Managing your Phone
4.1 Personalizing your Phone
Set up the Home screen
The Home screen is your starting place for most tasks. You
can gain access to all features and programs from the Home
screen.
The top of the Home screen displays icons for the programs
that you have most recently used. The center of the Home
screen can display your next appointment, the number of
new messages (voice mail, text, e-mail, or MMS) that you
have received, and other important information. When you
click an icon or item on the Home Screen, the associated
program opens.
To customize the Home screen
1.
On the Home screen, click
Start
>
Settings
>
Home
Screen
.
2.
In
Home screen layout
,
Color scheme
,
Background
image
, and
Time out
, select the options you want, and
click
Done
.
To set a picture as the background
1.
On the Home screen, click
Start
>
Pictures & Videos
.
2.
Select the picture you want to set as the background.
Click
View
or press ENTER for a larger view of the
image
3.
Click
Menu
>
Use as Home Screen
.
4.
Use NAVIGATION to select the portion of the picture
you want to use, and click
Next
.
5.
In
Adjust the transparency
, select a higher
percentage for a more transparent picture or a lower
percentage for a more opaque picture.
6.
Click
Finish
.

41
4
Managing your Phone
Set date, time, language, and other regional
options
Your phone should already be set up with the regional
settings that are appropriate for your locale.
To change regional settings
You can specify the language, locale, date and time style, as
well as number and currency formatting options.
1.
On the Home screen, click
Start
>
Settings
>
Regional Settings
.
2.
In
Language
, select your preferred language.
3.
In
Locale
, select the locale for the language you
selected. The Locale option automatically changes the
format of the remaining options (such as date, time,
and currency) according to the locale you specify.
4.
Click
Done
.
You must turn your phone off and on again for the changes to take
effect.
To set the date and time
1.
On the Home screen, click
Start
>
Settings
>
Clock &
Alarm
>
Date and Time
.
2.
In
Time zone
, select your time zone.
3.
In
Date
, edit the month, day, or year.
4.
In
Time
, edit the hour, minute, and second.
5.
Click
Done
.
Choose how to be notified about events or
actions
A profile is a group of settings that determine how your
phone will alert you to incoming calls, events such as e-mail
receipt notifications, alarms, or system events. A number of
different preset combinations of these settings are included

42
4
Managing your Phone
with your phone. Each profile appears with a descriptive
name.
To change the current profi le
1.
On the Home screen, click
Profi le [Type]
. Example:
Profi le Normal
.
2.
Click a new profi le, and click
Done
.
To quickly change the profile, briefly press POWER to display the
Quick List, and click a profile.
To edit a profi le
1.
On the Home screen, click
Profi le [Type]
. Example:
Profi le Normal
.
2.
Select the profi le to edit.
3.
Click
Menu
>
Edit
.
4.
Do one of the following:
•
Modify the settings, and click
Done
.
•
To cancel without saving changes, click
Cancel
.
To revert to the default profile settings, click Menu > Reset to
default.
To specify the sound for an event
1.
On the Home screen, click
Start
>
Settings
>
Sounds
.
2.
For the desired event, select a sound. Select
None
if
you do not want to hear a sound.
3.
Click
Done
.
For ring tones, you can use sounds in either .wav, .mid, or .wma file
format. For notifications or reminders, you can use .wav, or .mid.
When you select a sound, the sound plays. To hear it again, select
Menu > Play.

43
4
Managing your Phone
To set sound for the keypad
1.
On the Home screen, click
Start
>
Settings
>
Sounds
.
2.
In
Keypad control
, select a sound. Select
None
if you
do not want to hear any sound while pressing a key.
3.
Click
Done
.
To copy a sound to your phone
After a sound file is located on your phone, you can use it
for a ring tone, notification, or reminder. Sound files in either
.wav, .mid, or .wma formats can be used.
1.
Connect the phone to your PC using a USB
connection.
2.
On your PC, copy the sound fi le you want.
3.
In ActiveSync on your PC, click
Explore
and double-
click
My Windows Mobile-Based Device
.
4.
Do one of the following:
•
To save the sound file on your phone, double-click
Application Data
, double-click
Sounds
, and paste
the file into that folder.
•
To save the sound file on your storage card, double-
click
Storage Card
, and paste the file into the folder
you want.
To set an alarm
1.
On the Home screen, click
Start
>
Settings
>
Clock &
Alarm
>
Alarm
.
2.
In
Alarm
, choose one of the following:
•
Off
to turn the alarm off.
Off to turn the alarm off.Off
•
On
to turn the alarm on.
3.
In
Alarm time
, enter the time for the alarm to go off.
4.
Click
Done
.

44
4
Managing your Phone
Set personal information
Entering and displaying owner information are best
practices; they allow someone to return the phone to you in
case it is lost.
To enter owner information
1.
On the Home screen, click
Start
>
Settings
>
Owner
Information
.
2.
Complete the following:
•
In
Name
, enter your name.
•
In
Telephone number
, enter a number where you
can be reached.
•
In
E-mail address
, enter your e-mail address.
•
In
Notes
, enter any other information you want to
include.
3.
Click
Done
.
Set performance and maintenance options
To change accessibility settings
1.
On the Home screen, click
Start
>
Settings
>
Accessibility
.
2.
Select your preference for the following:
•
System font
size
to set the size of the font that is
displayed on the screen.
•
Multipress time
out
to set the length of time
between keypresses when entering text in
Multipress mode.
•
Confirmation time
out
to set the delay before an
unconfirmed action times out.
•
In-call alert volume
to set the volume for incoming
call or receiving new message alerts while you are
in a call.

45
4
Managing your Phone
3.
Click
Done
.
To change power management settings
You can use Power Management to check the battery, and
configure settings that prolong battery life.
1.
On the Home screen, click
Start
>
Settings
>
Power
Management
.
2.
Adjust the following:
•
In
Backlight time out on battery
, select the
amount of time for the phone to be idle before the
backlight turns off.
•
In
Backlight time out on AC
, select the amount
of time for the phone to be idle before the backlight
turns off when using AC power.
•
In
Display time out
, select the time limit for the
phone to be idle before the screen turns off.
3.
Click
Done
.
Main battery indicates the amount of battery life remaining.
To lock the phone
1.
On the Home screen, click
Start
>
Settings
>
Security
>
Enable Phone Lock
.
2.
In
Lock phone after
, select the amount of time for the
phone to be inactive before it gets locked automatically.
3.
Enter and confi rm your password.
4.
Click
Done
.
You can also briefly press POWER to display the Quick List, and then
select Device lock to lock the phone.

46
4
Managing your Phone
To fi nd the operating system version number
•
On the Home screen, click
Start
>
Settings
>
About
.
The operating system version number installed on
your phone along with the manufacturer copyright
information will be listed on the screen.
To fi nd the phone specifi cation
•
On the Home screen, click
Start
>
Settings
>
System
Information
.
The System Information screen displays the details
about the phone specifi cation, such as processor,
speed, memory, display, model name, and so on.
To turn on and off error reporting
1.
On the Home screen, click
Start
>
Settings
>
Error
Reporting
.
2.
Do one of the following:
•
Select
Enable
to turn on error reporting.
•
Select
Disable
to turn off error reporting.
3.
Click
Done
.
4.2 Adding and Removing Programs
Before you purchase additional programs for your phone,
you should note the name of your phone, the version of
Windows Mobile software running on it, and the type of
processor. This information will help you select a program
that is compatible with your phone. For more information,
see “To find the operating system version number” in this
chapter.
Programs available for purchase usually include a Setup
program (commonly named “setup.exe”) that you must first
install on your PC. You can then use ActiveSync to add
programs to your phone or add a program directly from the
Internet.

47
4
Managing your Phone
To add programs
1.
Download the program to your PC (or insert the CD or
disk that contains the program into your PC). You may
see a single *.exe fi le, a *.zip fi le, a Setup.exe fi le, or
several versions of fi les for different device types and
processors. Be sure to select a program designed for
your phone and processor type.
2.
Read any installation instructions or documentation
that comes with the program. Many programs provide
special installation instructions.
3.
Connect your phone and PC.
4.
Double-click the *.exe fi le.
•
If the executable file is an installation wizard, follow
the instructions on the screen. Once the program
has been installed on your PC, the wizard will
automatically transfer the program to your phone.
•
If an installation wizard does not start, you will
see an error message stating that the program
is valid but that it is designed for a different type
of computer. You will need to copy this program
to your phone. If you cannot find any installation
instructions for the program, use ActiveSync to copy
the program file to the Program Files folder on your
phone.
To remove a program
Programs that come with the phone cannot be removed.
1.
On the Home screen, click
Start
>
Settings
>
Remove
Programs
.
2.
Scroll to the program to remove.
3.
Click
Menu
>
Remove
.
48
4
Managing your Phone
4.3 Using Task Manager
and Managing Memory
To see how much memory is available
1.
On the Home screen, click
Start
>
Settings
>
About
.
2.
Scroll down to
Available Memory
.
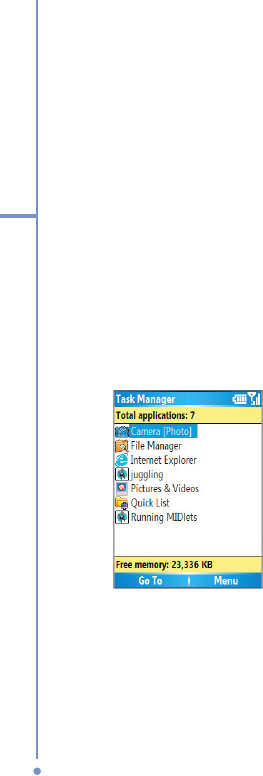
Use Task Manager
Task Manager allows you to view all the programs currently
running on your phone in the form of a list. From Task
Manager, you can switch to, activate, or terminate any
currently running program. It also allows you to view the
phone memory status and battery information.
To start Task Manager
•
Click
Start
>
Task Manager
.
Task
49
4
Managing your Phone
The Task Manager Menu contains the following options.
Option
Allows you to
Go To Switch to the selected program.
Refresh Refresh the Task Manager screen to reflect a list of
currently running programs.
Stop Stop the selected program. You can view the free
memory status at the bottom of the screen.
Stop All Stop all listed programs. Click OK to confirm that
you want to end all currently running programs. You
can view the free memory status at the bottom of
the screen.
Stop All But
Selected
Stop all running programs in the list except the one
you selected.
System Info View information about power status, memory
usage, flash, and device information.
About View program name, version, and copyright
information.
4.4 Managing and Backing Up Files
You can back up files to your PC using ActiveSync or copy
files to a storage card that is installed by you on your phone.
You can also efficiently manage your files and folders using
File Manager installed on your phone.
Using Microsoft ActiveSync, you can copy or move
information from the PC to the phone and vice versa.
Changes you make to the information on one computer
will not affect the information on the other computer. If
you want to automatically update information on both your
phone and PC, synchronize the information instead. For
more information about copying and synchronizing files, see
ActiveSync Help on your PC.

50
4
Managing your Phone
To copy a fi le using ActiveSync
Copying a file results in separate versions of a file on your
phone and PC. Because the files are not synchronized,
changes made to one file will not affect the other.
1.
Connect your phone to your PC.
2.
In ActiveSync, click
Explore
, which opens the Mobile
Device folder for your phone.
3.
In the Mobile Device folder, go to the fi le that you want
to copy on your phone or PC.
4.
Do one of the following:
•
To copy the file to your phone, right-click the file,
and click
Copy
. Right-click the desired folder on
your phone, and click
Paste
.
•
To copy the file to your PC, right-click the file and
click
Copy
. Right-click the desired folder on your
PC, and click
Paste
.
Use File Manager
File Manager provides many easy-to-use features for file
and folder management.
To start File Manager
•
On the Home screen, click
Start
>
File Manager
.
File Manager operates in the following two views:
•
Tree View
•
List View
Each view has an independent set of menu options for
managing files and folders.
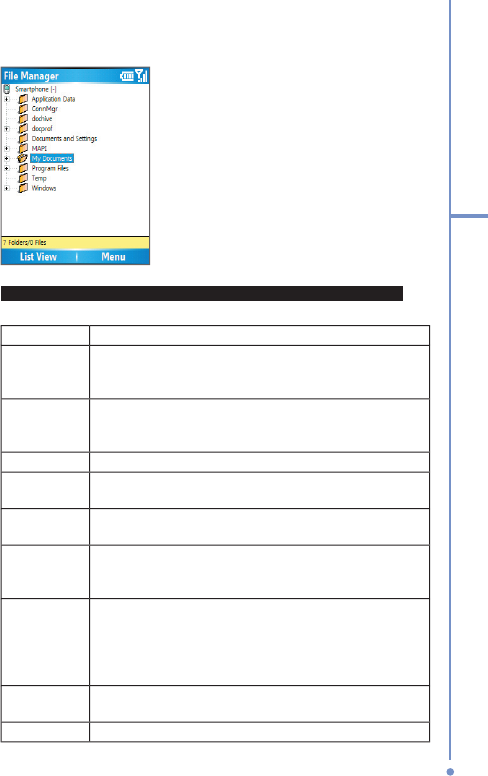
To use Tree view
The File Manager Tree View displays the entire file structure
in your phone’s memory. The functions in Tree View focus
primarily on folder management. When initially started, File
Manager is in Tree View by default.
51
4
Managing your Phone
File Manager
The File Manager Tree View Menu contains the following
options:
Option
Allows you to
Folder Create and rename a folder. You can also copy or
move the content of the selected folder to another
folder.
Find Search for files based on filename and/or text
content in the file. You can also specify the folder in
which to search for the file.
Go To Switch to other folders.
Delete Delete a folder and all of its contents. To delete
individual files, click Menu > Delete while in the List View.
Refresh Refresh the view on the screen to reflect the actual
current contents in memory.
Properties View information about the selected folder. To view
information about individual files, in List View, click
Menu > Properties.
Options Customize the behavior of File Manager by
configuring options in the Application style, File
browser settings, Get confirmation before, and
Temporary Files sections. To reset to the default, on
the Options screen, click Menu > Reset Default.
System Info View information about power status, memory usage,
flash, and device information.
About View the program version, and copyright information.

52
4
Managing your Phone
To use List View
The File Manager List View displays the contents of a
selected folder (its subfolders and files). The functions in List
View are basically file-oriented. While in Tree View, click
List
View
to display the files and subfolders.
If the currently selected folder in Tree View contains no
subfolders, pressing ENTER switches to List View. However,
if the selected folder in Tree View has subfolders, pressing
ENTER expands or collapses the tree for that folder.
Some system files may not be displayed for security reasons.

53
4
Managing your Phone
The File Manager List View
Menu
contains the following options:
Option
Allows you to
File Create and rename subfolders and files. You can copy
or move the folder content to another folder, duplicate
the currently selected file(s), and create a shortcut for a
file. You can even associate all files that have the same
extension as the selected file with a specific program
so that the files always open using that program.
You can also open a file using any other program by
selecting Open With.
Zip
Extraction
Extract ZIP files that you may have on your phone
from a PC via ActiveSync, infrared, beaming, or e-mail.
Select Extract Here to extract the file content in the
current folder. Select Contents to list and view the
content of the ZIP file, which also gives you the option
to extract, view, and test the integrity of each file
contained in the ZIP file and more.
Selection Select a single file or folder or multiple files or folders
in the list. Also provides you with options to navigate
the list.
Sort By Sort files or folders in the list by name, size, date, or
type, in either ascending or descending order.
Send Send a file or files via beaming or e-mail. You can send
only one file at a time through e-mail, but you can beam
more than one file, or an entire folder simultaneously.
Run Open a file with the related program. You can also run
a program file on your phone.
Delete Remove the selected file or folder from your phone.
Refresh Refresh the view on the screen to reflect the actual
current contents in memory.
Properties
View information about the selected file or folder and
set file attributes.
Options Customize File Manager by configuring options
in the Application style, File browser settings, Get
confirmation before, and Temporary Files sections. To
reset to the default, on the Options screen, click Menu
> Reset Default.

54
4
Managing your Phone
4.5 Protecting your Phone
There are several levels of security on your phone. You
can protect your phone from unauthorized use by requiring
a type of password called a PIN (personal identification
number) in order to make calls. Your first PIN will be given to
you by your wireless service provider. Additionally, you can
lock the keypad or the entire phone to prevent unauthorized
access.
To enable the SIM personal Identifi cation number (PIN)
1.
On the Home screen, click
Start
>
Settings
>
Security
.
2.
Click
Enable SIM PIN
.
3.
Enter your PIN, and click
Done
.
To cancel without enabling the SIM PIN, press HOME.
To disable the SIM PIN
1.
On the Home screen, click
Start
>
Settings
>
Security
.
2.
Click
Disable SIM PIN
.
3.
Enter your PIN, and click
Done
.
To change the SIM PIN
Be sure to make a note of your personal identification
number (PIN). When the SIM PIN is enabled, you must
provide this PIN to unlock the phone.
1.
Click
Start
>
Settings
>
Security
.
2.
Click
Change SIM PIN
.
3.
In
Old PIN
, enter the current PIN.
4.
Enter and confi rm the new PIN, and click
Done
.

55
4
Managing your Phone
To lock the keypad
Locking the keypad turns off keypad functionality. This is a
helpful feature if, for example, the phone is turned on and in
your pocket, and you want to prevent accidental keypresses.
•
On the Home screen, press and hold END.
Once the keypad is locked, the left soft key label
changes to
Unlock
.
To quickly lock the keypad, press POWER briefly to display the Quick
List, and select Key lock.
You can still receive calls and make emergency calls when the
keypad is locked.
To unlock the keypad
•
On the Home screen, click
Unlock
and press the * key.
To enable the phone lock
1.
On the Home screen, click
Start
>
Settings
>
Security
>
Enable Phone Lock
.
2.
In
Lock phone after
, select the amount of time for the
phone to be inactive before automatically locking.
3.
Enter and confi rm your password.
4.
Click
Done
.
Alternatively, press POWER briefly to display the Quick List and then
select Device lock to configure the phone lock settings.
Once you configure the phone lock settings, you can enable the
phone lock from the Quick List directly without configuring the
settings again.
To disable the phone lock
1.
On the Home screen, click
Start
>
Settings
>
Security
.
2.
Click
Disable Phone Lock
.
3.
Enter the password, and click
Done
.

56
4
Managing your Phone
4.6 Resetting your Phone
Occasionally, you may want to reset your phone, for
example, when a program is not performing properly or after
installing some programs. A reset clears the memory and
shuts down all active programs.
If a reset is performed while a program is running, unsaved work will
be lost.
To perform a soft reset
1.
Remove the battery.
2.
Remove the SIM card.
3.
Replace the SIM card and the battery.
4.
Turn on your phone.

Chapter 5
Getting Connected
5.1 Connecting to the Internet
5.2 Using Internet Explorer Mobile
5.3 Using Bluetooth
5.4 Using Modem Link
5.5 Using Wireless Manager

58
5
Getting Connected
5.1 Connecting to the Internet
Your phone is equipped with powerful networking functions
that enable you to connect to the Internet through a General
Packet Radio Service (GPRS) network or a Bluetooth
modem. GPRS is a new nonvoice value-added service
that allows information to be sent and received across a
mobile telephone network. You can set up connections to
the Internet or to a corporate network to browse the Internet,
and exchange e-mail or instant messages.
The connections settings on your phone allow you view and
configure various connection gateways, such as Dial-up,
GPRS, Proxy, Virtual Private Network (VPN), Bluetooth, and
Wi-Fi. You can even configure the settings for receiving and
sending information to other devices through beaming.
With an active connection on your phone, you can browse
the Web, download e-mails, chat using MSN Messenger, or
synchronize remotely with a Web server. Check with your
service provider to see if a connection has already been set
up for you, and if over-the-air configuration is supported.
Before you start setting up a connection, it is important
that you obtain the following information from your Internet
Service Provider (ISP) and the company whose intranet you
are trying to access:
•
ISP server phone number
•
User name
•
Password
•
Access point name (required for GPRS connection)
•
Domain name (required for accessing a corporate
network or an intranet)
Set up a Dial-up connection
You need to set up a dial-up connection to connect directly
to the Internet or to your corporate network.

59
5
Getting Connected
To set up a dial-up connection for browsing the Internet
1.
On the Home screen, click
Start
>
Settings
>
Connections
>
Dial-up
.
2.
Click
Menu
>
Add
.
3.
In Description, enter a name for the connection.
4.
In
Connects to
, select
The Internet
.
5.
Enter the appropriate information in the remaining
fi elds.
6.
Click
Done
.
To set up a dial-up connection for your corporate
network
1.
On the Home screen, click
Start
>
Settings
>
Connections
>
Dial-up
.
2.
Click
Menu
>
Add
.
3.
In Description, enter a name for the connection.
4.
In
Connects to
, select
Work
.
5.
Enter the appropriate information in the remaining
fi elds.
6.
Click
Done
. To start browsing the Internet, click
Start
>
Internet Explorer
.
In the same way, you can set up the following connections:
• VPN: A VPN connection is used to access your corporate
network by using an existing Internet connection.
• Proxy: A Proxy connection is used to access the Internet
using an existing connection to your corporate or WAP
network.
• GPRS: If there is GPRS coverage in your area, you can set
up a GPRS connection to access your corporate network
or the Internet, which is faster than a dial-up connection.

60
5
Getting Connected
Advanced options
You can use advanced settings options for a connection to
specify the type of connection, the wireless service provider,
the number of redial attempts, the amount of idle time to wait
before disconnecting, and so on.
1.
On the Home screen, click
Start
>
Settings
>
Connections
.
2.
Click
Menu
>
Advanced
.
3.
Select a connection type.
4.
Select a network service provider for each connection
type. You can choose Automatic to allow the phone to
set a service provider for each connection by default.
5.
Click
Menu
>
Options
.
6.
Enter appropriate information in the remaining fi elds.
7.
Click
Done
.
Add a URL exception
Some URLs for Web pages on your company intranet may
use periods, for example: intranet.companyname.com. To
view these pages in Internet Explorer Mobile, you must
create a URL exception.
1.
On the Home screen, click
Start
>
Settings
>
Connections
.
2.
Click
Menu
>
Advanced
.
3.
Click
Menu
>
Work URL Exceptions
.
4.
Click
Menu
>
Add
.
5.
In URL Pattern, enter the URL name.
To add multiple URLs, use a semicolon (;).
6.
Click
Done
.
You do not need to create URL exceptions for Internet URLs.

61
5
Getting Connected
5.2 Using Internet Explorer Mobile
Internet Explorer Mobile is a full-featured Internet browser,
optimized for use on your phone.
To open Internet Explorer
•
On the Home screen, click
Start
>
Internet Explorer
.
To go to a link
1.
On the Home screen, click
Start
>
Internet Explorer
.
2.
Scroll vertically or horizontally to see all available links.
3.
Click the link.
To go to a Web page
1.
On the Home screen, click
Start
>
Internet Explorer
.
2.
Click
Menu
>
Address Bar
.
3.
Enter the address, and click
G
o
.
To change Web page display options
1.
On the Home screen, click
Start
>
Internet Explorer
.
2.
Click
Menu
>
View
.
3.
Select one of the following:
•
One Column
. Arranges the content into one column
that is as wide as the screen. This means that you
will rarely have to scroll horizontally.
•
Default.
Maintains a layout similar to what you see
on a desktop computer, but makes items smaller
and arranges the content so that you can see most
of it without having to scroll horizontally.
•
Desktop.
Keeps the same layout and size as on a
desktop computer, which will require both horizontal
and vertical scrolling.
To change the size of text on Web pages
1.
On the Home screen, click
Start
>
Internet Explorer
.
2.
Click
Menu
>
Zoom
and select the size you want.

62
5
Getting Connected
To show or hide pictures on Web pages
1.
On the Home screen, click
Start
>
Internet Explorer
.
2.
Click
Menu
>
View
>
Show Pictures
.
3.
A check mark next to
Show Pictures
indicates that
pictures will be displayed on Web pages.
To view a page in full-screen mode
1.
On the Home screen, click
Start
>
Internet Explorer
.
2.
Click
Menu
>
View
>
Full Screen
.
To exit full-screen mode, press either SOFT KEY, and then click
Menu > View > Full Screen to cancel the selection.
To add a Web page to the Favorites list
1.
On the Home screen, click
Start
>
Internet Explorer
.
2.
To go to the page you want to add, click
Menu
>
Address Bar
, enter the address, and click
Go
.
3.
Click
Menu
>
Add
to
Favorites
.
4.
Confi rm or change the name and Web page address.
5.
In Folder, select a folder for the favorite.
6.
Click
Add
.
A quick way to add favorites to your phone is to synchronize with your
PC using ActiveSync. For more information, see ActiveSync Help on
your PC.
To view a favorite
1.
On the Home screen, click
Start
>
Internet Explorer
.
2.
Click
Favorites
.
3.
Select a favorite, and click
Go
.
To move a favorite to a folder
1.
On the Home screen, click
Start
>
Internet Explorer
.
2.
Click
Favorites
.
3.
Select the favorite to move.
4.
Click
Menu
>
Edit
.

63
5
Getting Connected
5.
Under Folder, scroll to the folder to which you want to
move the favorite.
6.
Click
Done
.
To clear history, cookies, or temporary fi les
1.
On the Home screen, click
Start
>
Internet Explorer
.
2.
Click
Menu
>
Tools
>
Options
.
3.
Click
Memory
.
4.
Select the type of memory to clear.
5.
Click
Clear
, click
Yes
, and then click
Done
.
To send a link via e-mail
1.
On the Home screen, click
Start
>
Internet Explorer
.
2.
Go to the Web page you want to send.
3.
Click
Menu
>
Tools
>
Send Link via E-mail
.
4.
Select
Text Messages
or
Outlook E-mail
.
5.
A new message is created with the page address
inserted in the message body.

64
5
Getting Connected
5.3 Using Bluetooth
Bluetooth is a short-range wireless communications
technology. Devices with Bluetooth capabilities can
exchange information over a distance of about 10 meters
without requiring a physical connection. You can even beam
information to a device in a different room, as long as it is
within range.
The software included with your phone allows you to use
Bluetooth in the following ways:
•
Beam information, such as fi les, appointments,
tasks, and contact cards, between devices that have
Bluetooth capabilities.
•
Create a dial-up modem connection between your
phone and a Bluetooth-enabled device, and then beam
information using the Bluetooth phone as a modem.
To turn on or off Bluetooth on your phone
1.
On the Homes screen on your phone, click
Start
>
Settings
>
Connections
>
Bluetooth
.
2.
In Bluetooth, select
On
.
3.
Click
Done
.
To turn off Bluetooth capabilities on your phone, in Bluetooth,
selec
t
Off
.
Bluetooth modes
Bluetooth on your phone operates in three different modes:
1.
On. Bluetooth is turned on and you can use Bluetooth
features.
2.
Off. Bluetooth is turned off. In this mode, you can
neither send nor receive information using Bluetooth.
You might want to turn off the radio at times to
conserve battery power, or in situations where radio
use is prohibited, such as onboard an aircraft and in

65
5
Getting Connected
hospitals.
By default, Bluetooth is turned off. If you turn it on, and then turn off
your phone, Bluetooth also turns off. When you turn on your phone
again, Bluetooth automatically turns on.
3.
Discoverable. Bluetooth is turned on, and all other
Bluetooth-enabled devices within a range of 10 meters
can detect your phone.
To make your phone discoverable
1.
On the Home screen on your phone, click
Start
>
Settings
>
Connections
>
Bluetooth
.
2.
In Bluetooth, select
Discoverable
.
3.
Click
Done
.
Selecting the Discoverable option on the Bluetooth screen also turns
on Bluetooth.
Bluetooth partnerships
A Bluetooth partnership is a relationship that you create
between your phone and another Bluetooth-enabled device
in order to exchange information in a secure manner.
Creating a partnership between two devices involves
entering the same personal identification number (PIN) on
both devices. Creating a partnership between two devices
is a one-time process. Once a partnership is created,
the devices can recognize the partnership and exchange
information without entering a PIN again. Make sure the two
devices are within a range of 10 meters, and Bluetooth is
turned on and in discoverable mode.
To create a Bluetooth partnership
1.
On the Home screen on your phone, click
Start
>
Settings
>
Connection
s >
Bluetooth
.
2.
Click
Menu
>
Devices
.
3.
Click
Menu
>
New
to search for a new device.
Your phone searches for other Bluetooth-enabled
devices and lists them.

66
5
Getting Connected
4.
Select the desired device name in the list.
5.
Click
Next
.
6.
Enter a passkey to establish a secure connection.
The passkey must be between 1 and 16 characters.
7.
Click
Next
.
8.
Enter the same passkey that is entered on the other
device.
You can, however, edit and enter a new name for the
other device.
9.
Click
Finish
.
To accept a Bluetooth partnership
1.
Ensure that Bluetooth is turned on and in discoverable
mode.
2.
Click
OK
when prompted to establish a partnership
with the other device.
3.
Enter a passkey (the same passkey that is entered on
the device requesting the partnership) to establish a
secure connection.
The passkey must be between 1 and 16 characters.
4.
Click
Next
.
5.
Click
Finish
.
You can now exchange information with the other device.
To rename a Bluetooth partnership
1.
On the Home screen, click
Start
>
Settings
>
Connections
>
Bluetooth
.
2.
Click
Menu
>
Devices
.
3.
Select the partnership.
4.
Click
Menu
>
Edit
.
5.
Enter a new name for the partnership.
6.
Click
Done
.

67
5
Getting Connected
To delete a Bluetooth partnership
1.
On the Home screen, click
Start
>
Settings
>
Connections
>
Bluetooth
.
2.
Click Menu >
Devices
.
3.
Select the partnership.
4.
Click
Menu
>
Delete
.
5.
Click
Done
.
Beam information using Bluetooth
1.
On the phone, select an item to beam.
The item can be an appointment in your calendar, a
task, a contact card, or a file.
2.
Click
Menu
>
Beam
[
type of item
]
.
3.
Select the device name to which you want to send the
beam.
4.
Click
Beam
.
The item is beamed to the device you selected.
If the device you want to beam to does not appear in the box, ensure
that the device is turned on, discoverable, and within close range (10
meters) of your phone.

68
5
Getting Connected
5.4 Using Modem Link
With Modem Link, you can use your phone as an external
modem for another device or PC connecting through
infrared, Bluetooth, or a USB connector.
Set up a connection using Modem Link
1.
Ensure that your phone is not connected to another
device and that it is in discoverable mode.
2.
On the Home screen, click
Start
>
Accessories
>
Modem Link
.
3.
In Connection, select the the connection type.
You can choose Serial (COM1:), USB, IrCOMM, or
Bluetooth. The default baud rate is set at 115,200.
4.
Click
Activate
.
5.
Click
Done
.
Set up your PC
Before you start using Modem Link, you must configure a
new modem on your PC and obtain the APN (access point
name) from your Internet service provider (ISP).
To confi gure a modem on your PC
1.
On your PC, click
Start
, click
Settings
, and then click
Control Panel
.
2.
Double-click
Phone and Modem Options
.
3.
On the
Modems
tab, click
Add
.
4.
Select the
Don’t detect my modem; I will select it
from a list
check box.
5.
In the Manufacturers list, select
Standard Modem
Types
.
6.
Select
Standard 33600 bps Modem
and click
Next
.
7.
Select the modem port on which you want to install the

69
5
Getting Connected
drivers.
8.
Click
Next
.
9.
Click
Finish
.
Now, when you check the
Modems
tab in the
Phone
and Modem
Options
dialog box, a Standard 33600
bps Modem appears in the modem list.
10.
Select
Standard 33600 bps Modem
.
11.
Click
Properties
.
12.
Click the
Advanced
tab.
13.
Enter the following string in the Extra initialization
commands fi eld: AT+CGDCONT=1,”IP”,”APN”,””,0,0.
14.
Click
Change Default Preferences
.
15.
On the
General
tab, set the
Float control
to
None
.
16.
Click
OK
until the modem installation wizard exits.
To create a new dial-up connection
After a new standard modem has been set up on your PC,
you must create a new dial-up connection.
1.
On your PC, click
Start
, click
Settings
, and then click
Control Panel
.
2.
Double-click
Network
and Dial-up Connections
.
3.
Double-click
Make New Connection
.
4.
Click
Next
to continue.
5.
Click
Dial-up to the Internet
.
6.
Click
Next
.
7.
Click
I want to set up my Internet connection
manually
, or
I want to connect through a local area
, or I want to connect through a local area , or
network (LAN)
and click
Next
.
8.
Click
I connect through a phone line and a modem
and click
Next
.
9.
Select the
Use area code and dialing rules
check
box.
10.
Enter the telephone number as *99# and click
Next
.

70
5
Getting Connected

71
5
Getting Connected
11.
Enter the user name and password you use to log on
to your ISP and click
Next
.
12.
Enter a name for this connection and click
Next
.
13.
Select
No
when the installation wizard prompts you to
set up an Internet mail account and click
Next
.
14.
Click
Finish
to exit the wizard.
Connect through a USB Port
To connect through a USB port, you need to first set up a
USB modem on your PC. Before setting up a USB modem,
verify that you have the following files:
•
USBMDM
•
USBModem_Dialer
Both files are available on the Program CD. Run the
Program CD from the CD-ROM of your PC and do the
following on your phone:
1.
On the Home screen of your phone, click
Start
>
Accessories
>
Modem Link
.
2.
Select USB as the connection type, and insert the USB
cable adapter.
3.
Click
Activate
.
The Found New Hardware message appears on your
PC.
4.
On your PC, select
Display a list of the known
drivers for this device so that I can choose a
specifi c driver
and click
specifi c driver and click specifi c driver
Next
.
5.
In the Hardware types list, select
Modem
and click
Next
.
6.
Click
Next
.
7.
Click
Have Disk
.
8.
Click
Next
.

72
5
Getting Connected
9.
Select the recognized USB Modem from the Modems
list.
10.
Click
Next
.
11.
Click
Finish
.
12.
On your PC, click
Start
, click
Settings
, and click
Control Panel
.
13.
Double-click
Phone and Modem Options
.
14.
Select the new USB modem from the Modems list.
15.
Double-click the
USB Modem Dialer
fi le on the
Program CD.
16.
Enter the GPRS settings (enter the APN assigned by
your ISP)
17.
Click
Dial
to start the connection
.
Once you set up a USB modem on your PC, you are ready
to establish a connection using Wireless Modem via a USB
port.
To establish a connection using Modem Link via a USB
port
1.
On the Home screen on your phone, click
Start
>
Accessories
>
Modem Link
.
2.
In Connection, select
USB
.
3.
Click
Activate
.
Before you select Activate, make sure your phone has a GPRS SIM
card installed, and you have connected your phone to a PC using the
phone to PC USB connector (using the USB sync cable or cradle)
and disabled ActiveSync.

73
5
Getting Connected
To establish a connection using Modem Link via
Bluetooth
1.
On the Home screen on your phone, click
Start
>
Accessories
>
Modem Link
.
2.
In Connection, select
Bluetooth
.
3.
Click
Activate
.
Before you start using your phone as a Bluetooth modem, ensure
that your PC is Bluetooth-enabled. You also need to check that:
•
A GPRS-enabled SIM card is installed on your phone.
•
The ActiveSync BT port connection of your PC is
disabled.
•
The Infrared function is disabled.
The interface of the Bluetooth program installed on your PC may
vary. If so, follow the installation instructions in the manual that came
with your PC.
To deactivate Modem Link
1.
On the Home screen on your phone, click
Start
>
Accessories
>
Modem Link
.
2.
Click
Deactivate
.
Failing to deactivate Modem Link when you are finished using it might
result in problems and conflicts while using ActiveSync in the same
session.

74
5
Getting Connected
5.5 Using Wireless Manager
Wireless Manager (WManager) allows you to view and
manage Wi-Fi network connections, Bluetooth, and second
generation network (GPRS) on your phone. You can use
the phone’s Power Save Mode to make optimal use of the
battery in a wireless local area network environment, view a
variety of data related to the current configuration and signal
quality, and increase network security.
To enable Wi-Fi on your phone, you need access to
broadband Internet and the necessary access point or
router that emits Wi-Fi signals. If you do not have access to
broadband Internet, consult your ISP before you try to run
this utility. The availability and range of your phone’s Wi-Fi
signal depends on the number, infrastructure, and other
objects through which the signal passes.
Using Wireless Manager, you can even activate Bluetooth on your
phone and communicate with other Bluetooth-enabled devices. To
communicate, make sure you have another device with Bluetooth
activated, and that it is within close range of your phone (within 10-
meter range).
Using Wireless Manager, you can also activate a second generation
network like GPRS on your phone and communicate with other
devices on the network. To do this, you need to have a SIM or USIM
card installed on your phone.
Check for a Wi-Fi signal
Before you start a Wi-Fi connection, verify that your phone
has access to a Wi-Fi signal. You can check the current
wireless connection status from the following three screens
on your phone.
•
Home screen. If your phone detects a Wi-Fi
connection, the Wi-Fi connection icon (
) appears at
the top of the Home screen.

75
5
Getting Connected
•
Connection Status screen. The current connection
status and signal quality for each specifi c Wi-Fi
channel appears on the Connection Status screen with
the current confi guration.
•
Wi-Fi Network screen. This screen displays the Wi-Fi
networks that are currently available and allows you to
add new ones if available.
Wi-Fi connects to the default network that is available on your phone.
However, GPRS starts by default if your phone does not detect any
Wi-Fi signal.
To connect to a Wi-Fi network
1.
On the Home screen, click
Start
>
WManager
.
This opens the Wireless Manager screen.
2.
Click
On
/
Off
corresponding to the Wi-Fi icon (
Off corresponding to the Wi-Fi icon (Off
).
The Wi-Fi icon (
) is selected to indicate that Wi-Fi is
turned on. You can also press 7on the keypad to turn
on Wi-Fi.
3.
Click
Menu
>
Wi-Fi Settings
to open the Wi-Fi
Settings screen.
4.
Select
Wi-Fi Network
to view a list of active Wi-Fi
networks.
5.
Select an active Wi-Fi network from the list, or select
New
to add a new Wi-Fi network.
6.
Click
Menu
>
Connect
to connect to the Wi-Fi
network.
You can also edit a Wi-Fi network by clicking
Menu
>
Edit
and specify the network key and required
information on the Wi-Fi Connections screen.
7.
Click
Done
.
8.
Select
Connection Status
to view the details of the
current Wi-Fi connection.

76
5
Getting Connected
While you are connected to a Wi-Fi network, it is recommended
that you configure your phone so that the Wi-Fi function turns off
automatically when no signal is detected for one minute. This helps
conserve battery power.
To increase security on the Wi-Fi network
The LEAP (Lightweight Extensible Authentication Protocol)
feature of Wireless Manager helps increase security on
your phone, and ensures that nobody is able to access your
network without your permission.
1.
On the Wi-Fi Settings screen, select
LEAP
.
2.
Click
Menu
>
New
.
By default, the LEAP screen displays data that you
entered previously. However, you can modify or delete
the data as required by clicking
Menu
>
Modify
or
Menu
>
Delete
.
3.
Enter the SSID (Service Set Identifi er).
You can obtain this information from your wireless
service provider.
4.
Enter the user name, password, and domain.
5.
Select an Authentication Type.
By default, the Authentication Type for your phone is
Open System authentication.
For LEAP to work correctly, both the access point and the receiving
phone (your phone) must be set with the same SSID, user name, and
password.

Chapter 6
Exchanging Messages and
Using Outlook
6.1 Using E-mail and Text Messages
6.2 Using MMS Messages
6.3 Using Pocket MSN Messenger
6.4 Using Calendar
6.5 Using Contacts
6.6 Using Tasks
6.7 Using Voice Notes

78
6
Exchanging Messages and Using Outlook
6.1 Using E-mail and Text Messages
Messaging is where all of your e-mail accounts and your text
message account are located. You can send and receive
Outlook e-mail, Internet e-mail through an Internet service
provider (ISP), and text messages. You can also access
e-mail from work using a virtual private network (VPN)
connection.
To set up an e-mail account
You need to set up an e-mail account that you have with an
Internet service provider (ISP) or an account that you access
using a VPN server connection (typically a work account)
before you can send and receive e-mail.
1.
On the Home screen, click
Start
>
Messaging
and
click any item on the Messaging screen.
2.
Click
Menu
>
Options
>
New Account
.
3.
In
Your name
, enter your display name for e-mail
messages.
4.
In
E-mail address
, enter the e-mail address for this
account.
5.
Select
Attempt to obtain e-mail settings from the
Internet
and click
Next
.
Auto configuration attempts to download necessary e-mail
server settings so that you do not need to enter them
manually. If the account is set up successfully, you will be
prompted to send and receive e-mail.
If
Auto configuration
is unsuccessful or you have an
account you access using a VPN server connection,
contact your ISP or network administrator for the following
information and enter it manually:

79
6
Exchanging Messages and Using Outlook
Setting
Description
User name Enter the user name assigned to you by your ISP
or network administrator. This is often the first part
of your e-mail address, which appears before the
at sign (@).
Password Choose a strong password. You have the option
to save your password so you do not need to
enter it each time you connect to your e-mail
server.
Domain Not required for an account with an ISP. May be
required for a work account.
Server type Select POP3 or IMAP4.
Account name Enter a unique name for the account, such as
“Work” or “Home.” This name cannot be changed
later.
Network Enter the type of network your e-mail server
connects to.
Incoming
server
Enter the name of your e-mail server (POP3 or
IMAP4).
Require SSL
connection
Select this to ensure you always send e-mail
from this account using an SSL connection. This
enables you to send personal information more
securely. Please note that if you select this and
your ISP does not support an SSL connection,
you will not be able to send e-mail.
Outgoing
server
Enter the name of your outgoing e-mail server
(SMTP).
Outgoing
server requires
authentication
Select this if your outgoing e-mail server (SMTP)
requires authentication. Your user name and
password from above will be used.
Outgoing
server settings
Your outgoing e-mail server may require different
authentication settings than your incoming e-mail
server.
Use different
user name for
outgoing server
Select this if your outgoing e-mail server requires
a different user name and password than the
ones you entered before.
User name Enter your user name for the outgoing e-mail
server.

80
6
Exchanging Messages and Using Outlook
Setting
Description
Password Enter your password for the outgoing e-mail
server.
Domain Enter the domain of the outgoing e-mail server.
Require SSL
connection
(Outgoing mail
server only)
Select this to ensure you always send e-mail
from this account using an SSL connection. This
enables you to send personal information more
securely. Please note that if you select this and
your ISP does not support an SSL connection,
you will not be able to send e-mail.
To compose and send an e-mail or text message
1.
On the Home screen, click
Start
>
Messaging
.
2.
Select an e-mail account, or select
Text Messages
.
Then, click
Select
.
3.
Click
New
.
4.
Enter the e-mail address or phone number of one or
more recipients, separating them with a semicolon
(;). To access addresses and phone numbers from
Contacts, in
To
,
press ENTER and select a recipient
from the list.
5.
Enter a message.
6.
Click
Send
.
If you are working offline, e-mail messages are moved to the Outbox
folder and will be sent the next time you connect. Text messages are
sent immediately.
To set the priority of an e-mail message, click Menu > Message
Options.
To cancel any message, click Menu > Cancel Message.
If you are sending a text message and want to know if it was
received, before sending the message, click Menu > Message
Options. Select Request message delivery notification.

81
6
Exchanging Messages and Using Outlook
To reply to or forward a message
1.
From an open message, click
Reply
, or click
Menu
>
Reply All
or
Forward
or Forwardor
.
2.
Enter a message in the message area.
3.
Click
Send
.
If you are replying to or forwarding e-mail from Outlook E-mail, you
will send less data if you do not edit the original message. This may
reduce data transfer costs based on your rate plan.
To add an attachment to an e-mail message
1.
In a new message, click
Menu
>
Insert
and
then
click
Picture
or
Voice Note
.
2.
Select the picture you want to attach, or record a voice
note.
To download attachments
•
In an open message with an attachment, select the
attachment. The attachment is downloaded the next
time you synchronize or connect to your e-mail server
and send and receive e-mail.
Download messages
The manner in which you download messages depends on
the type of account you have:
•
To send and receive e-mail for an Outlook E-mail
account, begin synchronization using ActiveSync. For
more information, see "Synchronizing Information" in
Chapter 3.
•
To send and receive e-mail messages for an e-mail
account that you have with an Internet Service
Provider (ISP) or that you access using a VPN server
connection (typically a work account), download
messages through a remote e-mail server. For more
information, see "To download messages from the
server" below.

82
6
Exchanging Messages and Using Outlook
•
Text messages are automatically received when your
phone is turned on. When your phone is in fl ight mode,
messages are held by your service provider until you
turn off fl ight mode.
To download messages from the server
To send and receive e-mail messages for an e-mail account
that you have with an Internet Service Provider (ISP) or that
you access using a VPN server connection (typically a work
account), you first need to connect to the Internet or your
corporate network, depending on the account.
1.
On the Home screen, click
Start
>
Messaging
.
2.
Select the e-mail account.
3.
Click
Menu
>
Send
/
Receive
. The messages on your
phone and e-mail server are synchronized as follows:
new messages are downloaded to the phone Inbox
folder, messages in the phone Outbox folder are sent,
and messages that have been deleted from the server
are removed from the phone Inbox folder.
If you want to download the entire message, select the message and
click Menu > Download Message. The remainder of the message
will download the next time you send and receive e-mail.
Manage folders
Each Messaging account has its own folder hierarchy with
five default Messaging folders: Inbox, Outbox, Deleted
Items, Drafts, and Sent Items. The messages you receive
and send through the account are stored in these folders.
You can also create additional folders within each hierarchy.
Folders for e-mail accounts behave differently depending on
the type of e-mail account you have.
If you set up an Outlook E-mail account to sync with
Exchange Server or a desktop PC, e-mail messages in the
Inbox folder in Outlook will be synchronized automatically
with your phone. You can select to synchronize additional

83
6
Exchanging Messages and Using Outlook
folders by designating them for synchronization. The
folders you create and the messages you move will then be
mirrored on the e-mail server. For example, if you move two
messages from the Inbox folder to a folder named Family,
and you have designated Family for synchronization, the
server creates a copy of the Family folder and copies the
messages to that folder. You can then read the messages
while you are away from your PC. You can only create and
delete folders on devices when you are connected to an
Exchange e-mail server.
Similar to the Outlook account, if you set up an account to
send and receive mail using an IMAP4 e-mail server, all
messages on the phone are copies of the messages on the
server. The folders you create locally on the phone and the
e-mail messages you move to these folders are mirrored on
the e-mail server. Moving a message on the phone moves
the copy on the server the next time you send and receive
e-mail for that account. Therefore, messages are available
to you anytime you connect to your e-mail server, whether
it is from your phone or PC. This synchronization of folders
occurs whenever you connect to your e-mail server, create
new folders, or rename/delete folders when connected. You
can also set different download options for each folder.
If you set up an account to send/receive mail using a POP3
e-mail server, e-mail messages you move to the Deleted
Items folder on the phone will break the link between the
messages on the phone and their copies on the e-mail
server. The next time you connect to send and receive
mail, the e-mail server will detect the messages that are
in the Deleted Items folder on the phone and will delete
those messages from the e-mail server. All other messages
in other folders remain on both the phone and the e-mail
server.
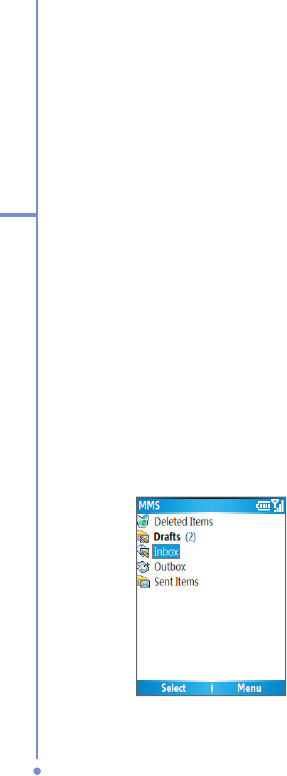
84
6
Exchanging Messages and Using Outlook
6.2 Using MMS Messages
Creating and sending Multimedia Message Service (MMS)
messages to your friends and family is fun and easy. You
can include or capture photos or video clips, include or
record audio, add text, then send them along with your MMS
message.
To access MMS
Do any of the following:
•
On the Home screen, click
Start
>
Messaging > MMS
.
•
From the Pictures & Videos program, select a picture
in My Pictures, and click
Menu
>
Send
. Select
MMS
as the messaging account to send the picture along
with the message.
•
From the Camera program, capture a photo or an
MMS video clip, and click
Menu
>
Send
>
via E-mail
.
Select
MMS
as the messaging account to send the
photo or video clip along with the message.
To access MMS message folders
•
Click
Start
>
Messaging
>
MMS
, then click
Menu >
Folders
.
MMS

85
6
Exchanging Messages and Using Outlook
Edit MMS settings
On the MMS main screen, click
Menu > Options > Account
Options > MMS
to open the Preferences screen and edit
MMS settings. Select or clear the provided check boxes
according to your needs.
In the Preferences screen, click
Menu > MMSC Settings
> Edit
to access Multimedia Messaging Service Center
(MMSC) settings. These settings are normally preset to the
appropriate values, and in most cases you will not need to
change them.
Create and send MMS messages
To start composing an MMS message
You can compose MMS messages in a combination of
various slides, where each slide can consist of a photo,
audio or video clip, and/or text.
1.
On the Home screen, click
Start
>
Messaging
>
MMS
>
New
.
2.
In
To
, enter the recipient’s phone number or e-mail
address directly, or press ENTER to choose a phone
number or an e-mail address from Contacts. You can
also click
Menu
>
Recipients
>
Add
to add a new
contact entry.
3.
In
Subject
, enter a subject for your message.
4.
Click
Insert Picture
/
Video
/Video/
t
o select a photo or video
clip from the Select Media screen and insert it.
5.
Enter text and insert audio clips by clicking the
respective fi elds.
6.
Click
Send
to send the message.
To send a copy of this message to others, access Cc and Bcc by
clicking Menu > Send Options. In these fields, enter the recipient‘s
phone number or e-mail address or click Menu > Recipients > Add
to add from Contacts.
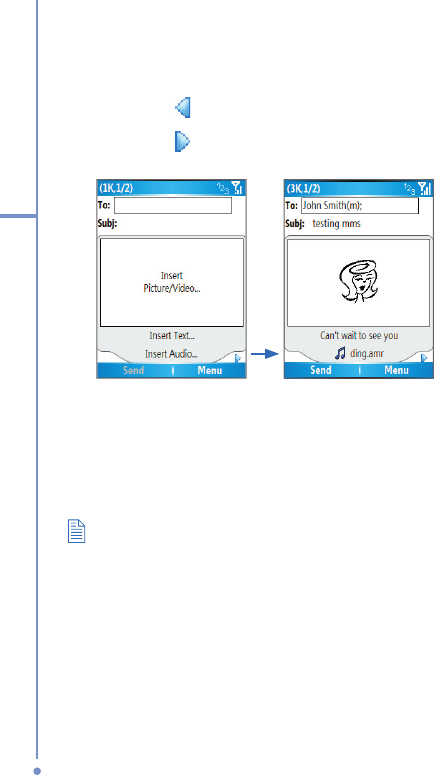
86
6
Exchanging Messages and Using Outlook
The following symbols act as shortcuts to some of the
options on the MMS Message screen.
•
Click
to go to the previous slide.
•
Click
to go to the next slide.
Composing an MMS
To create an MMS message from a template
•
On the blank MMS message screen, click
Menu
>
Template
>
New
from Template
to compose a
message using a predefi ned template.
To save a message as a template, create a message or open an
existing message, and click Menu > Template > Save as Template.
To insert a photo or video clip into an MMS message
You can add either a still image or a video clip to each
individual slide on the MMS message screen.
1.
Click
Insert Picture
/
Video
/Video/
to insert a photo or video clip.
2.
Select a picture or video clip on the Select Media
screen. This is the My Pictures folder where images
and video clips are displayed in thumbnail view. To
navigate to any other folder containing pictures or
videos, click
Menu
>
Change Folder
.
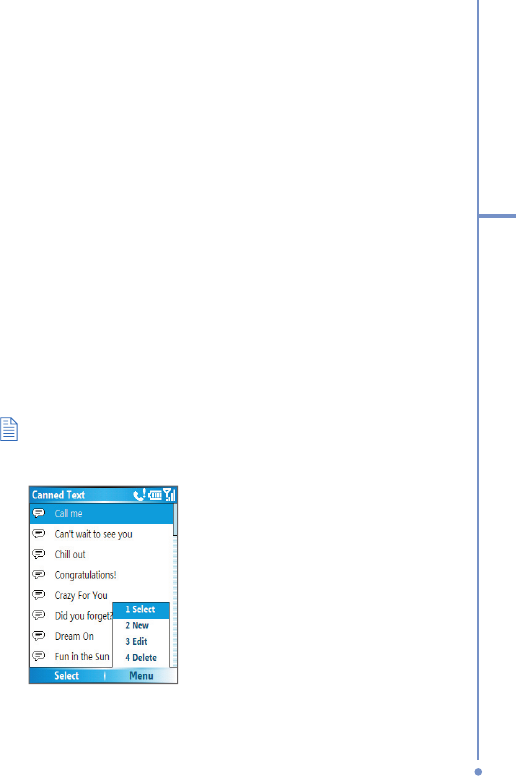
87
6
Exchanging Messages and Using Outlook
3.
Select a photo or video clip by using NAVIGATION,
and click
Select
or
Menu
>
Select
to insert it.
On the Select Media screen, you can view the thumbnails
in list view, open an item to view it, or delete an item by
clicking
Menu
and choosing the appropriate option. You can
even discard this photo or video clip by pressing BACK. To
capture a new photo or video clip and send it immediately
with the message, click
Menu
>
Capture Picture
or
Menu
>
Capture Video
. The newly captured photo or video clip is
automatically inserted into your message.
To add predefi ned text to an MMS message
You can instantly add text to any slide from a list of
predefined words or phrases, called Canned Text.
•
On the MMS message screen, click
Menu
>
Insert
Object
>
Canned Text
and then click
Select
or
Menu
>
Select
to add a text string from the Canned Text list.
To edit or delete a phrase on the Canned Text list, select a text string
and click Menu > Edit or Menu > Delete. To create and add a new
phrase to the list, click Menu > New.

88
6
Exchanging Messages and Using Outlook
To add an audio clip to an MMS message
You can add audio clips to your MMS messages. However,
you can add only one audio clip per slide.
1.
Click
Insert Audio
to insert an audio clip.
Select an audio clip on the Select Audio screen.
By default, the audio clips listed on the Select Audio screen
are from the My Sounds folder. To navigate to any other
folder containing audio clips, click Menu > Change Folder.
2.
Select an audio clip using NAVIGATION, and click
Select
or
Menu
>
Select
to insert it.
You can play and listen to the audio clip by clicking Menu >
Play before you insert it.
Otherwise,
to record a new audio clip, click
Menu
>
Capture Audio
. Then click
Record
to start recording
and
Stop
to stop recording. Click
Play
to listen to the
new audio clip you captured, then click
Done
.
The new audio clip is then added to your MMS message.
To set options for an MMS message
While composing an MMS message, you can set the
following options for the message by clicking
Menu
.
Option
Allows you to
Recipients Specify the phone number or e-mail address of
the recipient(s).
Insert Object Choose to insert a picture/video, audio, or
predefined text.
Capture Capture a photo, audio or video clip to be
inserted into the message.
Attachments Choose to attach a vCard, vCalendar, or other
file.
Remove Picture/
Remove Video
Delete a photo/video from the message.
Remove Audio Delete an audio clip from the message.
Remove Text Delete text from the message.

89
6
Exchanging Messages and Using Outlook
Slides Add and remove slides, view the next or
previous slides, and specify the duration of
slides.
Background Choose a background color from the list.
Template Compose a message using a predefined
template, and save a composed or existing
message as a template.
Send Options Specify the message delivery time, validity,
priority, class, and other settings for a message.
Preview Message Playback the contents of the MMS message
before sending it.
Send Message Send the message to the recipients.
Cancel Cancel the message and go back to the MMS
Messaging folders screen.
View and reply to MMS messages
To receive MMS messages
•
On any MMS message folder screen, click
Menu
>
Send
/
Receive
.
By default, messages are automatically downloaded to
your phone.
To view an MMS message
You can view MMS messages in several ways.
•
Press ENTER to view and play the message on your
phone. Click
Pause
or
Menu
>
Stop
to pause the
playback of the message.
•
Click
Menu
>
Object View
to see a list of fi les included
in the message. To open a fi le, select it and click
Open
. To save a fi le, select it, and click Save,
Menu
>
Save
Audio
, or
Menu
>
Save Photo
.
•
View each slide included in the message by clicking
Menu
>
Next
.

90
6
Exchanging Messages and Using Outlook
To reply to an MMS message
•
Click
Menu
>
Reply
>
Reply
to reply to the sender
of the message, or click
Menu
>
Reply
>
Reply All
to reply to all persons listed in To, Cc, and Bcc of the
message. Click
Menu
>
Reply
>
Forward
to
forward
the message to someone else.
6.3 Using Pocket MSN Messenger
Pocket MSN Messenger delivers the features of MSN
Messenger to your phone. With Pocket MSN Messenger,
you can do the following:
•
Send and receive instant messages.
•
See which contacts are online or offl ine.
•
Subscribe to status updates for selected contacts so
you know when they come online.
•
Block contacts from seeing your status or sending you
messages.
Before you can use MSN Messenger, your phone must be
connected to the Internet. For information about setting up
an Internet connection, see “Connecting to the Internet” in
Chapter 5.
You must have either a Microsoft .NET Passport or a Hotmail account
to use MSN Messenger. If you have a Hotmail.com or MSN.com
e-mail address, you already have a Passport. To get a Passport
account, go to http://www.passport.com. To get a Hotmail account, go
to http://www.hotmail.com.
To start MSN Messenger
1.
On the Home screen, click
Start
>
Pocket MSN
.
2.
Click
MSN Messenger
.
To sign in or out
•
On the main MSN Messenger screen, click
Sign

91
6
Exchanging Messages and Using Outlook
In
. Enter the e-mail address and password for your
Passport or Hotmail account, and click
Sign In
.
Signing in may take several minutes, depending on the
connection speed.
•
To sign out, click
Menu
>
Sign Out
.
To add or delete contacts
•
To add a contact, click
Menu
>
Add Contact
, and
follow the instructions on the screen.
•
To delete a contact, select the contact and click
Menu
>
Delete Contact
.
To send an instant message
1.
Click the contact to whom you want to send a
message.
2.
Enter your message in the text entry area at the bottom
of the screen, and click
Send
.
To quickly add common phrases, click Menu > My Text and select a
phrase in the list.
To block or unblock contacts
•
To block a contact from seeing your status and sending
you messages, select the contact and click
Menu
>
Block
.
•
To unblock a contact, select the contact, and click
Menu
>
Unblock
.
To change your own Messenger status
1.
Click your own name at the top of the screen.
Your current status is indicated by a bullet point in the
displayed list.
2.
Select a status (such as Out To Lunch) from the list.
To change your display name
1.
Click
Menu
>
Options
.
2.
In
My display name
, enter the name you want to

92
6
Exchanging Messages and Using Outlook
display to others in MSN Messenger.
3.
Click
Done
.
6.4 Using Calendar
Use Calendar to schedule appointments, including meetings
and other events. Your appointments for the day can be
displayed on the Home screen. If you use Outlook on your
PC, you can synchronize appointments between your
phone and PC. You can also set Calendar to remind you of
appointments with a sound or flashing light, for example.
To schedule an appointment
1.
On the Home screen, click
Start
>
Calendar
.
2.
Click
Menu
>
New Appointment
.
3.
Enter information about the appointment.
4.
To schedule an all-day event, in
End time
, select
All
day event
.
5.
Click
Done
.
All-day events do not occupy blocks of time in Calendar; instead, they
appear in banners at the top of the calendar.
To make an appointment recurring
1.
On the Home screen, click
Start
>
Calendar
.
2.
Click the appointment and click
Edit
.
3.
Scroll to
Occurs
and click one of the recurrence
options.
4.
Click
Done
.
To view your schedule
You can view your schedule in three different views: Month,
Week, and Agenda.
1.
On the Home screen, click
Start
>
Calendar
.
2.
Do one of the following:
•
Click
Menu
>
Month View
.

93
6
Exchanging Messages and Using Outlook
•
Click
Menu
>
Week View
.
•
Click
Menu
>
Go to Today
, or from
Week
or
Month
view, click
Menu
>
Agenda View
.
6.5 Using Contacts
Contacts is your address book and information storage for
the people and businesses you communicate with. Store
phone numbers, e-mail addresses, home addresses, and
any other information that relates to a contact, such as a
birthday or an anniversary date. You can also add a picture
or assign a ring tone to a contact.
From the contact list, you can quickly communicate with
people. Click a contact in the list for a summary of contact
information. From there, you can call or send a message.
If you use Outlook on your PC, you can synchronize
contacts between your phone and PC.
To create a new contact
1.
On the Home screen, click
Start
>
Contacts
>
New
.
2.
Enter information for the new contact.
3.
Click
Done
.
If someone who isn’t in your list of contacts calls you or sends you a
message, you can quickly create a contact from Call History or from
the message by clicking Menu > Save to Contacts.
In the list of contact information, you’ll see where you can add a
picture or assign a ring tone to a contact.
To view and edit a contact information
1.
On the Home screen, click
Start
>
Contacts
.
2.
Click the contact whose information you want to view.
3.
To edit the information, click
Menu
>
Edit
.
4.
When fi nished making changes, click
Done
.
To call a contact from the contact list
1.
On the Home screen, click
Start
>
Contacts
.

94
6
Exchanging Messages and Using Outlook
2.
Click the contact to call.
3.
Press TALK. The contact’s default phone number is
dialed.
To call a phone number other than the default, click the contact, scroll
to the number you want to dial, and press TALK.
To send an e-mail to a contact
1.
On the Home screen, click
Start
>
Contacts
.
2.
Click the contact.
3.
Click the e-mail address.
4.
Select the e-mail account to use.
5.
Enter a subject, compose your message, and click
Send
.
To send a text message to a contact
1.
On the Home screen, click
Start
>
Contacts
.
2.
Click the contact, and click
Menu
>
Send Text
Message
.
3.
Compose your message, and click
Send
.
To fi nd a contact
1.
On the Home screen, click
Start
>
Contacts
.
2.
If you are not in Name view, click
Menu
>
View By
>
Name
.
3.
Do one of the following:
•
Begin entering a name or phone number of the
contact until the contact is displayed. When you
press a number, such as 5, you find names that
begin with J, K, and L, as well as phone numbers
that start with 5. The next number you press
continues to narrow the search. For example, to
find "John", you would press 5, 6, 4, and then 6.
•
Filter the list by categories. In the contact list,
click
Menu
>
Filter
. Then click a category you’ve

95
6
Exchanging Messages and Using Outlook
assigned to a contact. To show all contacts again,
select
All Contacts
.
•
Locate the contact by company. In the contact list,
click
Menu
>
View By
, and click
Company
. Click
the company to see the contacts who work there.
To fi lter the contact list
Contacts that have categories assigned are displayed in the
list when you filter by category.
1.
On the Home screen, click
Start
>
Contacts
.
2.
Click
Menu
>
Filter
.
3.
Click a category to fi lter.
To assign a ring tone to a contact
To easily identify who is calling you, you can assign a
custom ring tone to each contact.
1.
On the Home screen, click
Start
>
Contacts
.
2.
Click the contact you want to assign a ring tone to.
3.
Click
Menu
>
Edit
.
4.
Click
Custom ring tone
and select the ring tone you
want.
5.
Click
Done
.
To assign a picture to a contact
1.
On the Home screen, click
Start
>
Contacts
.
2.
Click the contact.
3.
Click
Menu
>
Edit
.
4.
Click
Picture
.
5.
Click the picture you want to add.

96
6
Exchanging Messages and Using Outlook
6.6 Using Tasks
Use Tasks to keep track of things you need to do. A task can
occur once or repeatedly (recurring). You can set reminders
for your tasks and you can organize them using categories.
Your tasks are displayed in a task list. Overdue tasks are
displayed in red.
To create a task
1.
On the Home screen, click
Start
>
Tasks
.
2.
In the
Enter new task here
box, enter the task name
and press ENTER.
You can synchronize information on your phone with your PC to keep
your task list up to date in both locations.
If you create a new task with a reminder on your PC and then
synchronize tasks with your phone, the reminder will play at the time
that was set on your PC.
To delete a task
1.
On the Home screen, click
Start
>
Tasks
.
2.
Select the task, and click
Menu
>
Delete Task
.
To locate a task
1.
On the Home screen, click
Start
>
Tasks
.
2.
In the task list, do one of the following:
•
To sort the list, click
Menu
>
Sort by
, and click a
sort option.
•
To filter the list by category, click
Menu
>
Filter
, and
click the category you want displayed.
Categories appear only in tasks that are synchronized with your PC.
To filter your tasks further, click Active Tasks or Completed Tasks.
To mark a task as completed
1.
On the Home screen, click
Start
>
Tasks
.
2.
Select the task, and click
Complete
.

97
6
Exchanging Messages and Using Outlook
6.7 Using Voice Notes
Use Voice Notes to create short voice recordings. Voice
notes are included in the All Notes list and are named
consecutively (Recording1, Recording2, and so on).
To create a voice note
1.
On the Home screen, click
Start
>
Voice Notes
.
2.
Hold the phone’s microphone near your mouth.
3.
Click
Record
and say your voice note.
4.
Click
Stop
to stop recording a voice note.
To delete a voice note
1.
On the Home screen, click
Start
>
Voice Notes
.
2.
Select the voice note to delete.
3.
Click
Menu
>
Delete
.
4.
Click
Yes
.
If you delete a voice note that has a default name, such as
Recording1, this name becomes available for a new voice note.
To listen to a voice note
1.
On the Home screen, click
Start
>
Voice Notes
.
2.
Select the voice note to play, and press ENTER.
To stop listening to the voice note, click Stop while the voice note is
playing.
To use a voice note as a ringtone
1.
On the Home screen, click
Start
>
Voice Notes
.
2.
Select the voice note, and click
Menu
>
Set As
Ringtone
.

Chapter 7
Experiencing Multimedia
7.1 Using Camera and Camcorder
7.2 Using Pictures & Videos
7.3 Using Windows Media Player
7.4 Using MIDlet Manager

100
7
Experiencing Multimedia
7.1 Using Camera and Camcorder
Taking photos and shooting video clips with audio is easy
with your phone’s built-in camera.
To open Camera or Camcorder
Do any of the following:
•
On the Home screen, click
Start
>
Camera
.
•
On the Home screen, click
Start
>
Camcorder
.
•
Press the CAMERA button on your phone.
To exit, press END (
).
Use the camera
The Camera program lets you capture pictures and video
clips by using various built-in modes. By default, Camera
opens in the capture mode you last accessed. The title bar
displays the active capture mode. To switch to other capture
modes, on the Camera screen, do any of the following:
•
Click
Menu
>
Capture Mode
, and select a capture
mode from the list.
•
Click
Menu
>
Capture Mode
>
Manage
, and select a
capture mode.
•
Click
Menu
>
Options
>
Modes
, and select a capture
mode.
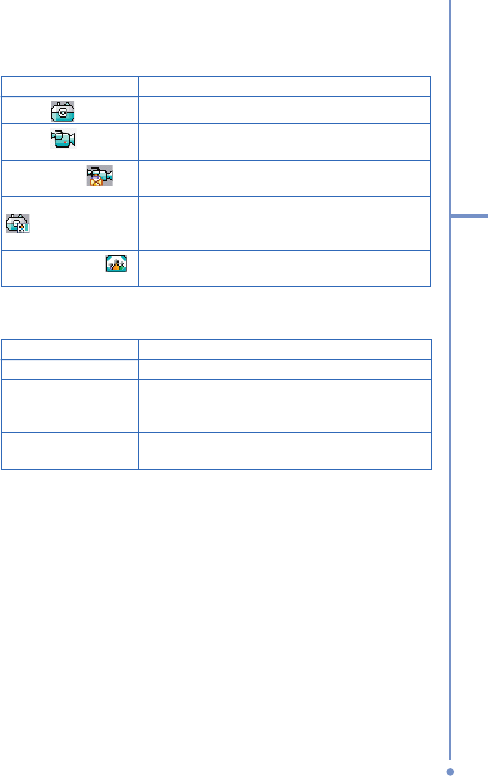
101
7
Experiencing Multimedia
The available capture modes
are as follows:
Capture mode
Function
Photo ( ) Captures standard still images.
Video ( )Captures video clips, with or without audio.
MMS Video ( )Captures video clips suitable for sending via
MMS.
Contacts Picture (
)
Captures a still image suitable for assigning
as an identification photo to a contact.
Picture Theme ( )Captures still images and places them within
frames.
Using the above capture modes, the camera captures files in
the following formats
:
Capture type
Format
Still Image JPEG
Video Motion-JPEG AVI (.avi)
MPEG-4 (.mp4)
H.263 baseline (.3gp)
MMS Video H.263 baseline (.3gp)
MPEG-4 (.mp4)
Camera mode icons , indicators, and buttons
•
Current date and time stamp indicator. 2005/06/14
09:28 Indicates when (date and time) the image was
captured.
•
Size indicator. size: 160x120 Indicates the current
image size based on the resolution you chose.
•
Storage status indicator. free: 887 Indicates the current
storage status of your phone in terms of number of
photos or maximum length of video you can capture
with the current resolution and quality, or the specifi ed
length of a video clip you intend to capture.
102
7
Experiencing Multimedia
•
Zoom-ratio indicator. zoom: 2.0x / 1.0x Indicates the
current zoom ratio.
•
Capture status indicator. After you click
Capture
on
the Camera screen, press the CAMERA button, or
press the ENTER button.
indicates that the camera
is processing and saving the captured picture, or
recording a video clip.
•
Audio recording On/Off indicator. (
/
/
) Indicates the
audio status (On/Off) while capturing video clips in
Video or MMS Video capture mode.
•
Template status indicator. (1/3) Indicates which photo
shot you are about to take and the total number of
shots that can be photographed using the current
template.
•
Zoom-ratio switching button. Clicking
and
on the
Review screen zooms in and zooms out the preview.
•
ENTER button. Press the ENTER button on the
NAVIGATION control to take a picture when you
are capturing a still image. Press this button to start
recording video; press it again to stop recording.
•
NAVIGATION control. Press NAVIGATION up or down
to increase or decrease the zoom level.
•
CAMERA button. Press the CAMERA button to switch
to the Camera screen. If already on the Camera
screen, press once to take a still image or to start
recording a video clip. In Video capture mode, you can
also stop video recording by pressing this button.
Use Still Image capture modes
While using Still Image capture modes such as Photo,
Contacts Picture, and Picture Theme, you can capture a
single still image by clicking
Capture
. You can also press the
CAMERA button or the ENTER button on the NAVIGATION

103
7
Experiencing Multimedia
control to capture the image. Still images are captured and
saved in JPEG format.
While capturing an image in the Picture Theme mode, you
can select a preset template. To browse and choose from
different templates, click
Menu
>
Select Template
on the
Camera screen, select a template on the Select Template
screen, and click
OK
. Depending on the chosen template,
one or more photos may need to be taken for the template.
Use Video capture mode
While using the Video capture mode, you can click
Capture
,
press the ENTER button, or press the CAMERA button on
your phone to start recording a video clip (with audio, if
desired). To stop recording, click
Stop
or press either the
ENTER button or the CAMERA button again. Your phone
displays the first frame of the captured video clip by default
on the Review screen.
Before you capture a video clip, click
Menu
>
Options
>
Modes
on the Camera screen to specify the file format,
resolution, and the recording limit in terms of time or file size.
You can set the encoding format to Motion-JPEG AVI,
MPEG-4, or H.263 on the Camera Settings screen.
Use MMS Video capture mode
While using the MMS Video capture mode, click
Capture
on the Camera screen to start capturing a video clip. You
can also press the ENTER button or the CAMERA button
on your phone to start recording a video clip (with audio if
desired). To stop recording, click
Stop
or press either the
ENTER button or the CAMERA button again.
The recording length of MMS video is fixed. Recording
automatically stops when the preset length is reached.
However, you can manually stop recording the video
anytime. The time indicator at the top-right side of the screen
indicates the time limit.

104
7
Experiencing Multimedia
You can specify the encoding format to be either H.263 or
MPEG-4 on the Modes screen by clicking
Menu
>
Options
>
Modes
; however, the ideal format for MMS is H.263
(3GP). After you capture the video file, click
Menu
>
Send
>
via E-mail
then select
MMS
on the Messaging screen to
send the file through MMS.
Use zooming
Before capturing a still image or a video clip, you can first
zoom in to make the object in focus move closer, and you
can zoom out to make the object move farther away. In all
capture modes, press NAVIGATION up on your phone to
zoom in, NAVIGATION down to zoom out. Alternatively, click
Menu
>
Zoom
to select a zoom ratio.
The camera zoom range
for a picture or video depends on
the capture mode and capture size. Following is a summary.
Capture mode
Capture size setting
Zoom range
Video and MMS
Video
Medium (176 x 144) 1.0x to 2.0x
Small (128 x 96) 1.0x to 2.0x
Photo 1M (1280 x 1024) 1.0x to 2.0x
Large (640 x 480) 1.0x to 2.0x
Medium (320 x 240) 1.0x to 4.0x
Small (160 x 120) 1.0x to 8.0x
Contacts Picture Full-screen size (240x266) 1.0x to 4.0x
Picture Theme Determined by the current
template
Depends on
the size of the
currently loaded
template

105
7
Experiencing Multimedia
The capture sizes available for certain capture formats also
vary from one capture mode to another. The zoom range has
been calculated based on the following ratio:
•
1.0x = normal size (no zooming)
•
2.0x = double enlargement
•
4.0x = quadruple enlargement
•
8.0x = octuple enlargement
Use the Camera menu
Clicking
Menu
on the Camera screen allows you to select
various capture modes and customize various settings for
each mode. Following is a list of the menu options.
Option
Allows you to
Capture
Mode
Choose a capture mode and set options for the current,
selected mode by clicking Menu > Capture Mode >
Manage.
Zoom
Zoom in or zoom out the image or video to be captured.
Ambience •
S
et the ambience level, such as Daylight, Night,
Grayscale, and so on, for the image or video to be
captured.
• Adjust the camera display properties, such as
Brightness, Gamma, Hue, and Saturation by clicking
Menu > Ambience > Adjust View. Select one of
these properties by clicking , and move the slider
by clicking or to change the value. The Camera
immediately shows the changes you made. Click OK
to save the settings.
Click Menu > Restore Default to revert to the default
camera settings.
Options Configure capture settings.
Pictures &
Videos
Open the Pictures & Videos program.

106
7
Experiencing Multimedia
Use the Options menu
Before capturing a still image or video clip using any capture
mode, click
Menu
>
Options
to access the Options screen.
The Options screen allows you to configure capture settings.
You can configure the following settings on the Options
screen.
Option
Allows you to
General Specify the storage location, make flicker adjustments,
enable preview, and disable shutter sound.
Counter Reset counters for captured photos and video clips.
Photo Configure settings for image quality, specify image file
naming conventions, specify a location for the folders
containing templates, and enable date and time stamp in
images you capture.
Video Enable/Disable audio recording while capturing a video
clip, and specify video file naming conventions.
Modes Switch capture modes and configure settings for each
mode. You can configure the following settings:
•
The encoding format and resolution for Photo capture mode.
• The encoding format, resolution, and recording limit for
Video capture mode.
• The encoding format and resolution for MMS Video
capture mode.
• The encoding format for Contacts Picture and Picture
Theme capture modes.
About View the program version and copyright information.

107
7
Experiencing Multimedia
Use the Review screen
When you click
Menu > Options > General
on the Camera
screen, you will see that the
Review after capture
check
box is selected by default on the General screen to allow you
to view the image or video clip after it has been captured.
The title bar of the Review screen indicates Zoom or Pan
mode. Press ENTER to switch between these two modes.
The Camera[Zoom] mode allows you to click
and
to
zoom in and zoom out the preview, while the Camera[Pan]
mode allows you to pan and position a large picture in the
display area by using the NAVIGATION control.
7.2 Using Pictures & Videos
The Pictures & Videos program allows you to view
pictures and play video clips on your phone, and even
view the pictures as a slide show, beam them, send them
via a messaging program, edit them, or set them as the
background on the Home Screen.
To copy a picture or video clip to your phone
You can copy pictures from your PC and view them on your
phone.
•
Copy the pictures and video fi les from your PC or a
storage card to the My Pictures folder on your phone.
For more information about copying files from your PC to
your phone, see ActiveSync Help on your PC.
You can also copy pictures and video files from your PC to your
phone using a memory card. Insert the memory card into the memory
card slot on your phone, and then copy them from your PC to the
folder you created on the memory card.

108
7
Experiencing Multimedia
To view pictures
1.
On the Home screen, click
Start
>
Pictures & Videos
.
The images in the My Pictures folder appear as
thumbnails by default.
2.
Select a picture and click
View
.
If you cannot find a picture in the default My Pictures
folder, click
Menu
>
Folders > My Device
to go
to
other folders
.
To play videos
1.
On the Home screen, click
Start
>
Pictures & Videos
.
Video fi les appear as thumbnails with a
icon.
2.
Select a video and click
Play
to play it with the built-in
Windows Media Player.
To view slide shows
You can view your pictures as a slide show on your phone.
Pictures are shown in full-screen view with 5-second
intervals between slides.
1.
On the Home screen, click
Start
>
Pictures & Videos
.
2.
Click
Menu
>
Play Slide Show
.
You can specify how pictures are scaled to optimize their display in a
slide show. Click Menu > Options, select Slide Show, and choose
either Portrait pictures or Landscape pictures. You can even set
your phone to play a screensaver on its monitor while your phone is
connected to the PC and idle for 2 minutes.
To start the camera from Pictures & Videos
•
On the My Pictures folder, click
Camera
.
To delete a picture or video clip
•
Select a picture or video clip on the Pictures & Videos
screen, and click
Menu
>
Delete
. Click
Yes
to confi rm
the deletion.

109
7
Experiencing Multimedia
To edit a picture
You can rotate, crop, and adjust the brightness and color
contrast of your pictures.
1.
On the Home screen, click
Start
>
Pictures & Videos
.
2.
Select the picture you want to edit, click
View
.
3.
Click
Menu
>
Edit
, and do any of the following:
•
To rotate a picture 90 degrees, click
Menu
>
Rotate
.
•
To crop a picture, click
Menu
>
Crop
. Then, drag
the cursor to position it on the first corner of the
cropping area, and click
Next
. Select the second
corner with the area to crop and click
Finish
, or
click
Previous
to go back to the previous screen
and select again.
•
To auto-adjust the brightness and contrast levels of
a picture, click
Menu
>
Auto Correct
.
4.
Click
Menu
>
Save
As
to save the edited picture with a
new name or at a new location.
To undo an edit, click Menu > Undo. To cancel all unsaved edits you
made to the picture, click Menu > Cancel.
To set a picture as the Home screen background
1.
On the Home screen, click
Start
>
Pictures & Videos
.
2.
Select the picture you want to set as the background.
3.
Click
View
.
4.
Click
Menu
>
Use as Home Screen
.
5.
Select the display area and click
Next
.
6.
Adjust the transparency. Select a higher percentage for
a more transparent picture, or a lower percentage for a
more opaque picture.
7.
Click
Finish
.

110
7
Experiencing Multimedia
To send pictures and video clips via e-mail
You can send pictures and video clips to other phones via
e-mail.
1.
First, set up Messaging to send and receive messages.
2.
On the Pictures & Videos screen, select the item you
want to send.
3.
Click
Menu
>
Send
.
4.
On the Messaging screen, select
Outlook E-mail
then
click
Select
.
A new message is created with the item attached.
5.
Enter the recipient name and subject, and click
Send
.
The message will be sent the next time you
synchronize your phone.
Pictures and video clips are saved automatically before they are sent.
To beam pictures
You can beam a picture to your friends or family by using
infrared technology.
1.
On the Home screen, click
Start
>
Pictures & Videos
.
2.
Select the picture you want to beam.
3.
Click
Menu
>
Beam
.
4.
Select the device to which you want to send the
picture.
5.
Click
Beam
.
To send pictures using Bluetooth
You can send pictures to other Bluetooth-enabled devices.
Make sure you have enabled Bluetooth on your phone
before you send a picture to another Bluetooth-enabled
device.
1.
On the Home screen, click
Start
>
Pictures & Videos
.
2.
Select the image you want to send.
3.
Click
Menu
>
Send to Bluetooth Device
.

111
7
Experiencing Multimedia
4.
On the Bluetooth Image Transfer screen, click
Menu
>
New
to fi nd a Bluetooth-enabled device.
5.
Select the device to which you want to send the image.
6.
Click
Menu
>
Send Image
.
To assign pictures to contacts
You can assign a picture to a contact so that you can easily
identify the contact at any time.
1.
On the Home screen, click
Start
>
Pictures & Videos
.
2.
Select the picture you want to assign to a contact.
3.
Click
Menu
>
Save to Contact
.
4.
Select the contact, and click
Select
.
To customize camera options
1.
On the Home screen, click
Start
>
Pictures & Videos
.
2.
Select the picture for which you want to confi gure
advanced options.
3.
Click
Menu
>
Options
.
4.
Select
General
or
Slide Show
on the Options screen
then press ENTER.
Selecting
General
on the Options screen allows you to
do the following:
•
Decrease the picture size so that photos can be
sent faster via e-mail.
•
Set the direction to rotate a picture.
Selecting
Slide Show
on the Options screen allows
you to do the following:
•
Configure the view settings during slide shows.
•
Activate screensaver.

112
7
Experiencing Multimedia
7.3 Using Windows Media Player
You can use Microsoft® Windows Media™ Player Mobile
for Smartphone to play digital audio and video files that are
stored on your phone or on a network, such as on a Web
site.
In this documentation, the version of Windows Media Player
for Windows-based PCs is called the “desktop Player” and
the version for Smartphone is called the “device Player.”
These are the following file formats that are supported by
this version of Windows Media Player Mobile.
Formats Supported
File
Extensions
Video
• Windows Media Video
• MPEG4 Simple Profile
• H.263
• Motion JPEG
• 3GPP2
.wmv, .asf
.mp4
.3gp
.avi
.3g2
Audio
• Windows Media Audio
• MP3
• MIDI
• AMR Narrow Band
• AMR Wide Band
• AAC
• 3GPP2
.wma
.mp3
.mid, .midi, .rmi
.amr
.awb
.m4a
.gcp

113
7
Experiencing Multimedia
About the controls
By default, these hardware buttons are assigned to
Windows Media Player Mobile functions. In some cases, the
manufacturer of your phone may have changed these button
assignments.
To
Press
Play or pause ENTER
Skip to a previous file NAVIGATION left
Skip to the next file NAVIGATION right
Increase the volume NAVIGATION up
Decrease the volume NAVIGATION down
Turn the sound on or off quickly (mute) #
Switch to full screen during video playback
0
Change rating *
Fast-forward a file NAVIGATION right (hold)
Rewind a file NAVIGATION left (hold)
About the screens and menus
Windows Media Player has three primary screens:
Playback screen.
The default screen that displays the
playback controls (such as Play, Pause, Next, Previous,
and Volume) and the video window. You can change the
appearance of this screen by choosing a different skin.
Now Playing screen.
The screen that displays the Now
Playing playlist. This special playlist indicates the currently
playing file and any files that are queued up to play next.
Library screen.
The screen that lets you quickly find your
audio files, video files, and playlists. It contains categories
such as My Music, My Videos, My TV, and My Playlists.
At the bottom of each screen is a menu called
Menu
. The
commands on this menu vary, depending upon which screen
you are viewing.

114
7
Experiencing Multimedia
Playback screen menu
When you are viewing the Playback screen, these options
appear on the
Menu
.
Option
Allows you to
Library Display the Library screen so you can choose a file
to play.
Play/Pause Start or pause playback.
Stop Stop playback.
Shuffle/
Repeat >
Shuffle
Play the items in the Now Playing playlist in random
order.
Shuffle/
Repeat >
Repeat
Play the items in the Now Playing playlist repeatedly.
Full Screen When a video is playing, display it by using the
entire screen.
Options Adjust various Windows Media Player Mobile
options, including network, skin, and hardware
button options.
Properties Display information about the currently playing file.
About Display information about Windows Media Player
Mobile, such as the version number.
115
7
Experiencing Multimedia
Now Playing screen menu
When you are viewing the Now Playing screen, these
options appear on the
Menu
.
Option
Allows you to
Library Display the Library screen so you can choose a
file to play.
Move Up Move the selected item up in the playlist order.
Move Down
Move the selected item down in the playlist order.
Remove from
Playlist
Remove the selected item from the playlist.
Shuffle/Repeat
> Shuffle
Play the items in the Now Playing playlist in a
random order.
Shuffle/Repeat
> Repeat
Play the items in the Now Playing playlist
repeatedly.
Clear Now
Playing
Remove all items from the Now Playing playlist.
Error Details View error information about the selected item
(an exclamation mark appears before the item
name if error details are available).
Properties View information about the selected file.

116
7
Experiencing Multimedia
Library screen menu
When you are viewing the Library screen, these options
appear on the
Menu
.
Option
Allows you to
Queue Up Add the selected item to the end of the
current (Now Playing) playlist.
Delete from Library Delete the selected item from the library.
Now Playing Display the Now Playing playlist.
Library > library
name
Switch between libraries, such as between
My Device and Storage Card.
Update Library Add new items to the library by searching
your phone or storage card.
Open File Find and play files that are stored on your
phone or storage card but that are not in the
library.
Open URL Play a file on a network, such as the Internet.
Properties View information about the selected file.
About licenses and protected files
Some content (such as digital media files downloaded
from the Internet, CD tracks, and videos) have associated
licenses that protect them from being unlawfully distributed
or shared. Licenses are created and managed by using
digital rights management (DRM), which is the technology
for securing content and managing its access rights. Some
licenses may prevent you from playing files that have been
copied to your phone. Files that have licenses associated
with them are called “
protected files
.
”
If you want to copy a protected file from your PC to your
phone, use the desktop Player to synchronize the file to your
phone (instead of dragging the file from a folder on your PC
to a folder on your phone, for example). This will ensure that
the license is copied along with the protected file. For more
information about synchronizing files to your phone and
other mobile devices, see the desktop Player Help.

117
7
Experiencing Multimedia
You can view the protection status for a file by checking its file
properties (Menu > Properties).
Play media
To play media on your phone
Use the library to find and play songs, videos, and playlists
that are stored on your phone or removable storage card.
1.
If you are not on the Library screen, click
Menu
>
Library
.
2.
If necessary, on the Library screen, click
Menu
>
Library
, and then select the library that you want to
use (for example,
Storage Card
).
3.
Select a category (for example,
My Music
or
My
Playlists
), select the item that you want to play (such
as a song, album, or artist name), and then click
Play
.
To play a file that is stored on your phone but is not in a library, on
the Library screen, click Menu > Open File. Select the item that you
want to play (such as a file or a folder), and click Play.
To play media on a network
Use the
Open UR
L
command to play a song or video that is
stored on the Internet or on a network server.
1.
If you are not on the Library screen, click
Menu
>
Library
.
2.
Click
Menu
>
Open URL
.
3.
Do one of the following:
•
In
URL
, enter a network address.
•
In
History
, select a URL that you have previously
used.
To play media on a network, your phone must be connected to a
network.

118
7
Experiencing Multimedia
Copy files to your phone
Use the
Sync
feature in the desktop version of Windows
Media Player to synchronize (copy) digital media files from
your PC to your phone. Using
Sync
ensures that protected
files and album art (for skins) are copied to your phone
correctly.
To synchronize content to your phone automatically
1.
On your PC, start Windows Media Player.
2.
Insert a 32-MB or larger storage card into your phone,
and then connect your phone to your PC.
3.
On your PC, the Device Setup Wizard opens.
4.
In the wizard, click
Automatic
, select the
Customize
the playlists that will be synchronized
check
box, and then select the playlists that you want to
synchronize.
5.
Click
Finish
.
6.
The fi les begin synchronizing to your phone. The next
time you connect your phone to your PC while the
desktop version of Windows Media Player is running,
synchronization will start automatically.
• Always use the desktop version of Windows Media Player 10 to
synchronize (copy) files to your phone. For example, do not use
Windows Explorer to drag and drop files from your computer to
your phone.
• Always synchronize files to a storage card that is inserted into your
phone. Do not synchronize to a storage card that is inserted into a
storage card reader.
• Audio files copy faster if the desktop Player is configured to
automatically set the quality level for audio files copied to your
phone. For more information, see the desktop Player Help.
• The desktop version of Windows Media Player 10 is only available
for computers running Windows XP. If you are not running
Windows XP on your PC, use the Copy to CD or Device feature of
Windows Media Player 9 Series to copy your audio files and video
files to your phone.

119
7
Experiencing Multimedia
• The desktop version of Windows Media Player 9 Series is not as
full-featured as the desktop version of Windows Media Player 10.
For example, the desktop version of Windows Media Player 9
Series does not support automatic synchronization, synchronization
of playlists, synchronization of album art, or synchronization of TV
shows recorded by computers running Windows XP Media Center
Edition.
• For more information about the Copy to CD or Device feature,
start the desktop version of Windows Media Player 9 Series, and
then press F1.
Change Player appearance
You can change the appearance of the Playback screen by
choosing a new skin.
1.
If you are not on the Playback screen, press BACK to
display the Playback screen.
2.
Click
Menu
>
Options
>
Skins
.
3.
To select a skin, press NAVIGATION left or right until
you fi nd the skin that you want to use.
4.
Click
Done
.
To download new skins, see the WMplugins.com site (http://www.
wmplugins.com).
After downloading a skin to your computer and unzipping it if
necessary, use ActiveSync to copy the .skn and .bmp files to your
phone (such as to the location, Smartphone\Program Files\
Windows Media Player, on the phone). To ensure that skins appear
on the Skins tab, do not store skin files in the Windows folder on
your phone.
Accessibility for people with disabilities
Microsoft is committed to making its products and services
easier for everyone to use. Many accessibility features have
been built into Microsoft products, including features for
individuals who have difficulty typing or using a mouse, who
are blind or have low vision, or who are deaf or hard-of-

120
7
Experiencing Multimedia
hearing. For more information about the following topics, see
the Accessibility section of the Microsoft Web site (
http://
http://
www.microsoft.com/enable
/
).
•
Accessibility in Microsoft Windows
•
Adjusting Microsoft products for people with
accessibility needs
•
Free step-by-step tutorials
•
Microsoft documentation in alternative formats
•
Assistive technology for Windows
•
Customer service for people who are deaf or hard-of-
hearing
The information in this section applies to users who license Microsoft
products in the United States. If you obtained this product outside the
United States, your package contains a subsidiary information card
that you can use to contact your subsidiary about the products and
services available in your area.
Troubleshooting
If you encounter any difficulty while using Windows Media
Player Mobile, a number of resources are available on the
Web to help you troubleshoot the issue, including a list of
frequently asked questions (FAQ).
For more information, see the Troubleshooting Windows
Media Player Mobile page at the Microsoft Web site
(
http://www.microsoft.com/windows/windowsmedia/player/
http://www.microsoft.com/windows/windowsmedia/player/
windowsmobile/troubleshooting.aspx
windowsmobile/troubleshooting.aspx
).

121
7
Experiencing Multimedia
7.4 Using MIDlet Manager
MIDlets are Java-based applications that can run on mobile
devices. Your phone supports Java 2 Edition, J2ME. The
MIDlet Manager allows you to download Java-based
applications, such as games and tools that are specifically
designed for mobile devices. Although some Java-based
applications and games have already been installed on your
phone, the Java MIDlet Manager gives you the flexibility of
installing and managing additional J2ME applications from
the Internet.
To install MIDlets from the Internet
1.
On the Home screen, click
Start
>
MIDlet Manager
.
The Java Apps screen appears.
2.
Click
Menu
>
Install
>
Browse
to open Internet
Explorer Mobile.
3.
Locate the MIDlet/MIDlet suite while connected to the
Internet.
4.
Select the MIDlet/MIDlet suite to download.
5.
To start installing the MIDlet/MIDlet suite, click
Yes
.
6.
Click
Done
to confi rm the installation.
You can cancel the installation at any time.
To install MIDlets from a PC
You can install the MIDlets/MIDlet suites on your phone
from a PC using the USB sync cable, infrared, or Bluetooth.
MIDlets copied to your phone using infrared, Bluetooth,
or e-mail attachments are automatically saved in the My
Documents folder. However, you can copy the MIDlet file(s)
from a PC to any of the following temporary folders on your
phone from where MIDlet Manager can install them.
•
Device memory: ../Smartphone/My Documents/My
MIDlets
•
Storage card: ../Smartphone/Storage Card
122
7
Experiencing Multimedia
If the My MIDlets folder does not exist in My Documents, you can
create one with the same folder name. However, a folder named
Storage Card automatically appears after you insert a storage card
into your phone.
To install MIDlets from a local folder
1.
On the Home screen, click
Start
>
MIDlet Manager
.
The Java Apps screen appears.
2.
Click
Menu
>
Install
>
Local
to install the MIDlets
currently saved in the My MIDlets folder.
Click
Recent
to view the MIDlets or a MIDlet suite
used recently on your phone.
3.
Select the MIDlet/MIDlet suite from the list by using the
NAVIGATION control.
4.
Click
Menu
>
Install
.
5.
Click
Yes
to install.
6.
Click
Done
to confi rm the installation.
To remove the MIDlet files from the default folder, click Menu >
Delete.
MIDlet

123
7
Experiencing Multimedia
To run MIDlets on your phone
1.
On the Home screen, click
Start
>
MIDlet Manager
.
The Java Apps screen appears.
2.
Select a MIDlet from the list by using the NAVIGATION
control.
3.
Press the ENTER button to run the MIDlet.
To view the MIDlets currently running
•
On the MIDlet Manager Java Apps screen, click
Menu
>
Running
.
To view the most recently used MIDlets, click Menu > Recent.
To stop running a MIDlet
1.
On the Home screen, click
Start
>
MIDlet Manager
.
The Java Apps screen appears.
2.
Click
Menu
>
Running
.
3.
Select a MIDlet on the Running MIDlets screen, and
click
Menu
>
Stop
.
To stop all MIDlets currently running on your phone, click Menu >
Stop All.
Manage MIDlets
You can organize the MIDlets into groups and define custom
groups. You can also change the default display settings for
a MIDlet.
To customize the display settings
1.
On the Home screen, click
Start
>
MIDlet Manager
.
The Java Apps screen appears.
2.
Click
Menu
>
Settings
.
3.
On the Settings screen, select Display Options by
using the NAVIGATION control.
4.
Press the ENTER button.

124
7
Experiencing Multimedia
5.
In
View
Options
, choose to display the MIDlets either
in groups or all at once.
6.
In
Sort Options
, choose to sort by Name or by Size.
7.
Click
Done
.
To change the display name of a MIDlet
1.
On the Home screen, click
Start
>
MIDlet Manager
.
The Java Apps screen appears.
2.
Select a MIDlet by using the NAVIGATION control.
3.
Click
Menu
>
Rename
.
4.
Enter a new name for the MIDlet.
5.
Click
Done
.
You cannot change the name of a MIDlet suite.
To uninstall a MIDlet
Before you uninstall a MIDlet/MIDlet suite, make sure that it
is not running.
1.
On the Java Apps screen, select the MIDlet/MIDlet
suite by using the NAVIGATION control.
2.
Click
Menu
>
Manage
>
Uninstall
.
3.
Click
OK
to confi rm.
You cannot uninstall a single MIDlet from a MIDlet suite; you must
uninstall the complete MIDlet suite.
To check storage space
1.
On the Home screen, click
Start
>
MIDlet Manager
.
2.
Select a MIDlet by using the NAVIGATION control.
3.
On the Java Apps screen, click
Menu
>
Settings
.
4.
On the Settings screen, select
System Info
by using
the NAVIGATION control.
5.
Press the ENTER button to see how much phone
storage space is used by the MIDlet.
6.
Click
OK
.

125
7
Experiencing Multimedia
To select a network type
1.
On the Java Apps screen, click
Menu
>
Settings
.
2.
Select
Choose Network Type
by using the
NAVIGATION control.
3.
Choose a network type from the list.
4.
Click
Select
.
To confi gure MIDlet security
You can adjust security settings for each MIDlet/MIDlet suite.
1.
On the Java Apps screen, select a MIDlet by using the
NAVIGATION control.
2.
Click
Menu
>
Manage
>
Security
.
3.
Confi gure the security options, such as
Local
Connectivity
,
App Auto Run
,
Messaging
, and so on.
Please note that some features may not be available for all
MIDlets/MIDlet suites. Following are the security options that
you can set for a running MIDlet/MIDlet suite.
Security
Option
Description
Net Access Determines whether a MIDlet/MIDlet suite can
access the Internet.
Local
Connectivity
Enables a MIDlet/MIDlet suite to access services,
such as infrared and Bluetooth.
App Auto Run Enables a MIDlet/MIDlet suite to run at specified
times, or any time.
Messaging Determines whether a MIDlet/MIDlet suite can send
and/or receive text (SMS, Short Message Service)
messages.
Multimedia
Recording
Enables a MIDlet/MIDlet suite to record sounds and
images.

126
7
Experiencing Multimedia
Error messages
The following is a list of error messages that you may
receive while managing and using MIDlets/MIDlet suites on
your phone.
Error Message
Description
Either RAM shortage, or
insufficient space on the file
system.
There is insufficient memory on your
phone.
Network out. There is no network connection
available.
The jar size does not match
that specified in the jad.
The installation information provided
by the MIDlet manufacturer is
inaccurate.
The jar manifest does not
match the jad.
The installation information provided
by the MIDlet manufacturer is
inaccurate.
Invalid Java application
descriptor (jad).
There is a problem with the
installation file provided by the
MIDlet manufacturer.
Invalid Java archive (jar). There is a problem with the
installation file provided by the
MIDlet manufacturer.
This Java application is not
compatible with this device.
One or more features required by
this MIDlet is not available on your
phone.

Appendix
A.1 Regulatory Notices
A.2
PC Requirement to Run ActiveSync 4.x
A.3 Specifications
A.4 Index

130
Appendix
A.1 Regulatory Notices
Agency identification numbers
For regulatory identification purposes, your product
(Smartphone) is assigned a model number of ST22A.
The
Battery Pack has been assigned a model number of ST26A,
ST26B, and ST26C.
To ensure continued reliable and safe operation of your
Smartphone, use only the accessories listed in this
document.
This product is intended to be used with a certified class 2 limited
power source, rated 5 volts DC, maximum 1A power supply unit.
Federal Communications Commission Notice
This device complies with part 15 of the FCC Rules.
Operation is subject to the following two conditions: (1) This
device may not cause harmful interference, and (2) this
device must accept any interference received, including
interference that may cause undesired operation.
This equipment has been tested and found to comply with
the limits for a Class B digital device, pursuant to Part 15
of the FCC Rules. These limits are designed to provide
reasonable protection against harmful interference in a
residential installation. This equipment generates, uses,
and can radiate radio frequency energy and, if not installed
and used in accordance with the instructions, may cause
harmful interference to radio communications. However,
there is no guarantee that interference will not occur in a
particular installation. If this equipment does cause harm-
ful interference to radio or TV reception, which can be
determined by turning the equipment on and off, the user is
encouraged to try to correct the interference by one or more
of the following measures:

131
Appendix
•
Reorient or relocate the receiving antenna.
•
Increase the separation between the equipment and
receiver.
•
Connect the equipment into an outlet on a circuit
different from that to which the receiver is connected.
•
Consult the dealer or an experienced radio or
television technician for help.
•
The FCC requires the user to be notifi ed that any
changes or modifi cations made to the device that
are not expressly approved by High Tech Computer
Corporation may void the user’s authority to operate
the equipment.
Important safety information
Retain and follow all product safety and operating
instructions. Observe all warnings on the product and in the
operating instructions.
To reduce the risk of bodily injury, electric shock, fire,
and damage to the equipment, observe the following
precautions.
Safety precautions for RF exposure
Use only original manufacturer-approved accessories, or
accessories that do not contain any metal
Use of non-original manufacturer-approved accessories may
violate your local RF exposure guidelines and should be
avoided.
Heed service markings
Except as explained elsewhere in the Operating or Service
documentation, do not service any product yourself.
Service
needed on components inside these compartments should
be done by an authorized service technician or provider.

132
Appendix
Damage requiring service
Unplug the product from the electrical outlet and refer
servicing to an authorized service technician or provider
under the following conditions:
•
Liquid has been spilled or an object has fallen into the
product.
•
The product has been exposed to rain or water.
•
The product has been dropped or damaged.
•
There are noticeable signs of overheating.
•
The product does not operate normally when you
follow the operating instructions.
Avoid hot areas
The product should be placed away from heat sources
such as radiators, heat registers, stoves, or other products
(including amplifiers) that produce heat.
Avoid wet areas
Never use the product in a wet location.
Avoid pushing objects into product
Never push objects of any kind into cabinet slots or other
openings in the product. Slots and openings are provided for
ventilation. These openings must not be blocked or covered.
Mounting accessories
Do not use the product on an unstable table, cart, stand,
tripod, or bracket. Any mounting of the product should follow
the manufacturer’s instructions, and should use a mounting
accessory recommended by the manufacturer.
Do not place
the product with an unstable base
.
Use product with approved equipment
This product should be used only with personal computers
and options identified as suitable for use with your
equipment.

133
Appendix
Adjust the volume
Turn down the volume before using headphones or other
audio devices.
Cleaning
Unplug the product from the wall outlet before cleaning. Do
not use liquid cleaners or aerosol cleaners. Use a slightly
damp cloth for cleaning, but NEVER use water to clean an
LCD screen.
Safety precautions for power supply unit
Use the correct external power source
A product should be operated only from the type of power
source indicated on the electrical ratings label. If you are
not sure of the type of power source required, consult
your authorized service provider or local power company.
For a product that operates from battery power or other
sources, refer to the operating instructions that are included
with the product.
Handle battery packs carefully: This
product contains a Lithium-Ion battery.
There is a risk
of fire and burns if the battery pack is handled improperly.
Do not attempt to open or service the battery pack. Do not
disassemble, crush, puncture, short external contacts or
circuits, dispose of in fire or water, or expose a battery pack
to temperatures higher than 140
°
F (60
°
C).
Exposure to radio frequency (RF) signals
Your wireless phone is a radio transmitter and receiver. It
is designed and manufactured not to exceed the emission
limits for exposure to radio frequency (RF) energy. These
limits are part of comprehensive guidelines and establish
permitted levels of RF energy for the general population. The
guidelines are based on the safety standards previously set
by international standards bodies:
•
American National Standards Institute (ANSI) IEEE.
C95.1-1992

134
Appendix
•
National Council on Radiation Protection and
Measurement (NCRP). Report 86. 1986
•
International Commission on Non-Ionizing Radiation
Protection (ICNIRP) 1996
•
Ministry of Health (Canada), Safety Code 6. The standards
include a substantial safety margin designed to assure
the safety of all persons, regardless of age and health.
The exposure standard for wireless mobile phones employs
a unit of measurement known as the
Specifi c Absorption
Rate
, or SAR.
The standard incorporates a substantial margin of safety to
give additional protection for the public and to account for
any variations in usage. Normal conditions only ensure the
radiative performance and safety of the interference. As with
other mobile radio transmitting equipment, users are advised
that for satisfactory operation of the equipment and for the
safety of personnel, it is recommended that no part of the
human body be allowed to come too close to the antenna
during operation of the equipment.
SAR Value
1.032W/kg @1g (FCC)
Your phone contains a Lithium-Ion battery pack. There is a risk
of fire and burns if the battery pack is handled improperly. Do not
disassemble, crush, puncture, short external contacts, or dispose of
in fire or water. Do not attempt to open or service the battery pack.
Replace only with the battery pack designated for this product.
Recycle or dispose of batteries properly. Do not discard with your
regular trash.

135
Appendix
Telecommunications & Internet Association
(TIA) safety information
Pacemakers
The Health Industry Manufacturers Association recommends
that a minimum separation of six inches be maintained
between a handheld wireless phone and a pacemaker to
avoid potential interference with the pacemaker. These
recommendations are consistent with the independent
research by and recommendations of Wireless Technology
Research. Persons with pacemakers:
•
Should ALWAYS keep the phone more than six inches
from their pacemaker when the phone is turned ON.
•
Should not carry the phone in a breast pocket.
•
Should use the ear opposite the pacemaker to
minimize the potential for interference. If you have any
reason to suspect that interference is taking place, turn
your phone OFF immediately.
Hearing Aids
Some digital wireless phones may interfere with some
hearing aids. In the event of such interference, you may
want to consult your service provider, or call the customer
service line to discuss alternatives.
Other Medical Devices
If you use any other personal medical device, consult
the manufacturer of your device to determine if they are
adequately shielded from external RF energy. Your physician
may be able to assist you in obtaining this information.
Turn your phone OFF in health care facilities when any
regulations posted in these areas instruct you to do so.
Hospitals or health care facilities may be using equipment
that could be sensitive to external RF energy.

136
Appendix
Safety Precautions
SAFETY
IN AIRCRAFT: This product can cause interference to
SAFETY IN AIRCRAFT: This product can cause interference to SAFETY
an aircraft's navigation system and network. In most countries it is
against the law to use this product on board an airplane.
ENVIRONMENTAL
SAFETY: Do not use this product in gas
ENVIRONMENTAL SAFETY: Do not use this product in gas ENVIRONMENTAL
stations, fuel stores, chemical plants and locations containing
explosives.
ROAD
SAFETY: Vehicle drivers in motion are not permitted to
use handheld telephony services, except in emergency. In some
countries, using hands-free devices as an alternative is allowed.
MEDICAL
EQUIPMENT SAFETY: This product may cause medical
MEDICAL EQUIPMENT SAFETY: This product may cause medical MEDICAL
equipment malfunction. In most hospitals or medical centers use of
this product is forbidden.
Other tips and cautions
•
Avoid using your phone near metal structures (for
example, the steel frame of a building).
•
Avoid using your phone near strong electromagnetic
sources, such as microwave ovens, sound speakers,
TV and radio.
•
Avoid using your phone after a dramatic change in
temperature.

137
Appendix
A.2
PC Requirement to Run ActiveSync 4.x
To connect your device to the PC, you have to installed
Microsoft® ActiveSync® program on your PC. ActiveSync
4.0 is included in the Installation CD, which is compatible
with the following operating systems and applications:
• Microsoft® Windows® 2000 Service Pack 4
• Microsoft® Windows® Server 2003 Service Pack 1
• Microsoft® Windows® Server 2003 IA64 Edition Service Pack 1
• Microsoft® Windows® Server 2003 x64 Edition Service Pack 1
• Microsoft® Windows® XP Professional Service Packs 1 and 2
• Microsoft® Windows® XP Home Service Packs 1 and 2
• Microsoft® Windows® XP Tablet PC Edition 2005
• Microsoft® Windows® XP Media Center Edition 2005
• Microsoft® Windows® XP Professional x64 Edition
• Microsoft® Outlook® 98, Microsoft® Outlook® 2000 and
Microsoft® Outlook® XP, and Microsoft® Outlook® 2003
messaging and collaboration clients
• Microsoft® Office 97, excluding Outlook
• Microsoft® Office 2000
• Microsoft® Office XP
• Microsoft® Office 2003
• Microsoft® Internet Explorer 4.01 or later (required)
• Microsoft® Systems Management Server 2.0
A.3 Specifications
System information
Processor
TI OMAP 850, 200 MHz
Memory
• ROM:
64 MB (Standard)
• RAM:
64
MB DDR
(Standard)
Operating system
Microsoft
Windows Mobile
Smartphone
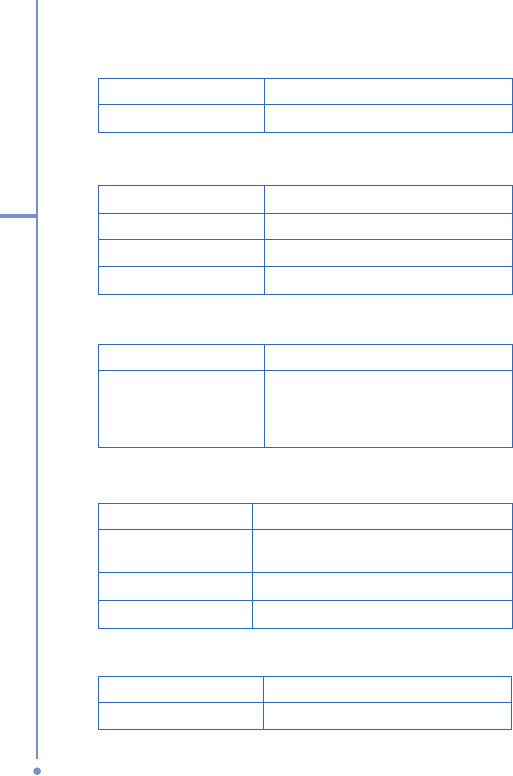
138
Appendix
Display
Type
Transflective 2.2” QVGA TFT-LCD
Resolution
320
x 240 at 64K colors
GSM/GPRS/EDGE Quad-band module
GSM 850
824
~
849, 869
~
894MHz
GSM 900
880 ~ 915, 925 ~ 960 MHz
GSM 1800
1710 ~ 1785, 1805 ~ 1880 MHz
GSM 1900
1850 ~ 1910, 1930 ~ 1990 MHz
Camera module
Type
1.3 mega-pixel Color CMOS
Resolution
•
S
XGA
:
1280 x 1024
•
VGA: 640 x 480
•
QVGA
: 320
x
240
•
QQVGA:
160 x
120
Connection
Infrared
IrDA SIR
I/O port
Standard 5
-pin
Mini-USB
port for
signals
(for USB and power)
Audio
Stereo headphone jack
Bluetooth
V1.2, Class 2 transmit power
Audio
Microphone/speaker
Built-in microphone and 3-in-1
speaker
Headphone
MP3
stereo

139
Appendix
Controls and lights
Navigation
5-way navigation pad/Action button
Buttons
•
Power on/off (top)
•
Pre-defined button (left side)
•
Volume Control: up/down (left side)
•
Camera (right side)
•
Left Softkey
)
•
Home screen
•
Back to previous screen
•
Right Softkey
•
Previous (Media Player)
•
Play/Pause/Stop (Media Player)
•
Next (Media Player)
•
Media Player
button
Media Player buttonMedia Player
•
Talk (start call/answer call)
•
End call/Lock keypad
•
12-button dialing keypad
Lights
•
Event notifi cation
•
Charge status
•
GSM/GPRS signals
•
Bluetooth connection
Expansion slot
SD/MMC slot
Mini-SD memory card
Power supply
Battery
1150mAh (typical) Lithium-Ion
removable, rechargeable battery
Talk time
Up
to 5 hours
Standby
Up to 25
0
hours
AC adapter
•
AC input/frequency
AC input/frequency
:
100 ~ 240
VAC, 50/60Hz
•
Rated output
:
5VDC, 1A (typical)

140
Appendix
A.4 Index
A
Accessibility
4
4
,
12
8
Accessing Camera
10
6
Accessing MMS
8
8
Accessing Review screen
11
0
ActiveSync
3
3
Adding and Removing Programs
4
6
Adding audio to MMS messages
9
2
Adding Canned text to MMS messages
9
1
Adding photo & video to MMS messages
9
0
Additional Dialing Information
2
7
Advanced camera options
11
9
Alarm settings
4
1
Alerts
4
1
Assigning pictures to contacts
11
9
B
Battery Information
8
Battery management
4
4
Beaming Information
6
9
Beaming pictures
11
8
Block
9
7
Bluetooth
3
7
,
6
5
Bluetooth Modes
6
6
Bluetooth Partnerships
6
7
Buddies
9
7
C
Calendar
9
8
Camera and Video
10
6
Camera Menu
11
2
Camera mode icons and indicators
10
7

141
Appendix
Camera zoom range
11
1
Capture formats
10
7
Capture modes
10
7
Check Battery Power
9
Composing MMS messages
8
9
Composing MMS messages from Templates
9
0
Conference call
2
6
Configuring MIDlet Security
13
4
Configuring MIDlet security
13
4
Connecting to the Internet
6
0
Connecting to Wi-Fi Network
7
7
Contacts
9
9
Cookies, in Internet Explorer
6
5
Copying pictures and videos
11
5
Copy media files
12
7
Currency setting
4
1
D
Date setting
4
1
Default view
6
3
Deleting pictures and videos
11
7
Desktop player
12
0
Desktop view
6
3
Digital Rights Management
12
5
Display name
9
7
Display of Web pages
6
3
E
E-mail
8
2
Editing pictures and videos
11
7
Enter text and numbers
1
5
Error reporting
4
6
Event notification
4
1
Exchange Server
3
6

142
Appendix
F
Favorites, in Internet Explorer
6
4
Full screen in Internet Explorer
6
4
H
Hide pictures on Web pages
6
3
History, in Internet Explorer
6
5
Home Screen
1
0
Home screen settings
4
0
I
Icons
1
2
IM
9
7
In-Call Options
2
5
Infrared (IR)
3
7
Installing MIDlets from Internet
13
0
Installing MIDlets from PC
13
0
installing MIDlets locally
13
1
Install Mini-SD Card
8
Instant message
9
7
Internet
6
3
Internet Explorer
6
3
L
Language settings
4
1
Launching camera from Pictures & Videos
11
7
Library screen
12
2
Licensed media
12
5
Locale setting
4
1
Lock the phone
4
5

143
Appendix
M
Making Calls
2
1
Making Calls From Call History
2
3
Making Calls From Contacts
2
2
Making Calls From Home Screen
2
1
Making Calls From Speed Dial
2
3
Manage Low Battery
9
Managing MIDlets
13
2
Media synchronization settings
3
8
Menus
12
2
Menu options for MMS messages
9
4
MIDlet Manager
13
0
MIDlet Manager Error messages
13
5
MMS messages
8
8
MMS Video capture mode
10
9
Model number (phone/battery)
13
8
Modem Link
7
0
MSN Messenger
9
6
Multipress mode
1
6
N
Now Playing screen
12
2
Number format
4
1
Numeric mode
1
7
O
One column view
6
3
Operating system version
4
6
Optimize Power Performance
9
Options
9
7
Options menu
11
3
Owner information
4
4

144
Appendix
P
Personalizing your Phone
4
0
Personal information
4
4
Phone lock
4
5
Pictures, hide or show on Web pages
6
3
Pictures & Videos
11
4
Playback screen
12
2
Playing videos
11
6
Play media
12
6
Power management
4
4
Profile settings
4
1
Program Icons
1
1
Protected files
12
5
R
Receiving Calls
2
5
Receiving MMS messages
9
3
Regional options
4
1
Replying to MMS messages
9
3
Running MIDlets
13
2
S
Securing Wi-Fi Connection
7
8
Sending pictures and videos
11
8
Sending pictures via Bluetooth
11
9
Setting pictures as Home Screen backgrounds
11
7
Setting up Dial-up Connection
6
0
Setting up MMS account
8
8
Set Ring Tones
2
0
Sign in to MSN Messenger
9
6
Smartphone player
12
0
Sounds
4
1
Start MSN Messenger
9
6
Status
9
7

145
Appendix
Status Indicators
1
1
Still Image capture modes
10
9
Stopping MIDlets
13
2
Storage card
3
8
Synchronizing Information
3
4
Synchronizing music, video, and pictures
3
8
Synchronizing via Infrared and Bluetooth
3
7
Synchronizing with Exchange Server
3
6
Sync Setup Wizard
3
3
T
T9 mode
1
7
Tasks
10
2
Temporary Files, in Internet Explorer
6
5
Text messages
8
2
Text size on Web pages
6
3
Time setting
4
1
Troubleshooting Windows Media Player
12
9
U
Unblock
9
7
Uninstalling MIDlets
13
3
Using ActiveSync
3
2
Using File Manager
5
0
Using Task Manager
4
8
V
Video capture mode
10
9
Viewing MMS messages
9
3
Viewing pictures
11
5
Viewing slide shows
11
6
Voice Notes
10
3

146
Appendix
W
Web browser
6
3
Web page view
6
3
Windows Media Player
3
8
,
12
0
Windows Media Player accessibility
12
8
Windows Media Player menus
12
2
Windows Media Player troubleshooting
12
9
Windows Mobile software version
4
6
Wireless Manager
7
5
Z
Zoom
11
0

WEEE Notice
English .........................................................
The Directive on Waste Electrical and Electronic Equipment
(WEEE), which entered into force as European law on 13th
February 2003, resulted in a major change in the treatment of
electrical equipment at end-of-life.
The purpose of this Directive is, as a fi rst priority, the prevention of
WEEE, and in addition, to promote the reuse, recycling and other
forms of recovery of such wastes so as to reduce disposal.
The WEEE logo (
) on the product or on its box indicates that
this product must not be disposed of or dumped with your other
household waste. You are liable to dispose of all your electronic
or electrical waste equipment by relocating over to the specifi ed
collection point for recycling of such hazardous waste. Isolated
collection and proper recovery of your electronic and electrical
waste equipment at the time of disposal will allow us to help
conserving natural resources. Moreover, proper recycling of the
electronic and electrical waste equipment will ensure safety of
human health and environment. For more information about
electronic and electrical waste equipment disposal, recovery, and
collection points, please contact your local city centre, household
waste disposal service, shop from where you purchased the
equipment, or manufacturer of the equipment.