HUBSAN INTELLIGENT 502CRX Hubsan X4 Star User Manual
SHENZHEN HUBSAN INTELLIGENT COMPANY LIMITED Hubsan X4 Star
UserManual.wiki
>
HUBSAN INTELLIGENT
>
502CRX User Manual
User Manual
Navigation menu
Upload a User Manual
Namespaces
Wiki Guide
HTML
PDF
Info
Views
User Manual
Discussion / Help
Navigation

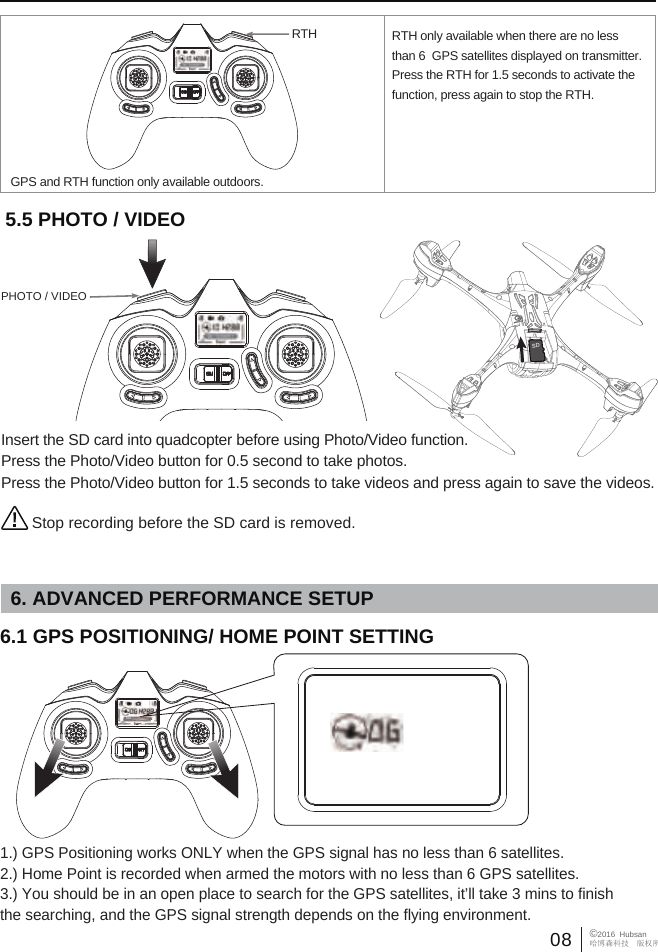
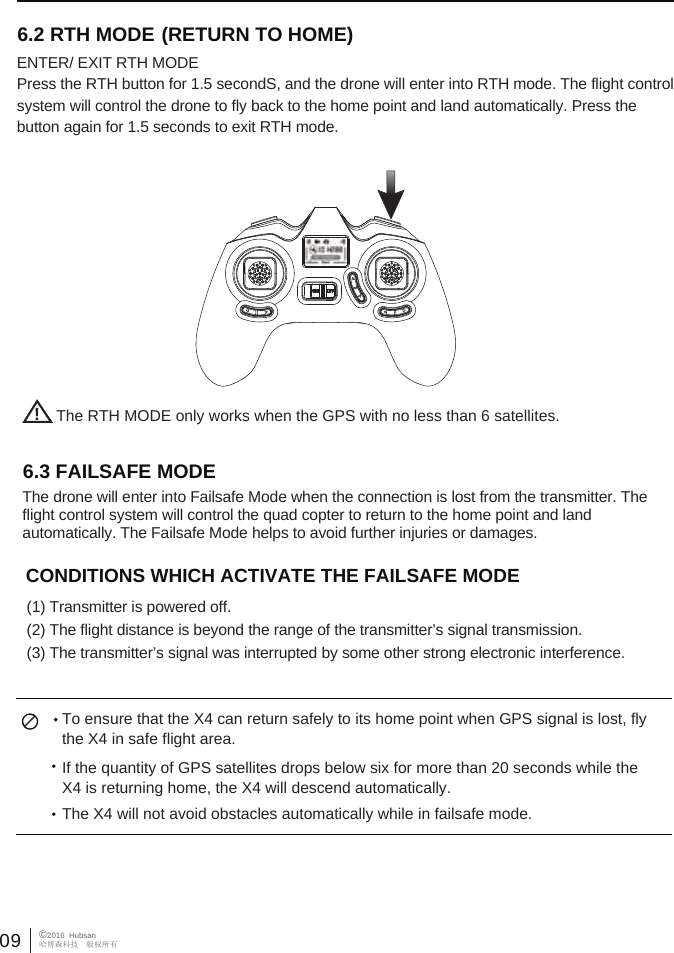
![10©2016 Hubsan哈博森科技 版权所有7. TRANSMITTER(FCC ID: 2AEXY10 0 0 TX) Transmitter[4] Power Switch[5] Elevator Trim [6] Aileron Trim[3] Rudder Trim Motor LED Switch[1] Photo/Video[7] LCD[8] RTH9 Elevator/Aileron Stick2Throttle/Rudder StickMODE 1MODE 2[1] Photo/Video[4] Power Switch[5] Elevator Trim [6] Aileron Trim[3] Rudder Trim Motor LED Switch[2] Elevator/Rudder Stick [9] Throttle/Aileron Stick[7] LCD[8] RTHInterfaceTansmitter battery voltage displayGPS satellitesGPS MarkQuad copter battery voltage displayHead orientationVideo PhotoExpert/NormalDistance MarkDistanceHeight MarkHeight](https://usermanual.wiki/HUBSAN-INTELLIGENT/502CRX/User-Guide-3055116-Page-11.png)