HUIZHOU FORYOU GENERAL ELECTRONICS FGEDV6310 CAR DVD RECEIVER User Manual VM9022 Caution content
HUIZHOU FORYOU GENERAL ELECTRONICS CO.,LTD. CAR DVD RECEIVER VM9022 Caution content
UserManual.wiki
>
HUIZHOU FORYOU GENERAL ELECTRONICS
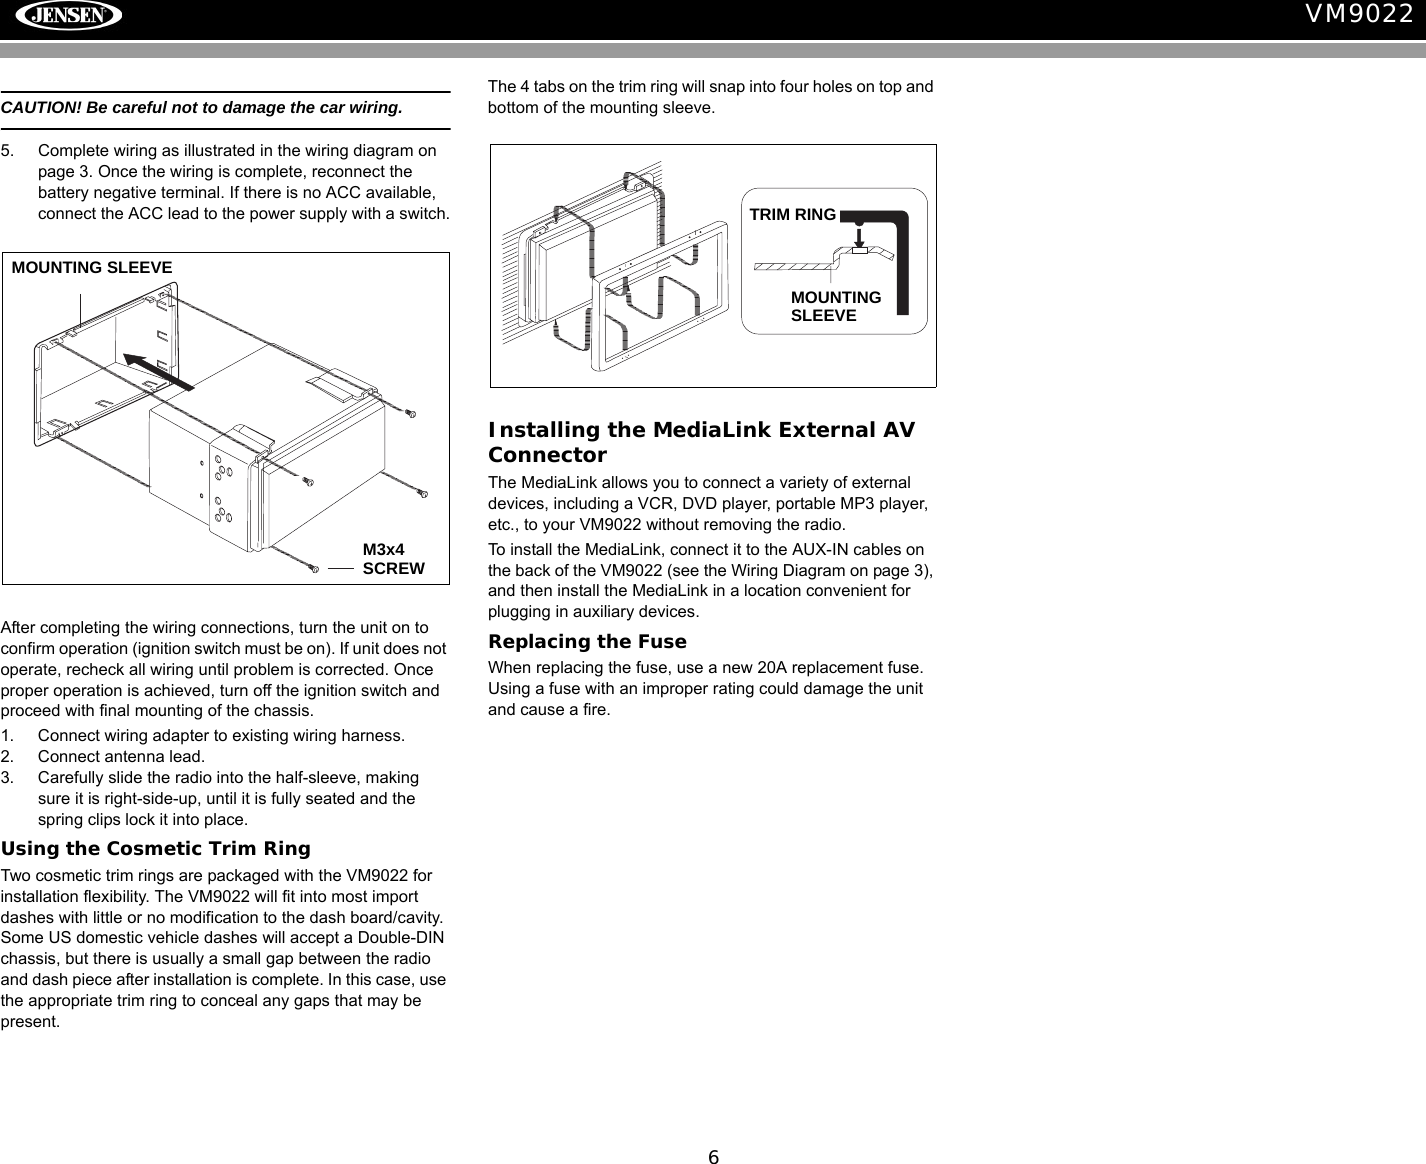
>
FGEDV6310 User Manual
Users Manual
Navigation menu
Upload a User Manual
Namespaces
Wiki Guide
HTML
PDF
Info
Views
User Manual
Discussion / Help
Navigation

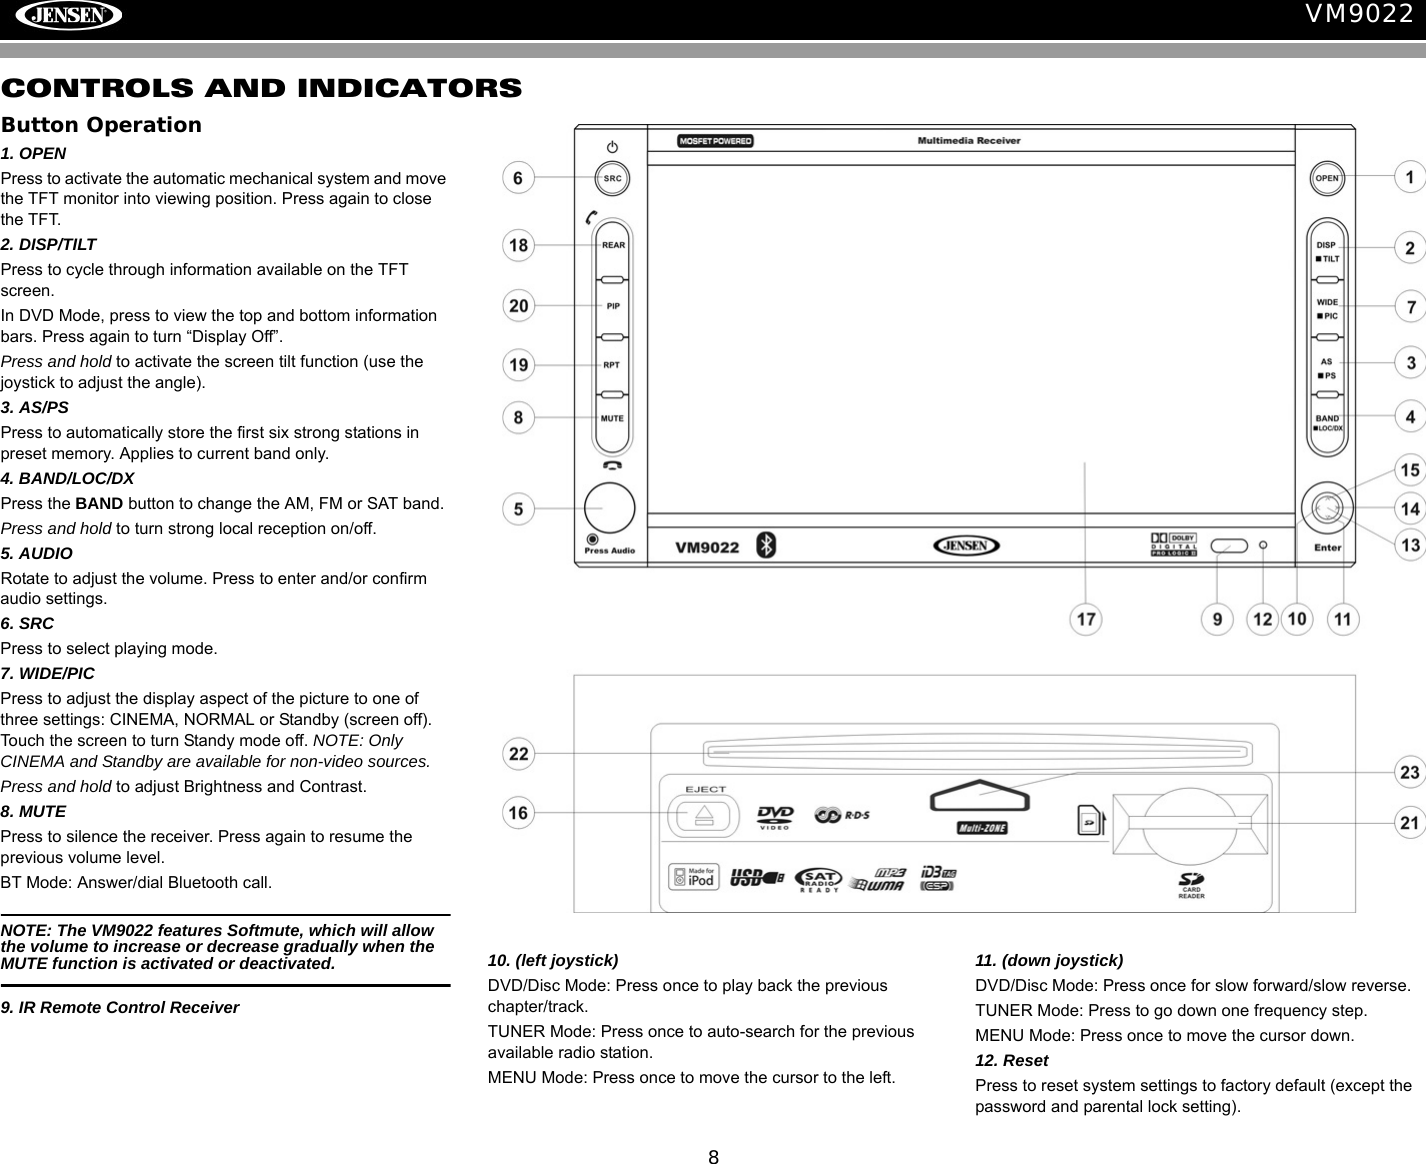
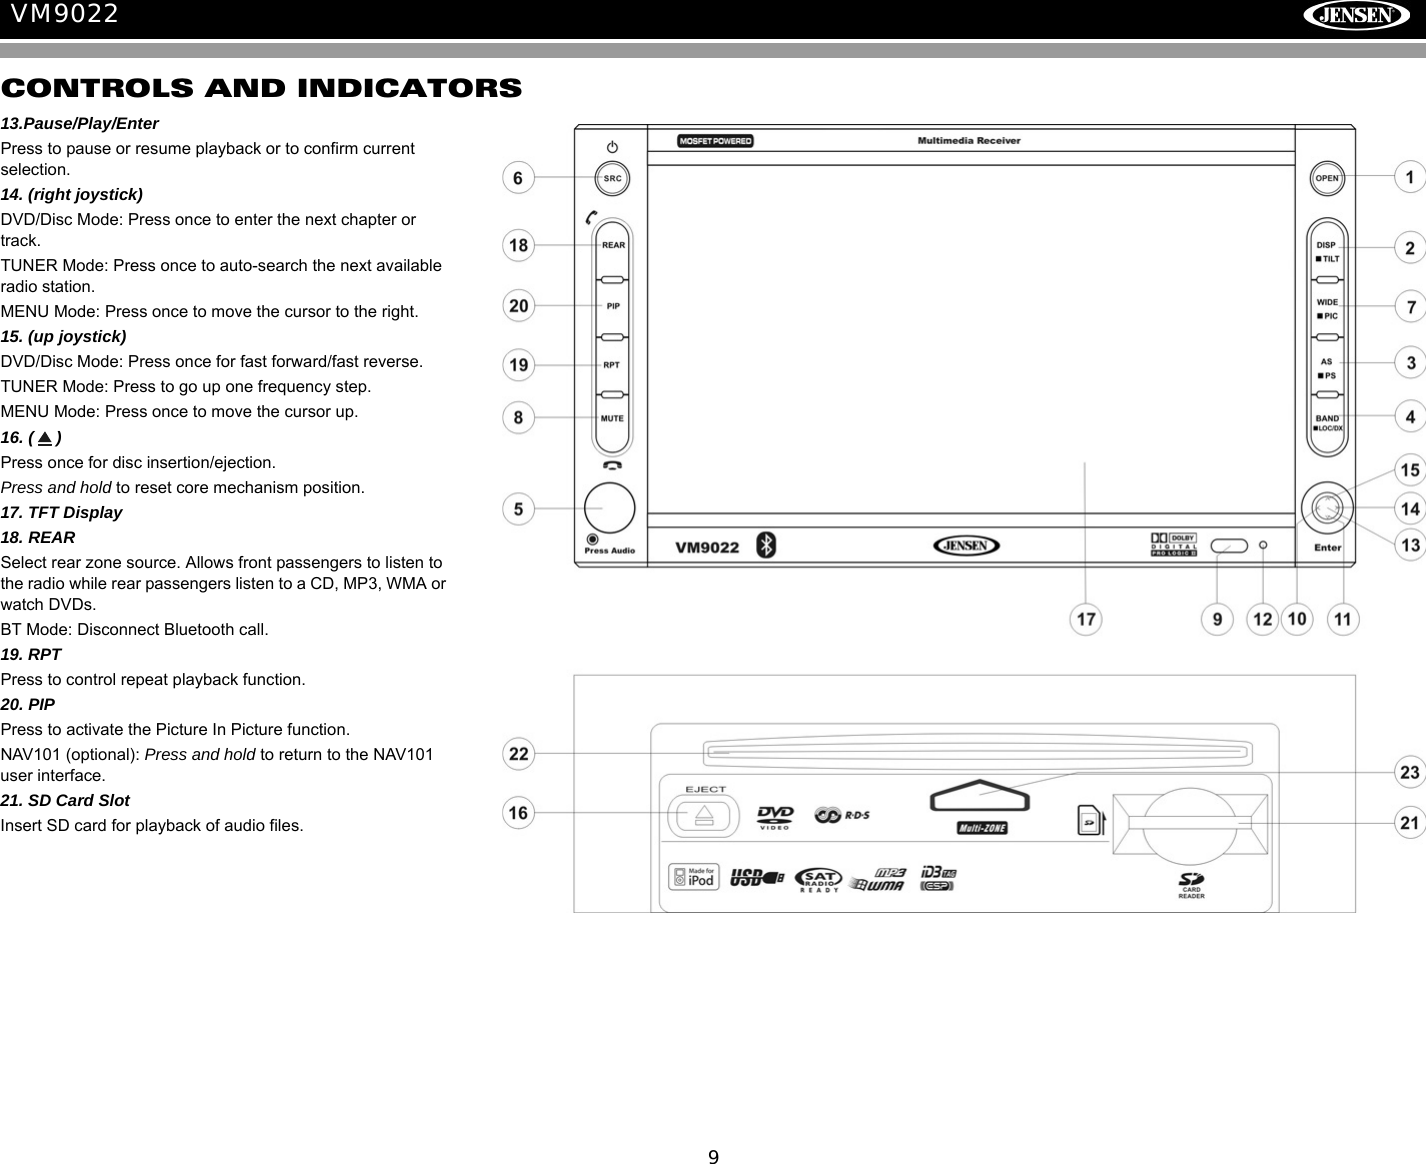
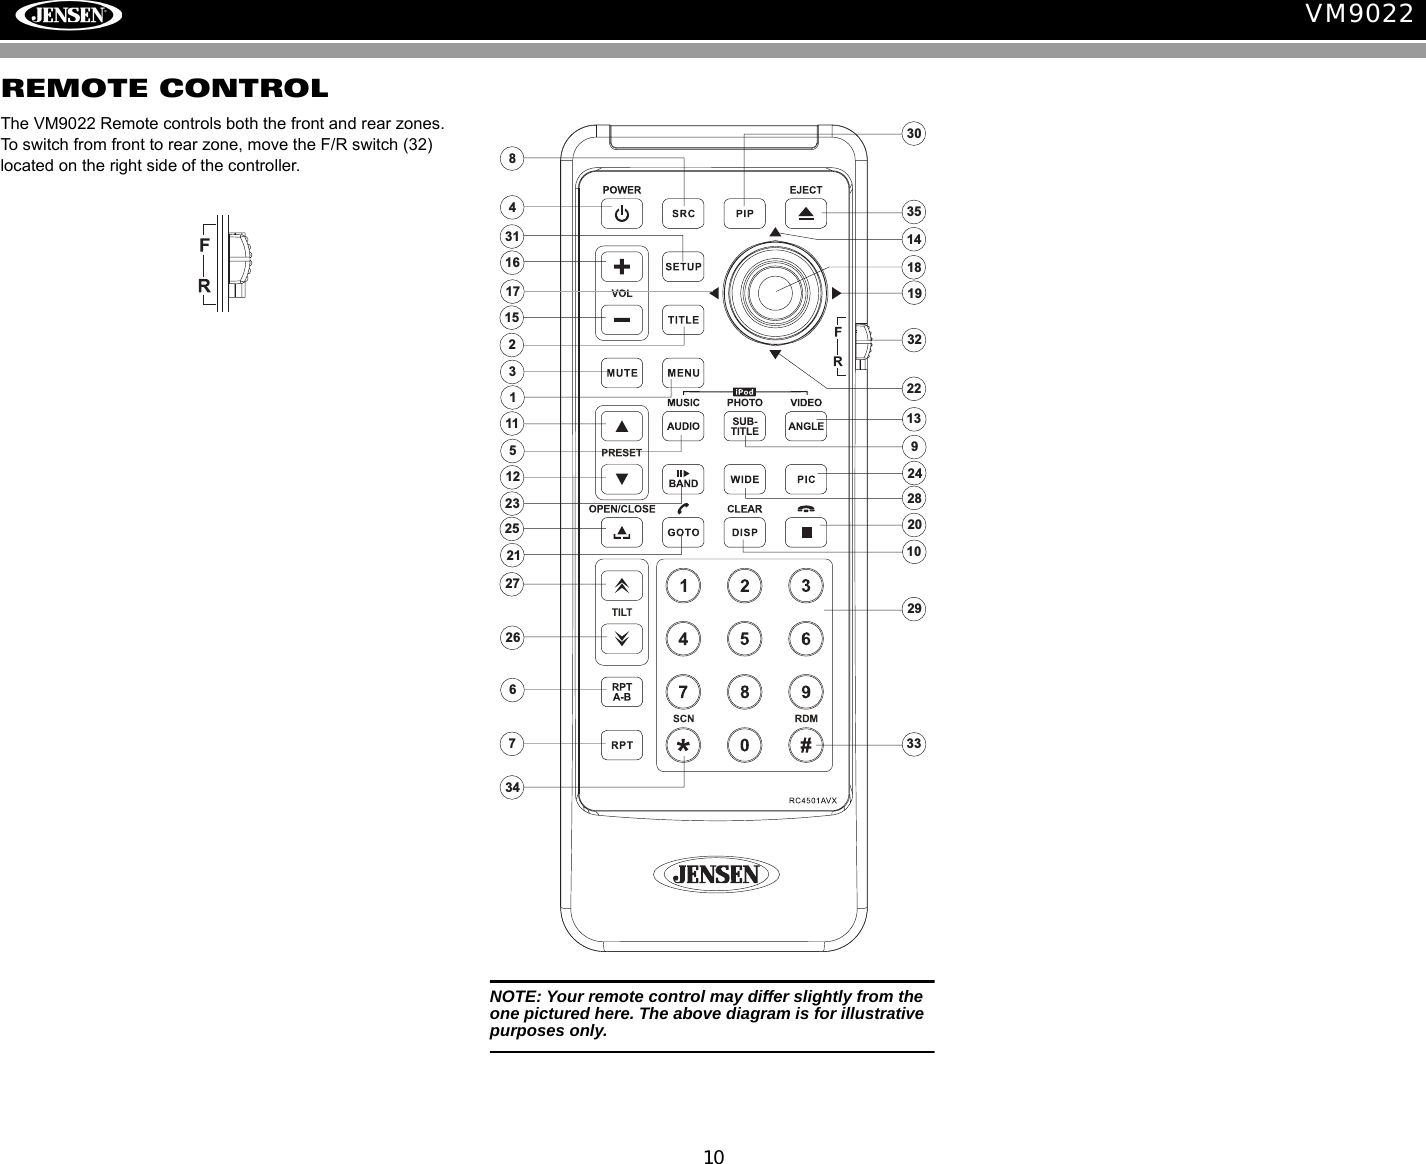
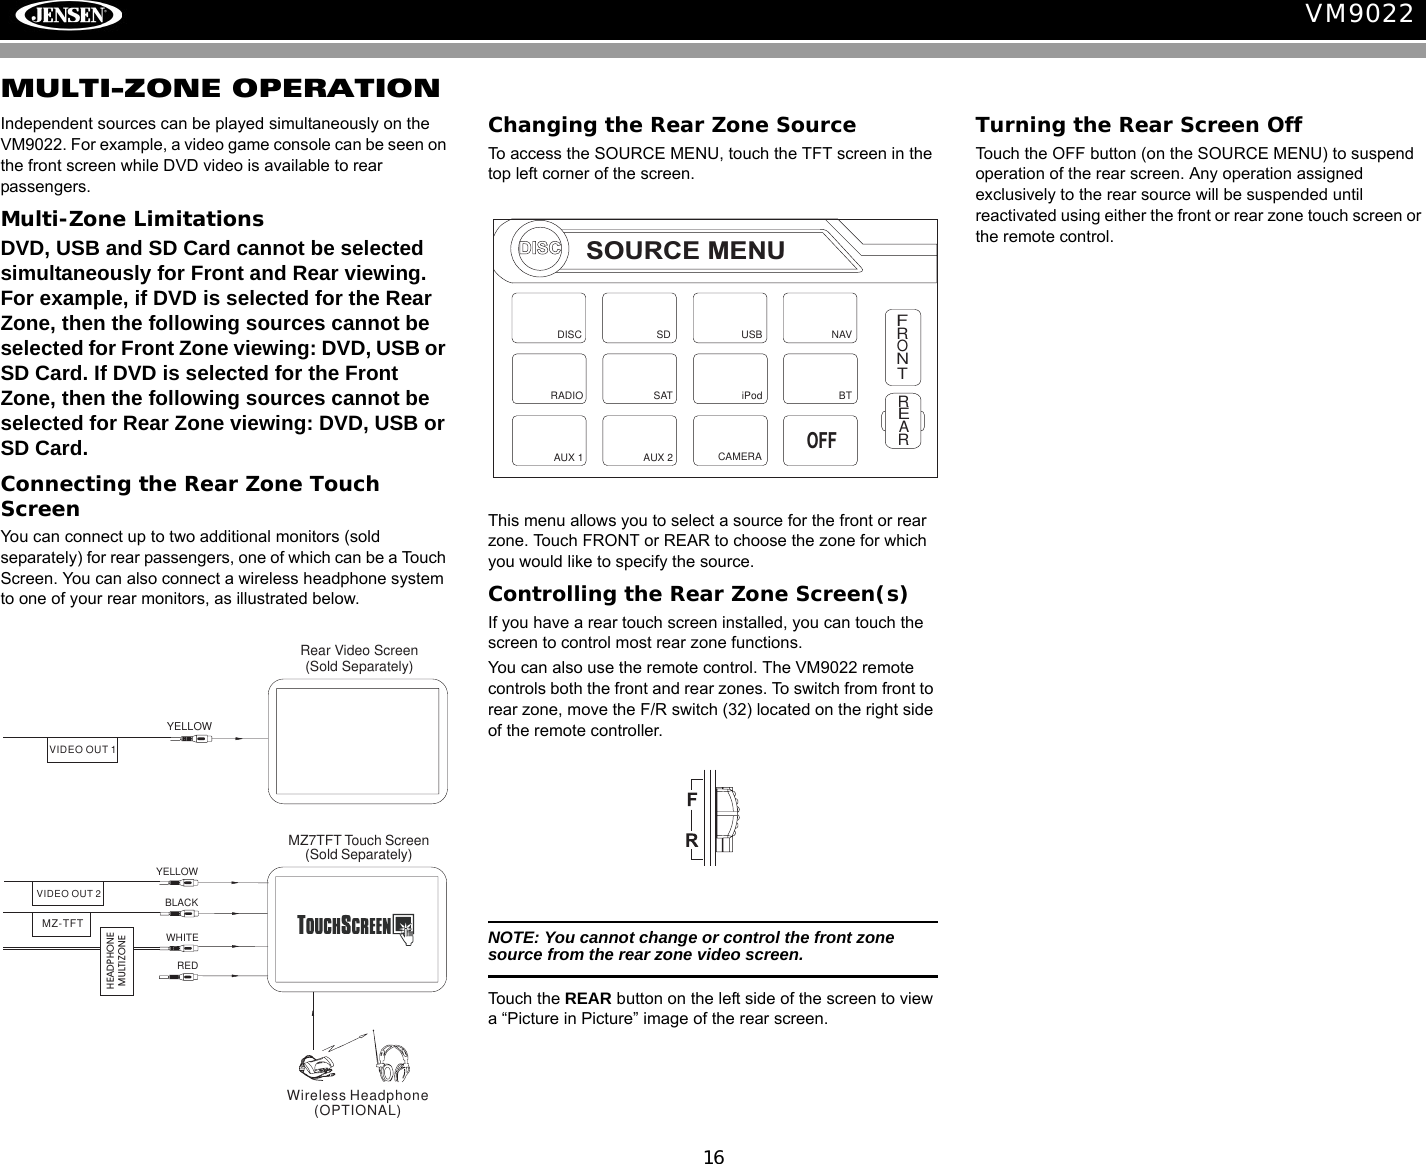
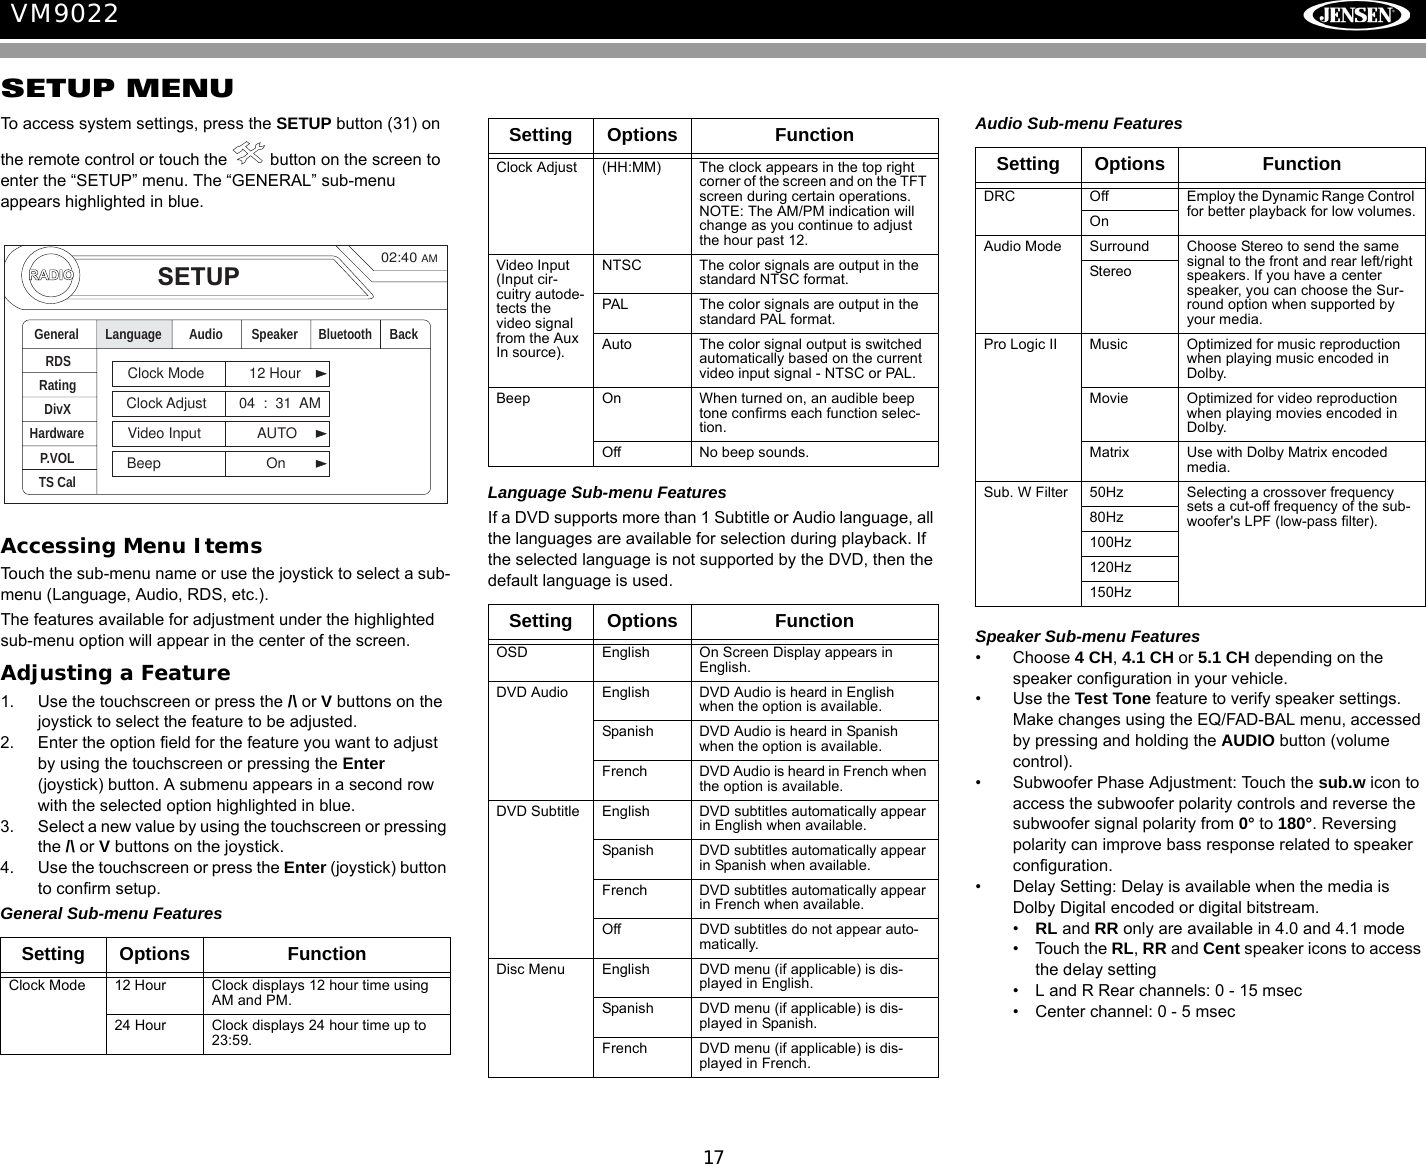
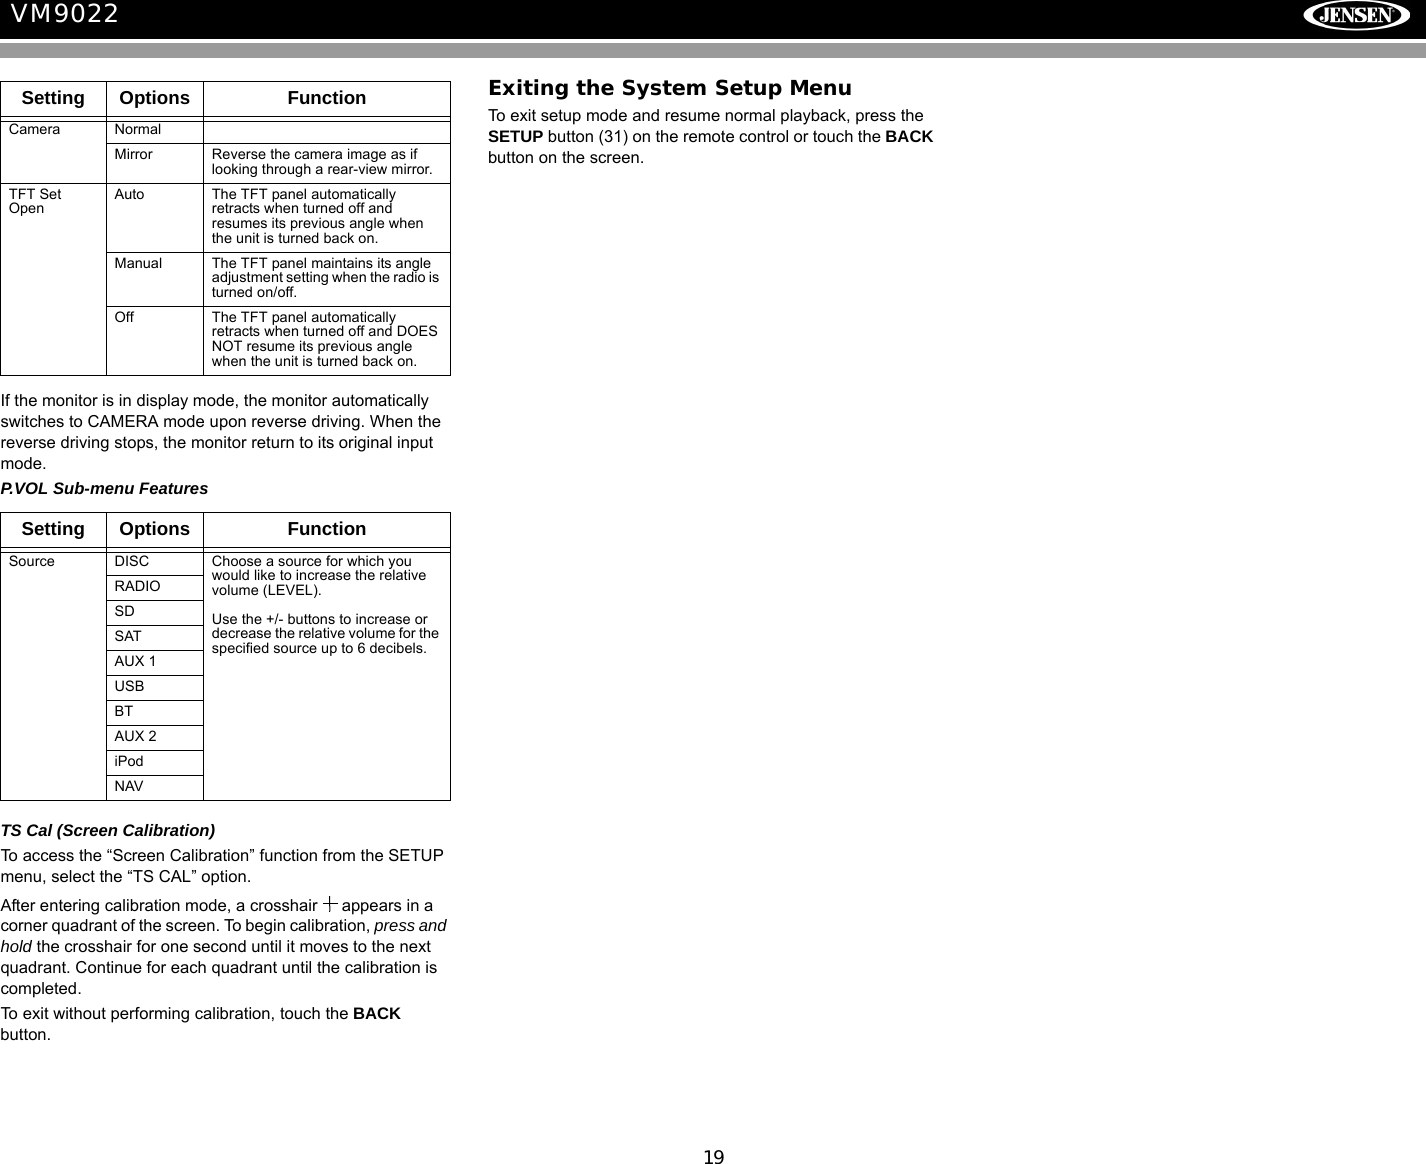
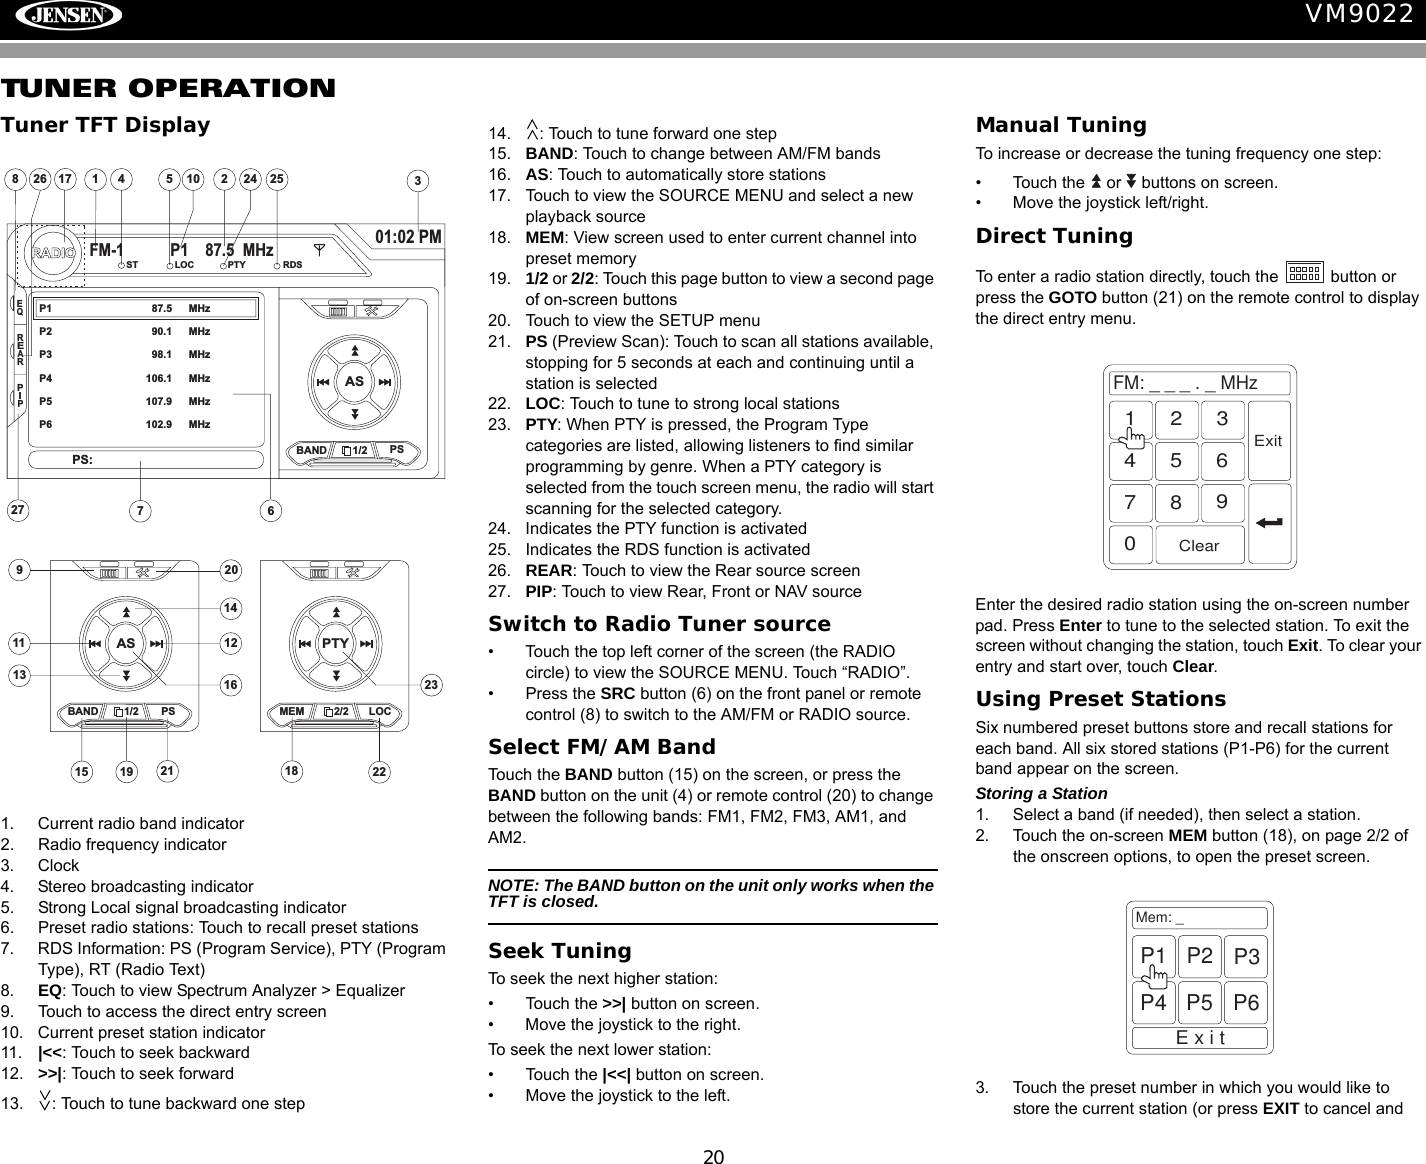
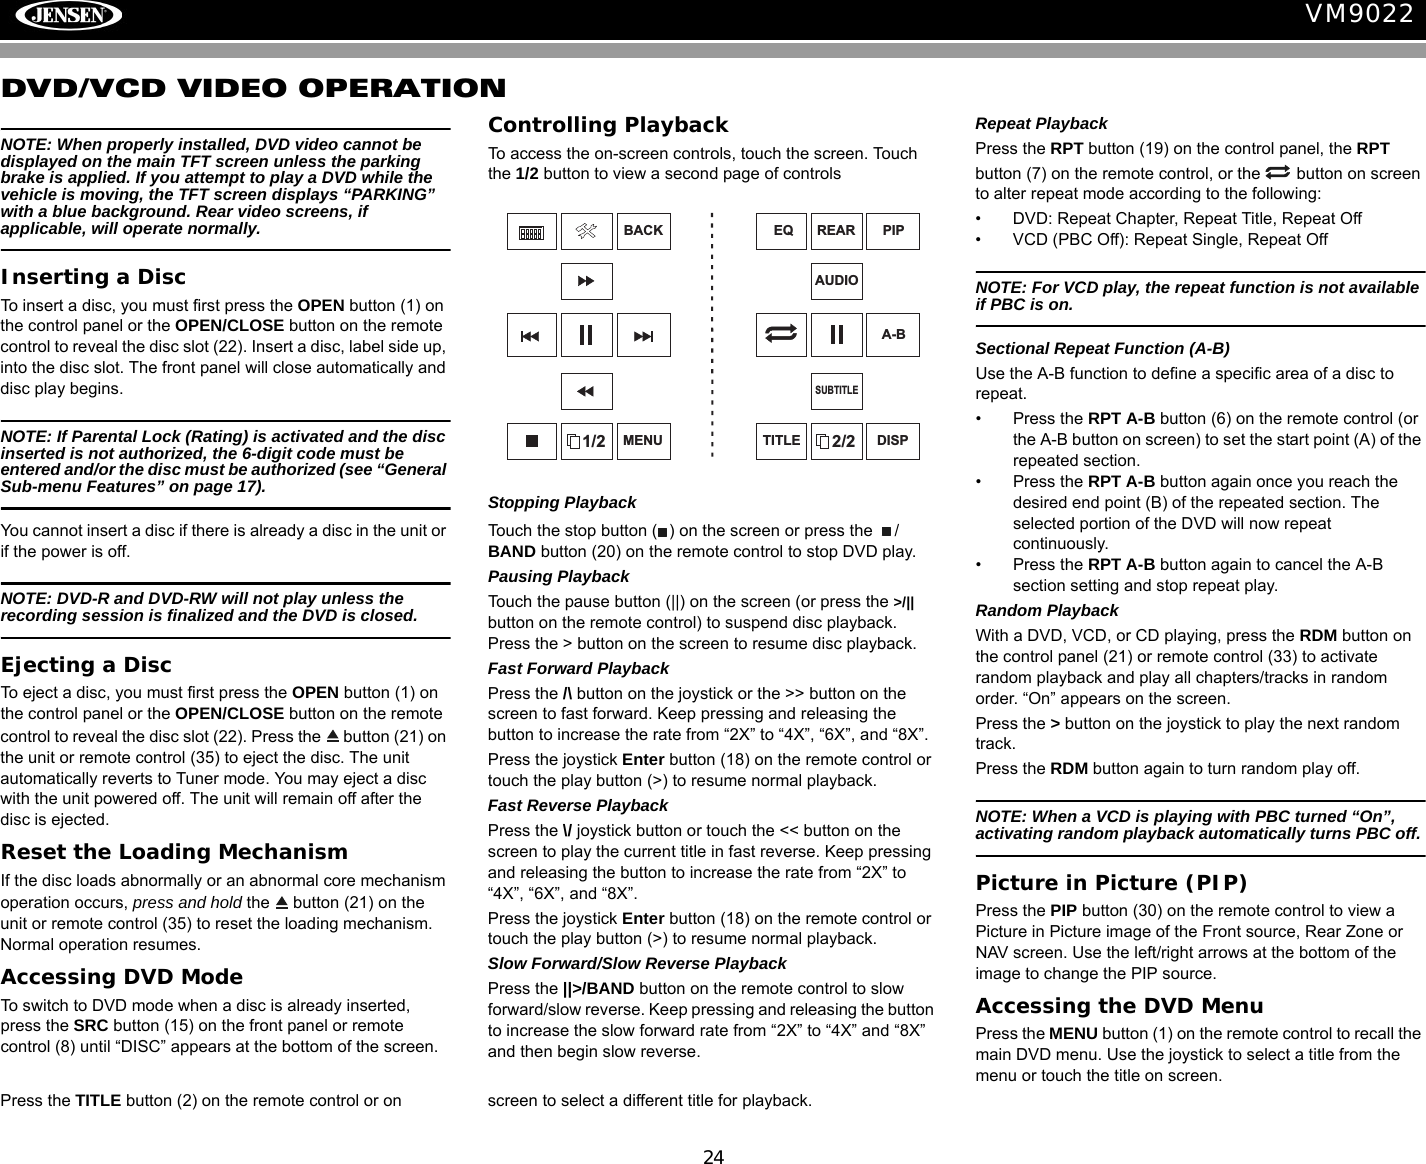
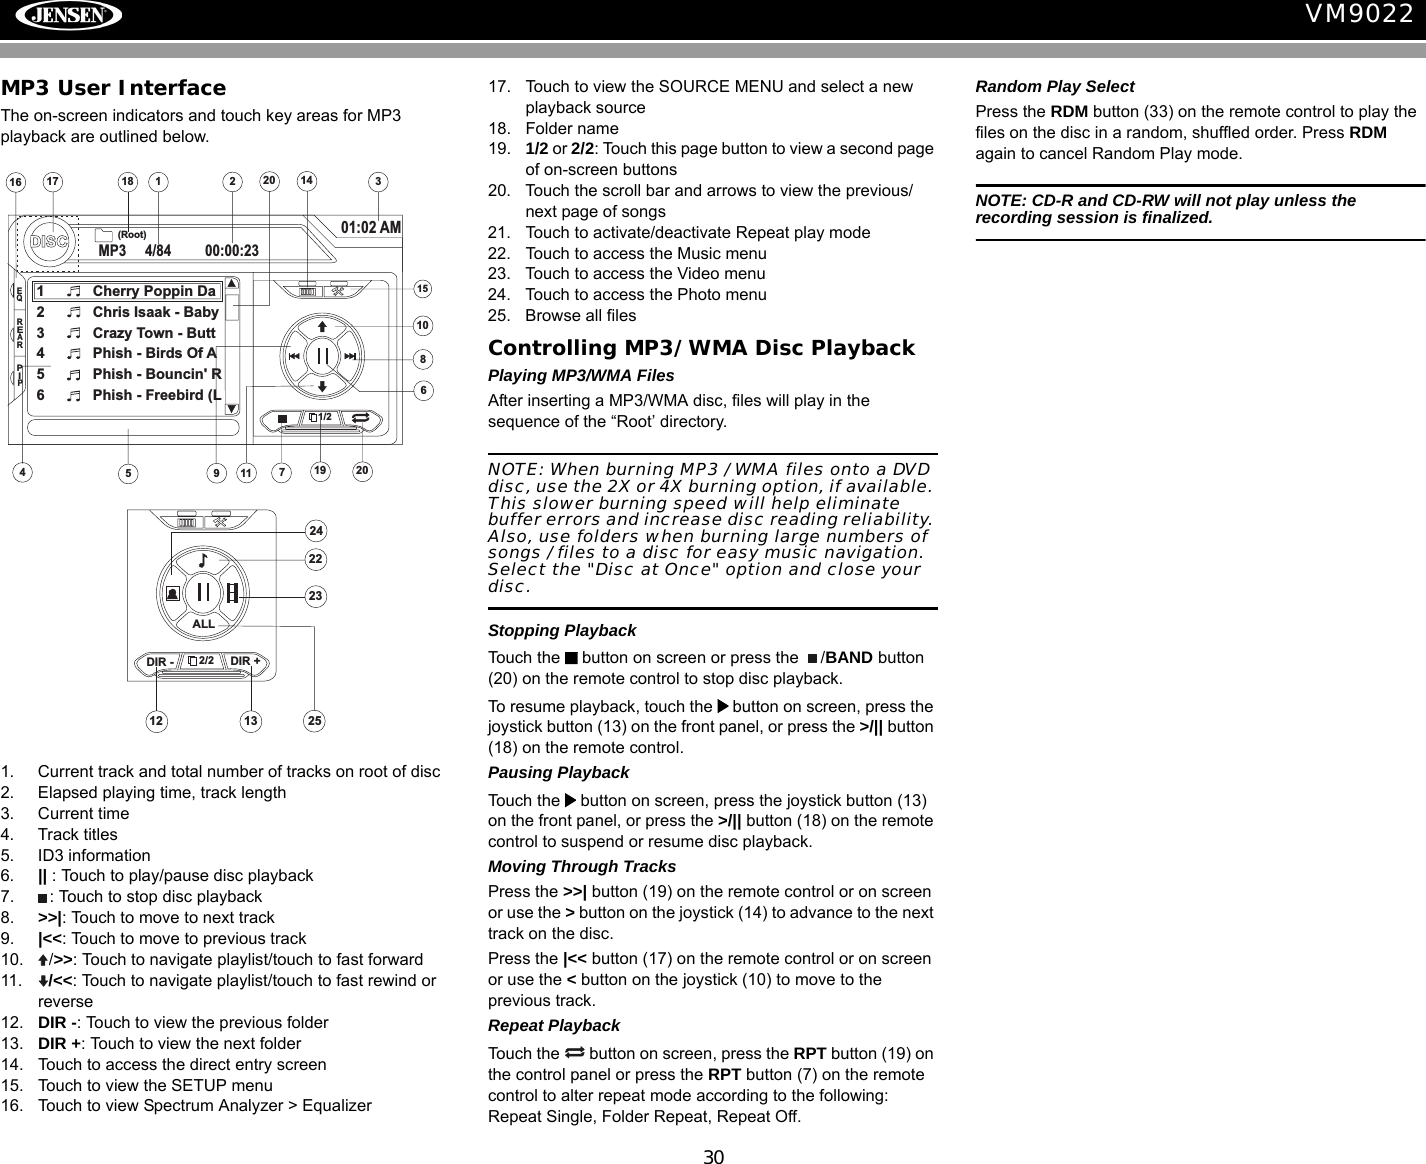
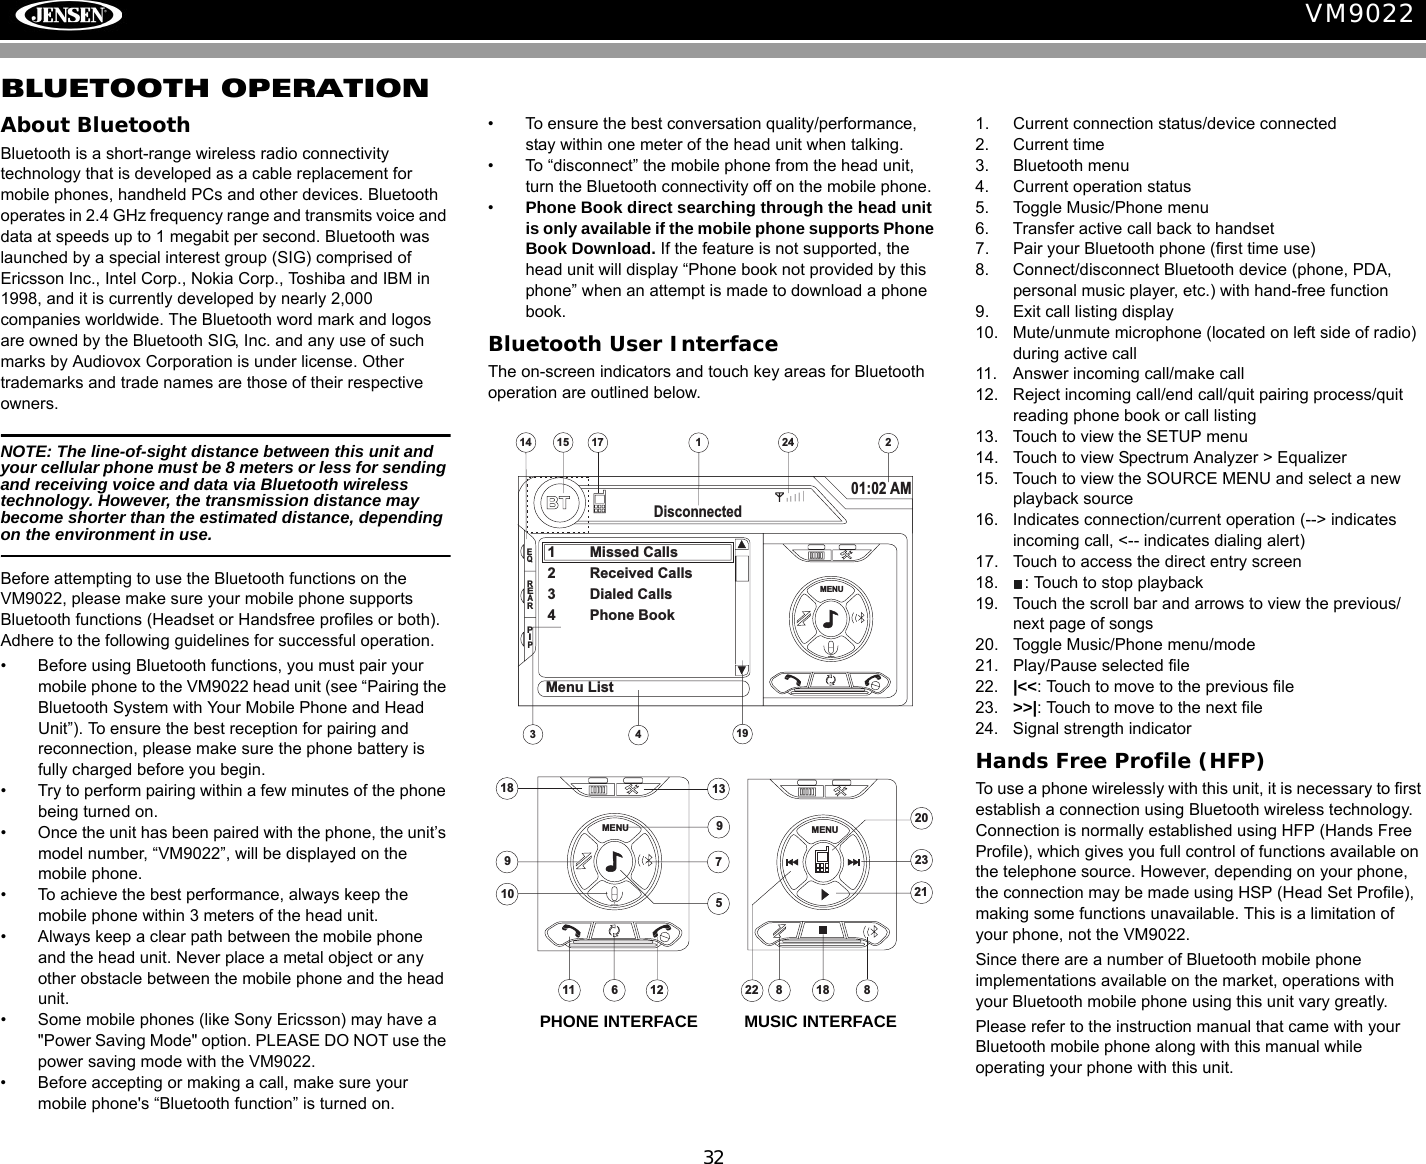
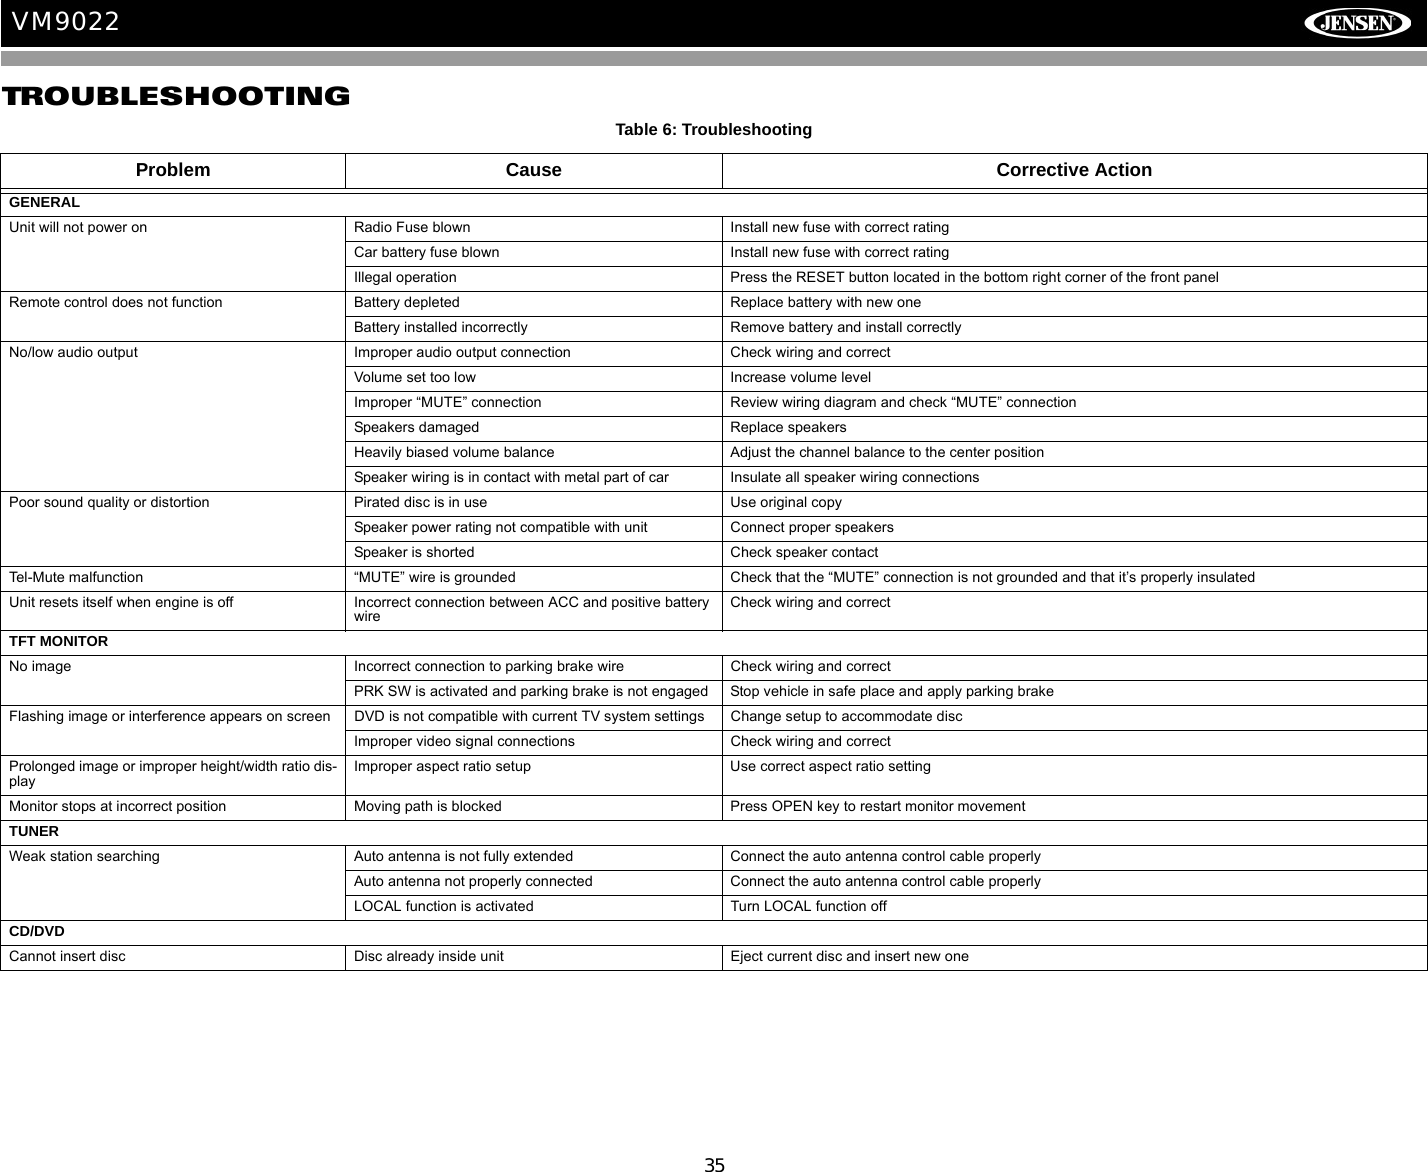
![15VM9022To adjust an audio feature:1. Use the left/right joystick buttons to highlight the audio feature to be adjusted.2. Press the joystick Enter button on the control panel (13) or remote control (18) to select the highlighted option.3. Use the joystick to adjust the selected feature to the desired setting.NOTE: The EQ mode will automatically change to “USER” when individual EQ bands are adjusted.Proper setting of the Fader and Balance complement the effects of the cabin equalizer. The Audio menu will automatically exit after a few seconds of inactivity. To exit quickly, touch the top left corner of the screen or press and hold the AUDIO button (5).Alternate Display OptionsA menu located on the left side of the screen provides immediate access to the Equalizer, Rear Zone screen view and PIP (Picture in Picture) features.•EQ: Touch to view Spectrum Analyzer > Equalizer.•REAR: Touch to view the Rear Zone screen. Control options appear below the PIP image, depending on the source.•PIP: Touch to view the Rear Zone, current Front Zone, or NAV screen. Use the left/right arrows below the PIP image to change the PIP source.System ResetTo correct a system halt or other illegal operation, use the tip of a pen to press the reset button (12) located on the front bottom-right corner of the unit. After a system reset, the unit restores all factory default settings.NOTE: If the unit is reset while a DVD is playing, the DVD resumes play once the reset is complete.Table 3: Audio AdjustmentsFunction Adjustment OptionsEQ User In user mode, you can manually adjust each of the seven frequency bands.Acoustic Use the on-screen arrows to select a predefined equalization curve.UrbanRaveLatinDanceHip HopRockFAD-BAL Use this screen to adjust the output level for each speaker in your surround system from 0 to -24dB. You can also adjust the master volume from this screen.CAT– CH– CH+ CAT+BAND ASDISCAM/FM RADIOSATELLITEPIP: DISCDISCMP3 4/84 00:00:2301:02 AM1 Cherry Poppin Da2 Chris Isaak - Baby3 Crazy Town - Butt4 Phish - Birds Of A5 Phish - Bouncin' R6 Phish - Freebird (L(Root)1/2EQREARPIP[RESET] Button](https://usermanual.wiki/HUIZHOU-FORYOU-GENERAL-ELECTRONICS/FGEDV6310/User-Guide-888581-Page-20.png)