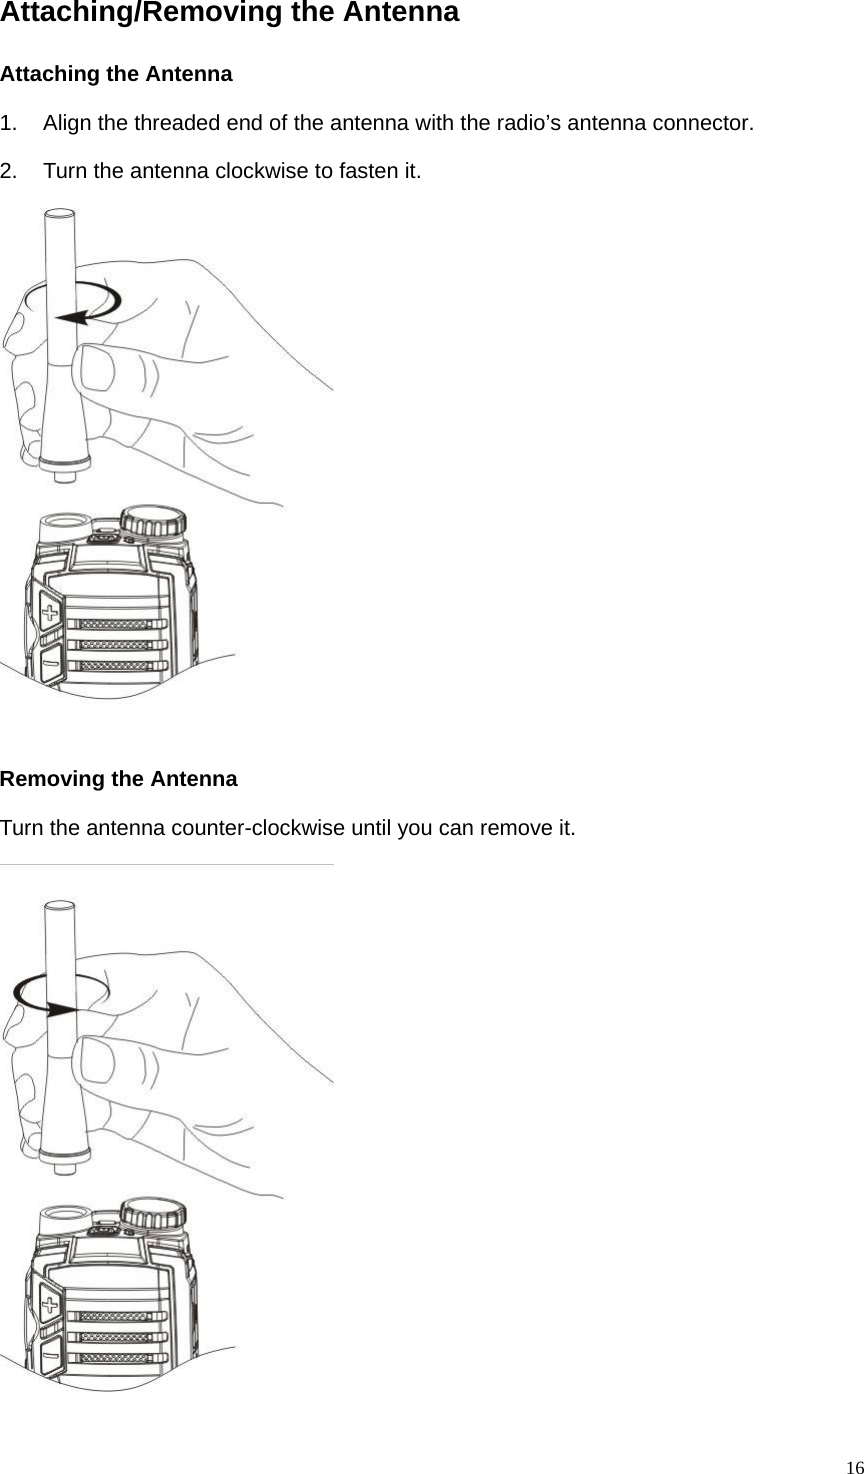
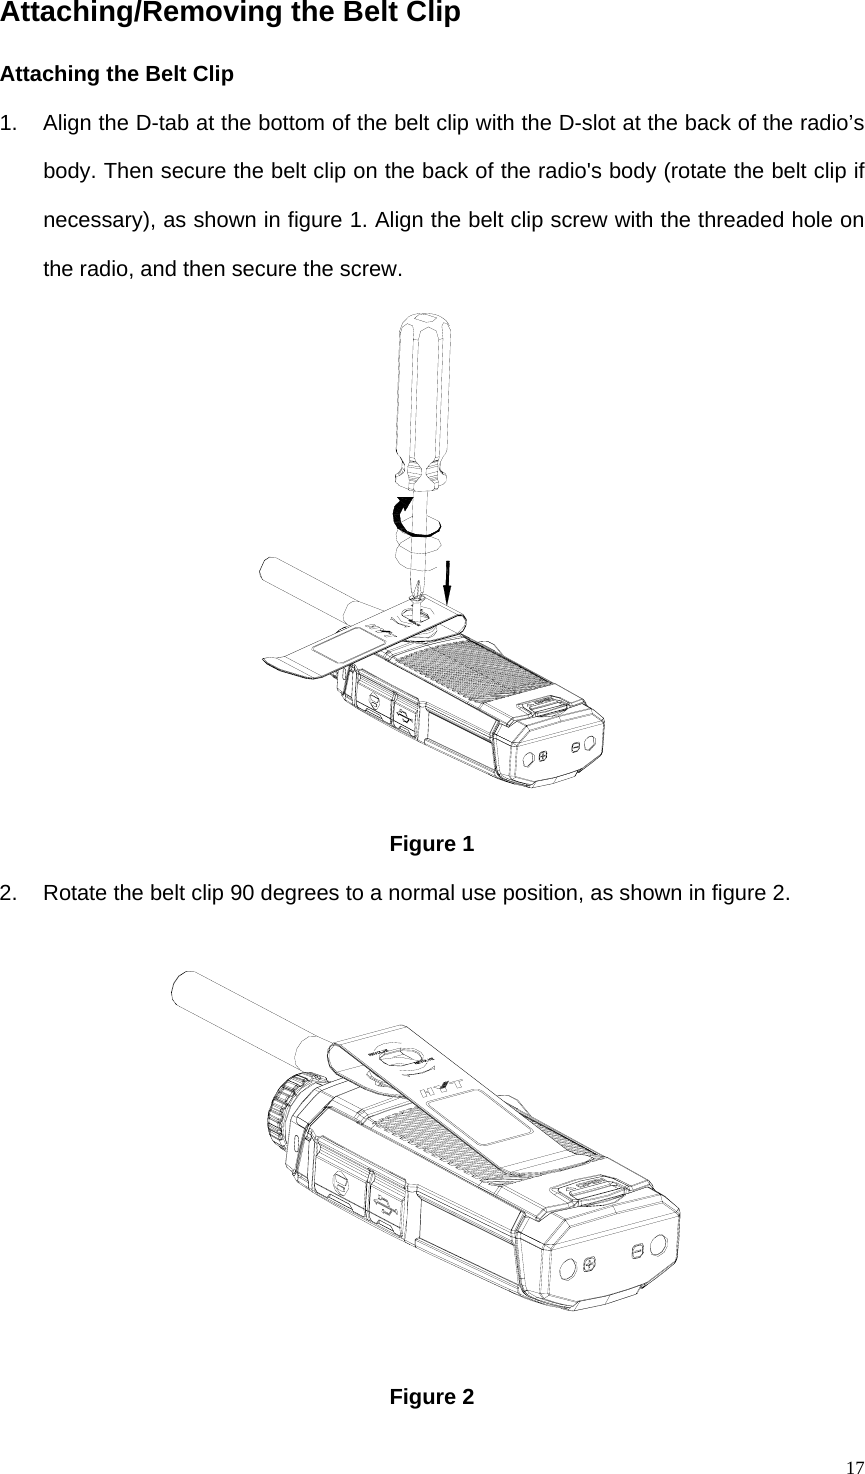
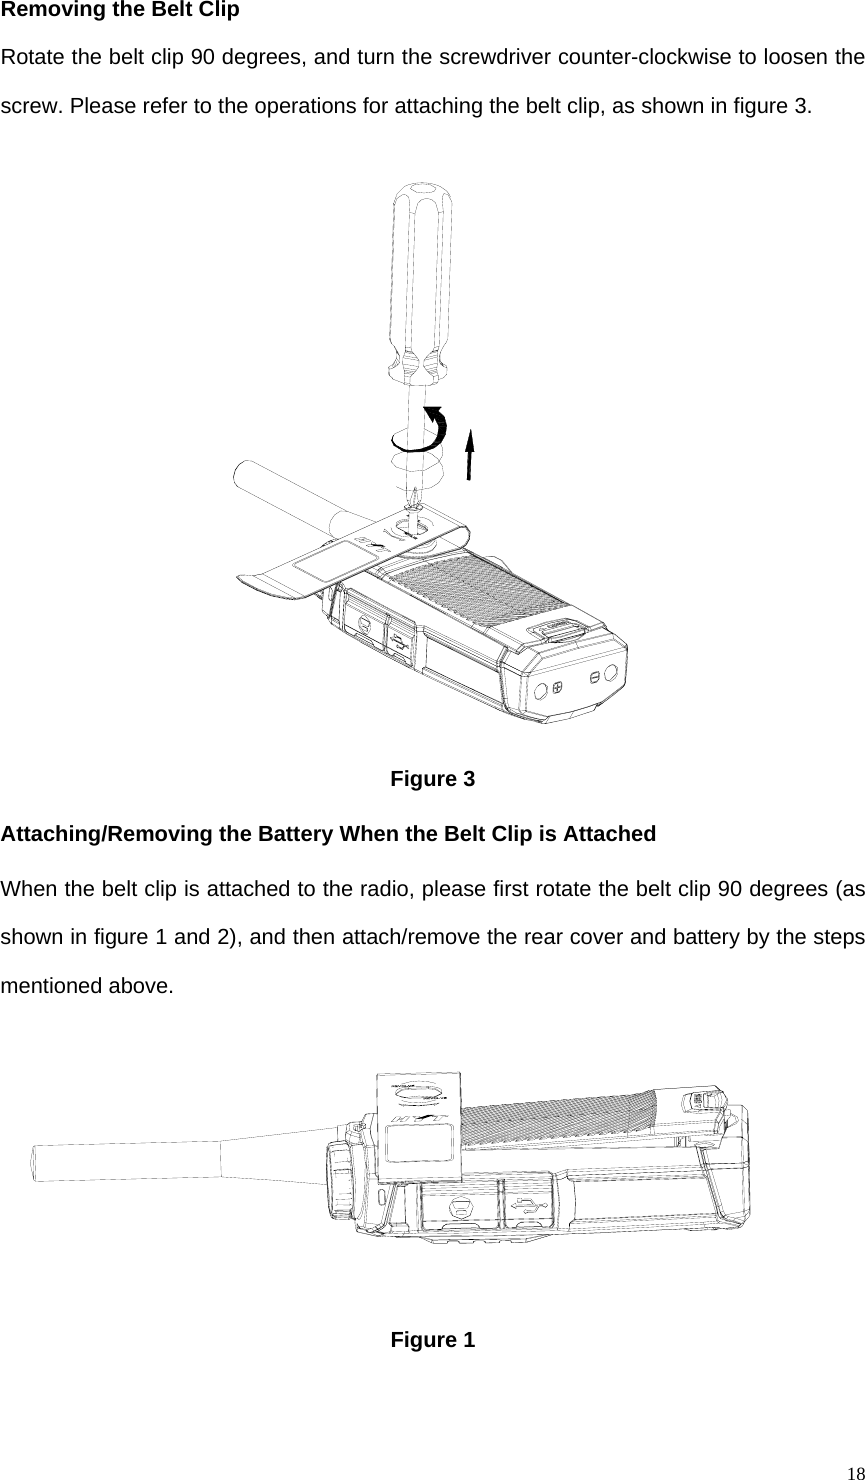
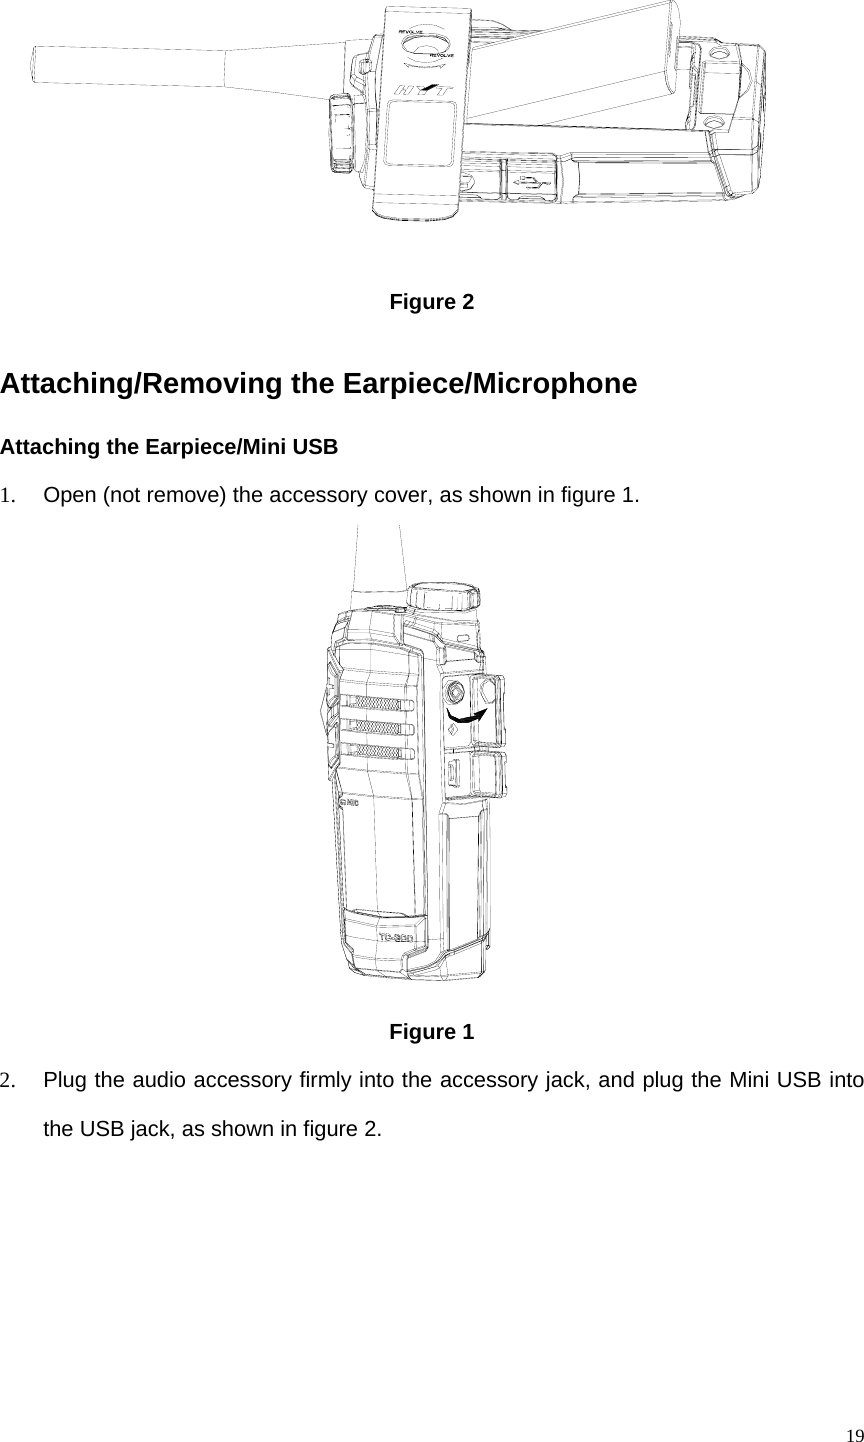
HYT Science and Technology Co TC-300U2 TWO-WAY RADIO User Manual USERS MANUAL
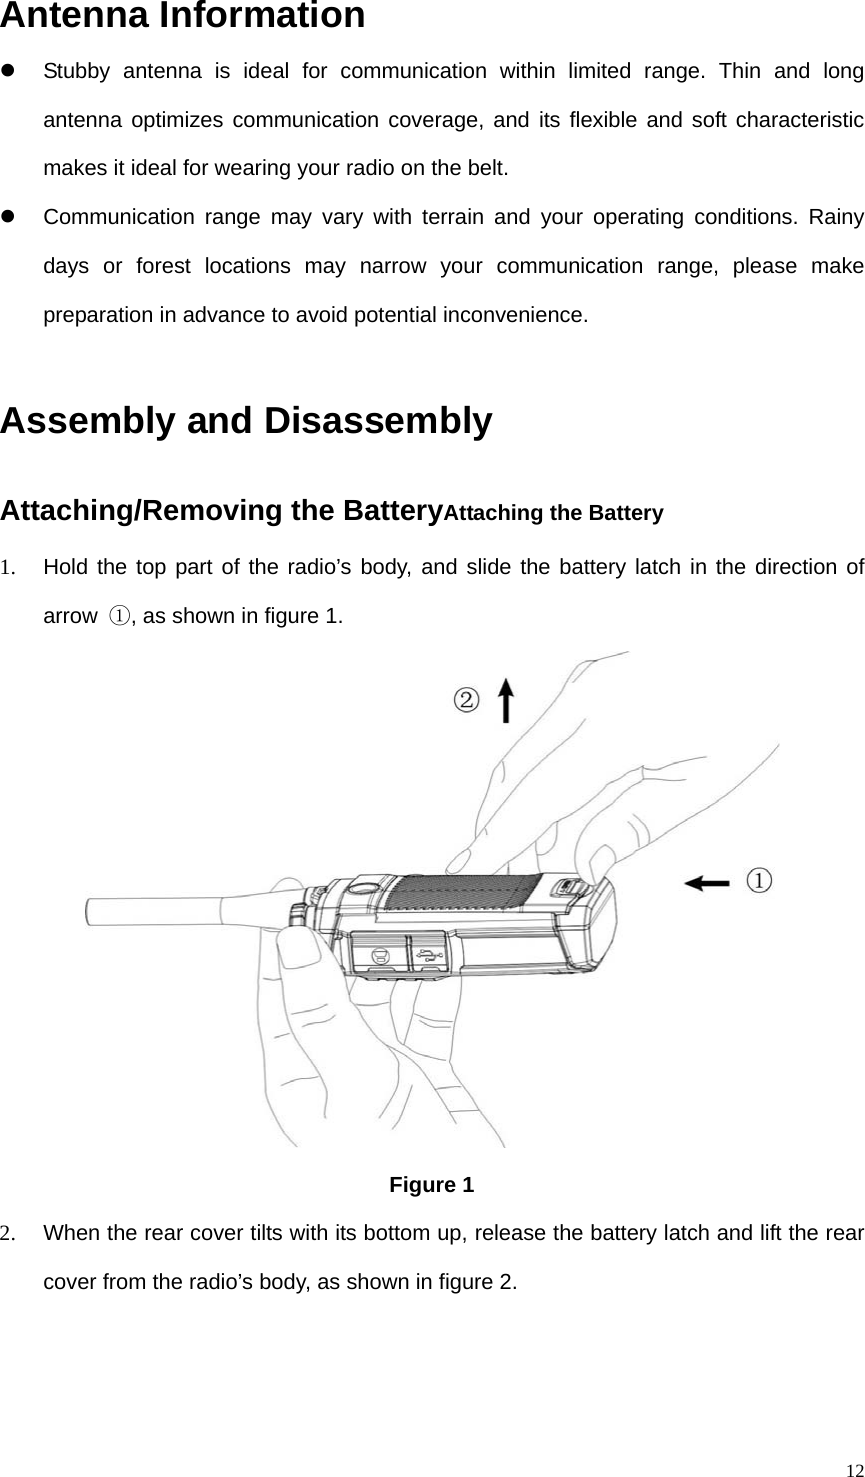
Shenzhen HYT Science &Technology; Co Ltd TWO-WAY RADIO USERS MANUAL
UserManual.wiki
>
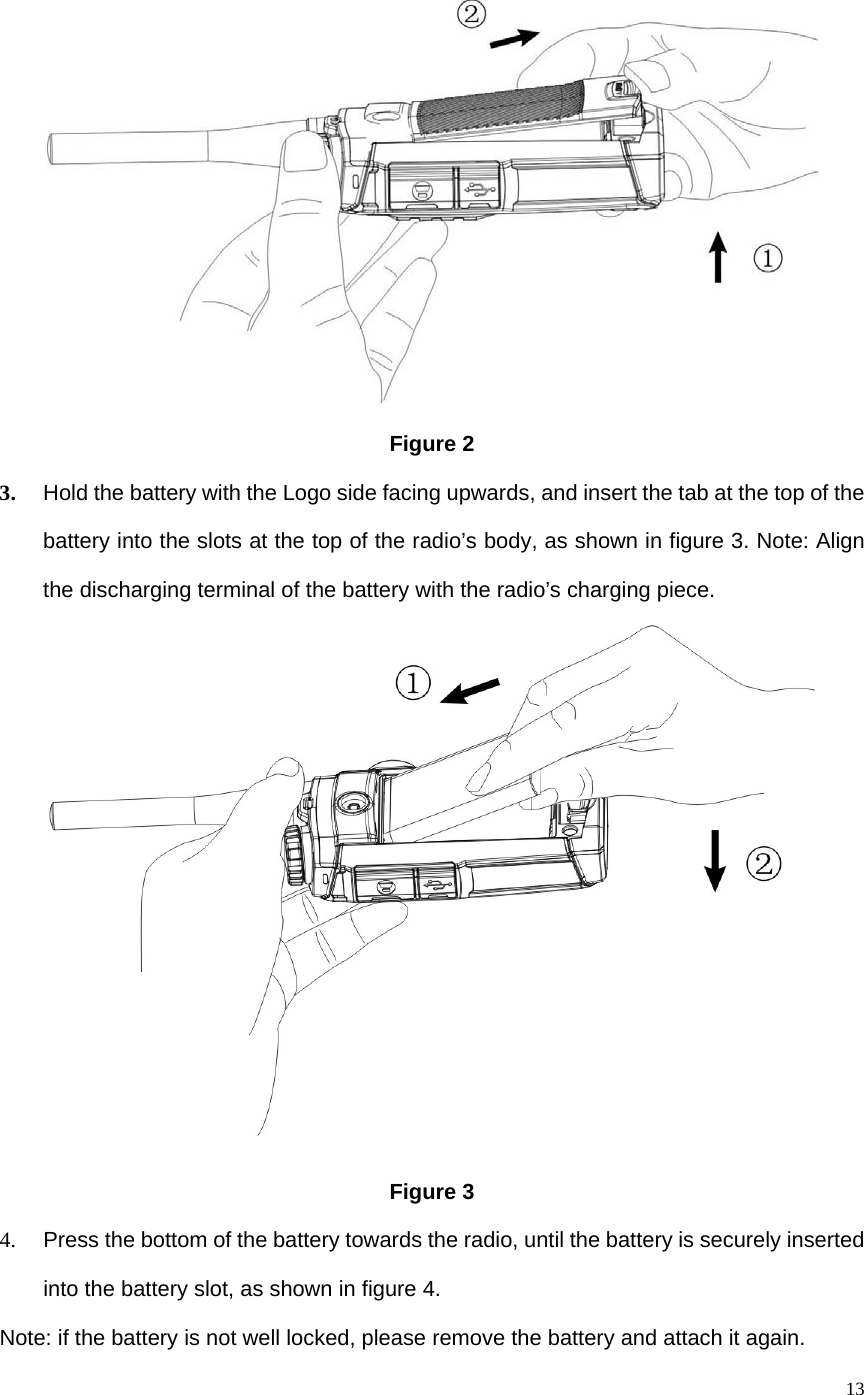
HYT Science and Technology Co
>
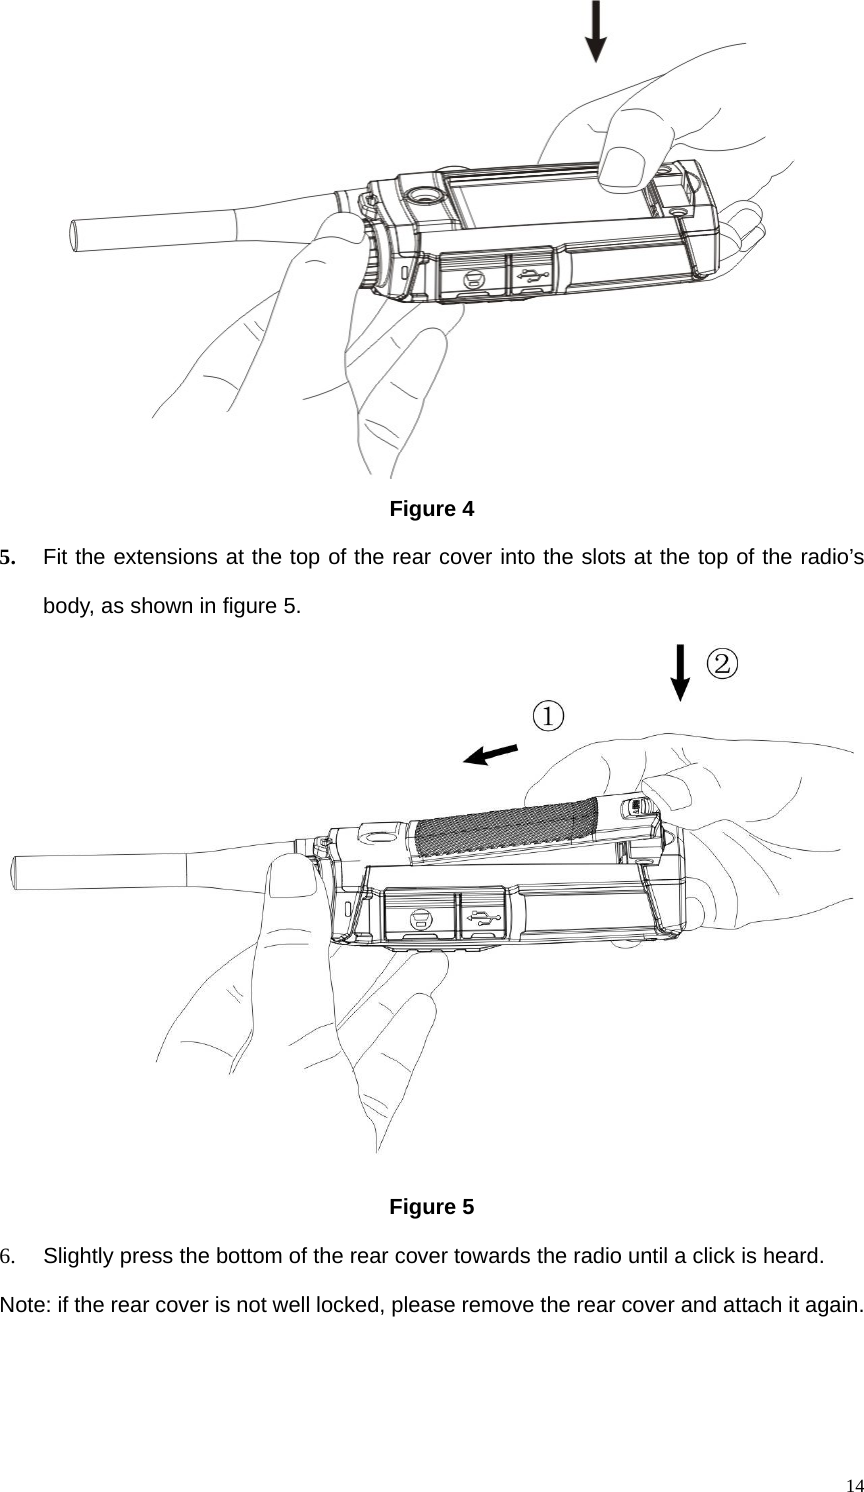
TC 300U2 User Manual
USERS MANUAL
Navigation menu
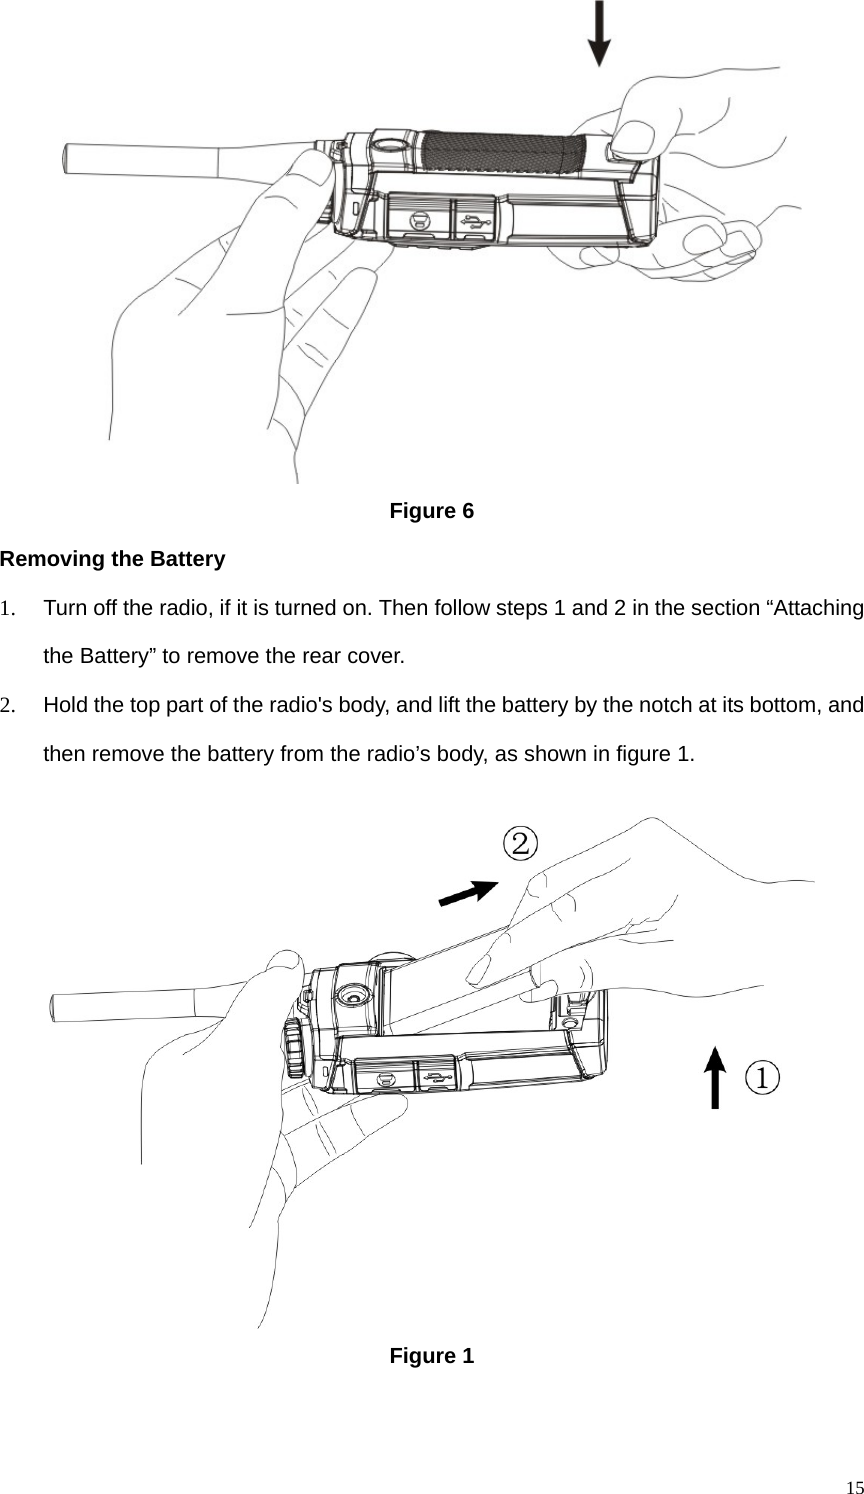
Upload a User Manual
Namespaces
Wiki Guide
HTML
PDF
Info
Views
User Manual
Discussion / Help
Navigation

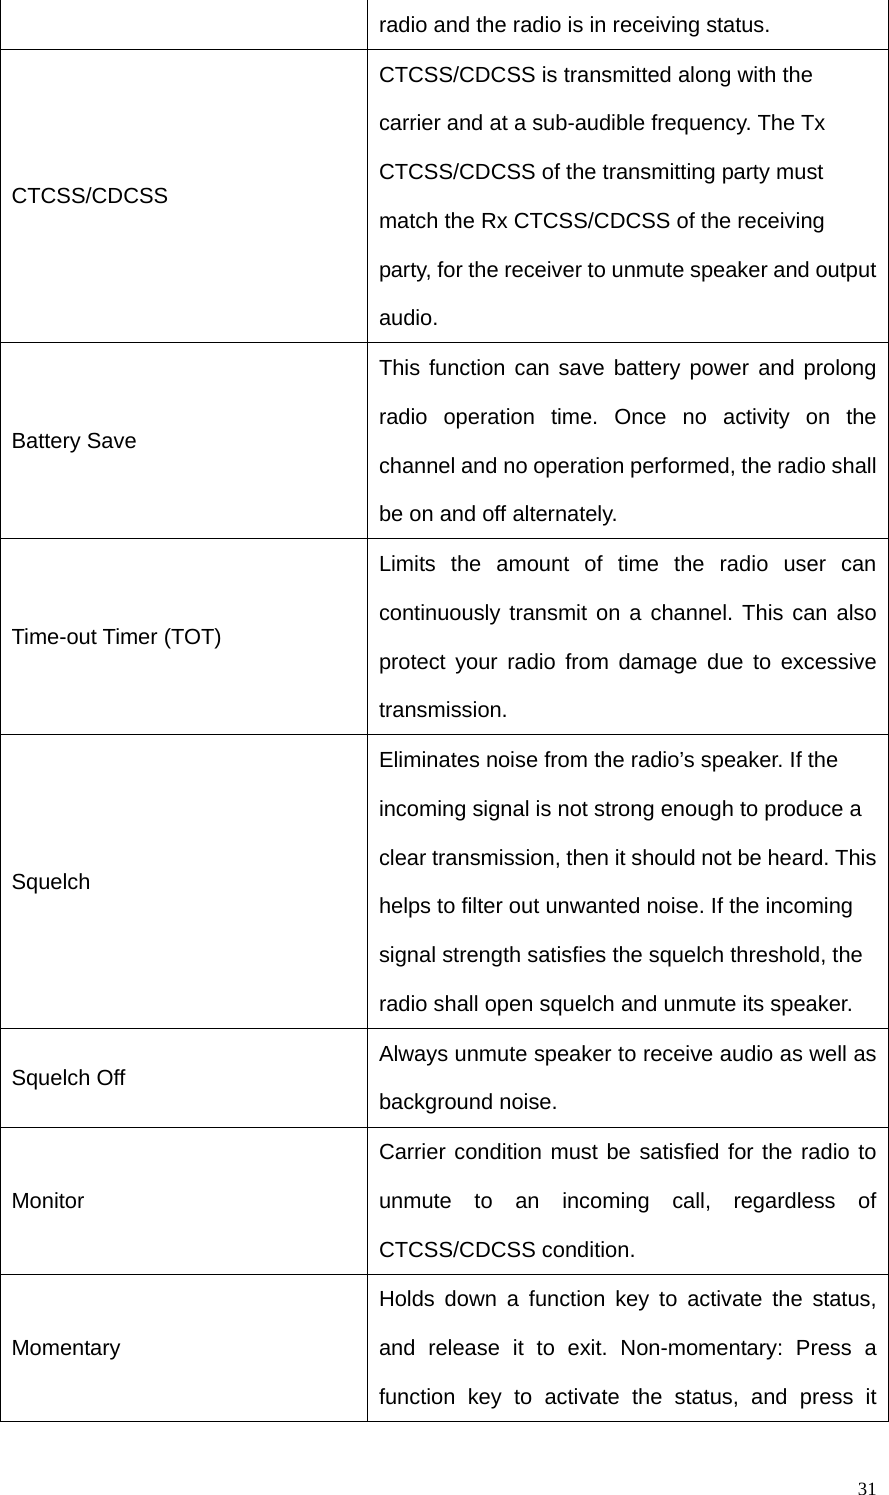
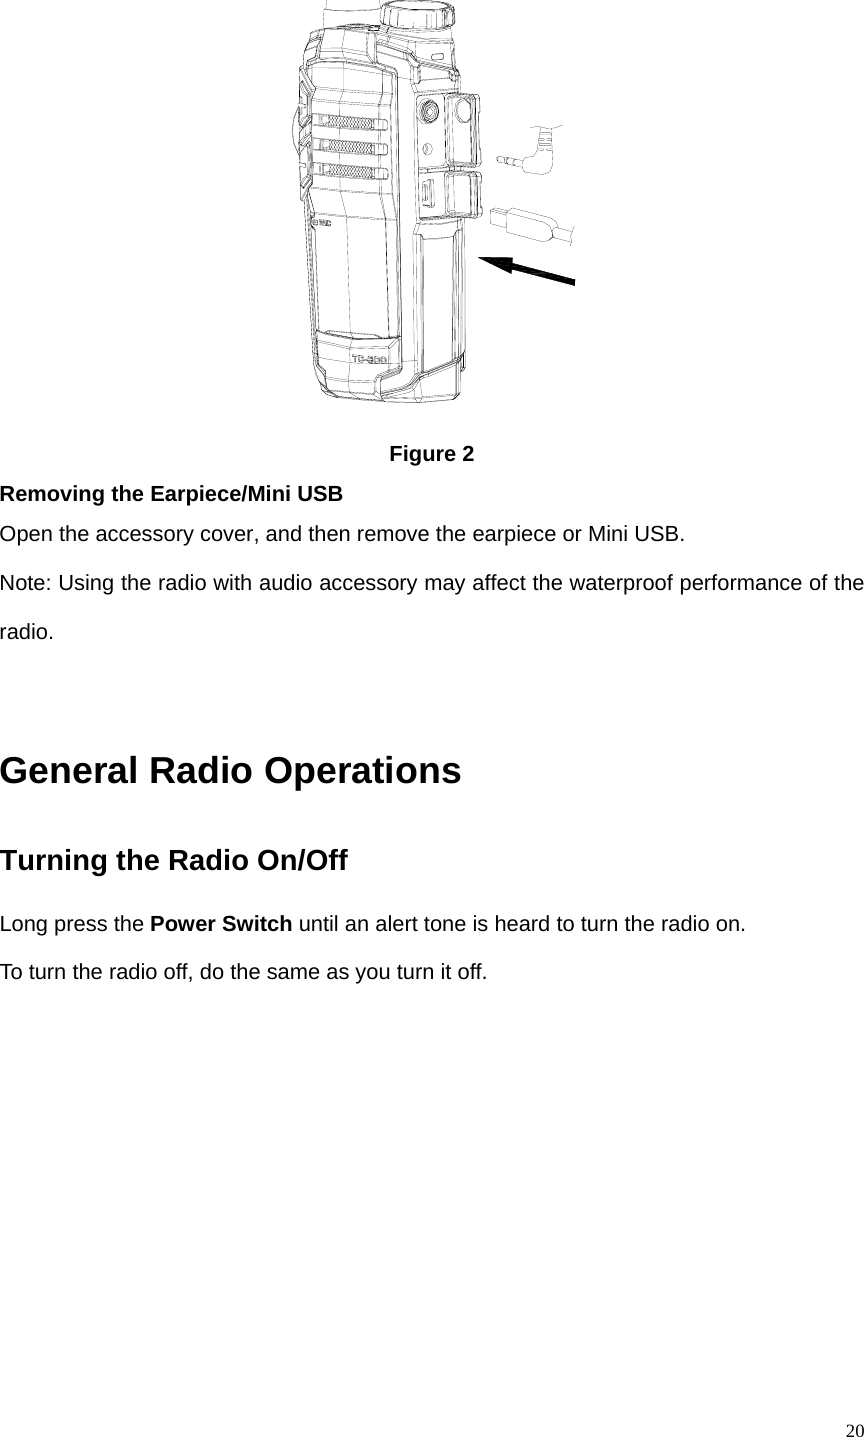
![5Radio Overview (1) PTT (Push-to-Talk) Key (2) SK (Side Key) (3) Speaker (4) Volume Adjust Keys [+]/[-] (5) Microphone (6) Nameplate (7) Charging Terminal (8) Antenna (9) Power Switch (10) LED Indicator (11) Channel Selector Knob (12) Charge Indicator(13) Accessory Jack Cover (14) Accessory Jack (15) Strap Hole (16) Screw (Belt Clip)(17) Back Cover (18) Battery Latch ﹡PTT (Push-to-Talk) Key Press and hold down the PTT key to transmit, and release it to receive. ﹡SK (Side Key)](https://usermanual.wiki/HYT-Science-and-Technology-Co/TC-300U2/User-Guide-969970-Page-7.png)
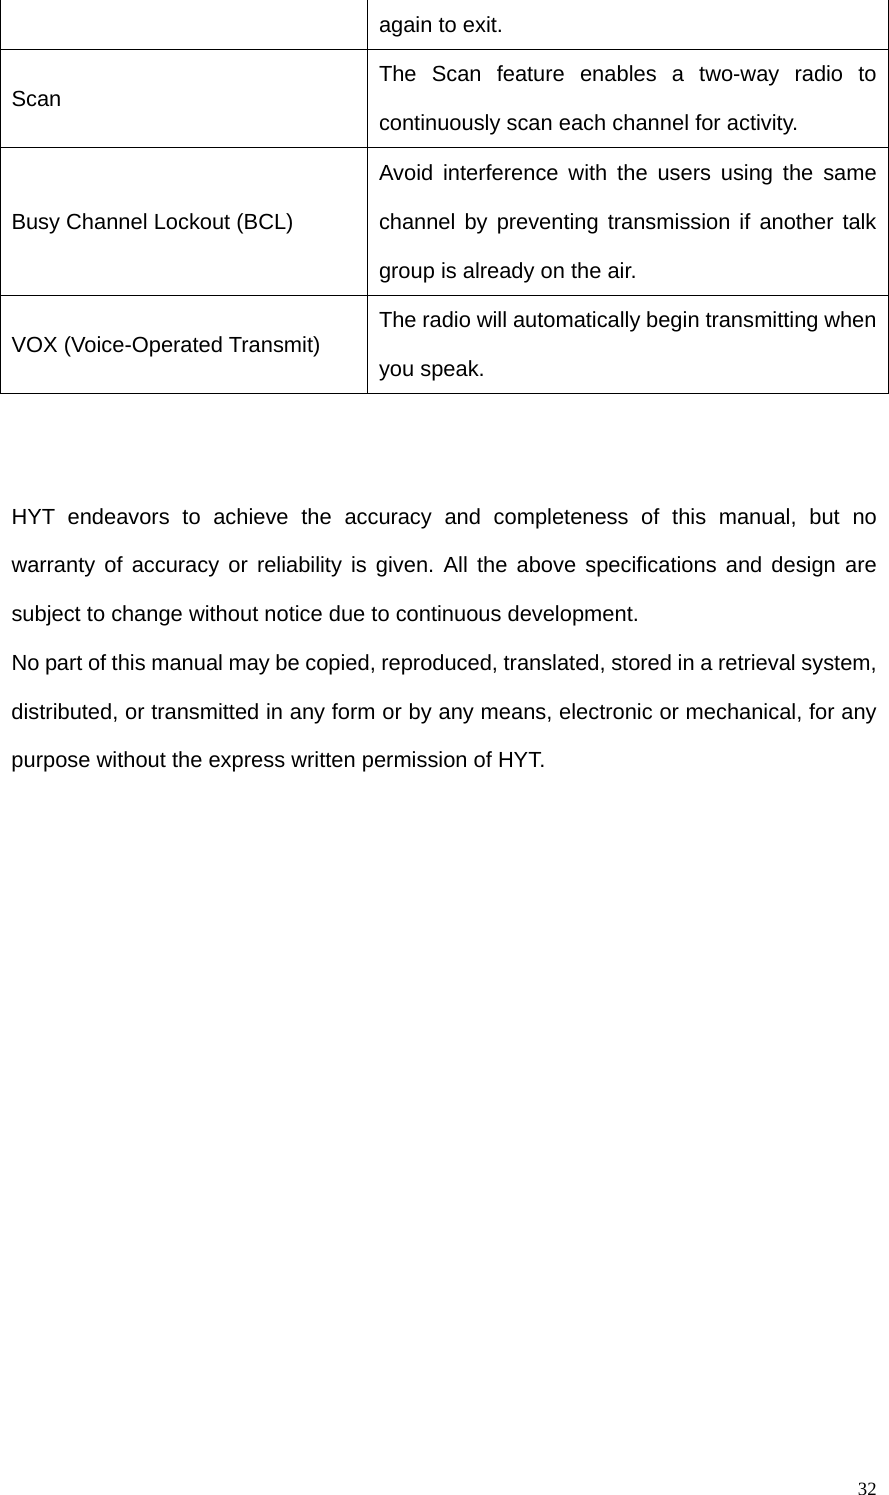
![7* Channel Selector Knob Rotate the knob to select from channels 1 to 16. * Power Switch Long press the Power Switch until an alert tone is heard to turn the radio on. To turn the radio off, do the same as you turn it off. * Volume Adjust Keys [+]/[-] You may adjust the volume level through keys [+]/[-]. * Battery Latch Used to secure or remove the battery. * Accessory Jack The upper jack is used to connect audio accessories, and the lower jack is used to connect accessories such as programming cable, cloning cable and power cord. Battery Information Initial Use New batteries are shipped uncharged from the factory. Charge a new battery for 5 hours before initial use. The maximum battery capacity and performance is achieved after three full charge/discharge cycles. If you notice the battery power runs low, please recharge the battery. Applicable Battery Packs To reduce the risk of injury, charge only the battery specified by the manufacturer. Other batteries may burst, causing bodily injury and damage. Caution: 1. To avoid risk of personal injury, do not dispose of batteries in a fire! 2. Dispose of batteries according to local regulations (e.g. recycling). Do not dispose as household waste. 3. Never attempt to disassemble the battery. Battery Tips 1. When charging your battery, keep it at a temperature among 5℃ - 40℃. Temperature](https://usermanual.wiki/HYT-Science-and-Technology-Co/TC-300U2/User-Guide-969970-Page-9.png)
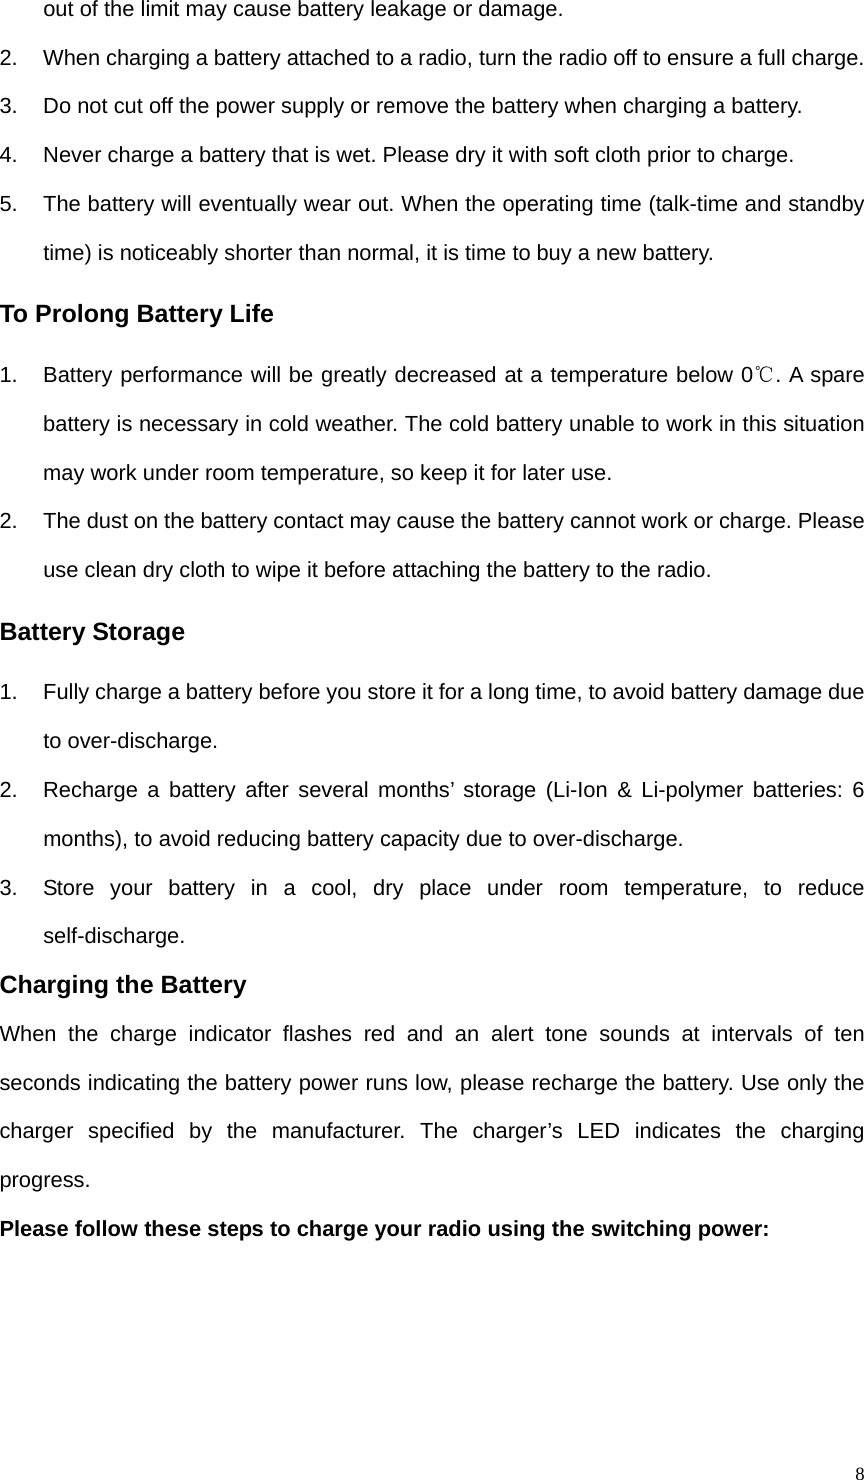
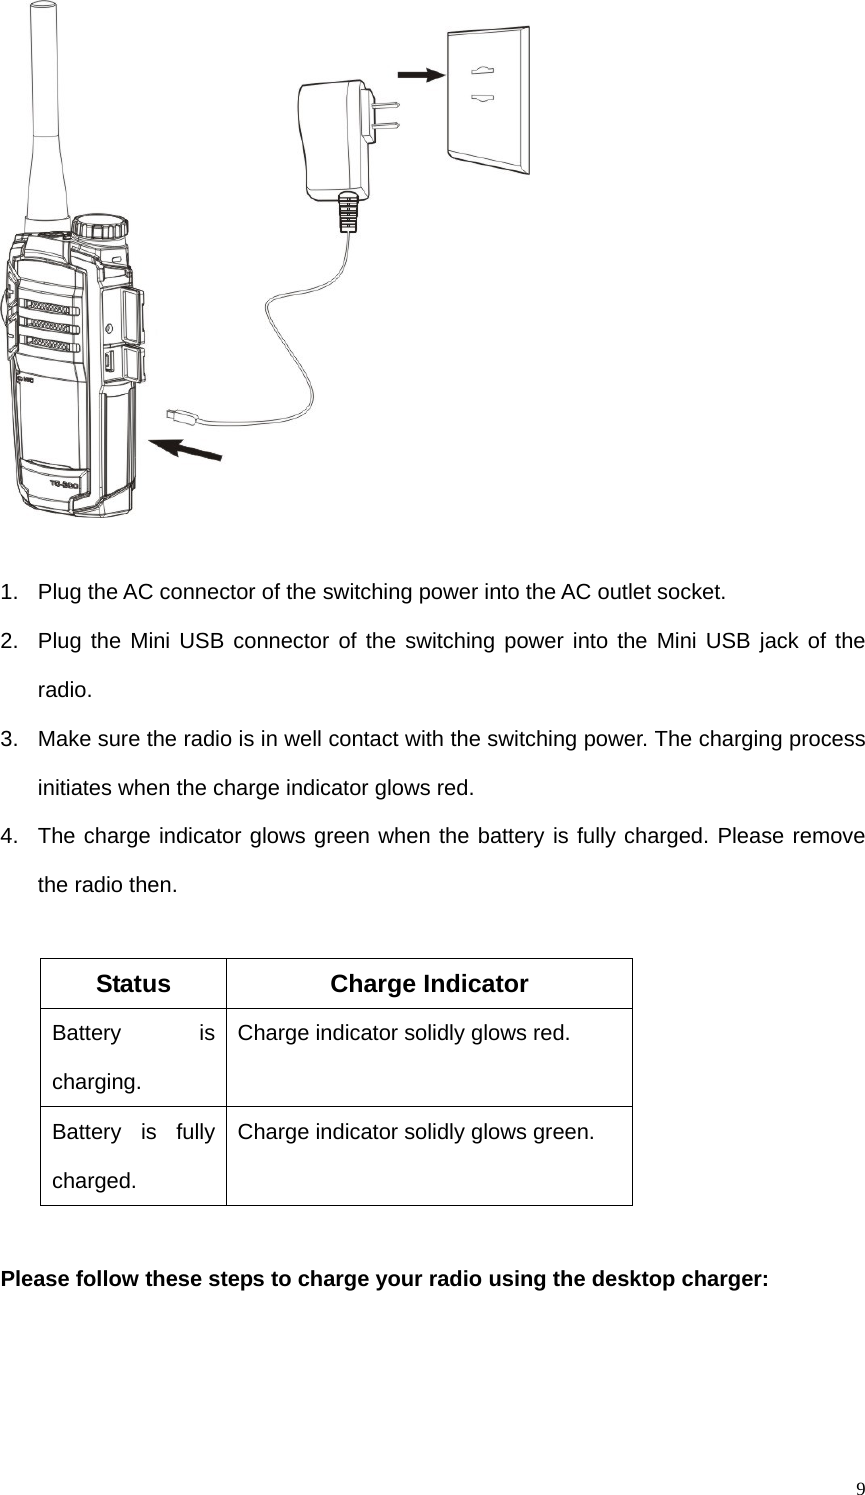
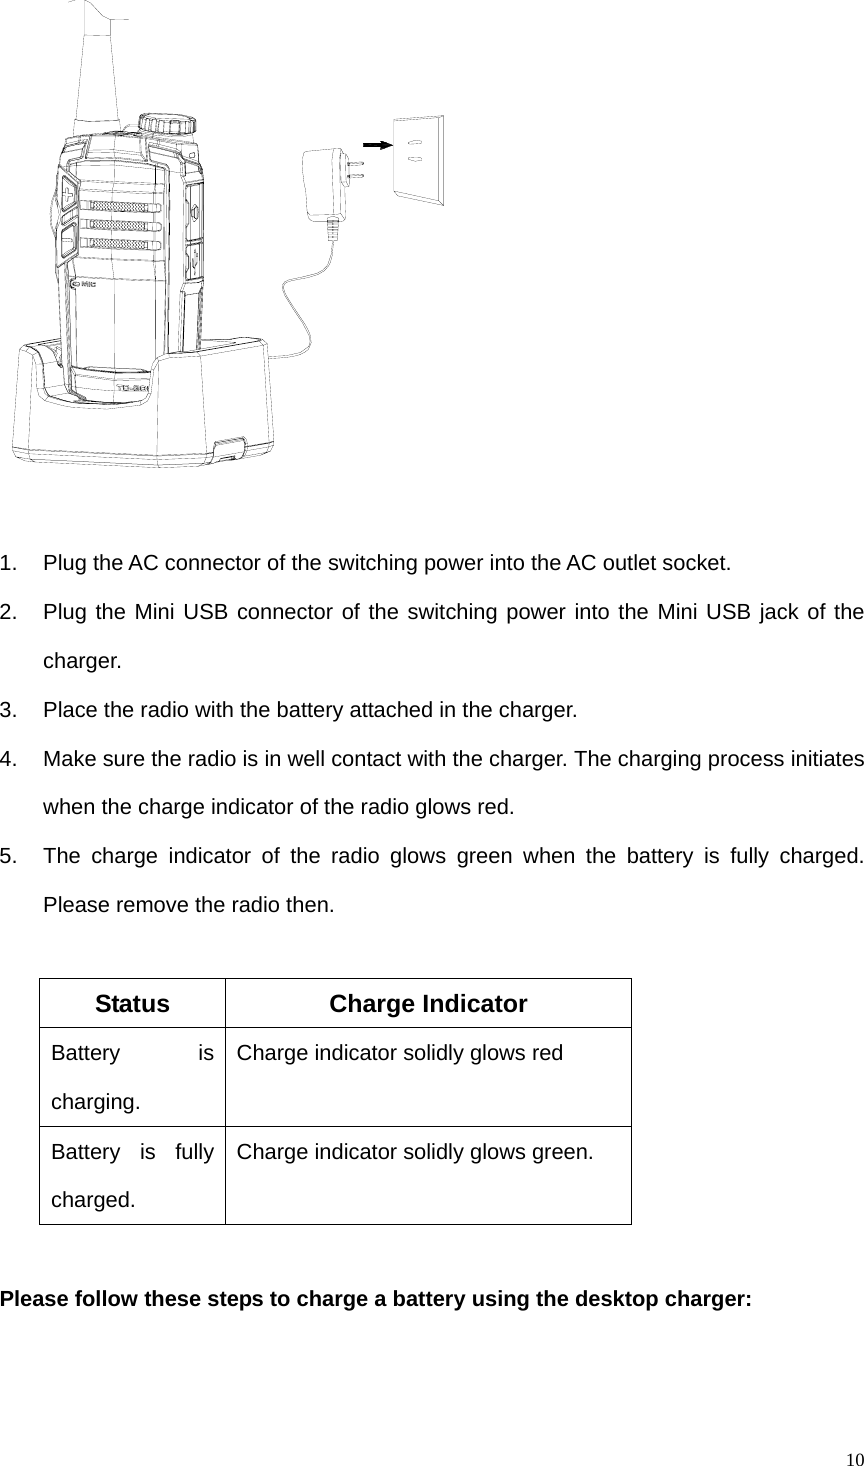
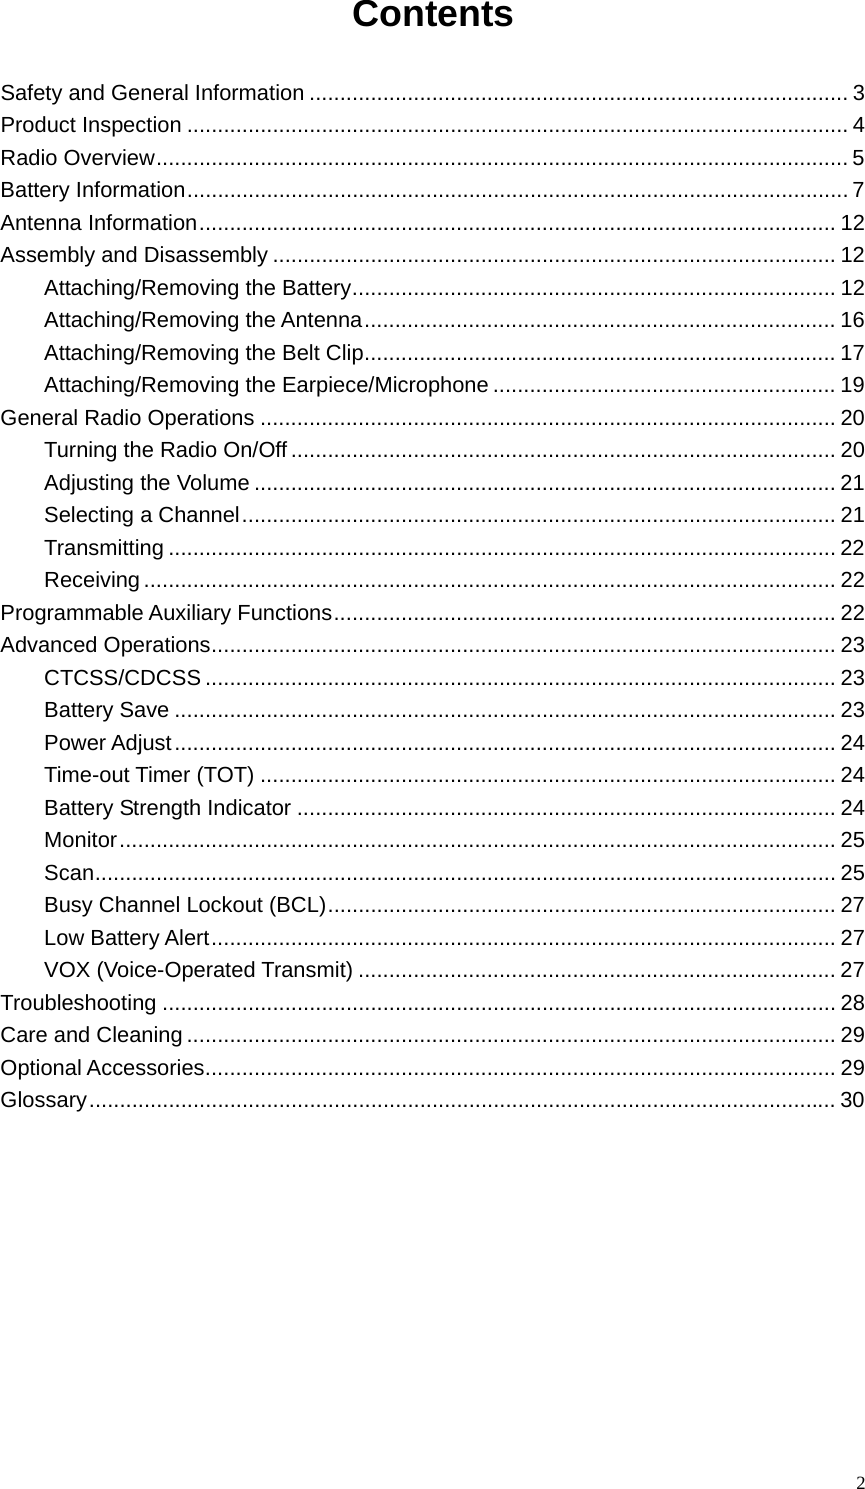
![21 Figure 1 Adjusting the Volume You may adjust the volume level through keys [+]/[-].Press the [+] key to increase the volume, or press the [-] key to decrease the volume. Figure 2 Selecting a Channel Turn the Channel Selector Knob to select a channel.](https://usermanual.wiki/HYT-Science-and-Technology-Co/TC-300U2/User-Guide-969970-Page-23.png)