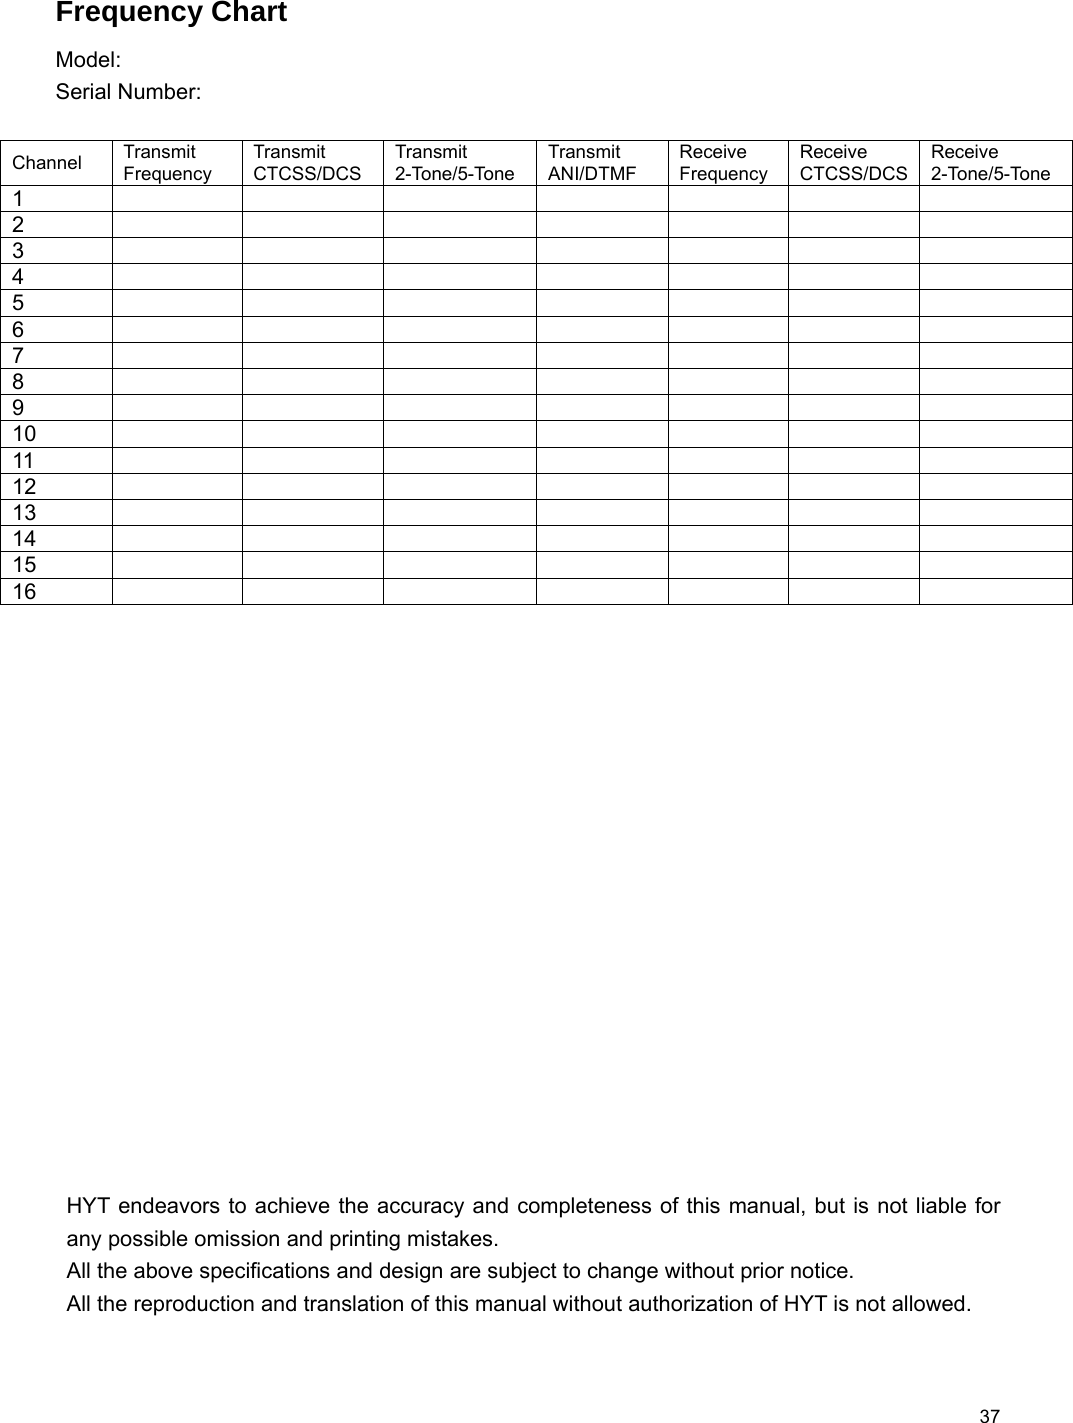
HYT Science and Technology Co TC3600V0 FM Handheld Transceiver User Manual
Shenzhen HYT Science &Technology; Co Ltd FM Handheld Transceiver Users Manual
UserManual.wiki
>
HYT Science and Technology Co
>
TC3600V0 User Manual
Users Manual
Navigation menu
Upload a User Manual
Namespaces
Wiki Guide
HTML
PDF
Info
Views
User Manual
Discussion / Help
Navigation
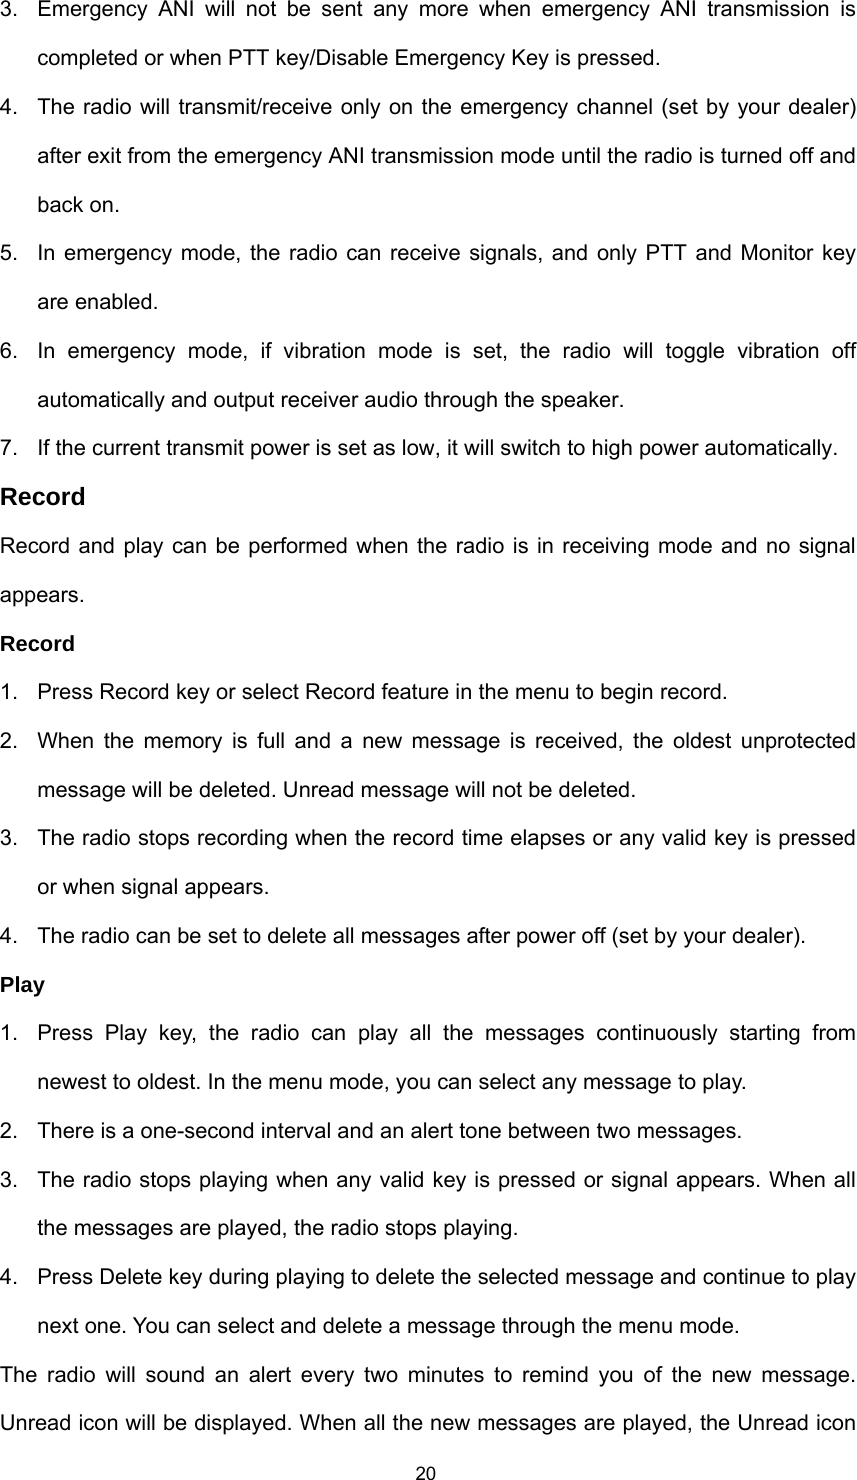
![13Getting Started (Keypad type model) (Non-keypad type model) (1) Antenna Used to transmit/receive signals. (2) LED The following table indicates LED mode and corresponding radio status: LED Status Not lit Standby Green Receive Red Transmit Flashing green Scan Flashing red Low battery voltage Flashing orange Call waiting (3) Channel Selector Used to select wanted channel. (4) Programmable key [A] (5) Power/Volume Control Knob Rotate the Power/Volume Knob clockwise until a “click” is heard to turn the radio on; rotate fully counter-clockwise to turn the radio off. When the radio is on, turn the knob to adjust volume. (6) Battery Latch Used to fasten the battery. (7) Speaker Used to output receiver audio and alert tones (8) Microphone](https://usermanual.wiki/HYT-Science-and-Technology-Co/TC3600V0/User-Guide-743282-Page-13.png)
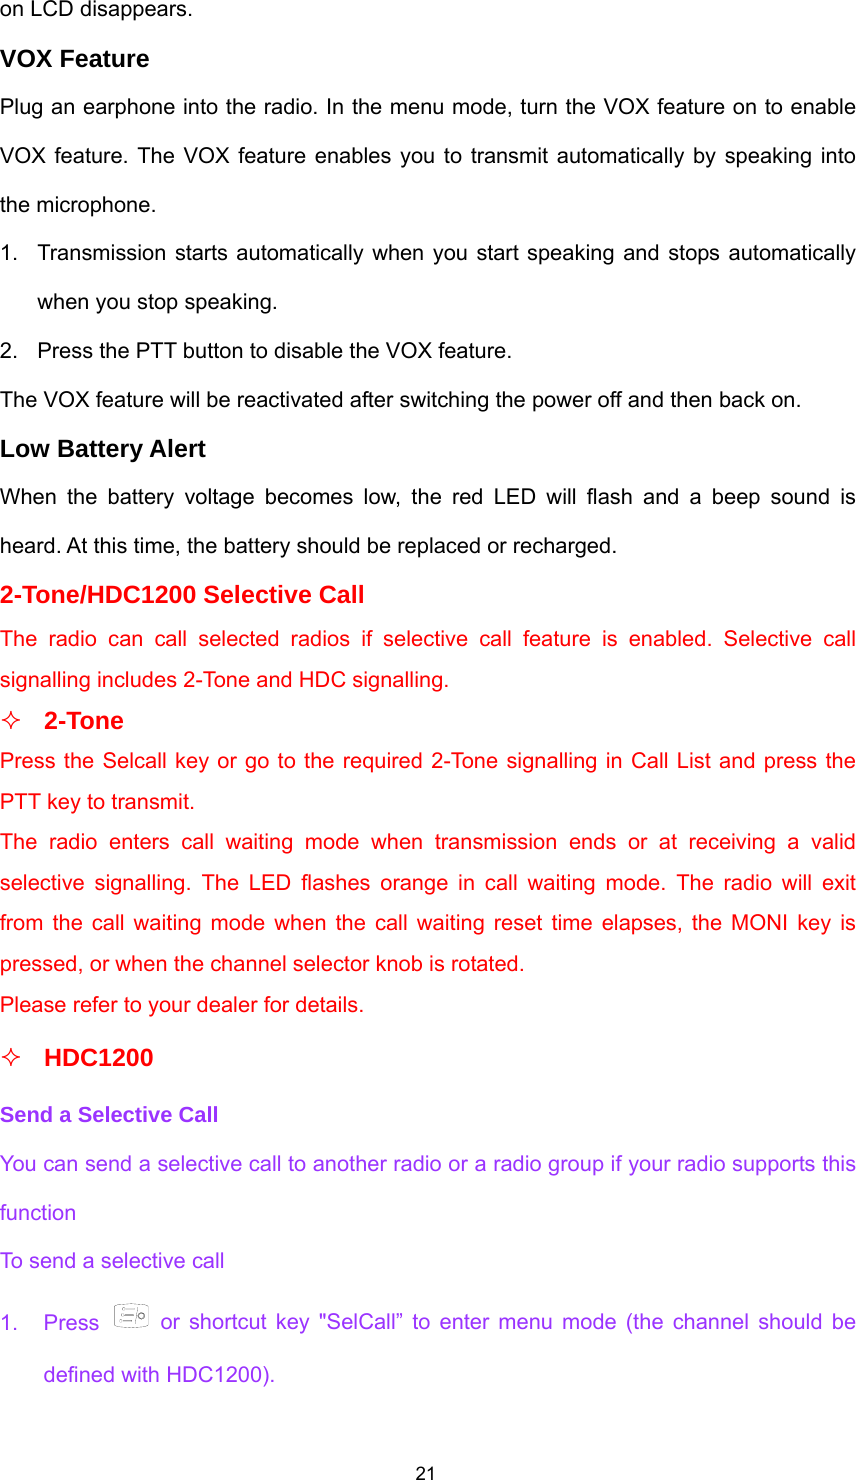
![14Used to input voice audio (9) External Jack Used to connect with external earphone or programming cable. (10) Belt Clip Used to clip the radio on your belt (11) Battery Pack (12) PTT Button Press and hold the PTT Button to transmit. Release the PTT Button to receive. (13) Programmable Key [B] (14) Programmable Key [C] The following table shows the key function when: • Short pressed • Long pressed Key Function Short Press Long Press Emergency Alert Enable emergency Alert Disable emergency Alert Monitor Disable monitor Monitor Scan Enable/Disable scan Enable/Disable scan Nuisance Delete Delete nuisance channel in scan Delete nuisance channel in scan Select High/Low Power Select High/Low Power Select High/Low Power Repeater/Talk Around Select Repeater or Talk Around Mode Select Repeater or Talk Around Mode Repeater/Reverse Frequency Select Repeater or Reverse Frequency Mode Select Repeater or Reverse Frequency Mode Call Transmit a Call Transmit a Call Selective Call Transmit selective call or group call signalling (2-Tone) or HDC shortcut key Transmit selective call or group call signalling (2-Tone) or HDC shortcut key Vibration Toggle Vibration On/off Toggle Vibration On/off Record Enable/Disable Record Function Enable/Disable Record Function Play Toggle Record Playing On/off Toggle Record Playing On/off Delete Delete the Current Message Delete the Current Message Please contact your dealer for more details about the programmable keys.](https://usermanual.wiki/HYT-Science-and-Technology-Co/TC3600V0/User-Guide-743282-Page-14.png)


![25Call List 1. Press key in standby mode to enter the main menu and go to the “call list”item. Press [C] key to exit from the menu mode. 2. Press key to enter call list and then press◄/►key to select upwards/downwards. Press key to save the change and exit from the menu. Press [C] key to return to the upper menu without saving the change. Edit Call Alias 1. Press in standby mode to enter the main menu and then press ►key to enter “edit call alias” item. 2. Press key to enter selective call list and then press ◄/►key to select a call alias. Press key again to edit the selective call alias. Input characters through the numeric keyboard and press ◄/►key to move. Press key to save the change and return to the selective call list. Press [C] key to return to the selective call list without saving the change. Press key to continue the above operation and [C] key to return to the main menu. Call List Simon Edit Call Alias Call1](https://usermanual.wiki/HYT-Science-and-Technology-Co/TC3600V0/User-Guide-743282-Page-25.png)
![26Select Zone 1. Press ►key to enter “select zone” item. 2. Press key to enter the zone list (1-16) and press ◄/►key to select a zone. Press key to save the selected zone and return to the main menu. Press [C] key to return to the main menu without saving the change. Utilities Squelch Level 1. Press ►key to enter “Utilities” menu. 2. Press key to enter the utilities menu. Press ◄/►key to select the item and key to enter the item. After entering the item, LCD displays the current squelch level (Off, level 1-3). Press ◄/►key to change the squelch level. 3. Press key to save the change and return to the utilities menu. Press [C] key to return to the utilities menu without saving the change. VOX Level Select Zone Zone 6 Utilities Squelch Level 2](https://usermanual.wiki/HYT-Science-and-Technology-Co/TC3600V0/User-Guide-743282-Page-26.png)
![271. Enter the “Utilities” menu. 2. Press ►key to go to VOX item. Press key to enter the item. LCD displays current VOX level. 3. Press ◄/►key to change the VOX level (off, level 1-3). VOX feature is disabled when OFF. Press key to save the change and return to the utilities menu. Press [C] key to quit without saving the change. Power Level 1. Enter the “Utilities” menu. 2. Press ►key to go to “power level” item. Press key to enter the item. LCD displays power level option. 3. Press ◄/►key to toggle the power level (High/Low). Press key to save the change and return to the utilities menu. Press [C] key to quit without saving the change. Utilities VOX Level 1 2 Utilities Power Level Power High Power Low](https://usermanual.wiki/HYT-Science-and-Technology-Co/TC3600V0/User-Guide-743282-Page-27.png)
![28Backlight 1. Enter the “Utilities” menu. 2. Press ►key to go to “backlight” item. Press key to enter the item. LCD displays backlight option. 3. Press ◄/►key to turn the backlight on/off. Press key to save the change and return to the utilities menu. Press [C] key to quit without saving the change. Tone Level 1. Press ►key to go to “tone level” item. 2. Press key to enter “tone level” (level 1-8) item. LCD displays current tone level. Press ◄/►key to change the tone level. You will hear a confirmation tone at the same time. Press key to save the change and return to the utilities menu. Press [C] key to quit without saving the change. Utilities Backlight Off On Tone Level 6](https://usermanual.wiki/HYT-Science-and-Technology-Co/TC3600V0/User-Guide-743282-Page-28.png)
![29Talk Around/Reverse Frequency 1. Press ►key to go to “talk around/reverse frequency” item. 2. Press key to enter this item. LCD displays the current transmit mode. Press ◄/►key to change the transmit mode. Press key to save the change and return to the utilities menu. Press [C] key to return without saving the change. Language 1. Press ►key to go to “language” item. Press to enter “language” item and LCD displays the current language. Press ◄/►key to toggle the language interface. (Only English is available) Channel Display 1. Press ►key to go to “channel display” item. 2. Press key to enter channel display item. LCD displays the current channel display mode. Press ◄/►key to toggle the display mode. Press key to save the change and return to the utilities menu. Press [C] key to return without saving the change. Channel display mode can be switched among channel number, channel alias and receiving frequency. TalkAround/Reverse Language Reverse Talkaround Channel Display Alias](https://usermanual.wiki/HYT-Science-and-Technology-Co/TC3600V0/User-Guide-743282-Page-29.png)