HYUNDAI MOBIS AVC31B2AN DIGITAL CAR AVN SYSTEM User Manual 2 of 2
HYUNDAI MOBIS CO., LTD. DIGITAL CAR AVN SYSTEM 2 of 2
UserManual.wiki
>
HYUNDAI MOBIS
>
AVC31B2AN User Manual
>
User manual 2 of 2
Contents
1.
User manual 1 of 2
2.
User manual 2 of 2
User manual 2 of 2
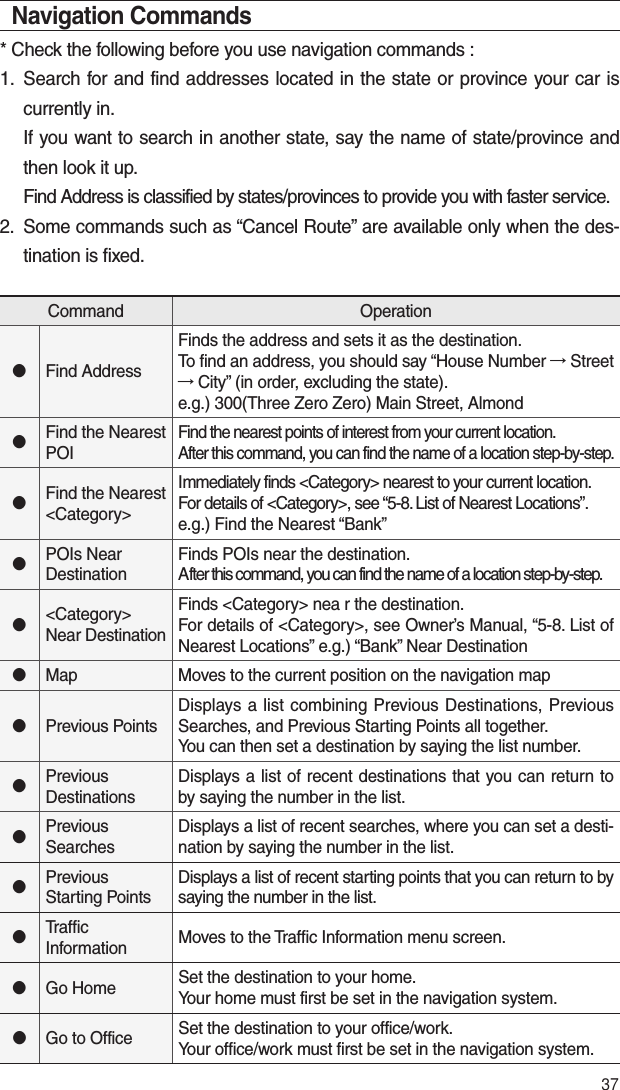
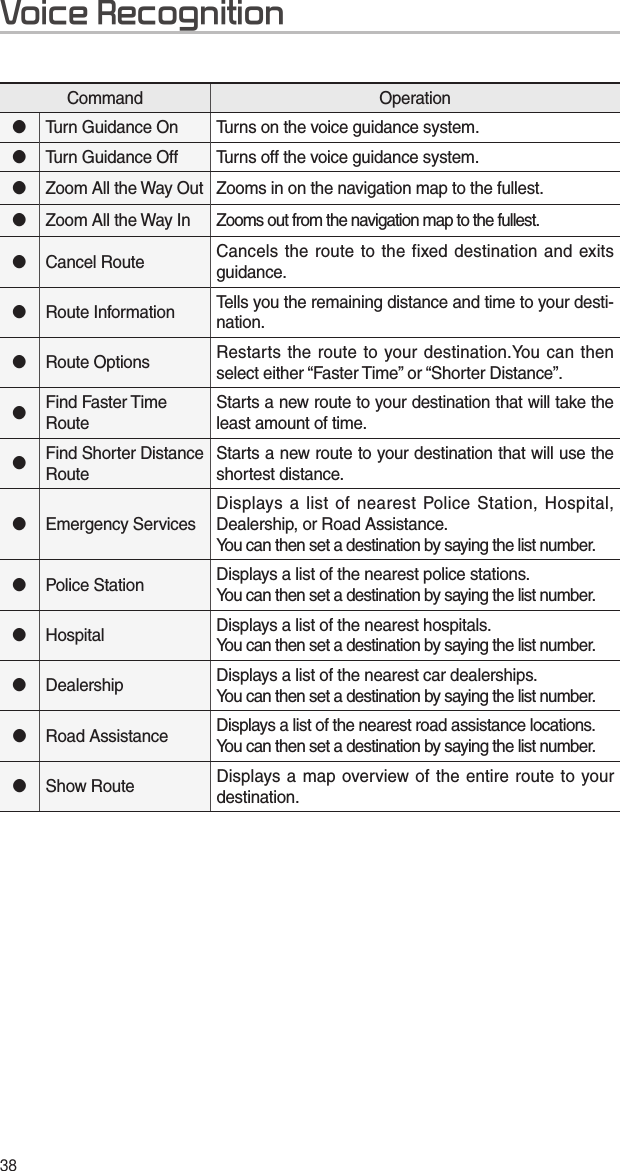
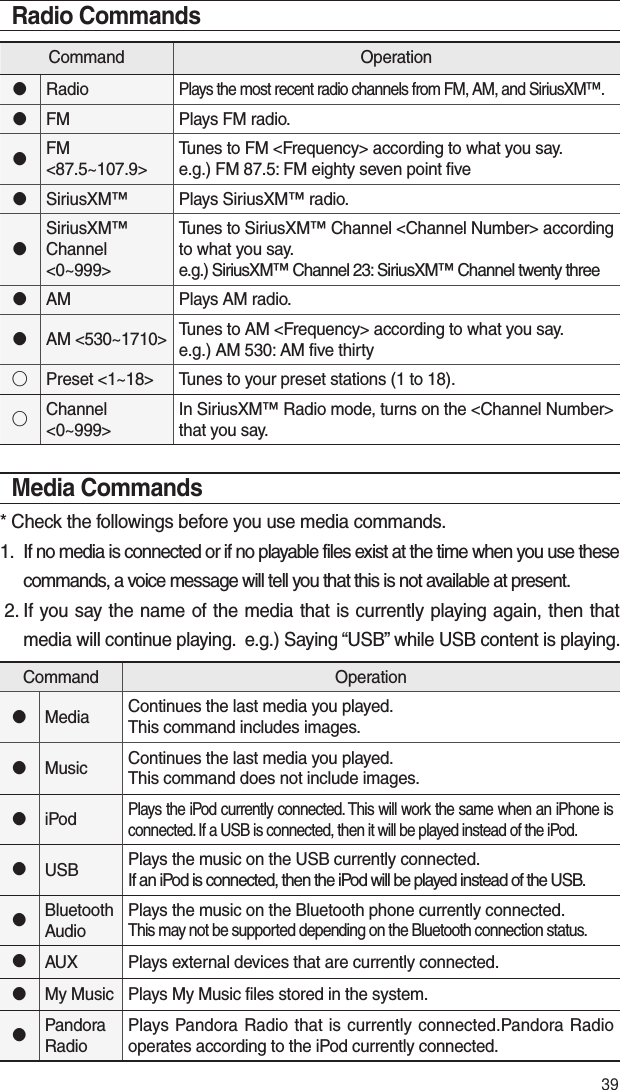
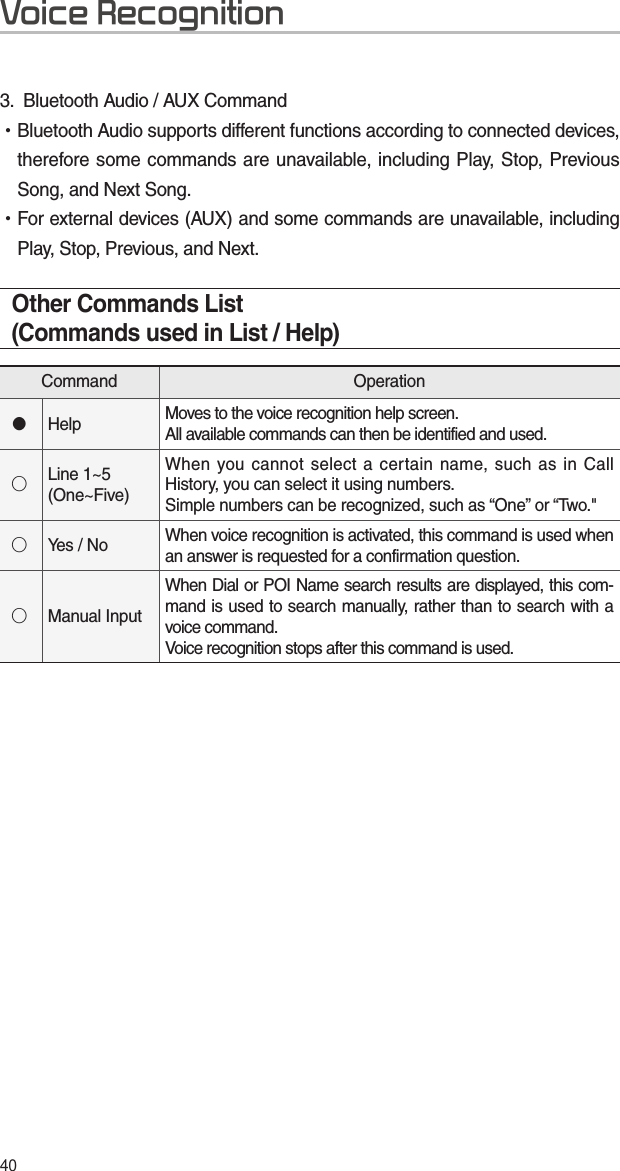
Navigation menu
Upload a User Manual
Namespaces
Wiki Guide
HTML
PDF
Info
Views
User Manual
Discussion / Help
Navigation


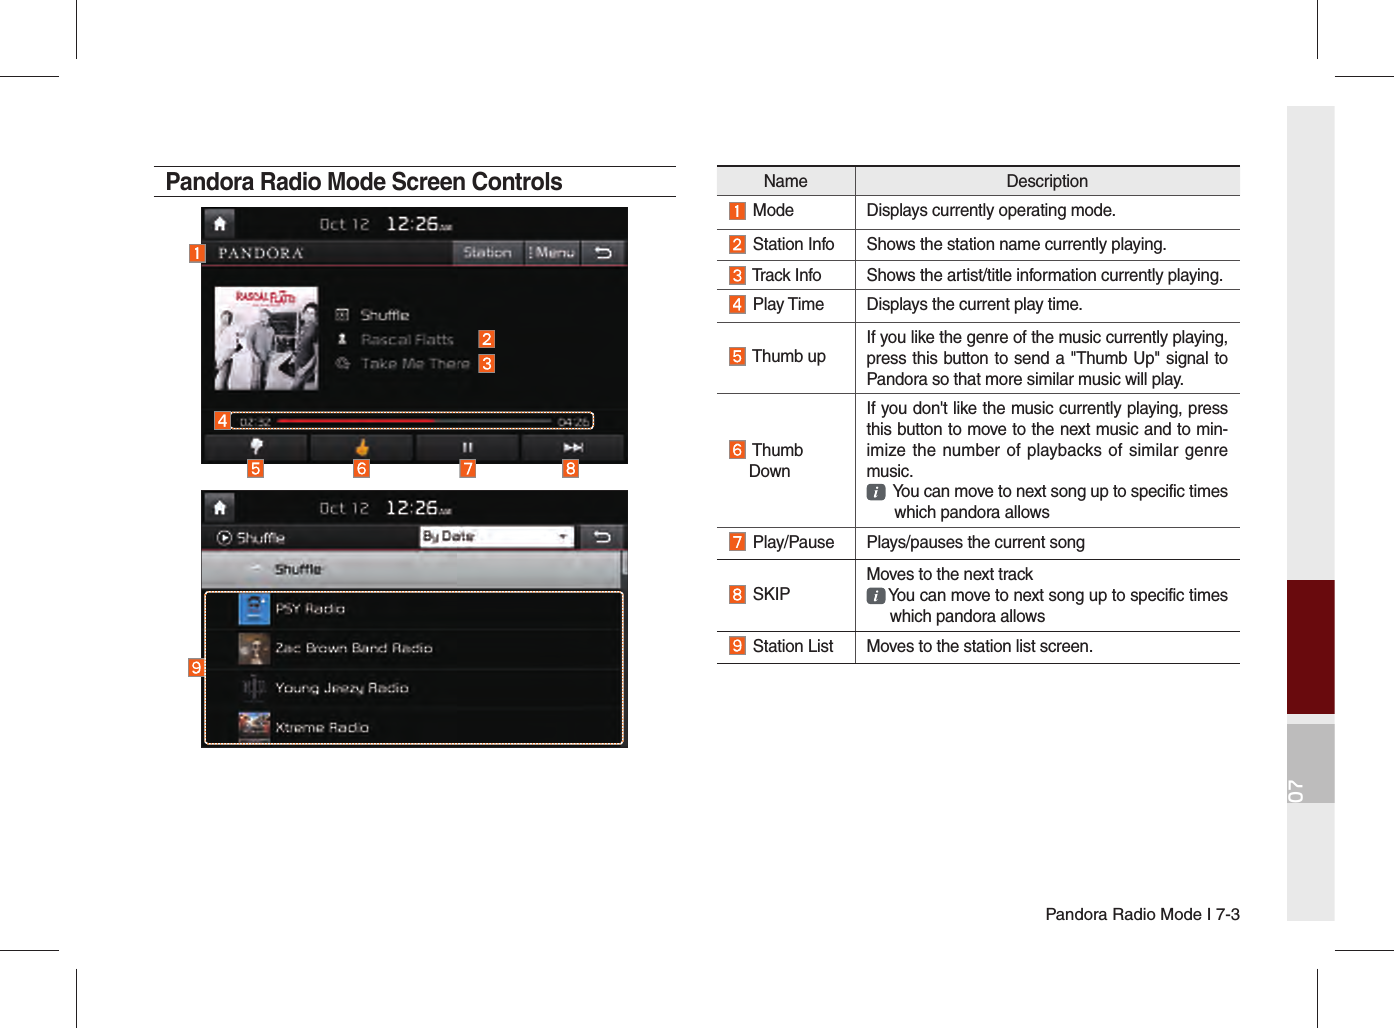


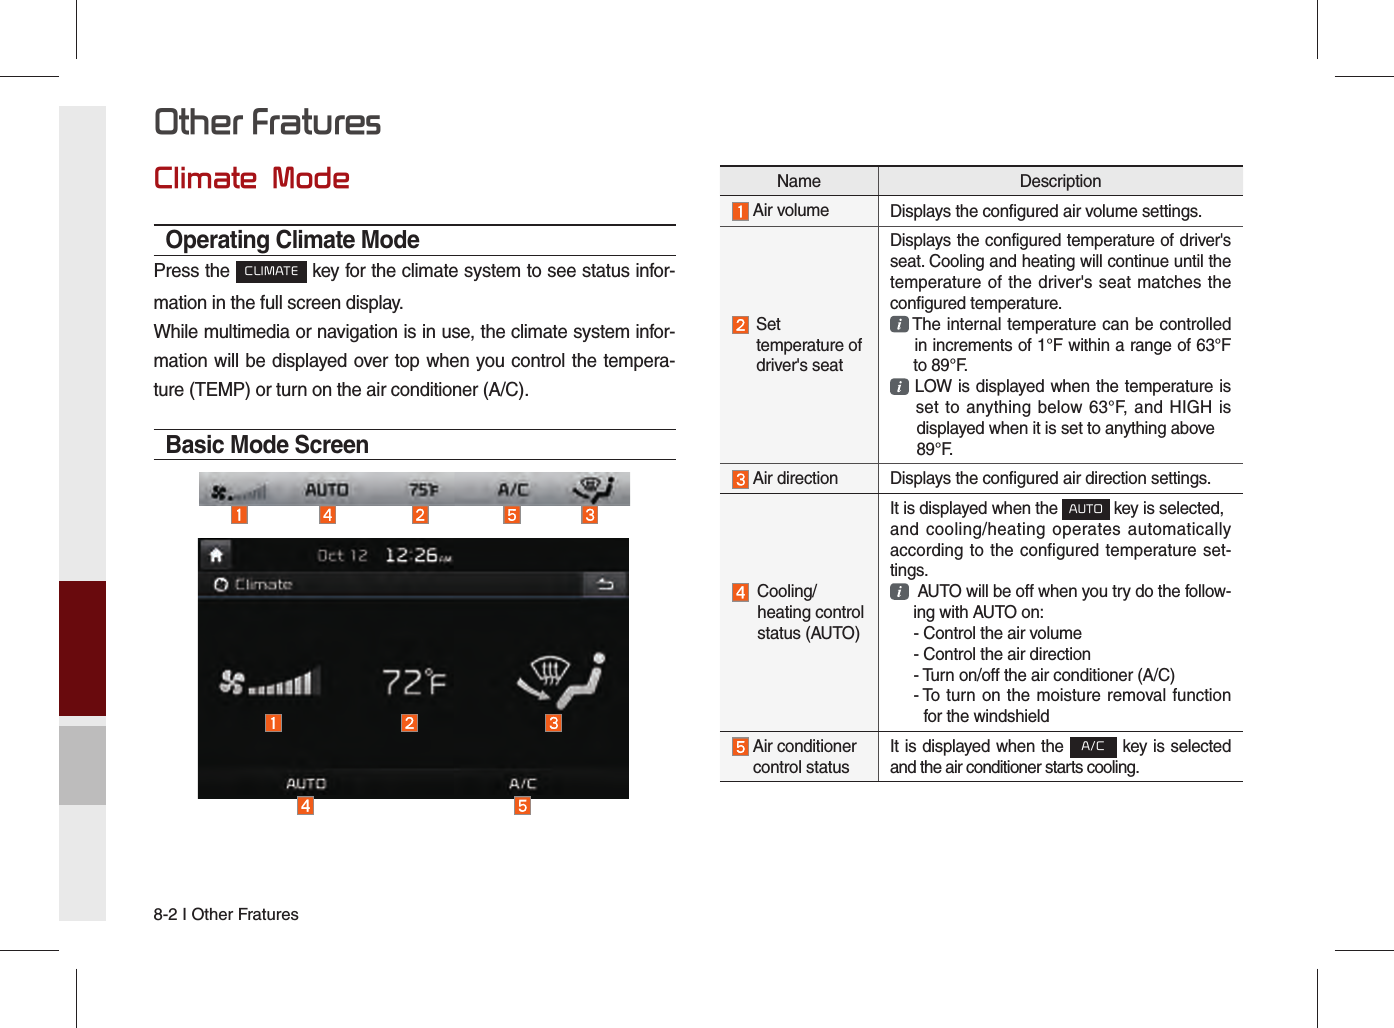

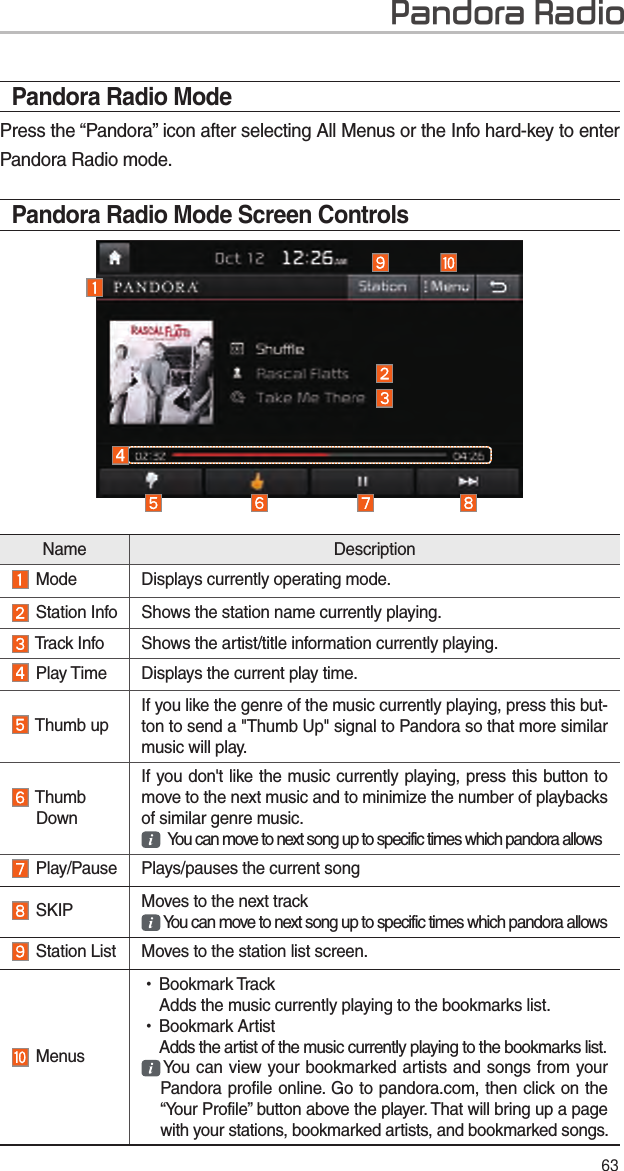
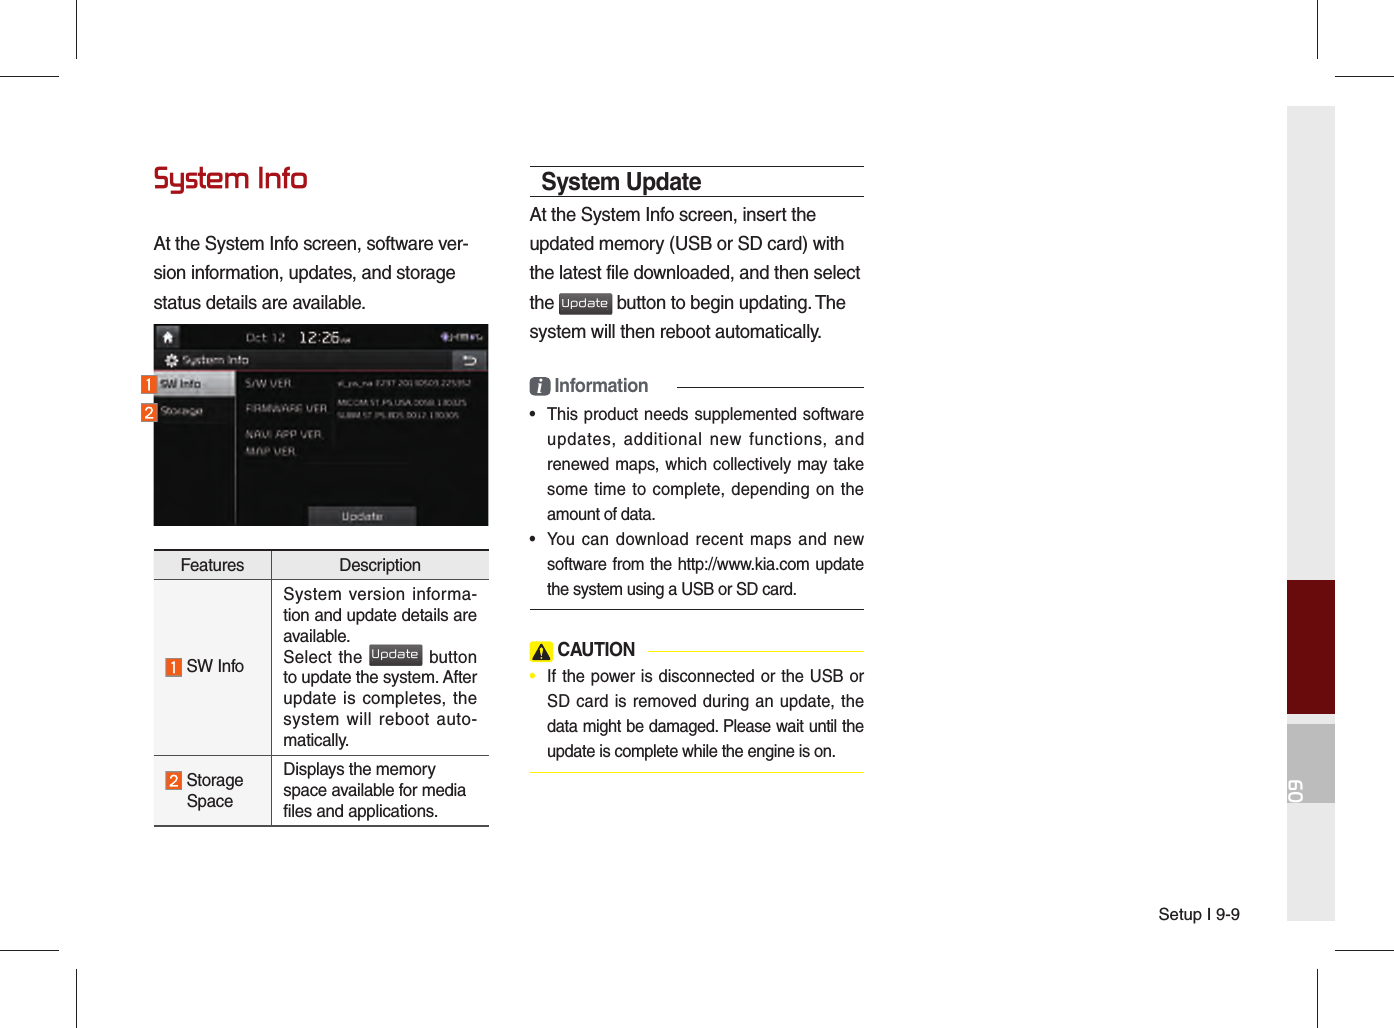
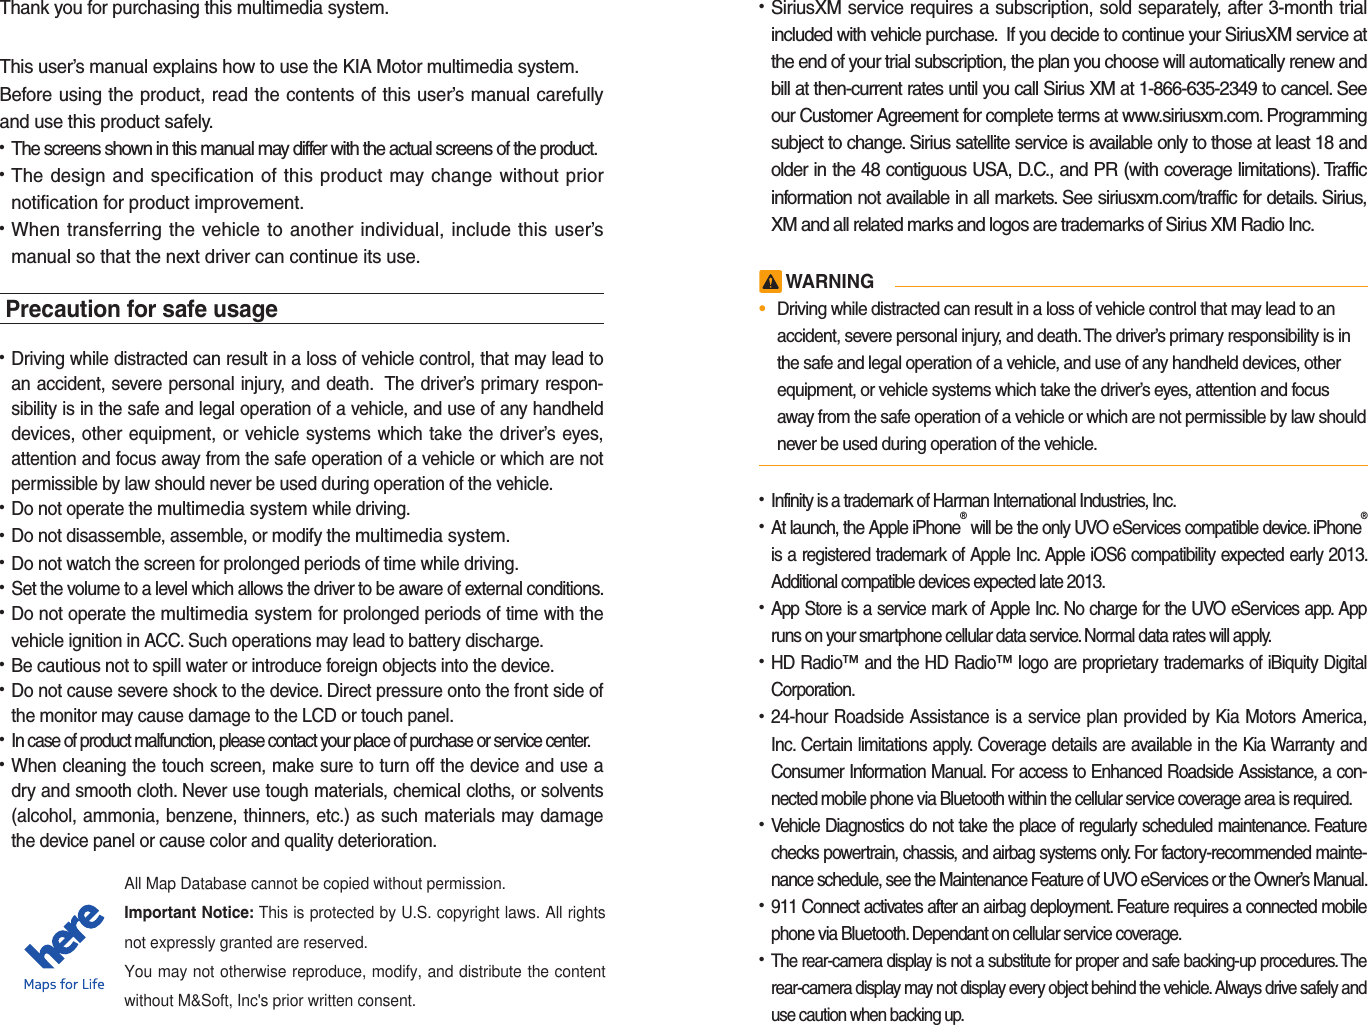
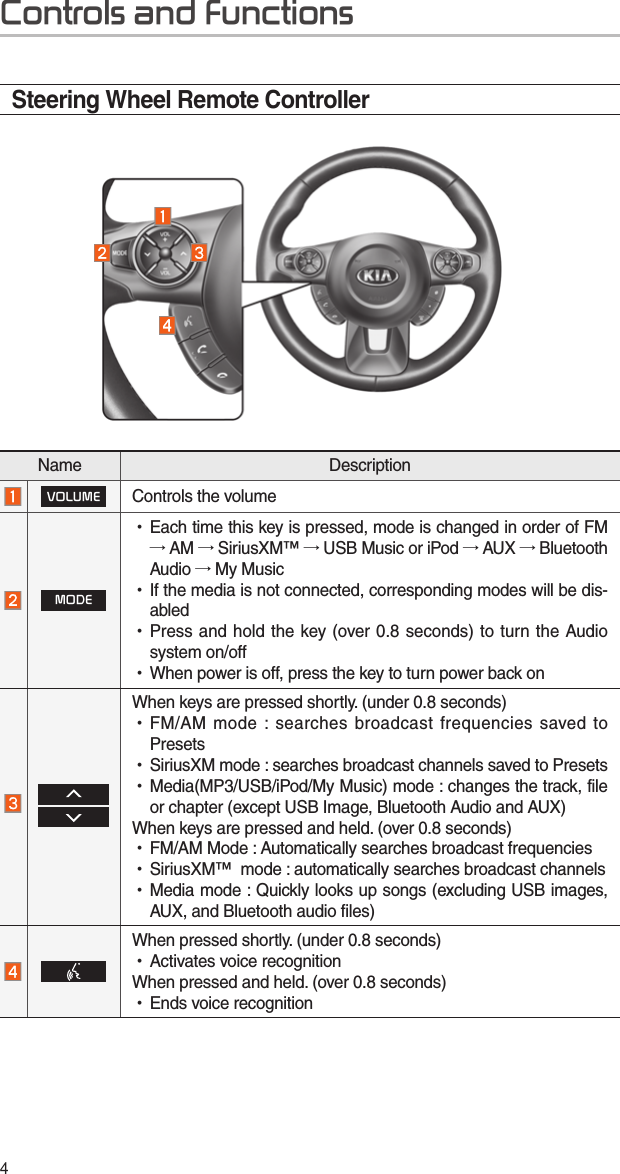
![9-2 I SetupSetupSetupSetup is the screen to control system set-tings of the AVN. To enter the screen, select the Setup key of the device or the Setup button in All Menus.[Option 1]Features Description NavigationProvides Normal/Screen/Guidance/Route/Safety Setting. SoundProvides the sound control options for Position, Bass, Mid, Treble, Volume, Ratio and Advanced settings. Display Provides the Adjust/Mode settings. PhoneProvides the Bluetooth Connection/Auto Download/Auto Connection Priority/Phone Ringtone/Audio Streaming/System Bluetooth Information settings.Features Description Voice RecognitionProvides the Guidance and Priority settings. Clock Provides the Time and View settings. Keyboard Provides settings to switch keyboard layouts. Screen SaverProvides the Clock/Image/None settings. System InfoProvides software and storage space informa-tion. Display OffProvides the Display Off (touch activation) func-tion.](https://usermanual.wiki/HYUNDAI-MOBIS/AVC31B2AN.User-manual-2-of-2/User-Guide-2210226-Page-22.png)
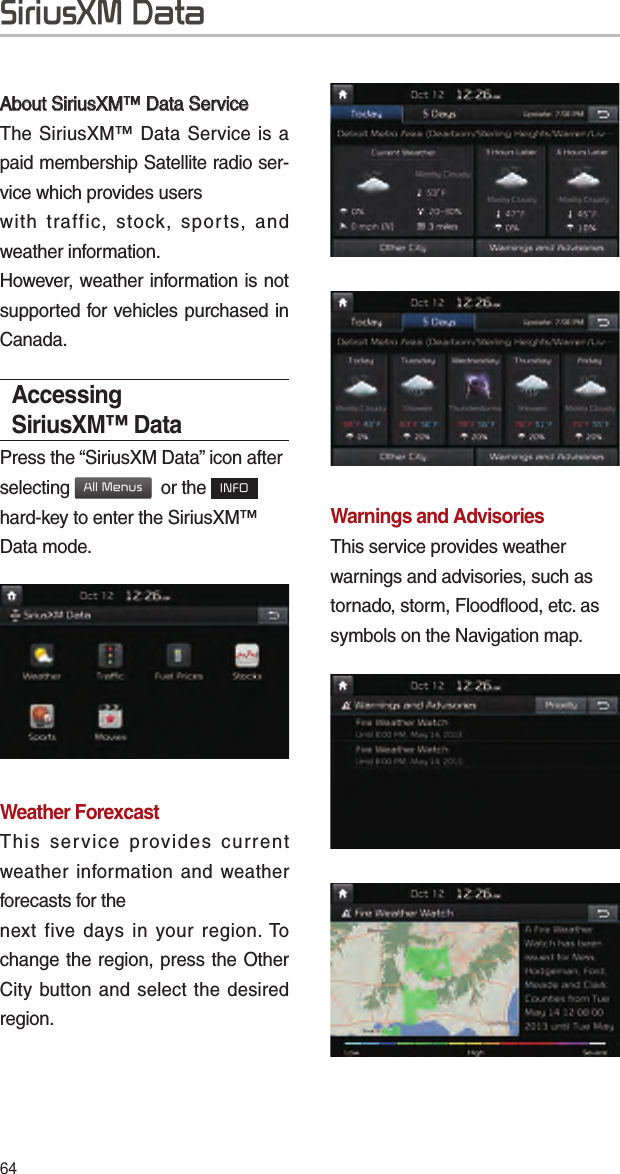
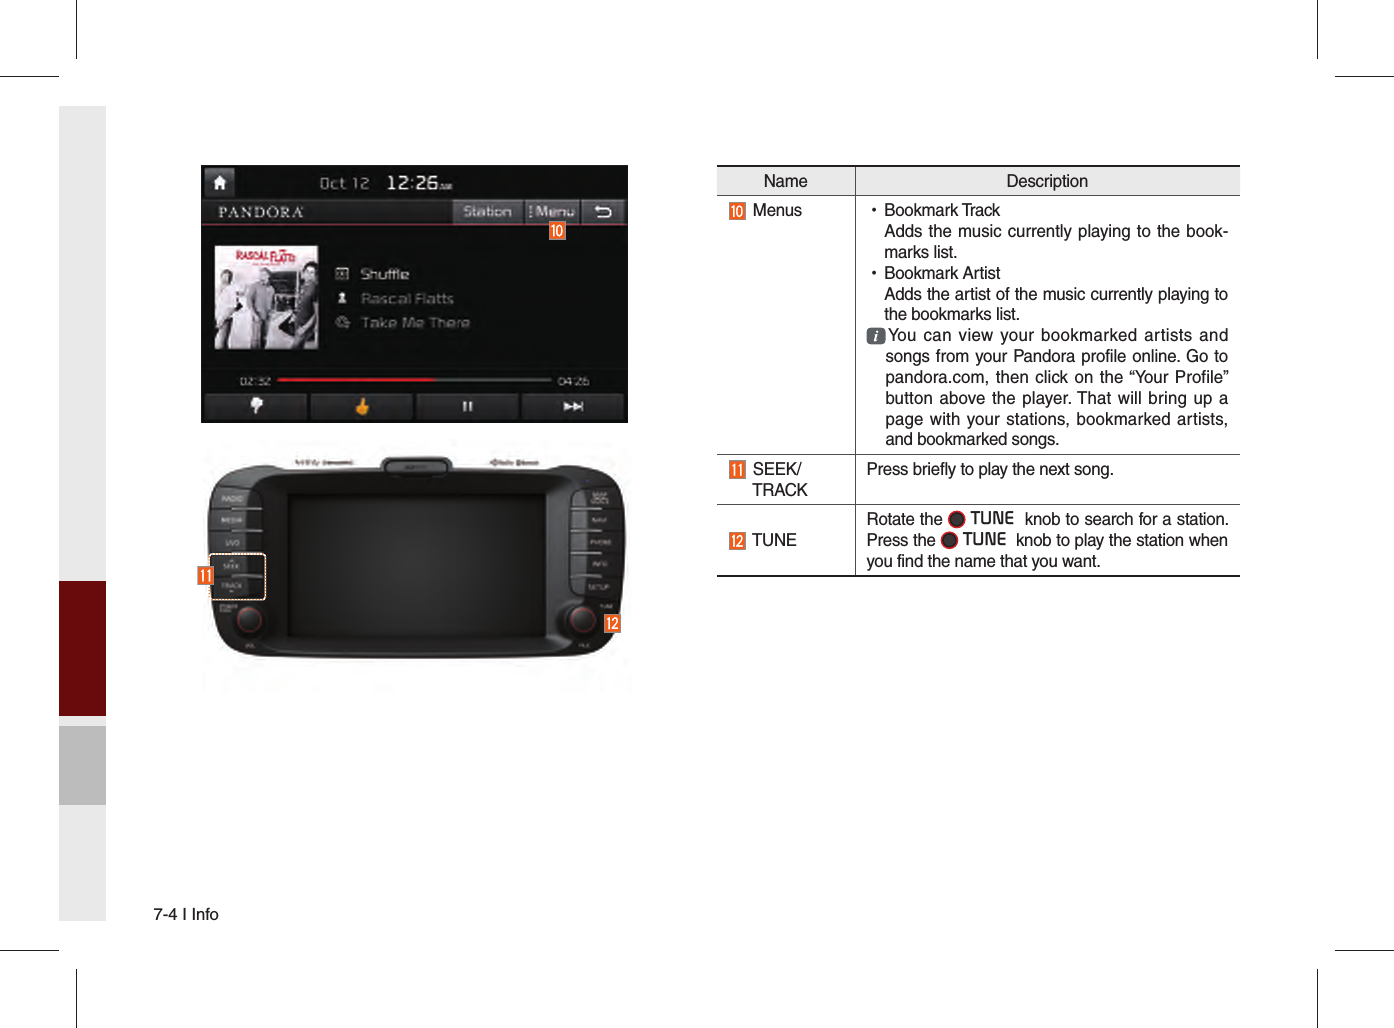
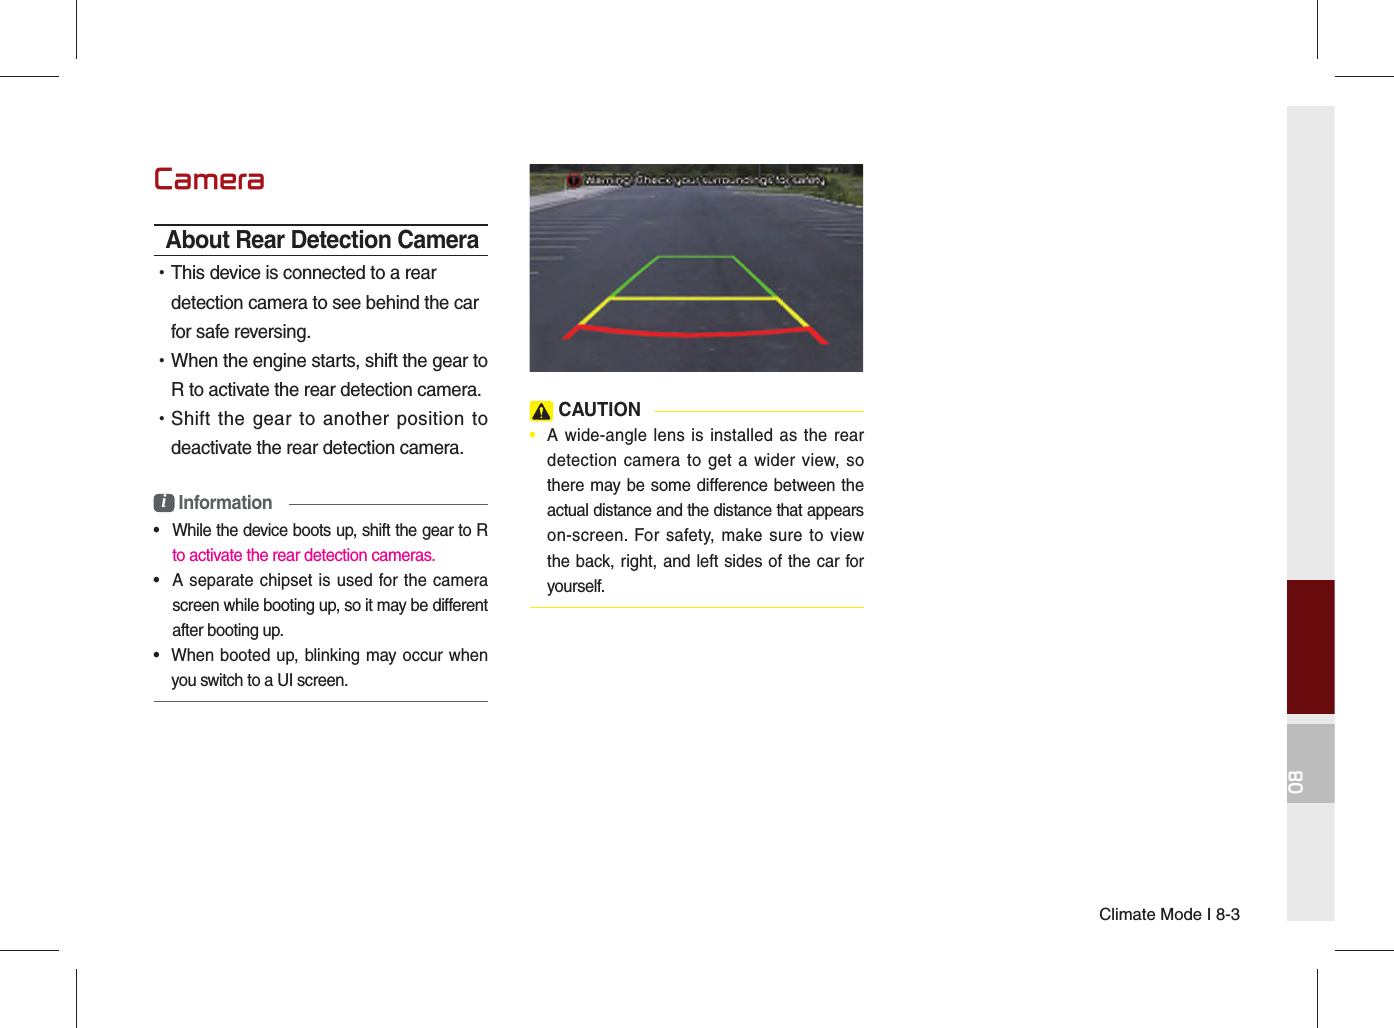
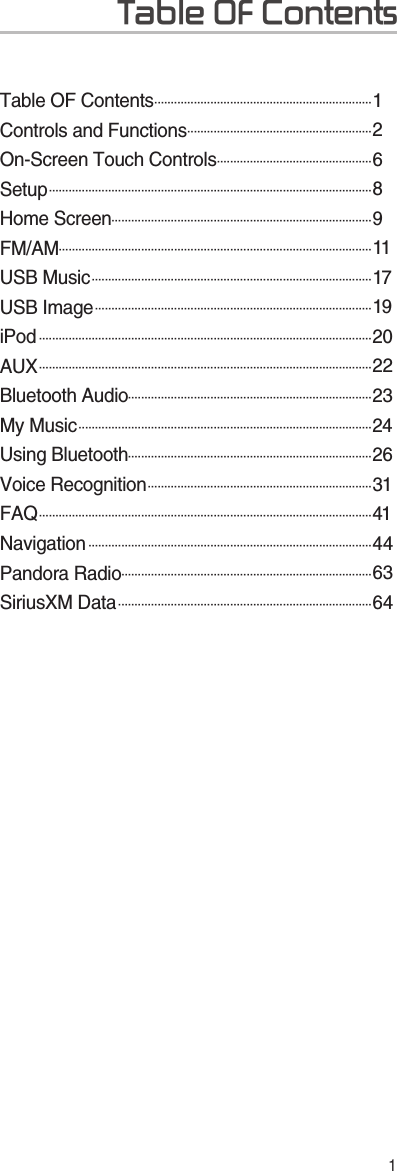
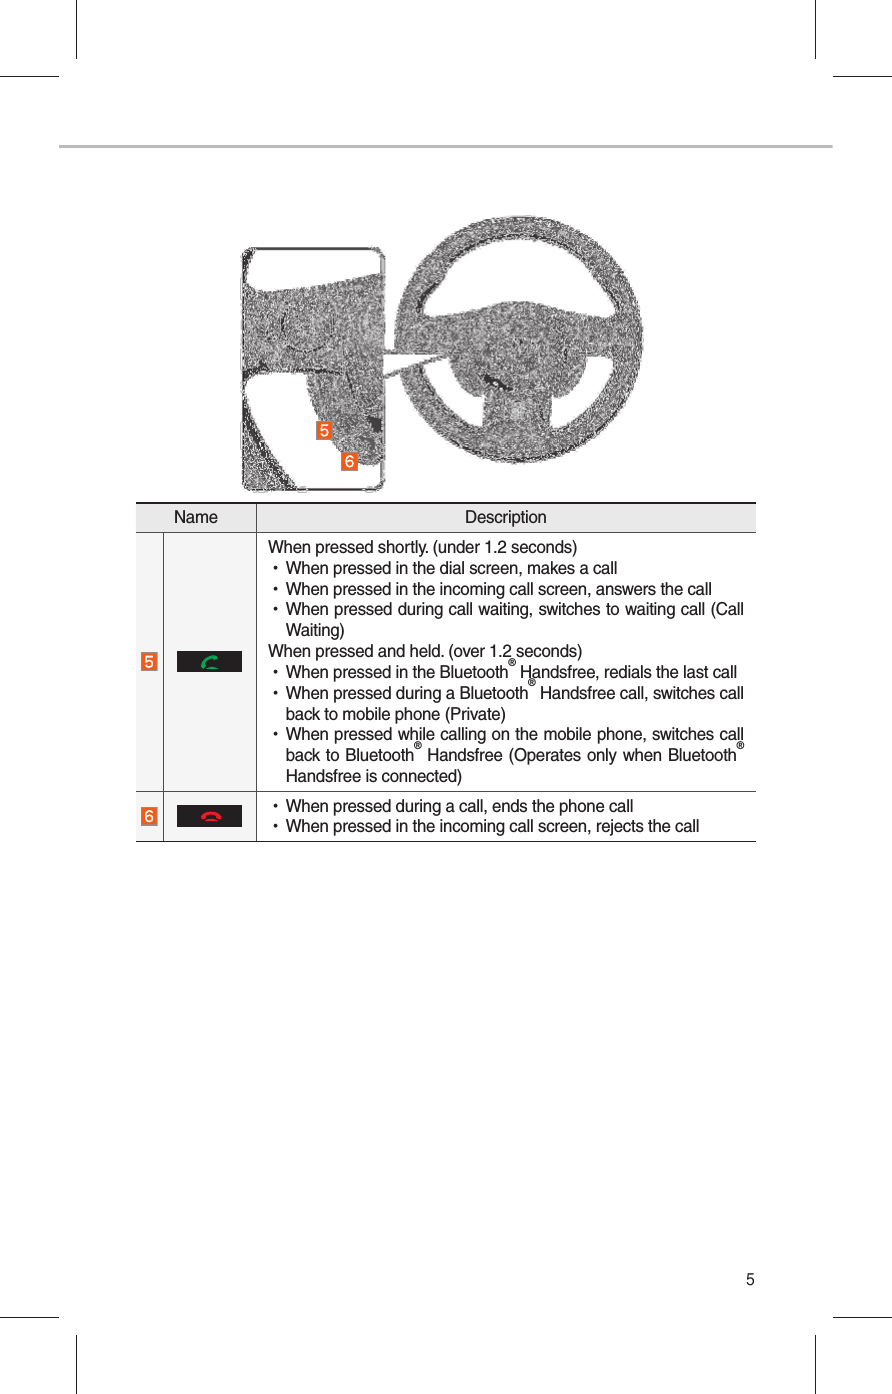
![Setup I 9-309Sound SettingsAdjusts the sound effects for the whole system.Display SettingsControls the display brightness and image rate for the whole system.Features Description AdjustDrag the slide bar to control the Brightness/Hue/Contrast/Saturation settings.Press [Default Settings] to initialize the settings. ModeYou can select Daylight/Night/Automatic options for the display bright-ness according to mode changes.Features Description PositionSelect the Up/Down/Left/Right but-ton to control sound posi-tioning. Press [Default Settings] to concentrate the sound on the center of vehicle. ToneDrag the slide bar to control bass/mid/treble settings.Press [Default Settings] to initialize the settings.Features Description PriorityYou can adjust the volume ratio between navigation announcements and reg-ular audio. AdvancedYou can select [Speed Dependent Volume Control] to automatically control the volume by the vehicle's speed and Surround sound options.(Surround sound is optional.) Beep Select to activate a beep when pressing buttons.](https://usermanual.wiki/HYUNDAI-MOBIS/AVC31B2AN.User-manual-2-of-2/User-Guide-2210226-Page-23.png)


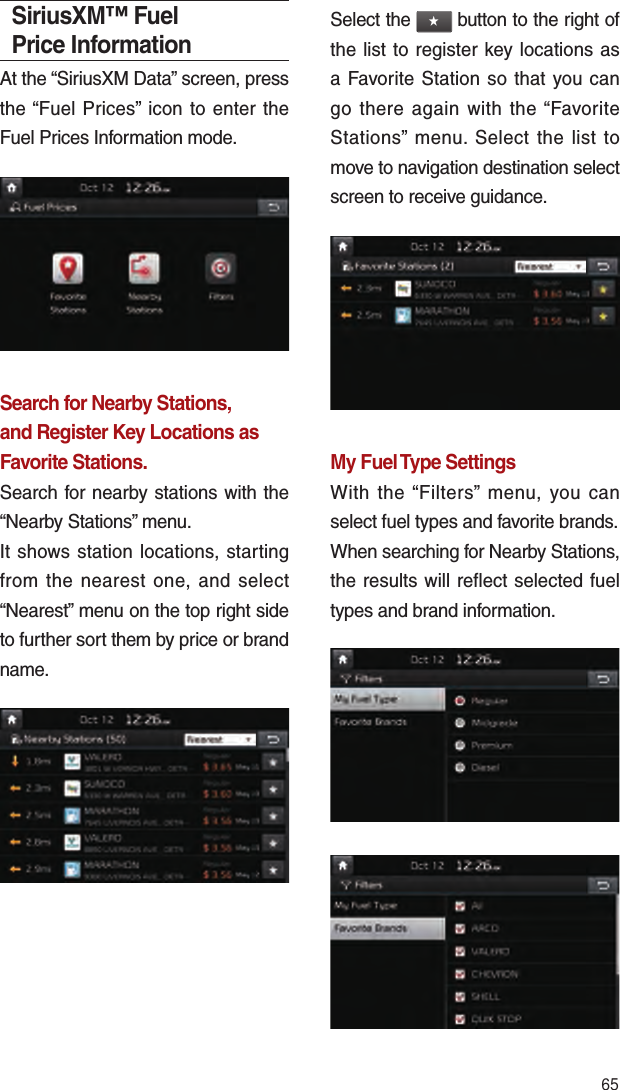
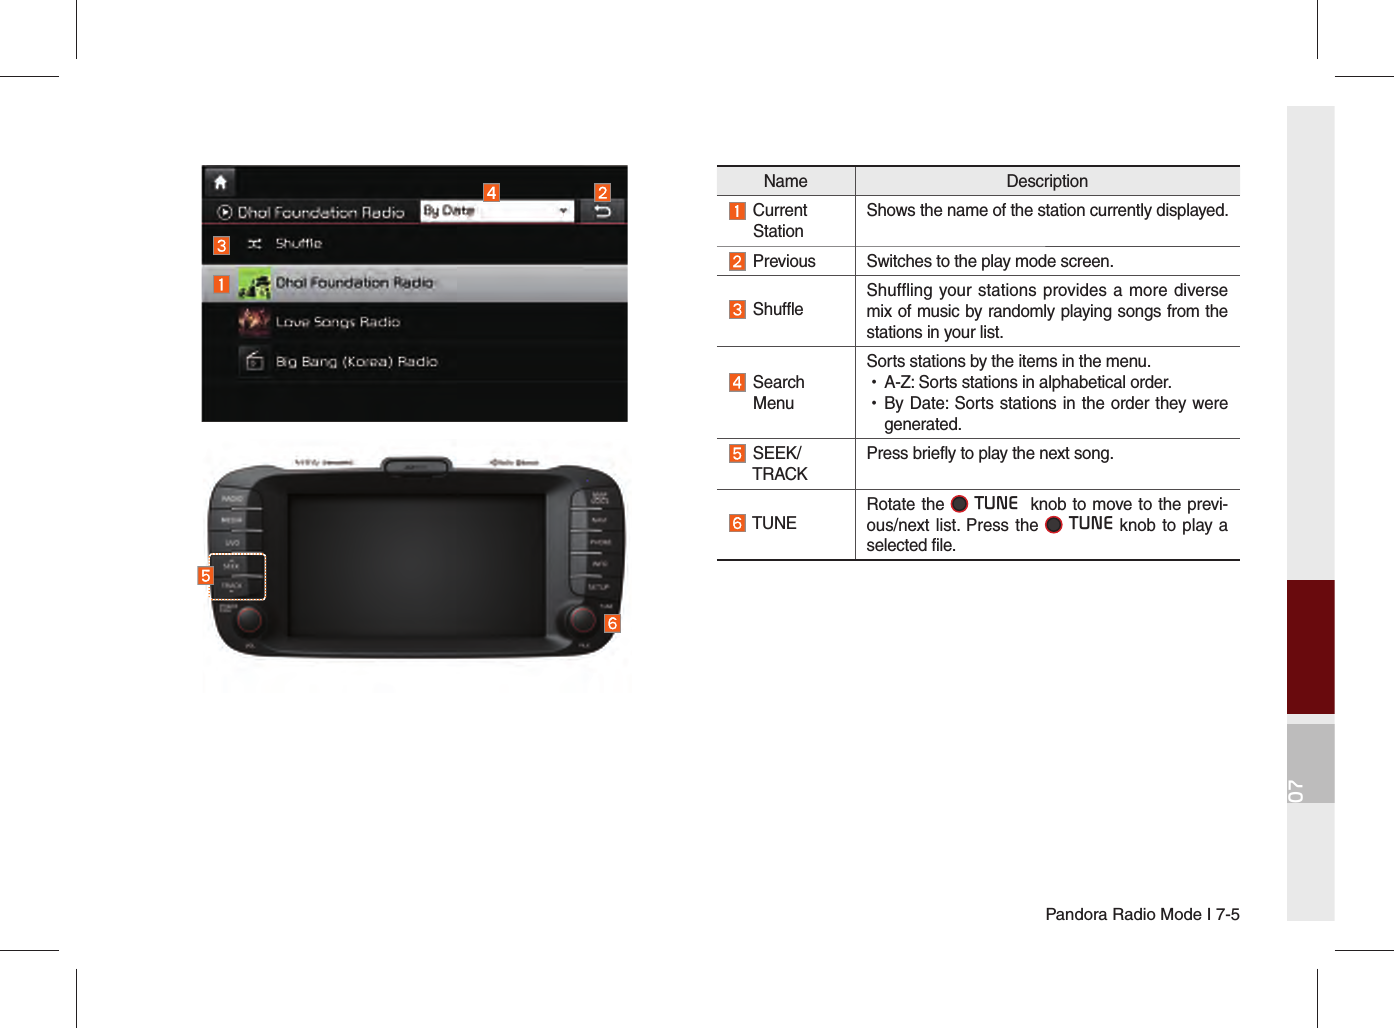
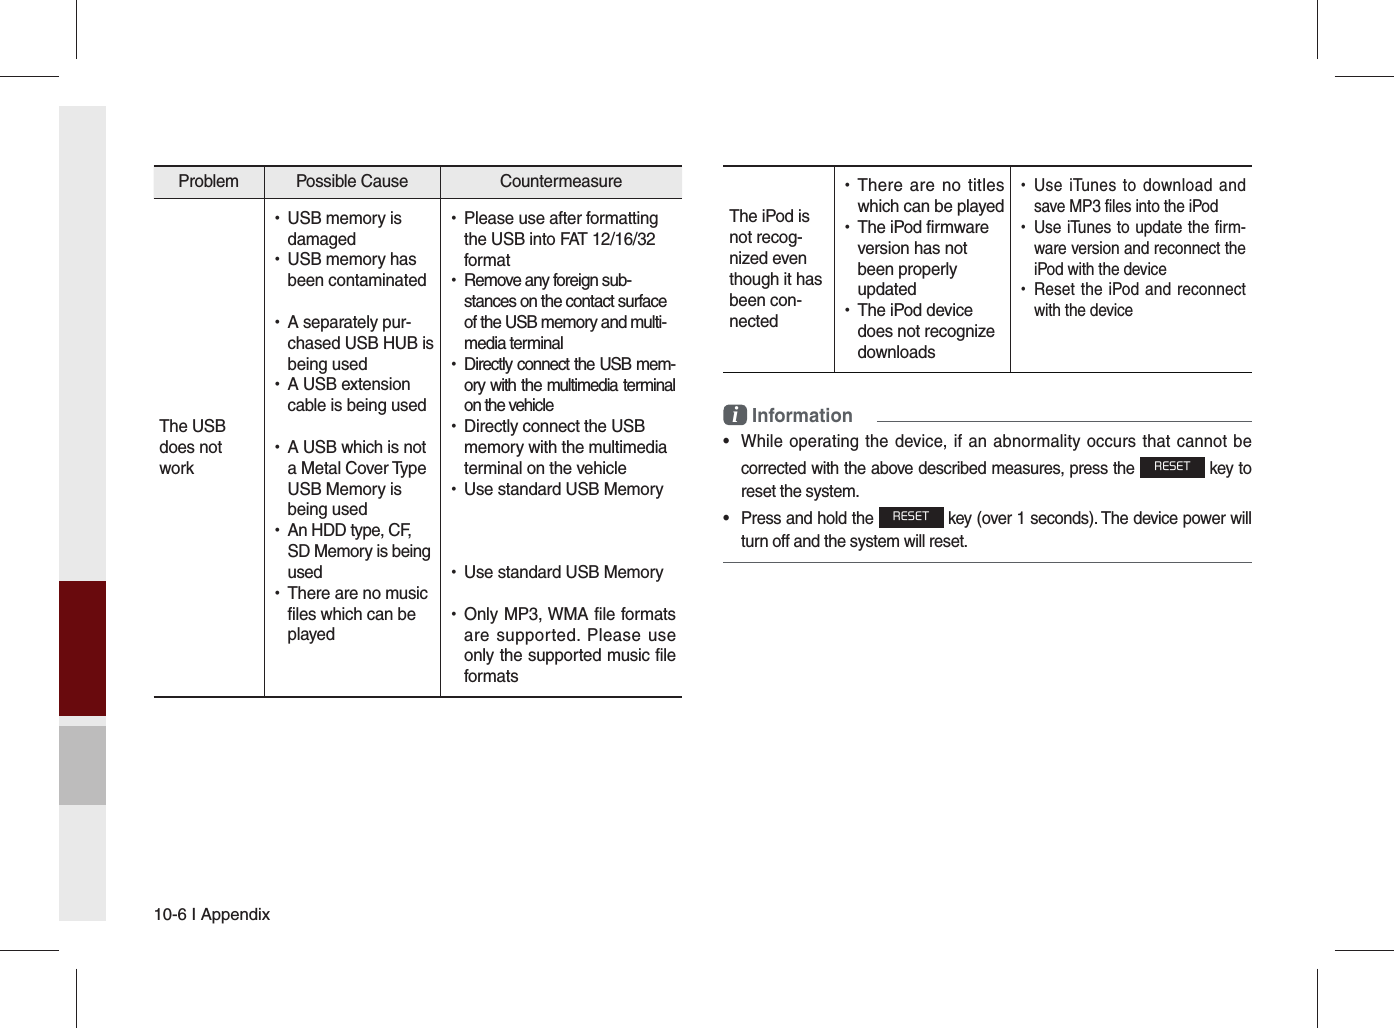
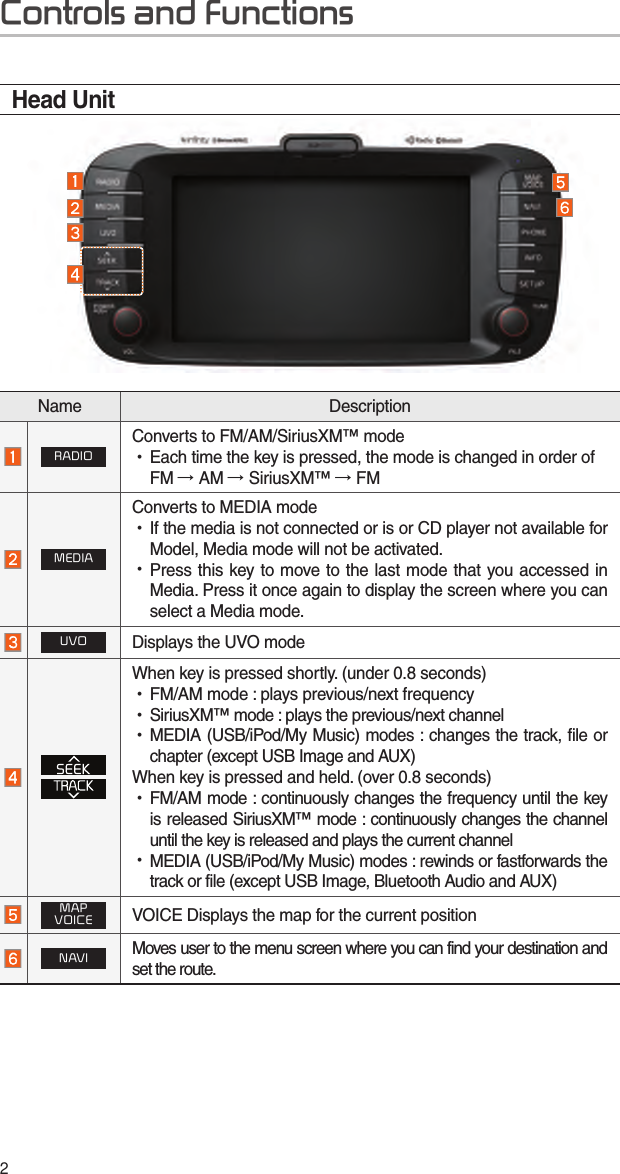
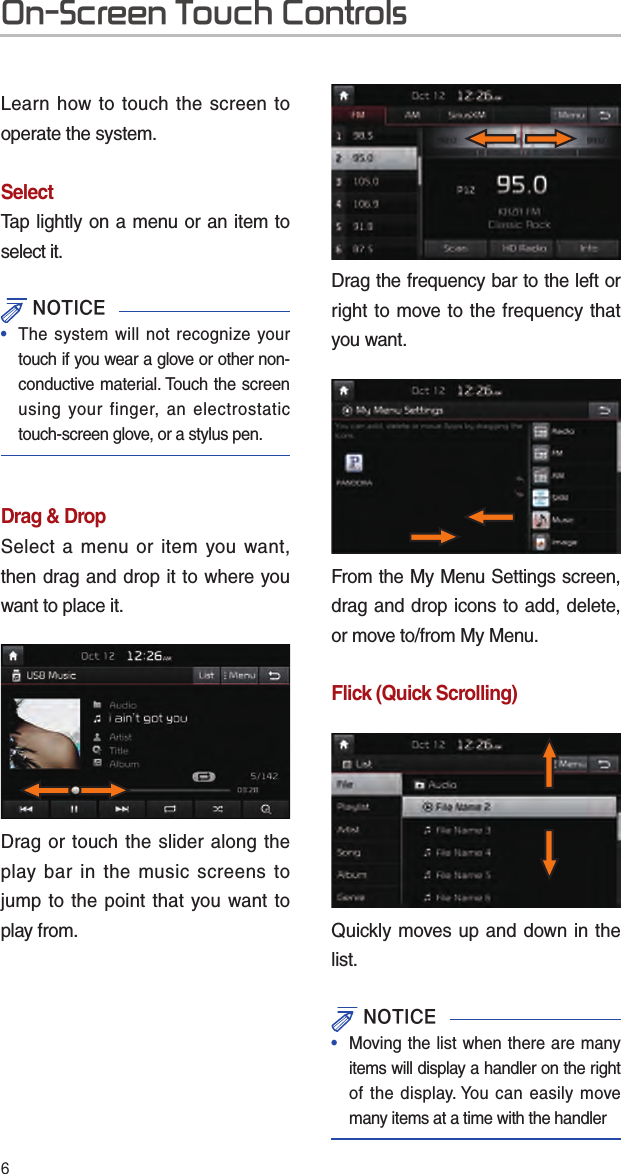
![10-4 I AppendixBefore Thinking the Product Has Malfunctioned1. Errors which occur during the operation or installation of the device may be mistaken as a malfunction of the actual device.2. If you are having problems with the device, try the suggestions listed below.3. If the problems persist, contact your KIA dealer.Problem Possible CauseThere are small red, blue, or green dots on the screen •Because the LCD is manufactured with technology requiring high point density, a pixel or lighting deficiency may occur within 0.01% of total pixelsThe sound or image is not working •Has the Switch for the vehicle been turned to [ACC] or [ON]? •Has the SYSTEM been turned OFF?The screen is being dis-played but sound is not working •Has the volume been set to a low level? •Has the volume been muted?When the power is turned on, the corners of the screen are dark •The display appearing somewhat dark after prolonged periods of use is normal with LCD panels. It is not a malfunction •If the screen is very dark, contact your nearest KIA dealer for assistanceSound is working from only one speaker •Are the positions of Fader or Balance sound controls adjusted to only one side?Problem Possible CauseSound does not work in AUX mode •Are the audio connector jacks fully inserted into the AUX terminal?The external device is not working •Is the external device connected with a standard connector cable?Upon turning power on, the most recent mode screen is not displayedWithin modes that play files by reading external sources, such as discs, USB, iPod, or Bluetooth® streaming mode, the most recently played mode screen prior to turning off power may not properly load •If there is no disc or the corresponding device is not connected, the mode oper-ated prior to the most recent mode will operate •If the previous mode still cannot be prop-erly played, the mode operated prior to that will operate](https://usermanual.wiki/HYUNDAI-MOBIS/AVC31B2AN.User-manual-2-of-2/User-Guide-2210226-Page-34.png)


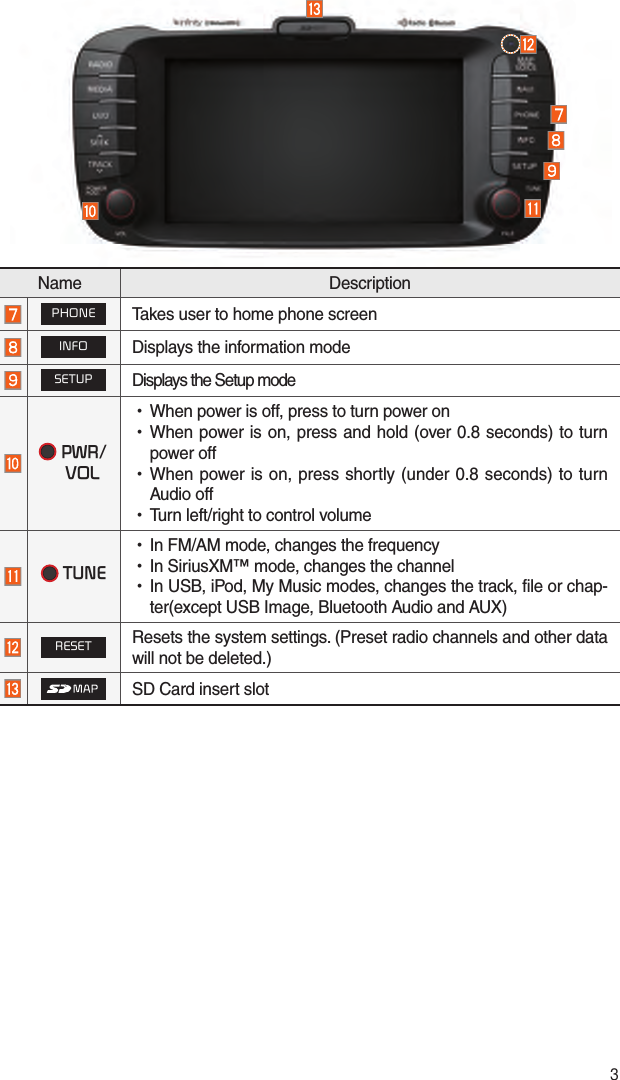
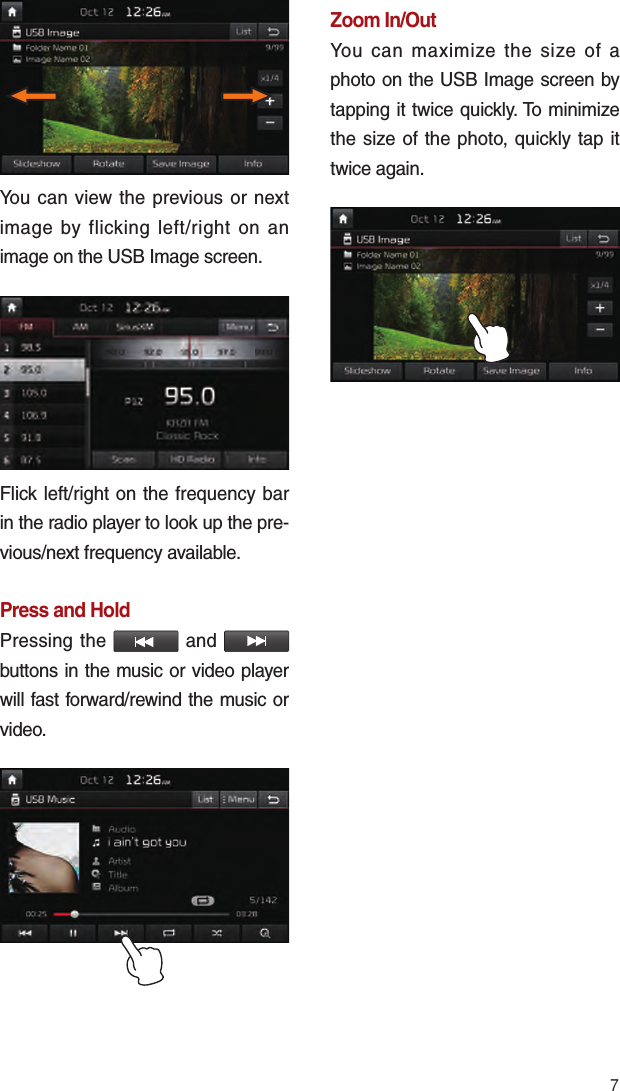
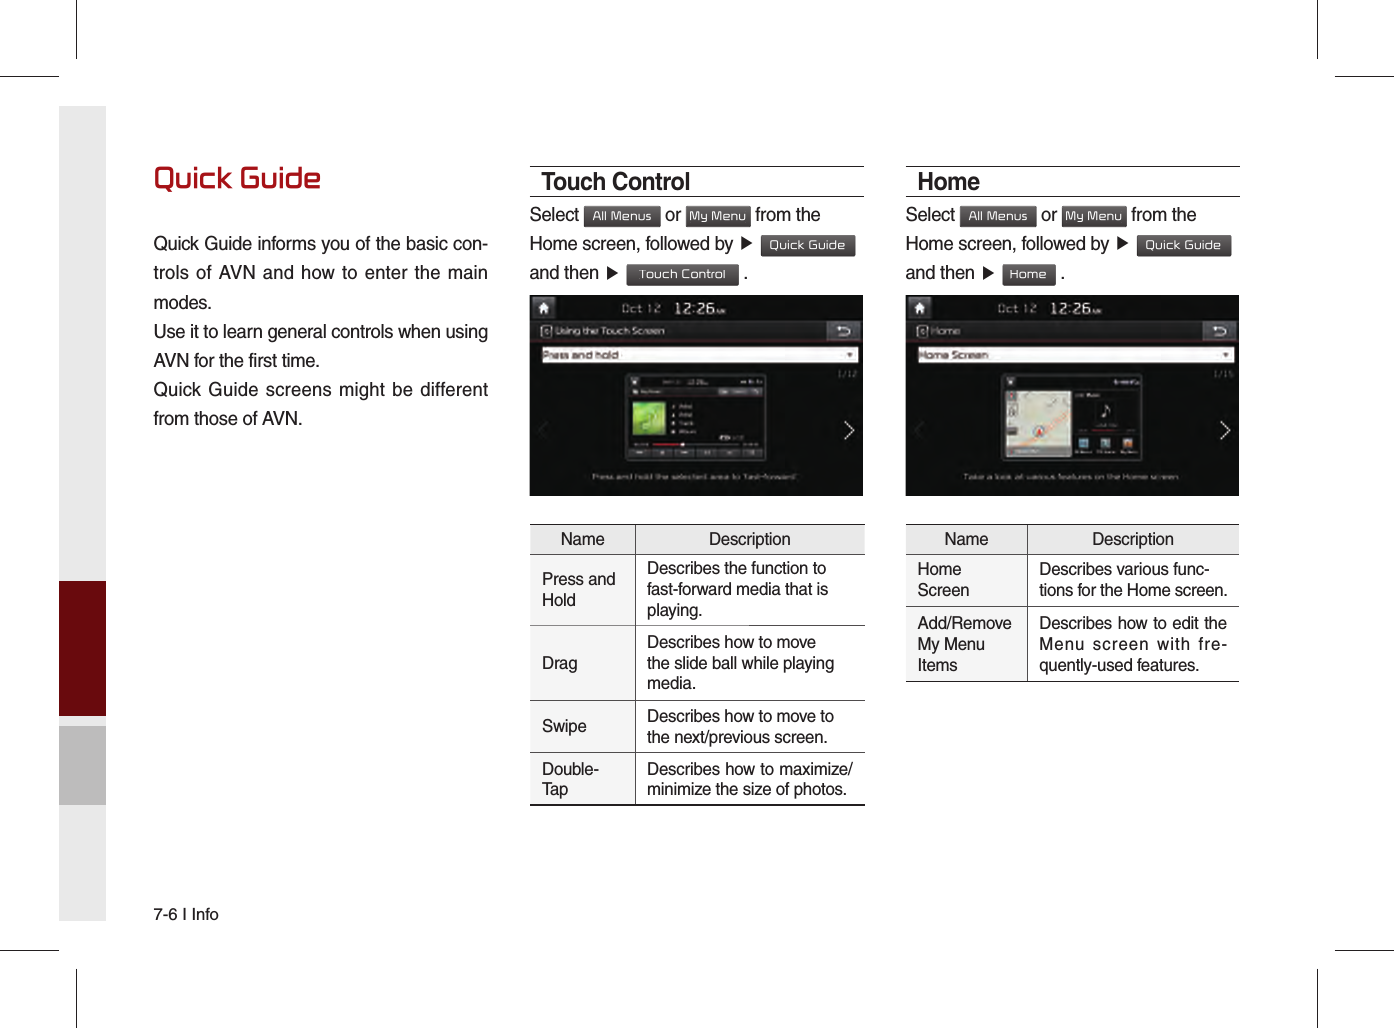
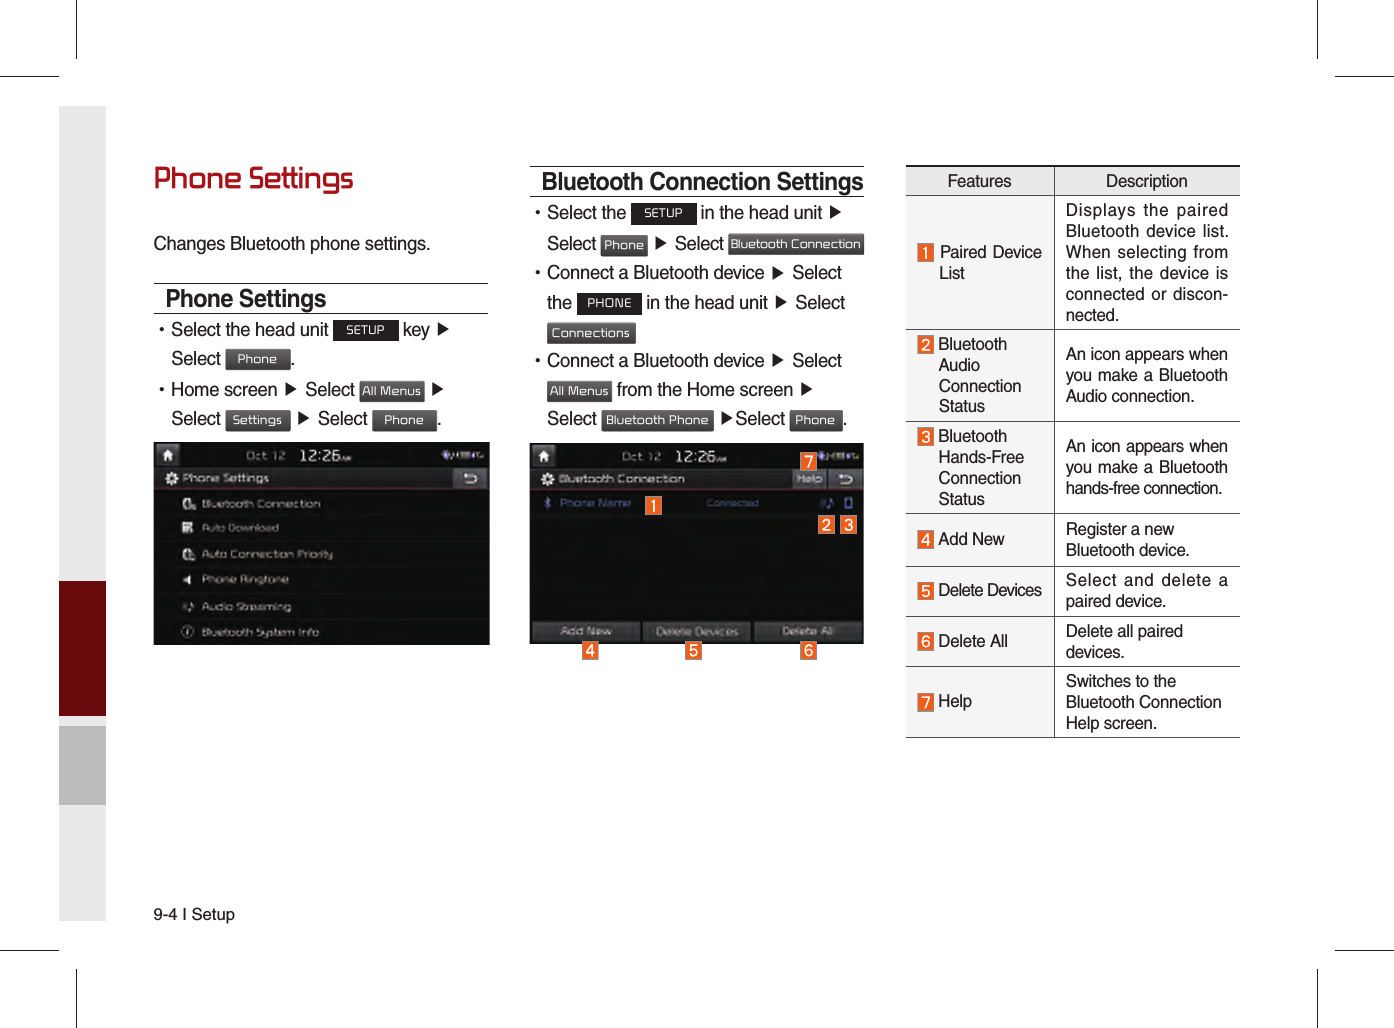
![8SetupSetup is the screen to control sys-tem settings of the AVN. To enter the screen, select the Setup key of the device or the Setup button in All menus.[Option 1]Features Description NavigationProvides Normal/Screen/Guidance/Route/Safety Settings. SoundProvides the sound control options for Position, Bass, Mid, Treble, Volume, Ratio and Advanced settings. Display Provides the Adjust/Mode settings. PhoneProvides the Bluetooth Connection/Auto Download/Auto Connection Priority/Phone Ringtone/Audio Streaming/System Bluetooth Information settings.Features Description Voice RecognitionProvides the Guidance and Priority settings. Clock Provides the Time and View settings. KeyboardProvides settings to switch keyboard lay-outs. Screen SaverProvides the Clock/Image/None settings. System InfoProvides software and storage space infor-mation. Display OffProvides the Display Off (touch activation) function.](https://usermanual.wiki/HYUNDAI-MOBIS/AVC31B2AN.User-manual-2-of-2/User-Guide-2210226-Page-62.png)


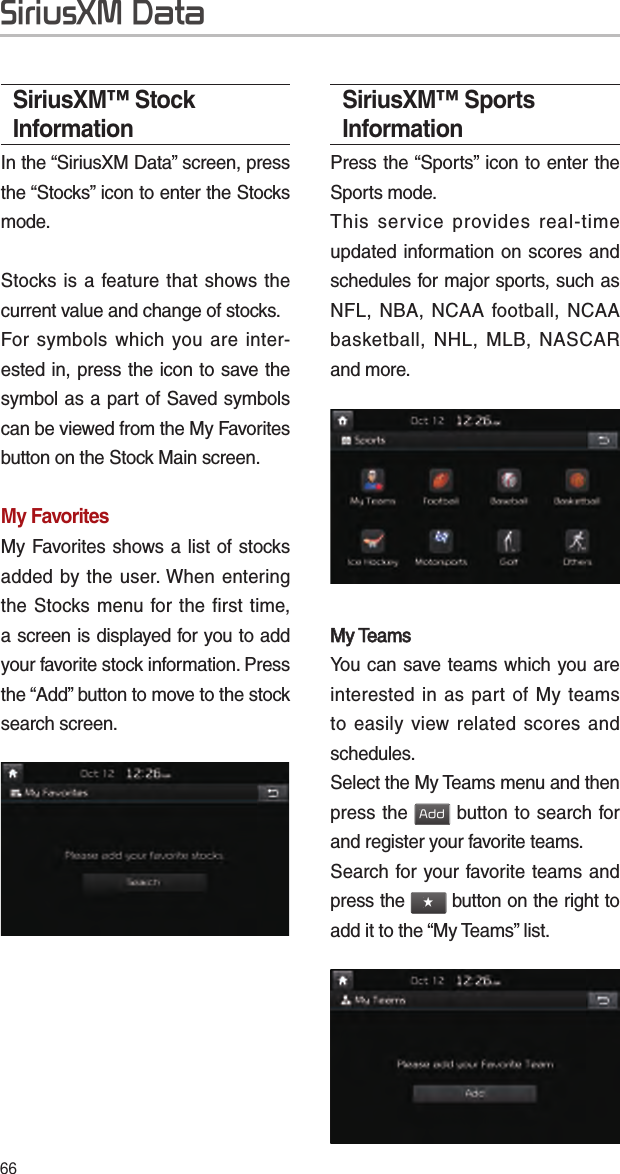
![62Traffi cChange the traffic information set-ting.Press the ON or OFF button to change the settings. •Show Traffic Information On/Off : Select whether to display traffic information or not •Traffic Event Popup Freeway On/Off : Select whether to display popup massage for traffic informa-tion on freeway •Traffic Event Popup Surface Road On/Off : Select whether to display popup massage for traffic informa-tion on surface road.RouteChange the route setting.Press the ON or OFF button to change the [Alternative Routes] set-ting. •Alternative on : Alternative routes will be suggested(depending on the route preference between “Faster time” and “Shorter Distance” NOTICE• Alternative routes can be shown only while the vehicle is not moving. •Alternative off : No alterna-tive routes will be suggested. Guidance will start right after cal-culating with the route preference (Faster time or Shorter distance)Navigation](https://usermanual.wiki/HYUNDAI-MOBIS/AVC31B2AN.User-manual-2-of-2/User-Guide-2210226-Page-116.png)