Haier Telecom 0504T3000 Mobile phone User Manual T3000
Haier Telecom (Qingdao) Co., Ltd. Mobile phone T3000
UserManual.wiki
>
Haier Telecom
>
0504T3000 User Manual
User Manual
Navigation menu
Upload a User Manual
Namespaces
Wiki Guide
HTML
PDF
Info
Views
User Manual
Discussion / Help
Navigation


![Attention 1.There are no user serviceable parts inside this product. If this product appears to be broken, call qualified service personnel or send this product to your original dealer. Do not attempt to disassemble or repair this product as it may result in electric shock or unrecoverable damage to the product itself. 2.Keep this product out of reach of small children. Attention: For body worn operation, this phone has been tested and meets FCC RF exposure guidelines when used with an accessory that contains no metal and that positions the handset a minimum of 1.5cm from the body. Use of other accessories may not ensure compliance with FCC RF exposure guidelines Ⅱ Fast guides Switch on/off the mobile phone press and hold the red ‘power’ key Make a call entry the phone number through keypad and then press green ‘dial’ key to call. Answer a call press the green ‘dial’ key to answer call during calling End a call press the red ‘power’ key. Enter main menu press [OK] in idle mode Enter the Contacts menu press down key or press briefly ‘contacts’ key in the idle mode Enter the call list option press up or send key in the idle mode Return to previous menu press CLR key Changing language which is in service press and hold [#] key in idle mode Activate SMS feature press briefly ‘SMS’ key in idle mode Activate ringtone feature press and hold ‘Contacts’ key in idle mode Activate MMS feature press and hold ‘SMS’ key in idle mode Access the voice tag option press and hold [OK] key in idle mode Access WAP menu press left key in idle mode Activate camera feature press briefly the side key ‘Camera’ in idle mode Activate haier fairyland feature press right key in idle mode Access haier universe option press and hold ‘0’ key in idle mode Events Same events may be change display of the idle mode (missed call, new message). Press [OK] to access the relevant menu or you can press and hold CLR key return to the previous menu.](https://usermanual.wiki/Haier-Telecom/0504T3000/User-Guide-540380-Page-6.png)
![Ⅲ Mobile phone introduction 1. Use for the first time To use your mobile phone, you must insert a valid SIM card in your phone, and the SIM card supplied by your GSM provider or retailer. The SIM card contains your personal subscriber information, your phone number, and memory in which you can store phone numbers and messages. 1.1 Installing SIM card 1. Turn the phone face down and hold supinely its hull. Press the battery clip and slide the battery cover downwards and then unpack the battery cover. 2. Remove the SIM card from its holder and place it on its slot, then push the plastic clip holder, until it stops and maintains the SIM. Note: The clipped corner of the SIM card at top left corner must in align with the one corner of the slot. 3. Slide the battery downwards so that it clicks into place, be careful that the metallic Contacts of battery on the bottom end in alignment with the four metal strips on the phone. 4. Slide the battery door into slots, until it locks into place. 1.2 Switch on the phone 1. To switch on the phone, press the red power key. 2. When you switch on the phone you may be prompted to enter the PIN code, which is the 4 to 8-digit secret code of your SIM card to protect it from unauthorized use. It is pre-configured and communicated to you by your operator or retailer. If you want to change the PIN code, see lower chapter “PIN codes safeguard”. Note: If you enter a wrong PIN code 3 times, your SIM card is blocked. To unblock it, you must request the PUK code from your operator. 1.3 Set Time and Date As prompted by the phone at first switch on, set the date by pressing the appropriate numeric keys then press [OK], to validate, if you need to erase a number, press CLR key to cancel it. Proceed in the same way to set the time. For complete date and time options, see lower chapter ‘Time and Date’. 1.4 Copy of the SIM Contacts If you had a mobile phone before and are using the same SIM card, the card might contain all or part of your current Contacts. The mobile phone detects this and a message asks you if you want to copy your SIM Contacts onto the built-in Contacts (see below). Press ‘CLR’ key to cancel or [OK] key to accept. The Contacts located on your phone is automatically set as your default Contacts. To switch back to the SIM Contacts, please see lower chapter ‘Contacts selecting’. If you do not copy the SIM Contacts at very first switch, you will be able to do it directly from the Contacts menu, see lower chapter ‘all copy to phone’.](https://usermanual.wiki/Haier-Telecom/0504T3000/User-Guide-540380-Page-7.png)
![otherwise it will not be displayed. ///// Auto switch on/off Appears when this feature is activated; otherwise it will not be displayed. //// Vibra Whether in profile mode or in sounds mode, this icon will be appeared when you activate the vibra alert feature, otherwise it will not be displayed. ///// SMS chat Appears when the SMS chat feature is activated. ////// Black list Appears when the black list feature is activated. ////// While list Appears when the while list feature is activated. 2. Main Features 2.1 Access and consult the Contacts In idle mode, press ‘down’ key or press briefly Contacts / ringer key, Contacts/ring key is in the upper left corner of the keypad. Depending on the selected Contacts (in SIM or in phone), the content that appears on the screen may vary: see “Contacts” for details on this subject. To consult the Contacts during a call, press [OK], select View Names List, press [OK] key, and scroll through the entries by pressing ‘down’ or ‘up’ key. Then press CLR key twice to return to the main menu. Note: In Contacts menu, press # key to enter surname of desired name or the first letter, and then press ‘OK’ to access the name directly. 2.2 Make a Call 1. In idle mode, enter the phone number using the keypad. Press CLR key, to correct an error. 2. Press green key to dial the number and press red power key to hang up. Note: For an international call, enter the + sign instead of the usual international prefix by pressing and holding * key. 2.3 Answer and end a call When receiving a call, depending on your subscription and if the caller has permitted this information to be transmitted, his number may be displayed. If the number is stored in the selected phonebook, the corresponding name is displayed instead of the number. 1. To answer the call, press Green key on the left of the keypad or open the phone if it was closed. 2. To reject a call, press Red key on the right of the keypad. If you have activated “Call forward”(see ‘Call forward’ option of in the ‘Call settings’ menu), the call is diverted to a number or voice mail. 3. To hang up press Red key on the right of the keypad or close the phone flip. The phone will not ring if in Silence mode. If you have selected Any Key Answer, you can accept a call by pressing any key (except red key). Closing the phone always hangs up an ongoing communication. A beep indicates the end of the communication. 2.4 Make an IP call handsfree 1. If you want to select the Contacts in SIM card, you can select a desired number, enter the next menu by press OK twice, and then select ‘IP call handsfree’ option to confirm it. 2. If you want to select the Contacts in phone, you can select the same method to make an IP call handsfree. Otherwise, you can select other number of Contacts by press up /down key, and then press OK key to activate ‘IP call handsfree’ feature. 2.5 Change the ringer](https://usermanual.wiki/Haier-Telecom/0504T3000/User-Guide-540380-Page-9.png)
![Press [ok] key select Settings > Sounds > Ringers, move up / down key to select a ringer in the list, then press OK to confirm your choice. Note: Press and hold Contacts/ring key (that is in the upper left corner of the keypad) to enter ringer list. 2.6 Activate the silence mode If you don’t want your phone to ring when you receive a call, you can deactivate the ringer as follows: Select Settings > Sounds > Silent and select ‘on’ confirm. You can press left down side key to close the volume during calling. 2.7 Activate the vibrate alert If you want your phone to vibrate when you receive a call, you can activate the vibra alert as follows: Select Settings > Sounds > Vibra alert and then move up or down to select On or Off and press OK to confirm. Activating the vibra doesn’t mute the ringer. If you want to mute it and keep the vibra function on, activate the Silent mode as described above. The vibra alert is automatically deactivated when you plug the charger. 2.8 Read your mobile phone number To read your own mobile phone number, press down key when in idle mode and select ‘Own numbers’, then press OK to select Show and press OK again. Your phone number is displayed if present on your SIM card. If not, select New, then follow the instructions. If your own number has been stored in the Phonebook, you can read it during a call. 2.9 Adjust the earpiece volume During a call, press up /down left side key to increase /decrease the volume. 2.10 Mute the microphone You can mute the microphone so that your caller cannot hear you. During a call, press [OK], select Mute and confirm by pressing [OK]. 2.11 Un-mute the microphone To un-mute the microphone during a call, press [OK], select ‘Un-mute’ and confirm by pressing [OK], The microphone is un-muted. 2.12 Clear the call list To clear your call list, press [OK], and select Call Info > Call list > Reset. Press [OK], twice to reset the call list. 2.13 Clear the SMS list To clear the whole messages list at once, press [OK], and select Messages > SMS > Read SMS > Delete all SMS. Press [OK], twice to reset the SMS list. 2.14 Clear the contacts To clear the content of your contacts at once, press OK and select Contacts > Delete all. Press OK twice to reset the contacts content.](https://usermanual.wiki/Haier-Telecom/0504T3000/User-Guide-540380-Page-10.png)
![Ⅳ Menu Operation 1. Contacts Your mobile phone has two phonebooks. The SIM phonebook is located on the SIM card and the number of entries depends on the card capacity. The second phonebook is built into the mobile’s memory and can hold up to 991 names. When entering new names in one of the contacts, they will only be added to the one you have selected. The phonebook located on your phone shares the mobile capacity and memory with other features. As such, they are inter-dependent: the more names you create, the less events you can store and vice-versa. 991 are the maximum number of names and events cards, provided that other features are not using a significant amount of the phone’s memory. 1.1 Contacts select In idle mode, press [OK] enters the main menu and select Contacts > Contacts select. Then press up or down key to select the memory located in SIM card. Names added to this selected contact, and then it be copied into the phonebook located in your phone. Your mobile phone only manages one phonebook at a time and will ignore the information relative to the other one: e.g., if «Smith» is present in both phonebooks and if you delete it in the phone, it remains unchanged in the SIM. 1.2 Groups setting In idle mode, press [OK] to entry the main menu, then select Contacts > Groups setting >, you can manage groups and modify group name; you can associate a specific melody and picture to each group. You can associate a name to each group. please see ‘self-Fotocall’. 1.3 Copy to phone If you cancelled or aborted the automatic copy of your SIM phonebook at very first switch, you can do it manually: press [OK], and select Contacts > Copy to phone. When you copy the contents of your SIM phonebook into your phone, you can still use the phonebook of your SIM card, even though it features less fields of information. The contacts will be set default contacts in your phone. 1.4 Delete all You can be reset at once using the Delete all option, and the Delete all option does not apply to the SIM card contacts. 1.5 Name list Press [OK] to entry main menu and then select Contacts > Names list, you can see an added names list; otherwise, you can activate search feature to search desired linkman, when the name list is empty you can select New option to add linkman’s information. Add names in the contacts In the SIM card To add a name in the SIM: 1. Press [OK] key to enter the main menu in idle mode, select Contacts > Names list > New, or press down key to enter the Name list in idle mode, select New to add name. 2. Enter the name, the number of your choice, and then select the type of number allocated to the name: Phone, Fax or Data and press [OK] key to confirm and store this name in your contacts. Note: A number can contain a maximum of 40 digits, depending on your SIM card. Entering all numbers including local ones with international prefix, country code and area code, allow you to](https://usermanual.wiki/Haier-Telecom/0504T3000/User-Guide-540380-Page-11.png)
![dial them from any location. To add a name in the phone: 1. Press [OK] key to enter the main menu in idle mode, select Contacts > Names list > New, or press down key to enter the Name list in idle mode, select New option to input first and last name (no more than 20-latin characters); there is one black between first and last name. 2. Then select the type of number, the numbers fields contain no more than 40 digits and 1 <+> symbol, the extra fields (remark e-mail) contain no more than 50 Latin characters. You can create a maximum of 5 numeric fields (for example, you can save 2 mobile numbers, 3 work numbers), an e-mail address and a text note all for the same person. 3. The phone will then prompt you the Group: choose the group you want this name to confirm. Own numbers The Own numbers option that appears in your phonebook should contain your own phone number. If not, we advise that you enter your mobile number as well as any other relevant information. Although all its fields can be empty, the «Own numbers» item cannot be deleted. Emergency number The emergency number will call the emergency services number in your country. In most cases, you can call this number even if your keypad is locked and if you haven’t yet entered your PIN. Depending on the network operator, the emergency number can be dialled without the SIM card being inserted. 1.5.2 Search In idle mode, press [OK] to entry main menu and then select Contacts > Names list > Search, press [OK] key after input your desired name, and the phone will activate the selected name. Once you have stored names in your contacts, press down key when in idle mode to access the Contacts. You can search for a name in the Contacts by pressing the corresponding key for the letter that you want to go to in the list (e.g., press 8 twice to access the letter «U»). The first record starting with this letter is selected in the list. 1.5.3 Edit and manage names In idle mode, press [OK] to entry main menu and then select Contacts > Names list, once you have stored names in your contacts, then the linkman list will be displayed in the screen. When you select one of the list and press [OK] key that you can see its option, there are different the option between in SIM card or in phone as follows: In SIM card Select a name in the SIM card phonebook, then press [OK], to access one of the following options: • Call • IP call • Send an SMS • Change name • Delete • Voice dial • Flash dial • Copy to phone • Call handsfree • IP call handsfree](https://usermanual.wiki/Haier-Telecom/0504T3000/User-Guide-540380-Page-12.png)
![- Copy to phone to copy the selected name and all related information into the phonebook located in your phone. In the phone Select a name in the phone phonebook, then press [OK], to access one of the following options: • Call • IP call • Send an SMS • Change name • Delete • Voice dial • Flash dial • Copy to phone • Call handsfree • IP call handsfree Select ‘Groups setting’ option, allows you to personalize the groups, and refer to ‘fotocall: see & hear who’s calling’ below for complete information. You can view the name with its relevant information such as all number and field by search ‘Show’ option, and then select ‘New’ to choose the type of field to be added and press [OK] to access the following option: • Call • IP call • Send an SMS • Send an MMS • Change name • Change type: to change or define a field type of an existing record. Only delete or change the alphabetic field (e.g. remark and e-mail). • Delete a field • Show: To show the content of a field in an existing record. • Copy to SIM card: You copy phone numbers into the SIM card. (Your contacts are always updated when switching contacts or when using another phone) • Voice dial • Flash dial • Make default: The first number you enter when creating a new record becomes the default number; it will appear first on the fields list and is automatically called when pressing the green ‘dial’ key. This option allows you to set other number as a default number. • Call handsfree • IP call handsfree 1.5.4 Fotocall: see & hear who’s calling The Fotocall feature allows you to personalize the groups available with their own name («Friends», «Office», etc.), a given picture (from the Picture album) and a given melody (from the Ringers list). You can link one or several contacts from your phonebook to a group. When a name in that group calls, the contact’s name will appear along with the defined picture of that group. The melody defined for that group will also ring. 1. You can select Contacts > Groups setting, and rename the group to be identified («Friends»,](https://usermanual.wiki/Haier-Telecom/0504T3000/User-Guide-540380-Page-13.png)
![«Kids», etc.) and select the Melody and the Picture to be associated to this group. 2. Press and hold ‘CLR’ key to go back to idle, and then press down key to display the content of your phonebook. 3. Select a contact you wish to link to this group and press [OK]. Then choose Select group and select the group of your choice. Note: This feature is only available when you select the phonebook of your phone, not the SIM phonebook. 2. Settings The Settings menu allows you to customize your phone and change the settings related to each available option (sounds, time and date, security, etc.). The Profiles menu allows you to change several settings at once (see ‘profiles’). 2.1 Sounds 2.1.1 Ringtone Allows you to select the ringer tone from the default ringer tone available. The list also includes the recorded and stored melodies. Scroll through the list by pressing up or down and wait to hear the selected melody being played. Press OK key to select this melody as ringer, press CLR key to cancel, or move to the next melody. Note: You will not hear the melody if the volume ringer is set to Off or if the Silence mode was activated. 2.1.2 Messages Ringer Allows you to set an alert beep On or Off, for each time you receive a new message. When On, this option also allows you select the alert of your choice from the ringers list. 2.1.3 Ringer volume By default the ringer volume can be set to High. Press ‘up’ or ‘down’ key to set the volume of your ringer from Silent to Increasing. 2.1.4 Sounds Alerts Allows you to set alert beeps On or Off for the following items: - When an Event you programmed in your organizer is due, - When you have missed a call, - When the Battery is low and requires charging, - To manage the duration of your calls, first after 45 seconds, then every minute of an ongoing call (the beep cannot be heard by the caller). Note: This menu only allows you to activate/deactivate the alert sounds, NOT the alerts themselves. E.g. setting the event alert Off will not prevent your phone from displaying the Reminder screen (if you programmed one), but the corresponding sound will not be played. 2.1.5 Key tones Allows you to set the key tones On or Off. Even when set Off, DTMF are played during calls. 2.1.6 Silent Allows you to set the Silence mode On or Off. When this setting is On, all alerts are deactivated and the vibra alert is active. The Silent mode also applies to key tones. 2.17 Vibra alert Allows you to set the vibra alert On or Off when receiving a call, when an event set in the organiser is due, when you receive a message and when the alarm rings. The vibra alert is always Off you connect the charger or the Cigarette Lighter Adapter.](https://usermanual.wiki/Haier-Telecom/0504T3000/User-Guide-540380-Page-14.png)
![2.1.8 Equaliser This option allows you to choose from different audio settings, also available while a call is in progress. In this case, press [OK] key, select Equaliser, scroll through the list and wait a few seconds to hear the difference. Press [OK] key, to confirm your choice. 2.2 Profile This menu allows you to access a group of predefined settings, which let you quickly adapt your phone to your environment by changing several settings at once. For example, selecting Meeting will set your ringer volume to silent, activate vibra and deactivate the key tones (the other items are set according to the settings you configured). When your meeting is over, selecting ‘Personal’ will reactivate all your usual settings. When you activate any profile mode, this detail of the selected mode will display in the screen. When you associate a hotkey to a profile, also press and hold this key to deactivate it and go back to the ‘Personal settings’. The settings listed in the column Personal, in the following table, are default settings of factory settings. As you can change them, the personal settings in your phone may differ from the table. Except ‘Personal setting’, each blank-box of the five modes of table refers to the settings as stored in the Personal menu (whether you have hanged the settings or not). Other box is the fixed value you can’t change it. Personal Autonomy Meeting Headset Outdoors Car Vibra alert On Off On Ringer volume High Medium Silent Medium High High Backlight 10 second Autonomy 10 second Key tones On Off Animation On Off 2.3 Display 2.3.1 Wallpaper Allows you to set the Wallpaper On or Off. When On, the picture (s) you selected is (are) displayed in Normal or Fade mode in idle mode, if you didn’t activate a slide show. 2.3.2 Animation Allows you to set the animation of the carrousel menus On or Off. When On, this option will also scroll texts, such a message selected in the Read SMS menu. Deactivating this function increases the autonomy of your phone. 2.3.3 Backlight You can set the backlight Duration by selecting one of the available values. The backlight is activated when receiving incoming calls or messages, browsing lists and menus, etc. 2.3.4 Contrast Allows you to choose among several levels of contrast. 2.4 Time and Date 2.4.1 Clock display Allows you to select Analogue digital or tiny time formats when shown in idle mode, as follows: digital, pointer type, no show date or time. 2.4.2 Set date Allows you to set the date by pressing the appropriate numeric keys; you can also set the date by pressing up or down key.](https://usermanual.wiki/Haier-Telecom/0504T3000/User-Guide-540380-Page-15.png)
![2.4.3 Set time Allows you to set the time by pressing the appropriate keys or press up or down key to increase or decrease the time minute by minute. 2.4.4 International clock Allows you to set the own time zone and foreign time zone. 2.4.4.1 International clock display Allows your phone display the own time and foreign time of selected tone at the wallpaper and then press up or down key to select On or Off option. Note: When you selected ‘no clock’ option or activated ‘instant information’ feature, the ‘international time display’ feature will lose efficacy. 2.4.4.2 Own time zone Set time Enter time of own time zone. Own time zone Access this menu, and then press up or down key to select the setting corresponding to your area. Daylight saving This option allows you to set the daylight savings to On (in summer time) or Off (in winter time) by moving up or down. Note: This setting only concerns countries in which time is set according to summer/winter time (e.g. Greenwich Meridian Time / British Summer Time). 2.2.4.3 Set foreign time own Foreign time zone Access this menu, and then press up or down key to select the setting corresponding to foreign area. Daylight saving This option allows you to set the daylight savings to On (in summer time) or Off (in winter time) by moving up or down key. Note: This setting only concerns countries in which time is set according to summer/winter time (e.g. Greenwich Meridian Time / British Summer Time). 2.5 Languages This menu allows you to select a language for all menu text. Press up or down key to select desired language, and then press [OK] key to comfier your choice. 2.6 Firewall 2.6.1 Firewall for incoming calls This feature prevents incoming calls you don not want to answer. Calls from phone number (up to 10) in the “black list” be automatically refused, and only calls from phone numbers (up to 10) in the “white list” will be connected. 2.6.2 Information privacy 2.6.2.1 Information privacy This feature allows you to protect important information such as messages, contacts or call information. You can set passwords for massages, contacts and call information respectively or for any of them. To set a password, press the up or down key to select the item you want to protect and press left or right key to confirm your selected. 2.6.2.2 Change code](https://usermanual.wiki/Haier-Telecom/0504T3000/User-Guide-540380-Page-16.png)
![You can change the password via this menu. The first input the old and correct code and confirm it, then input the new code twice and confirm it. 2.7 Security 2.7.1 PIN protection This allows you to set the PIN protection On or Off. When On, you will be asked to enter your PIN code when switching your phone on. You cannot change your PIN code if this option is Off. 2.7.2 Call barring This menu allows you to limit the use of your phone to specific calls by letting you bar both outgoing and incoming calls. This function is network dependent and requires a specific call barring password supplied by your service provider. This feature had application in incoming calls (all calls and roaming) and outgoing calls (all calls, international calls and Intl. Exc. Home calls). 2.7.3 Change codes Allows you to change your PIN and PIN 2 codes, as well as the call Barring code. Depending on your SIM card, some features or options may require a PIN2 secret code. Your operator gives this to you. Note: If you enter a wrong PIN2 code 3 times, your SIM card is blocked. To unblock it, request the PUK2 code from your operator or retailer. If you enter an incorrect PUK code 10 times in a row, the SIM card will be blocked and unusable. If this happens, contact your operator or retailer. 2.7.4 Public names Allows you to manage a specific names list, called Public Names list, and restrict calls to this list via the Call restriction option. This feature is subscription dependent and requires a PIN2 code. 2.7.4.1 Call restriction If you activate the ‘public only’ feature, only select public names list. You can only access the names of the Public names list, as opposed to the contacts of the main menu. Note: This function is subscription dependent and requires a PIN2 code. Please note that when activating this option, it might also apply to WAP and e-mail connections over GPRS. 2.7.4.2 Public names Allows you to consult and modify your Public Names list. You can search, new and edit name, modify or delete a name in the Public Names list via PIN2 code. 2.8 Shortcuts 2.8.1 Hotkeys Instead of entering the various menus and browsing the lists, you can set up direct access to a specific function by linking it to a Hotkey. Press and hold the key will then automatically activate the function directly or call the associated number. You can only program keys 2 to 9and #, as keys 0 (select language) and 1 (call voice mailbags) are predefined and locked, preventing reprogramming. Depending on your service provider, other hotkeys may be predefined and locked. 1. Select a key from 2 to 9 and press [OK]. 2. Browse the list by up or down key to select the function you wish to associate with ‘2’ key, e.g. launch the calculator feature, then press [OK] to confirm your choice. You can select open the menu (e.g. send message or e-mail) or activate this feature (e.g. calculator and record option). 3. To use the hotkeys, simply press and hold the [2] key corresponding to the function (calculator). If the selected key is already set, you can reprogram or delete it, select the set a hotkey in the list. Press [OK] twice; select Change or Delete option and press [OK].](https://usermanual.wiki/Haier-Telecom/0504T3000/User-Guide-540380-Page-17.png)
![2.8.2 Voice command Instead of entering the various menus and browsing the lists, you can also set a voice tag that will activate a feature (e.g., launch the Calculator). You can associate a Voice command to all the functions supported by the Hotkeys. 1. Enter Voice Command menus, select <New> option and browse the list to select the function to be set with a voice tag. Press [OK] to confirm your choice. 2. When ‘Press OK then speak’ appears, follow the instructions displayed on the screen. When prompted ‘speak now’ to record your voice tag, after the systems store the voice tag, prompted ‘press OK then speak again’ will be displayed on the screen, you must speak again, then the systems will compare the second voice tag with the first, if the twice recorded too much different, you must record again. 3. The voice commend have finished when the voice command twice is the same, you may enter the next menu to operation option as follow: Play voice tag, delete change function and change voice. 4. To use the voice command feature, you can press and hold [OK] in idle mode, then say the voice tag corresponding to the number you want to dial. Note: instructions displayed on the screen. When prompted to record your voice tag, make sure you are in a quiet environment, choose a short and simple word and clearly pronounce it. 2.8.3 Voice dial Voice dial allows you to quickly call name from your phonebook: set a voice tag by recording a word that will call the corresponding name when pronounced. 1. Enter Voice dial menus to select <New> option and then enter the list to select the call number (in phone contacts and in SIM card contacts), depending on the selected contacts to select a name and press [OK]. 2. When Add voice tag? appears, press [OK] ,and follow the instructions displayed on the screen. When prompted ‘speak now’, then record your voice tag, after the systems store the voice tag, the ‘press OK then speak again’ prompted will be displayed on the screen, you must speak again, then the systems will compare the second voice tag with the first, if the twice records too much different, you must record again. 3. The voice record has finished when the voice command twice is the same, you may enter the next menu to operate option as follow: Play voice tag, delete and change. 4. To use the voice dial feature, you can press and hold [OK] in idle mode, then say the voice tag corresponding to the number you want to dial. Note: Words recorded as voice tags can be played, changed or deleted at any time. Up to 15 voice tags can be defined and shared between voice dial and voice command. 2.9 Network Contact your phone operator to have full information about GPRS availability over their network and for an appropriate subscription. You might also need to configure your phone with the GPRS settings supplied by your operator, by using the menus described in this section. This menu allows you to handle the connection between the phone and the network, register manually the available networks and manage your preferred networks. 2.9.1 Preferred list Allows you to build a network list in order of preference. Once defined, the phone will try to register on a network, according to your preferences.](https://usermanual.wiki/Haier-Telecom/0504T3000/User-Guide-540380-Page-18.png)
![2.9.2 GPRS attach This menu allows you to define the attach mode of your mobile phone to the GPRS service: Always on Your phone will always register to the GPRS service. This option allows faster GPRS connection. However it will increase energy consumption. For data calls Your phone will automatically register to the GPRS service only when required. This option reduces energy consumption, however it will increase the connection delay. All options described below are operator and/or subscription dependent. With some operators, you may receive a SMS that contains access parameters that will be stored automatically. Please contact your network operator for detailed information on this subject. Some pre-configured profiles might be locked, preventing re-programming and renaming. Allows you to enter or change the GSM settings and gives you access to the following items: Change name Allows you to enter or change the name of the selected profile. Your phone will automatically register to the GPRS service only when required. This option reduces energy consumption, however it will increase the connection delay. 2.9.3 Register again Provides you with a list of the networks available in the area when the Manual mode is selected. Select the network you want to register with and press [OK] to confirm. 2.9.4 Access settings This menu allows you to create several data profiles: when using WAP or when sending a multimedia message (MMS), the selected profile will be used to connect to the GSM or GPRS network. Note: All options described below are operator and/or subscription dependent. With some operators, you may receive a SMS that contains access parameters that will be stored automatically. Please contact your network operator for detailed information on this subject. Show: Allows you to visualize all parameters of the selected profile. GSM settings: Allows you to enter or change the GSM settings. z Login z Password z Phone number: Phone Number supplied by operator allows you to enter the phone number needed to establish a connection ISDN No. or Analogic No). z Inactivity time: allow you to enter inactivity time period after which the phone automatically disconnects (enter a value (in seconds) of over 30 s). GPRS settings: This allows you to change the GPRS settings: z Login, z Password z APN: Allows you to enter the character string for use to connect to establish the connection. z Inactivity time z Inactivity time: allow you to enter inactivity time period after which the phone automatically disconnects (enter a value (in seconds) of over 30 s). 2.10 Factory settings](https://usermanual.wiki/Haier-Telecom/0504T3000/User-Guide-540380-Page-19.png)
![If you want to clear any added linkman information, you can select this linkman and press OK to delete or change. In case, the ‘send to multi group list’ finished, select ‘Confirm list’ to confirm it. 3.1.3 Read SMS The Read SMS option in the Messages menu allows you to consult the list of SMS you have sent, received, read and that are first stored on your SIM card. Several options allow you to then manage them directly on your mobile phone. - Reply: Send to the sender, - Forward: Forward the selected message (choose the recipient in the phonebook or enter a phone number manually), - Delete: Delete the selected message, - Edit: Edit a message, modify it and resend it to someone (you can add a picture or a sound). - Store number: to store the sender’ number (this option displayed only when this message no store in current contacts list). - Extract number: Extract a number included in the message itself, if this number is included in 3 or more than 3 numbers can be included and extracted - Call: Call the sender, - IP Call: IP Call the sender (operator dependent), - Handsfree: Select handsfree mode to call the sender, - IP hands free: select IP handsfree mode to call the sender, - Store melody if a melody was sent together with the SMS, - Move to Archive allows you to store read messages in the phone memory. Then be consulted by selecting Messages, SMS Archive, and moving a message to the archive list deletes it from the read SMS list. 3.1.4 Stored Messages This feature allows you to store all of the read, sent, saved messages; select the first menu ‘delete all SMS’ to clear the whole messages list at once, press [OK] key to reset the SMS list. When displayed a new message received, press [OK] to access the following options: - Reply: reply an edited message to the sender. (This option only displayed when this message received) - Forward: Forward the selected message (choose the recipient in the phonebook or enter a phone number manually), - Delete: Delete the selected message, - Move to SIM card: Allows you to move archive list to read list and then store this message in the SIM card memory. - Edit: Edit a message, modify it and resend it to someone (you can add a picture or a sound). - Store number: to store the sender’ number (this option displayed only when this message no store in current contacts list). - Extract a number: If this message included several numbers (more number can be included and extracted at the same time) - Call: Call the sender, - IP Call: IP Call the sender (operator dependent), - Handsfree: Select handsfree mode to call the sender, - IP hands free: select IP handsfree mode to call the sender, 3.1.5 SMS settings](https://usermanual.wiki/Haier-Telecom/0504T3000/User-Guide-540380-Page-21.png)
![This menu allows you to customise your SMS via the options described below. SMS centre Allows you to select your default SMS centre. If not available on your SIM card, you must enter your SMS centre number. Signature Allows you to sign your SMS. By default, your signature is you phone number, added at the end of your message (which length is consequently reduced). You can Edit the signature, Change and Save it. Auto save SMS Allows you to set On or Off the option of automatically saving messages sent in the Archive menu. Reply path Allows you to set the Reply path option On or Off. When On, it allows you to transmit the number of your SMS message centre together with the message. Your correspondent can then reply using your own SMS centre and not theirs. This speeds up the rate of transmission. Note: This feature is subscription dependent. 3.2 MMS Your mobile phone allows you to send and receive MMS (multimedia messages), featuring texts, pictures and sounds, including memos that you have recorded. A multimedia message can be made of one slide including text, sound and image), or of several: in this case, the message is played in a slide show, whether you send it to an e-mail address or to another mobile phone. Depending on the application you are using for receiving e-mails, MMS slide shows may not be played. You can press and hold the MMS key in the upper left corner of the keypad to access the MMS menu directly. Note: If the «Memory full» icon is displayed you must Delete old messages (for example, to save the messages as the template, drafts and inbox) 3.2.1 Create MMS Create the name You must have selected the phonebook «In phone» to access a name or to input new number and e-mail address, and then you can select one of the items (if have more numbers) and press [OK] key to Edit the e-mail address or phone number, or to Remove it from the list. Design your message Confirm the addressee list and access MMS editor to edit following contents: 1. Allow you to add a Picture, add Text, add a Sound, Send the message or access the Options menu. Press up or down key to access the Picture Album list, select a picture, a text and a sound and then press OK to access correspondent menu. Press right key to edit more than ever slides. 2. Select ‘Send MMS’ the text icon by press up or down, press [OK] key to confirm your choice. 3. Press up or down to select icon of MMS and then press [OK] to access the options. z Add slide: Add and create a new slide. Press up or down to browse slides. Once you have created a page, you can also press right key to add when the last page of the message you are currently designing is selected. z Next slide (only the MMS including many pages): To move to the next slide. z Previous slide (only the MMS including many pages): To move to the previous slide.](https://usermanual.wiki/Haier-Telecom/0504T3000/User-Guide-540380-Page-22.png)
![z Add subject: To edit and change or enter subject of your message. z Save MMS as draft: To save your message as a draft, that you can edit, complete and send later on. z Save as template: To save your message as a template, that you can use as a basis for other MMS. z Preview MMS: To preview the slide show you have created from the first to the last slide, including sounds & pictures. z Slide duration: To change the value of slide duration that you set a delay between each slide. Sounds can be one of the files available in the Album, or a sound memo that you record when creating the MMS: in this case, select <Records>, then <New> and follow the procedure that appears on the screen. You cannot attach an existing voice memo. Warning: The icon of the item you have added (picture or sound) changes colour to indicate its insertion. Although the picture preview when creating the MMS is (W) 105 x (H) 55 pixels, the maximum size of a picture you can send is (W) 640 x (H) 640 pixels. A copyright-protected picture cannot be sent. The bigger the picture size, the longer it will take to send it. Select none if you don’t want to insert any picture. Send your Message As described above, you can either: Send your message as soon as it is completed. To select ‘Send MMS’ by press up or down key, press OK key to send this MMS. Save it as a Draft to complete it and send it later: to send, select the message in Drafts, select Send MMS. Once it has been sent, the MMS is removed from the drafts list. Note: If the sending of a draft message fails, the message will be moved to the Outbox menu, and identified as not sent. Receive an MMS When you receive an MMS, an alert message appears on the screen to inform you. If the sender of the message has asked for a Read report, a prompt will ask you to press [OK] key to send it or to press CLR key to refuse the sending of the report. Once the MMS is downloaded, select it in the Inbox list and press right key to play it. Press OK key to access the following option: z Play message: To switch back to automatic mode, the MMS is then played as a continuous slide show. z Next or Previous slide: To move to the next or previous slide. You can also press up or down when viewing the MMS in manual mode. This item is not available when you have selected the last or first slide. z Save picture: To detach the picture of the current slide and save it in the Picture album. z Save sound: To detach the sound of the current slide and save it in the Sound album. z Close: close the MMS menu to return to the main menu. 3.2.2 Inbox Lists all the Notifications, Delivery and Read reports, Read and Unread MMS. You can Read or Delete notifications and reports. You can Play, Forward or Reply to an MMS, display its Details or Delete it. Note: Notifications are automatically deleted once you have received the full MMS. Do NOT](https://usermanual.wiki/Haier-Telecom/0504T3000/User-Guide-540380-Page-23.png)
![Slide duration Allows you to select the duration between each slide included in your MMS. Network account Allows you to choose a data profile from the ones you have set (see “Access settings” page 39 for complete information on how to configure or modify a data profile). This profile and the parameters it features will then be used for connection. Bearer This menu allows you to select the type of network used when launching a connection, including GSM, GPRS OR GPRS first. MMS Center Allows you to enter or change the MMS address of the server your phone will connect to. Gateway address Allows you to enter or change the IP address of the server’s gateway. Gateway port Allows you to enter or change the Port number of the server’s gateway. 3.3 E-mail If not included in your phone subscription, you must subscribe to an e-mail account (over the phone or via Internet from a computer) and have received the settings information from your provider. In this case, all parameters are communicated to you by your provider and/or operator as described below and must be entered as given. If included in your subscription, you simply have to enter the login, password and e-mail address of your e-mail account. In some cases, your operator might also be your e-mail service provider. Your phone might have been pre-configured. In this case, most parameters are already set and you don’t have to change them (except for Login, Password and E-mail address which are up to you when creating an e-mail account). Access e-mail menu, Mailboxes 1 and 2 feature the same settings and options. Configuring them differently will allow you to have two different e-mail addresses from your phone. 3.3.1 Open mailbox E-mails are received on a server, which you must connect to in order to retrieve your e-mails on your mobile phone. 1. Select Open mailbox and your mobile phone automatically connect to the e-mail server and download the e-mail headers. Your mobile phone retrieves five e-mail headers at a time. 2. If the Next or Previous appears at the end or beginning of the list, other e-mail headers are pending, select one of the available options and press OK key to retrieve them. Note: E-mail without any attachment may be automatically displayed in the details screen. 3. Select one of the headers and its Header information is displayed on the screen. [No icon] The e-mail can be downloaded. //// The e-mail size is too large and it cannot be downloaded. //// The e-mail is marked to be deleted. 4. Then select Get mail and press OK key to download the e-mail. Repeat this operation to download each e-mail corresponding to each selected header. Note: If the e-mail is too big (over 50 KB), it is rejected and the download is cancelled. 5. If the e-mail you have received contains attachments (JPEG picture, text file or another e-mail), they are characterized by a specific icon: //// Contains the details of the e-mail header (date and time, sender’s e-mail address, etc.), press](https://usermanual.wiki/Haier-Telecom/0504T3000/User-Guide-540380-Page-25.png)

![5. Call info. 5.1 Call list This menu provides you with the list of outgoing and incoming calls, as well as attempts at auto redialing and call details. The calls (made, missed and received) are displayed in chronological order with the most recent on top of the list. When the Call list is empty the screen displays List empty. The most recent number is displayed on the top of the screen. The different call type will have different icon be shown, there are three icon of the call type as follows: /// Indicates the dialed calls /// Indicates the missed calls /// Indicates the answer calls 5.1.1 Call list Select a call list press OK to consult the date, time, number, and call status of any selected call and to know if it was sent or received. Press [OK] key to following option: Call: Dial the selected associated number of the call list. IP Call: Allows you to set prefix IP number before made a call. Headsfree: Use the Headsfree feature to call the selected number of call list IP Headsfree: Enter the IP prefix before dial the IP call number. Send a SMS: Allows you to send a SMS to the selected number of the call list. Send a MMS: You can send a MMS to the selected number of call lists Store: store the associated number. Reset Clear the all Name lists and restart the list. 5.2 Counters The GSM Call Counters do not include WAP connections. Most options mentioned below are subscription-dependent. You can access follows option use this menu: Total duration Select this option to show the time duration of Outgoing or Incoming calls. Last call information This menu allows you to display the name, number, time and cost of your last call. Reset Select this option to reset the time duration of outgoing or incoming calls. 5.3 Total cost Allows you to display the accumulated cost and to set the counter to zero. It may be protected by PIN or PIN2 5.3.1 show Shows how much has been spent after having established the charge rate. 5.3.2 Change rate Allows you to set or change the rate per unit. First enter the currency used (three characters maximum) then enter the cost per unit. 5.3.3 Reset Allows you to reset the current Total cost to 0; requires your PIN2 code. 5.3.4 Show balance Allows you to check the remaining credit (compared with previously set limit).](https://usermanual.wiki/Haier-Telecom/0504T3000/User-Guide-540380-Page-31.png)

![8 Entertainments 8.1 Games This menu gives you access to the brick game. The object of the game is to destroy the bricks by hitting them with the ball. When you have destroyed the last brick, you access the next level. Keys used are the following: [4] and [6] to move the racket left or right. [*] and [#] to throw the ball left or right. Press either of these keys to start the game. [0] to pause the game; pause time is limited to 2 min. after which the screen returns to idle mode and the game is lost. 8.2 Constellation Fate This feature allows you to search the fate on today or a certain day after you have set a certain constellation. If you know your constellation, you can select it from “constellation”, if not you can select “birthday set” then press OK key to show your constellation. Return to Constellation fate, you can select Today or Any day to check your fate. (Latter choice needs you to input date and then press OK key) 8.3 Chinese Gala This feature allows you to search for the next gala after you entering a certain date. You can select Today or Any day to search for the next gala after that date. (Any day needs you to input a certain date) Press OK key to display the next gala. 9 Operator services Most features are depended on your operator. If you have applied for those services already, you can use those services any time. So you may not be able to use all features displayed on the screen. Please consult your supplier for the details. You need to send a message or dial a number for getting the right to use some of those services. Note: if your card does not have STK, WAP will be showed directly. 9.1 WAP Your mobile phone supports services based on the Wireless Application Protocol (WAP). The built-in WAP browser allows you to access services supplied with your network, such as news, sports, weather, etc. Note: your mobile phone readily supports the WAP function if it is included in your subscription; if your phone was pre-configured, it shouldn’t be necessary for you to change the settings described in this section. With some operators, WAP parameters can be set remotely. Please check directly with your operator for detailed information. If you want to activate WAP, you can press left key to enter WAP directly or select Operator services 〉WAP 〉Home page, press up and down key to review the contents. Press OK key to select one or press CLR key to quit. 9.1.1 Homepage The homepage is pre configured and will connect directly to your operator’s WAP homepage. You can change this default homepage by specifying the name and URL address of another homepage, which will then replace the current one, please see WAP set in the next chapter for detail.](https://usermanual.wiki/Haier-Telecom/0504T3000/User-Guide-540380-Page-40.png)
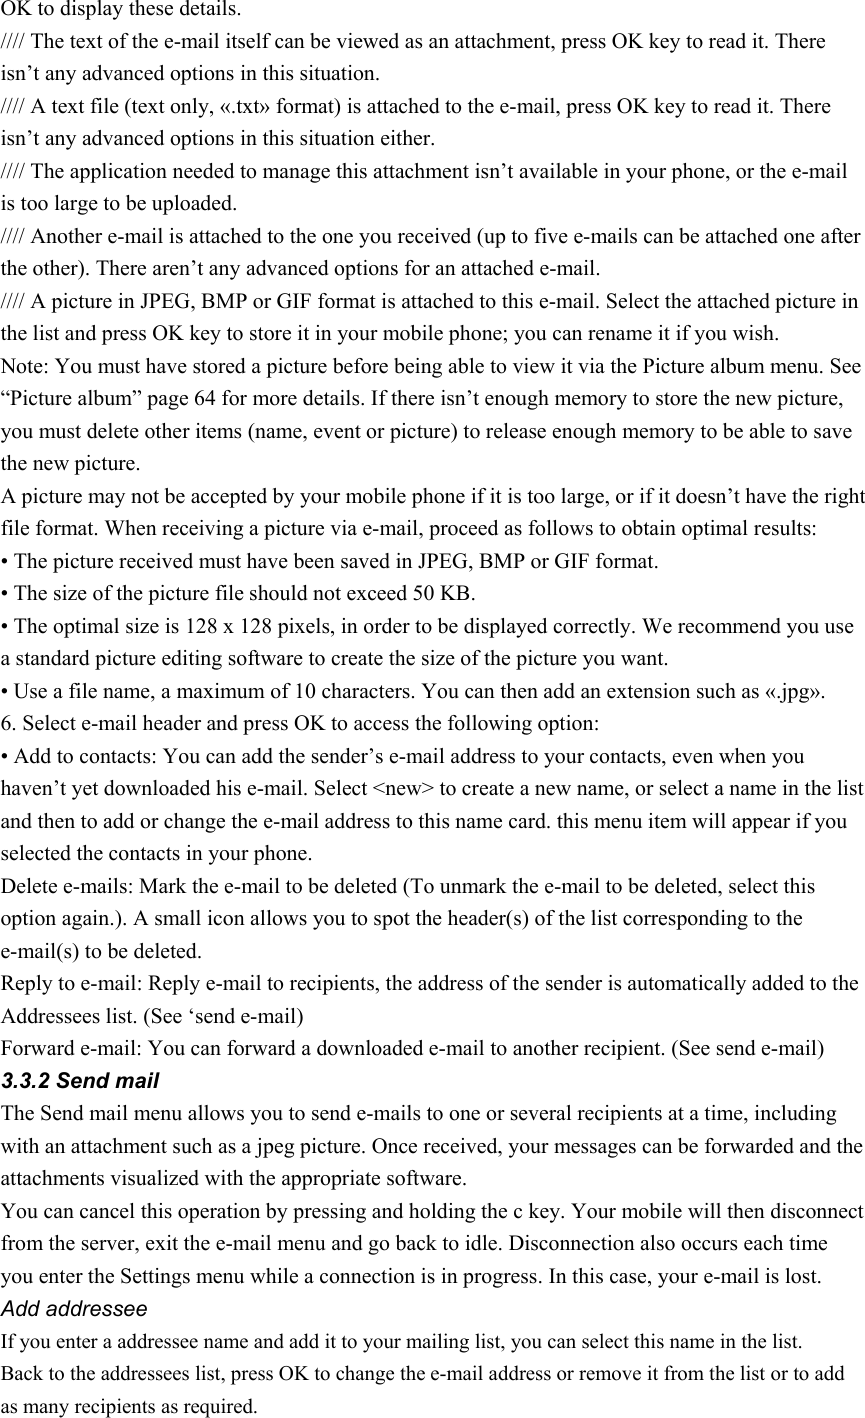
![Ⅵ Trouble shooting Problem Remedy The display indicates that the phone is locked. You need PIN code and PUK coke to unlock the phone. Contact your service provider. No signal You lose connection with your network. Your location may be a blind area(like in a tunnel or between high-rises) or not covered by the network. Change your location and try again. Or contact the service center for advice. Slow (or no) keypad response It is extremely cold. Move to a warmer place and try again. No standby display Press the Clear key Turn the phone off and then check if the SIM card and the battery are properly installed. Turn on the phone and try again. Battery icon flashing during charging without battery level indicating bars The battery level is extremely low or the ambient temperature is out of the acceptable range(0-4.5 Celsius degree). Move the battery to a warmer place and wait some minutes before starting changing. Flashing backlight and battery icon, prolonged beep and prompt “wrong accessory” Detach the charger from the phone and replace with a genuine one. You can not use the phone in a car A car may contain some metal parts that absorb electromagnetic wave and thus have an adverse effect on phone performance. Purchase a car kit to allow hand-free answer. Consult the local authorities about use of phones while driving. What is the difference between pressing and pressing and holding a number key Press a number key and the number is displayed. When pressing and holding (one second at least) a number key, you can activate a hotkey( refer to setting up a Hotkey) or a special symbol (e.g. “+”when pressing and hold the [T9+*]key)](https://usermanual.wiki/Haier-Telecom/0504T3000/User-Guide-540380-Page-44.png)