Haier Telecom 0619HW-W300 PDA User Manual
Haier Telecom (Qingdao) Co., Ltd. PDA
user manual
1
This document and all its contents included remain the proprietary material of Qingdao
Haier Telecom Co. Ltd. (Haier Telecom) and are protected by the Chinese laws and
applicable international conventions on copyrights. Any reproduction, transmission,
disclosure,revision, modification or use otherwise of this document or the whole or part of
its contents, in whatever form and by whatever means, is not permitted without prior
express written authorization from Haier Telecom. Offenders will be liable for any and all
damages caused by their offence hereof and will be subject to all remedies that Haier
Telecom is entitled to seek under applicable laws.
2
Contents
Contents ............................................................................................................................ 2
1. Safety Precautions ........................................................................................................ 4
2. Handset guide ............................................................................................................... 5
2.1 Keyboard description ........................................................................................... 5
2.2 Idle mode screen ................................................................................................. 5
2.3 Battery ................................................................................................................. 6
2.4 SIM card and memory card .................................................................................. 6
2.5 Desktop ................................................................................................................ 7
2.6 Keyboard lock ...................................................................................................... 7
2.7 Text edit ................................................................................................................ 8
2.8 Notification panel ................................................................................................. 8
2.9 Using the airplane model ..................................................................................... 9
3. Quick Functions ............................................................................................................ 9
3.1Dialer .................................................................................................................... 9
3.2 Messaging .......................................................................................................... 11
3.3 Music ................................................................................................................. 13
3.4 MainMenu .......................................................................................................... 13
4. Menu Functions ........................................................................................................... 14
4.1 Menu Tigo .......................................................................................................... 14
4.2 Top Games ......................................................................................................... 14
4.3 Contacts ............................................................................................................. 14
4.4 Call log ............................................................................................................... 15
4.5 Calendar ............................................................................................................ 16
4.6 Camcorder ......................................................................................................... 16
4.7 Settings .............................................................................................................. 16
4.8 Alarm .................................................................................................................. 18
4.9 Browser .............................................................................................................. 18
4.10 Downloads ....................................................................................................... 18
4.11 Gallery .............................................................................................................. 19
4.12 Calculator ......................................................................................................... 19
4.13 File mgr. ........................................................................................................... 19
4.14 App mgr. ........................................................................................................... 19
4.15 Recorder .......................................................................................................... 20
4.16 Connection management ................................................................................. 20
4.17 Notes ............................................................................................................... 20
4.18 Tasks ................................................................................................................ 20
4.19 FM Radio ......................................................................................................... 20
4.20 Email ................................................................................................................ 20
4.21 World Clock ...................................................................................................... 21
4.22 Converter ......................................................................................................... 22
4.23 EBook .............................................................................................................. 22
3
4.24 Torch ................................................................................................................ 22
4.25 Network Links .................................................................................................. 22
4.26 Java ................................................................................................................. 22
4.27 MSN ................................................................................................................. 22
4.28 Facebook ......................................................................................................... 22
5. Care and maintenance ................................................................................................ 22
6. Warnings and Precautions .......................................................................................... 23
4
1. Safety Precautions
Please read these simple guidelines. Not following them may be dangerous or illegal.
Do not switch the phone on where Mobile Phone use is prohibited or when it
may cause interference or danger.
Do not place your phone and its accessories in containers with strong
electromagnetic field.
Obey all traffic laws. Always keep your hands free, to operate the vehicle while
driving. Your first consideration while driving should be road safety.
Hospitals or health care facilities may be using equipment that could be
sensitive to external radio frequency energy. Follow all regulations and rules
enforced.
Do not use the phone at a refueling station. Do not use near fuel or chemicals.
Follow all instructions. Wireless devices can cause interference in aircraft.
Keep the phone and all its parts, including accessories, out of the reach of
children. Do not use the phone while connected to the charger or with wet hand
or bare feet.
Use only approved batteries and chargers. Disconnect the charger from the
power source when it is not in use. Do not leave the battery connected to a
charger for more than a week, since overcharging may shorten its life. Please
remove the battery only after the phone is switched off normally, otherwise it
could cause unpredictable damage for the phone.
Only qualified personnel should service the phone. Faulty service may be
dangerous and may invalidate any warranty applicable to the device.
5
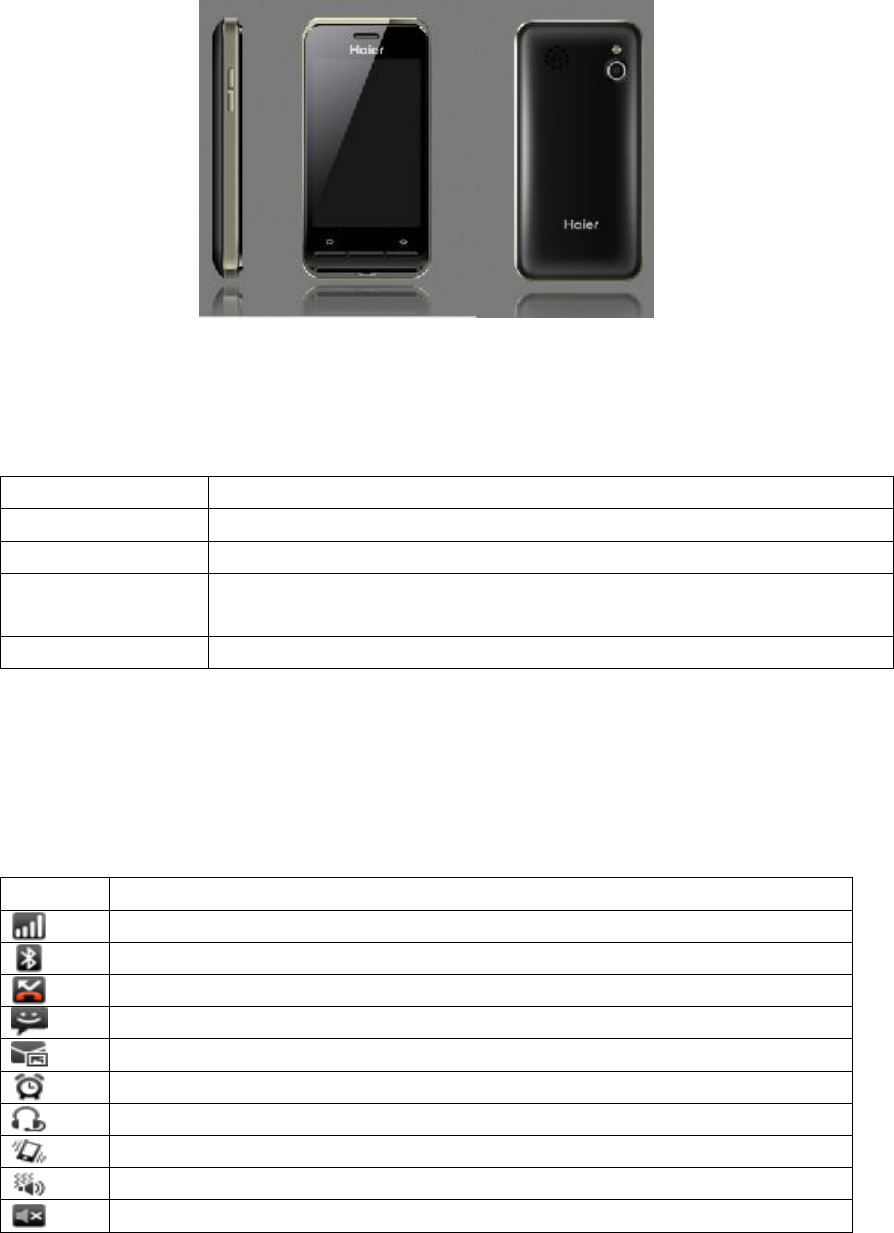
2. Handset guide
The illustration below displays the main components of your phone.
The appearance of the mobile phone and introduction:
2.1 Keyboard description
Name
Description
1 Send key
Enter the call log
2 HOME key
Short press to enter the idle screen.
3 Back key
Short press will fall back to the previous step, Long press will power
on/off.
4 Side key
In Idle screen: turn up or turn down voice
Notes: long press means pressing the key for more than 2 seconds; short press means
pressing key for less than 2 seconds.
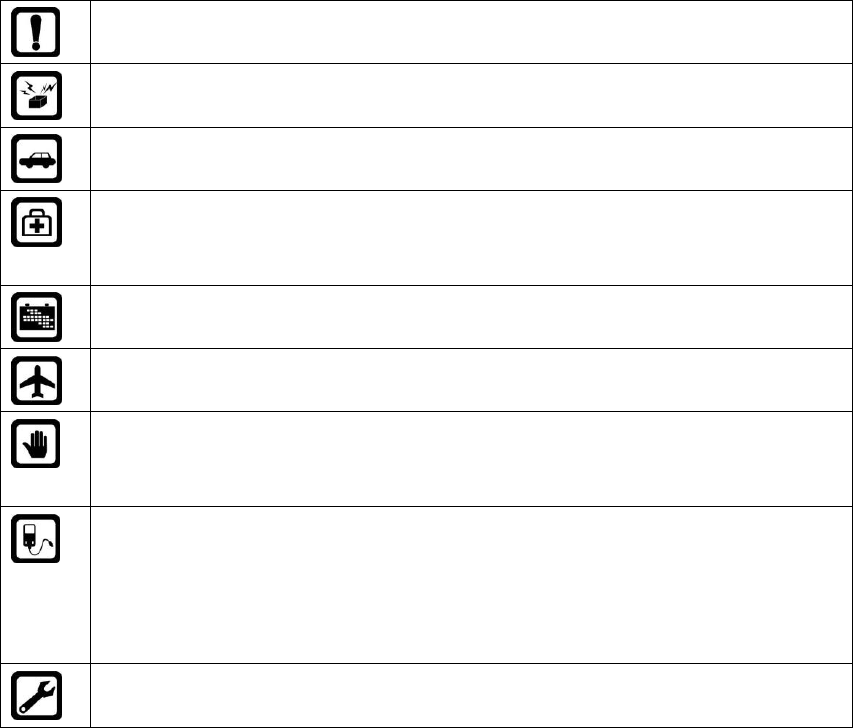
2.2 Idle mode screen
Icon
Description
Indicates signal strength.
Indicates Bluetooth has been activated.
You have one or several missed calls.
You have one or several new text messages.
You have one or several new multimedia messages.
Alarm clock has been activated.
Indicates a headset is connected to the phone
Indicates vibrate alert type.
Indicates vibrate and ring alert type.
Indicates Silent mode.
6
Indicates battery power level.
2.3 Battery
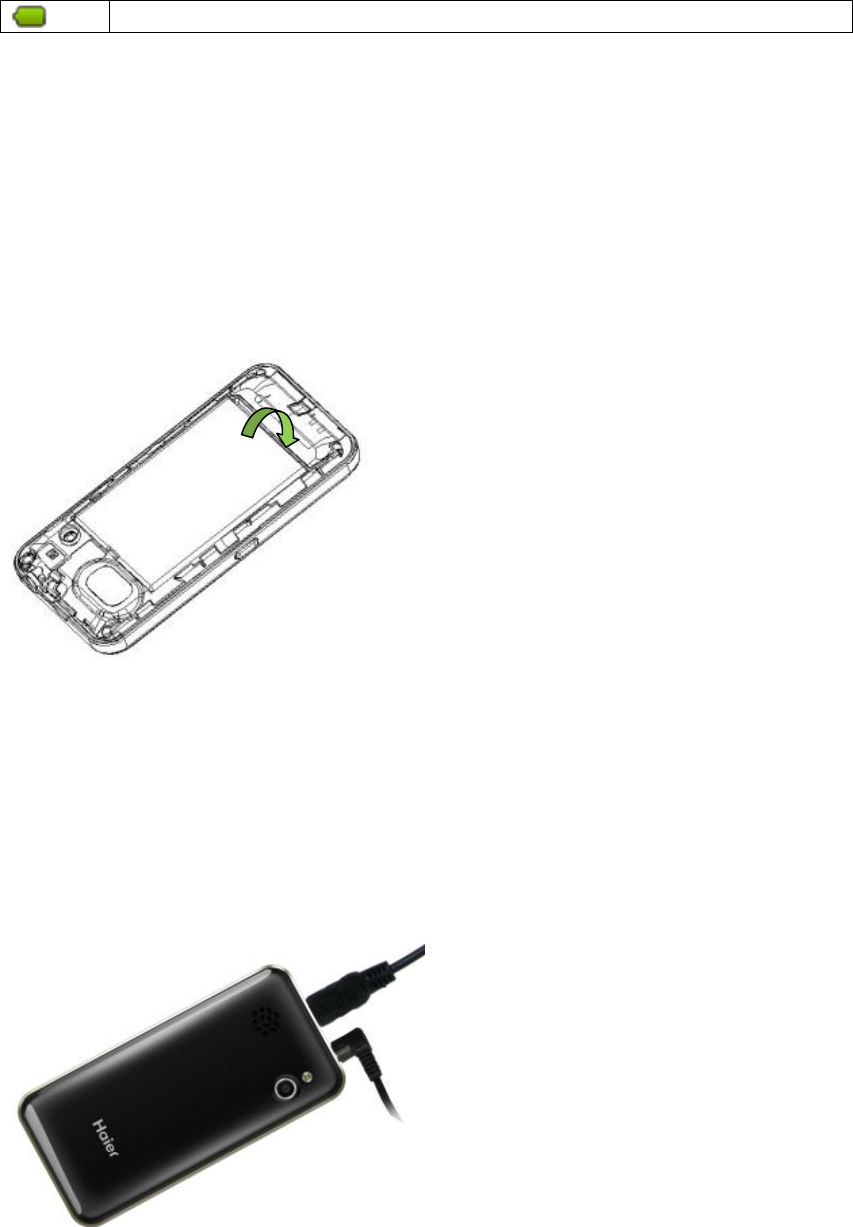
2.3.1 Installing and removing
1. Remove the battery cover.
2. Insert the battery
3. Replace the battery cover.
2.3.2 Charging the battery
Before charging the battery, ensure that it has been properly inserted into your phone.
1. Connect the USB cable that came with your mobile phone to the charger.
2. Connect the USB cable to your mobile phone
3. Then, plug in the connector of the charger to an electrical outlet.
2.4 SIM card and memory card
Installing SIM card and memory card.
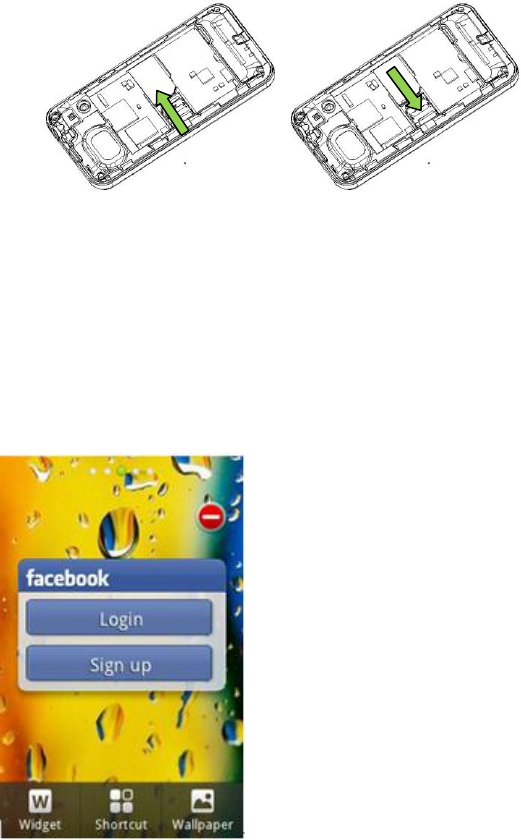
7
1. Remove the battery cover.
2. Insert the SIM card and memory card as shown in the diagram.
Note:
When inserting the SIM card, ensure that the golden contact faces downward.
2.5 Desktop
In standby mode, Press the desktop space, you can enter widget, shortcut menu and
change the current wallpaper.
2.6 Keyboard lock
2.6.1 Locking the screen
When your mobile phone is on, press the Power key to lock the screen. When the screen
is locked, you can still receive messages and calls.
You can select time for automatic keyboard lock via [Settings][Display
settings][Screen auto-lock], so that your cell phone can automatically locks the
keyboard.

8
2.6.2 Unlocking the screen
Press the Power key to wake up the screen. Then drag the lock icon left or right to unlock
the screen.
2.7 Text edit
Input mode
When you use your cell phone, you may need to enter text. For example, to save a name
in phonebook, write a short message, and create an agenda. You can enter letters,
symbols and numbers through virtual keyboard of your cell phone.
In edit state, This cell phone provides English capital/small letter, Number input modes
and so on.
Default input mode after power-on is Smart English. If you have changed input method in
edit window, the setting will be saved when you enter edit screen again as long as the cell
phone has not been powered off.
: In the edit mode, short press into input method; long press into writing language.
: In edit mode, Click it, you can select input pattern, Qwerty, Alphanumeric,
Handwriting.
Notices: you can set the language and input method from language and input
method of the settings.
2.8 Notification panel
Notification icons report the arrival of new messages, calendar events, as well as ongoing
events, such as when call forwarding is on or the current call status. You can open the
notification panel to view the reminder or events.
2.8.1 Opening the notification panel
1. Dragging the Status bar down from the top of the screen and the notification panel
will be open, when the new notification icon is on it.
2. These actions can be done:
Touching a notification to open it in its application.
Touching Clear to clear all of the notifications.
2.8.2 Closing the notification panel
Dragging the tab at the bottom of the Notifications panel to the top of the screen.
9
2.9 Using the airplane model
Some locations may require you to turn off your phone’s mobile, Wi-Fi, and Bluetooth
wireless connections. You can turn off all these wireless connections at once by placing
your phone in Airplane mode. There are 2 ways you can set up airplane model:
1. Pressing and holding the power key and touch Airplane mode in the options menu.
2. On home screen, touching menu key > Settings > network & connectivity > Check
Airplane Mode
3. Quick Functions
3.1Dialer
3.1.1 Dial numbers
When logo of network provider appears on the screen, you can dial or answer calls.
Information bars at upper left corner of the screen show intensity of network signal. (Four
information bars represent most intense signal.)
Since quality of call is greatly affected by barrier, movement in small range can effectively
improve quality of call.
3.1.1.1 Make domestic phone call
Enter the interface of dialer Input phone number and then Click send key to start the call. If
the phone number needs to be changed, please delete characters. While dialing, dialing
animation will be displayed on the screen. Once the other side is put through, talk state
information will be displayed on the screen.
After the call, please click the icon of the end call.
You can enter domestic phone numbers according to following sequence:
Area code Phone number Send key.
3.1.1.2 Make international Call
To make an international call, press number key 0 until pre-fix symbol “+” for international
long-distance call appears on the screen.
You can enter international phone number according to following sequence:
+ Country code Complete phone number Send key
After pre-fix, enter country code and complete phone number you want to dial. According
to conventions, county code for Germany is 49, and 44 for UK and 46 for Sweden, etc.
Similar to making an international call, “0” before city code should be removed.
For example, you must dial +86 21 114 if you want to dial Shanghai’s service hotline from
another country.
10
Note: In some networks, it is not allowed to use “+” to dial international phone numbers.
3.1.1.3 Dial a number in the list
Every phone number you dialed or received is saved in call log list in your cell phone.
Phone numbers you dialed or received recently are recorded in the call log list, Phone
number of the call you received most recently is located at the top of every list. When
phone number list is full, old numbers will be deleted automatically. Operate as follows:
Phone numbers appear in the lists can be dialed directly by clicking Send key.
In phone number list, click contact to view details and so on.
3.1.2 To receive a call
When there is an incoming call, incoming call animation will be displayed together with
special ringtone or vibration. If phone number of the caller can be recognized, the number
will be displayed on incoming call screen. If information about the number is stored in
contacts, caller’s name and icon will also be displayed. At the same time, specified
ringtone will be played or play music or vibrate according to current settings. If caller hides
his/her number or the network bans call indication, the incoming call is displayed as ******.
Click [accept] or slide the icon of [answer] to answer calls.
When you want to reject the incoming call, touch the icon of the reject directly.
3.1.2 During a phone call
3.1.2.1 Managing a multi-party call
If you receive a new call while you are already on a call, you can connect the second call
to the call you are on or reject it. If you receive the new call, you can switch between the
two calls or merge them and set up a conference call with multiple callers.
3.1.2.2 Switching between calls
The active call number will be on the first line and the other will be hold. You can switch
the two calls by selecting one of them on screen or menu. The hold call will be kept
automatically and the conference will not be heard by the hold one. If you hang up either
of them, the other one will be active automatically.
3.1.2.3 Making a Conference Call
You can also set up a conference call with multiple callers. The steps are following:
1. Establishing two calls, either by dialing or answering an incoming call.
2. when the two calls are active, making a conference call by selecting the merge-call on
11
screen.
3. You can dial or receive a new call and merge it into the conference call, if new partner
joins
The conference will be cancelled if you touch End key during the conference call.
3.1.3 Emergency call
As long as you are within coverage of network (which can be found out by checking
network signal intensity indicating bars on upper left corner of the screen), you can call
emergency service. If your network provider does not provide roaming service for the area,
“Restricted Service” will be displayed on the screen. As long as you are within coverage of
network, you can make an emergency call even without a SIM card.
3.2 Messaging
You can touch the messaging button in the main screen. You can send and receive SMS
or MMS. The default is conversation mode. You can enter settings menu to close the
conversation mode.
3.2.1 Sending SMS
Enter this menu, touch New msg. to create a new message.
1. Entering messaging then touching New msg to compose a new SMS.
2. Touching the “To” part then enter one contact or many contacts, or Select from the
phone book or you want to send the recipient.
3. Touching the “Tap to compose” part then Use the virtual keyboard or handwriting input
the information you want to edit.
4. After composing the message, it can be sent by SIM card.
New msg. interface menu:
3.2.1.1 Send:
Enter the recipient’s number or retrieve a number from the phonebook, then click send to
send.
3.2.1.2 Save
Save the message to the draft.
3.2.1.3 Insert
Touch Insert on the screen to add image, audio, video and subject and so on.
3.2.1.4 Add subject
Insert the subject and converted to mms.
3.2.1.5 CC/BCC
Insert the cc/bcc and converted to mms.
3.2.1.6 Preview
12
Preview the MMS.
3.2.2 Sending MMS
1. Entering messaging then Touch Insert on the screen to add image, audio, video and
subject can corner to compose a new MMS.
2. Touching the “To” part then inputting the receivers’ number, or touching the contacts
icon to choose receivers from the contacts.
3. Touching the “Tap to compose” part then inputting the content to be sent.
4. Touching the button around the “Tap to compose” part to attach pictures, videos and
audio files.
5. Touching the menu key, choosing “Add subject” and a subject can be inputted.
6. After composing the message, touching send button to send the message.
3.2.3 Replying Text Messages
When your phone receives a new message, your phone will beep and the status bar in the
phone main screen displays the new message indicator, and you can read it, and You can
reply it after reading.
1. Entering the messaging.
2. Selecting the message to be replied from the messages list.
3. Touching the “Reply” part then inputting the content to be replied.
4. After composing the message to be replied, touching send button to send the message.
3.2.4 Deleting Messages
1. Entering the messaging.
2. You can delete messages as follows.
• Long pressing the message from the list of messages to popup the options menu
then choosing the option of “delete ”.
•Touching the “delete” button enter the list of messages then choosing one message,
more messages, pressing the “delete” button to delete message.
3.2.5 Inbox
Inbox contains the received messages.
3.2.6 Sentbox
Use the menu to view and search the messages you sent.
13
3.2.7 Outbox
Use the menu to view and search the messages you sent but failed due to some reason.
3.2.8 Drafts
You can read the messages saved in draft.
3.2.9 Archive
Use the menu to view and search the messages you save to this folder.
3.2.10 SIM Messages
Use the menu to view and search the messages in SIM card.
3.2.11 Settings
Enter the menu to set SMS and MMS settings. Select the option you want to set to edit.
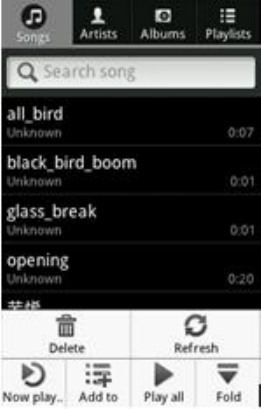
3.3 Music
Enter this menu, Click-More-Refresh then it will search all songs.
3.4 MainMenu
You can click [main menu] in standby state to enter the main menu

14
4. Menu Functions
4.1 Menu Tigo
You can enter the USIM card application.
4.2 Top Games
You can enter into a link of games.
4.3 Contacts
It integrated dial, call recording and contact functions, You can use the functions of
telephone directories to store some important person's name, phone, home phone,
business cards, such as telephone company information. From the main menu, enter the
contacts.
Note: This phone can store 2000 contacts.
4.3.1 Opening Contacts
You can open the contacts list in two ways:
1. Touching Contacts on home screen.
2. Touching Call key > Contacts
4.3.1 Search
It supported by the first letter and the whole string to find.
15
4.3.2 Add contacts
1. Opening the contacts list, touching Menu key > Add contact.
2. Selecting Phone or SIM card you want to save the contact to.
3. Entering the contact's name, and then adding any detailed information such as phone
number or address.
4. When you are finished, touch Save to save the contact information.
4.3.3 Groups
Add the Groups name、picture、ringtone and you can append the members
4.3.4 Share
Send the selected numbers via Bluetooth.
4.3.5 Delete
1. Opening contacts list, then touching Menu key>more.
2. Touching Delete contact and entering the contacts list.
3. Selecting the contact(s) that you want to delete, and then touching Done to confirm that
you want to delete the contact.
4. Touching Delete to confirm that you want to delete the contact.
4.3.6 Message
Send SMS to selected number.
4.3.7 My card
Set personal’s name, number.
4.3.8 Settings
It contains Contacts storage, Name display, Set speed dial list, Backup contacts (Need to
insert T card), Restore contacts (Need to insert T card), Import contacts (import contacts
on the SIM card into your phone), Export contacts, Fixed dial number (FDN).
4.4 Call log
Enter the call log you can see three options: All/Missed/Clear, Choose Clear to delete all
16
call records, And you can click single record to delete.
Contact information stored call records: Enter the call log interface, click to save the
record, select Add and add a new contact record in the existing contact.
4.5 Calendar
Enter the menu to show date,and you set the followings:
Add: Select a date and add a new task for the date. When the set time phone will alarm to
remind you that the task.
Events: You can view the current events.
4.6 Camcorder
Enter the menu, touch the icon to choose camera or video recorder, and set the
functions through the icon on the idle of camera interface. >Touch [icon] of the setting to
set the following: switch to front camera, photos, flash, EV, capture mode, Situational
model,self-timer, white balance, effects, storage, image quality and settings,
>In video recorder interface touch [icon] to set the following: Situational model,white
balance,EV and settings.
4.7 Settings
4.7.1 Network&connectivity
1. Flight mode: on/off
2. Connectivity settings: Bluetooth
3. Cellular network settings: Data service, Data roaming, GPRS transfer preference,
Mobile network settings, Data accounts.
4.7.2 Sound settings
Set the sound of the phone.
4.7.3 Call settings
4.7.3.1 Blacklist
Auto reject the number in black list
4.7.3.2 Whitelist
Auto answer the number in white list
4.7.3.3 Auto redial
Allows you redial automatically when one time trial dial fails by turning on this function.
17
4.7.3.4 IP dial
Open/close IP dial function.
4.7.3.5 Call time reminder
During a phone call, as your call duration nears the set time, alert will sound.
4.7.3.6 Auto quick end
Function with a time limit on the call. Beyond setting the length of time, the phone
automatically hang up call
4.7.3.7 Reject unknown number
Reject unknown number
4.7.3.8 Reject by SMS
Set function on/off, set SMS templates.
4.7.3.9 Connect notice
Connect tone when call connect.
4.7.3.10 Auto answer
Auto answer when headset is plugged in.
4.7.3.11 Video call
Include Video call preview, Dial mode, Answer mode and so on.
4.7.3.12 Additional call settings
Include Call waiting, forwarding, barring and so on.
4.7.4 Contacts settings
You can set some options of contacts.
4.7.5 Messaging settings
Supports viewing and editing
4.7.6 Display settings
Set Wallpaper, Themes, Brightness, Screen auto-lock, Motion sensor: on/off, when the
phone is properly rotated, the interface will be with the rotation.
4.7.7 Schedule power on/off
Set the time of the Schedule power on/off.
4.7.8 Security settings
Set the phone and SIM card’s security information

18
4.7.9 Date&time settings
Set the Date and time.
4.7.10 Language &input method
Set the current language and input method
4.7.11 Pen calibration
You can adjust touch screen to more nicety, please touch the screen to adjust.
4.7.12 SIM usage
State the amount of your SIM card.
4.7.13 Restore factory settings
Use this menu to reset the phone’s settings to the original factory settings.
Caution: Please backup the important phone data before resetting your mobile
phone.
1. Entering main menu, selecting “Settings” > “Restore factory settings”.
2. Input phone password and press ok to restore factory settings.(password is 0000.)
4.8 Alarm
Enter this menu, you can Add the Alarm, delete, Set sleep time and volume from settings.
4.9 Browser
Enter the URL, click Go, it will link to the current contents.
Browser - "browsing the web, press on the picture, there shortcut keys, select" Save
picture "function
4.10 Downloads
Downloaded file will be shown here.

19
4.11 Gallery
View the current pictures and videos
4.12 Calculator
Touch screen for the current computing.
4.13 File mgr.
4.13.1 View the available space of phone memory and memory card.
Enter main menu, selecting “File mgr” > “Storage status”, which allows you to view the
available storage space.
4.13.2 Freeing Up Your Mobile Phone Memory
If your mobile phone memory space is insufficient, please attempt to use the following:
• Moving files to the micro SD card.
• In Browser, clearing all temporary Internet files and Browser history information.
• Uninstalling the downloaded programs that you no longer use.
• Resetting your mobile phone.
4.14 App mgr.
It contains: Applications and Widgets.
20
4.15 Recorder
It supports recording.
4.16 Connection management
You can check the connection Connection Status.
4.17 Notes
You can add notes what you want.
4.18 Tasks
You can add tasks what you want.
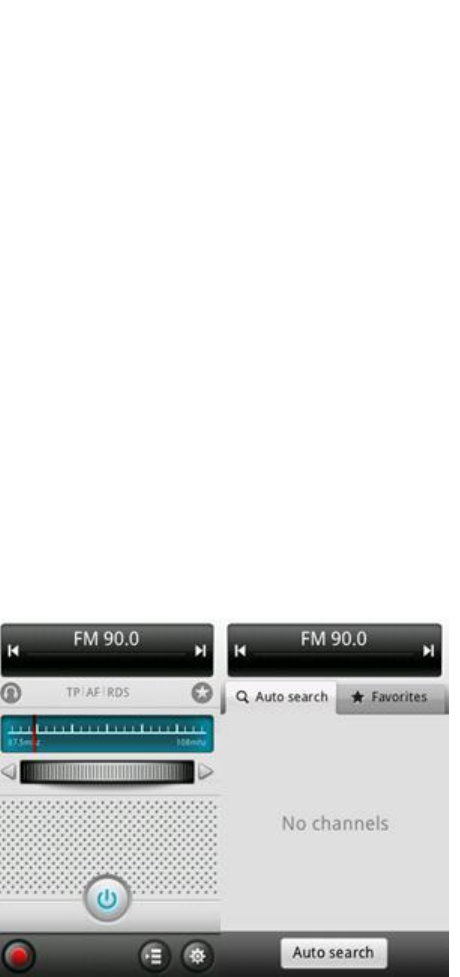
4.19 FM Radio
Once you have entered this function, you must insert the earphone.
4.20 Email
You can use E-mail to send and receive mail message. You can add the type of POP3 or
IMAP E-mail provided by Web (such as Yahoo, 163 or other providers).
Select the email menu, enter the e-mail address and password, such as the system
automatically identifies the mailbox information, will automatically complete the
configuration, if the system does not recognize, will mail to the user according to the type
21
of IMAP or POP3, enter the appropriate configuration information.
4.20.1 Adding an E-mail Account
Caution: Your E-mail account must be set in advance, then an E-mail can be sent or
received in access to Internet.
1. Touching the main menu button in the home screen to enter main menu then selecting
E-mail.
2. Inputting address and password, then touching “Next”.
3. Following the direction of screen to finish the setup.
4.20.2 Deleting an E-mail Account
1. Entering the main menu, choosing E-mail then getting access to the interface of
account.
2. Touching the “settings”> “Accounts”>”Delete” .
3. Touching “OK” to delete your account.
4.20.3 Sending an E-mail
1. Entering the main menu, choosing E-mail then getting access to the interface of
account.
2. Touching the “New Email”
3. Inputting the address of receiver in the “To” part.
4. Inputting the subject of the E-mail in the “Subject” part.
5. Inputting the content of the E-mail in the “Compose Mail” part.
6. Touching “Send” to send the E-mail.
4.20.4 Viewing an E-mail
1. Entering the main menu to choose E-mail, then getting access to your account.
2. Choosing the E-mail you want to view.
3. Touching the menu button, then choosing “Refresh” to refresh your inbox.
4. Touching the E-mail to view.
4.21 World Clock
You can look up the time of the other city in the world.
View the storage capacity of phonebook of SIM card and phone

22
4.22 Converter
You can choose weight/length/currency to conversion.
4.23 EBook
Firstly, put the ebook into the document management in the root directory of the ebook,
then you can turn on this feature from the interface normal.
4.24 Torch
Click on the icon, you can open/close the Torch.
4.25 Network Links
The machine provides some network links: Gmail, Google, Yahoo, Twitter, Youtube,
Flickr.
4.26 Java
Native support for JAVA, built ebuddy, Nimbuzz, Guiacel, you can also manually install
some of the JAVA program.
4.27 MSN
MSN is a chatting tool, you can chatting with other in network,
4.28 Facebook
Facebook is a chatting tool, you can chatting with other in network,
5. Care and maintenance
If your mobile phone has abnormal conditions, please check it with the following table. If
the problem still remains, please ask mobile phone after sales for help.
Common problems
Check item
Cannot charge
Please check if the charger is properly connected to the phone

23
and the power source jack.
Cannot power on
Please check if the battery level is too low;
Please check if the battery is properly loaded;
Please press power key for enough time.
Insert the SIM card
but cannot read the
information in the
SIM card
Please check if the SIM card is properly inserted;
Please check if your SIM card is valid.
Cannot make phone
call
Please check if the phone number is valid.
Please check if you are in service area.
Poor voice quality
Please check if the phone signal is strong enough.
If you are in a building, please move near the window.
The contact cannot
get your voice during
the phone call
Please check if your mike is blocked by fittings or other blocks.
6. Warnings and Precautions
This section contains important information pertaining to the operating instructions of your
device. It also contains information about how to use the device safely. Read this
information carefully before using your device.
Electronic Device
Power off your device if using the device is prohibited. Do not use the device when
using the device causes danger or interference with electronic devices.
Medical Device
• Follow rules and regulations set forth by hospitals and health care facilities. Do not use
your device when using the device is prohibited.
• Pacemaker manufacturers recommend that a minimum distance of 15 cm be
maintained between a device and a pacemaker to prevent potential interference with
the pacemaker. If you are using a pacemaker, use the device on the opposite side of the
pacemaker and do not carry the
device in your front pocket.
Potentially Explosive Atmosphere
Power off your device in any area with a potentially explosive atmosphere, and comply
with all signs and instructions. Areas that may have potentially explosive atmospheres
include the areas where you would normally be advised to turn off your vehicle engine.
Triggering of sparks in such areas could cause an explosion or a fire, resulting in bodily
injuries or even deaths. Do not power on your device at refueling points such as service
stations. Comply with restrictions on the use of radio equipment in fuel depots, storage,
and distribution areas, and chemical plants. In addition, adhere to restrictions in areas
where blasting operations are in progress. Before using the device, watch out for areas
that have potentially explosive atmospheres that are often, but not always, clearly
marked. Such locations include areas below the deck on boats, chemical transfer or
24
storage facilities, and areas where the air contains chemicals or particles such as grain,
dust, or metal powders. Ask the manufacturers of vehicles using liquefied petroleum
gas (such as propane or butane) whether this device can be safely used in their vicinity.
Traffic Security
Observe local laws and regulations while using the device. In addition, if using the
device while driving a vehicle, comply with the following guidelines:
• Concentrate on driving. Your first responsibility is to drive safely.
• Do not talk on the device while driving. Use hands-free accessories.
•When you have to make or answer a call, park the vehicle at the road side before using
your device.
•RF signals may affect electronic systems of motor vehicles. For more information,
consult the vehicle manufacturer.
•In a motor vehicle, do not place the device over the air bag or in the air bag deployment
area. Otherwise, the device may hurt you owing to the strong force when the air bag
inflates.
•Do not use your device while flying in an aircraft. Power off your device before boarding
an aircraft. Using wireless devices in an aircraft may cause danger to the operation of
the aircraft and disrupt the wireless telephone network. It may also be considered
illegal.
Operating Environment
• Do not use or charge the device in dusty, damp, and dirty places or places with
magnetic fields. Otherwise, it may result in a malfunction of the circuit.
• The device complies with the RF specifications when the device is used near your ear
or at a distance of 1.5 cm from your body. Ensure that the device accessories such as a
device case and a device holster are not composed of metal components. Keep your
device 1.5 cm away from your body to meet the requirement earlier mentioned.
• On a stormy day with thunder, do not use your device when it is being charged, to
prevent any danger caused by lightning.
• When you are on a call, do not touch the antenna. Touching the antenna affects the
call quality and results in increase in power consumption. As a result, the talk time and
the standby time are reduced.
• While using the device, observe the local laws and regulations, and respect others'
privacy and legal rights.
• Keep the ambient temperature between 0°C and 45°C while the device is being
charged. Keep the ambient temperature between –10°C to 55°C for using the device
powered by a battery.
Prevention of Hearing Damage
Using a headset at high volume can damage your hearing. To reduce the risk of
damage to hearing, lower the headset volume to a safe and comfortable level.
Safety of Children
Comply with all precautions with regard to children's safety. Letting the child play with
your device or its accessories, which may include parts that can be detached from the
device, may be dangerous, as it may present a choking hazard. Ensure that small
children are kept away from the device and accessories.
25
Accessories
Choose only batteries, chargers, and accessories approved for use with this model by
the device manufacturer. The use of any other type of battery, charger, or accessory
may invalidate any warranty for the device, may be in violation of local rules or laws,
and may be dangerous. Please contact your dealer for information about the availability
of approved batteries, chargers, and accessories in your area.
Battery and Charger
• Unplug the charger from the electrical plug and the device when not in use.
• The battery can be charged and discharged hundreds of times before it eventually
wears out. When the standby time and the talk time are shorter than the normal time,
replace the battery.
• Use the AC power supply defined in the specifications of the charger. An improper
power voltage may cause a fire or a malfunction of the charger.
• Do not connect two poles of the battery with conductors, such as metal materials, keys,
or jewelries. Otherwise, the battery may be short-circuited and may cause injuries and
burns on your body.
• If battery electrolyte leaks out, ensure that the electrolyte does not touch your skin and
eyes. When the electrolyte touches your skin or splashes into your eyes, wash your
eyes with clean water immediately and consult a doctor.
• If there is a case of battery deformation, color change, or abnormal heating while you
charge or store the battery, remove the battery immediately and stop using it. Otherwise,
it may lead to battery leakage, overheating, explosion, or fire.
• If the power cable is damaged (for example, the cord is exposed or broken), or the
plug loosens, stop using the cable at once. Otherwise, it may lead to an electric shock,
a short circuit of the charger, or a fire.
• Do not dispose of batteries in fire as they may explode. Batteries may also explode if
damaged.
Cleaning and Maintenance
• The device, battery, and charger are not water-resistant. Keep them dry. Protect the
device, battery, and charger from water or vapor. Do not touch the device or the charger
with a wet hand. Otherwise, it may lead to a short circuit, a malfunction of the device,
and an electric shock to the user.
• Do not place your device, battery, and charger in places where they can get damaged
because of collision. Otherwise, it may lead to battery leakage, device malfunction,
overheating, fire, or explosion.
• Do not place magnetic storage media such as magnetic cards and floppy disks near
the device. Radiation from the device may erase the information stored on them.
• Do not leave your device, battery, and charger in a place with an extreme high or low
temperature. Otherwise, they may not function properly and may lead to a fire or an
explosion. When the temperature is lower than 0°C, performance of the battery is
affected.
• Do not place sharp metal objects such as pins near the earpiece. The earpiece may
attract these objects and hurt you when you are using the device.
• Before you clean or maintain the device, power off the device and disconnect it from
26
the charger.
• Do not use any chemical detergent, powder, or other chemical agents (such as alcohol
and benzene) to clean the device and the charger. Otherwise, parts of the device may
be damaged or a fire can be caused. You can clean the device and the charger with a
piece of damp and soft antistatic cloth.
•Do not dismantle the device or accessories. Otherwise, the warranty on the device and
accessories is invalid and the manufacturer is not liable to pay for the damage.
•If the device screen is broken by colliding with hard objects, do not touch or try to
remove the broken part. In this case, stop using the device immediately, and then
contact an authorized service center in time.
FCC Regulations:
This device complies with part 15 of the FCC Rules. Operation is subject to the following
two conditions: (1) This device may not cause harmful interference, and (2) this device
must accept any interference received, including interference that may cause undesired
operation.
This device has been tested and found to comply with the limits for a Class B digital
device, pursuant to Part 15 of the FCC Rules. These limits are designed to provide
reasonable protection against harmful interference in a residential installation. This
equipment generates, uses and can radiated radio frequency energy and, if not installed
and used in accordance with the instructions, may cause harmful interference to radio
communications. However, there is no guarantee that interference will not occur in a
particular installation If this equipment does cause harmful interference to radio or
television reception, which can be determined by turning the equipment off and on, the
user is encouraged to try to correct the interference by one or more of the following
measures:
-Reorient or relocate the receiving antenna.
-Increase the separation between the equipment and receiver.
-Connect the equipment into an outlet on a circuit different from that to which the receiver
is connected.
-Consult the dealer or an experienced radio/TV technician for help.
Changes or modifications not expressly approved by the party responsible for compliance
could void the user‘s authority to operate the equipment.
RF Exposure Information (SAR)
This device meets the government’s requirements for exposure to radio waves.
This device is designed and manufactured not to exceed the emission limits for exposure
to radio frequency (RF) energy set by the Federal Communications Commission of the
U.S. Government.
The exposure standard for wireless devices employs a unit of measurement known as the
Specific Absorption Rate, or SAR. The SAR limit set by the FCC is 1.6W/kg. *Tests for
SAR are conducted using standard operating positions accepted by the FCC with the
device transmitting at its highest certified power level in all tested frequency bands.
Although the SAR is determined at the highest certified power level, the actual SAR level
of the device while operating can be well below the maximum value. This is because the

27
device is designed to operate at multiple power levels so as to use only the power
required to reach the network. In general, the closer you are to a wireless base station,
the lower the power output.
The highest SAR value for the model device as reported to the FCC when tested for use
at the ear is 0.492 W/kg and when worn on the body, as described in this user guide, is
0.61 W/kg (Body-worn measurements differ among device models, depending upon
available accessories and FCC requirements.)
While there may be differences between the SAR levels of various devices and at various
positions, they all meet the government requirement.
The FCC has granted an Equipment Authorization for this model device with all reported
SAR levels evaluated as in compliance with the FCC RF exposure guidelines. SAR
information on this model device is on file with the FCC and can be found under the
Display Grant section of www.fcc.gov/oet/ea/fccid after searching on FCC ID:
SG70619HW-W300.
For body worn operation, this device has been tested and meets the FCC RF exposure
guidelines for use with an accessory that contains no metal and the positions the handset
a minimum of 1.5 cm from the body. Use of other accessories may not ensure
compliance with FCC RF exposure guidelines. If you do not use a body-worn accessory
and are not holding the device at the ear, position the handset a minimum of 1.5 cm from
your body when the device is switched on.