Haier Telecom 1007H-U50 MOBILE PHONE User Manual H U50
Haier Telecom (Qingdao) Co., Ltd. MOBILE PHONE H U50
UserManual.wiki
>
Haier Telecom
>
1007H U50 User Manual
Users Manual
Navigation menu
Upload a User Manual
Namespaces
Wiki Guide
HTML
PDF
Info
Views
User Manual
Discussion / Help
Navigation

![14Number key Enter numbers, letters, and some special characters. In standby mode, press and hold [1] to access your voice mail server. # key In standby mode, long press this key to enable or disable the Meeting mode; short press this key to Input the symbol “#”. * key In standby mode, short press this key to input the symbol “*”. key Input method switch. key Short press this key to input numbers and symbols, but only enter once in the input interface. Ctrl key Enter Symbol. 1.3 State icons <Icons on the screen: > Indicates SIM Card signal strength. You may use GPRS to serve. Indicates vibration mode has been activated. New short message(s) received. The SIM card receives one new multimedia message. The SIM card receives one new email. Alarm clock has been activated.](https://usermanual.wiki/Haier-Telecom/1007H-U50/User-Guide-1327233-Page-14.png)
![15 Indicates a headset is connected to the phone. Start call forwarding function. Indicates keyboard has been locked. Indicates battery power level. You have one or several missed call. Open the Bluetooth Open the WLAN If your cell phone is within coverage of GSM network and has registered the network, the name of the registered network service operator will be displayed at upper part of the screen. 1.4 Screen background light Background light can illuminate the screen. When you power on your cell phone, background light will turn on for a certain period. If no key is pressed within the period, the background light will turn off automatically so as to save battery. Setup background light brightness in [Settings] –[Phone Settings] –[ [Misc settings] – [LCD Backlight].](https://usermanual.wiki/Haier-Telecom/1007H-U50/User-Guide-1327233-Page-15.png)

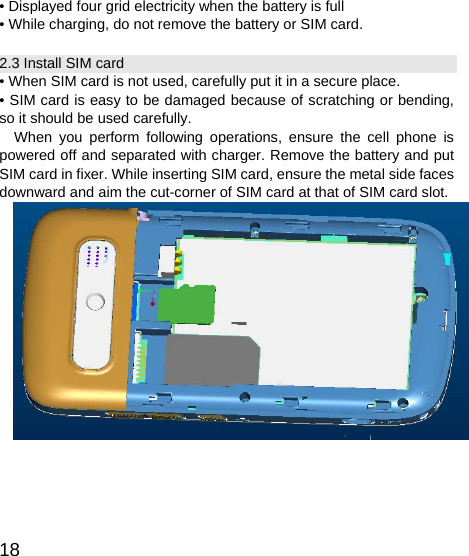
![19 2.4 Remove SIM card When you perform following operations, ensure the cell phone is powered off and separated with charger. Remove the battery and take out SIM card from holder. Note: SIM card is a computer chip containing protocol details, security information and personal phonebook, etc. 2.5 How to power on/off Ensure battery is properly installed. Power on and hold [Power key] button until boot screen appears. Some SIM cards have PIN code protection. If there is prompt for input your PIN code, input your PIN code and then press [OK].](https://usermanual.wiki/Haier-Telecom/1007H-U50/User-Guide-1327233-Page-19.png)
![20Default PIN code is 1234. After power on, if SIM card inserted is valid, your cell phone will automatically search available network; if not, it will prompt: no SIM card is available. To power off, hold [Power key] until shutdown screen appears. 2.6 Security password You can use access password to avoid unauthorized use of your SIM card. PIN code PIN code is used to prevent illegal use of user’s SIM card. If your cell phone has enabled PIN code protection, there will be prompt for entering PIN code. If wrong PIN code is entered for three times, SIM card will be automatically locked. You have to enter PUK code so as to unlock it. PIN code is related to SIM card instead of the cell phone, and is provided by network service operator. PUK code PUK code, referring to personal unlock code, is used to unlock SIM card that is locked because of wrong input of PIN code. If wrong input of PUK code amounts to ten times, SIM card will lose efficacy. PUK code is provided by network service operator.](https://usermanual.wiki/Haier-Telecom/1007H-U50/User-Guide-1327233-Page-20.png)
![25Press this key in this state to enter phone book. Messages Press this key in this state to enter short message. Sound recorder Record the call. Background sound Press this key in this state to open or close background sound. Mute Open or close Mute. DTMF Open or close DTMF. Note: Menu items marked with * appear in specific conditions only. For example, “Switch” appears only when calls in talk state and hold state exist at the same time. Besides, multi-party talk function should be applied from network service operator. 3.7 Keyboard lock You can select time for automatic keyboard lock via [Settings]Æ[Security settings]Æ[Auto keypad lock], so that your cell phone can automatically locks the keyboard. You can also press [soft key] and then [send key] to lock keyboard in standby state. Once keyboard is locked, you can press [send key] according to directions on the screen to unlock the keyboard.](https://usermanual.wiki/Haier-Telecom/1007H-U50/User-Guide-1327233-Page-25.png)
![26Basic Functions 4.1 Dial phone Direct dial In standby state, press number keys to enter the telephone number you want to dial. To delete wrong input, press [right soft key] to delete a number before the cursor. To delete all numbers, please hold [right soft key] until all numbers are deleted or press [End key] to return to standby interface directly. Once phone number to dial has been input, press [Send key]. If the phone number being dialed out can be recognized by phonebook, name and icon of contact person will be displayed on dialing screen, and calling animation is displayed at the same time. Press [End key] to end a call. Quick dial from contacts list Press [right soft key] to enter contact interface. Press [Up navigation key] or [Down navigation key] to select the phone number you want to dial. Press [Send key] to dial out the number. Quick dial from dialed phone number list Press [Send key] to enter dialed phone number record page. Press [Up navigation key] or [Down navigation key] to select the person you want to call or the number you want to dial. Press [Send key] to dial out the number. Quick dial](https://usermanual.wiki/Haier-Telecom/1007H-U50/User-Guide-1327233-Page-26.png)
![27Open the speed dial function, and then set different name for different number keys. In standby mode,press and hold the number key to speed dial. 4.2 Answer incoming call When there is an incoming call, incoming call animation will be displayed together with special ringtone or vibration. If phone number of the caller can be recognized, the number will be displayed on incoming call screen. If information about the number is stored in contacts, caller’s name and icon will also be displayed. At the same time, specified ringtone will be played or play music or vibrate according to current settings. If caller hides his/her number or the network bans call indication, the incoming call is displayed as ******. Press [Answer soft key] or [Send key] to answer calls. If Any Key Answer is selected, you can press any key apart from End key and Right soft key to answer calls. When you want to reject the incoming call, press [End key] directly. 4.3 Talk options The cell phone provides some talk control functions in the process of talk. Press [Options soft key] to access the talk control functions in the process of talk. Hold/release talk state If network supports, you can hold current talk. Press [Options soft key] and select Hold option in the menu.](https://usermanual.wiki/Haier-Telecom/1007H-U50/User-Guide-1327233-Page-27.png)
![28To activate held talk, press [Options soft key] and select Hold option in the menu. Dial second number When you are making a call, you can dial another number. Enter the second number or press [Phonebook] option in [Options soft key] to select in phonebook and then press [Send key]. When the second number is put through, the first call will be held automatically. Answer second incoming call If there is a second incoming call in the process of talk, the screen will display a second call is waiting. Call wait function is only available when the network supports this service and you have set to Enabled in Call wait menu. Press [Answer soft key] or [Send key] to answer second call. When the second call is put through, the first call will be switched to hold state. Press [End key] to terminate the second call. Select current phone number Information of the other side is indicated by small icon in title area of the screen. Select the number in talking and press [Option soft key] to display following options: Switch: Current call enters hold state, while the held call is activated. Conference: Add held call to conference call. End single call: End one call. Phonebook: press this key in this state to enter phone book. Message: press this key in this state to enter short message](https://usermanual.wiki/Haier-Telecom/1007H-U50/User-Guide-1327233-Page-28.png)
![29Record: Enter record state. Mute: Open or close mute. DTMF: Open or close DTMF. Turn up tone When you are on the line you can adjust volume through the key on the right of phone. 4.4 Text edit Input mode When you use your cell phone, you may need to enter text. For example, to save a name in phonebook, write a short message, and create an agenda. You can enter letters, symbols and numbers through keyboard of your cell phone. In edit state, press the lower left corner of the screen button to select proper text input mode. This cell phone provides Spain input, English input and number input modes. Default input mode after power-on is Lowercase Spanish. Press [ctrl key] to enter symbol selection mode. 4.5 Handwriting input Input method is display at the top left corner of the screen. ABC or ES representatives capital letter input method; abc or es representatives lowercase alphabet input method; 123 representatives digital input method; input method. Right key touch with pen or touch screen can be removed remove the word wrong. 4.6 Quit from the menu](https://usermanual.wiki/Haier-Telecom/1007H-U50/User-Guide-1327233-Page-29.png)
![34Menu Functions You can press [Main menu] key in standby state to enter the main menu. Once you have entered the main menu, you can select corresponding options by using [Navigation key] to move the cursor. Stop the cursor on an option and press [OK] key to enter the function window of the option. You can also use short-cut method, i.e. press a number key from 1 to 9 directly to enter function window of corresponding option. Press [Back soft key] or [End key] to return to standby mode. 6.1 Messages 6.1.1 Text message Use the menu to send and receive short messages. 6.1.1.1 Write message In the edit mode, press the [options] to operate the followings: Send to: Select send number from phonebook or enter number, then send. Input method: Change the input method through this menu. Insert templates: Use the templates to the message. Advanced: Insert object in the message through this munu. Save to drafts: Save a message to the drafts. 6.1.1.2 Inbox Enter Inbox to view text message you received. Open a short message and press the “option” to operate the followings: Reply: Reply the message to the sender. Caller sender: Call the sender.](https://usermanual.wiki/Haier-Telecom/1007H-U50/User-Guide-1327233-Page-34.png)
![35Forward: Forward the message. Delete: Delete the message you selected. Advanced: Use the number and Email, and copy or move the message you selected through this menu. 6.1.1.3 Drafts View the message that was not send saved in drafts. 6.1.4 Outbox View send message saved in outbox and press the “options” to operate the followings: Forward: Forward the message. Delete: Delete the message you selected. Advanced: Use the number and Email, and copy or move the message you selected through this menu. 6.1.1.5 Templates Use the menu to edit the templates. 6.1.1.6 SMS Settings Use the menu to enter SIM message settings. SIM card message settings contain Profile settings, Voicemail server, Common settings, Memory status, Preferred storage, Preferred connection. 6.1.2 MMS Use the menu to send and received MMS. 6.1.2.1 Write message In the edit mode, select the [Edit content] to press the [edit], then press the [options] to operate the following options: Done: Finish the message. Input method: Change the input method. Add picture: Add pictures from phone or memory card.](https://usermanual.wiki/Haier-Telecom/1007H-U50/User-Guide-1327233-Page-35.png)
![36Add audio: Add audio from phone or memory card. Add video: Add video from phone or memory card. Add attachment: Add attachment from phone or memory card. Add slide before: Add a slide before here. Add slide after: Add a slide after here. Add bookmark text: Add a bookmark Text. Preview: Preview the MMS. Slide timing: Settings time interval. 6.1.2.2 Inbox Open the MMS you received. Press [options] to operate the following operations: View: view the message you received. Reply: reply the message to the sender. Reply by SMS: reply SMS to the sender. Forward: Forward the message. Delete: Delete the MMS you selected. Delete All: Delete all MMS from the phone. Save as template: Save the MMS to template. Properties: Property of the MMS. Use Details: Use the MMS details. 6.1.2.3 Outbox Open the MMS you sent. Press [options] to enter the following options: View: view the message you sent. Forward: Forward the message to others. Edit: Edit the SMS. Delete: Delete the MMS you selected.](https://usermanual.wiki/Haier-Telecom/1007H-U50/User-Guide-1327233-Page-36.png)
![37Delete all: Delete all MMS. Save as template: Save the MMS to template. Properties: Property of the MMS. Use Details: Use the MMS details. 6.1.2.4 Draft Enter the MMS you saved. Press [options] to operate the following operations: View: view the message you saved. Send: sent the MMS. Edit: Edit the MMS. Delete: Delete the MMS you selected. Delete All: Delete all MMS from the phone. Save as template: Save the MMS as template. Properties: Property of the MMS. Use Details: Use the MMS details. 6.1.2.5 Templates It contains User defined and Default. 6.1.2.6 MMS Settings It provides six options, for example: profile, Compose, Send, Retrieve, Filter, Memory status. 6.1.3 Email First, set the Email accounts,then you can send or receive e-mail. The details as follows: 1. Start to create account: Input your email account address. 2. Select the email’s protocol: select pop3 or IMAP4. 3. Select Data account: select data account from GPRS account.](https://usermanual.wiki/Haier-Telecom/1007H-U50/User-Guide-1327233-Page-37.png)
![398. Move contacts: Use the menu to move all records between the card and the phone. 9. Delete all contacts: Use the menu to delete records from the card or phone. Note: This phone can store 1000 phone numbers. 6.3 Calendar Enter the menu, press [options] to set the followings: View Tasks: Set or view the task. Add event: Add a new task. Delete event: Delete a task. Jump to date: Jump to the date you selected. Go to weekly view: View calendar by weekly. Print: Print the date. 6.4 Services 6.4.1 WAP Home page: Connect to home page. Bookmarks: Enter bookmarks where have five bookmarks Recent Pages: Enter the history page Offline Pages: choice the old page Input Address: input a web page Service Inbox: get the service message Settings: select or edit account, browser options, service message settings, clear cache, clear cookies, trusted certificates. 6.4.2 Data Account GSM Data: Choose the GSM account. GPRS: Choose the GPRS account.](https://usermanual.wiki/Haier-Telecom/1007H-U50/User-Guide-1327233-Page-39.png)
![40WLAN: Open or close WLAN. 6.5 Multimedia 6.5.1 Camera Press the number key to set some functions, such as Effect settings, White balance, Delay timer, Cont. shot, Scene mode, Image Quality, Image size. Press the soft key to start the following settings: Photos: View the images you saved. Choose one image to operate the followings: View, Slide show, Edit, Print, Browse style, Use, Send, Rename, Delete, Delete all files, Sort by, Storage. Camera Settings: It contains seven functions: LED highlight, Shutter sound, EV, Contrast, Anti-flicker, Delay timer, Cont. shot. Image Settings: You can set the size and quality of the image. White balance: It contains six options: Auto, Daylight, Tungsten, Fluorescent, Cloud, Incandescent. Scene mode: It contains two modes: Auto and Night. Effect Settings: It contains six effects: Normal, Grayscale, Sepia, Sepia Green, Sepia Blue, color invert. Storage: It contains two storage addresses: Phone and Memory card. Restore Default: You can restore the default settings. 6.5.2 Image viewer Enter the menu, press [options] to set the followings: View, Browse style, Forward, Rename, Delete, Delete all files, Sort by, Storage, etc. 6.5.4 Video recorder Enter the menu, press [soft key] to set the followings: Camcorder Setting: It contains the following options: EV, Night mode, Ati-flicker.](https://usermanual.wiki/Haier-Telecom/1007H-U50/User-Guide-1327233-Page-40.png)
![41Video settings: To set the quality of Video. It contains three options: Normal, Low, Good. White balance: It contains six options: Auto, Daylight, Tungsten, Fluorescent, Cloud, Incandescent. Effect settings: It provides six options: Normal, Grayscale, Sepia, Sepia Green, Sepia Blue, color invert. Storage: It provides two storage addresses: Phone and Memory card. Restore Default: You can restore the default settings of the camcorder. 6.5.4 Video player Choose the video you saved, press [options] to set the following functions: Play: Play the video file. Use as: Use the video file to a video call for a contact. Send: Send the video file to someone by mms or Bluetooth. Rename: Rename the video file. Delete: Delete the video file. Delete all files: Delete all the video files in the phone/memory card. Sort by: Order the video files by name ,type, time, size or none. Storage: Store the video files to the phone or memory card. 6.5.5 Audio player Play the music that you saved in the phone and in memory card. [Up Navigation key]: Open or pause music. [Down Navigation key]: Close music. [Left Navigation key]: Play the previous file.](https://usermanual.wiki/Haier-Telecom/1007H-U50/User-Guide-1327233-Page-41.png)
![42[Right Navigation key]: Play the next file. [List]: List all the music. Choose the music to set the following functions Play: Play the selected music. Details: View the details of the song. Add To Ringtones: Add the song to the ring. Refresh List: Refresh the list from phone or memory card. Settings: It contains four function settings: player settings, display settings, sound effect and Bluetooth settings. To set the following functions: Pre. Play list, List auto gen., Repeat, Shuffle, Background play, BT stereo output, BT stereo headset, lyrics display and so on. 6.5.6 Sound recorder Use the menu to record the voice .Choose the file you saved to operate the followings: Record: Record the new file. Play: Play the recorder file. Append: Append the new record to the file what you select. Rename: Rename the video file. Delete: Delete the video file. Delete All Files: Delete all the video files in the phone. Settings: It contains three options: Pref. storage, File format, Audio quality. Use: Send the recorder file to user profiles. Send: It contains two options: To MMS, To Bluetooth. 6.5.7 FM radio](https://usermanual.wiki/Haier-Telecom/1007H-U50/User-Guide-1327233-Page-42.png)
![43 Use the menu to listen to the radio. Press [options] to set the followings: Channel List: List the channel of the FM radio. Manual Input: Input the channel of the FM radio. Auto Search: Preset Auto search. Settings: To set Background play and Loud speaker. Record: Record the FM radio file of one channel. Append: Append the new record to the file what you select. File list: View the file list. 6.6 Alarm Phone can set five alarm clocks. In edit mode, press [Edit] to set the followings: time, repeat, alarm tone, snooze(min), alert type. 6.7 Camera The use method of camera is the same as the camera in multimedia. 6.8 Caller center 6.8.1 Call history 1. Call history Dialed Calls: Press ok to view dialed calls list. Received Calls: Press ok to view received calls list. Missed Calls: Press ok to view missed calls list. In the missed、dialed、received calls interface, press ok to view the details: date, time, number. Press options to operate the following: send text message, send MMS, call, delete, save, edit. 2. Delete Call Log](https://usermanual.wiki/Haier-Telecom/1007H-U50/User-Guide-1327233-Page-43.png)
![44Delete all calls log. 3. Call Timers View the call time 4. Call Cost View the call cost. 5. Text message Counter View the quantity of the SMS you received and sent. 6. GPRS Counter View the bytes of the MMS you received and sent. 6.8.2 Call settings Enter the menu to set the followings: 1. Caller ID If you choose [Hide ID]. Your phone number can’t display when you make telephone calls. 2. Call waiting Activate: Activate the Call waiting function. Deactivate: Deactivate the Call waiting function. Query Status: Query the status of the function. 3. Call divert: Divert the incoming calls to the other phone number. 4. Call barring: Use the menu to set the call barring. It contains outgoing calls, incoming calls, Cancel all, Change barring password. 5. Line switching: You can change the line 1 or line 2. 6. Closed user group: You can add or close your group. 7. Magic Sound Setting](https://usermanual.wiki/Haier-Telecom/1007H-U50/User-Guide-1327233-Page-44.png)
![45Open or close magic sound, and you can select different sound. 8. Advance settings Black list Activate blacklist mode and edit the blacklist numbers. You can’t receive the calls in the list. Auto redial Turn on or turn off the function. Background sound Open or close the function, and select different background sound. Call time display Turn on or turn off the function. Call time reminder Turn on or turn off the function. Auto quick end Set talk time, and the call is hanged up automatically when to the setting time. Reject by SMS Turn on or turn off the function. 6.9 Tasks Enter the menu, view the task lists and choose the task you saved. Press [Option] to set the followings: View: You can view the task. Add: Add a new task. Edit: Edit the task you selected. Delete: Delete the task what you select.](https://usermanual.wiki/Haier-Telecom/1007H-U50/User-Guide-1327233-Page-45.png)
![46Delete All: Delete all the tasks in the phone. Send vCalendar: It provides four options: send by SMS, send by MMS, send by Bluetooth, Save to file. 6.10 Audio player The use method of audio player is the same as the audio player in multimedia. 6.11 Files Manage the files that saved in the phone and memory card. 6.12 Extra 6.12.1 Calculator Use the menu to do basic calculations, such as addition, subtraction, multiplication and division. Key operations: Left navigation key: Multiplication. Right navigation key: Division. Up navigation key: Addition. Down navigation key: Subtraction. OK: Equal. Press the key to display calculation result. Press [Clear] to clear the contents you input. 6.12.2 Unit converter It contains two unit conversion: weight and length. 6.12.3 Currency Converter Input the currency rate, and press OK to input local currency. 6.12.4 Health](https://usermanual.wiki/Haier-Telecom/1007H-U50/User-Guide-1327233-Page-46.png)
![47Calculate the proportion of height and weight. 6.12.5 Stopwatch Enter the menu to use the stopwatch. It provides two options: Typical stopwatch, nWay stopwatch. 6.12.6 Ebook reader Enter the menu, choose the book you saved, press[options] to operate the followings: Open E-Book, Clean up bookshelf, Global settings, Book info, Delete, Delete all files, Sort by, Apply global settings, Help. 6.13 Fun 6.13.1 MSN Use the menu to achieve msn, it needs the support of the network service provider. 6.13.2 Yahoo Use the menu to achieve yahoo, it needs the support of the network service provider. 6.13.3 Java Provide two type java: opera mini, eBuddy. 6.13.4 Java settings: You can set Java audio, vibration, select SIM, Java profile, heap size. 6.13.5 Games Provide one game: Puzzle. You can open or close BGM, Sound effect, Vibration by games settings. 6.14 Organizer 6.14.1 Calendar](https://usermanual.wiki/Haier-Telecom/1007H-U50/User-Guide-1327233-Page-47.png)
![48Description ibid. 6.14.2 Tasks Description ibid. 6.14.3 Alarm Description ibid. 6.14.4 World clock You can look up the time of the other city in the world. 6.14.5 Synchronization and Phone sync It’s provided by the network service provider. 6.15 Calculator Description ibid. 6.16 Profiles It provides seven profiles: General, Meeting, Outdoor, Indoor, Silent, Headset, Bluetooth. Press [options] to set the followings: Activate: Activate the profile. Customize: It contains six options: Tone setup, Volume, Alert type, Ring type, Extra tone, Answer mode. Headset mode can be set to automatically answer the call. 6.17 Connectivity 6.17.1 Bluetooth Enter the menu to set the followings: Power, Inquiry audio device, Remote control, My device, Active device, Settings, About. 6.17.2 Conn. Management It is used to display date of the WLAN connection.](https://usermanual.wiki/Haier-Telecom/1007H-U50/User-Guide-1327233-Page-48.png)