Hallmark Global HEXA ECLIPSE1 Tablet projector User Manual
Hallmark Global LTD DBA HEXA Tablet projector
User Manual
Eclipse 1 User Manual
Product demo photos:
Tablet projector HEXA
Description ofbasic specifications:
Category
Description
CPU
Intel cherrytrail Quad-core
DDR
2GB
Flash
32GB
WIFI
2.4G、5G(802.11ac)
Brightness
220ANSI lumens
Battery capacity
4350mAh
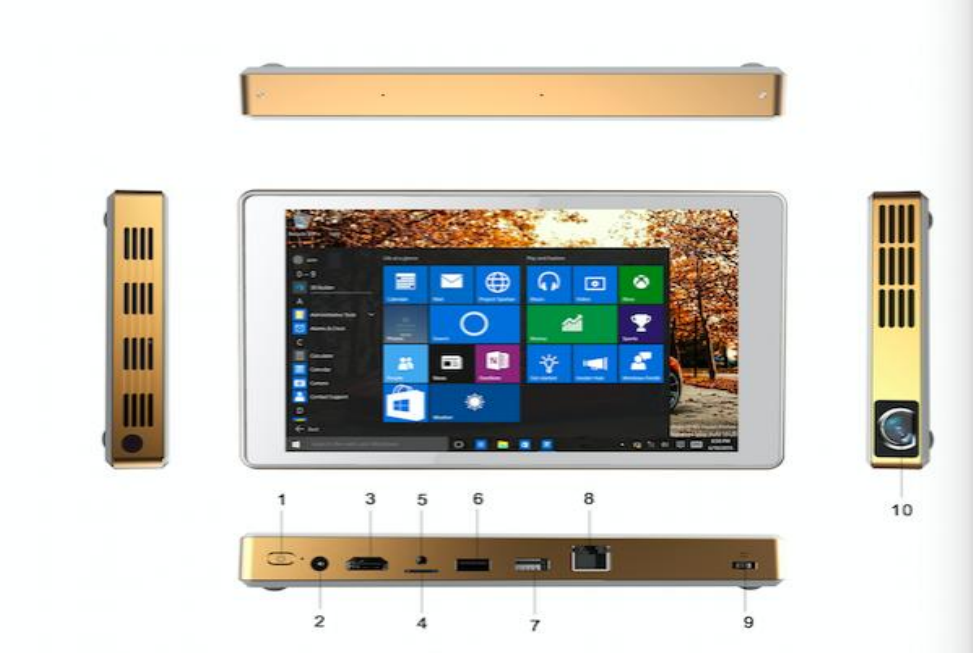
Description of interface:
(1)Power key: long press about 3-second to start; long press about
8-second to forced shut down;short press 1 second for sleep or wake up
the tablet.
(2)Power port:connect with adapter to power and charge the tablet.
(3)HDMI socket: connect HDMI output device, such as PC、DVD、
STB.
(4)TF card socket: standard TF card;support maximum extension to
64G.
(5)Headset socket:standard headset socket, while using headset the
speaker is cut off status
(6)USB 2.0 socket: connect external devices;such as mouse、keyboard、
usb disk.
(7)USB 2.0 socket: connect external devices;such as mouse、
keyboard、usb disk.
(8)RJ45 Internet port socket:link to wired network;the maximum
transmission speed is 100M.
(9)Focus Setting button: adjust the definition by distance
(10) Light Bulb : light screen
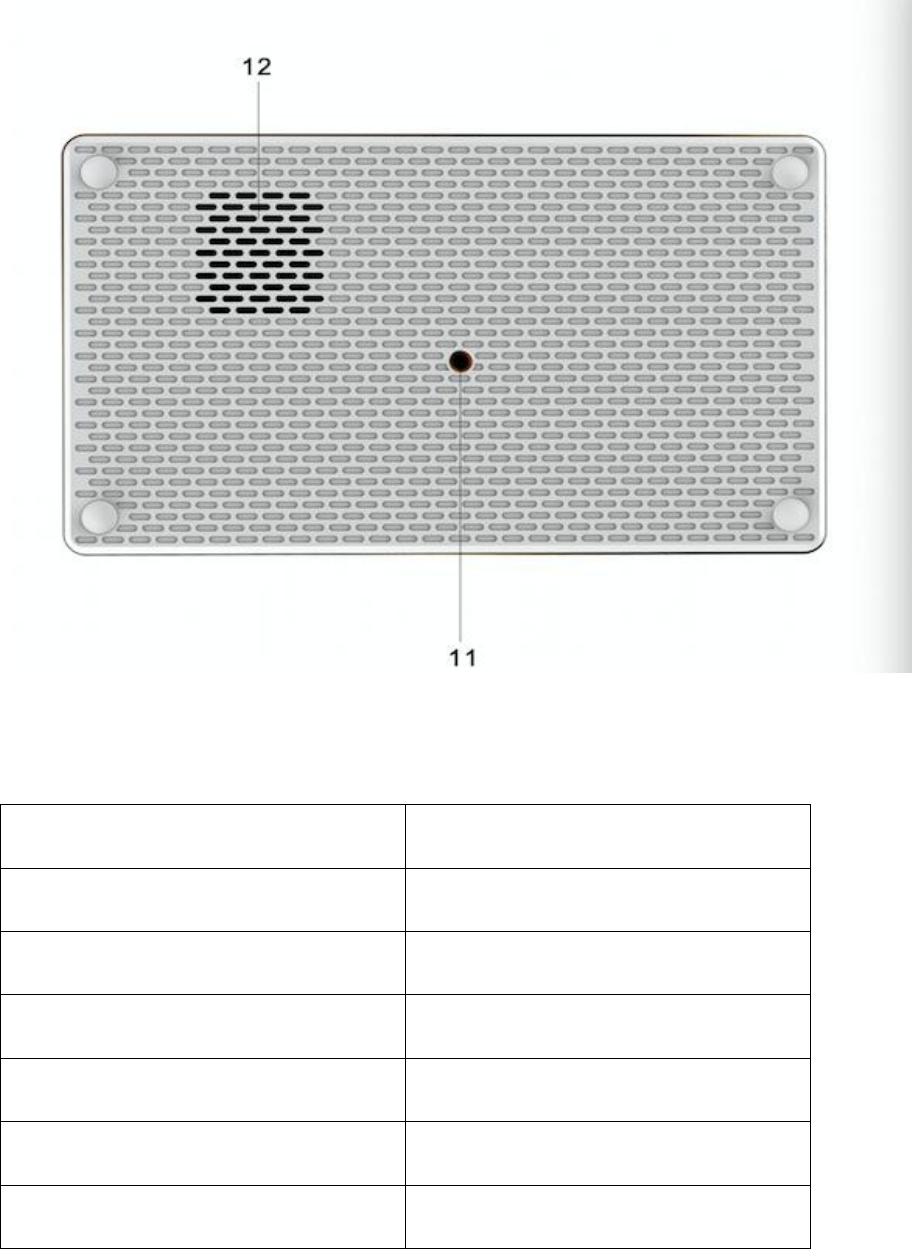
(11) stand hole
(12)Speaker
User Manual of Remote control:
Start button: No function
Separate projector switch:Turn on/off the light bulb.
Menu button:enter and exit OSD menu.
Menu upturning button:enter OSD menu then upturning
Menu page down button:enter OSD menu then go down
Projector brightness“+” button: increase projector brightness
Projector brightness “-“ button: reduce projector brightness
Volume+ button: increase the volume
Volume - button: reduce the volume
HDMI input switch: switch to HDMI signal
Return button: return operation when using OSD Menu
Simply instruction
1.Guidance of power on
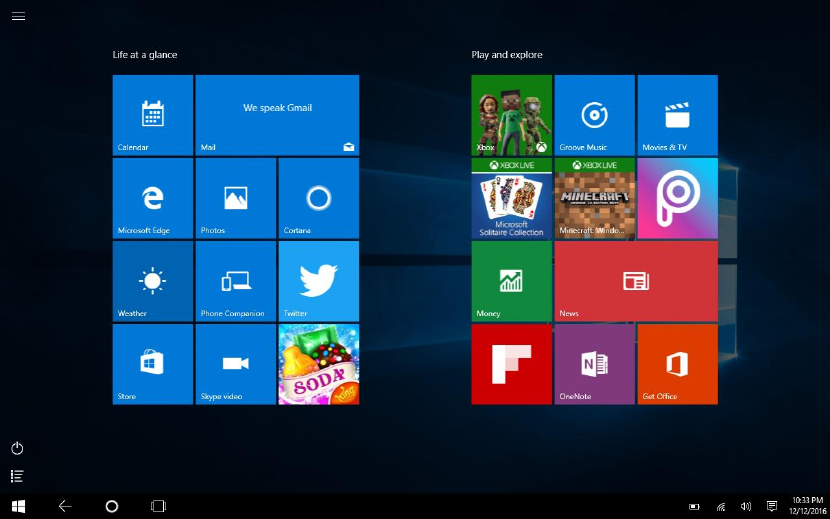
Press POWER button to start(long press about 3 second);
After starting up as picture show
Then click the small Icon on the right corner (as picture show), then click
the tablet mode.
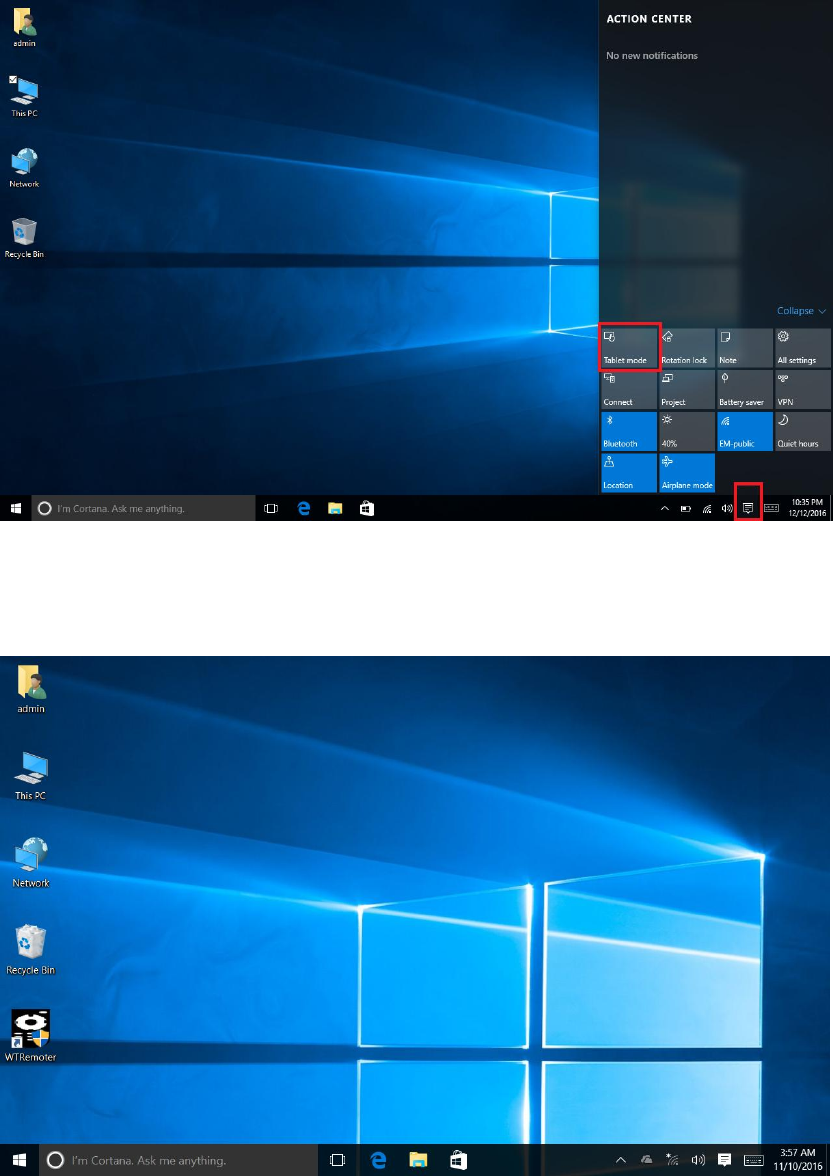
Click it to quit the tablet mode
Click any blank space on the desktop, the shortcut menu will be hidden
and stich to Windows desktop.
Note: Every time start up the tablet will recover to tablet mode, if we
want to back to desktop need do above steps every time
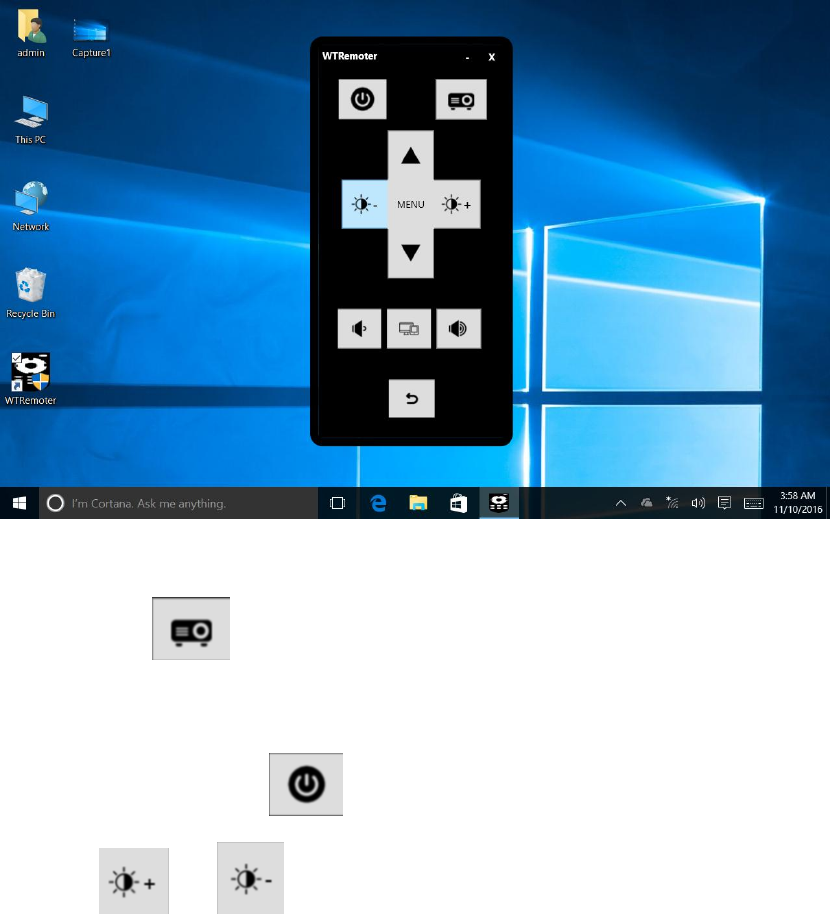
2.Virtual remote control APP.
There will be installeda remote controller App(WTRemoter) for customer
on Windows desktop, long press that Icon to select open or use mouse
double-clicking to open, then it will workas the real remote controller.
3.Description of Virtual remote control
1.)Press this key on remote controller can shut down or start the
projector,
2.)No function for this
3.)Press or button can adjust the brightness of light screen;

【Brightness adjusting has 4 rate, the lowest rate is sleep, the highest
rate is the brightest, the third rate is default】;
4.)Press”MENU” key call out OSD menu,
brightness”+””-”key and up down key can adjust items in OSD
menu,press key to exit;
5.) this can switch to external HDMI mode,press again return to
tablet mode;
6.)”+”or “-“ key can adjust the sound volume, press return key can
keep what you adjusted volume.
7.)This key can chose tablet or HDMI mode;
Adjust the angle of placed tablet(above 5°), the light screen has sensitive
G-sensor will automatic adjust to suit it.
4.Enter setting interface
1.)Select setting option on menu
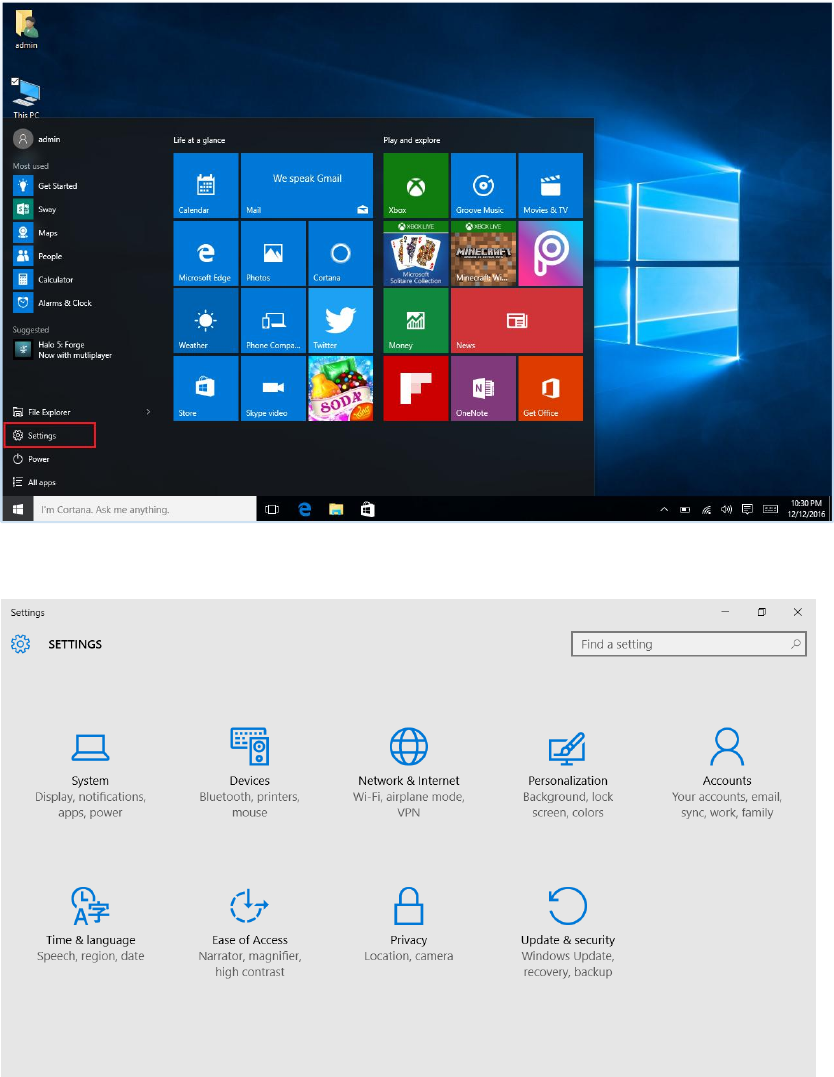
2.)Enter setting interface
FCC Want you to known:
This device complies with part 15 of the FCC Rules. Operation is subject to the following two
conditions: (1) this device may not cause harmful interference, and (2) this device must
accept any interference received, including interference that may cause undesired
operation.
Any changes or modifications not expressly approved by the party responsible for
compliance
could void the user's authority to operate the equipment.
NOTE: This equipment has been tested and found to comply with the limits for a Class B
digital device, pursuant to Part 15 of the FCC Rules. These limits are designed to provide
reasonable protection against harmful interference in a residential installation. This
equipment generates, uses and can radiate radio frequency energy and, if not installed and
used in accordance with the instructions, may cause harmful interference to radio
communications. However, there is no guarantee that interference will not occur in a
particular installation.
If this equipment does cause harmful interference to radio or television reception,
which can be determined by turning the equipment off and on, the user is encouraged to try
to correct the interference by one or more of the following measures:
-- Reorient or relocate the receiving antenna.
-- Increase the separation between the equipment and receiver.
-- Connect the equipment into an outlet on a circuit different
from that to which the receiver is connected.
-- Consult the dealer or an experienced radio/TV technician for help.
The device has been evaluated to meet general RF exposure requirement. The device can be
used in portable exposure condition without restriction.
FCC ID: 2ALLP-ECLIPSE1