Handheld Group 14249-RF2 Handheld Device User Manual 2
Handheld Group AB Handheld Device Users Manual 2
Contents
Users Manual-2
Ver 1.0
18
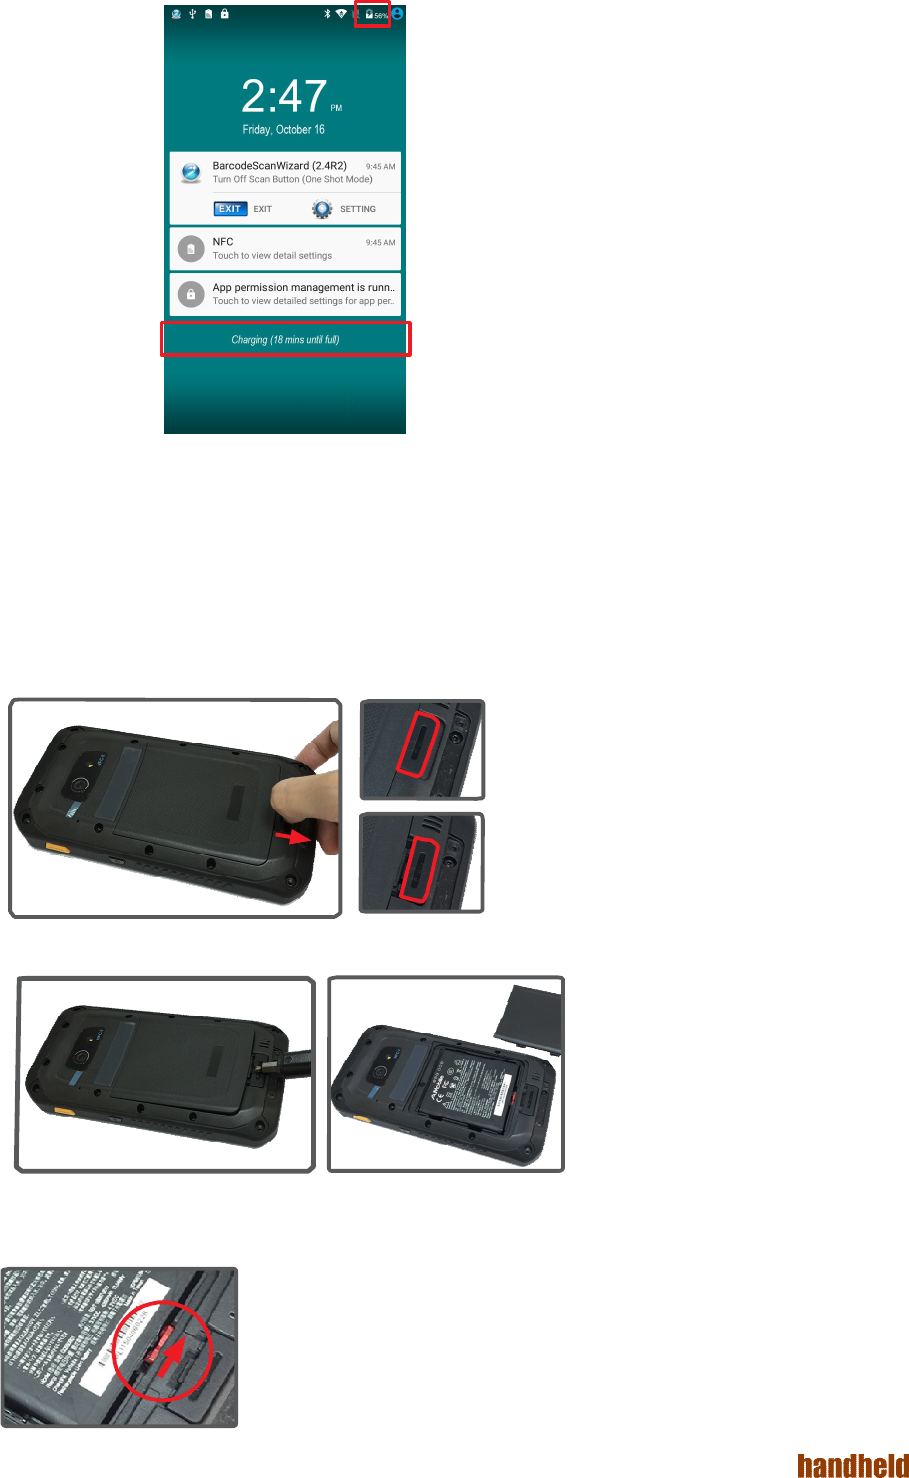
Also, a battery indicator will appear in the Notification Area showing the charging percentage. The remaining
charging time will also be displayed.
When the battery is fully charged, unplug the USB cable from the device
2.3 Installing/Replacing the Battery
In case you need to install or replace the battery, follow the steps below to access the battery chamber and
replace the battery.
1. Pull the back cover release latch towards the bottom of the phone to unlock the latch.
Latch locked
Latch unlocked
2. Insert a small flat head screwdriver into the notch and gently pry up the cover.
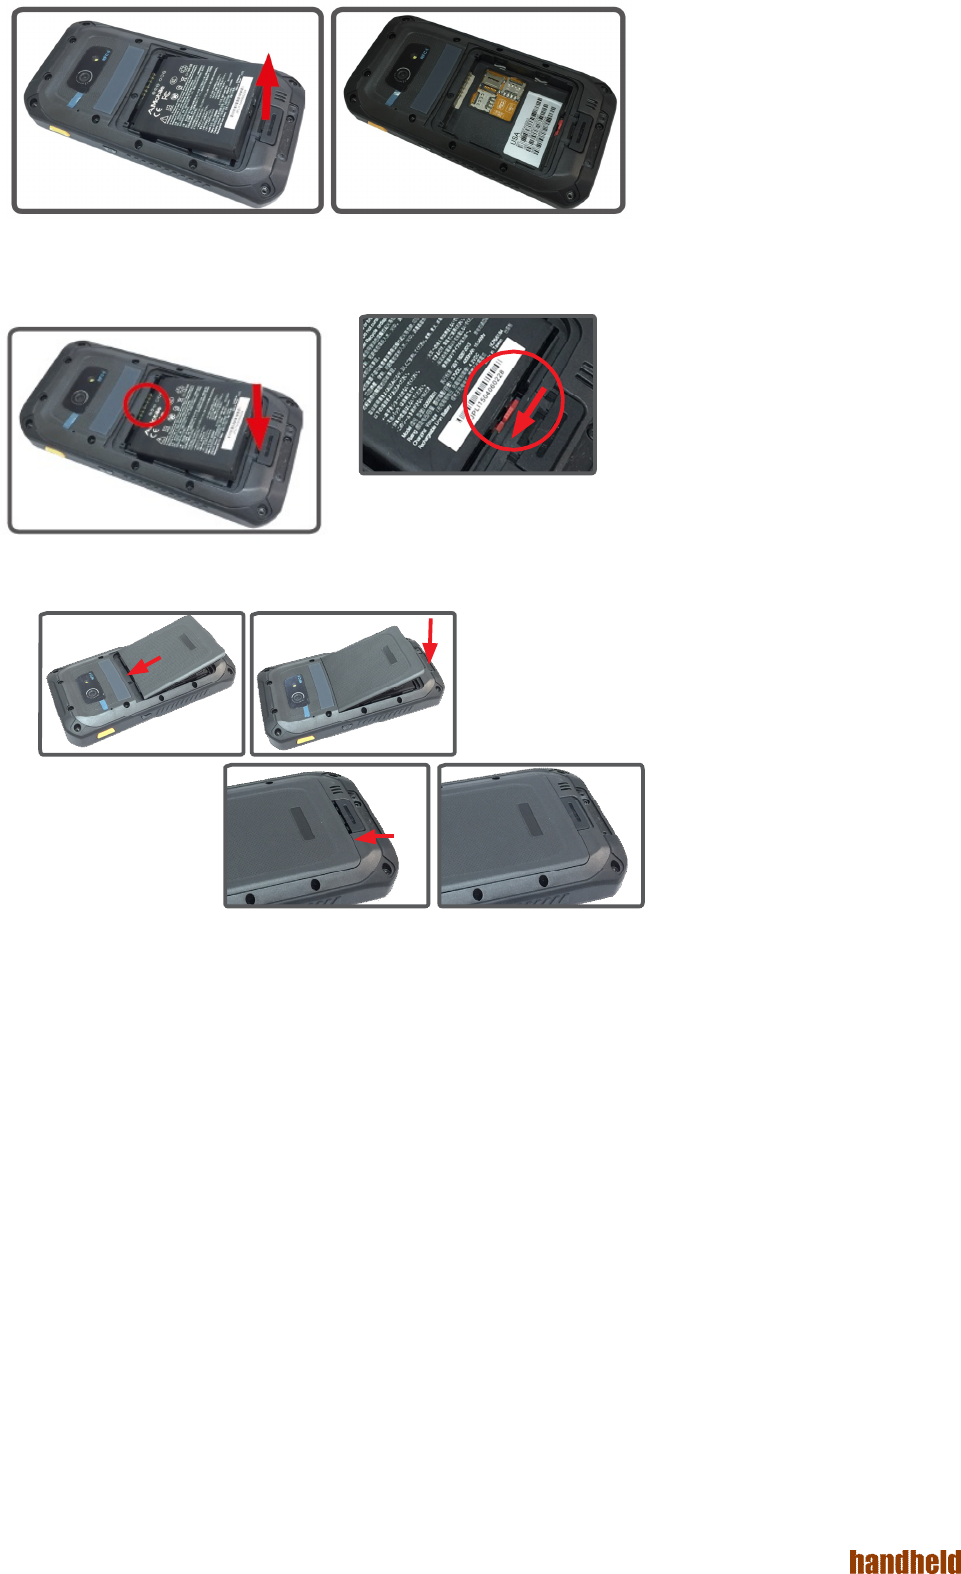
3. Remove the battery, if inserted. The battery is secured by a red slider. Move the slider to the right so that
you can remove the battery.
Move the slider to the right to unlock the battery.
Ver 1.0
19
4. Insert the battery back to the compartment while ensuring gold contacts align with the device contacts. Then
move the slider to the left to secure the battery.
Move the slider to the left to secure the battery.
5. Replace the back cover and push the latch towards the cover to lock it.
Ver 1.0
20
2.4 Optimizing Battery Life
To optimize the operating time of the battery, it is recommended that you do the following:
Decrease the LCD display brightness.
• Set a shorter timeout of inactivity to allow the screen enter sleep mode.
• Turn off the display if you are not using it.
• Always exit the applications if it is not in use.
• Disable the Wi-Fi, Bluetooth or GPS function if you are not using it.
• Disable the App that heavily drains the battery if you are not using it.
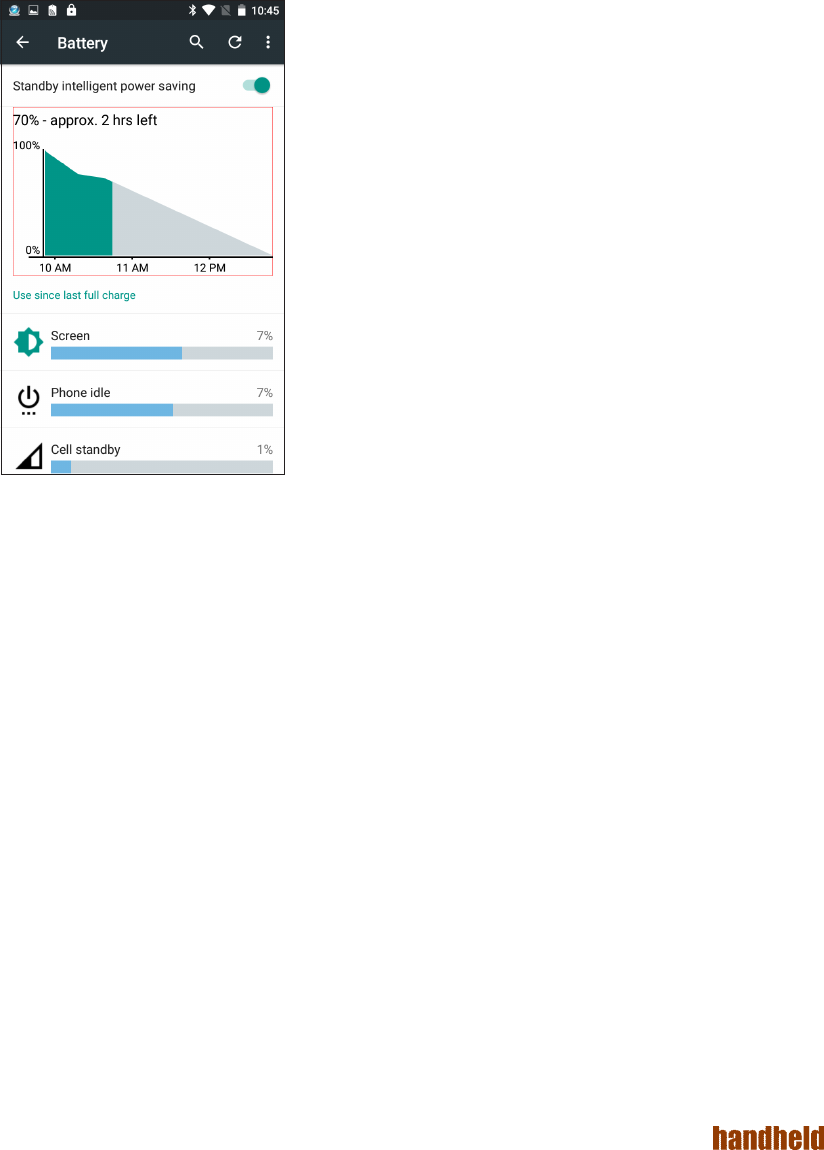
To view the battery usage by individual App, tap Settings | Device | Battery.
• Disconnect USB devices such as USB flash drive if it is not in use.
Ver 1.0
21
3. USING THE RUGGED HANDHELD DEVICE
3.1 Using the Barcode Scanner
Barcode scanner is an optional feature on the Nautiz X9. This section will walk you through the basic
operations. To get the information on supported barcode formats, see 3.1.2 Supported Barcode Formats for
details.
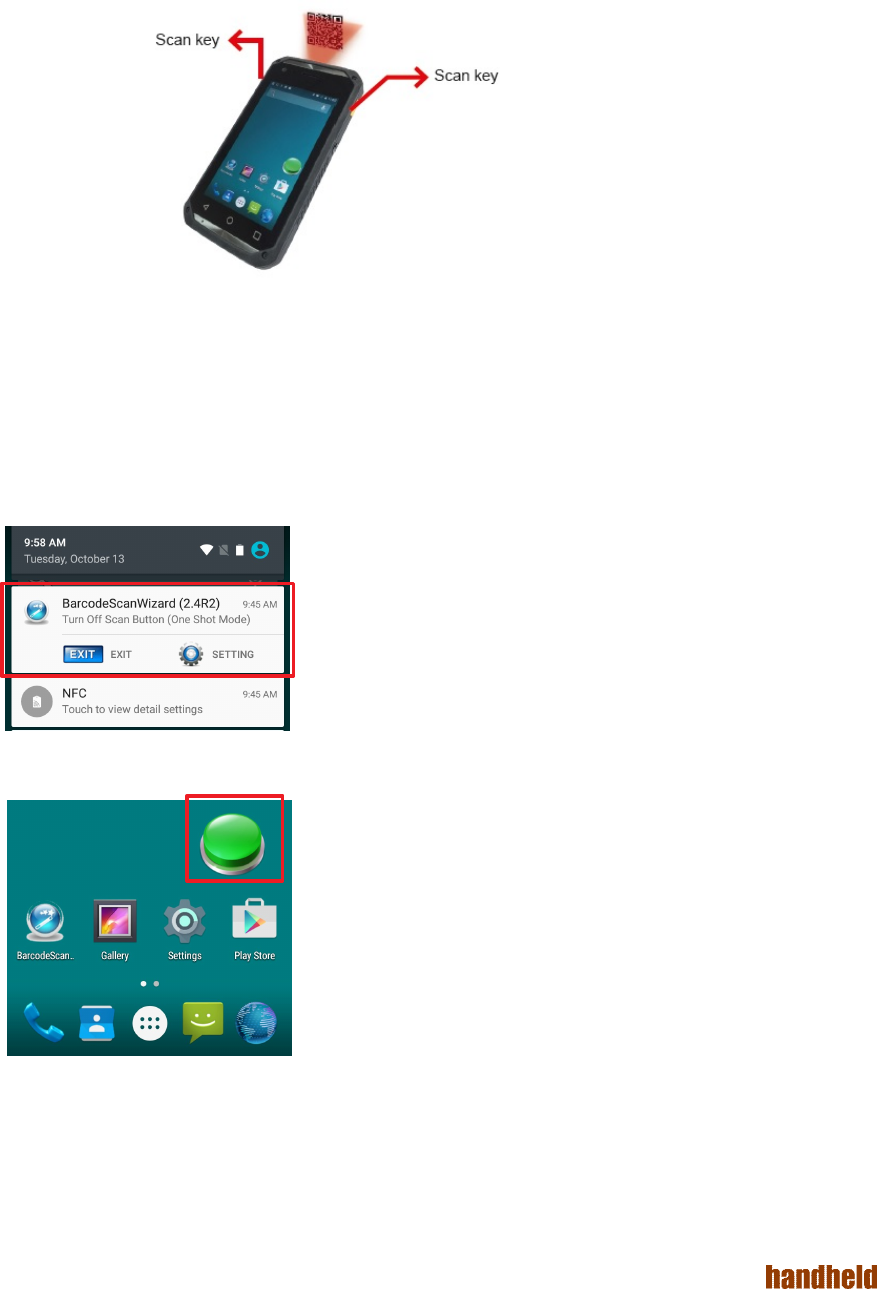
To use the barcode scanner, simply press the scan keys on either side of the Nautiz X9 to scan the barcode.
3.1.1 Using the BarcodeScanWizard (Optional)
Generally a third-party barcode application will be used to process the data read by the scanner. An optional
BarcodeScanWizard is installed on the Nautiz X9. The App provides on-screen buttons to activate the barcode
scanner so that you don' need to press the triggers on either side of the Nautiz X9.
To use the App:
1. Launch the BarcodeScanWizard App.
2. Swipe down the Notification Area and make sure to turn on the Scan button.
3. A green button shall appear on the screen. Press the button to scan. The button turns green when the
scanner is activated.
4. Press the red button to stop.
Ver 1.0
22
3.1.2 Supported Barcode Formats
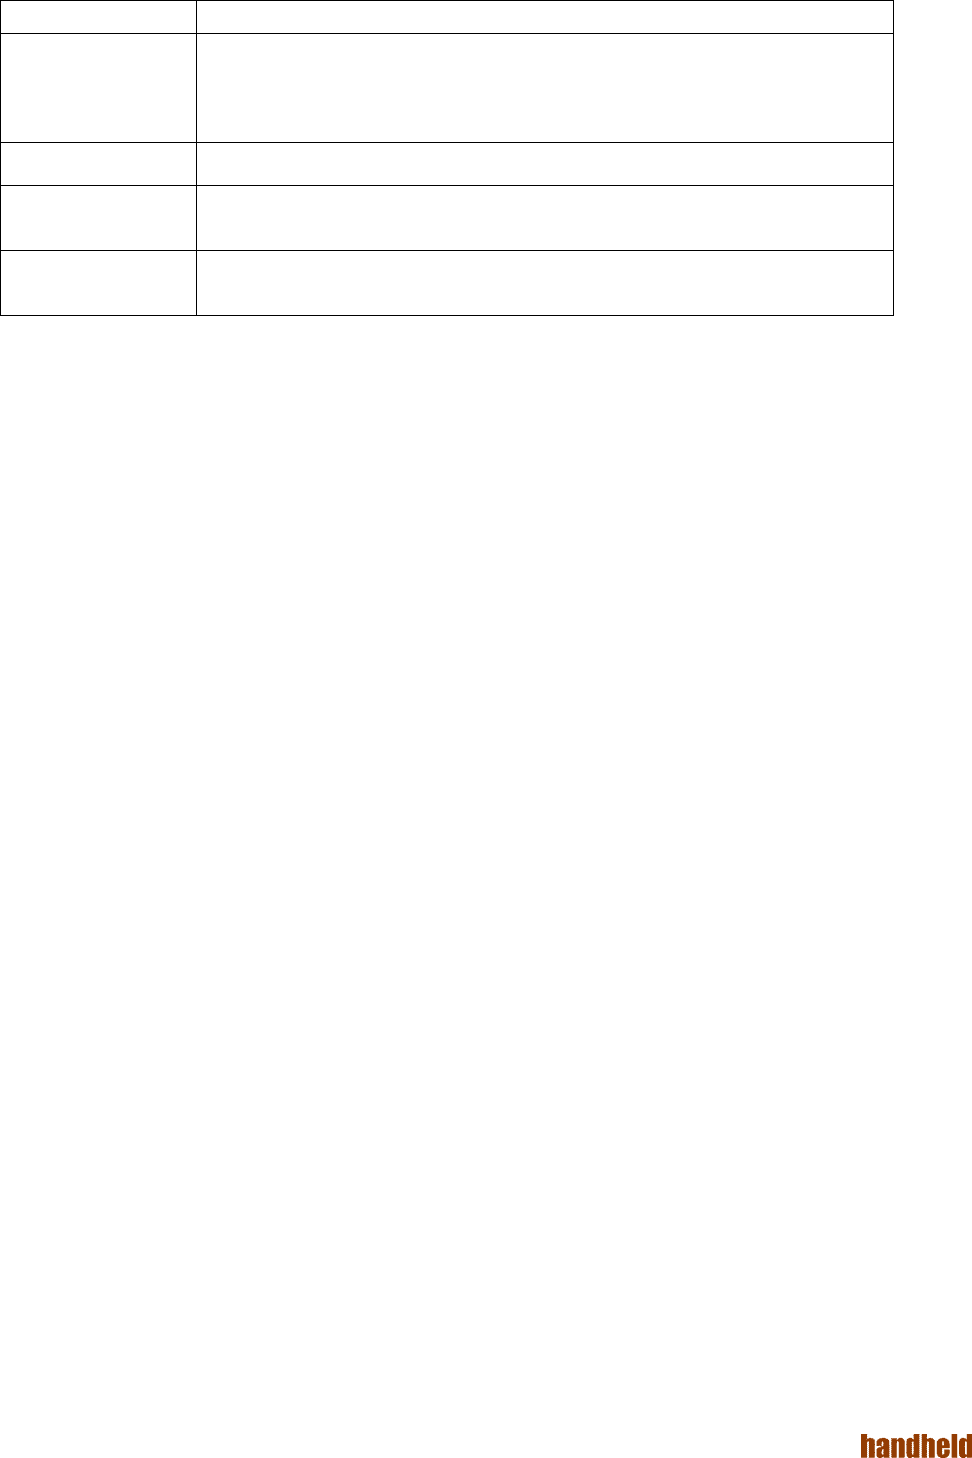
Type Formats
Linear UPC/EAN, Bookland EAN, UCC Coupon Code, ISSN EAN, Code 128, GS1-128,
ISBT 128, Code 39, Trioptic Code 39, Code 32, Code 93, Code 11, Interleaved 2 of
5, Discrete 2 of 5, Codabar, MSI, Chinese 2 of 5, Matrix 2 of 5, Korean 3 of 5,
Inverse 1D, GS1DataBar, Composite Codes
2D Stacked PDF417, MicroPDF417
2D Matrix Data Matrix, Data Matrix Inverse, Maxicode, QR Code, MicroQR, QR Inverse, Aztec,
Aztec Inverse
Postal US Postnet, US Planet, UK Postal, Japan Postal, Australian Postal, Netherlands KIX
Code, USPS 4CB/One Code/Intelligent Mail, UPU FICS Postal