Hangzhou Hikvision Digital Technology MH2111 Body Camera User Manual users manual Rev1
Hangzhou Hikvision Digital Technology Co., Ltd. Body Camera users manual Rev1
users manual Rev1
Body Camera
User Manual
UD.6L0204D1154A01

Body Camera User Manual
1
User Manual
COPYRIGHT © 2016 Hangzhou Hikvision Digital Technology Co., Ltd.
ALL RIGHTS RESERVED.
Any and all information, including, among others, wordings, pictures, graphs are the properties of Hangzhou
Hikvision Digital Technology Co., Ltd. or its subsidiaries (hereinafter referred to be “Hikvision”). This user manual
(hereinafter referred to be “the Manual”) cannot be reproduced, changed, translated, or distributed, partially or
wholly, by any means, without the prior written permission of Hikvision. Unless otherwise stipulated, Hikvision
does not make any warranties, guarantees or representations, express or implied, regarding to the Manual.
About this Manual
This Manual is applicable to Body Camera.
The Manual includes instructions for using and managing the product. Pictures, charts, images and all other
information hereinafter are for description and explanation only. The information contained in the Manual is
subject to change, without notice, due to firmware updates or other reasons. Please find the latest version in the
company website (http://overseas.hikvision.com/en/).
Please use this user manual under the guidance of professionals.
Trademarks Acknowledgement
and other Hikvision’s trademarks and logos are the properties of Hikvision in various jurisdictions.
Other trademarks and logos mentioned below are the properties of their respective owners.
Legal Disclaimer
TO THE MAXIMUM EXTENT PERMITTED BY APPLICABLE LAW, THE PRODUCT DESCRIBED, WITH ITS HARDWARE,
SOFTWARE AND FIRMWARE, IS PROVIDED “AS IS”, WITH ALL FAULTS AND ERRORS, AND HIKVISION MAKES NO
WARRANTIES, EXPRESS OR IMPLIED, INCLUDING WITHOUT LIMITATION, MERCHANTABILITY, SATISFACTORY
QUALITY, FITNESS FOR A PARTICULAR PURPOSE, AND NON-INFRINGEMENT OF THIRD PARTY. IN NO EVENT WILL
HIKVISION, ITS DIRECTORS, OFFICERS, EMPLOYEES, OR AGENTS BE LIABLE TO YOU FOR ANY SPECIAL,
CONSEQUENTIAL, INCIDENTAL, OR INDIRECT DAMAGES, INCLUDING, AMONG OTHERS, DAMAGES FOR LOSS OF
BUSINESS PROFITS, BUSINESS INTERRUPTION, OR LOSS OF DATA OR DOCUMENTATION, IN CONNECTION WITH
THE USE OF THIS PRODUCT, EVEN IF HIKVISION HAS BEEN ADVISED OF THE POSSIBILITY OF SUCH DAMAGES.
REGARDING TO THE PRODUCT WITH INTERNET ACCESS, THE USE OF PRODUCT SHALL BE WHOLLY AT YOUR OWN
RISKS. HIKVISION SHALL NOT TAKE ANY RESPONSIBILITES FOR ABNORMAL OPERATION, PRIVACY LEAKAGE OR
OTHER DAMAGES RESULTING FROM CYBER ATTACK, HACKER ATTACK, VIRUS INSPECTION, OR OTHER INTERNET
SECURITY RISKS; HOWEVER, HIKVISION WILL PROVIDE TIMELY TECHNICAL SUPPORT IF REQUIRED.
SURVEILLANCE LAWS VARY BY JURISDICTION. PLEASE CHECK ALL RELEVANT LAWS IN YOUR JURISDICTION BEFORE
USING THIS PRODUCT IN ORDER TO ENSURE THAT YOUR USE CONFORMS THE APPLICABLE LAW. HIKVISION
SHALL NOT BE LIABLE IN THE EVENT THAT THIS PRODUCT IS USED WITH ILLEGITIMATE PURPOSES.
IN THE EVENT OF ANY CONFLICTS BETWEEN THIS MANUAL AND THE APPLICABLE LAW, THE LATER PREVAILS.

Body Camera User Manual
2
Regulatory information
FCC information
FCC compliance: Please take attention that changes or modification not expressly approved by the party
responsible for compliance could void the user’s authority to operate the equipment.
Note: This product has been tested and found to comply with the limits for a Class B digital device, pursuant to
Part 15 of the FCC Rules. These limits are designed to provide reasonable protection against harmful interference
in a residential installation. This product generates, uses, and can radiate radio frequency energy and, if not
installed and used in accordance with the instructions, may cause harmful interference to radio communications.
However, there is no guarantee that interference will not occur in a particular installation. If this product does
cause harmful interference to radio or television reception, which can be determined by turning the equipment
off and on, the user is encouraged to try to correct the interference by one or more of the following measures:
—Reorient or relocate the receiving antenna.
—Increase the separation between the equipment and receiver.
—Connect the equipment into an outlet on a circuit different from that to which the receiver is connected.
—Consult the dealer or an experienced radio/TV technician for help.
FCC conditions
This device complies with part 15 of the FCC Rules. Operation is subject to the following two conditions:
1. This device may not cause harmful interference.
2. This device must accept any interference received, including interference that may cause undesired operation.
EU Conformity Statement
This product and -
if applicable -
the supplied accessories too are marked with "CE" and comply therefore with
the
applicable harmonized European standards listed under the Radio Equipment Directive
2014/53./EU,
the EMC Directive 2014/30/EU, the LVD
Directive 2014/35/EU, the RoHS Directive
2011/65/EU.
2012/19/EU (WEEE directive): Products marked with this symbol cannot be disposed of as unsorted
municipal waste in the European Union. For proper recycling, return this product to your local
supplier upon the purchase of equivalent new equipment, or dispose of it at designated collection
points. For more information see:
www.recyclethis.info.
2006/66/EC (battery directive): This product contains a battery that cannot be disposed of as
unsorted municipal waste in the European Union. See the product documentation for specific
battery information. The battery is marked with this symbol, which may include lettering to indicate
cadmium (Cd), lead (Pb), or mercury (Hg). For proper recycling, return the battery to your supplier
or to a designated collection point. For more information
see: www.recyclethis.info.
Industry Canada ICES-003 Compliance
This device meets the CAN ICES-3 (B)/NMB-3(B) standards requirements.
After the laboratory measurement, the SAR value is 0.121W/Kg which satisfies the RF exposure requirement
To satisfy RF exposure compliance the user should operate the device as the User Manual introduced and the
antenna(s) used for this transmitter must not be co-located or operating in conjunction with any other antenna or transmitter.

Body Camera User Manual
3
This device complies with Industry Canada licence-exempt RSS standard(s). Operation is subject to the following
two conditions:
1) this device may not cause interference, and
2) this device must accept any interference, including interference that may cause undesired operation of the
device.
Le présent appareil est conforme aux CNR d'Industrie Canada applicables aux appareils radioexempts de licence.
L'exploitation est autorisée aux deux conditions suivantes :
1) l'appareil ne doit pas produire de brouillage, et
2) l'utilisateur de l'appareil doit accepter tout brouillage radioélectrique subi, même si le brouillage est
susceptible d'en compromettre le fonctionnement.
Under Industry Canada regulations, this radio transmitter may only operate using an antenna of a type and
maximum (or lesser) gain approved for the transmitter by Industry Canada. To reduce potential radio interference
to other users, the antenna type and its gain should be so chosen that the equivalent isotropically radiated power
(e.i.r.p.) is not more than that necessary for successful communication.
Conformément à la réglementation d'Industrie Canada, le présent émetteur radio peut
fonctionner avec une antenne d'un type et d'un gain maximal (ou inférieur) approuvé pour l'émetteur par
Industrie Canada. Dans le but de réduire les risques de brouillage radioélectrique à l'intention des autres
utilisateurs, il faut choisir le type d'antenne et son gain de sorte que la puissance isotrope rayonnée équivalente
(p.i.r.e.) ne dépasse pas l'intensité nécessaire à l'établissement d'une communication satisfaisante.

Body Camera User Manual
4
Safety Instruction
These instructions are intended to ensure that user can use the product correctly to avoid danger or property
loss.
The precaution measure is divided into “Warnings” and “Cautions”
Warnings: Serious injury or death may occur if any of the warnings are neglected.
Cautions: Injury or equipment damage may occur if any of the cautions are neglected.
Warnings
● Proper configuration of all passwords and other security settings is the responsibility of the installer and/or
end-user.
● In the use of the product, you must be in strict compliance with the electrical safety regulations of the nation
and region. Please refer to technical specifications for detailed information.
● Input voltage should meet both the SELV (Safety Extra Low Voltage) and the Limited Power Source with 5 VDC
according to the IEC60950-1 standard. Please refer to technical specifications for detailed information.
● Do not connect several devices to one power adapter as adapter overload may cause over-heating or a fire
hazard.
● Please make sure that the plug is firmly connected to the power socket.
● If smoke, odor or noise rise from the device, turn off the power at once and unplug the power cable, and then
please contact the service center.
Preventive and Cautionary Tips
Before connecting and operating your device, please be advised of the following tips:
● Make sure that all the related equipment is power-off during the installation.
● Do not place the product in high-temperature or damp environment, and do not expose it to high
electromagnetic radiation.
● If the product does not function properly, please contact your dealer or the nearest service center. Do not
disassemble the product for repair or maintenance by yourself.
● Only use the battery, power adapter and assembly parts specified by the manufacturer.
● Consult the authorized dealer or technician from Hikvision for any question and request for product using.
Warnings Follow these safeguards
to prevent serious injury or death.
Cautions Indicates a potentially hazardous situation,
which if not avoided, could result in equipment
damage, data loss, performance degradation, or
unexpected results.
Body Camera User Manual
5
Applicable Models
This manual is applicable to the models listed in the following table.
Series
Model
DS-MH2111 Series
DS-MH2111/32G
DS-MH2111/32G/GLF
Symbol Conventions
The symbols that may be found in this document are defined as follows.
Symbol
Description
Indicates a potentially hazardous situation, which if not avoided,
could result in equipment damage, data loss, performance
degradation, or unexpected results.
Provides additional information to emphasize or supplement
important points of the main text.

Body Camera User Manual
6
TABLE OF CONTENTS
TABLE OF CONTENTS .................................................................................................................................. 6
Chapter 1Introduction ................................................................................................................................ 8
1.1 Package List ..................................................................................................................................... 8
1.2 Buttons and Interfaces ..................................................................................................................... 8
1.3 SIM Card Installation...................................................................................................................... 10
1.4 Shoulder Clip Installation/Uninstallation ....................................................................................... 10
1.5 Charging ......................................................................................................................................... 11
1.5.1 Charger Specification ........................................................................................................ 11
1.5.2 How to Charge .................................................................................................................. 11
1.5.3 How to Protect Charger .................................................................................................... 12
Chapter 2Start-up .....................................................................................................................................13
2.1 Start-up .......................................................................................................................................... 13
2.2 Sleep/Wake up .............................................................................................................................. 13
2.3 Shutdown ...................................................................................................................................... 13
2.4 Force to Shutdown ........................................................................................................................ 13
Chapter 3Basic Functions ..........................................................................................................................14
3.1 Live View Icons .............................................................................................................................. 14
3.2 Menu Operation ............................................................................................................................ 15
3.3 Taking Pictures ............................................................................................................................... 15
3.4 Record and Capture ....................................................................................................................... 16
3.5 Taping ............................................................................................................................................ 16
3.6 Playback ......................................................................................................................................... 17
3.7 Alarm ............................................................................................................................................. 17
3.7.1 SOS Message ..................................................................................................................... 17
3.7.2 Memory Full Alarm ........................................................................................................... 17
Chapter 4Network Settings .......................................................................................................................19
4.1 Dialing ............................................................................................................................................ 19
4.2 Wi-Fi .............................................................................................................................................. 20
4.3 Network Transmission Parameters ................................................................................................ 21
Chapter 5Camera Settings .........................................................................................................................22
Chapter 6System Settings ..........................................................................................................................23
6.1 System Sound ................................................................................................................................ 23
6.2 LED Settings ................................................................................................................................... 23
6.3 Language Settings .......................................................................................................................... 24
6.4 Turning on/off IR Lights ................................................................................................................. 24
6.5 Positioning Settings ....................................................................................................................... 25
6.6 System Information ....................................................................................................................... 25
6.7 Battery Information ....................................................................................................................... 26
Chapter 7Body Camera Assistant............................................................................................................... 27
7.1 Assistant Installation ...................................................................................................................... 27

Body Camera User Manual
7
7.2 Device Login................................................................................................................................... 30
7.3 Password Recovery ........................................................................................................................ 31
7.4 Media Information ......................................................................................................................... 32
7.4.1 File Operation via Assistant............................................................................................... 33
7.4.2 File Operation in USB Mode.............................................................................................. 34
7.5 Device Configuration ..................................................................................................................... 35
7.5.1 User Information Settings ................................................................................................. 35
7.5.2 Encoding Parameters ........................................................................................................ 36
7.5.3 Time Synchronization ....................................................................................................... 36
7.5.4 Wi-Fi Parameters .............................................................................................................. 37
7.5.5 Dial Parameters ................................................................................................................. 37
7.5.6 Security Settings ............................................................................................................... 38
7.5.7 Platform Settings............................................................................................................... 38
7.5.8 Formatting ........................................................................................................................ 39
7.5.9 System Resetting ............................................................................................................... 40
7.6 Log Operations............................................................................................................................... 40
7.7 Assistant File Saving Path .............................................................................................................. 41
7.8 Upgrading Device ........................................................................................................................... 42
7.9 Exit Assistant .................................................................................................................................. 42
Chapter 8Troubleshooting .........................................................................................................................44
Body Camera User Manual
8
Chapter 1 Introduction
Purpose:
Body camera is a video recording system that is typically used by law enforcement to record their interactions
with the public and gather video evidence at crime scenes.
1.1 Package List
Following objects are delivered with package list. If something loses, contact us or our supplier for it.
1 * Body camera.
1 * USB data cable.
1 * Charger.
1 * Demountable and angle adjustable clip
1 * CD which contains user manual and Body Camera Assistant.
1 * Printed quick start guide.
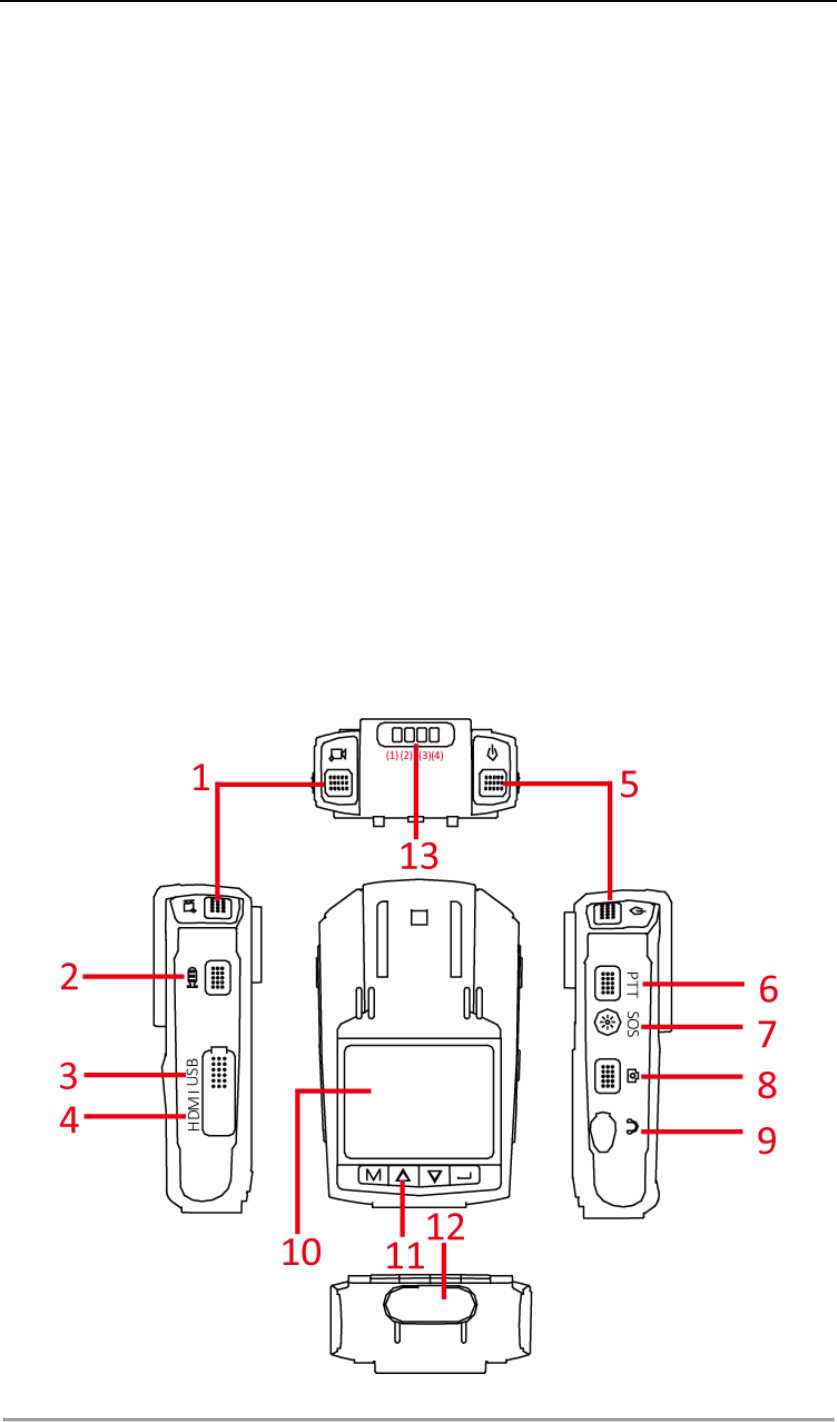
1.2 Buttons and Interfaces
Figure 1. 1 Overall View
Body Camera User Manual
9
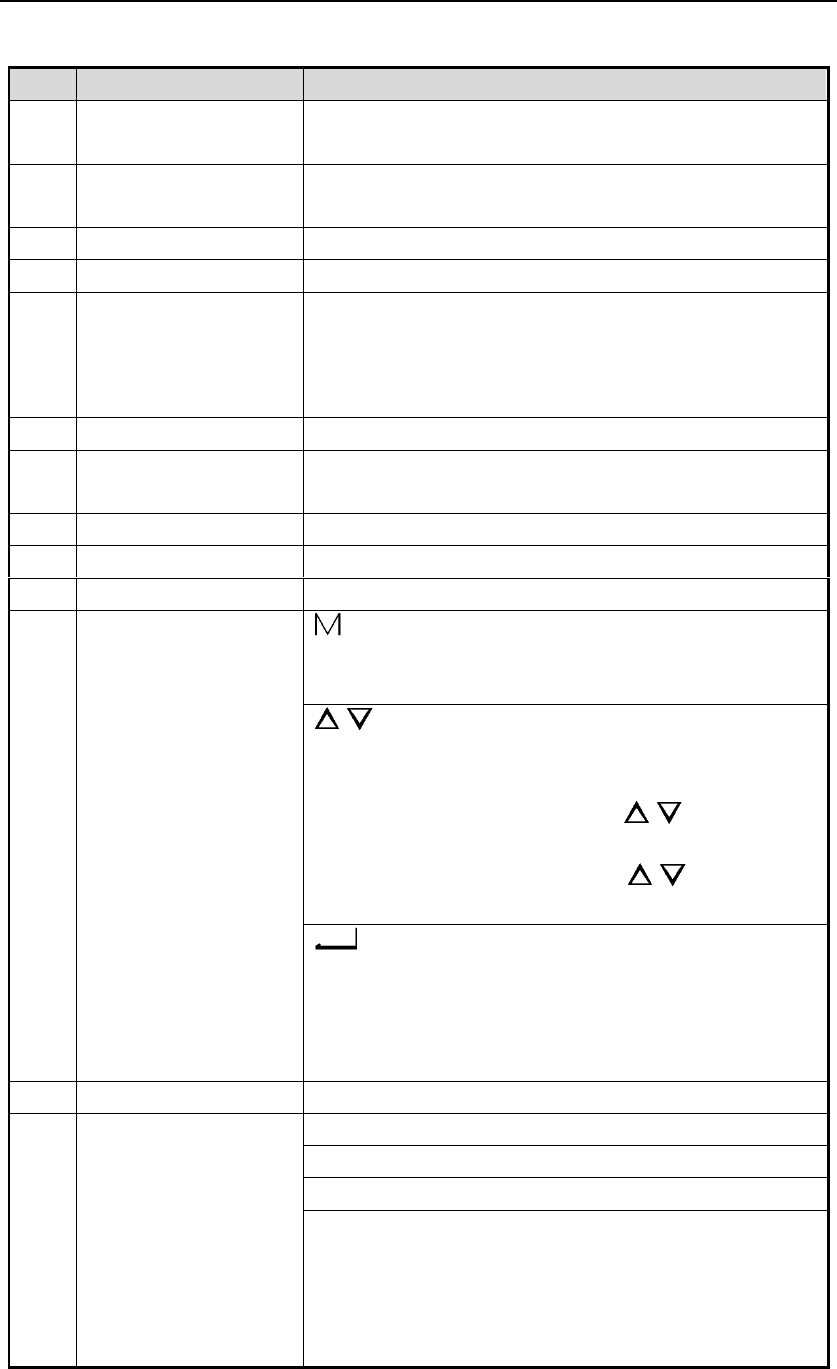
Table 1. 1 Buttons’ Description
No.
Button
Description
1
Recording
Hold down it to start/stop recording.
Hold down it for 3 seconds to turn on IR positioning light.
2
Taping
Press it to start/stop taping.
Hold down it for 3 seconds to turn on/off fluorescent.
3
USB interface
USB interface.
4
HDMI interface
HDMI interface.
5
Sleep/Wake
Press it to start up.
Hold down the button at the top right corner for 3 seconds to
turn on.
After device starts up, press it to inactivate/activate LCD.
6
PTT
Reserved.
7
SOS
When device is connecting with iVMS platform, press it to send
alarm to platform.
8
Capture
Press it to capture.
9
MIC interface
MIC interface
10
LCD
LCD for local operation.
11
Buttons
:
In LCD live view mode, press it to enter main menu.
In LCD menu, press it to exit.
/ :
In LCD menu, press it to navigate between fields and items in
menus.
In LCD playback mode, press the / button to speed
up/slow down playback speed.
In LCD live view mode, press the / button to zoom
in/out.
:
In LCD menu, press it to enter a sub-menu or confirm a
selection.
In LCD live view mode, hold down it for 3 seconds to set
important video tag.
12
SIM card slot
Install SIM card here.
13
LEDs
LED (1): During network transmission, it flashes in blue.
LED (2): When taping, it flashes in yellow.
LED (3): When device starts up, it turns green.
LED (4):
When recording, it turns red and flashes in low frequency.
When charging, it turns solid red.
When device is in low battery, it turns red and flashes in high
frequency.
Body Camera User Manual
10
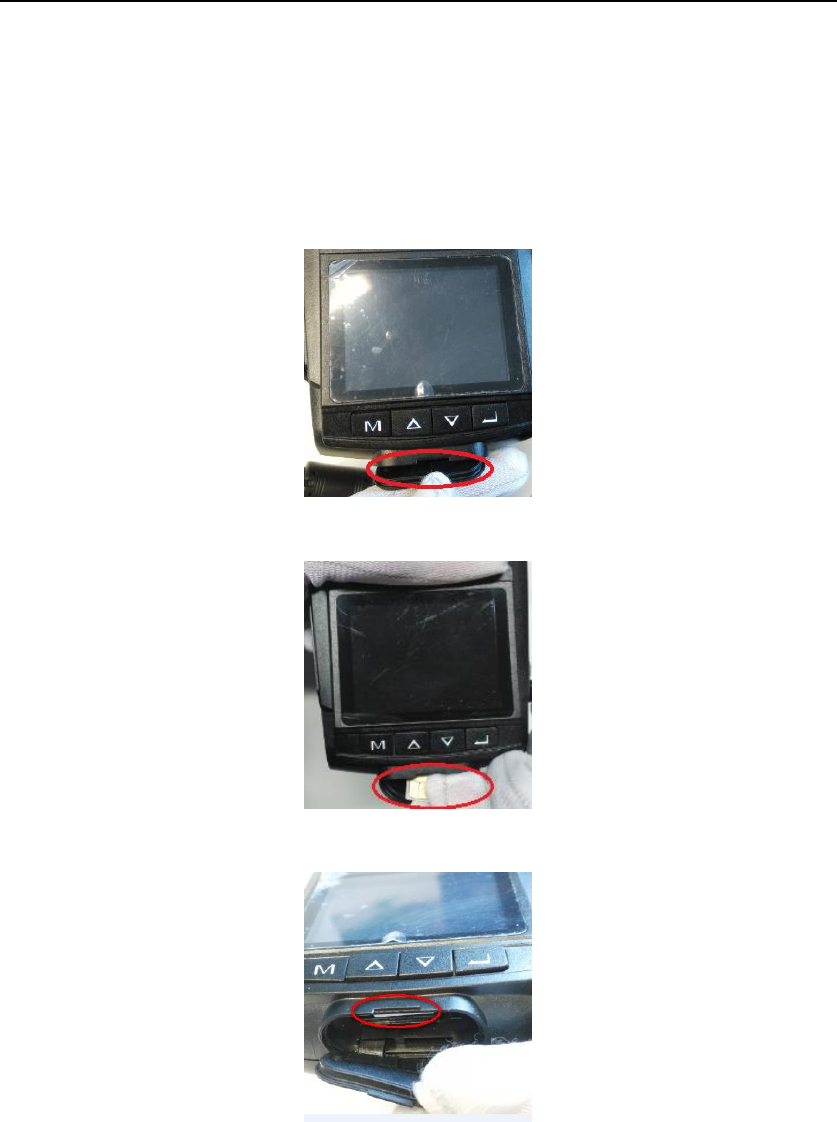
1.3 SIM Card Installation
Purpose:
The DS-MH2111/32G/GLF series body camera supports 3G/4G wireless network. You need to install SIM card before dialing.
Steps:
1. SIM card slot locates at the bottom of body camera. Open the cover to show the SIM card slot.
Figure 1. 2 Open the Cover
2. Insert the SIM card into the slot bottom with the gold area facing upwards.
Figure 1. 3 Insert SIM Card
3. Close the cover to finish installation.
Figure 1. 4 Close the SIM Card
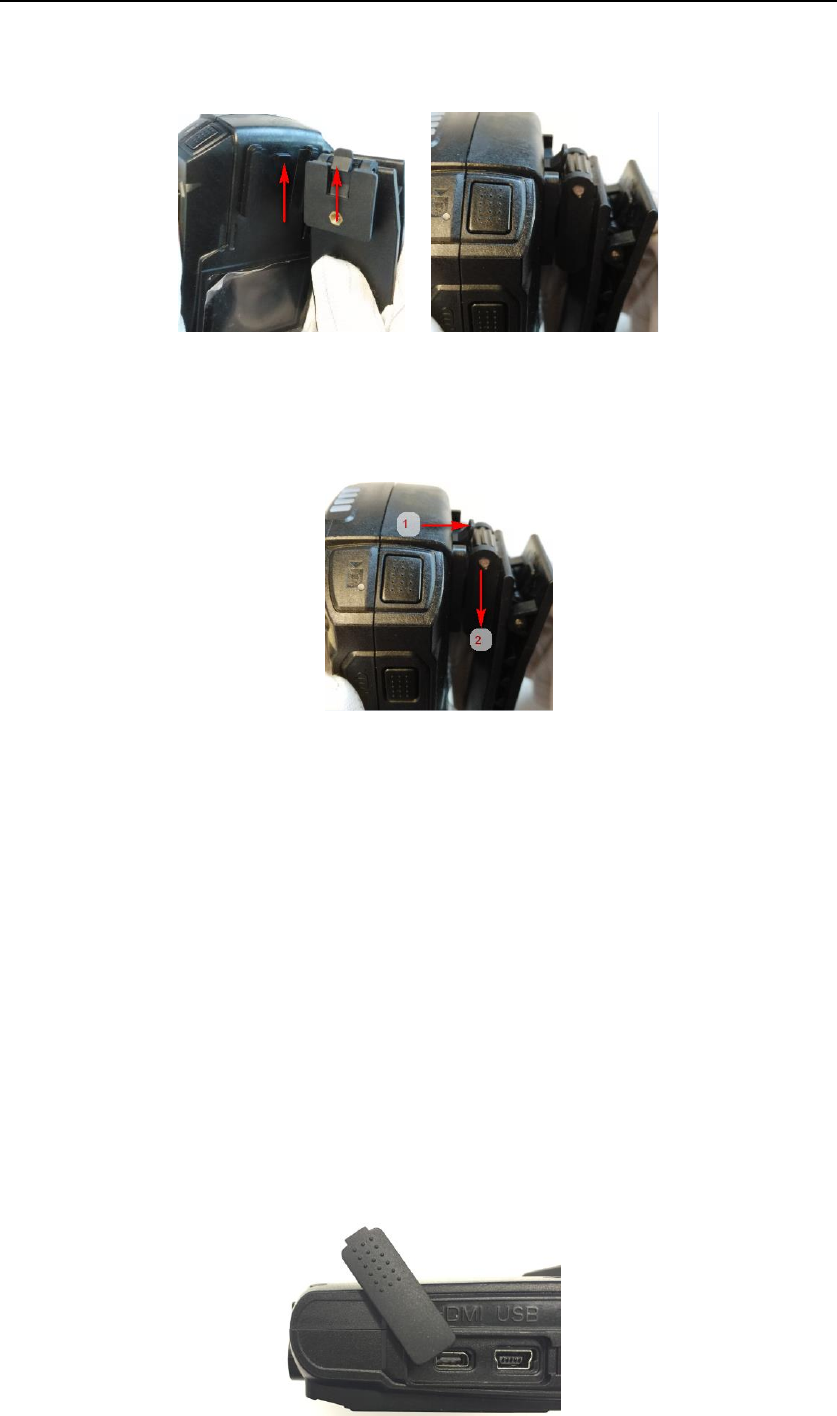
1.4 Shoulder Clip Installation/Uninstallation
Purpose:
The shoulder clip makes it possible to fix the body camera on the garment. Besides, the vertical angle of the
shoulder clip is adjustable.
Step:
To install clip, do following step:
Body Camera User Manual
11
Push the shoulder clip into top of the clip slot as the direction shown in the following figure, till you hear a
click sound.
Figure 1. 5 Install Shoulder Clip
To uninstall clip, do following steps:
1) Press and hold the stick as the direction 1 shown in the following figure.
2) Push the shoulder clip down as the direction 2 to separate it from body camera.
Figure 1. 6 Uninstall Shoulder Clip
1.5 Charging
1.5.1 Charger Specification
Input: 200 to 240 V AC, 50/60 Hz, 0.2 A.
Output: 5 V/2.0 A
1.5.2 How to Charge
Purpose:
When device power is insufficient, you will receive a message says “Low battery. Device will shut down.”. Follow
the steps to charge device.
Steps:
1. Open the cover of USB interface.
Body Camera User Manual
12
Figure 1. 7 Open the Cover
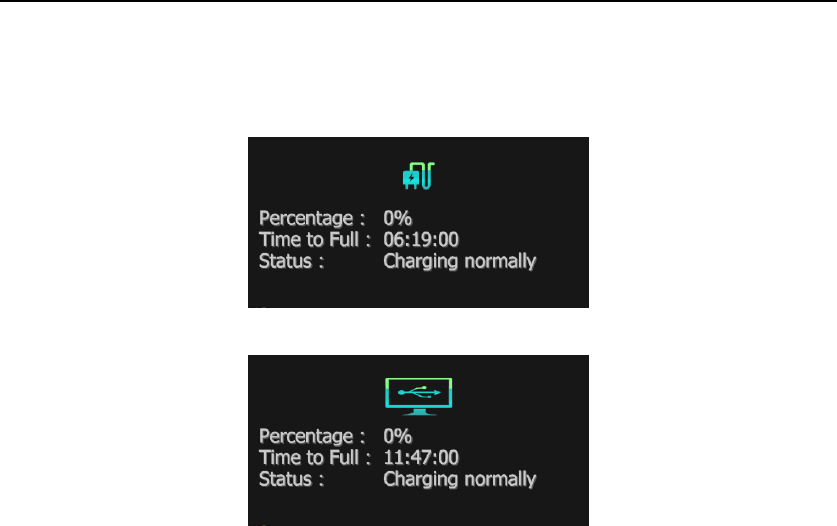
2. Connect body camera to the charger or USB port of computer with the USB data cable. The LCD will show
the charging status. The charging status via charger or computer is different.
Figure 1. 8 Charging via Charger
Figure 1. 9 Charging via Computer
1.5.3 How to Protect Charger
Once charging completed, disconnect the connection between charger and body camera, and the
connection between charger and power supply.
Handle with care. In case the charger or USB data cable is physically damaged or is affected with damp, do
not keep using it. You can contact us to change charger.
To protect device and your security, don’t touch the body camera, charger, and USB cable with wet hand.
Don’t pull out charger from power supply by pulling the USB data cable.

Body Camera User Manual
13
Chapter 2 Start-up
2.1 Start-up
Before you start:
Ensure the power is sufficient. If not, charge body camera. For details, refer to 1.4 Shoulder Clip
Installation/Uninstallation.
Step:
Press the Sleep/Wake button. After this the LED (3) turns green, the HIKVISION logo pops up in LCD, and you will
hear an audio notification. All of these indicate the body camera starts successfully.
2.2 Sleep/Wake up
Step:
The LCD goes to sleep automatically when there is no operation in the predefined time. Press the Sleep/Wake
button to manually inactivate or activate LCD.
2.3 Shutdown
Step:
Hold down the Sleep/Wake button for 3 seconds. When you hear a sound notification, and see the HIKVISION
logo pops up on the LCD, the LCD is shut down.
2.4 Force to Shutdown
Step:
If body camera crashed or it cannot be shutdown normally, you can hold down the Sleep/Wake button for 15
seconds to shutdown forcedly.
The operation will result in restoring to default settings.
Body Camera User Manual
14
Chapter 3 Basic Functions
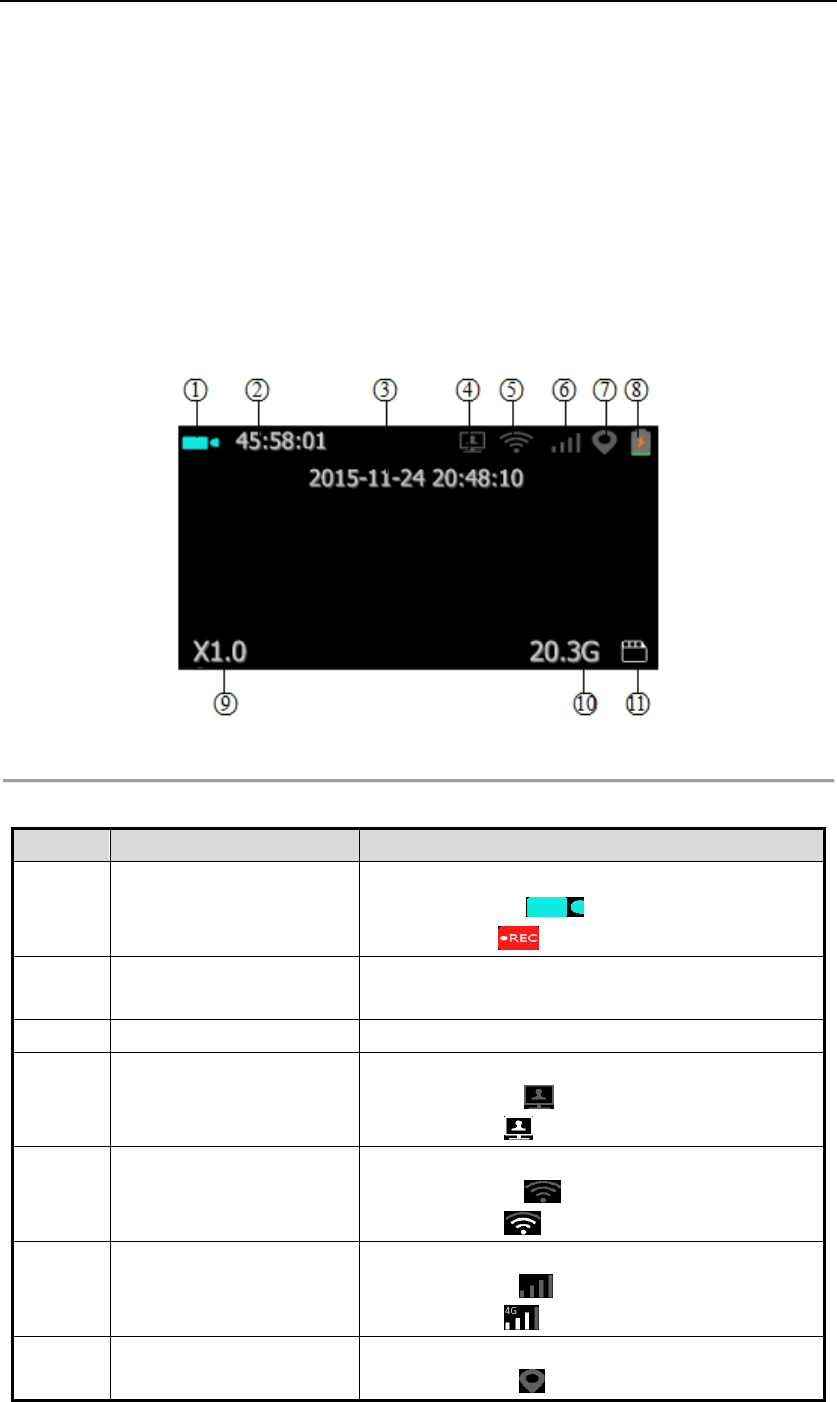
3.1 Live View Icons
Purpose:
Once the body camera starts up completely, it automatically enters the live view image. 11 icons are shown in
live view.
Figure 3. 1 Live View Icons
Table 3. 1 Live View Icons Description
Number
Name
Description
1
Recording status
Shows the recording status.
Not recording:
Recording:
2
Remaining recording time
The time is variable and is decided by video resolution,
frame rate, and bitrate.
3
OSD (On Screen Display) menu
Shows the device date and time.
4
Platform status
Shows whether device is connected with platform.
Disconnected:
Connected:
5
Wi-Fi status
Shows whether Wi-Fi is connected.
Disconnected:
Connected:
6
Dialing status
Shows whether device dialing succeeded.
Unsuccessful:
Succeeded:
7
Positioning status
Shows whether positioning is successful.
Unsuccessful:
Body Camera User Manual
15
Number
Name
Description
Succeeded:
8
Battery information
Shows the remaining battery and charging status.
9
Zoom status
Shows the zoom status.
10
Remaining memory capacity
Shows the remaining memory capacity
11
Memory status
Shows whether memory is recognized.
3.2 Menu Operation
Before you start:
Wake up LCD.
Step:
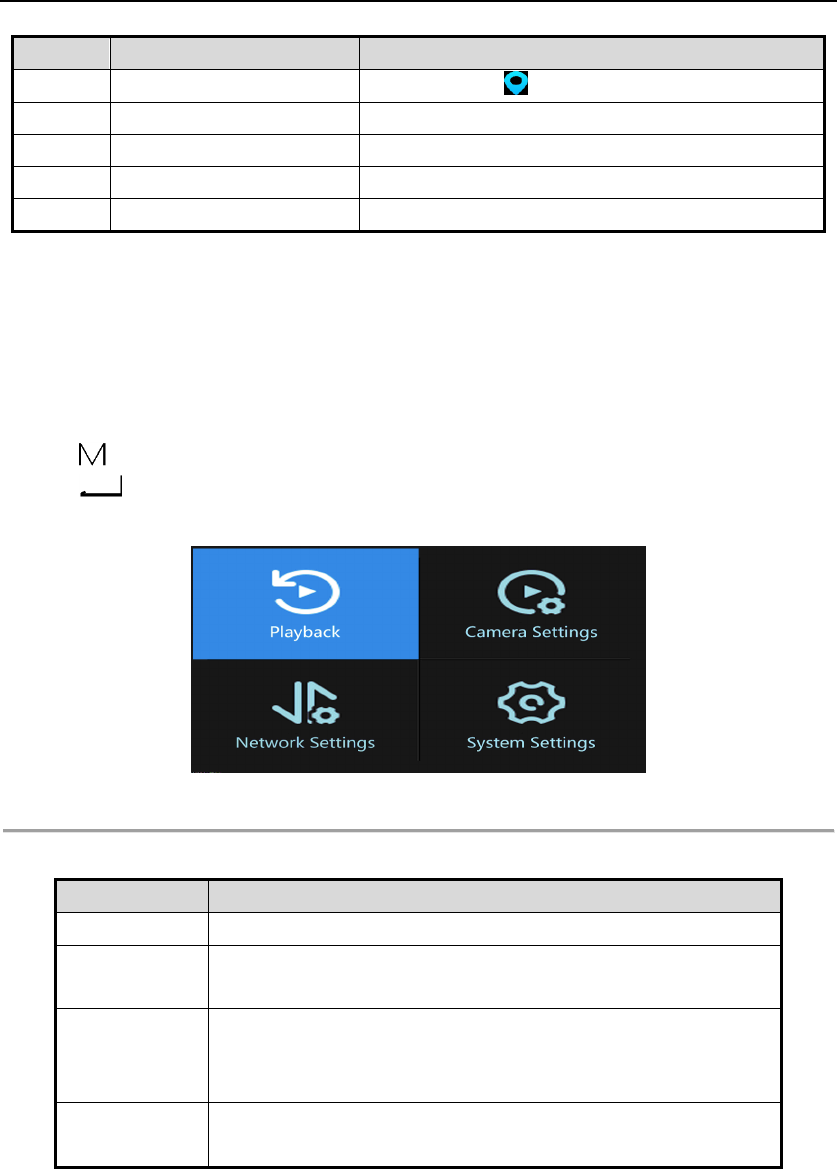
Press the button to bring up main menu.
Press the button to enter the four sub-menus, including Playback, Camera Settings, Network Settings, and
System Settings.
Figure 3. 2 Main Menu
Table 3. 2 Sub-Menu Description
Menu
Description
Playback
You can view recorded videos, pictures, and audios.
Camera Settings
You can set camera parameters including video resolution, bitrate, frame
rate, pre-record time, post-record time, video clip time, and picture quality.
Network Settings
You can set network transmission resolution, network transmission bitrate,
network transmission frame rate, platform connection, and Wi-Fi
parameters.
System Settings
You can set positioning parameters, time synchronization, system sound,
language, and so on.
3.3 Taking Pictures
Purpose:
You can take pictures of the crime scenes or other situations.
Step:
1. To set picture quality, do following steps:
Body Camera User Manual
16
1) Enter Camera Settings interface.
2) Press the / button to position the cursor on Picture Quality. And click the button to
enter Picture Quality menu.
3) Press the / button to select picture quality. And click the button to save the settings.
2. Enter live view mode, or you will fail to take pictures.
3. Press the button at the right side of device to take a picture of current live view image.
The picture is saved in device memory in .jpg format and named by taking picture date and time.
You can play back the picture in playback menu or download and save it in computer local path. For
detailed steps of downloading pictures, you can refer to 7.7 Assistant File Saving Path.
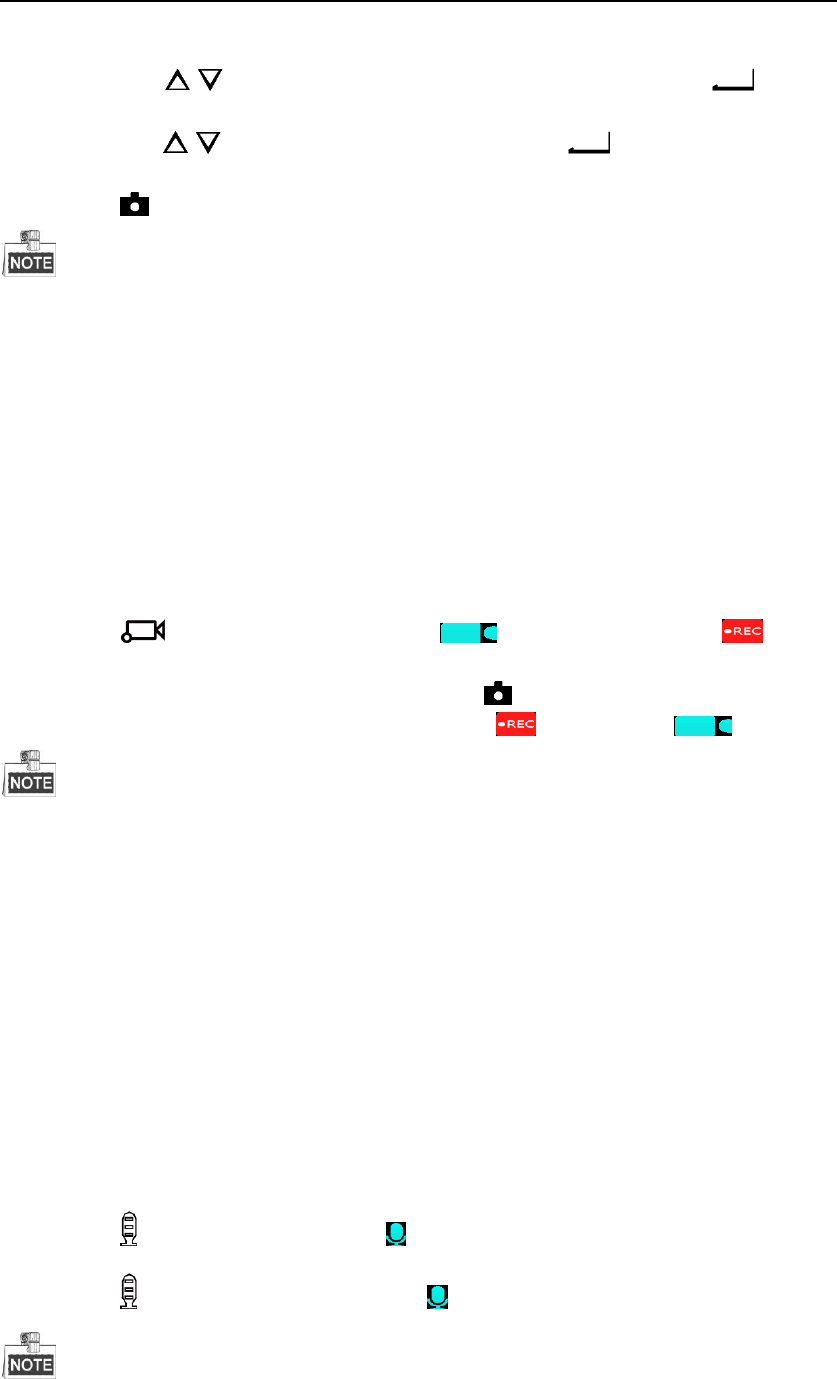
3.4 Record and Capture
Purpose:
You can record the videos in crime scenes or other situations. And during the recording, you can capture.
Steps:
1. Enter live view mode.
2. Press the button to start recording. Then the icon in live view turns to the icon and
the LED (4) starts flashing in red once per second.
3. Optionally, during the recording process, you can press the button to capture current live view image.
4. Press the recording button again to stop recording. Then the icon turns to the icon
The video is saved in device meory in .mp4 format and named by recording starting time.
The picture is saved in memory in .jpg format and is named by capturing date and time.
The captured picture’s resolution is the same as video resolution.
You can play back the video and picture in playback menu or download and save it in computer local path.
For detailed steps of downloading videos, you can refer to 7.7 Assistant File Saving Path.
3.5 Taping
Purpose:
You can tape audios in crime scenes or other situations.
Steps:
1. Enter live view mode.
2. Press the button to start taping. Then the icon pops up in live view interface.
3. Press the button again to stop taping. Then the icon disappears.
The audio file is saved in device memory in .AAC format and named by taping starting time.
Body Camera User Manual
17
You can play back the audio in playback menu or download and save it in computer local path. For detailed
steps of downloading audios, you can refer to 7.7 Assistant File Saving Path.
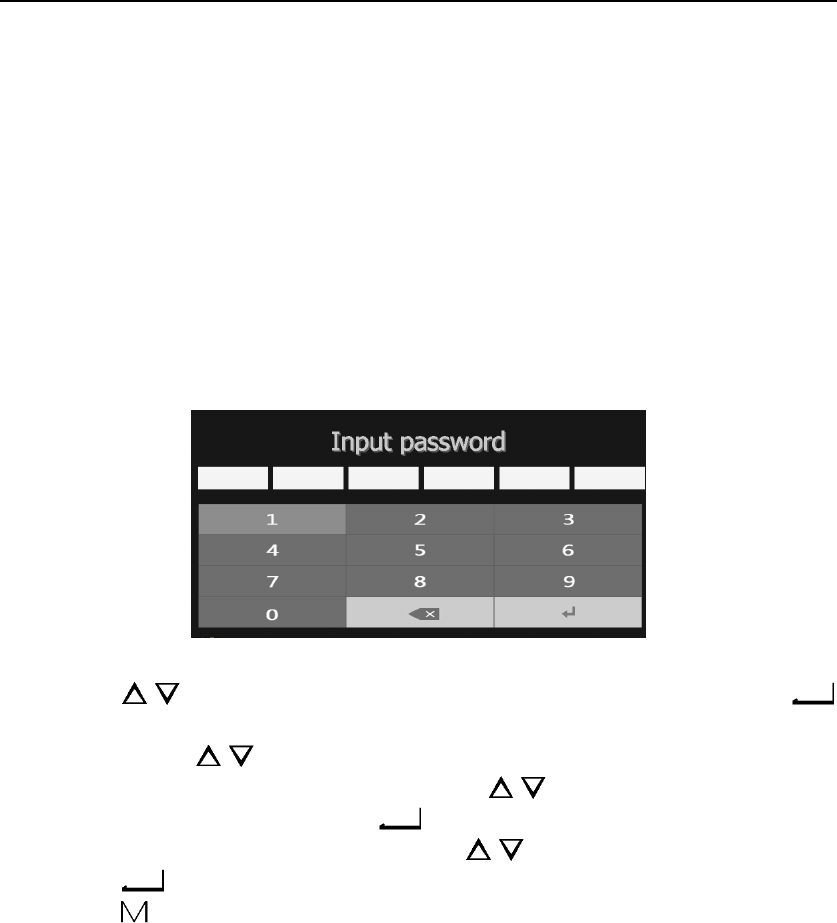
3.6 Playback
Purpose:
You can play back recorded videos, pictures, and audios.
Steps:
1. Enter Playback interface.
Main Menu > Playback
2. Enter device password to get permission.
Figure 3. 3 Enter Password
3. Press the / button to select the playback file type as Video, Picture, or Audio. And press the
button to enter selected type menu.
4. In file list, press the / button to select the file to play back.
During video playback process, you can press the / button to speed up/slow down the
playback speed. And you can press the button to pause/resume playback process.
During picture playback process, you can press the / button to turn to previous/next picture.
5. Press the button to start playback.
6. Press the button to exit playback.
3.7 Alarm
3.7.1 SOS Message
Purpose:
In emergency, you can send SOS message to iVMS platform by pressing the SOS button.
Before you start:
Log in body camera via iVMS platform.
Step:
To send SOS message to platform, hold down the SOS button for at least 1 second.
3.7.2 Memory Full Alarm
Purpose:
If memory is full, when you start recording, taping, capture, or other function consumes storage, the message

Body Camera User Manual
18
“Memory is full.” will pop up in LCD. To save new files, including videos, pictures, and audios, you need to backup
device first and clear memory.
Memory full alarm is on by default and cannot be turned off.
Figure 3. 4 Memory is Full
Body Camera User Manual
19
Chapter 4 Network Settings
4.1 Dialing
Purpose:
For DS-MH2111/32G/GLF series body camera, you can access internet by dialing via 3G/4G SIM card.
Before you start:
Install SIM card first. For details, refer to 1.3 SIM Card Installation.
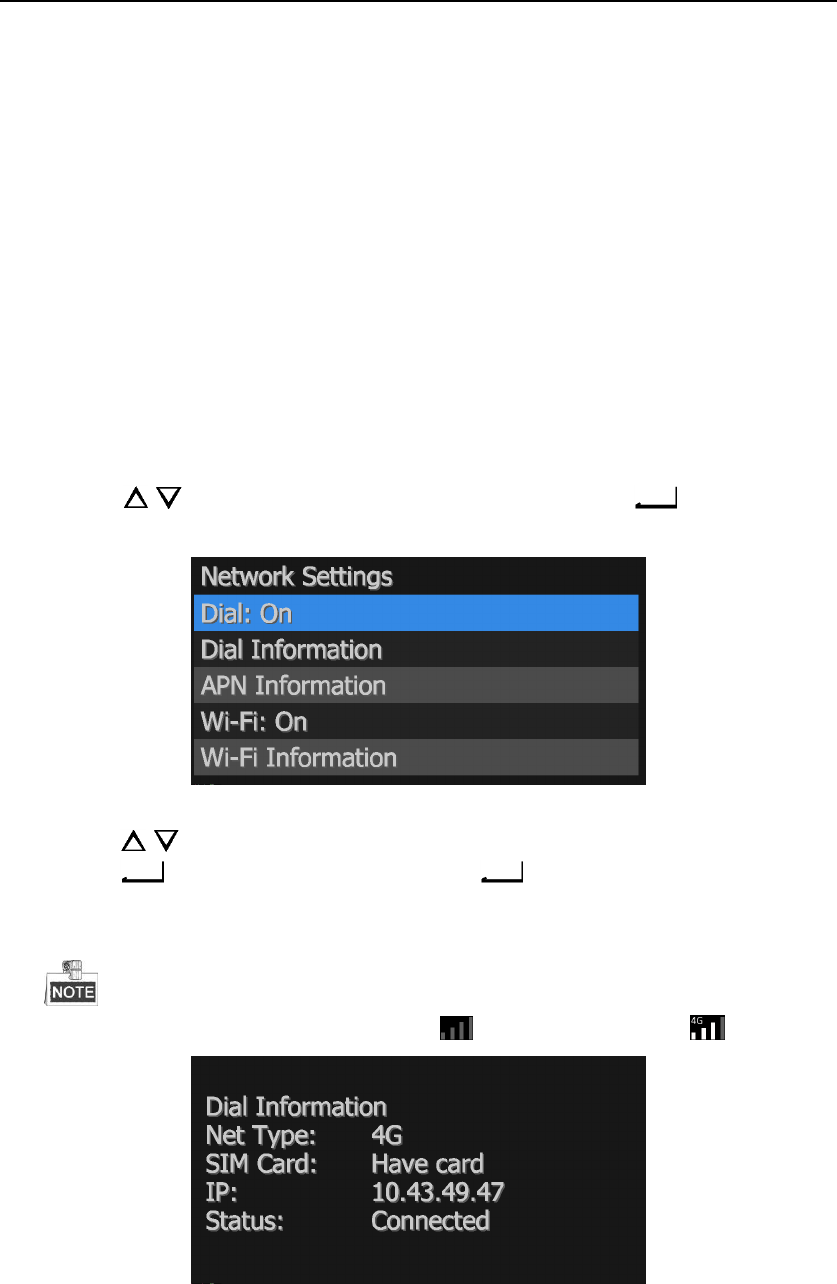
Steps:
1. Enter Network Settings interface.
Main Menu > Network Settings
2. Press the / button to position the cursor on Dial item. And press the button to enter the
menu.
Figure 4. 1 Dial
3. Press the / button to select Dial as On.
4. Press the button to save the settings and press the button to reboot device.
5. You can view dialing status in Dial Information menu.
Main Menu > Network Settings > Dial Information
If dialing succeeded, the Status is Connected and the icon in live view will turn to icon.
Figure 4. 2 Dial Information
Body Camera User Manual
20
4.2 Wi-Fi
Purpose:
You can access internet by connecting to a Wi-Fi.
Before you start:
Configure Wi-Fi parameters, including SSID and key, in body camera assistant. For detailed steps, refer to 7.5.4
Wi-Fi Parameters.
Steps:
To turn on Wi-Fi on LCD menu, do following steps:
1. Enter Network Settings interface.
Main Menu > Network Settings
2. Press the / button to position the cursor on Wi-Fi item. And press the button to enter Wi-Fi
menu.
Figure 4. 3 Wi-Fi Settings
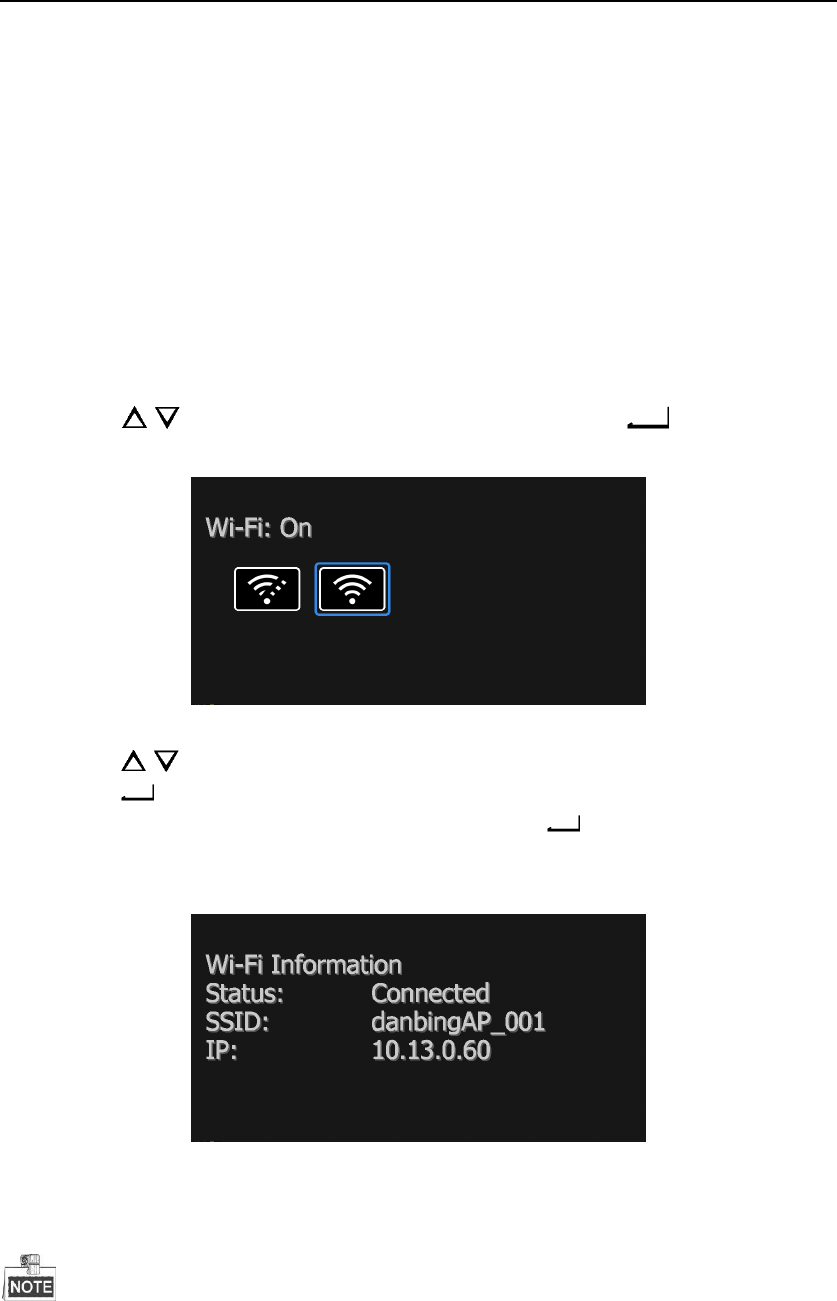
3. Press the / button to select Wi-Fi as On.
4. Press the button to save the settings.
5. Then the prompt “Reboot device to take effect.” pops up. Press the button to reboot.
6. You can view the Wi-Fi Status, SSID, and IP in Wi-Fi Information menu.
Main Menu > Network Settings > Wi-Fi Information
Figure 4. 4 Wi-Fi Information
To turn on Wi-Fi on Body Camera Assistant.
For detailed steps, refer to 7.5.4 Wi-Fi Parameters.
In the situation of both dialing and Wi-Fi are connected, device prioritise access to internet through Wi-Fi.
Body Camera User Manual
21
4.3 Network Transmission Parameters
Purpose:
By setting network transmission parameters, you can determine the resolution, frame rate, and bitrate used by
iVMS platform when it views body camera’s image.
Steps:
1. Enter Network Settings interface.
Main Menu > Network Settings
Figure 4. 5 Wi-Fi Settings
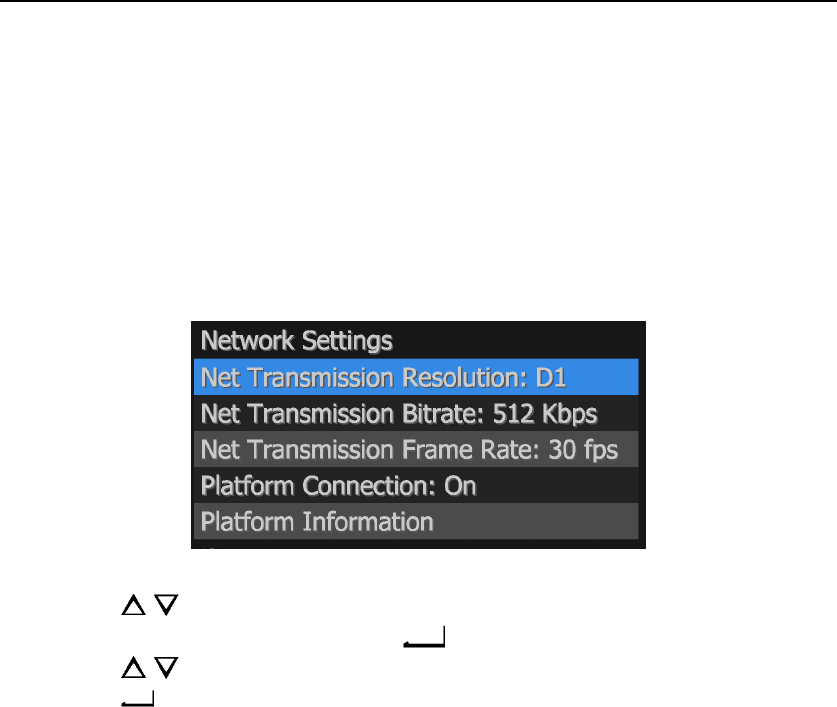
2. Press the / button to position the cursor on Net Transmission Resolution, Net Transmission Bitrate,
or Net Transmission Frame Rate. And press the button to enter corresponding menu.
3. Press the / button to select target parameter.
4. Press the button to save the settings.
Body Camera User Manual
22
Chapter 5 Camera Settings
Purpose:
You can set the parameters for video, including resolution, frame rate, bitrate, and so on.
Steps:
To configure camera parameters on LCD menu, do following steps:
1. Enter Camera Settings interface.
Main Menu > Camera Settings
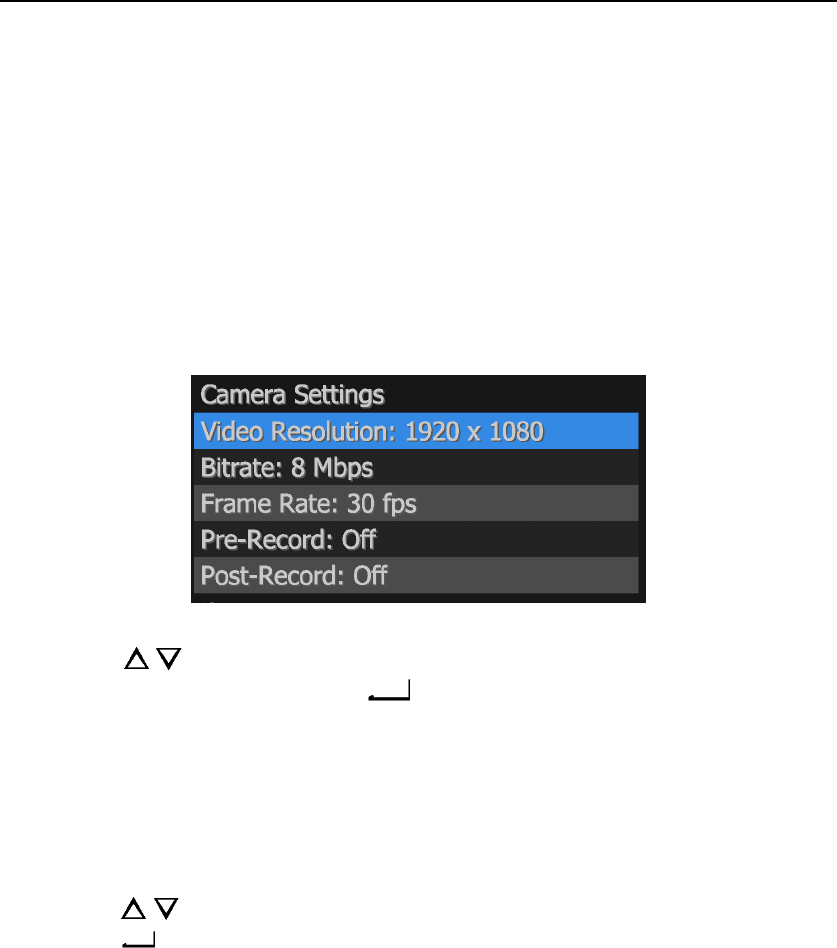
Figure 5. 1 Camera Settings
2. Press the / button to position the cursor on Video Resolution, Bitrate, Frame Rate, Pre-Record,
Post-Record, or other items. And press the button to enter corresponding menu.
Pre-Record: The time you set to record before the start recording time. For example, when you start
recording at 10:00, if you set the pre-record time as 5 seconds, the camera records it at 9:59:55.
Post-Record: The time you set to record after the stop recording time. For example, when you stop
recording ends at 11:00, if you set the post-record time as 5 seconds, it records till 11:00:05.
Video Clip: Maximum size for every video. Video will be automatically recorded into a new clip once
reaches the size.
3. Press the / button to select target parameter.
4. Press the button to save the settings and go back to upper menu. You need to reboot device to take
effect the new settings.
To configure camera parameters on Body Camera Assistant.
For detailed steps, refer to 7.5.2 Encoding Parameters.
Body Camera User Manual
23
Chapter 6 System Settings
To enter System Settings menu, do following step:
Press the / button to position the cursor on System Settings menu. And press the button to enter
System Settings menu.
6.1 System Sound
Purpose:
You can turn on and turn off system sound if necessary. If you turn on it, when you press each buttons or alarm
occurs, there will be a system sound. By default it is on.
Steps:
1. Enter System Settings menu.
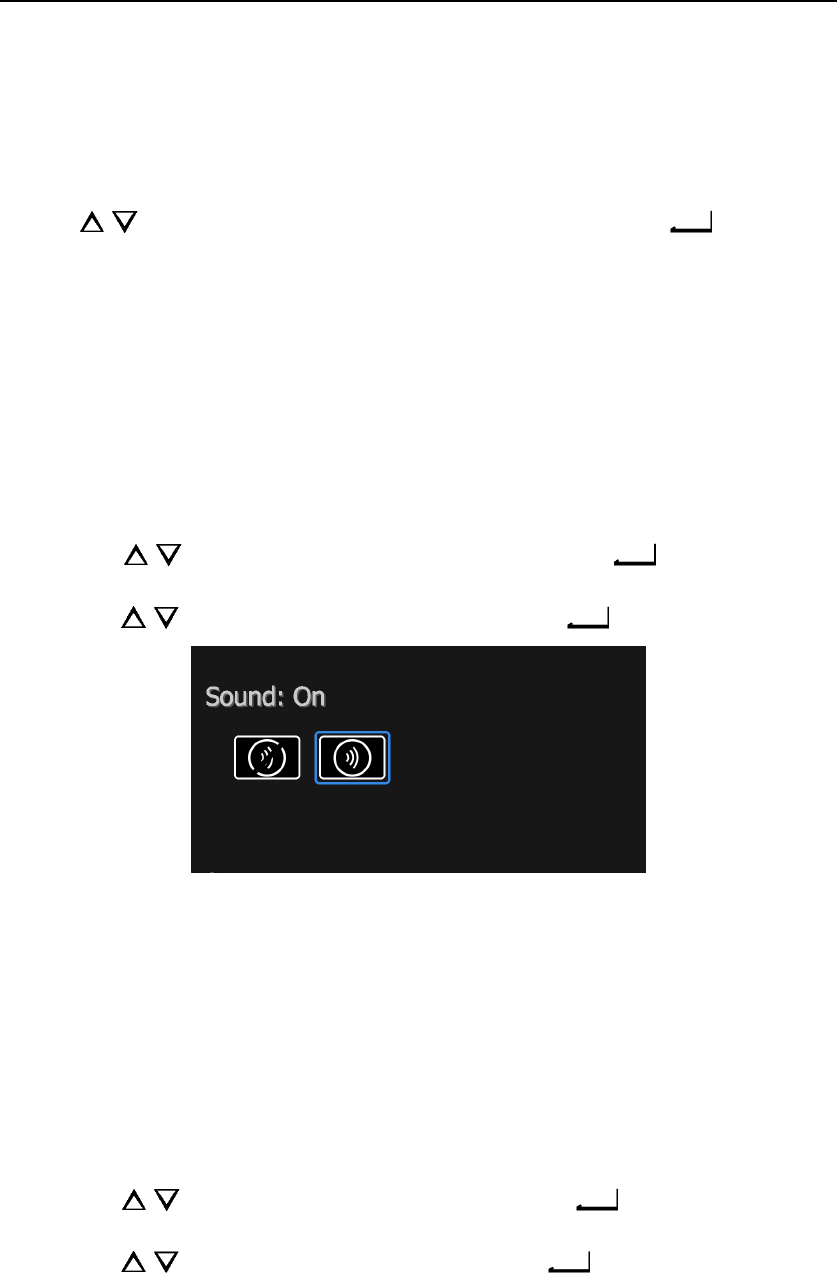
2. Press the / button to position the cursor on Sound. And press the button to enter Sound
settings menu.
3. Press the / button to select Sound as On or Off. And press the button to save the settings.
Figure 6. 1 Sound Settings Menu
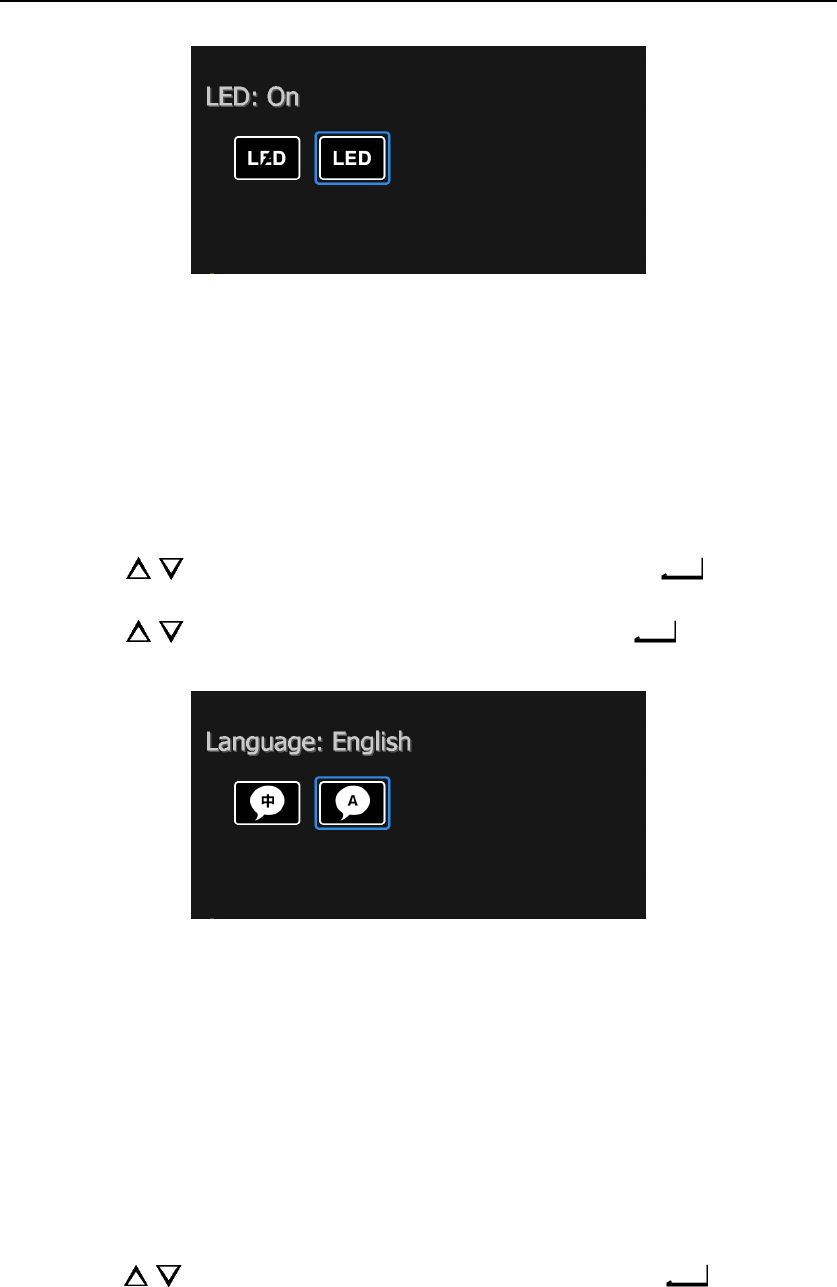
6.2 LED Settings
Purpose:
You can turn on or turn off the four LEDs. If you turn on them, the LEDs will be on or off according to device
status. For details of LED status, you can refer to 1.2 Buttons and Interfaces.
Steps:
1. Enter System Settings menu.
2. Press the / button to position the cursor on LED. And press the button to enter LED settings
menu.
3. Press the / button to select LED as On or Off. And press the button to save the settings.
Body Camera User Manual
24
Figure 6. 2 LED Menu
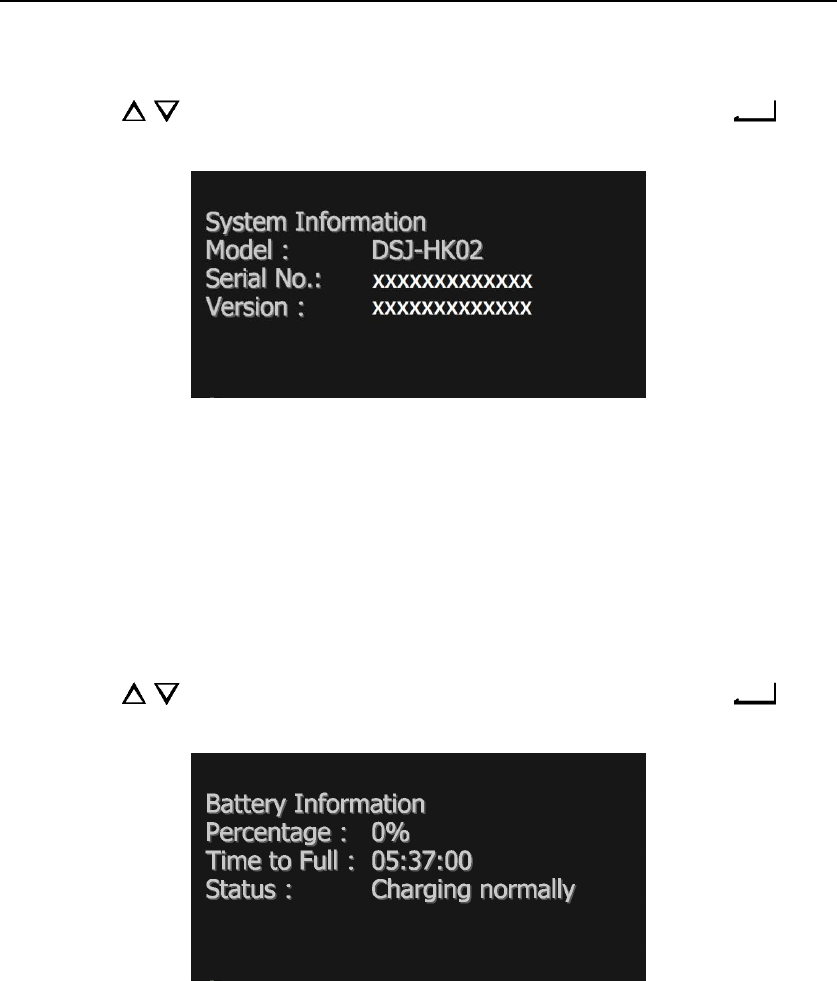
6.3 Language Settings
Purpose:
Two languages are provided: Chinese and English.
Steps:
1. Enter System Settings menu.
2. Press the / button to position the cursor on Language. And press the button to enter
Language settings menu.
3. Press the / button to select LED as Chinese or English. And press button to save the
settings.
Figure 6. 3 Language
6.4 Turning on/off IR Lights
Purpose:
The body camera provides IR (Infrared Radiation) lights. At night or dark environment, the IR light supplies the
sufficient light to get a visible image.
Steps:
1. Enter System Settings sub-menu.
Main Menu > System Settings
2. Press the / button to position the cursor on Infrared item. And press the button to enter
Infrared menu.

Body Camera User Manual
25
Figure 6. 4 Infrared Menu
3. Press the / button to position the cursor on OFF, ON, or AUTO.
OFF: By default, IR light is off. The status adapts to daylight period.
ON: In night period or dark environment, it is recommended to turn on IR light.
AUTO: Body camera automatically turns on/off IR light according to environment.
4. Press the button to save the settings.
6.5 Positioning Settings
Purpose:
Body camera has a built-in positioning module. By turning on positioning function, the device can obtain the
latitude, longitude, and speed information. The information will be displayed in live view.
Before you start:
Ensure the body camera locates in a place the positioning signal exists.
Steps:
1. Enter System Settings interface.
2. Press the / button to position the cursor on Positioning item. And press the button to enter
Positioning menu.
3. Press the / button to select positioning type as Off, GPS, BeiDou, or GPS and BeiDou.
4. Press the button to save the settings. If positioning succeeded, the positioning icon in live view will
turn from to .
Figure 6. 5 Positioning Settings
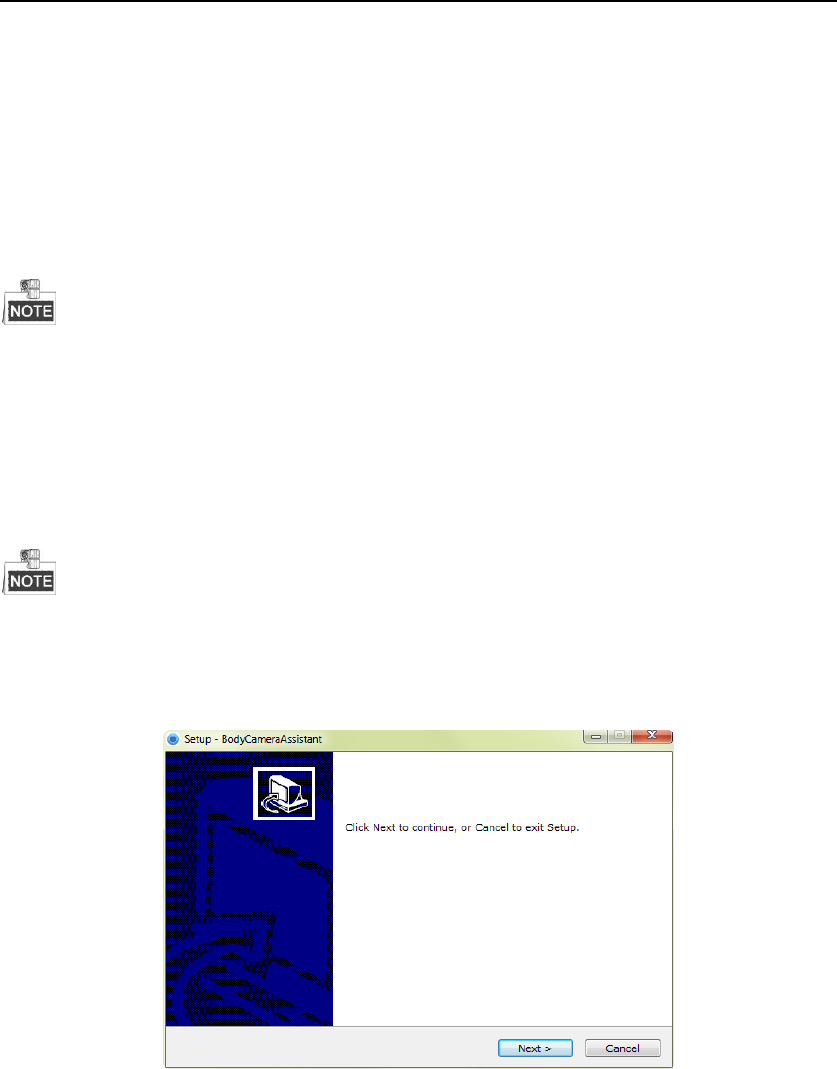
6.6 System Information
Purpose:
System information menu shows the device model, serial number, and version.
Body Camera User Manual
26
Steps:
1. Enter System Settings interface.
2. Press the / button to position the cursor on System Information item. And press the button
to enter System Information menu.
Figure 6. 6 System Information
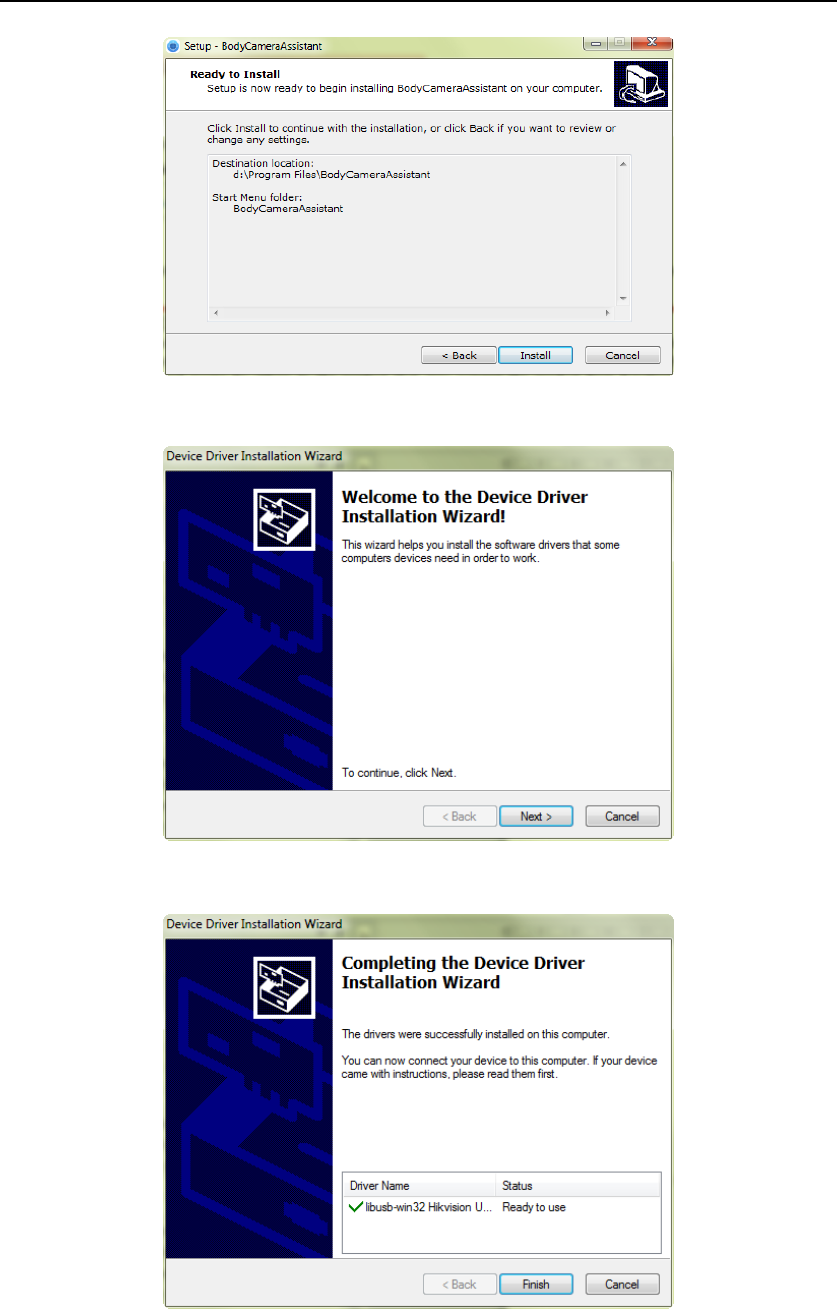
6.7 Battery Information
Purpose:
Battery information menu shows the remaining battery, time to fully charged, and charging status.
Steps:
1. Enter System Settings interface.
2. Press the / button to position the cursor on System Information item. And press the button
to enter System Information menu.
Figure 6. 7 Battery Information
Body Camera User Manual
27
Chapter 7 Body Camera Assistant
Purpose:
Log into body camera via the Body Camera Assistant to view device’s logs, videos, audios, and pictures, and
configure parameters remotely.
Assistant mentioned below refers to the Body Camera Assistant.
7.1 Assistant Installation
Purpose:
The body camera assistant’s installation package is delivered with the CD.
Installation package includes BodyCameraAssistant-win32.exe and BodyCameraAssistant-win64.exe. Select
installation package according to your computer system type.
Steps:
1. Double-click the installation package to start installing.
Figure 7. 1 Setup
2. Click Next to enter Select Destination Location window. Click Browser to select the path where to install the
assistant.

Body Camera User Manual
28
Figure 7. 2 Destination Location
3. Click Next to enter Select Start Menu Folder window. Optionally, you can edit the shortcut name and click
Browser to select the folder where to create shortcut.
Figure 7. 3 Start Menu Folder
4. Click Next to enter Select Additional Tasks window. Optionally, you can create a desktop icon by checking
the checkbox of Create a desktop icon.
Figure 7. 4 Additional Tasks
5. Click Next to enter Ready to Install window. Click Install start installing.
Body Camera User Manual
29
Figure 7. 5 Ready to Install
6. During the installation process, the following window will pop up.
Figure 7. 6 Device Driver Installation Wizard
7. Click Next to start installing device driver.
Figure 7. 7 Device Driver Installation Wizard
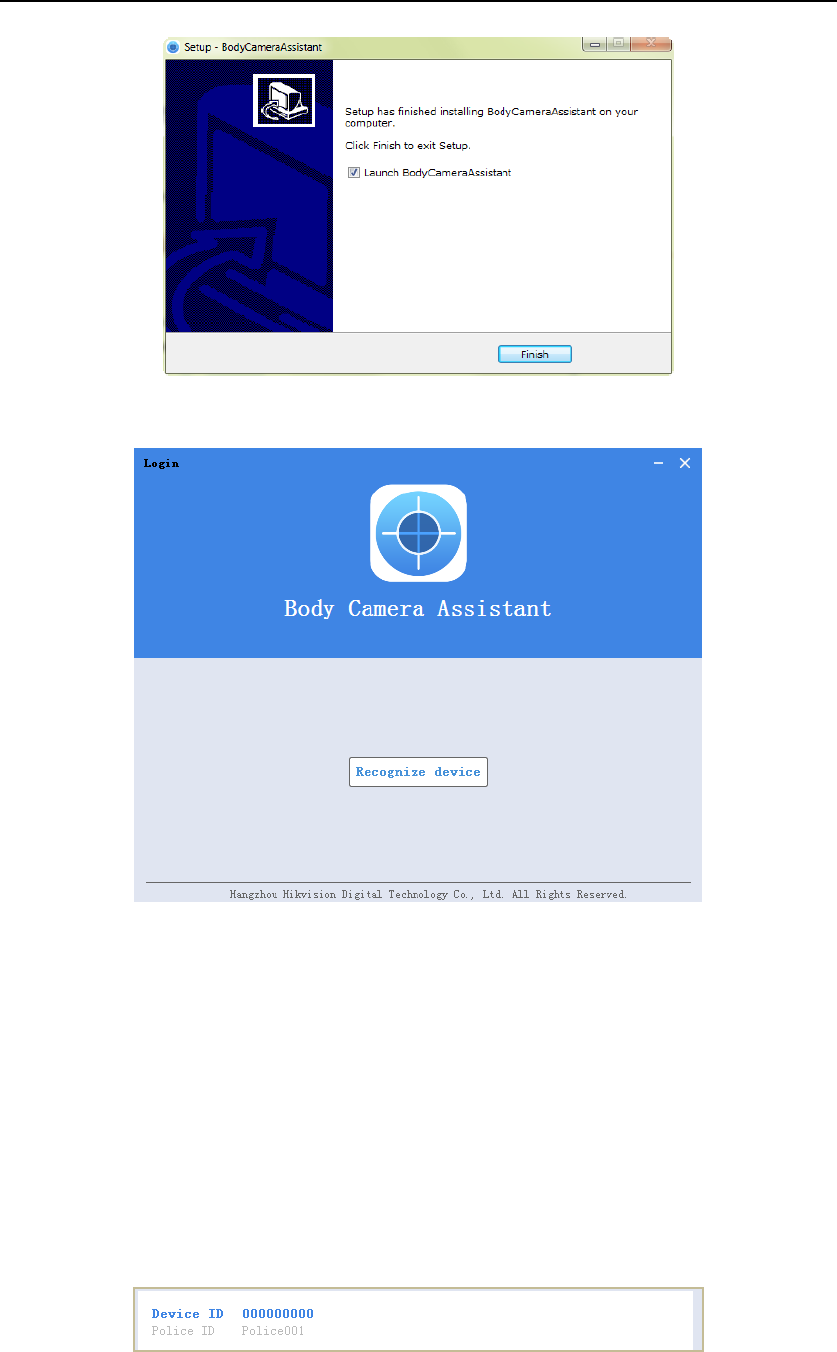
8. Click Finish in Device Driver Installation Wizard and click Finish in Body Camera Assistant Wizard to finish
the installation.
Body Camera User Manual
30
Figure 7. 8 Finish
9. Then the body camera assistant window appears.
Figure 7. 9 Body Camera Assistant
7.2 Device Login
Purpose:
You need to connect the assistant with body camera.
Before you start:
Connect the body camera to your computer with the USB data cable.
Steps:
1. Run the assistant.
2. Click Recognize device button to start recognizing. Then the recognized device will be listed.
Figure 7. 10 Recognized Device
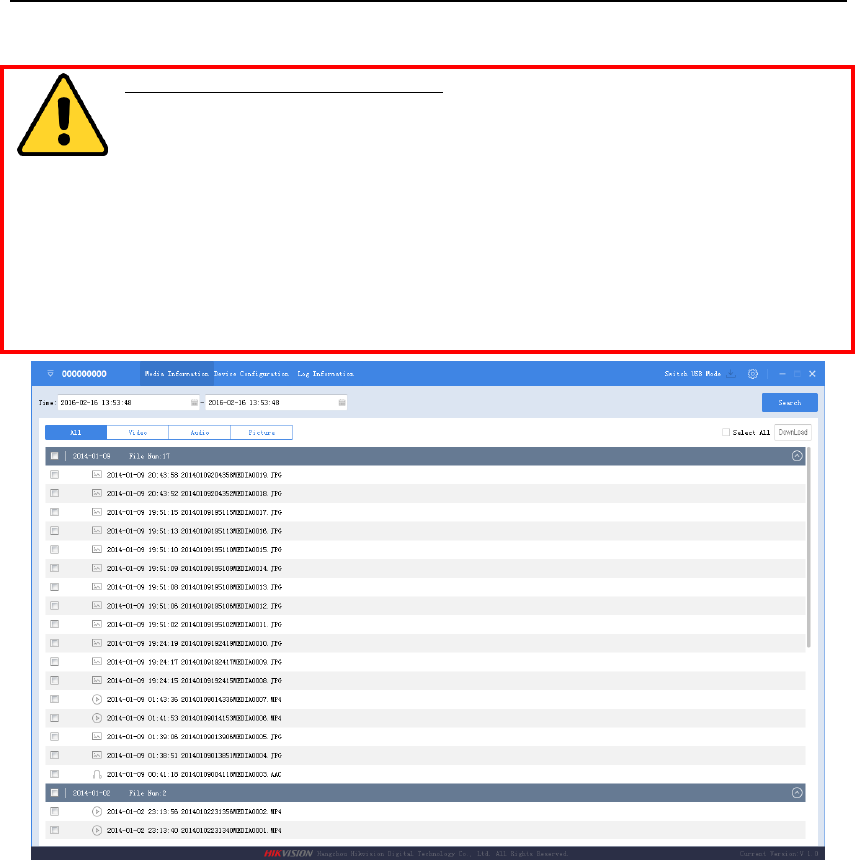
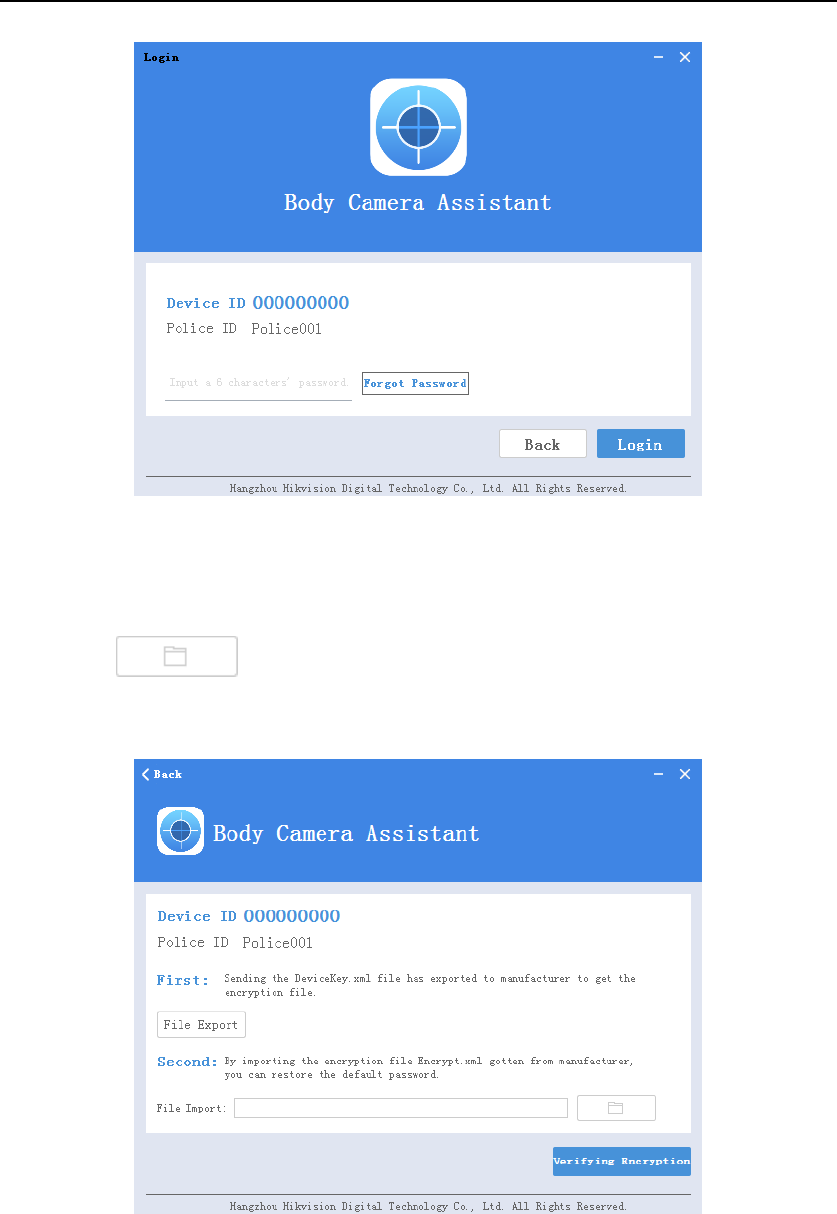
3. Click the recognized device, input device password, and then click Login to log in. Then the assistant
Body Camera User Manual
31
window shows. If you forget the password, refer to 7.3 Password Recovery to recover password.
CHANGE THE DEFAULT PASSWORD
The default password (123456) for the Admin account is for first-time log-in purposes only. You
must change this default password to better protect against security risks, such as the
unauthorized access by others to the product that may prevent the product from functioning
properly and/or lead to other undesirable consequences.
For your privacy, we strongly recommend changing the password to something of your own choosing (using a
minimum of 8 characters, including upper case letters, lower case letters, numbers, and special characters) in
order to increase the security of your product.
Proper configuration of all passwords and other security settings is the responsibility of the installer and/or
end-user.
Figure 7. 11 Body Camera Assistant
7.3 Password Recovery
Purpose:
If you forgot your device password, you can recover it back to default password.
Steps:
1. Enter device login window.
Body Camera User Manual
32
Figure 7. 12 Login Window.
2. Click the Forget Password button.
3. Click the File Export button to export file DeviceKey.xml.
4. Send the file to your manufacturer. They will send you an encryption file.
5. Click the button to import the encryption file received in step 4.
6. Click Verifying Encryption to start verifying. If verifying succeeded, device password will be recovered to
default.
Figure 7. 13 Password Recovery
7.4 Media Information
Purpose:
Two methods are provided for you to operate files saved in body camera: operating files via logging in assistant

Body Camera User Manual
33
and switching device into USB mode.
7.4.1 File Operation via Assistant
Purpose:
You can download or clear files here.
Steps:
1. Log in device via assistant.
2. Click the Media Information tab.
Figure 7. 14 Media Information
3. Click All, Video, Audio, or Picture tab to select which file type you want to view.
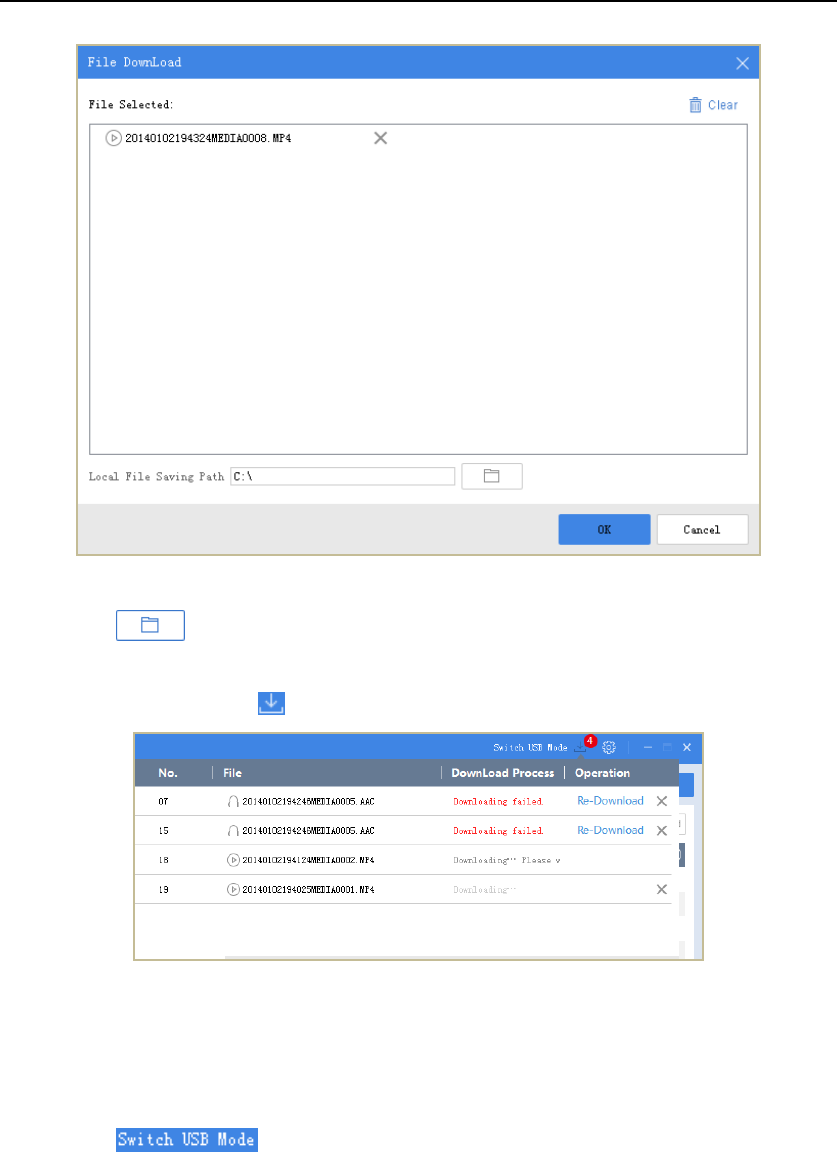
4. Check the checkboxes of files you want to download.
5. Click the button to enter File Download window.
Body Camera User Manual
34
Figure 7. 15 File Download
6. Click the icon to select Local File Saving Path.
7. Click OK to start downloading.
8. Optionally, you can click the button in top right corner to view downloading status.
Figure 7. 16 Downloading Status
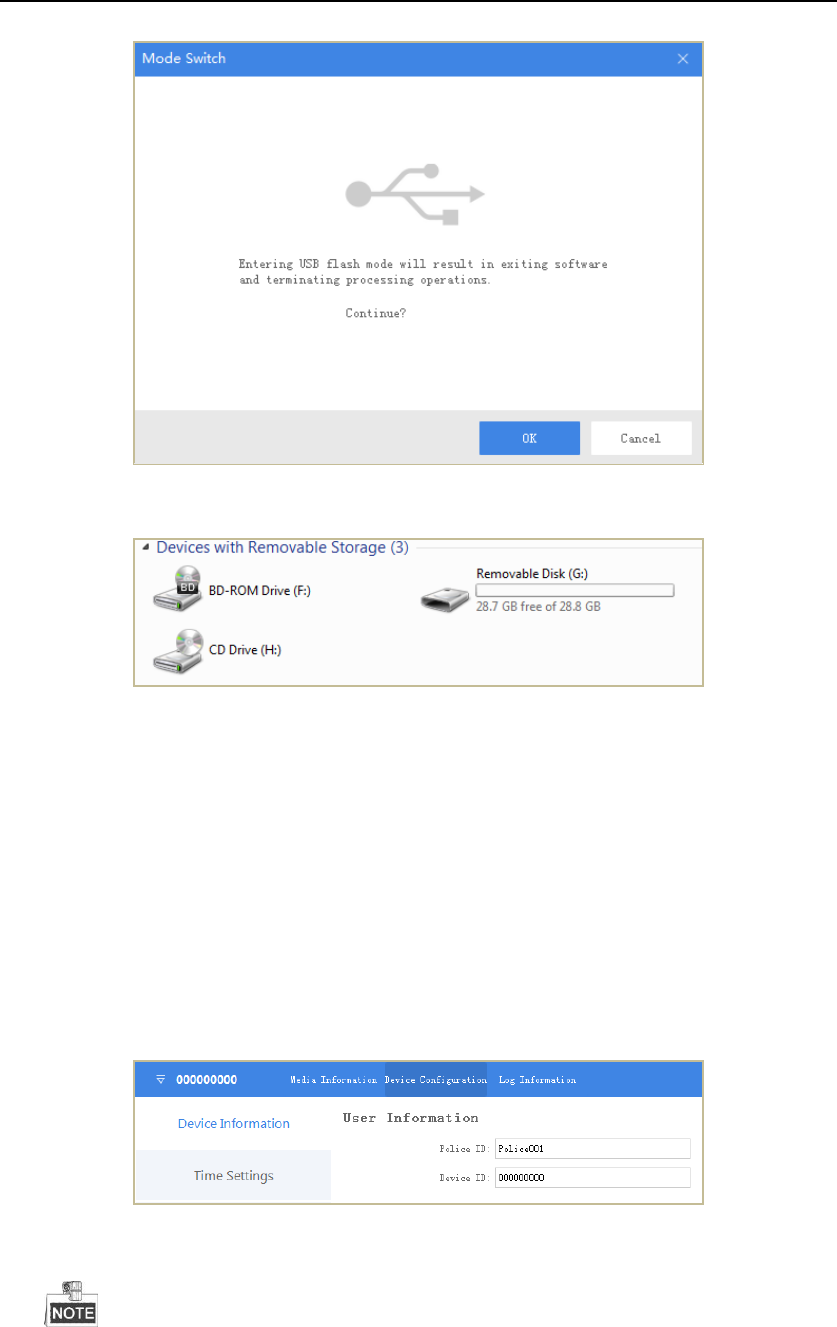
7.4.2 File Operation in USB Mode
Steps:
1. Log in device via assistant.
2. Click the icon in top right corner of assistant window.
3. Click OK to confirm in the pop up dialog box. Then the assistant will exit.
Body Camera User Manual
35
Figure 7. 17 Dialog Box
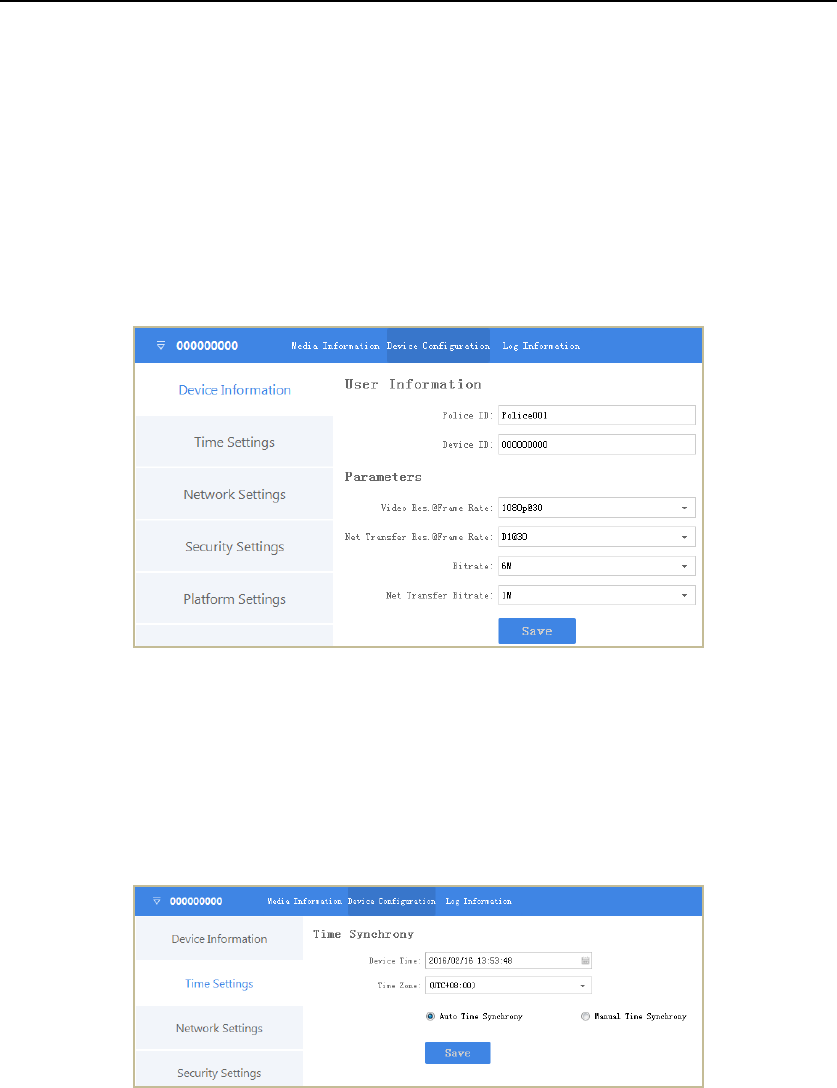
4. Enter Computer window to view the body camera. It will be recognized like an USB flash disk.
Figure 7. 18 Devices with Removable Storage
5. Double-click the disk to enter it and operate files.
7.5 Device Configuration
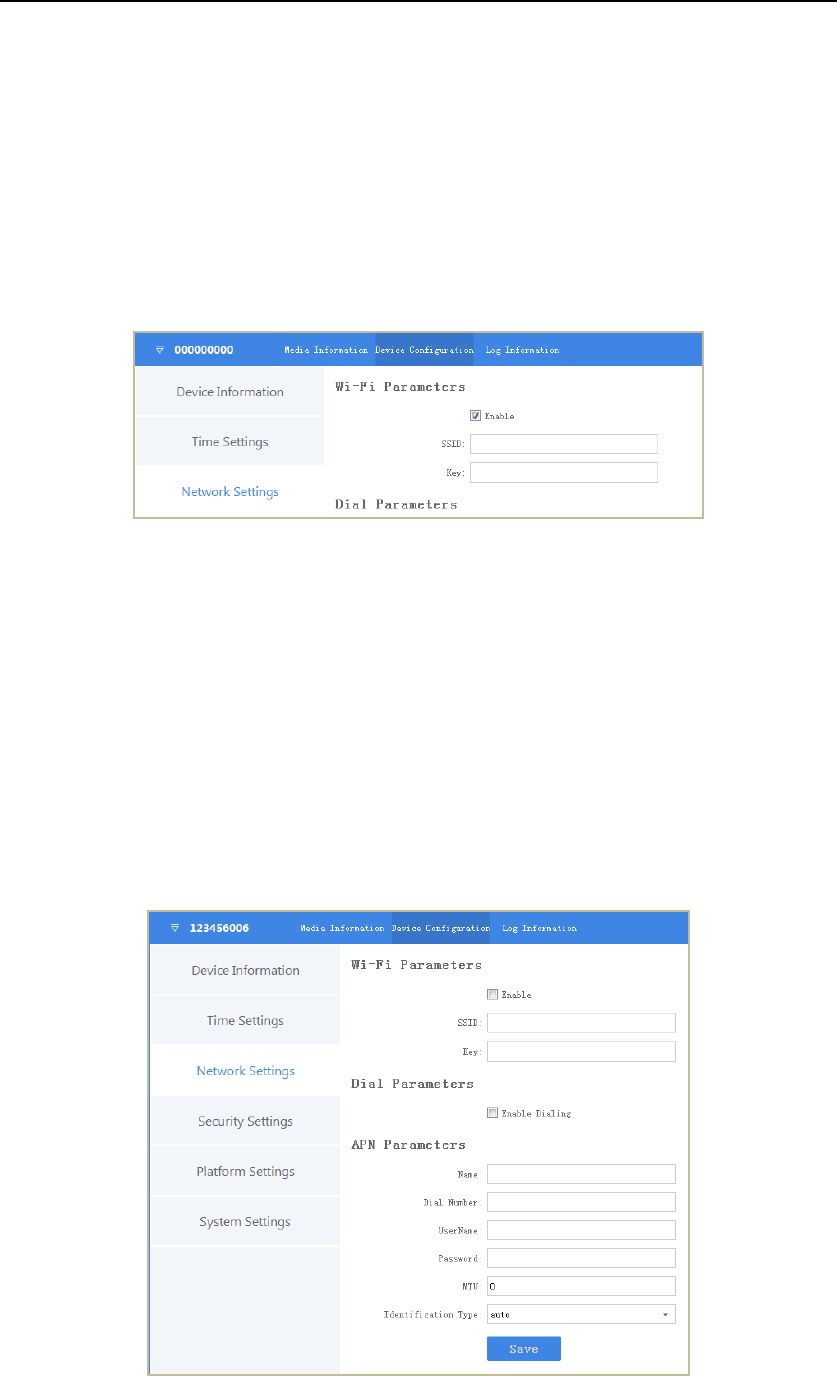
7.5.1 User Information Settings
Purpose:
You can customize the police ID and device ID.
Steps:
1. Click the Device Configuration tab, and click Device Information item in the left menu list.
Figure 7. 19 User Information
2. You can edit the Police ID and Device ID.
Both Police ID and Device ID cannot be longer than 32 characters.
3. Click Save to save the settings.
Body Camera User Manual
36
7.5.2 Encoding Parameters
Purpose:
You can set the parameters for video, including resolution, frame rate, bitrate, and so on.
Steps:
1. Click the Device Configuration tab, and click Device Information item in the left menu.
2. Select Video Res.@Frame Rate, Net Transfer Res.@Frame Rate, Bitrate, and Net Transfer Bitrate from
respective drop-down list.
3. Click Save to save the settings.
Figure 7. 20 Encoding Parameters
7.5.3 Time Synchronization
Purpose:
You can synchronize device time with your set time or network time.
Steps:
1. Click the Device Configuration tab, and click Time Settings item in the left menu.
Figure 7. 21 Time Settings
2. You can select time synchronization type as Auto Time Synchrony or Manual Time Synchrony by checking
corresponding checkbox.
Auto Time Synchrony: If selected, Device Time isn’t configurable. Assistant will synchronize the
device time with the NTP server time.
Manual Time Synchrony: If selected, you can synchronize device time according your custom time.
3. If Auto Time Synchrony is selected, select the Time Zone according to your needs.
If Manual Time Synchrony is selected, select the Device Time and Time Zone according to your needs.
4. Click Save to save the settings.
Body Camera User Manual
37
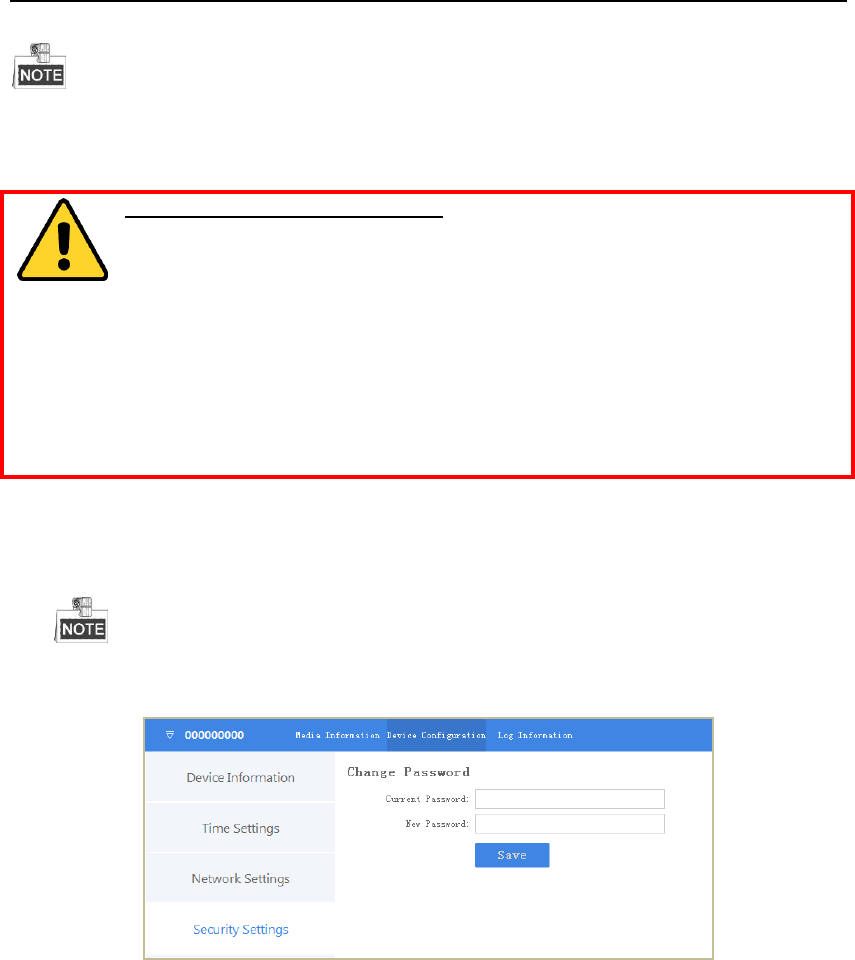
7.5.4 Wi-Fi Parameters
Purpose:
You can access internet by connecting to a Wi-Fi. Wi-Fi parameters can only be configured in assistant.
Steps:
1. Click the Device Configuration tab, and click Network Settings item in the left menu list.
2. Check the checkbox of Enable.
3. Input SSID and Key of Wi-Fi signal you want to connect in text fields.
4. Click Save to save the settings.
Figure 7. 22 Wi-Fi Parameters
7.5.5 Dial Parameters
Purpose:
For DS-MH2111/32G/GLF series body camera, you can access internet by dialing via 3G/4G SIM card.
Before you start:
Install SIM card first. For details, refer to 1.3 SIM Card Installation.
Steps:
1. Click the Device Configuration tab, and click Network Settings item in the left menu.
2. Check the checkbox of Enable Dialing, thus to enable dialing.
3. Optionally, if you need to dial to a specified network, input the APN Parameters.
4. Click Save to save the settings.
Figure 7. 23 Dial Parameters
Body Camera User Manual
38
In the situation of both dialing and Wi-Fi are connected, device prioritise access to internet through Wi-Fi.
7.5.6 Security Settings
CHANGE THE DEFAULT PASSWORD
The default password (123456) for the Admin account is for first-time log-in purposes only. You
must change this default password to better protect against security risks, such as the
unauthorized access by others to the product that may prevent the product from functioning
properly and/or lead to other undesirable consequences.
For your privacy, we strongly recommend changing the password to something of your own choosing (using a
minimum of 8 characters, including upper case letters, lower case letters, numbers, and special characters) in
order to increase the security of your product.
Proper configuration of all passwords and other security settings is the responsibility of the installer and/or
end-user.
Steps:
1. Click the Device Configuration tab, and click Security Settings item in the left menu.
2. Input Current Password and New Password.
Password can only contain the number, instead of the letter and the symbol.
3. Click Save to save the new password.
Figure 7. 24 Security Settings
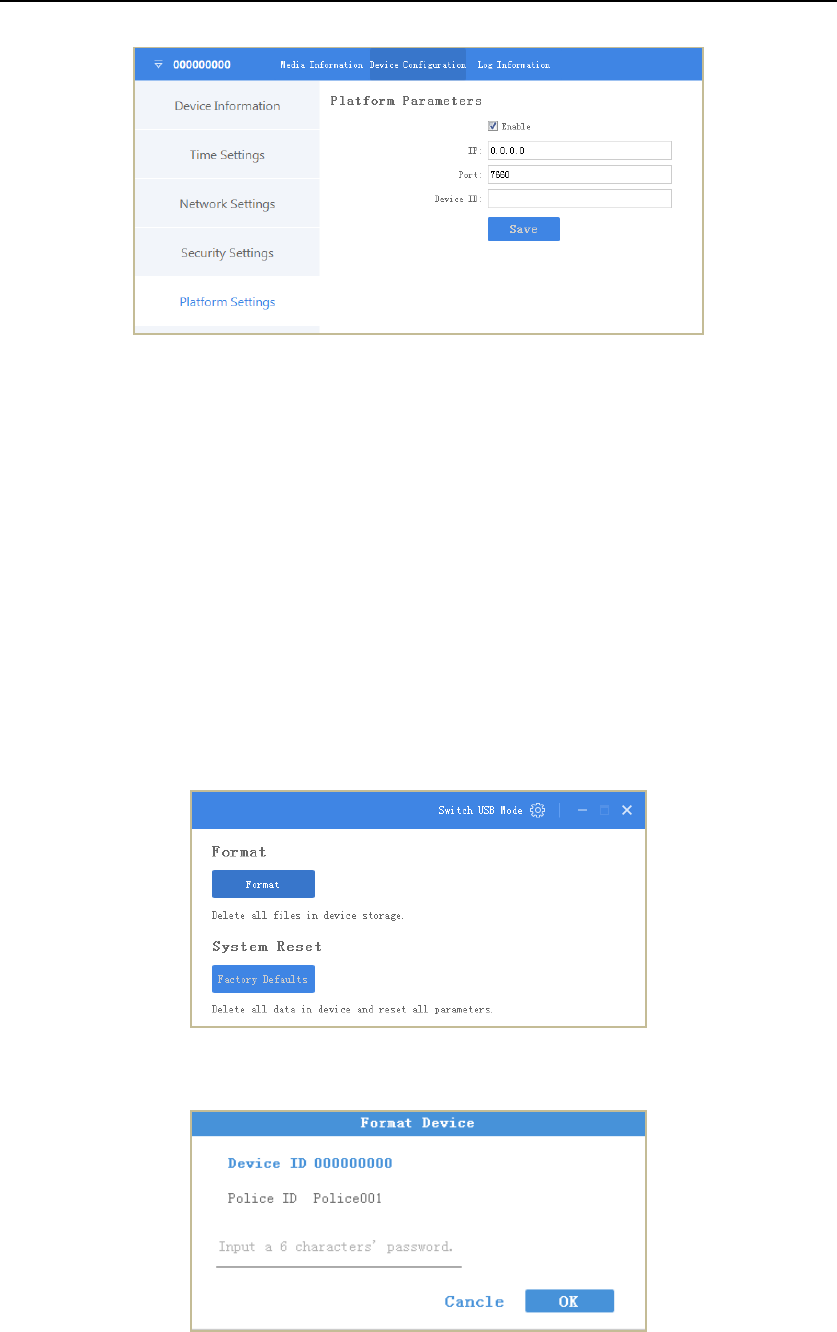
7.5.7 Platform Settings
Purpose:
You can log in device via iVMS, to monitor device, receive alarms, and so on.
Steps:
1. Click the Device Configuration tab, and click Platform Settings item in the left menu.
Body Camera User Manual
39
Figure 7. 25 Platform Settings
2. Check the checkbox of Enable to enable platform connection.
3. Edit IP, Port, and Device ID.
IP: The IP address of platform server you want to connect.
Port: The port of platform. The default port of iVMS is 7660.
Device ID: When adding device via platform, the ID is needed. It is device’s unique identification.
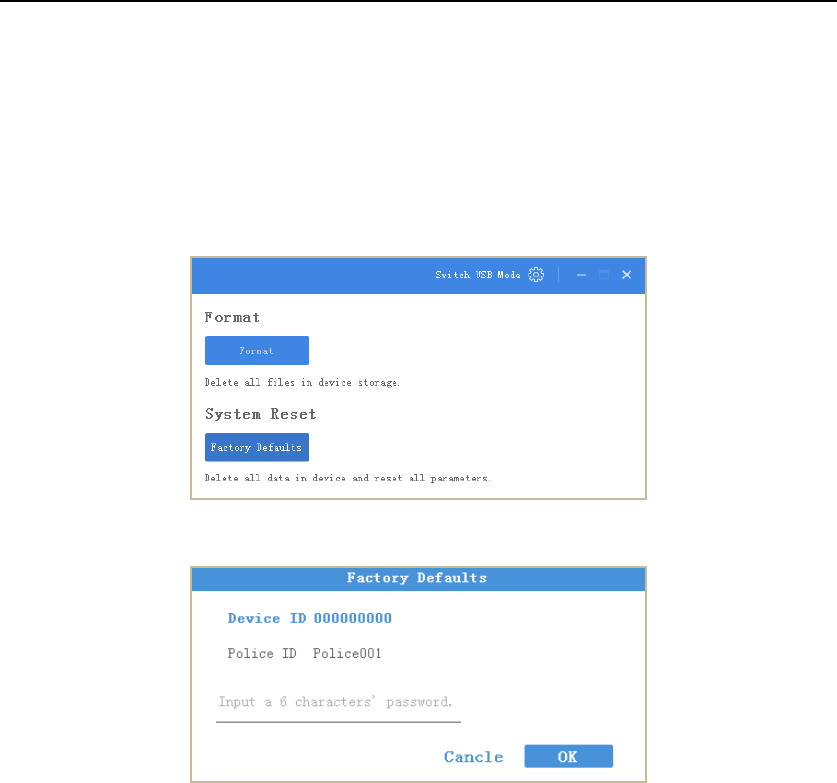
7.5.8 Formatting
Purpose:
Format helps you to clear all data saved in device. It’s not recommended to format the body camera like the way
you format USB flash disk, or the body camera will fail to recognize the memory.
Steps:
1. Click the Device Configuration tab, and click System Settings item in the left menu list.
2. Click the Format button.
Figure 7. 26 Formatting
3. Input device password in the text field and click OK to start formatting.
Figure 7. 27 Format Device
Body Camera User Manual
40
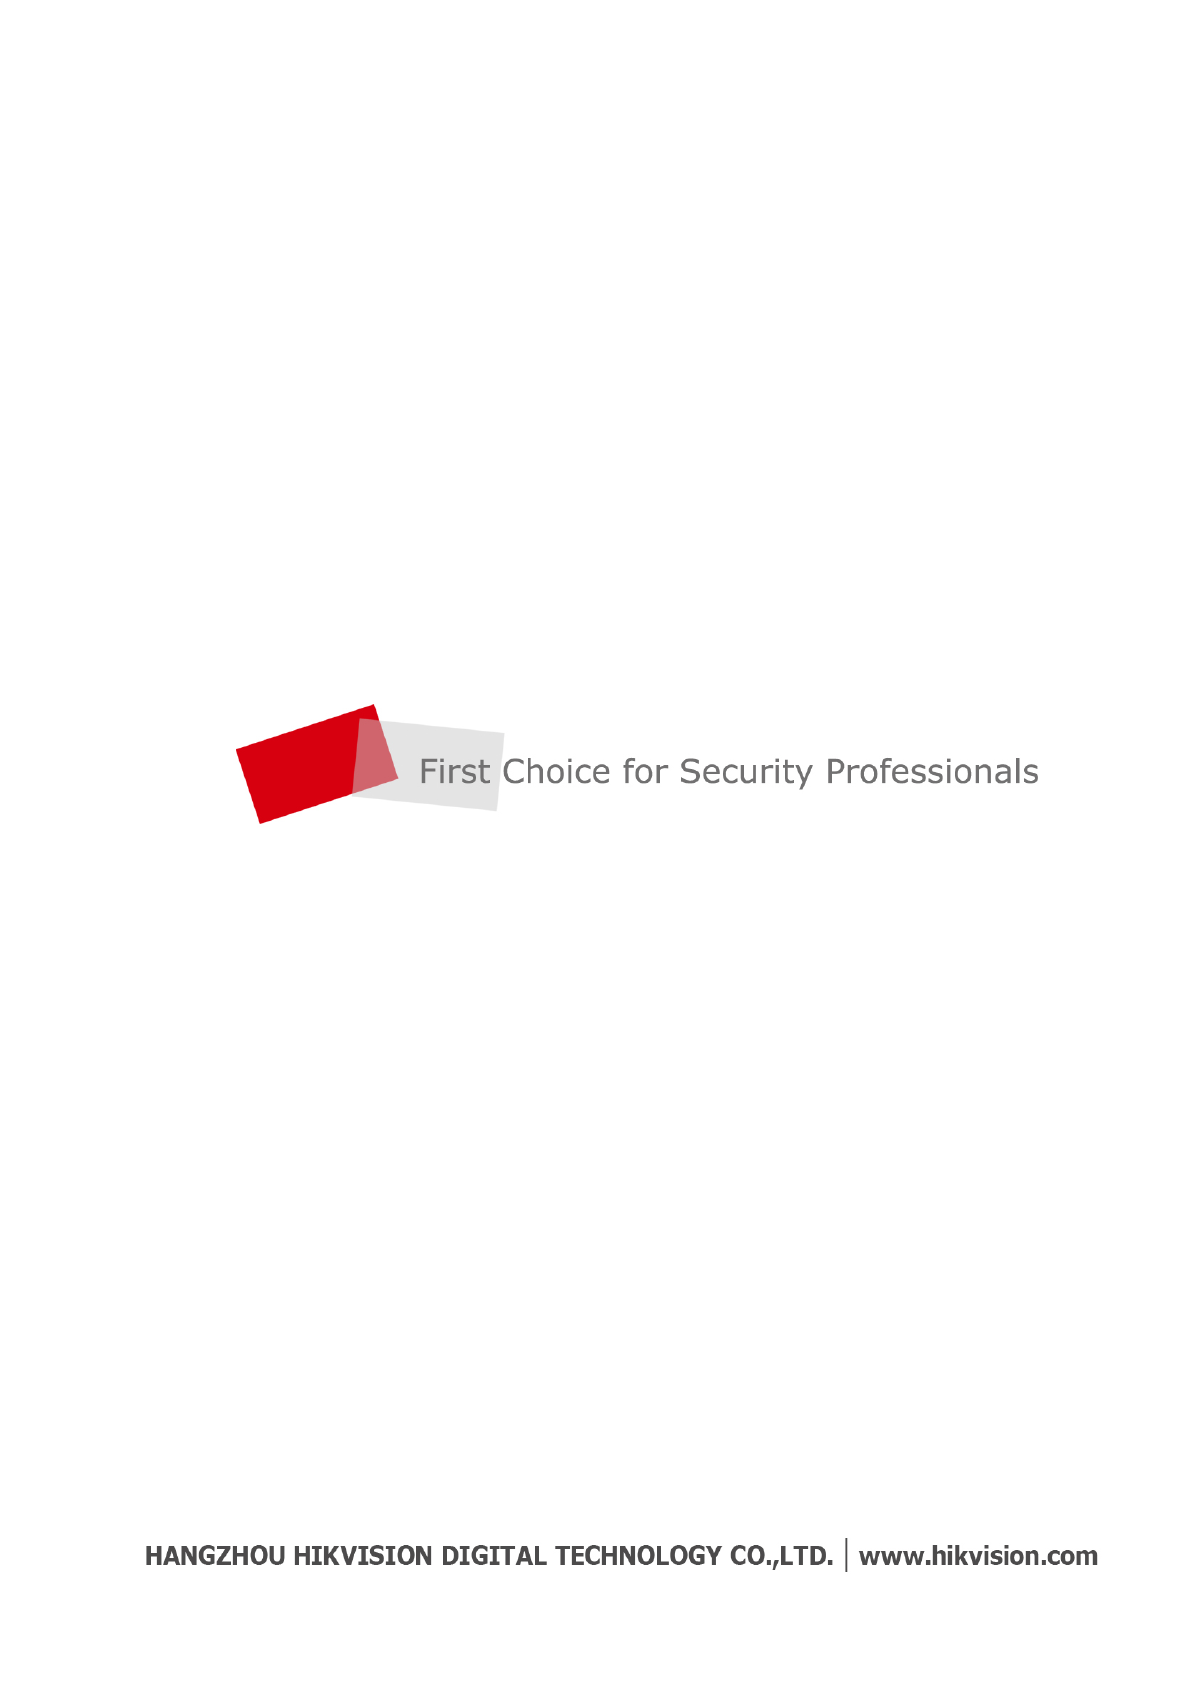
7.5.9 System Resetting
Purpose:
You can reset all parameters to default settings by resetting system.
Steps:
1. Click the Device Configuration tab, and click System Settings item in the left menu.
2. Click the Factory Defaults button.
Figure 7. 28 System Reset
3. Input device password in the text field and click OK to start resetting.
Figure 7. 29 Factory Defaults
7.6 Log Operations
Purpose:
By searching logs, you can review the history device status, device operation, and so on.
Steps:
1. Click the Log Information tab.

Body Camera User Manual
41
Figure 7. 30 Log Information
2. To search logs in a specified duration, do following steps:
1) Edit the log’s start time and end time.
Figure 7. 31 Search Condition
2) Click the Search button to start search. The matched logs will be listed.
3. To export searched logs, do following steps:
1) Search the logs you want to export.
2) Click the Export button to export them.
The exported logs are saved in the set assistant’s log saving path and are saved in .txt format.
4. To clear logs, do following steps:
1) Search the logs you want to clear.
2) Click the Clear button to clear them.
7.7 Assistant File Saving Path
Purpose:
You can customize the local file and log file saving path.
Steps:
1. Log in device first. For detailed steps, refer to 7.2 Device Login.
2. Click the icon in the top right corner of assistant window.
3. Click the icon to customize Local File Saving Path and Log Saving Path.
4. Click Save to save the settings.

Body Camera User Manual
42
Figure 7. 32 Local Configuration
7.8 Upgrading Device
Purpose:
It is recommended to upgrade device with the help of professional technical support.
Steps:
1. Switch to USB mode. For detailed steps, refer to 7.4.2 File Operation in USB Mode.
2. Enter the Removable Disk of body camera through Computer.
3. Copy the upgrade file into the removable disk.
4. Reboot the body camera.
5. Enter the System Setting in LED menu.
6. Press the / button to position the cursor on System Upgrade item. And press the button to
start upgrading. During the upgrade process, the four LEDs light up. After upgrade finished, LEDs goes out
and device reboot automatically.
Figure 7. 33 System Upgrade
7.9 Exit Assistant
Steps:
1. Click the button in the top left corner.
2. To exit the assistant, click Exit icon.
3. To switch to other devices, click Switch Device icon.

Body Camera User Manual
43
Figure 7. 34 Exit and Switch Device

Body Camera User Manual
44
Chapter 8 Troubleshooting
Unable to start up.
a) Possible Reason: Device runs out of power.
Solution: Get device be charged.
b) Possible Reason: Device is abnormal.
Solution: Hold down the Sleep/Down button for 15 seconds to reset device.
Unable to start recording.
a) Possible Reason: Memory is full.
Solution: Back up device and clear the memory.
b) Possible Reason: Formatting memory error.
Solution: Format the memory via assistant. For detailed steps, refer to user manual.
Unable to log in.
a) Possible Reason: Password error.
Steps: Reset your password. For detailed steps, refer to 7.5.8 Formatting in user manual.
b) Possible Reason: Device is abnormal.
Steps: Reboot device.

Body Camera User Manual
45
Specifications
Model
DS-MH2111/32G
DS-MH2111/32G/GLF
Sensor
Type
CMOS, 16MP
Lens Angel
Horizontal FOV: 127°
Display
Displayer
2.0″ TFT LCD
Video
Parameter
Video Input
1080p
Recording
1080p/60fps, 720p/120fps, 704*480
Dual-Stream
Main stream: 1080p/60fps;
Sub-stream:720p/30fps
Video Format
.mp4
Picture Resolution
Up to 16MP
Picture Format
.jpg
Shutter
Digital shutter
IR Light
Automatically turn on/off IR light.
White Balance
Auto
Flashlight
Supported
Laser Positioning
Supported
Storage
Storage Capacity
A built-in EMMC storage chip of 32GB capacity
Positioning
Satellite Positioning
Built-in GPS module and built-in BeiDou module are provided.
Wireless
Transmission
4G
Doesn’t support
Supported
Wi-Fi
802.11b/g/n
Reliability
Working Temperature
-20 to +55 °C (-4 to 131 °F)
Working Humidity
≤ 90%
Ingress Protection
IP55
Structure
Dimension (L × W × H)
105 × 61 × 25 mm (41.3 × 24.0 × 9.8 ″)
Weight
220g (0.49 lb)
Buttons
Power switch, Recording button, taping button, capture button, two-way audio
button, alarm button, menu button, up button, down button, OK button.
Others
Data Interface
Mini USB 2.0
Charge Method
Charge via USB interface
Battery
A battery with 4400 mAh capacity which can record videos of 1080p for 8 hours.
The battery can’t be uninstalled.
microHDMI interface
Supported.
Body Camera User Manual
46