Hansaton Akustik WL002ITE Hearing Aid User Manual
Hansaton Akustik GmbH Hearing Aid
User Manual
27
D · GB · F · I · E · P · TR
INSTRUCTIONS FOR USE

28
You have chosen a hearing system
from HANSATON
If you read this brochure carefully and follow the
advice on use and care, you will get much enjoy-
ment from your new hearing system.
This product has passed every phase of the
independently-certified HANSATON quality
management system.
We take pleasure in your choice and con-
gratulate you on your decision, because with a
HANSATON hearing system you own a high-
quality product of the most modern technology.
For more than 50 years, we have been helping
people with our devices to achieve better hear-
ing and better speech understanding, hence a
higher quality of life.
Behind our products stand many years of
development and production experience, as a
corporate philosophy centred on people and
their needs.

29
Contents
Your hearing system Page 30
Intended use Page 31
General notes on safety Page 32
Changing batteries Page 34
Turning your hearing system on/off Page 37
– Via battery compartment Page 37
– Via pushbutton Page 37
– Via remote control Page 37
How to tell which system is which Page 37
Adjusting volume Page 38
– without switch Page 38
– with switch Page 38
– Via remote control Page 39
Changing the hearing program Page 39
– Via program pushbutton Page 39
– Via remote control Page 40
Functionalities Page 41
– i-com/i-com2 Page 41
– Power-on-delay Page 41
– Automatic telephone program Page 42
Inserting and removing your
hearing system Page 44
Advice on care Page 45
Accessories Page 46
Trouble shooting Page 48
Technical Information Page 50
Disposal information Page 52
30
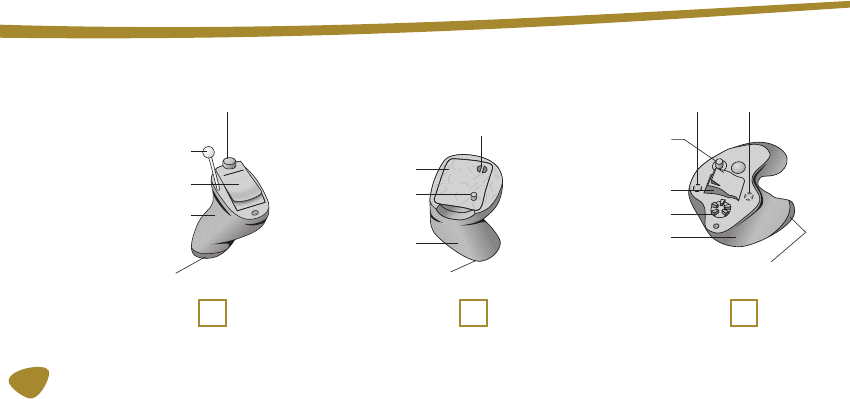
Sound outlets
Program pushbutton
Battery
compartment
Pull-string
Hearingsystem
shell
How to tell which instrument is which: Red = right ear, blue = left ear
Battery compart-
ment
Sound outlets
Sound outlets
Program
pushbutton
Program
pushbutton
Battery compart-
ment
Hearing system
shell
Hearing system
shell
Microphone entry
Microphone entry
Volume control

31
WARNING! points out a situation that
could lead to serious injuries.
CAUTION! dindicates a situation that could lead
to minor and moderate injuries.
indicates possible property damage.
i Advice and tips on how to handle your hear-
ing system better.
Intended use
Symbole
Hearing systems are intended to improve the
hearing of hearing impaired persons. Diagnosis
and prescription of a hearing system must be
performed by hearing health specialists, e.g.
ENT doctors, audiologists or acousticians.
Read and follow the instructions of this user
guide to avoid injuries or damage to the hear-
ing system. !

32
General notes on safety
• Instruction. Indicates that something has to be
done.
Indicates an option that not every
hearing system has. Ask your hearing
system professional to check off the relevant
information.
!
• Do not expose your hearing system to extreme
temperature or high humidity.
• Do not leave it in direct sunlight.
• Do not wear it in the shower or when you apply
make up, perfume, aftershave, hairspray or
suntan lotion.
• Do not wear your hearing system when you
are exposed to short-waves, a strong magnetic
field, a high frequency field or X-rays.
Your hearing system is sensitive to ex-
treme heat, high humidity, strong mag-
netic fields (> 0.1T), X rays and mechanical
stress.

33
WARNING!
Choking hazard posed by small parts.
• Keep hearing systems, batteries and accesso-
ries out of children‘s reach.
• If swallowed consult a physician or hospital
immediately.
• If infants, small children or mentally disabled
persons need to wear hearing systems ensure
adequate supervision.
WARNING!
Risk in explosive environments, e.g.
mining areas!
• Don‘t use your hearing systems (and remote
control) in areas where there is a danger of
explosions.
i In some countries restrictions for the usage of
wireless equipment exist.
• Refer to local authorities for further informa-
tion.
i When using mobile telephones, however, elec-
tromagnetic field effects cannot be ruled out.
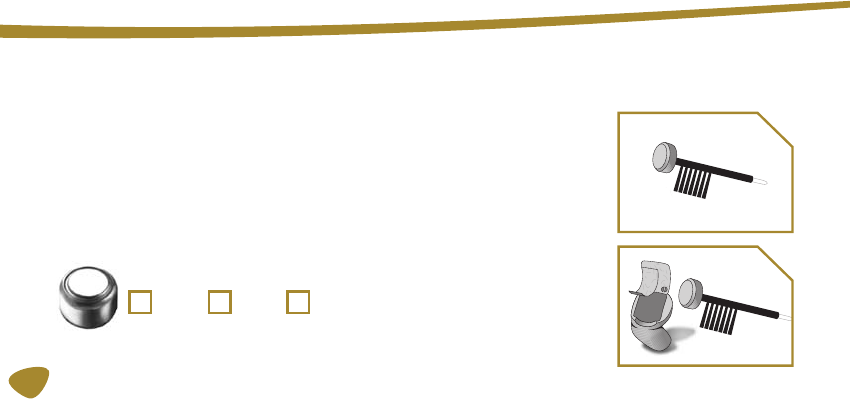
34
312
10 13
Inserting the battery without tool
• Open the battery compartment with a finger-
nail and swing the compartment right out.
• Open the battery compartment and put the
battery in the open compartment so that the
negative pole faces into the compartment.
• Close the battery compartment until you feel a
sharp click.
Inserting the battery with tool
• Open the battery
compartment with a
fi ngernail and swing
the compartment
right out.
• Lift the battery (with
the positive pole)
with the magnetic
side of your brush.
• Push the battery into
battery compart-
ment with the minus
35
negative pole
With a new battery, it may take a few minutes
for the battery to develop its full output.
Only then should you close the battery-com-
partment.
!
pole facing into the battery door.
• Loosen the brush from the battery.
• Close the battery
until you feel a sharp
click.

36
Advice on Batteries
• Batteries can be harmful if swallowed. Never
put batteries in your mouth ! For this reason,
keep batteries out of reach of children.
• If a battery is inadvertently swallowed, please
call a doctor immediately.
• Always use new batteries.
• Remove the batteries if the hearing system is
to remain unused for a long time.
• Failing batteries should be replaced immedi-
ately.
• Place each spare battery in an individual,
non-metallic container to prevent contact with
other batteries or metal objects, such as keys
or coins.
• Do not throw used batteries in the household
waste or burn them, but return them to your
hearing instrument specialist.
Safety instructions
Never attempt to recharge batteries
that are not designed for that purpose
(danger of explosion)!

37
Switch on
• Close the battery compartment.
Switch off
• Open the battery compartment.
Switch on
• Press the pushbutton for 2 seconds.
Switch off
• Press the pushbutton for 2 seconds.
• Refer to the remote control user guide.
How to tell which system is which:
Red = right ear Blue = left ear
Switch your hearing system
on and off
Via battery compartment
Via pushbutton
Via remote control

38
Adjusting volume
The volume of the hearing system is adjusted
automatically, no manual control is required.
If you have reached the maximum or minimum
volume, short signal sound in succession.
Right hearing system Left hearing system
The volume increases
if you turn the switch clockwise (right hearing
system) / anticlockwise (left hearing system).
The volume decreases
if you turn the switch anticlockwise (right hear-
ing system) / clockwise (left hearing system).
louder
quieter
louder
quieter
Without switch
With switch

39
• Refer to the remote control user guide.
Switching of hearing programs
• Use the program pushbutton to select one
of the hearing programs individually pro-
grammed for you.
• When changing, your hearing system uses
signal sounds to indicate which program you
have selected.
The number of signal sounds is based on the
relevant program (e. g. 1st program 1 signal
sound, 2nd program 2 signal sounds, 3rd
program 3 signal sounds, 4th program 4 signal
sounds, 5th program: Melody beep).
Via pushbutton
Via remote control

40
• You can thus adjust your instrument to the
relevant hearing situation and thus, for exam-
ple, make use of the advantages of MultiMic
technology, especially in conversation in
groups.
• Refer to the remote control user guide.
Via remote control
Hearing program/Description
1
2
3
4
5

41
• Move away from the source of interference if
you experience difficulty.
• allows you to turn the hearing systems on with
an automatic delay of 6, 12 or 18 seconds to
avoid feedback (whistling).
Functionalities
Your hearing system professional can activate or
deactivate the following functionalities.
• automatically adjusts both hearing systems
simultaneously to changes in the hearing
system settings, e.g. volume and program.
• allows use of a remote control.
i The performance of i-com2 may be affected
by electromagnetic interference – e.g. from
a computer monitor or halogen lamp system
controlled by a switching power supply.
i com/i-com2
Power -on -delay

42
• Hold a telephone near your hearing instrument.
The hearing instrument automatically switches
to the telephone program. Move the telephone
away from your hearing instrument. The hear-
ing instrument switches back to the previously
used program
i Not all telephones produce a magnetic field
strong enough to activate the PhoneConnect
function. In this case, use the PhoneConnect
magnet, enclosed in your hearing instrument
package.
• Attach it to the telephone receiver to activate
the PhoneConnect function.
WARNING!
Magnets may interfere with the
operation of life supporting systems (e. g.
pacemakers, magnetic valves).
• Use a magnet only if not in doubt about the
safe distance.
• The safe distance between pacemaker and
magnet should be at least 10 cm (4 inches).
Automatic telephone program

43
WARNING!
• Keep magnets away from children.
If swallowed consult a physician or hospital im-
mediately.
NOTICE
Magnets can disturb electrical devices
and delete stored data.
• Keep magnets away from computers, color
monitors, television sets, floppy discs, video
and audio discs and other electronic equip-
ment /devices.
i When operating the hearing instrument in
telecoil mode, the wireless function may cause
a pulsing noise. This is due to the pick-up of the
transmission signal.
• When your hearing instrument is in telecoil
mode please use the remote control only with
a distance greater than 10 cm (4 inches).

44
Inserting and removing
the hearing system
• Hold your hearing instrument between your
thumb and forefi nger and insert it carefully
into your auditory canal.
• How to tell which instrument is which:
red = right ear, blue = left ear
• You can get it in the right position by twisting
it slightly.
• Pull the flap of your ear slightly up and back
with one hand, pushing the hearing instrument
a bit further in with the index finger of the
other hand.
• To remove the instrument, pull on your ear
lobe to loosen the instrument in the auditory
canal. The instrument can then be pulled out
of the auditory canal (at CIC with pull string).

45
oven or micro-wave oven
to dry the earmould.
Always store your hearing
system and earmould
inside its case.
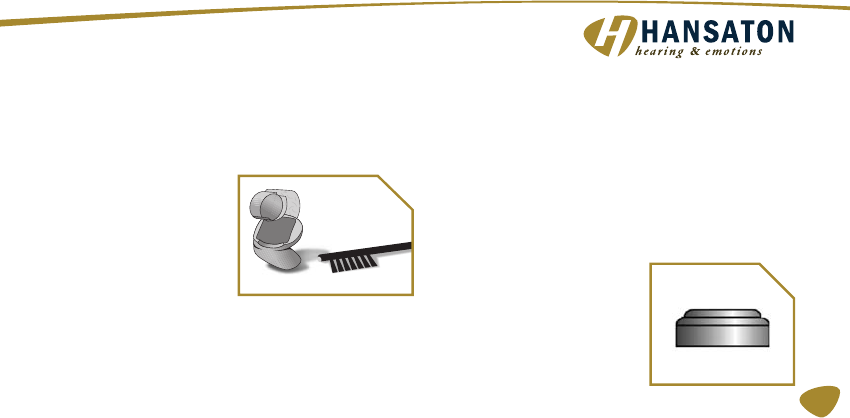
• Clean your hearing
system (preferably in the
morning) with a cleaning tissue, keeping it dry.
• Residues can be removed from the sound
outlets with a small brush (allow instrument to
dry completely first). Please do not use sharp
objects to clean the instrument.
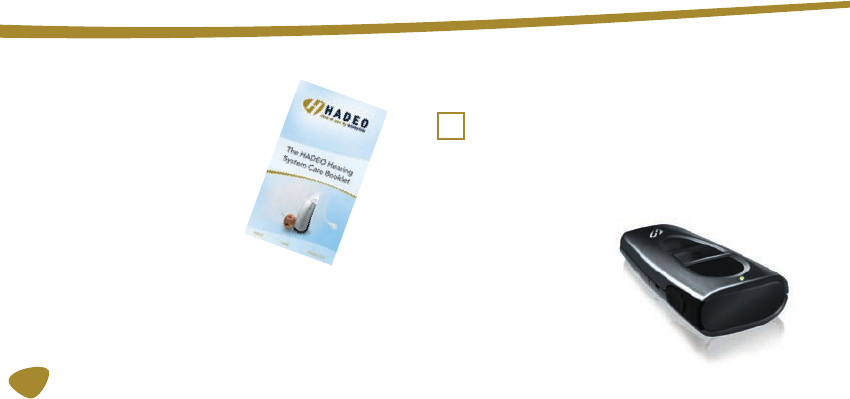
• You are advised to use our HADEO care
products to clean your hearing system. These
products were developed specifi cally for this
purpose and are available exclusively from
your hearing instrument professional.
• The hearing system itself must not be placed
in water or cleaning fl uid.
• The hearing system must be kept dry. Please
put it in a HADEO DryBox, HADEO Drying
Bag or Drying Container overnight to extract
any moisture from the inside of the instrument.
If the earmould is not dry, the hearing system
can be damaged. Do not use a hair dryer,
Advice on care
46
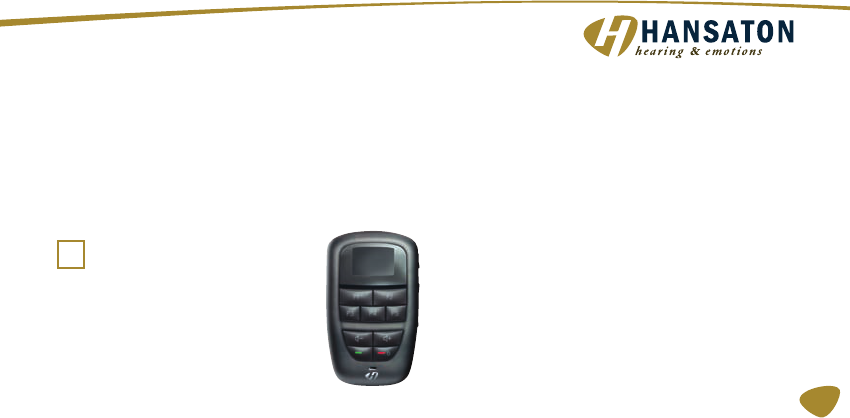
The wireless function of your hearing systems
allows you to use a remote control to change the
program and volume of your hearing systems.
For detailed information
and instructions refer
to the User guide or
ask your hearing system
professional.
Our HADEO care primer
can be obtained from
your hearing instrument
specialist who will be glad
to advise you on any
questions you may have
about caringfor your
system.
Accessories
Care Primer
Remote control eMote/eMote2
47
connection it is possible to receive audio signals
from your mobile, your television or your mp3-
player. For detailed information and instructions
refer to the Media user guide or ask your
hearing system professional.
i In case the hearing system is controlled by
another person’s remote control, return to your
hearing system professional with your remote
control and hearing systems.
Your hearing systems together
with the Media remote control will
allow you to connect your hearing
systems to the growing world of
technology. Via a special Bluetooth
Remote control Media

48
Should a problem occur, it can usually be cor-
rected quickly. Use these troubleshooting tips to
resolve simple issues.
If you still encounter problems after trying
these suggestions, consult your hearing system
professional.
Trouble shooting
49
Problem
Sound is weak
or no sound
Instrument emits whistling
sound
Sound is distorted
Instrument emits signal
tones
Instrument does not work
Possible Solution
Replace empty battery. Increase volume. Clean instrument.
Close battery door completely or press and hold the program button for approximately
2 seconds.
Try reinserting the instrument.
Clean instrument.
Replace empty battery. Lower volume.
Clean instrument.
Gently close battery compartment completely.
Replace empty battery.
Turn instrument on. Gently close battery compartment completely.
Replace empty battery. Make sure battery is inserted correctly.
Power-on delay is active – wait 18 seconds and check again.

50
Technical Information
FCC-ID: WU7-WL002ITE
Operating frequencies: Fc = 3.28 MHz
Changes or modifications not expressly ap-
proved by the party responsible for compliance
could void the users authority to operate the
equipment.
This device complies with Part 15 of the FCC
Rules.
Operation is subject to the following conditions:
(1) this device may not cause harmful interfer-
ence, and
(2) this device must accept any interference
received, including interference that may cause
undesired operation.
This equipment has been tested and found
to comply with the limits for a Class B digital
device, pursuant to Part 15 of the FCC Rules.
These limits are designed to provide reasonable
protection against harmful interference in a resi-
dential installation. This equipment generates,
uses and can radiate radio frequency energy
and, if not installed and used in accordance with

51
the instructions, may cause harmful interference
to radio communications. However, there is no
guarantee that interference will not occur in a
particular installation. If this equipment does
cause harmful interference to radio or television
reception, which can be determined by turning
the equipment off and on, the user is encour-
aged to try to correct the interference by one or
more of the following measures:
• Reorient or relocate the receiving antenna.
• Increase the separation between the equip-
ment and receiver.
• Connect the equipment into an outlet on a
circuit different from that to which the receiver
is connected.
• Consult the dealer or an experienced radio/TV
technician for help.
52
Within the European Union, the marked equip-
ment is covered by „Directive 2002/96/EC of the
European Parliament and of the Council of 27
January 2003 on waste electrical and electroni-
cal equipment“.
Amended by „Directive 2003/108/EC“
(WEEE).
i Recycle the device and batteries according to
national regulations.
With the CE marking HANSATON
confirms compliance with the European
Directive 93/42/EEC concerning medical
devices.
0124
Disposal information

53
FDA information (valid for USA only)
Use your hearing systems all day long
The best way to ensure better hearing is to prac-
tice listening with your hearing systems until you
are able to wear them comfortably all day.
Generally, infrequent use of the hearing system
does not provide you with the full benefit of
amplification.
Your hearing systems will not restore normal
hearing. Hearing systems will not prevent or
improve hearing impairment resulting from a
physiological condition. Hearing systems will
help you to make better use of your residual
hearing.
The use of hearing systems is only part of hear-
ing rehabilitation; auditory training and lip read-
ing instruction may be required as weIl.
Possible side effects
The hearing system or earmold is a custom-
made product. If you are experiencing discom-
fort, see your audiologist or hearing instrument
dispenser immediately for modification of the
hearing system or earmold at the point of irrita-
tion. A hearing system or earmold may cause an

54
accelerated accumulation of cerumen (earwax).
Also in rare cases, the otherwise non-allergenic
material may cause a discharge from the ear,
allergic reaction, or any other unusual condition.
Please seek immediate consultation with a physi-
cian if these conditions occur.
Warning to Hearing Instrument Dispensers
A hearing instrument dispenser should advise a
prospective hearing instrument user to consult
promptly with a licensed physician (preferably
an ear specialist) before dispensing a hearing
instrument if the hearing instrument dispenser
determines through inquiry, actual observation,
or review or any other available information con-
cerning the prospective user, that the prospec-
tive user has any of the following conditions:
(i) Visible congenital or traumatic deformity of
the ear.
(ii) History of active drainage from the ear within
the previous 90 days.
(iii) History of sudden or rapidly progressive
hearing loss within the previous 90 days.
(iv) Acute or chronic dizziness.

55
(v) Unilateral hearing loss of sudden or recent
onset within the previous 90 days.
(vi) Audiometric air-bone gap equal to or greater
than 15 decibels at 500 hertz (Hz), 1,000 Hz and
2,000 Hz.
(vii) Visible evidence of significant cerumen ac-
cumulation or a foreign body in the ear canal.
(viii) Pain or discomfort in the ear.
Special care should be exercised in selecting
and fitting a hearing instrument whose maxi-
mum sound pressure level exceeds 132 decibels
because there may be risk of impairing the re-
maining hearing of the hearing instrument user.
Important Notice for Prospective Hearing
Instrument Users
Good health practice requires that a person
with a hearing loss have a medical evaluation
by a licensed physician (preferably a physician
who specializes in diseases of the ear) before
purchasing a hearing instrument. Licensed phy-
sicians who specialize in diseases of the ear are
often referred to as otolaryngologists, otologists
or otorhinolaryngologists. The purpose of

56
medical evaluation is to assure that all medically
treatable conditions that may affect hearing are
identified and treated before the hearing instru-
ment is purchased.
Following the medical evaluation, the physician
will give you a written statement that states that
your hearing loss has been medically evaluated
and that you may be considered a candidate
for a hearing instrument. The physician will refer
you to an audiologist or a hearing instrument
dispenser, as appropriate, for a hearing instru-
ment evaluation.
The audiologist or hearing instrument dispenser
will conduct a hearing instrument evaluation
to assess your ability to hear with and without
a hearing instrument. The hearing instrument
evaluation will enable the audiologist or dis-
penser to select and fit a hearing instrument to
your individual needs.
If you have reservations about your ability to
adapt to amplification, you should inquire about
the availability of a trial-rental or purchase-op-
tion program. Many hearing instrument dispens-
ers now offer programs that permit you to wear

57
a hearing instrument for a period of time for a
nominal fee after which you may decide if you
want to purchase the hearing instrument.
Federal law restricts the sale of hearing instru-
ments to those individuals who have obtained
a medical evaluation from a licensed physician.
Federal law permits a fully informed adult to
sign a waiver statement declining the medical
evaluation for religious or personal beliefs that
preclude consultation with a physician. The ex-
ercise of such a waiver is not in your best health
interest and its use is strongly discouraged.
Children with hearing loss
In addition to seeing a physician for a medical
evaluation, a child with a hearing loss should
be directed to an audiologist for evaluation
and rehabilitation since hearing loss may cause
problems in language development and the
educational and social growth of a child. An au-
diologist is qualified by training and experience
to assist in the evaluation and rehabilitation of a
child with a hearing loss.

58
Identification information
The year of manufacture is incorporated into the
serial number. The warranty is based upon the
date of purchase, not date of manufacture. The
serial number may look similar to this sample:
AJ12345. The second letter of this serial number
refers to the date of manufacture of the hearing
system. The letters progress in one-year incre-
ments, each reflecting the corresponding year.
The letter J means the year of manufacture is
2002, the letter K indicates that the manufacture
year is 2003, and so on. Your hearing system
professional can answer any questions you may
have about the identifying code on your hearing
system.