Hanse Electronics CM500PCAE Micro Scope USB User Manual a USB
Hanse Electronics Co., Ltd. Micro Scope USB a USB
User Manual

Warning :Please read this user s guide prior to use.
Never use this product for observing your or other people s
eyes as LED light cause eye s injury.
HVS-CM500PC(USB)
User s guide
Reg. No. 249826 for Micro scope & Reg. No. 0246851 for multi-
functional zoom camera as a practical new device field in Korean
Intellectual Property Office
Thank you for purchasing Hanse Microscope

MicroScope
User s guide
2
1. Contents 2
2. Caution 3
3. Main features 4
4. Application 5
5. Composition 6
6. Name of each part 6
7. How to use the mirror for ear observation 7
8. Applicable system network 7
9. Specifications 8
10. Install of Hardware 9
11. Install Program 12
12. Warranty 23
1. Contents

MicroScope
User s guide 3
2.
Caution
This user s guide show you exactly the features and
specifications of Hanse Microscope HVS-CM500PC(USB).
For safe and right use please read this user s guide and
relevant cautions before using or installation.
Please keep this user s guide where you can get it easily
whenever you need.
Please treat lens carefully like your eye to avoid any dust
or fingerprint on it and use soft fabric or something similar
when you cleaning the lens.
To keep from damaging your HVS-CM500PC(USB) avoid
exposing it to moisture and extreme temperatures.
Do not use or store your HVS-CM500PC(USB) where
strong electrostatic or electrical noise may be generated.
Do not drop or give excessive shock to the HVS-
CM500PC(USB).
Do not disassemble or touch the inside of the
HVS-CM500PC(USB).
This may result in malfunctions of the microscope.
Do not use organic solvents, such as thinner or benzene,
on to the HVS-CM500PC(USB).

MicroScope
User s guide
4
This product is a multi-functional zoom camera available to
various application that s more convenient to use than
others with the following excellent features.
USB 1.1 Compliant (USB Interface)
USB 1.1 compliant(USB interface)
1/3inch CMOS VGA(640X480)m CIF(320X240)
Portable with compact size
X20~X75 Magnification with 17 monitor (It depends on
the distance of object)
LED for colse photography
Serveral images can be analysized, recorded and
printed with S/W
Image capture by H/W & S/W
Beauty care, education tool, inspection for components
and etx can be applied
3.
Main features
MicroScope
User s guide 5
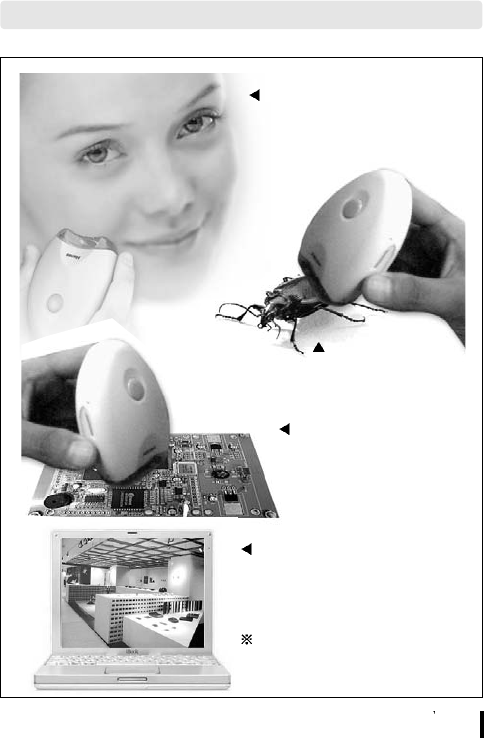
Beauty cares
Observing skin and
hair condition
4.
Application
Electronic
components
inspection
Education tool
in school
Applicable to CCTV
camera substitute
LED function is to be
operated only for close
distance photographing
MicroScope
User s guide
6
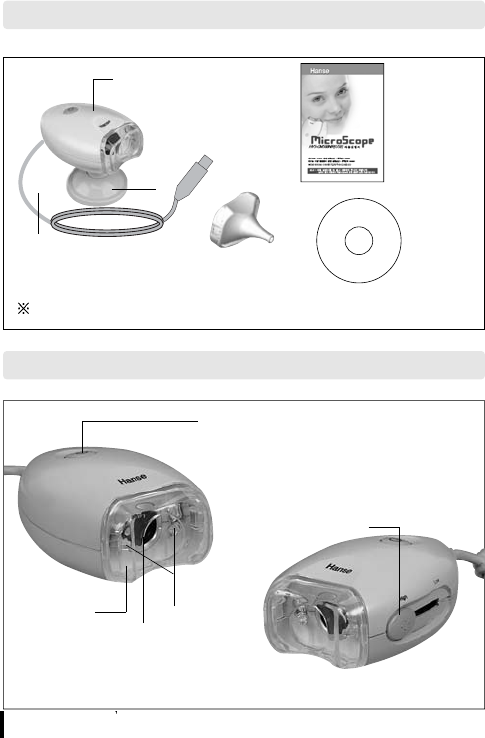
5.
Composition
Menual
CD
Microscope
Mirror for ear observation
Extension cable : option
Body
Cable
Base
6.
Name of each part
Capture
Focus control
lever
Lens
LED
Transparent
window
MicroScope
User s guide 7
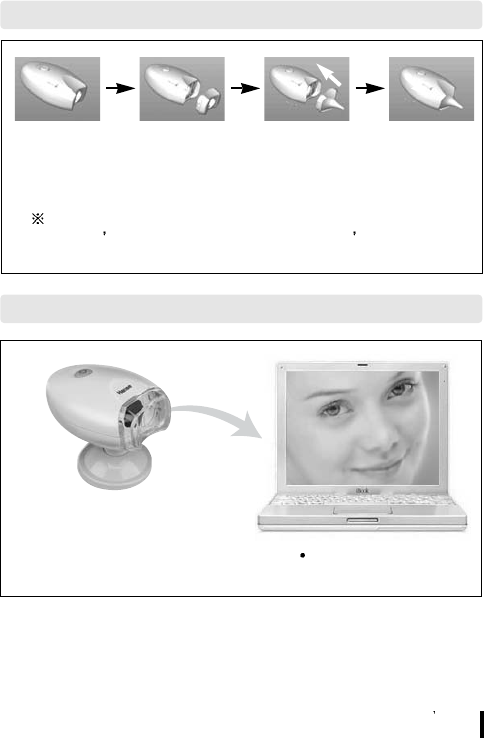
Take off transparent window from the body.
Assemble the mirror instead.
Never use this product for observing your or other
people s eyes as LED light cause eye s injury.
7.
How to use the mirror for ear observation
8.
Applicable system network
Microscope
HVS-CM500PC
COMPUTER
MicroScope
User s guide
8
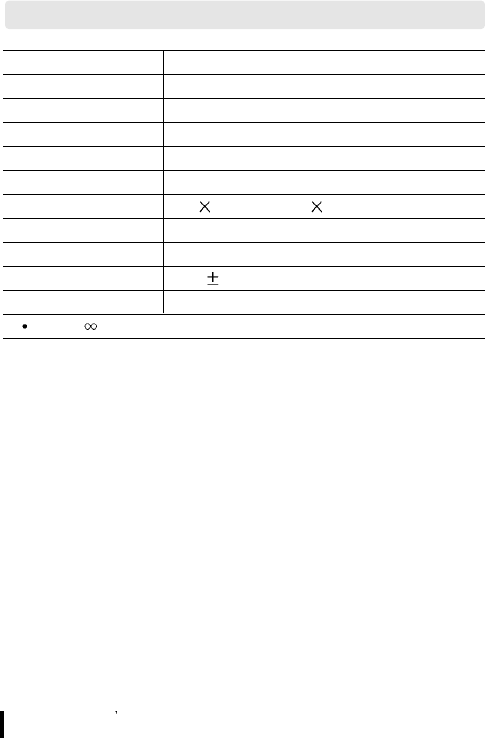
9. Specifications
Description HVS-CM500PC
Image Sensor 318,000 pixels (VGA 1/3” CMOS)
Device Type Digital Video Camera
Frame Rate Up to 30 frames
Interface USB Specifcation 1.1
Signal/Noise Ratio c.56dB
Pixel Resolution 640 480(VGA), 320 240(CIF)
Exposure Control Automatic(to+82dB)
Gain Control Automatic(to+24dB)
USB Cable 1.5m 0.2
Supply Voltage 4V1~6V0 DC(Internally regulated)Through USB
20~75, magnification
MicroScope
User s guide 9
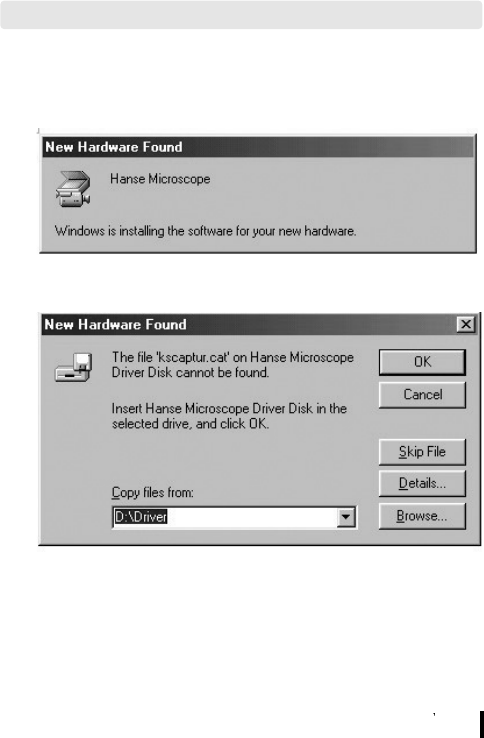
1. Install with P&P Process
1) Connect Microscope to USB port of your computer
2) Checking “Browse”
10. Install of Hardware
3) After checking drive position , click “OK”Button
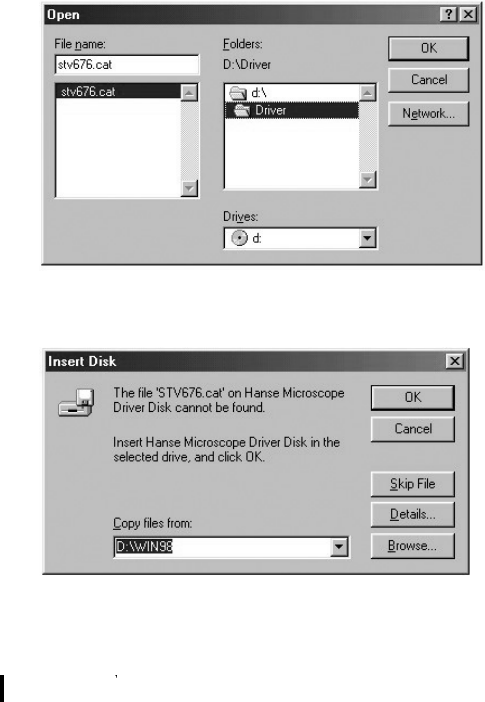
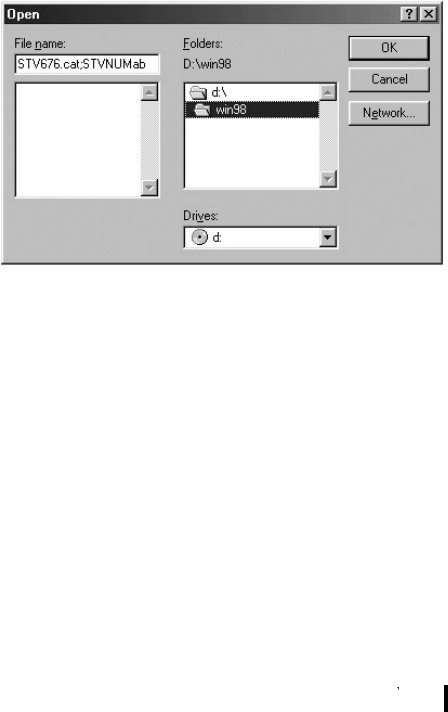
4) After Click “Browse” for original copy position, pointing win98
holder of program CD
Press “confirm” buttion and all the drive installation is finished.
MicroScope
User s guide
10
MicroScope
User s guide 11
5) If the following picture displayed, click “OK” button
MicroScope
User s guide
12
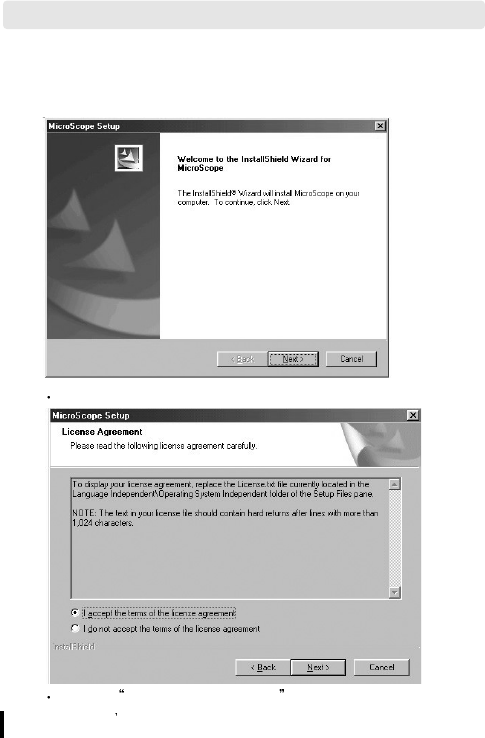
1. Install Program
1) Installation.
Press the next button for installShield wizard.
Choose Agreement of License and Press the next button.
11. Install Program
MicroScope
User s guide 13
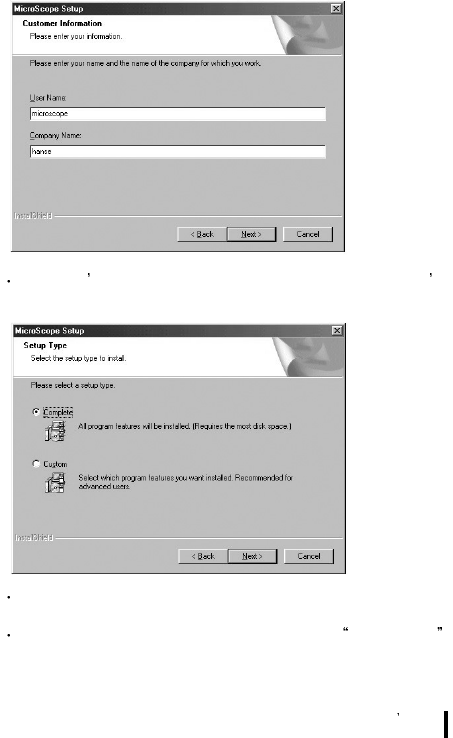
Fill user s name and company name out in user s
information window and Press the next button.
Choose the installation type users want to and Press the
next button.
It is recommended for users to choose Full set up
basically.
MicroScope
User s guide
14
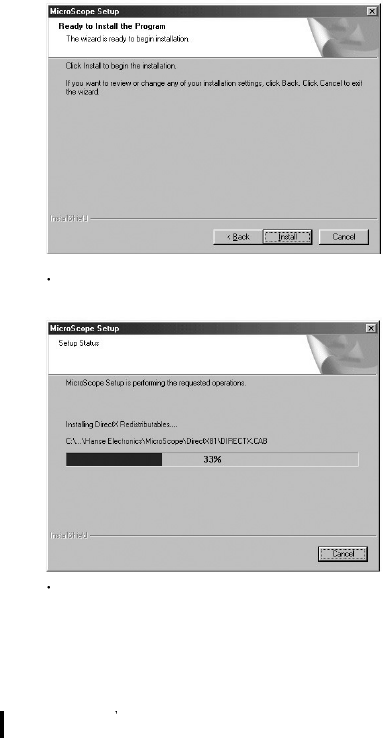
Press the install button to set up the program.
Window is appeared for displaying installation.
MicroScope
User s guide 15
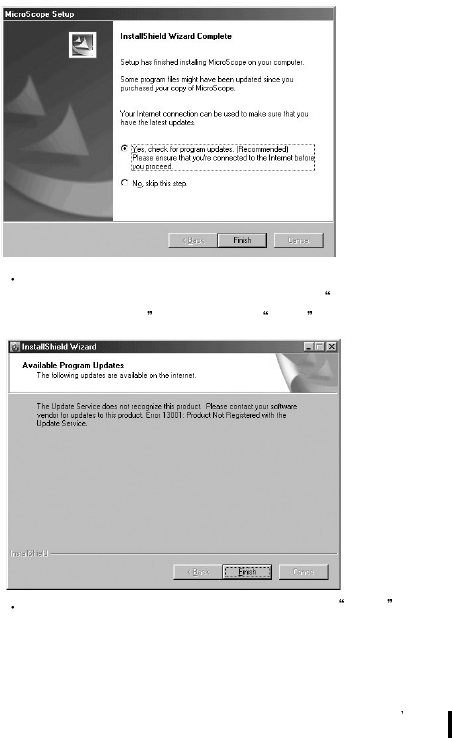
The program will be updated on our homepage and to
renew the updated program ,choose yes, check the
renewed program and press the finish button.
After finishing renewing program, press the Finish button,
then installation is completed successfully.
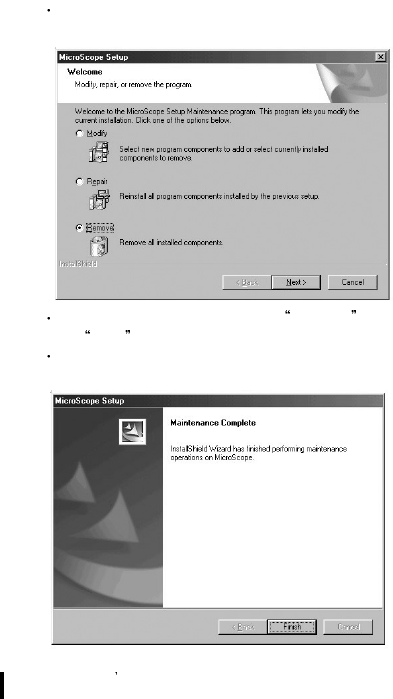
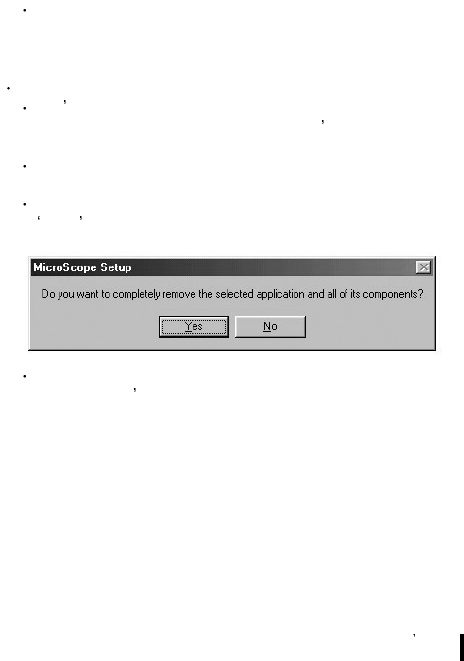
2) Note
In case microscope program was installed before, execute
the existed set up program again.
Above the window, choose the Remove botton and press
the Next button.
After remove the program completely, execute the new
version of setup.exe and install program again.
MicroScope
User s guide
16
MicroScope
User s guide 17
2. Program Manual
1) Starting program
Connect to USB camera and start program pressing
Microscope_Beta icon (Start -> Program -> Hanse ->
Microscope_Beta)
Note
Don t start program without Microscope. If you do without
connecting Microscope to PC, you ll see the below
message.
In this case, start the program after connect Microscope to
PC,.
To see only capture screen without live screen, press
enter button.
In case you connect camera to PC, the above warning
message won t appear.
MicroScope
User s guide
18
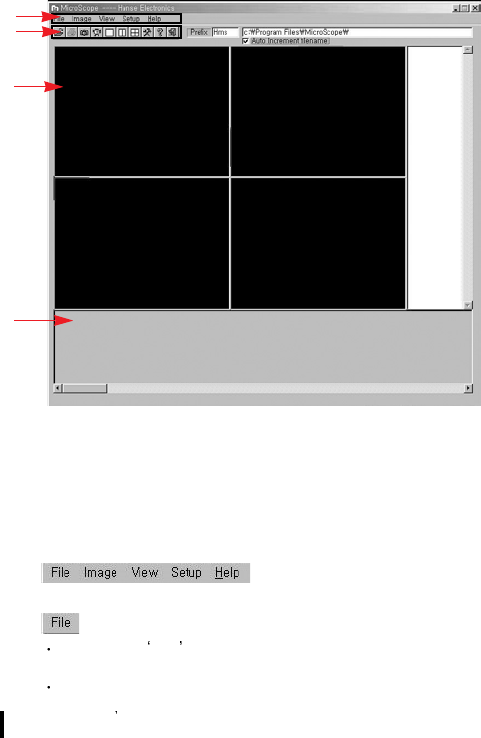
1 :
Menu window
2 :
Tool window
3 :
Screen window
4 : Folder
window
5 : Temp
window
1-1)
Menu window
Pointing Menu
When click File , pop up menu shows Open, Print, Print
Setup, Exit in a row.
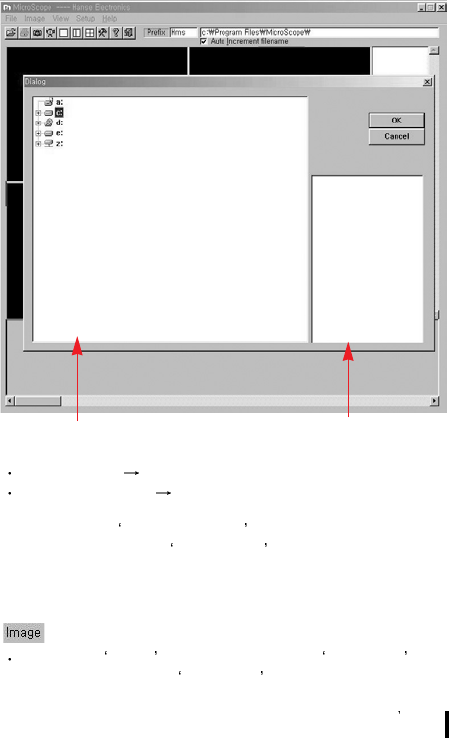
The window is opened as below :
1
2
3
4
5
MicroScope
User s guide 19
Driver window It shows saving driver and folder.
Picture file window It shows chosen driver and picture file
in folder.
Print : Open Print Setup Mode and Pre-view.
Print Setup : Open Print Setup mode which is set by
default.
Exit : Exit the program
When click Image , pop up menu shows Snap Shot .
Snap Shot : Capture Live Image
2. Picture file window
1. Driver window
MicroScope
User s guide
20
When click View pop up menu shows Division 1,2,4 .
Division1 : Screen 1 (640*480)
Division2: Screen 2 (320*240)
Division4: Screen4 (320*240)
When click Setup , pop up menu shows Auto Increment
File Name
Auto Increment File Name : When save files,it determines
whether to save one picture or automatically save with the
increasing series number.
When click Help pop up menu shows About .
About : It is description of product (version, manufacturer,
etc...)
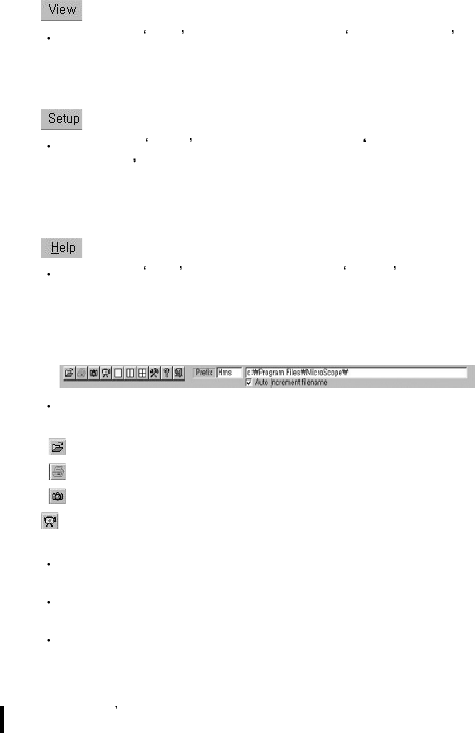
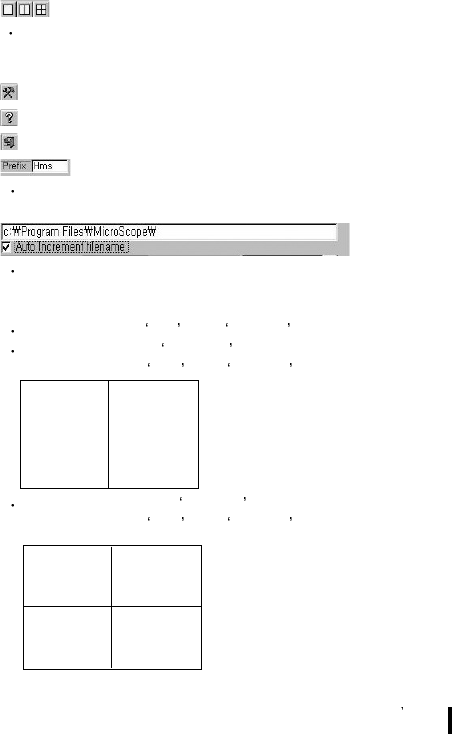
1-2) Tool window
The functions of below Icons are the same to the menu.
: File Open
: Print
:Snap Shot
:Live/Capture
In case of 1 screen, you can choose the main screen
between live or capture.
In case of 2 screens, you can choose the left side screen
between live or capture.
In case of 4 screens, you can select one top and left side
screen between live or capture.
MicroScope
User s guide 21
:Division
You can select screen as one full screen, two screens and
four screens.
: Setup
:Help
: Exit
You can put the head letter of title for screen that you want
to record
.
You can define the location of file that you want to capture.
1-3) Screen window
Screen 1 shows Live and Capture .
Screen 2 shows Capture only and screen 4 can be
chosen between Live and Capture .
Screen2,3,4 shows Capture only and screen1 can be
chosen between Live and Capture .

MicroScope
User s guide
22
1-4) Folder window
This window shows picture file which would be now loaded.
When picture is captured, this windows shows the captured
picture.
1-5) Temp window
When double-click the picture which was saved at folder, the
picture is saved at Temp window.
When double-click the screen of Temp Window, the saved
pictures are shown at screen window
In a row.

MicroScope
User s guide 23
How to get A/S
PRODUCT Microscope
MODEL
DATE OF PURCHASE
YEAR MONTH DATE
TERMS OF WARRANT
SALES AGENT
ADDRESS OF SALES
AGENT
We will guarantee as follows :
1. This product is made through rigid quality control and
test process
2. In case that this product is out of order due to the defect
in manufacturing even through the product has been
normally used, A/S will be afforded at free
of charge for one year after purchasing date.
3. In case of the followings, Hanse will afford A/S with
charge of cost even through warrant period.
1) Out of order by user's mishandling or move
2) In case of wrong repair or damage by modification of
inner part
3) Out of order by natural disaster or disorder in power
source
4) In case of omission, correction without confirmation,
loss of warranty card.
4. Please be careful of keeping this warranty card as it
won't be reissued.
5. Please surely present the warranty card in A/S request.
12.
WARRANTY

MicroScope
User s guide
4
Seoul Office :
2F, 260-7, Youmchang-Dong, Gangseo-Gu, Seoul 157-862, Korea
Tel: +82-2-6675-2500 Fax: +82-2-6675-2501
http://www.hanseelec.com E- mail:hanse hanseelec.co.kr
Factory :
4L, 33B, Namdong-Industrial Zone, 613-3,Namchon-Dong, Namdong-Gu, Incheon
405-846, Korea Tel: +82-32-816-8700 Fax: +82-32-818-4473
INFORMATION TO THE USER
This equipment has been tested and found to comply with the limits for a Class B
digital device, pursuant to part 15 of the FCC Rules. These limits are designed to
provide reasonable protection against harmful interference in a residential installation.
This equipment generates, uses and can radiate radio frequency energy and, if not installed
and used in accordance with the instructions, may cause harmful interference to radio
communications. However, there is no guarantee that interference will not occur in a
particular installation. If this equipment does cause harmful interference to radio or
television reception, which can be determined by turning the equipment off and on,
the user is encouraged to try to correct the interference by one more of the
following measures:
-. Reorient or relocate the receiving antenna.
-. Increase the separation between the equipment and receiver.
-. Connect the equipment into an outlet on a circuit different from that to which the
receiver is connected.
-. Consult the dealer or an experienced radio/TV technician for help.
CAUTION
Any changes or modifications not expressly approved by the manufacturer could void
the user’s authority to operate the equipment.
This device complies with Part 15 of the FCC Rules. Operation is subject to
the following two conditions: (1) this device may not cause harmful interference, and
(2) this device must accept any interference received, including interference that may
cause undesired operations.