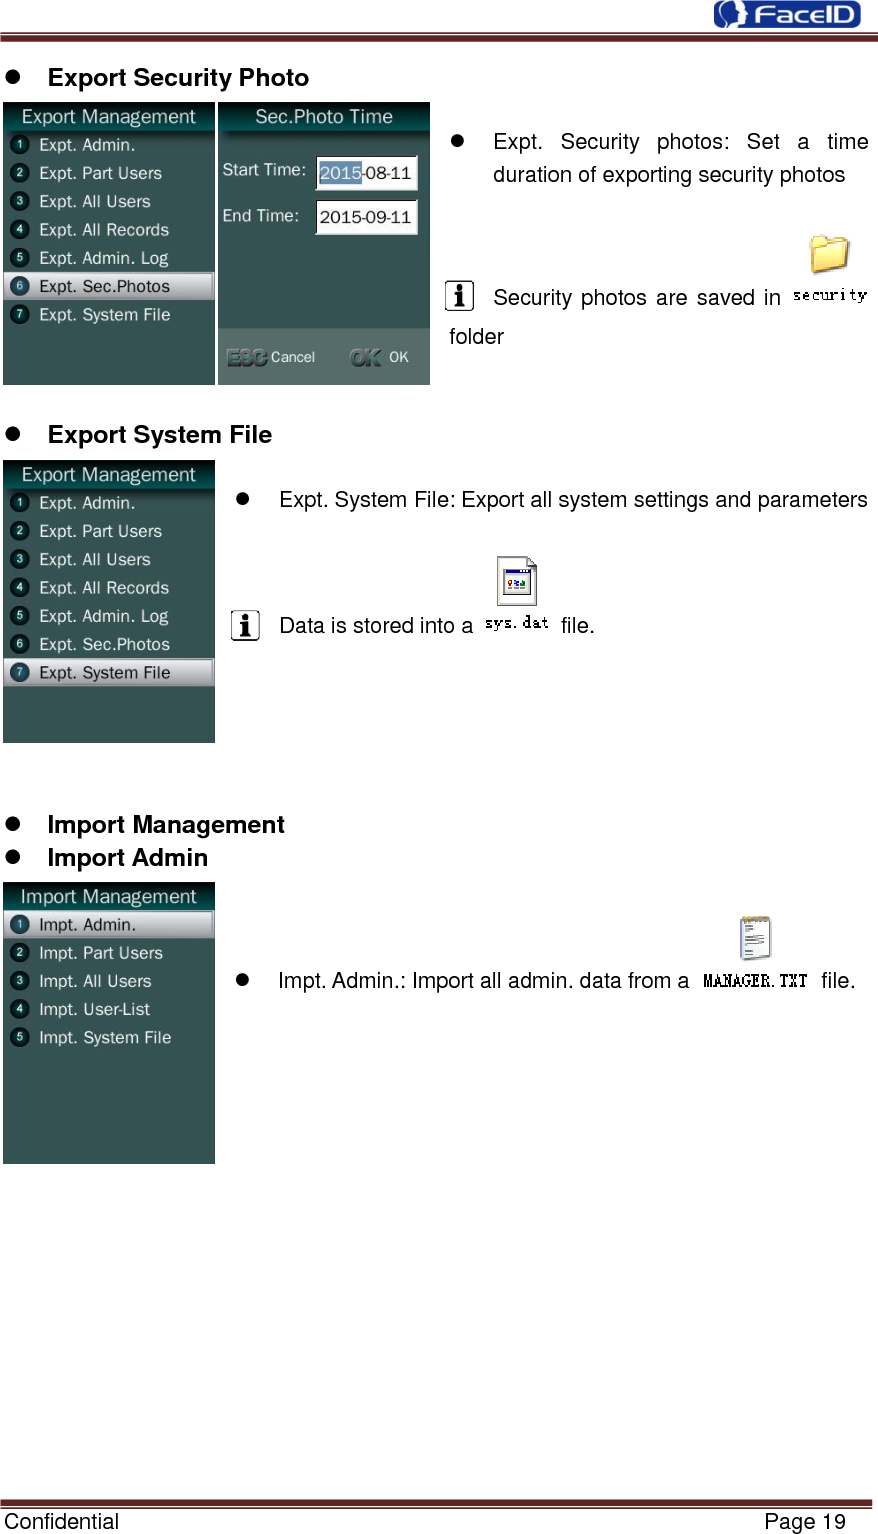
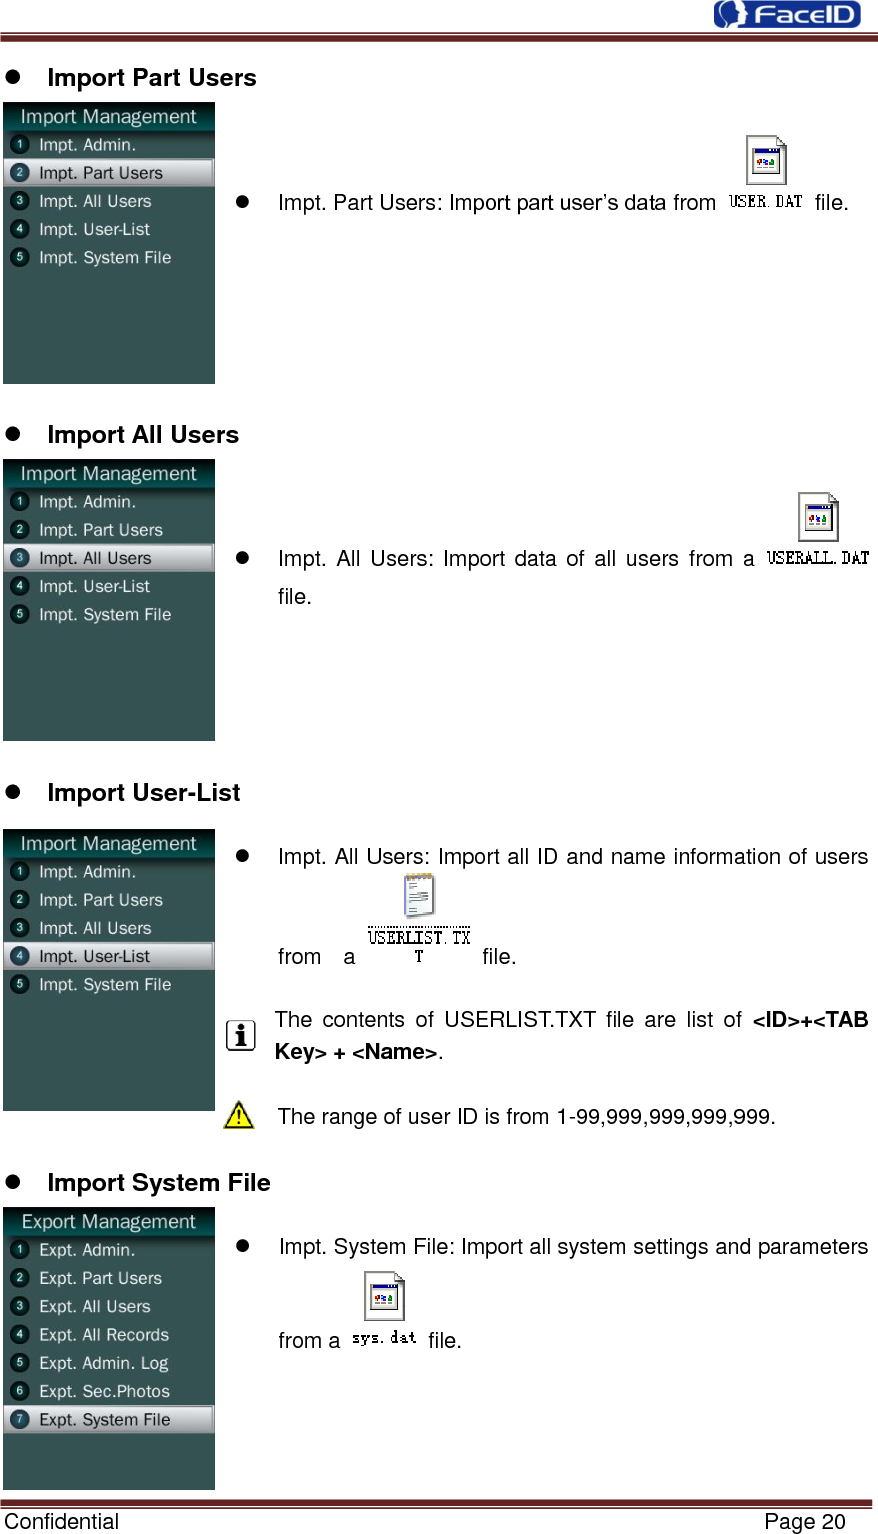
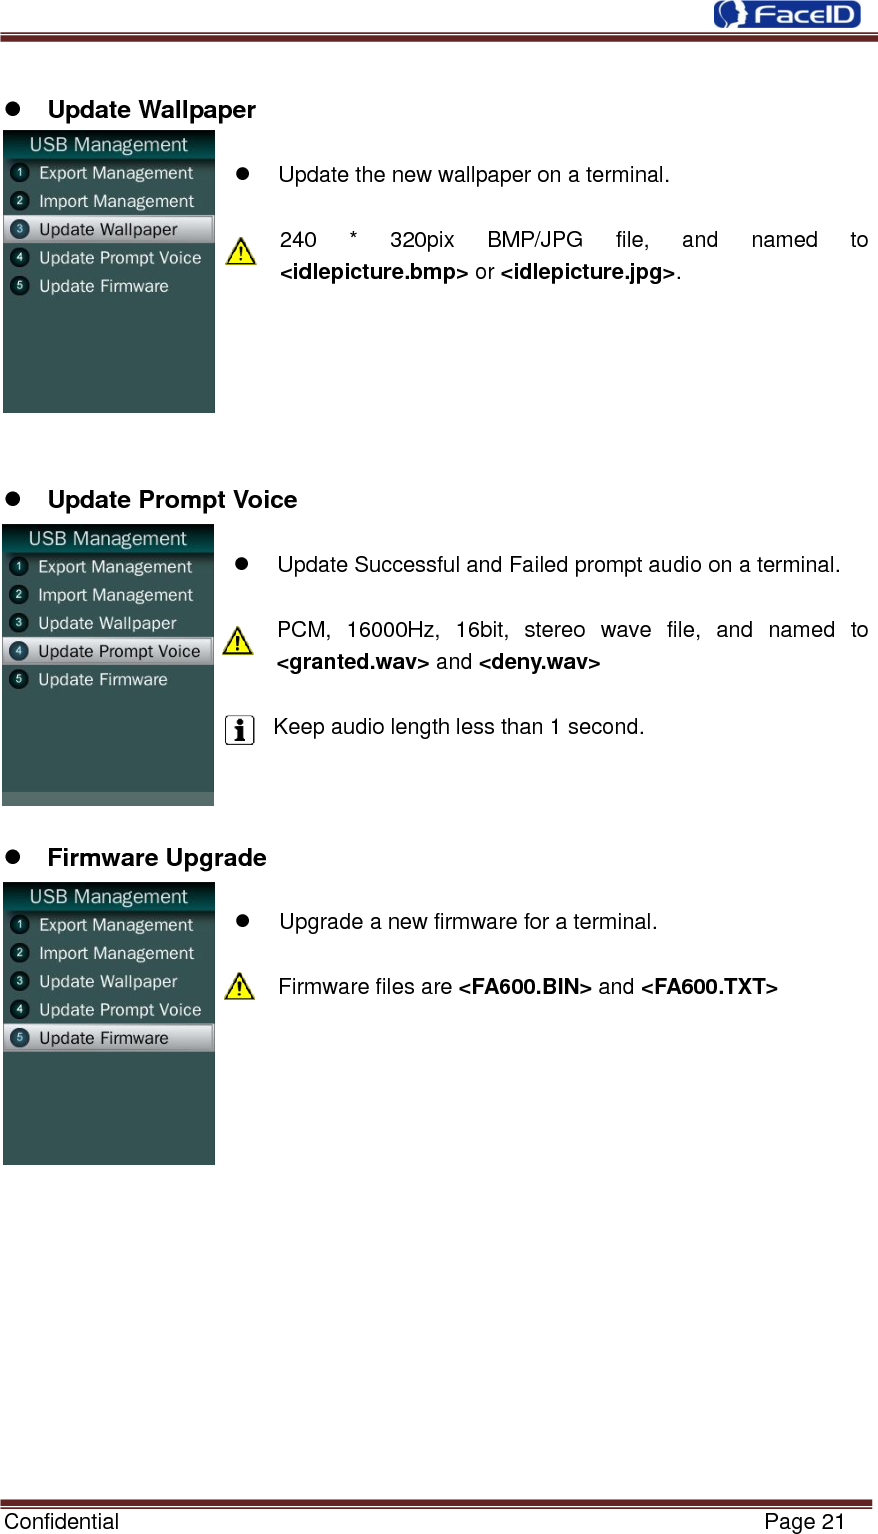
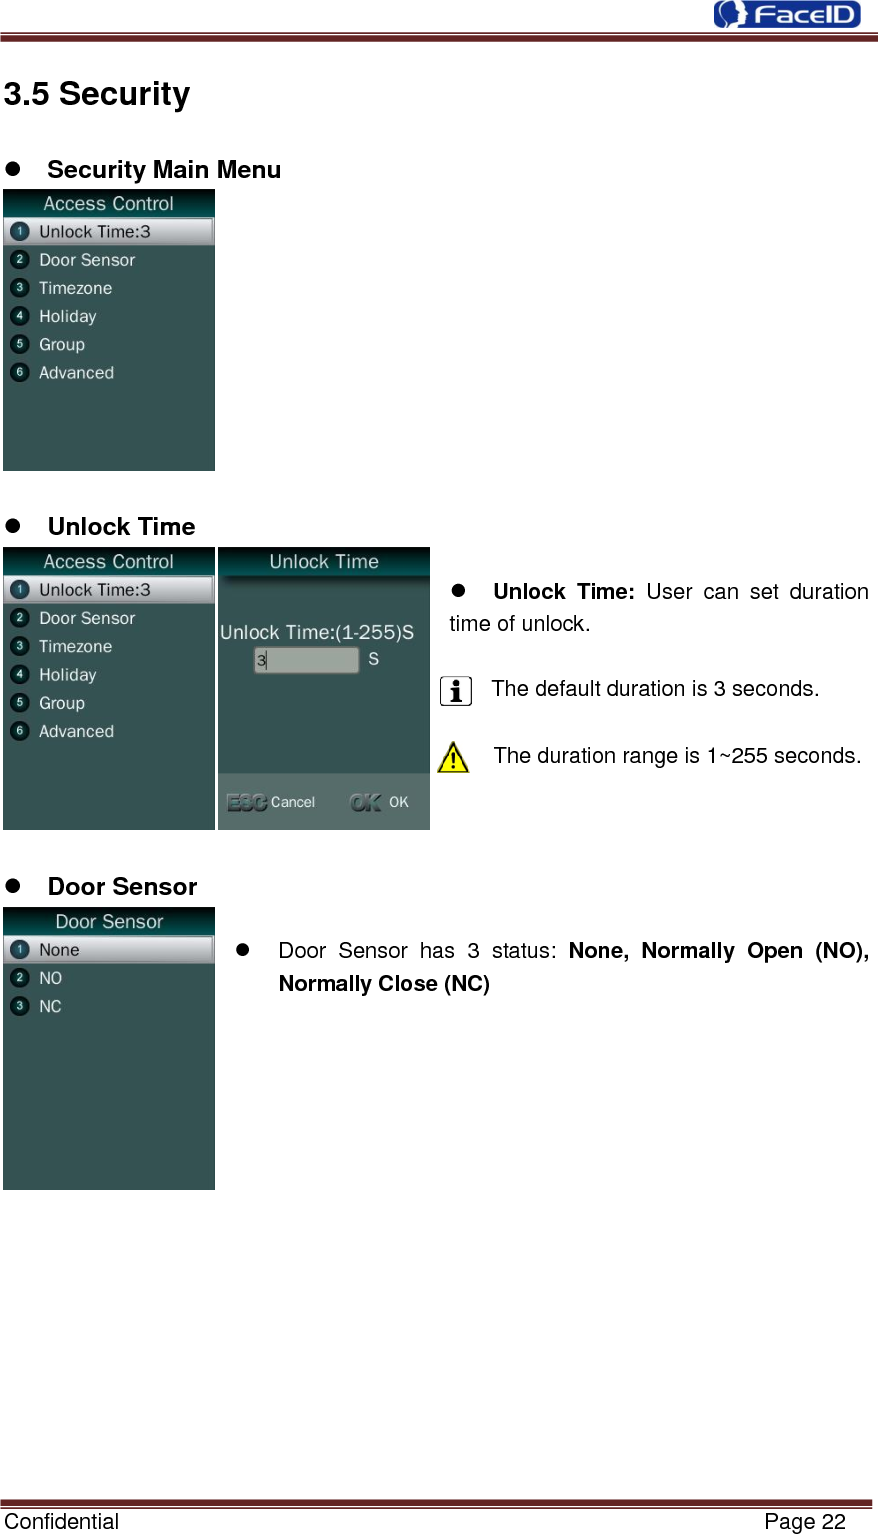
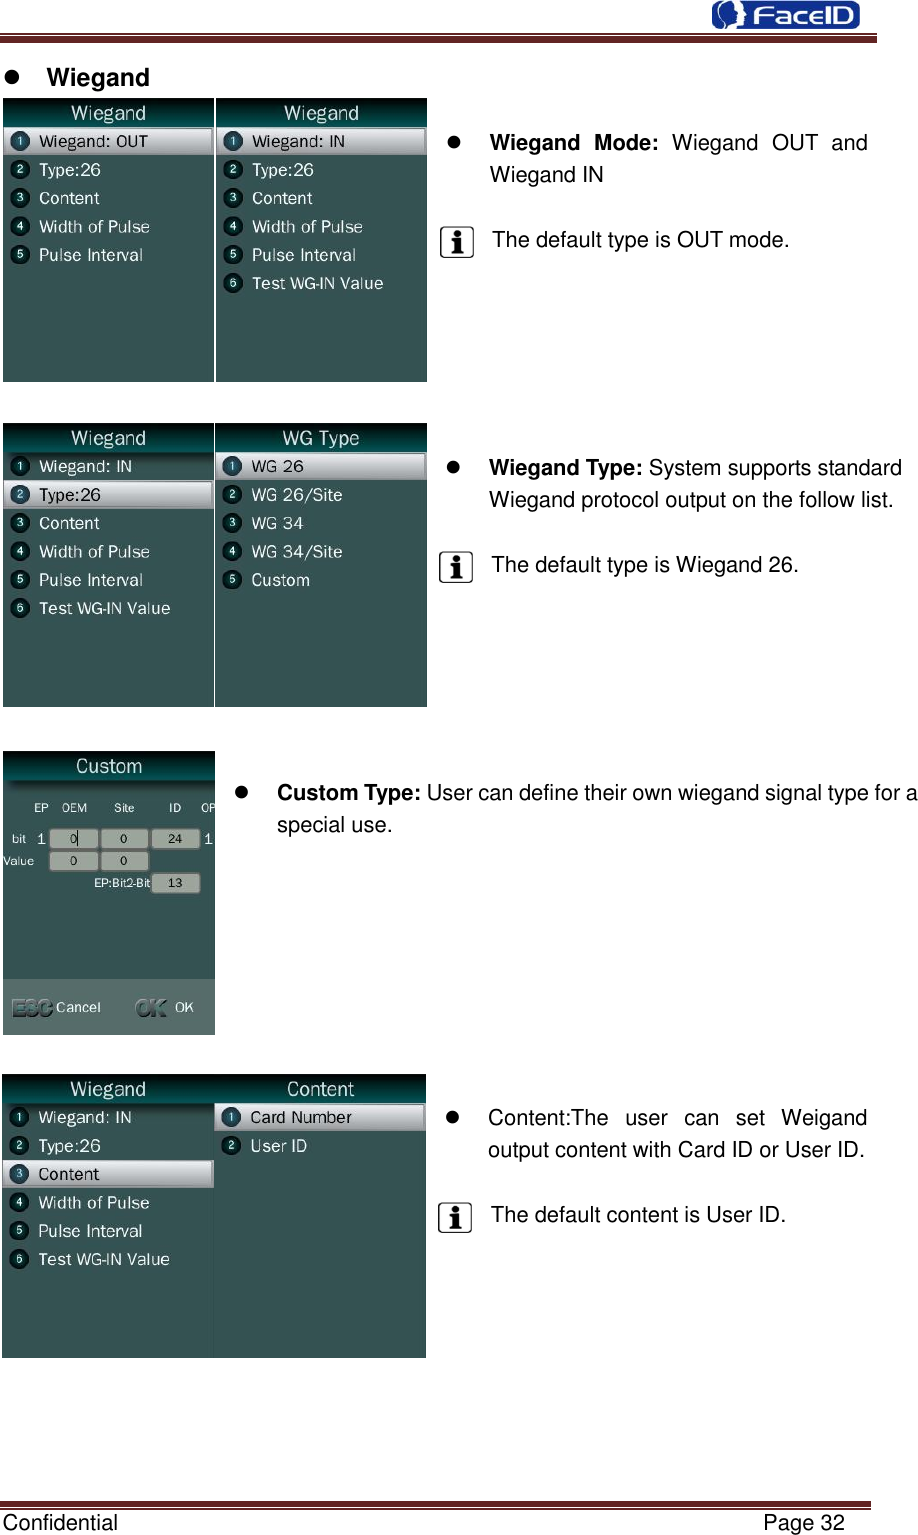
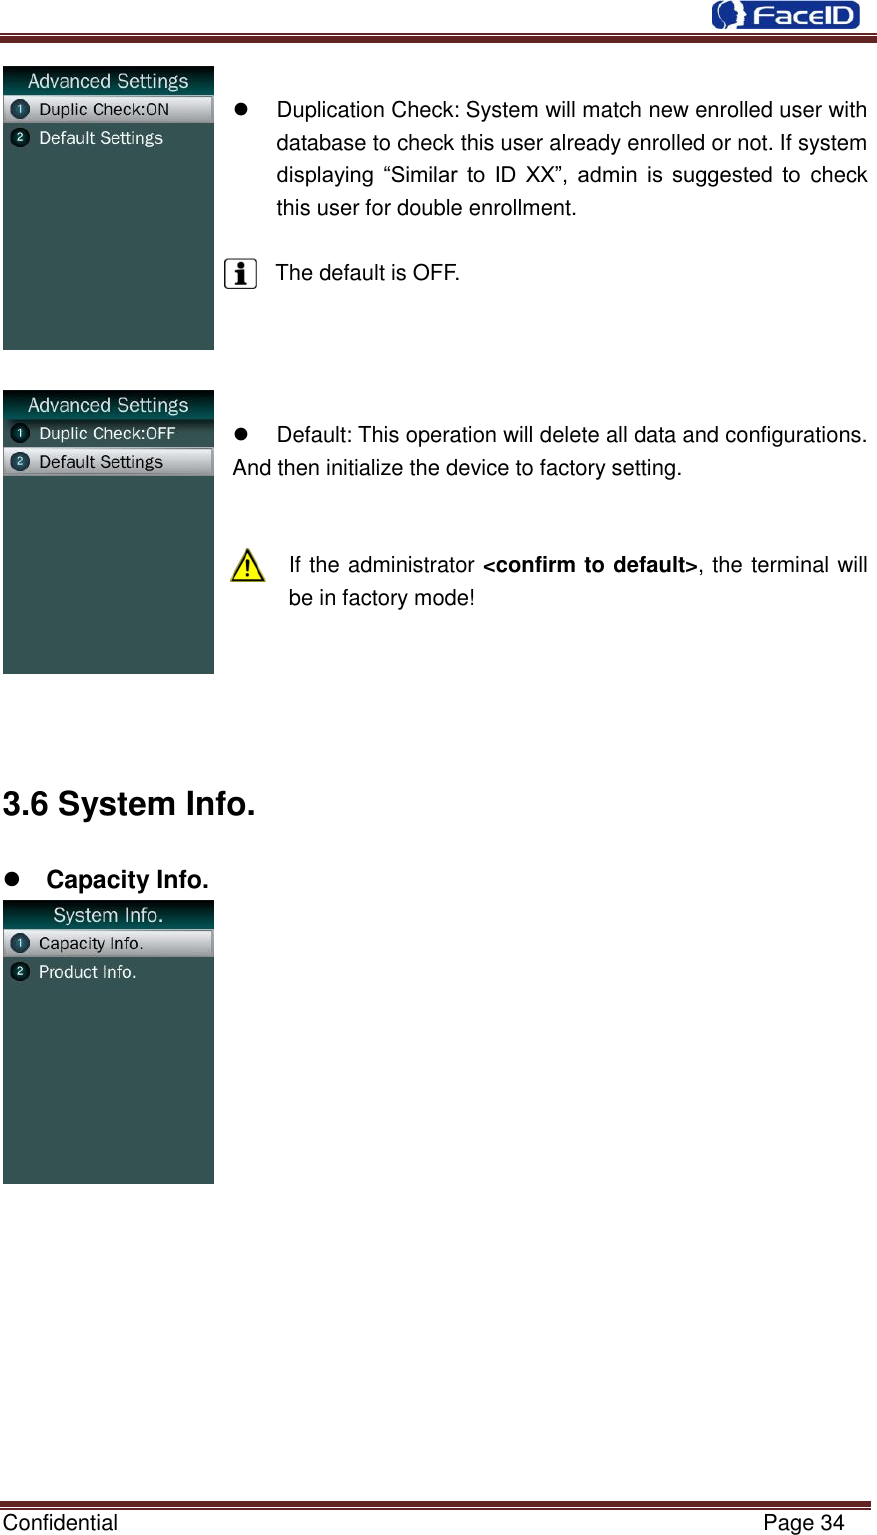
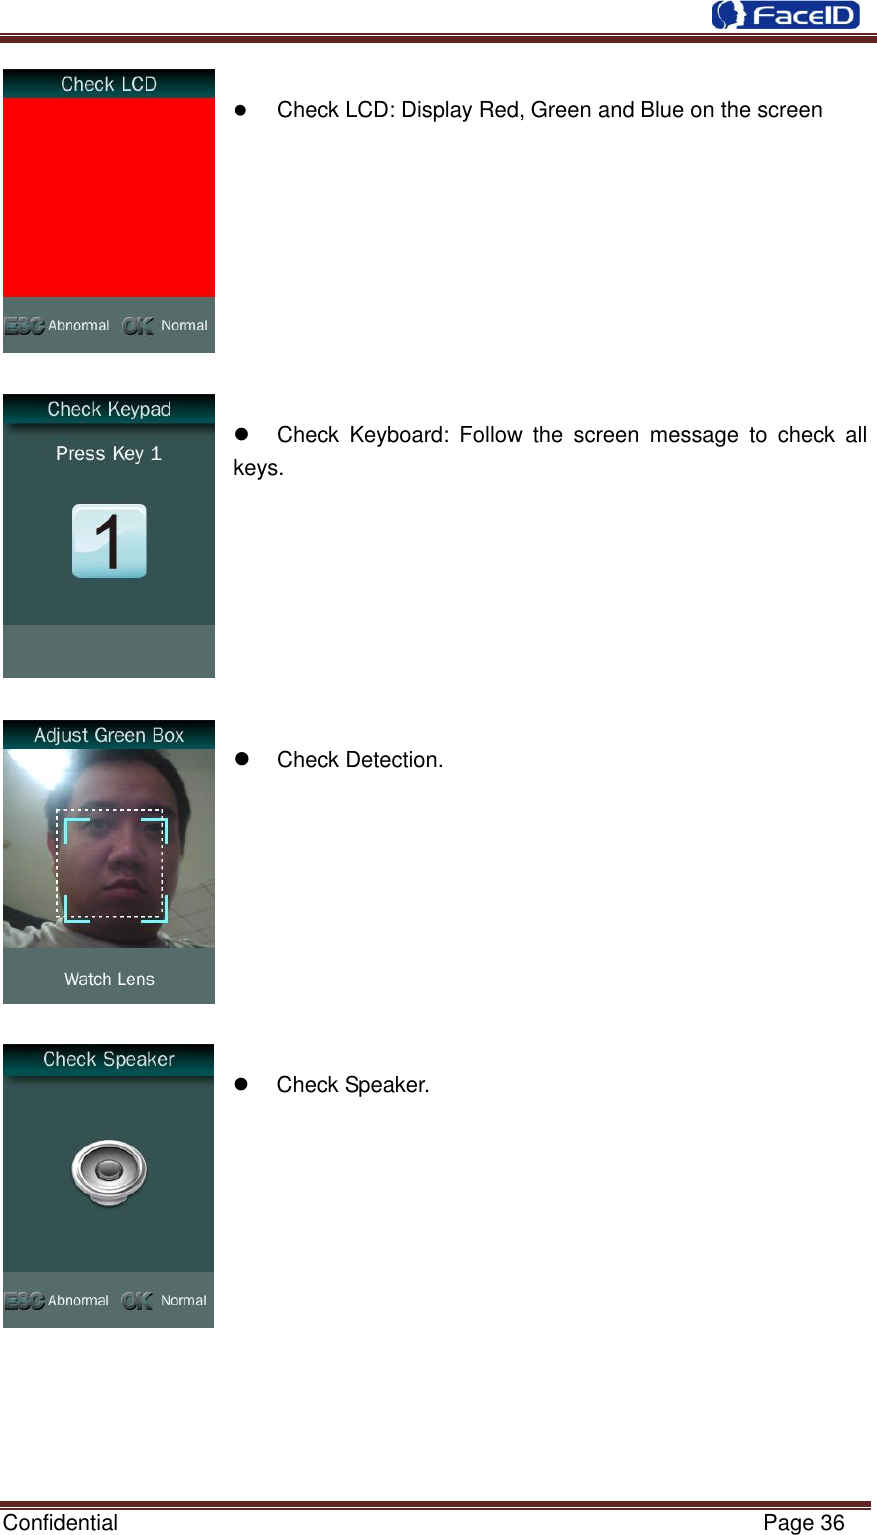
Hanwang Technology FACEID-FAX00 Facial Recognition Terminal User Manual
Hanwang Technology Co., Ltd Facial Recognition Terminal Users Manual
UserManual.wiki
>
Hanwang Technology
>
FACEID FAX00 User Manual
Users Manual
Navigation menu
Upload a User Manual
Namespaces
Wiki Guide
HTML
PDF
Info
Views
User Manual
Discussion / Help
Navigation

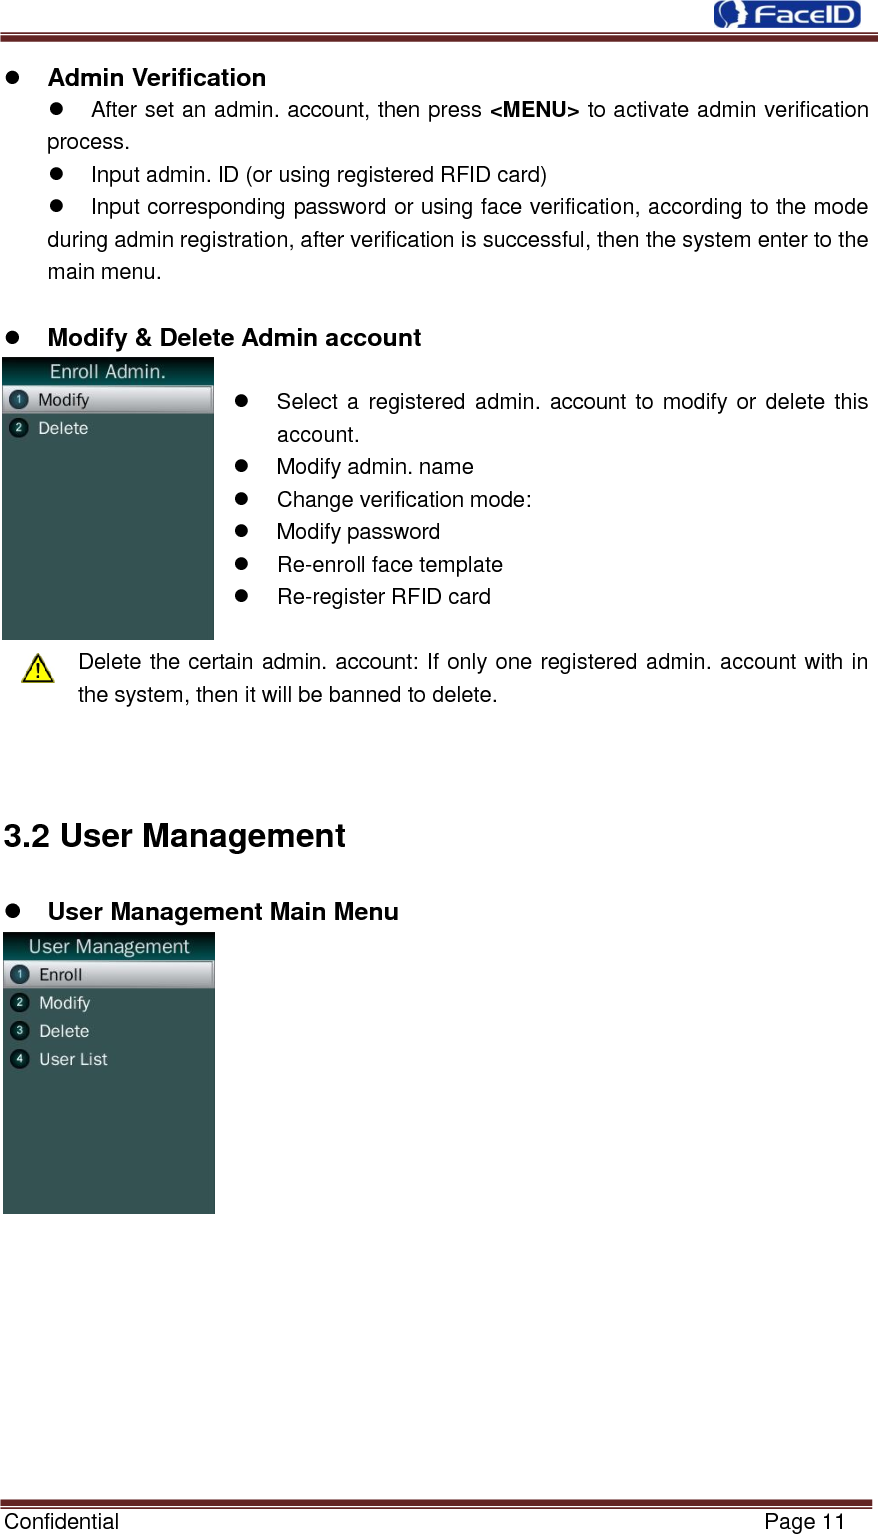
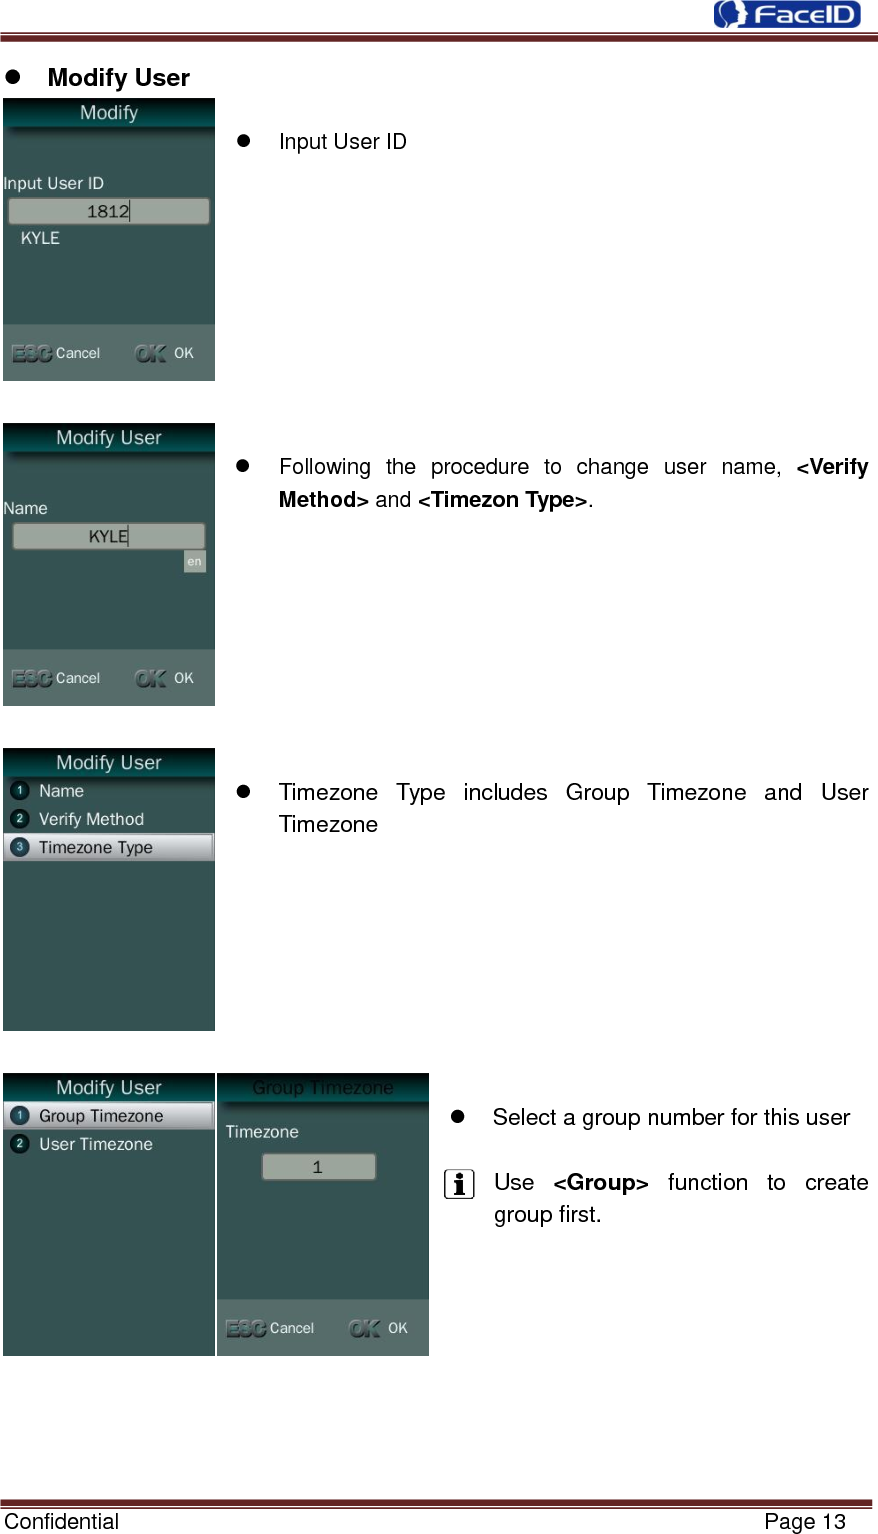
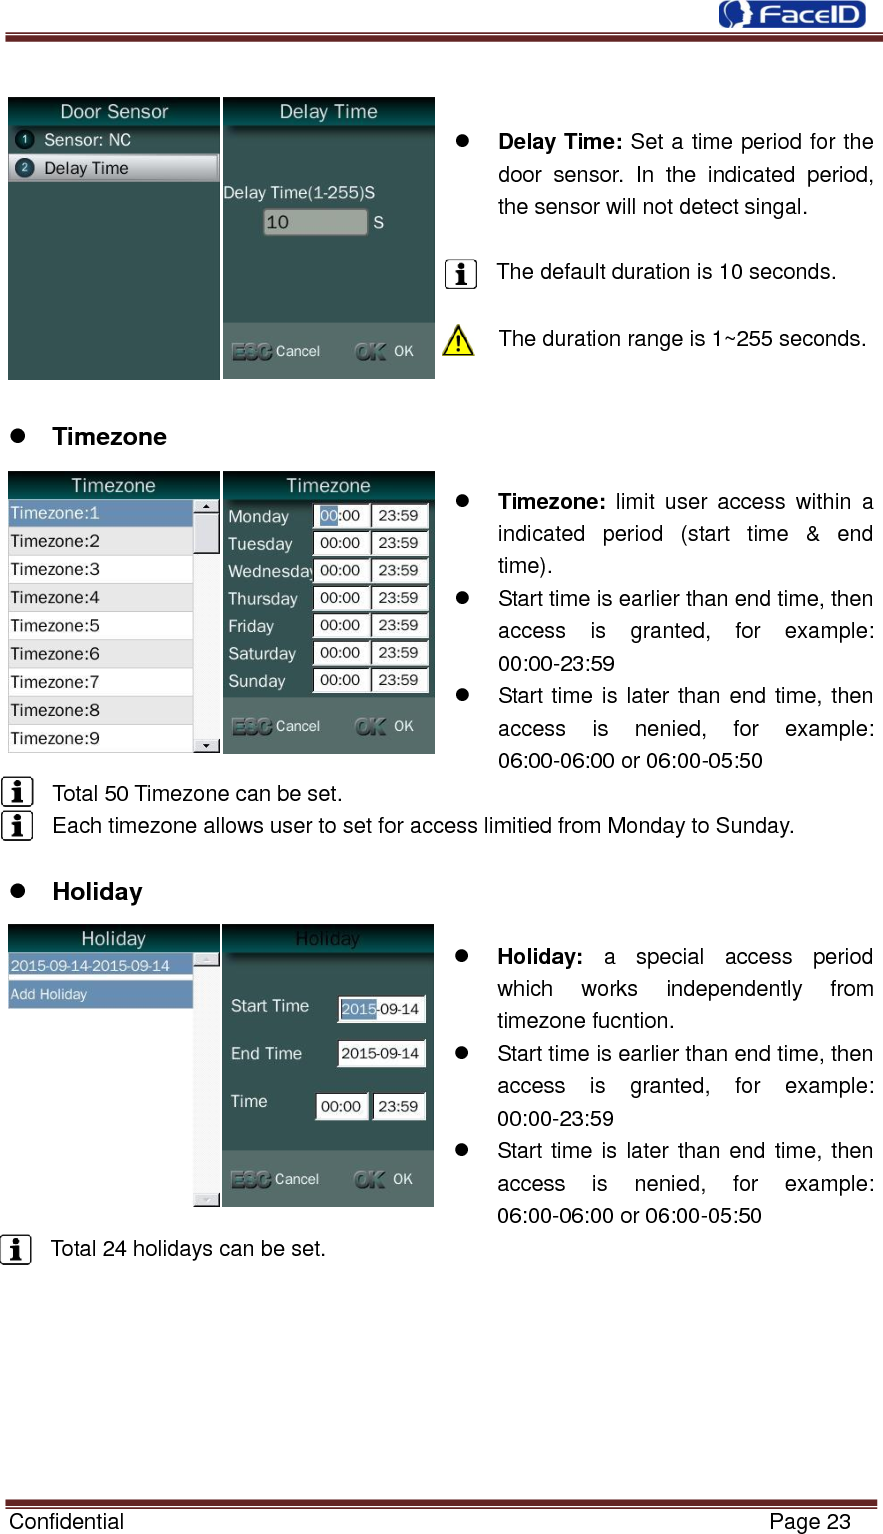
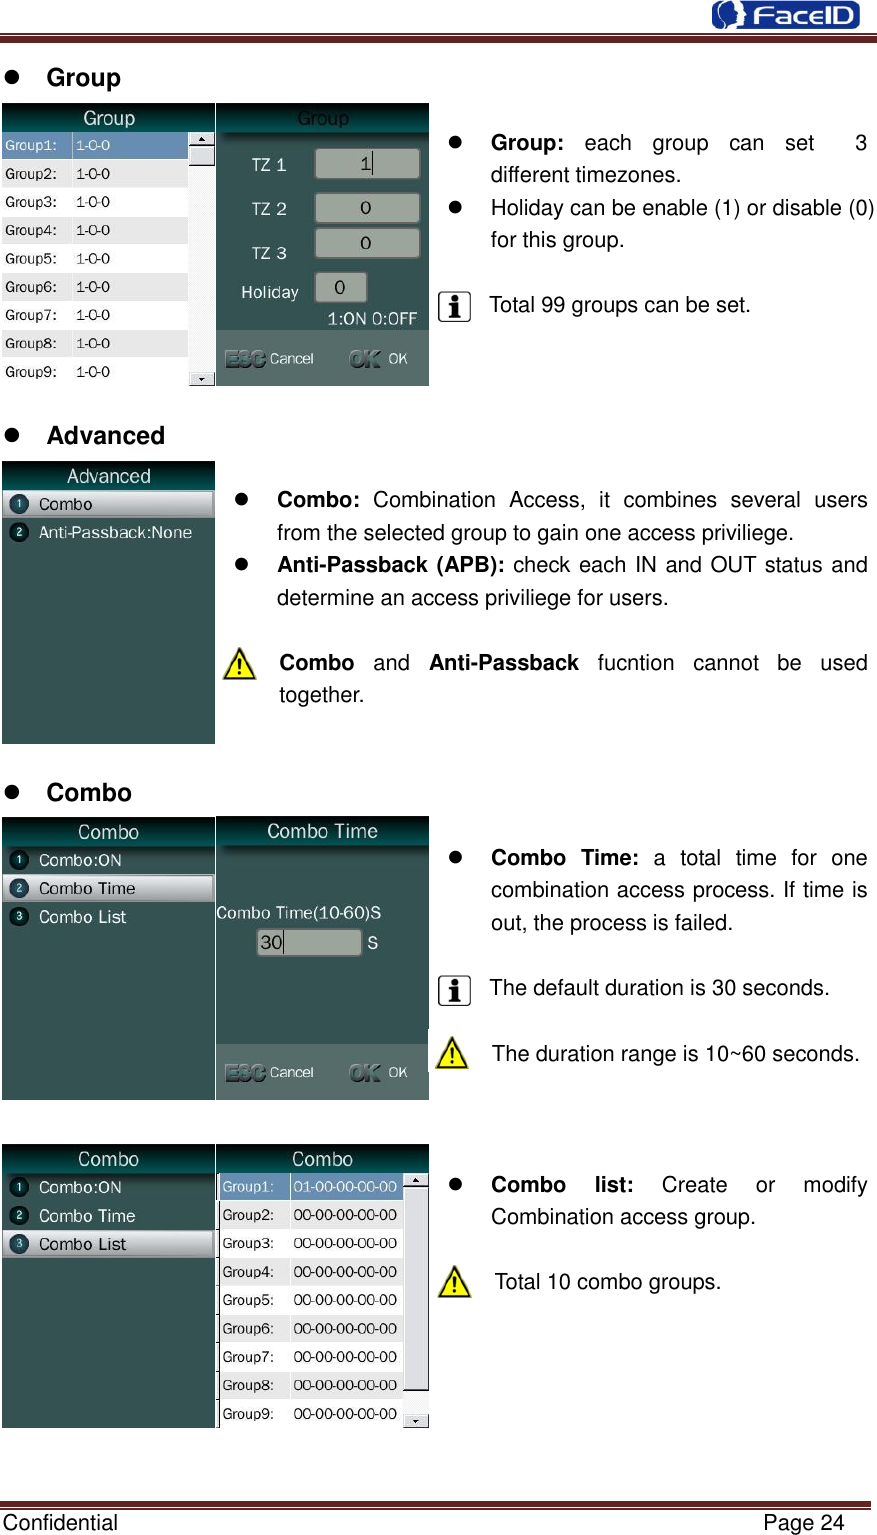
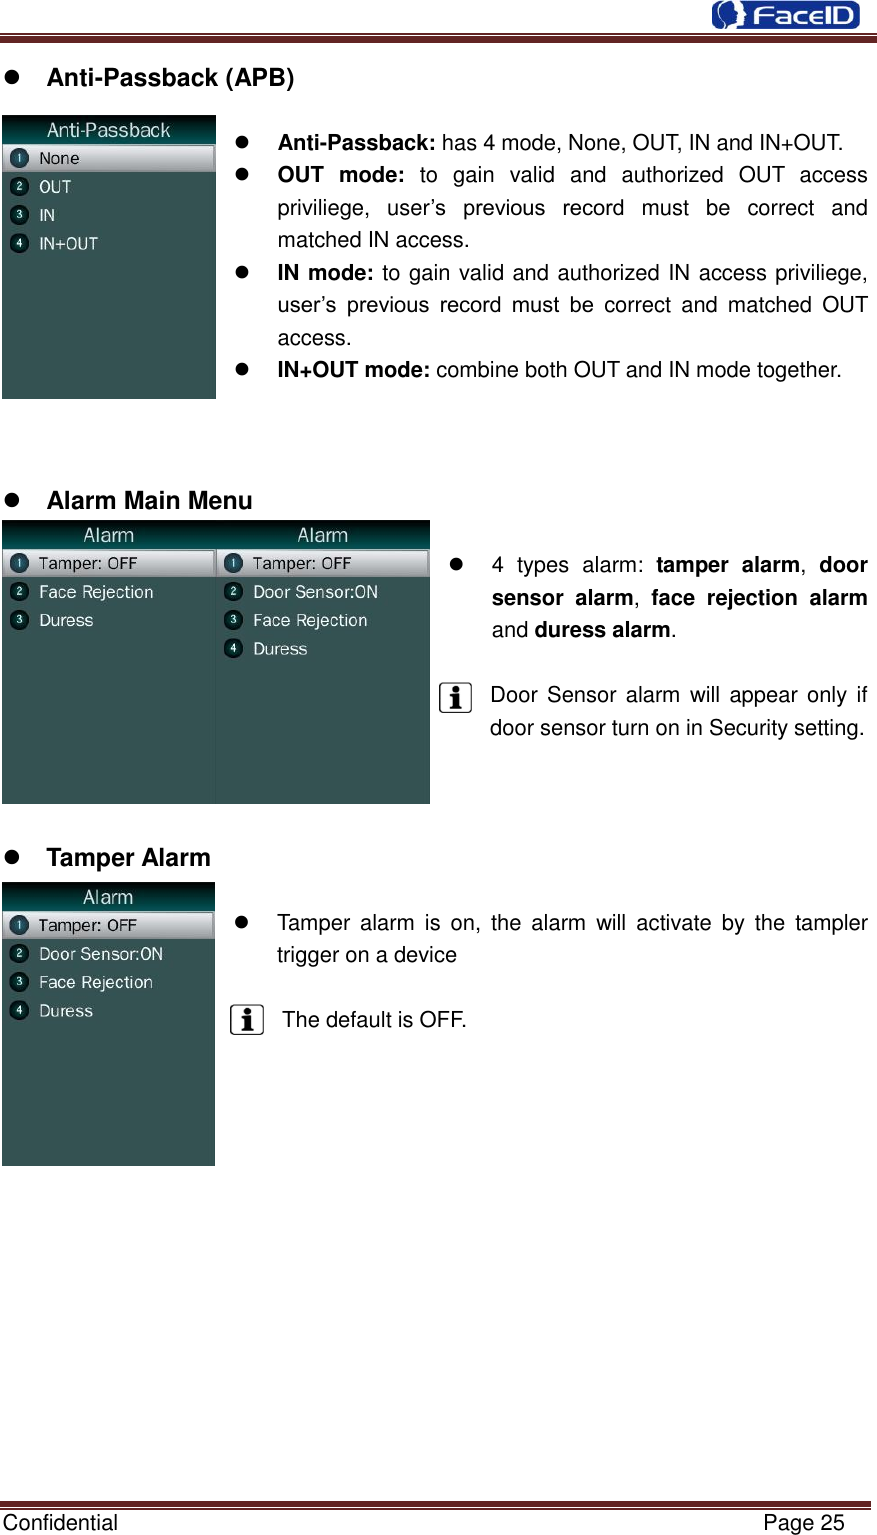
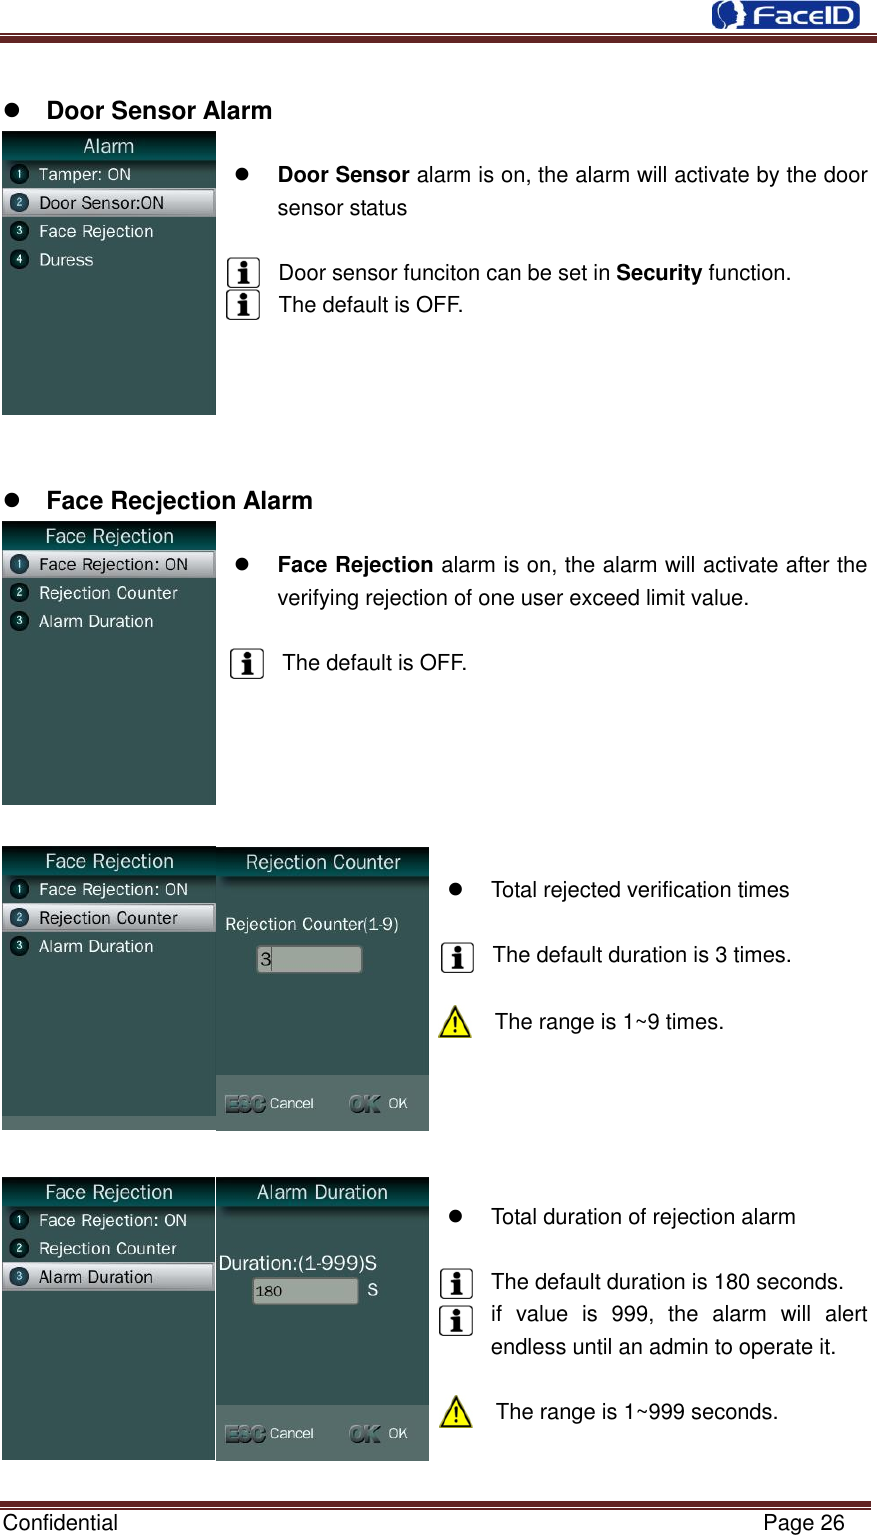
![Confidential Page 14 Select 3 timezones for this user Each user can set 3 user timezones. Use <Group> function to create group first. Delete User Input an User ID Press [OK] (or [ESC]) to confirm (or cancel) this process. Delete All Users Press [OK] (or [ESC]) to confirm (or cancel) this process. All user‟s ID, name and templates will be erased. This step is irreversible. Not affect Admin data and records. User List Enter user list to check Un-enrolled and Enrolled list. Press [OK] (or [ESC]) to confirm (or cancel) this process. <User List> provides enroll, modify and delete users directly](https://usermanual.wiki/Hanwang-Technology/FACEID-FAX00/User-Guide-2806692-Page-14.png)