Hanwha Techwin DIGIMAXU-CA4 Digital Camera User Manual U CA4en 02 V01
Samsung Techwin Co Ltd Digital Camera U CA4en 02 V01
UserManual.wiki
>
Hanwha Techwin
>
DIGIMAXU-CA4 User Manual
>
User Manual 1
Contents
1.
User Manual 1
2.
User Manual 2
3.
User Manual 3
User Manual 1
Navigation menu
Upload a User Manual
Namespaces
Wiki Guide
HTML
PDF
Info
Views
User Manual
Discussion / Help
Navigation
![2InstructionsUse this camera in the following orderInsert the USB cableSet up the camera driverBefore connecting the camera to a PC, via the USBcable, you will need to set up the camera driver.Install the camera driver that is contained in theApplication S/W CD-ROM.(p.95)Take a picture (p.21)Insert the supplied USB cable into the PC’s USB portand the camera’s USB connection terminal.(p.83)Check the camera’s powerIf the power is turned off, press the camera button topower it on.(p.24) Take a pictureCheck the camera’s powerCheck [Removable Disk]Open Window s EXPLORER and search for[Removable Disk].(p.84)To play back a video shot with this camera, be sure to use the QuickTime player supplied onthe software CD-ROM. Applications that do not support the MPEG-4 codec (e.g., Windows Media Player) may not be able to play back the video. If you use a card reader to copy the images on the memory card to your PC, the images could bedamaged. When transferring the images taken with the camera to your PC, be sure to use thesupplied USB cable to connect the camera to your PC. Please note that the manufacturer holds noresponsibility for loss or damage of images on the memory card due to the use of a card reader.](https://usermanual.wiki/Hanwha-Techwin/DIGIMAXU-CA4.User-Manual-1/User-Guide-449713-Page-2.png)
![16Precautions on Using the Memory Stick DuoDo not insert the Memory Stick Duo on its own into a Memory Stick-compatible device.Do not insert the Memory Stick Duo adapter into a Memory Stick-compatible device withoutattaching the Memory Card Duo to the adapter. Using it without the Memory Stick Duo mayadversely affect the device into which it is inserted.Be sure to check the proper direction of insertion before use .Insert the Memory Stick Duo all the way into the Memory Stick Duo adapter. If the Memory Stick Duo is not inserted correctly into the adapter, it may not operate properly.Do not attach labels to any part of the Memory Stick Duo and Memory Stick Duo adapter. Thelabels may come off as you insert the Memory Stick Duo into the adapter or into a MemoryStick-compatible device.When inserting the Memory Stick Duo into the slot, do not force or bend it.Do not touch the Memory Stick Duo adapter's card pins with your fingers or with metal objects.Do not allow dirt or foreign material to get into the Memory Stick Duo adapter slot.Do not leave the Memory Stick Duo with its adapter in areas subject to high temperatures.Those models with the write-protect switch on the back of the card prevents accidental erasureof data from deletion or formatting. By sliding the switch to the top of the memory card, the datawill be protected. By sliding the switch to the bottom of the memory card, the data protectionability will be canceled. Please use a pointed object to move the write-protect switch. Slide theswitch to the bottom of the memory card before taking a picture.Card pins(A)Writeprotectswitch(B)Label(C)[ Memory Stick Duo ]FrontBackSome models of Memory Stick Duo media do not have the write-protect switch (B).Do not touch the card pins (part A) withyour fingers or with metal objects.Do not press hard when writing on thelabel (part C).If you insert the Memory Stick Duo intothe Memory Stick Duo adapter, you willbe able to use it with a Memory Stick-compatible device.](https://usermanual.wiki/Hanwha-Techwin/DIGIMAXU-CA4.User-Manual-1/User-Guide-449713-Page-17.png)
![17Precautions on Using the Memory Stick DuoMaintenance of the Memory Stick Duo(Hereafter the Memory Stick Duo is referred to as the "Memory Card".) Be sure to format the memory card (see p. 66) if you are using a newlypurchased memory for the first time, if it contains data that the cameracannot recognize, or if it contains images captured with a different camera.Turn off the camera power whenever the memory card is being inserted or removed.Repeated use of the memory card will eventually reduce the memory card's performance.Should this be the case, you will need to purchase a new memory card. Wear and tear on the memory card is not covered by the Samsung warranty.The memory card is an electronic precision device. Do not bend, drop or subject the memorycard to any heavy impact.Do not store the memory card in an environment with strong electronic or magnetic fields, e.g.near loud speakers or TV receivers.Please do not use or store in an environment where there are extremes in temperature.Do not allow the memory card to become dirty or to come into contact with any liquid. Shouldthis happen, clean the memory card with a soft cloth.Please keep the memory card in its case when not in use.During and after periods of extended use, you may notice that the memory card is warm. This is perfectly normal.Do not use a memory card that has been used in another digital camera or memory card reader.Do not use a memory card formatted by another digital camera or memory card reader.Preserving the memory card dataDo not remove the memory card while the camera status lamp (green) is blinking. Doing so will corrupt the data on the memory card.Samsung cannot be held responsible for lost data.It is advisable to copy important data onto other media as back-up e.g. floppy disks, hard disks,CD etc.If there are no shots remainingWhen you press the shutter button, a [CARD FULL !] message is displayed and the camera willnot operate. To optimize the amount of memory in the camera, replace the memory card ordelete unnecessary images stored in the memory.](https://usermanual.wiki/Hanwha-Techwin/DIGIMAXU-CA4.User-Manual-1/User-Guide-449713-Page-18.png)

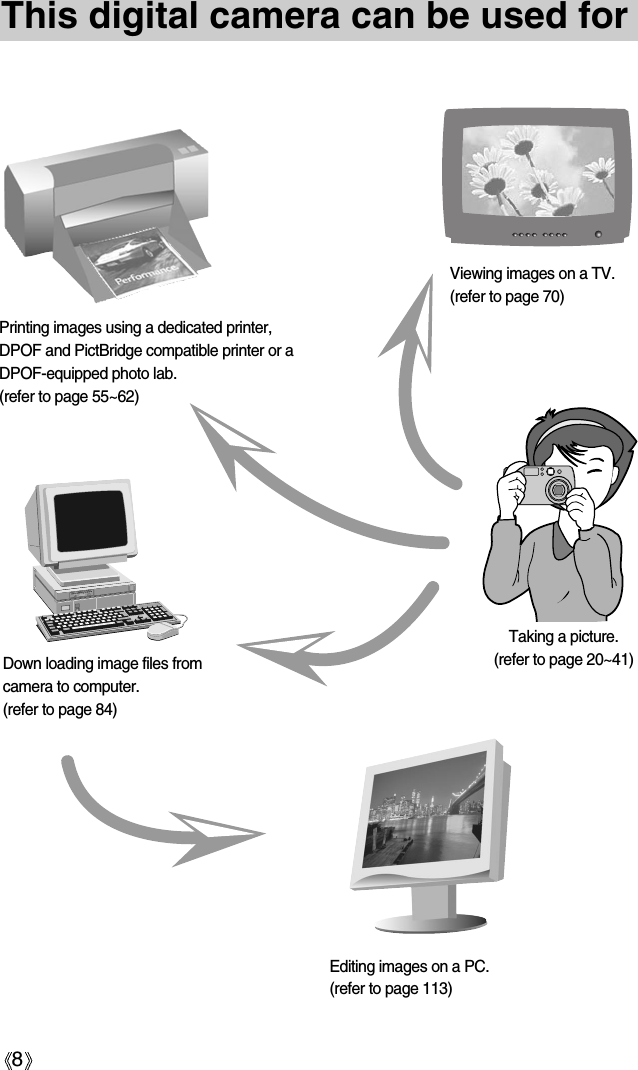
![19When Using the Camera for the First TimeIf the camera is turned on for the first time, a menu will be displayed to set date, time andlanguage in the LCD monitor. This menu will not be displayed after setting up the date, timeand language. Set up the date, time and language before using this camera. Setting up the date, time and date type1. Select the [DATE.TIME] menu by pressing the UP/DOWNbutton and press the RIGHT button.2. Select the desired sub menu by pressing the UP/ DOWN/LEFT/ RIGHT button.RIGHT button : selects YEAR/ MONTH/ DAY/ HOUR /MINUTE/DATE TYPELEFT button : Moves the cursor to the [DATE/TIME]main menu if the cursor is at the firstitem of the date and time setup. In all other instances, the cursor will beshifted to the left of its current position.UP/ DOWN button : changes the value of each item.Date setting range : 2004/01/01 ~ 2050/12/31(Leap years and months are corrected automatically)You will need to check and select the correct Date / Time when the batteries have beenremoved for a period longer than 1 hour.INFORMATIONYou can select 16 languages. These are listed below: English, Korean, French, German, Spanish, Italian, S. Chinese, T. Chinese, Japanese,Russian, Portuguese, Dutch, Danish, Swedish, Finnish, Thai, and Malaysian.Even if the camera is restarted, the language setting will be maintained.INFORMATIONSetting up the language1. Select the [LANGUAGE] menu by pressing theUP/DOWN button and press the RIGHT button.2. Select the desired sub menu by pressing the UP/ DOWNbutton and press the OK button. When the settings arecomplete, press the MENU button twice to exit the menuscreen.DATE.TIMELANGUAGESETUPSETUPMOVE: SET:OK04/01/01 12:00YY/MM/DDDATE.TIMELANGUAGEMOVE: SET:OKENGLISHFRANÇAIS](https://usermanual.wiki/Hanwha-Techwin/DIGIMAXU-CA4.User-Manual-1/User-Guide-449713-Page-20.png)
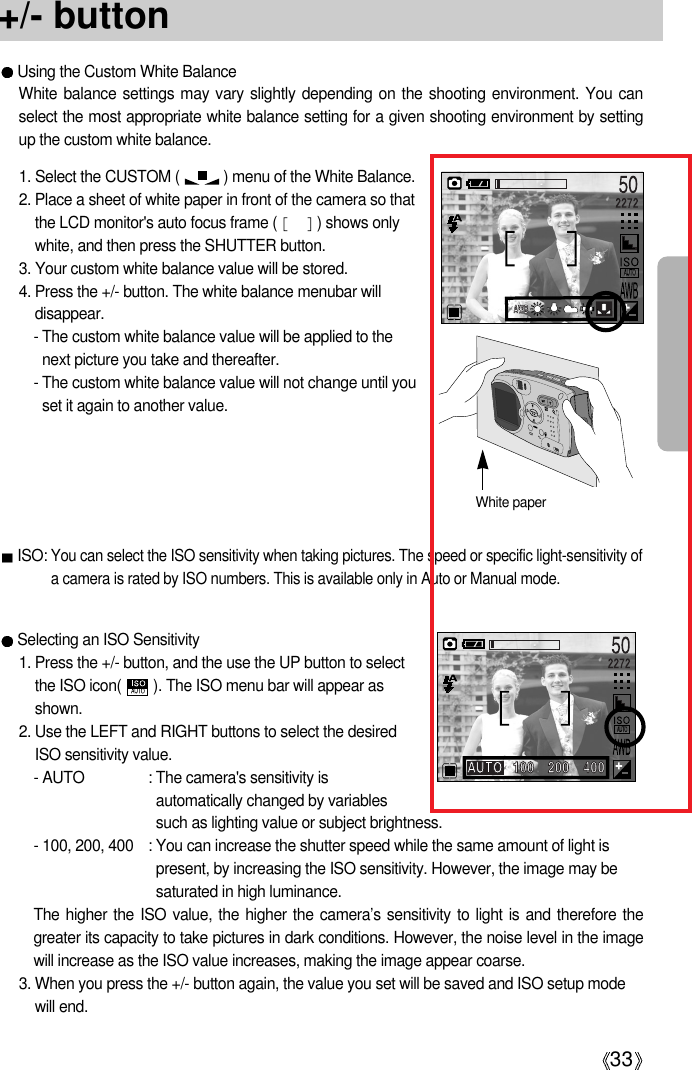
![20LCD monitor indicatorThe LCD monitor displays information about the shooting functions and selections.[ Image & Full Status ]No. Description Icons Page1Batteryp.152Recording modep.12~133Camera shake warningp.234Flashp.295Self-timerp.306 Voice memop.267 Macrop.278 Meteringp.409 Auto focus frame10 Time01:00 PM p.19, 6711 Date2004/07/01 p.19, 6712 Exposure compensationp.3113 White Balancep.32](https://usermanual.wiki/Hanwha-Techwin/DIGIMAXU-CA4.User-Manual-1/User-Guide-449713-Page-21.png)
![21LCD monitor indicatorStarting the recording modeRecording a Movie clip1. Insert the batteries (p.15). Insert the batteries taking note of the polarity (+ / -).2. Insert the memory card (p.18).3. Close the memory card cover.4. Press the power button to turn on the camera.5. Select the MOVIE CLIP( ) mode by sliding the modeswitch.6. Point the camera towards the subject and compose theimage by using either the viewfinder or LCD monitor.7. Press the shutter button to take a movie clip. Press the shutter button once and movie clips arerecorded for as long as the available recording timeallows. Movie clips will still be recorded if the shutterbutton is released. If you wish to stop recording, press theshutter button again. Image size and type are listed below.- Image size : 320X240, 160X120(Selectable)- File type : *.mov (MPEG4)The available recording time may vary depending on shooting conditions and camerasettings.INFORMATION14 ISO p.3315 Sharpnessp.4116 Image qualityp.3917 Image size2272, 2048, 1600, 1024, 640 p.3818Number of available shots remaining50Remaining time( Movie clip/ Voice recording)00:05:00 / 01:00:00 p.2119 Digital Zoom rateX3.0 p.2520 Optical zoom[ MOVIE CLIP mode ]SSTTAANNDDBBYY](https://usermanual.wiki/Hanwha-Techwin/DIGIMAXU-CA4.User-Manual-1/User-Guide-449713-Page-22.png)
![22Starting recording modeRecording a still imageSteps from 1-4 are the same as those for recording a movieclip.5. Select the STILL IMAGE( ) mode by sliding the modeswitch.6. Point the camera towards the subject and compose theimage by using either the viewfinder or LCD monitor.7. Press the shutter button to capture an image.A [DELETE?] message may be displayed after taking apicture. Refer to p.49 for more information about this[DEL. ANSWER].Recording VoiceSteps from 1-4 are the same as those for recording a movieclip.5. Select the VOICE RECORDING( ) mode by slidingthe mode switch.6. Press the shutter button to record a voice.- Press the shutter button once and voice is recorded for aslong as the available recording time(Max : 1 hour) allows. The recording time will be displayed on the LCD monitor.- Voice will still be recorded if the shutter button is released.- If you wish to stop recording, press the shutter button again.- File type : *.wavA distance of 40cm between you and the camera (microphone) is the best distance torecord sound.INFORMATIONManner mode: Pressing the power button for more than 3 seconds changes the buzzerand start-up sound setting to OFF, even though you may have set these to ON. To turn on the startup sound and operation sound, set the startup sound (MyCAMmode) and operation sound (Setup mode) to a submenu other than [OFF].INFORMATION[ STILL IMAGE mode ][ VOICE RECORDING mode ]STANDBYSTART.SHUTTER](https://usermanual.wiki/Hanwha-Techwin/DIGIMAXU-CA4.User-Manual-1/User-Guide-449713-Page-23.png)
![25WIDE / TELE buttonTELE ZoomOptical zoom TELE : Pressing the zoom button T. This will zoom into the subject i.e. thesubject will appear nearer.Digital zoom TELE : When the maximum (3X) optical zoom is selected, pressing the zoombutton T activates the digital zoom software. Releasing zoom button Tstops the digital zooming at the required setting. Once the maximumdigital zoom (3X) is achieved, pressing the zoom button T will have noeffect. You can check the digital zoom rate with the [X1.5 ~ X 3.0]numerical mark next to the zoom bar.[ WIDE zoom ] [ TELE zoom ] [ Digital zoom 2.0X ]Pressing theTELE buttonPressing theTELE buttonWIDE ZoomOptical zoom WIDE : Pressing the zoom button W. This will zoom out from the subjecti.e. the subject will appear further away. Pressing the W buttoncontinuously will set the camera to its minimum zoom setting i.e.the subject appears at its furthest from the camera.Digital zoom WIDE : When the digital zoom is in operation, pressing the zoom buttonW will reduce the digital zooming in steps. Releasing zoom buttonW stops digital zooming. Pressing the W button will reduce thedigital zoom and then it will continue to reduce the optical zoomuntil the minimum setting is reached. [ TELE zoom ] [ Optical zoom 2X ] [ WIDE zoom ]Pressing theWIDE button Pressing theWIDE button[ Digital zoom 3.0X ] [ Digital zoom 2.0X ] [ Optical zoom 3X ]Pressing theWIDE buttonPressing theWIDE buttonOptical zoomDigital zoom](https://usermanual.wiki/Hanwha-Techwin/DIGIMAXU-CA4.User-Manual-1/User-Guide-449713-Page-26.png)
![26WIDE / TELE buttonTo use the digital zoom the LCD monitor has to be turned on.Images taken using the digital zoom may take a little longer for the camera to process.Allow time for this to take place.The digital zoom cannot be used in movie clip shots.Digital Zoom will not work in Night Scene mode. You may notice a decrease in image quality when using the digital zoom.When the maximum(3X) optical zoom is selected, pressing the zoom button Tincreases the digital zoom ratio by 0.5 steps.If the movie clip is being recorded, the zoom operation cannot be activated.Take care not to touch the lens to avoid taking an unclear image and possibly causingcamera malfunction. If the image is dim, turn the camera power off and on again to modify the lens position.Take care not to press the lens as this may cause a camera malfunction.When the camera is turned on, take care not to touch the camera s moving lens partsas this may cause the resulting image to be dim and unclear.Take care not to touch the lens during zoom operation as this may cause damage.INFORMATIONVoice memo( )/ UP buttonWhile the menu is showing, press the UP button to move up the submenu cursor.When the menu is not displayed on the LCD monitor, the UP button operates as the voicememo( ) button. You can add your voice-over to a stored still image.Recording a voice memo1. Select the STILL IMAGE mode by sliding the mode switch.2. Press the VOICE MEMO( ) button. If the voice memo indicator is displayed on the LCDmonitor, the setting is completed.[ Preparing for Voice Memo ] [ Recording Voice Memo ]STOP:SHUTTERREC](https://usermanual.wiki/Hanwha-Techwin/DIGIMAXU-CA4.User-Manual-1/User-Guide-449713-Page-27.png)
![27Voice memo( )/ UP button3. Press the shutter button and take a picture. The picture is stored on the memory card.4. Voice memo will be recorded for ten seconds from the moment the picture is stored. In the middle of the sound recording, pressing the shutter button will stop the voice memo.A distance of 40cm between you and the camera (microphone) is the best distance torecord sound.INFORMATIONAuto : The changed Focus mode will be maintained until the camera is turned off.Manual : The changed Focus mode will be maintained even after the camera is turned off.Night : The MACRO button will not work.When the macro mode is selected, it is possible that camera shake will occur. If this is the case, use a tripod to eliminate this.When the macro mode is selected, it is recommended that you use the LCD monitor tocompose these shots.INFORMATIONMacro( ) / Down button (Focusing)While the menu is showing, press the DOWN button to move from the main menu to asubmenu, or to move down the submenu cursor.When the menu is not showing, you can use the MACRO ( )/DOWN button to take macropictures (within the distance range of 5-80 cm for WIDE and 50-80 cm for TELE) in the STILLIMAGE mode.[ Macro ][ Autofocus ]Pressing theMACRO button](https://usermanual.wiki/Hanwha-Techwin/DIGIMAXU-CA4.User-Manual-1/User-Guide-449713-Page-28.png)
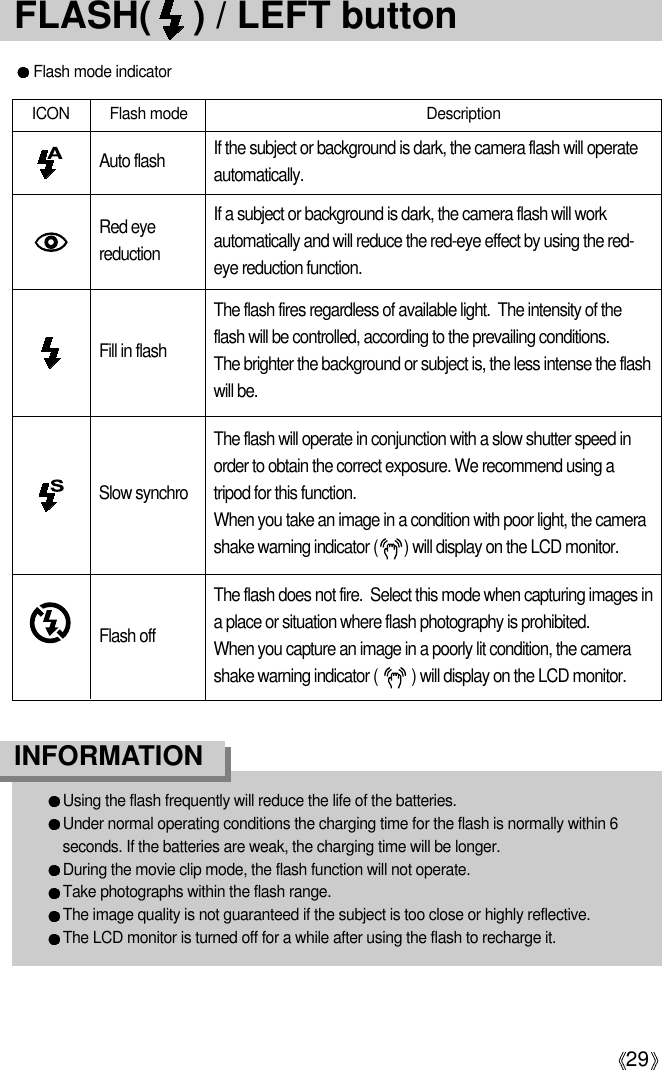
![28Focus lockTo focus on the subject positioned outside of the center, use the focus lock function.Using the Focus Lock1. Ensure the subject in the center of the autofocus frame.2. Press the SHUTTER button halfway. The camera status lamp (green) will light up, indicatingthat the camera is in focus. Be careful not to press the SHUTTER button all the way down toavoid taking an unwanted picture. 3. With the SHUTTER button still pressed down only halfway, move the camera to recompose yourpicture as desired, and then press the SHUTTER button completely to take the picture. If yourelease your finger from the SHUTTER button, the focus lock function will be canceled.[ The image to be captured ] [ Press the SHUTTER buttonhalfway and focus on the subject ] [ Recompose the picture and fullydepress the SHUTTER button ]FLASH( ) / LEFT button[ Selecting the Auto flash ]When the menu is displayed on the LCD monitor, pressingthe LEFT( ) button makes the cursor shift to the left tab.When the menu is not displayed on the LCD monitor, theLEFT( ) button operates as the FLASH ( ) button.Selecting the flash mode1. Slide the mode switch to the STILL IMAGE mode.2. Press the Flash( ) button until the desired flash modeindicator displays on the LCD monitor. 3. A flash mode indicator will be displayed on the LCD monitor. Use the correct flash to suit the environment.WIDE TELE WIDE TELE0.8~3 0.8~2 0.2~0.8 0.5~0.8(Unit : m)Flash rangeISOAUTOMACROAUTO FOCUS](https://usermanual.wiki/Hanwha-Techwin/DIGIMAXU-CA4.User-Manual-1/User-Guide-449713-Page-29.png)
![30Self-timer( ) / Right( ) buttonSelecting the self-timer1. Slide the mode switch to the STILL IMAGE mode.2. Press the SELF-TIMER( ) button until the desiredmode indicator displays on the LCD monitor. A 2 secondself-timer or 10 second self-timer icon appears on theLCD monitor.2SEC self-timer( ): Pressing the shutter button will allow an interval of 2seconds before the image is taken.10SEC self-timer( ): Pressing the shutter button will allow an interval of 10seconds before the image is taken.3. Press the SHUTTER button. The picture will be takenafter the specified time has elapsed.When the menu is displayed on the LCD monitor, pressing the Right button makes the cursorshift to the sub tab.When the menu is not displayed on the LCD monitor, the RIGHT button operates as the Self-timer( ) button. This function is used when the photographer would also like to be in theimage.[ Selecting the 10SEC self-timer ]The default is OFF.When taking a picture using the self-timer, the function lamp works as follows:2 second self-timer setting : The function lamp blinks at 0.25 second interval for 2seconds.10 second self-timer setting : The function lamp blinks at 1 second interval for the first 7seconds. It blinks at 0.25 second interval for the remaining3 seconds.If you operate the Power button, Mode switch, and Self-timer button during the self-timeroperation, the self-timer function is cancelled.Use a tripod to prevent the camera from shaking.INFORMATION](https://usermanual.wiki/Hanwha-Techwin/DIGIMAXU-CA4.User-Manual-1/User-Guide-449713-Page-31.png)
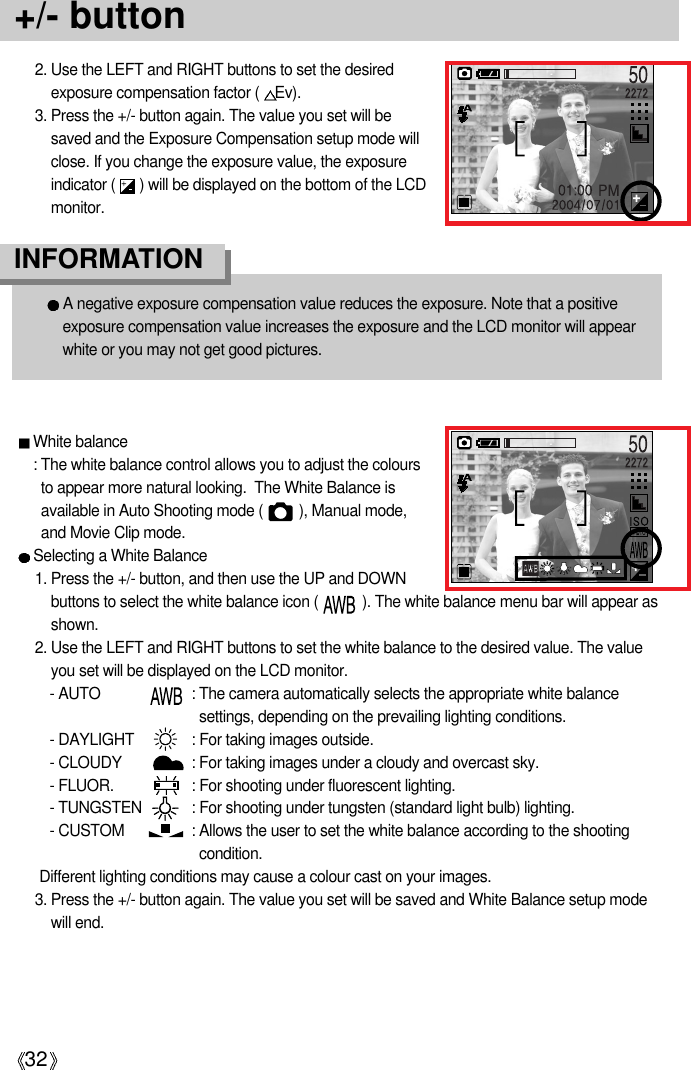
![31MENU/ OK button If the menu is displayed, use the 5-Function buttons ( ///) to change the data valuesand for your changes to be accepted.If the menu is not displayed, press the MENU/OK button to display a menu for the currentcamera mode on the LCD monitor. Press the button again to return to the previous state.Exposure compensation : This camera automatically adjusts the exposure according to the ambient lighting conditions. InAuto or Myset mode, the exposure compensation can be adjusted between -2.0EV and +2.0EV (at0.5EV increment), and in Night mode, you can set the long time shutter. The setting value you haveadjusted in Manual mode will remain unchanged even after the camera is turned off.Compensating Exposure1. Press the +/- button, and then use the UP and DOWNbuttons to select the exposure compensation icon ( ). The exposure compensation menubar will appear asshown.+/- button You can use the +/- button to adjust the values for the exposure compensation, white balance,and ISO.Main menu Sub menu Available camera mode-2.0EV ~ +2.0EV(0.5EV steps)White balanceISOExposure[ Menu on ][ Menu off ]Pressing theMENUbuttonAUTO MANUALNIGHTMODEAUTO](https://usermanual.wiki/Hanwha-Techwin/DIGIMAXU-CA4.User-Manual-1/User-Guide-449713-Page-32.png)
![34+/- button 2) Setting Userset mode1. In Night Shot mode, press the +/- button. A screenappears as shown to the right.2. Use the LEFT and RIGHT buttons to set the shutterspeed. Available shutter speeds are as follows:AUTO, 1/8, 1/4, 1/2, 1, 2, 4, 6, 8, 12, and 16 seconds.Use the UP and DOWN buttons to set the aperture value.Use the UP and DOWN buttons to display the large/smallaperture values to the left of the shutter speed bar.3. Press the +/- button again. The value you set will be saved and the mode will switch to NightShot mode. Press the SHUTTER button to take the picture. Userset mode: This camera automatically adjusts the shutter speed and aperture values to the shootingenvironment. However, in Night Shot mode, you can set the shutter speed and aperturevalues to your preference. Select Night Shot mode, and then press the +/- button. The zoom function does not work while setting up the aperture value and shutter speed.1) Selecting the Night Shot Mode1. Slide the MODE switch to select Still Image mode ( ).2. Press the MENU button.3. Use the LEFT and RIGHT buttons to select the [MODE]menu tab, and then use the UP and DOWN buttons toselect the [NIGHT] menu.4. Press the MENU button. The menu will disappear and themode will switch to Night Shot mode.AUTO MANUALNIGHTMODE](https://usermanual.wiki/Hanwha-Techwin/DIGIMAXU-CA4.User-Manual-1/User-Guide-449713-Page-35.png)
![35+/- button zoom1 zoom2 zoom3 zoom4 zoom5 zoom6 zoom7 zoom85.8 7.5 9.1 10.8 12.4 14.1 15.7 17.42.8 3.1 3.4 3.7 3.9 4.2 4.5 4.85.8 6.4 7.0 7.6 8.2 8.8 9.4 10.0Optical ZoomLargeSmallApertureValueZoom PositionFocusing range(mm)[ Image & full information ] [ Image & basic information ] [ LCD off ]You can check the recording status in the LCD monitor.Pressing the LCD button in the RECORDING (STILLIMAGE, MOVIE CLIP) mode will change the display asshown below.Pressing theLCD buttonPressing theLCD buttonPressing the LCD buttonAperture values that can be selected for each zoom position are as follows:LCD buttonIf the LCD monitor is turned off, the camera status lamp will light up.Aperture ValueLarge (Press the UP button.)Small (Press theDOWN button.)Shutter SpeedFast (Press theLEFT button.)Slow (Press theRIGHT button.)](https://usermanual.wiki/Hanwha-Techwin/DIGIMAXU-CA4.User-Manual-1/User-Guide-449713-Page-36.png)

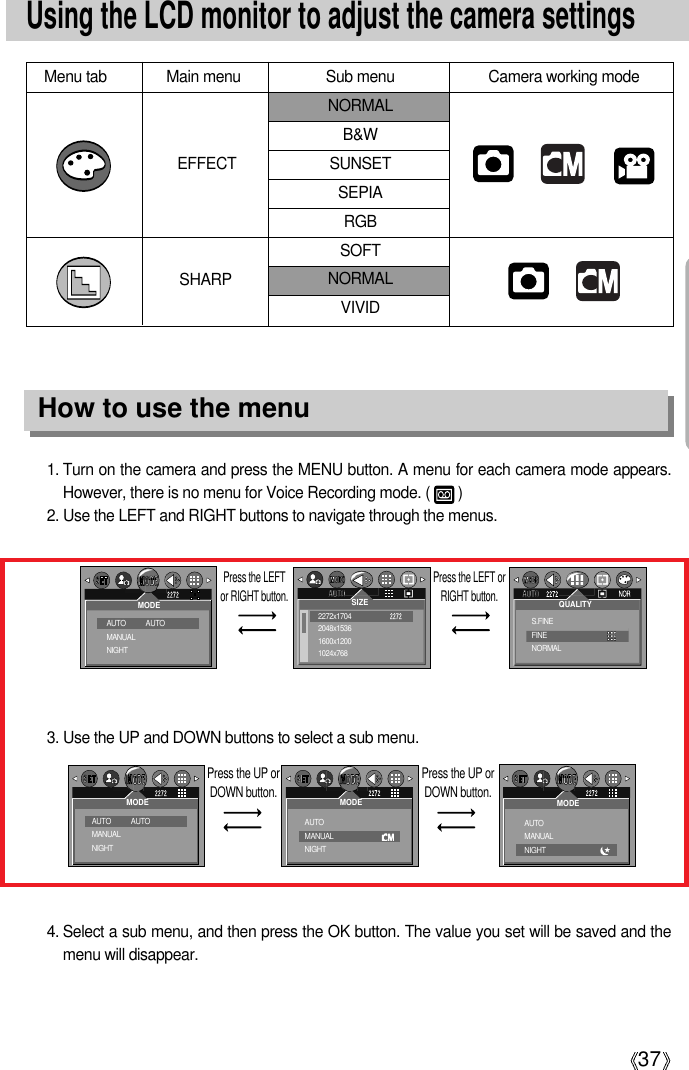
![38ModeAUTO : Use this for shooting basic still images. MANUAL : Use this to store your custom settings forthe camera. Any changes made tosettings other than Self-Timer and VoiceRecording will be saved.NIGHT : Use this for shooting still images at nightor in other dark conditions.You can select the image size appropriate for your application. You can select from AUTO, MANUAL, NIGHT and Movie Clip modes.SizeThe higher the resolution, the lower the number of available shots will be because highresolution images require more memory than lower resolution images.INFORMATION You can select the desired Still Image mode. This is available in Auto, Manual, and Night modes.Mode Icon2272 2048 1600 1024 640Size2272x1704 2048x1536 1600 1200 1024 768 640 480 320 240 160 120STILL IMAGE mode MOVIE CLIP mode320 160[ STILL IMAGE mode ]2272 x 17042048 x 15361600 X 12001024 X 768SIZE[ STILL IMAGE mode ]AUTO MANUALNIGHTMODEAUTO [ MOVIE CLIP mode ]320 X240160X120SIZE](https://usermanual.wiki/Hanwha-Techwin/DIGIMAXU-CA4.User-Manual-1/User-Guide-449713-Page-39.png)
![39Quality You can select the compression ratio appropriate for your application of the captured images.The higher the compression ratio, the lower the picture quality. This is available in Auto,Manual, Night, and Movie clip modesMode IconSub menu S.FINE FINE NORMAL HIGH LOWFile Format jpeg jpeg jpeg mov movSTILL IMAGE mode MOVIE CLIP mode320 160Image Size and Quality for the Number of Images that can be saved in a Memory Card/ShootingTime(When using a 32MB Memory Stick Duo; based on Samsung's own testing)S.FINE is the highest quality and NORMAL is the lowest setting. Choose the settingappropriate for your needs.This file format complies with the DCF(Design rule for Camera File system).Even if the camera should be restarted, the quality setting is maintained.JPEG (Joint Photographic Experts Group): JPEG is the image compression standarddeveloped by the Joint Photographic Experts Group. This type of compression is mostcommonly used for compressing photos and graphics because it can compress the filesefficiently without damaging the data.INFORMATIONSTILL IMAGE mode MOVIE CLIP modeModeQuality/Size2272 2048 1600 1024 640320 240 160 120S.FINE11 14 24 50 120 --FINE22 28 42 77 180 --NORMAL36 42 57 110 240 --HIGH-----4 MIN 8 MINLOW-----7 MIN 12 MIN[ STILL IMAGE mode ]S.FINEFINENORMALQUALITY[ MOVIE CLIP mode ]HIGHLOWQUALITY](https://usermanual.wiki/Hanwha-Techwin/DIGIMAXU-CA4.User-Manual-1/User-Guide-449713-Page-40.png)
![40MeteringIf you cannot obtain suitable exposure conditions, you can change the metering method to takebrighter pictures. This can be set in Auto and Manual modes.MULTI( ) : Exposure will be calculated based on anaverage of the available light in theimage area. However, the calculationwill be biased towards the centre of theimage area. This is suitable for generaluse.SPOT( ) : Only the rectangular area in the centerof the LCD monitor will be metered forlight. This is suitable when the subject in the center is exposed correctly,regardless of the back lighting. The default metering mode is Multi pattern metering.If the subject is not the centre of the focus area, do not use the spot metering as this mayresult in an exposure error. In this circumstance, rather use exposure compensation.INFORMATIONEffect By using the camera’s digital processor, it is possible to add special effects to your images. You can select from AUTO, MANUAL, and Movie Clip modes. The value you set will remainunchanged until the camera is turned off.NORMAL : No effect is added to the image.B & W : Converts the image to black and white.SUNSET : Used for capturing images at sunsetSEPIA : Captured images will be stored in a sepia tone (a gradient of yellowish brown colours).RGB : Allows the user to adjust the R (Red), G (Green), and B (Blue) values of the imagesto be captured.MULTISPOTMETERING[ STILL IMAGE mode ]NORMALB & WSUNSETSEPIAEFFECT[ MOVIE CLIP mode ]NORMALB & WSUNSETSEPIAEFFECT](https://usermanual.wiki/Hanwha-Techwin/DIGIMAXU-CA4.User-Manual-1/User-Guide-449713-Page-41.png)
![41Effect SharpnessYou can adjust the sharpness of the picture you want to take.You cannot check the sharpness effect on the LCD monitorbefore you take a picture, because this function is applied onlywhen the captured image is stored on the memory. You canselect from AUTO and MANUAL modes. Sub menu Icon Description The edges of the image are softened. This effect is suitable for editing images on your PC.The edges of the image are sharp. This is suitable for printing.The edges of the image are emphasized. The edges willappear sharp, but noise may occur in the recorded image.Setting RGB Values1. Use the DOWN button to select [RGB] among the Effectsubmenus, and then press the OK button. A screen thatlooks like the one shown on the right will appear.2. Use the UP and DOWN buttons to select the [OFF] or[ON] auxiliary menu, and then press the OK button.[OFF] : Select this if you do not want to change the RGBvalues.[ON] : Select this to open a window where you canadjust the RGB values.Use the UP and DOWN buttons to navigate the R, G, andB controls. Use the LEFT and RIGHT buttons to set thevalue for each control. If you press the OK button, yourchanges will be saved and the menu will disappear.VIVIDNORMALSOFT[ STILL IMAGE mode ]SOFTNORMALVIVIDSHARPB & WSUNSETSEPIARGBOFFONEFFECTRGBEXIT:SH1 SET:OK](https://usermanual.wiki/Hanwha-Techwin/DIGIMAXU-CA4.User-Manual-1/User-Guide-449713-Page-42.png)
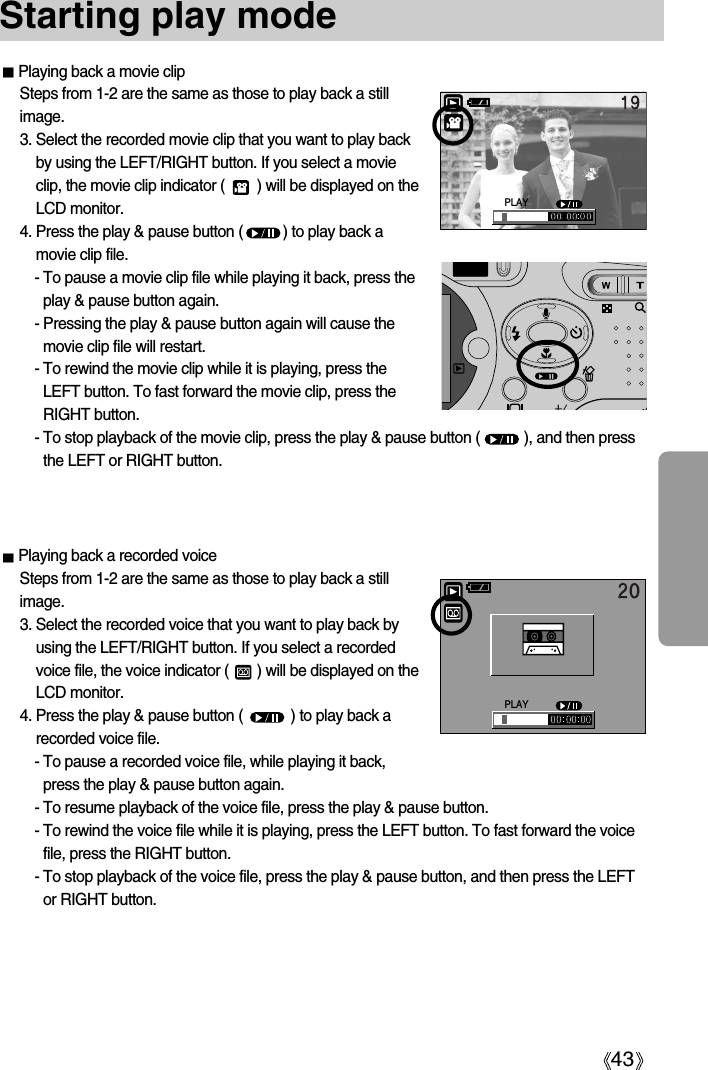
![42Starting play modeTurn the camera on and select Play mode by pressing the play mode button ( ). The camera can now play back the images stored in the memory. If you have turned on the camera by pressing the POWER button, you can press the PLAYbutton once to switch to Play mode and press it again to switch to Recording mode. If you have turned on the camera by pressing the PLAY button, you can press the PLAY buttonagain to turn off the camera. You can set up the PLAY mode function by using the camera buttons and LCD monitor.Playing back a still image1. Select the PLAY mode( ) by pressing theplay mode button.2. The last image stored on the memory isdisplayed on the LCD monitor.3. Select an image that you want to play back bypressing the LEFT / RIGHT button.Press and hold the LEFT or RIGHT button toplay back the images quickly.Manner mode: Pressing the power button for more than 3 seconds changes the buzzerand start-up sound setting to OFF, even though you may have set theseto ON. To turn on the startup sound and operation sound, set the startupsound (MyCAM mode) and operation sound (Setup mode) to a settingother than [OFF].Even if the camera s power is off, you can start the play mode by pressing the playmode button.INFORMATION](https://usermanual.wiki/Hanwha-Techwin/DIGIMAXU-CA4.User-Manual-1/User-Guide-449713-Page-43.png)
![45Using the camera buttons to adjust the cameraIn Play mode, you can use the buttons on the camera to conveniently set up the Play modefunctions.Image enlargement1. Select an image that you want to enlarge and press the enlargement button.2. Different parts of the image can be viewed by pressing the5 function button.3. Pressing the thumbnail button will zoom back to theoriginal full sized image.- You can tell whether the image displayed is an enlargedview by checking the image enlargement indicator shownat the bottom left of the LCD monitor. (If the image is notan enlarged view, the indicator will not be displayed.)You can also check the area of enlargement.- Movie clips and WAV files can’t be enlarged.- If an image is enlarged, a loss of quality may occur.Thumbnail( ) / Enlargement( ) button [ Normal display mode ]Pressing the thumbnailbutton( )Pressing the enlargementbutton( )Highlighted imageYou can view multiple pictures, enlarge a selected picture, and crop and save a selected areaof an image.Thumbnail display1. While an image is displayed full screen, press thethumbnail button.2. The thumbnail display will highlight the image that hadbeen showing at the time the thumbnail mode wasselected.3. Press the 5 function button to move to a desired image.4. To view an image separately, press the enlargementbutton ( ).[ Thumbnail display mode ]](https://usermanual.wiki/Hanwha-Techwin/DIGIMAXU-CA4.User-Manual-1/User-Guide-449713-Page-46.png)
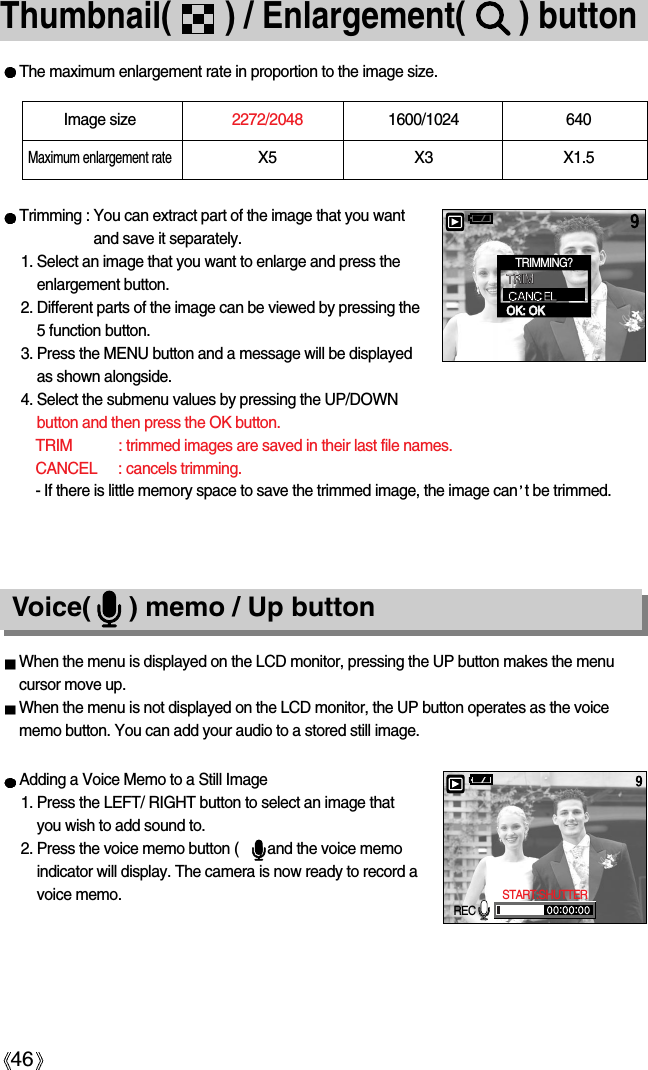
![47Voice( ) memo / Up button3. Press the shutter button to start recording. The [REC]message will be displayed on the LCD monitor (as shown)and voice will be recorded to the still image for 10seconds.4. The recording can be stopped by pressing the shutterbutton again.5. The ( ) icon will be displayed on the LCD monitor aftervoice memo recording has finished. - Voice memos can’t be recorded onto movie clip files.- A distance of 40cm between you and the camera(microphone) is the best distance to record sound.- The voice memo will be saved in *.wav format, but hasthe same file name as the still image to which itcorresponds.- If you add a new voice memo to the still image thatalready has a voice memo, the existing voice memo will be erased.Play & Pause( )/ Down buttonIn Play mode, the play & pause/ down button works as follows:- If the menu is displayedPress the DOWN button to move from the main menu to a sub menu, or to move down thesub menu cursor.- If a still image with a voice memo, a voice file, or a movie clip is playingIn Stop mode : Plays a still image with a voice memo, a voice file, or a movie clip.During playback : Temporarily stops playback.In Pause mode : Resumes playback[ Voice recording is stopped ] [ Voice recording is paused ][ Voice file is playing ]PLAY PAUSE PLAYSTOP:SHUTTERREC](https://usermanual.wiki/Hanwha-Techwin/DIGIMAXU-CA4.User-Manual-1/User-Guide-449713-Page-48.png)
![48LEFT / RIGHT/ MENU/ OK buttonLEFT / RIGHT/ MENU/ OK buttons activate the following.- LEFT button : While the menu is showing, press the LEFT button to select the menu tabto the left of the cursor.- RIGHT button : While the menu is showing, press the RIGHT button to select the menutab to the right of the cursor, or to move an auxiliary menu.- MENU button : When you press the MENU button, the play mode menu will be displayedon the LCD monitor. Pressing it again will return the LCD to the initialdisplay.- OK button : When the menu is displayed on the LCD monitor, the OK button is usedfor confirming data that is changed by using the 5 function button.The shooting information will be displayed on the LCDmonitor.The last image stored in the memory is displayed on theLCD monitor by pressing the play mode button.Pressing the LCD button in the PLAY mode will changethe display as shown below. [Image & Icons] [Image &Information] [Image only][ Image & Icons ] [ Image & Information ] [ Image only ]LCD( ) button Pressingthe LCDbuttonPressing the LCD buttonPressingthe LCDbuttonIf you press the LCD button in Thumbnail Display mode, the image to be deleted ( ) will beselected.](https://usermanual.wiki/Hanwha-Techwin/DIGIMAXU-CA4.User-Manual-1/User-Guide-449713-Page-49.png)