Hanwha Techwin SEM3048WN Wireless Video Baby Monitor User Manual
Hanwha Techwin Co., Ltd. Wireless Video Baby Monitor
UserManual.wiki
>
Hanwha Techwin
>
SEM3048WN User Manual
User manual
Navigation menu
Upload a User Manual
Namespaces
Wiki Guide
HTML
PDF
Info
Views
User Manual
Discussion / Help
Navigation
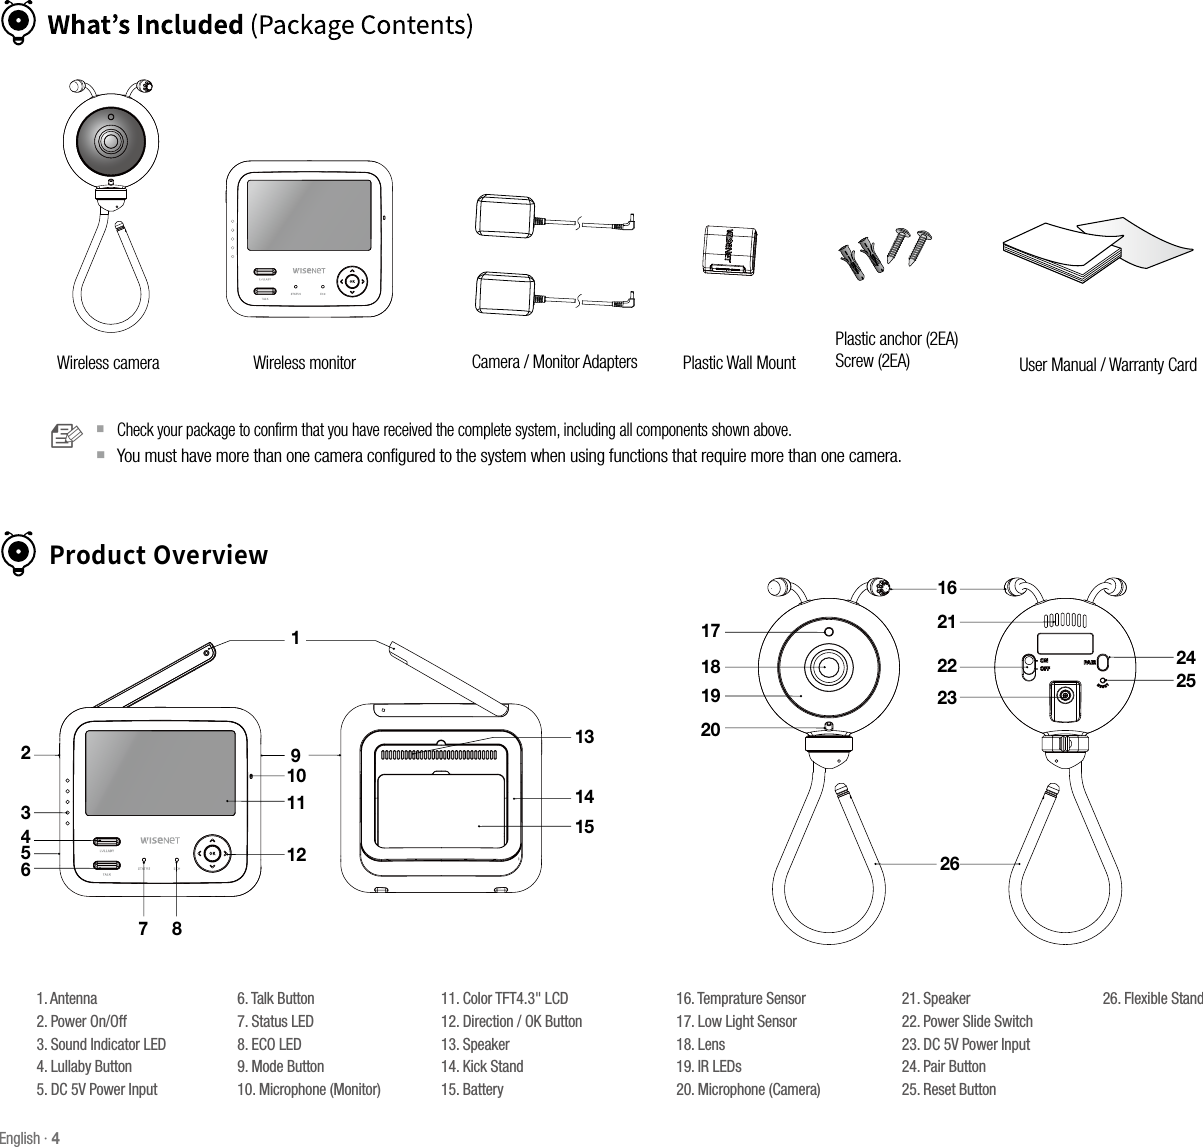
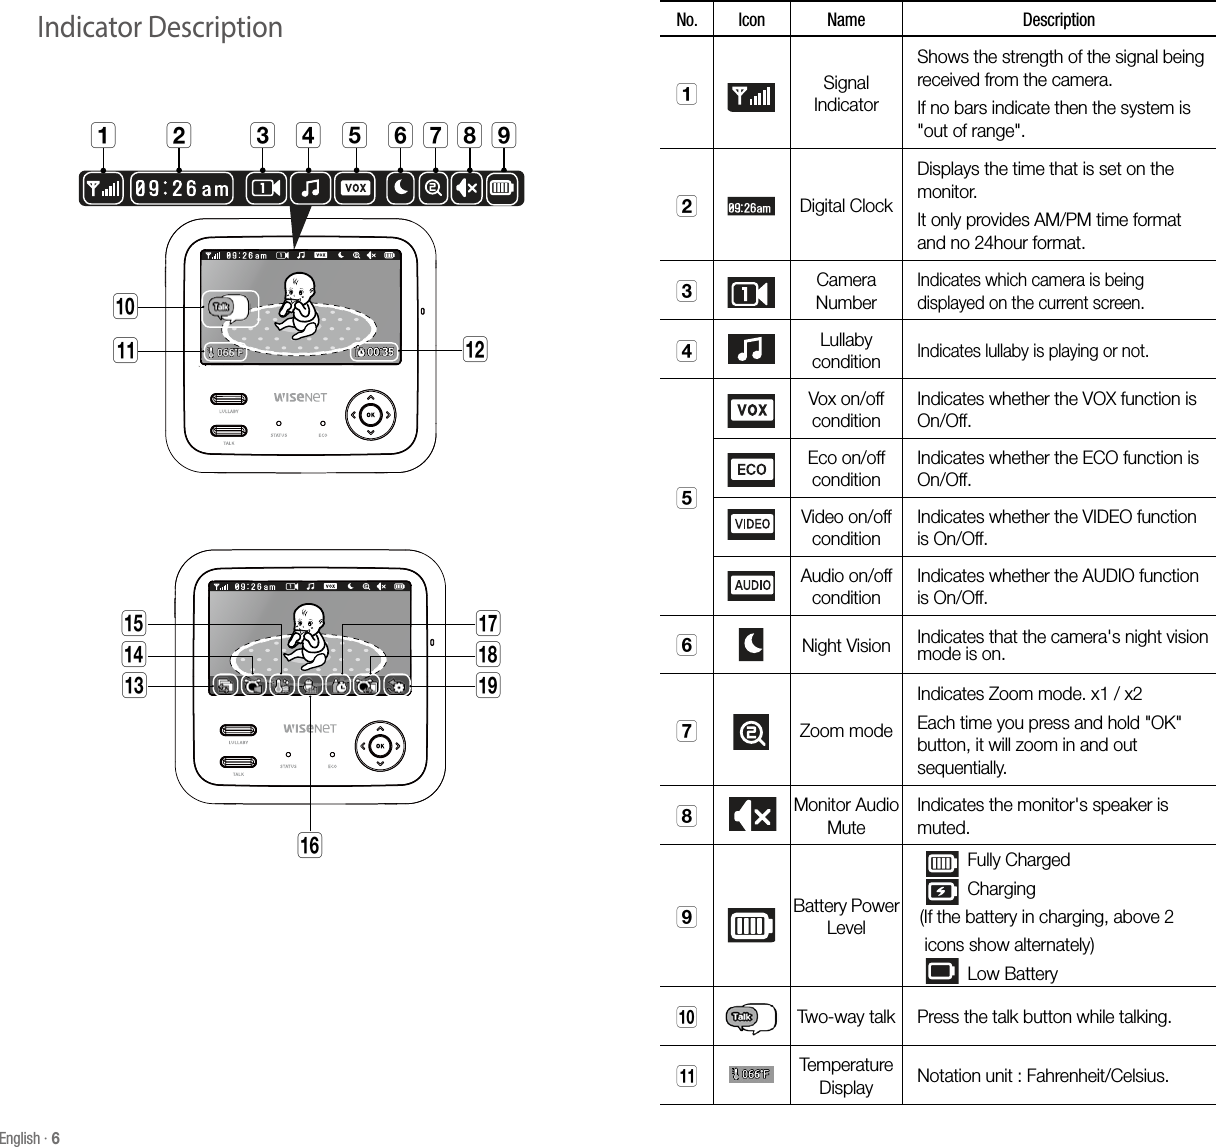
![English · 5Pairing Camera and Monitor The units already come paired for your convenience.The pair button is used to pair additional cameras. Users can assign numbers to the cameras. Up to 4 Cameras may be paired.If you have additional camera, pair your camera as follow: 1. Power on wireless monitor and wireless camera. 2. Press "OK" button to make the settings icon appear on the screen.3. Select [ ] icon.4. Select camera number. The monitor will search for the camera when set to pairing mode. A countdown clock will appear in the middle of the screen and will start counting from 30 to 0.5. Press the [PAIR] button found on the rear of the camera.6. If the monitor successfully pairs with the camera within the 30 seconds, the monitor will automatically switch to the camera's current view. 1. Fully charge the system before use. Camera must be plugged in at all times.2. Push the power button for about 2-3 seconds to turn on the monitor.3. To turn the camera "On", turn on the power switch located on the back of the camera. A red LED indicator will illuminate if it is turned on.Powering Your systemMonitor CameraPAIR n `You can use the monitor while it is charging. `Fully charged time (Monitor - 50 ~ 60min)After opening the box, fully charge the monitor before use. After initial charge, recharge as needed.Getting Started](https://usermanual.wiki/Hanwha-Techwin/SEM3048WN/User-Guide-3654475-Page-5.png)