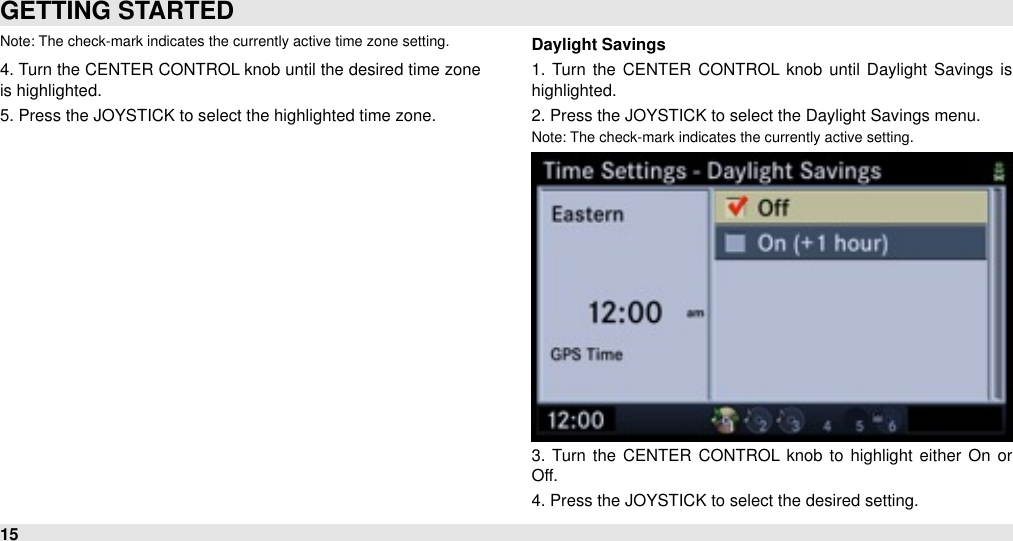
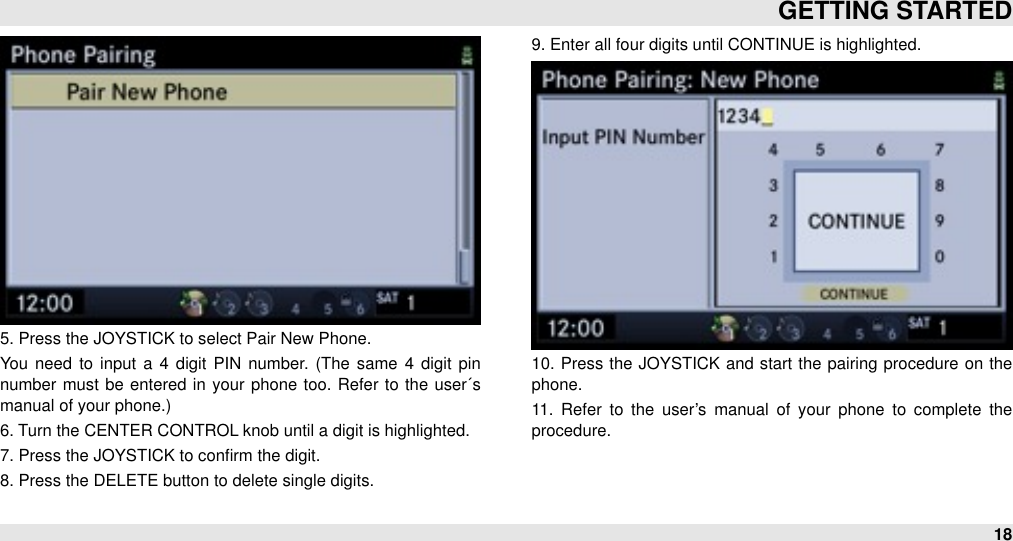
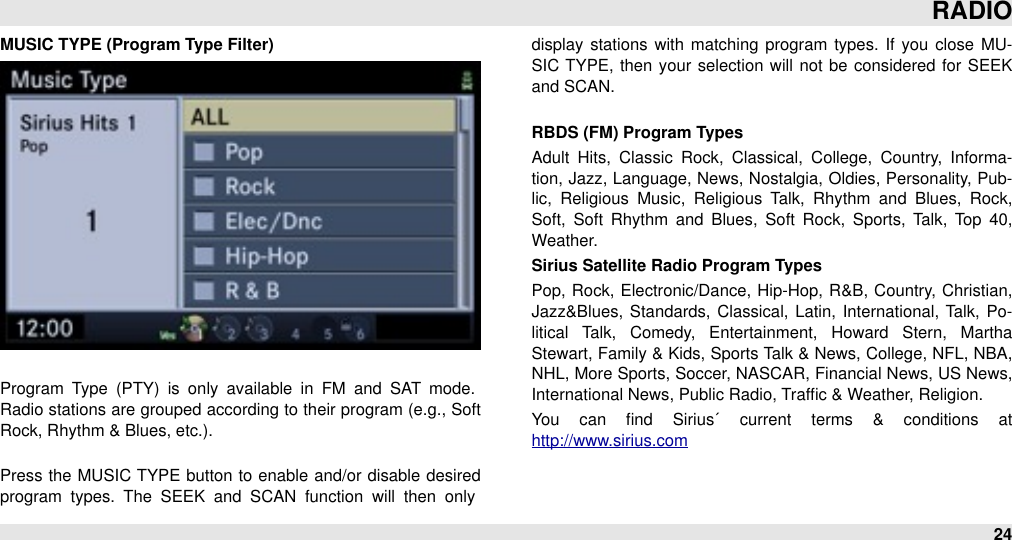
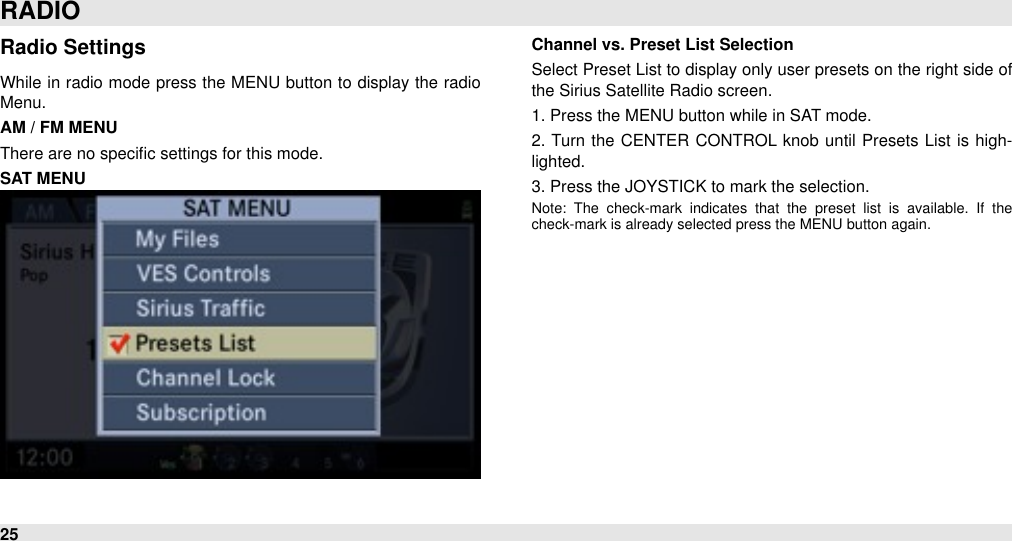
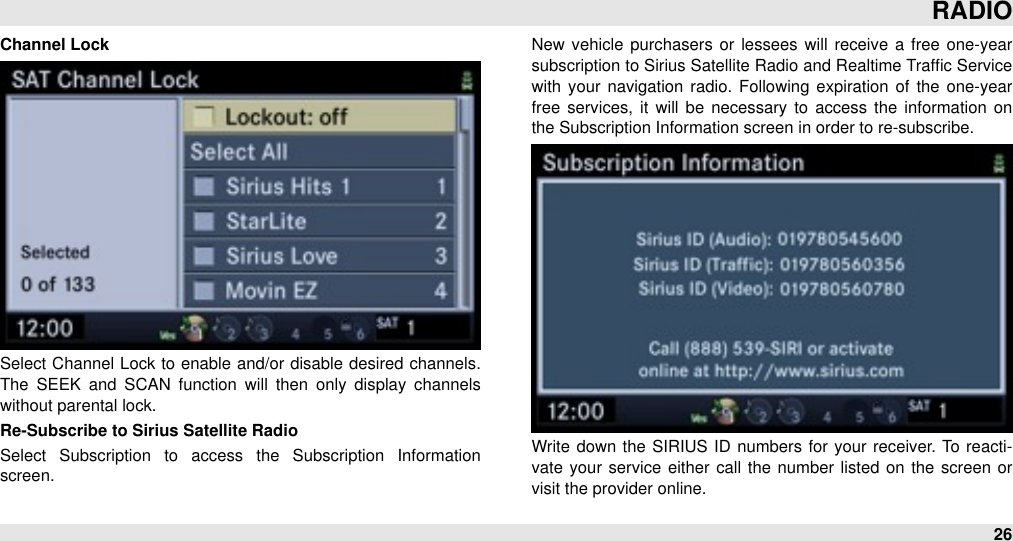
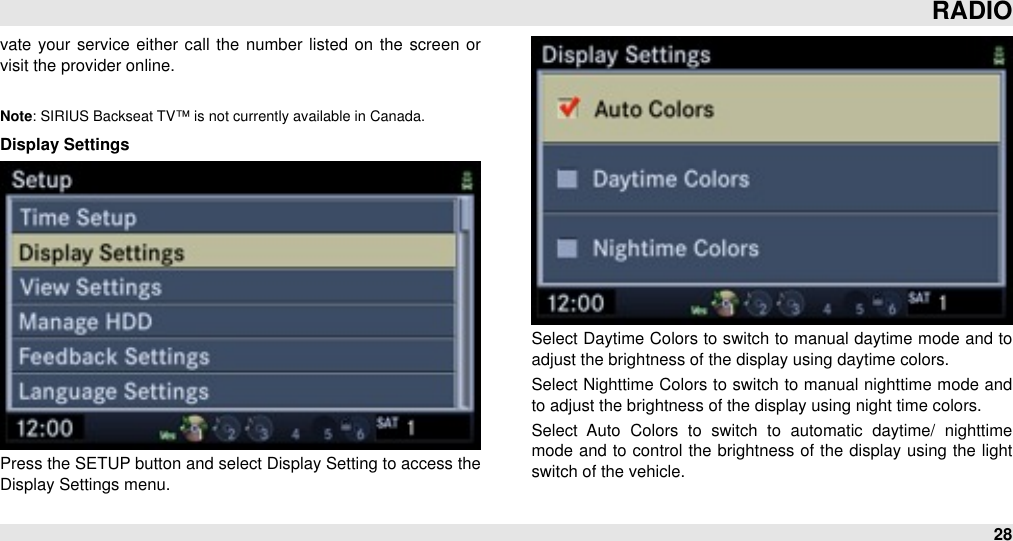
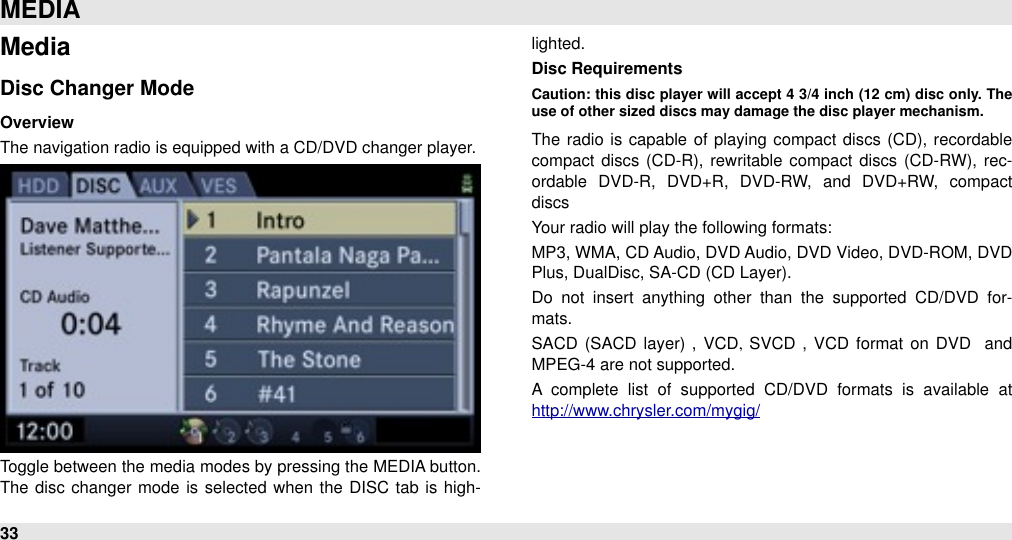
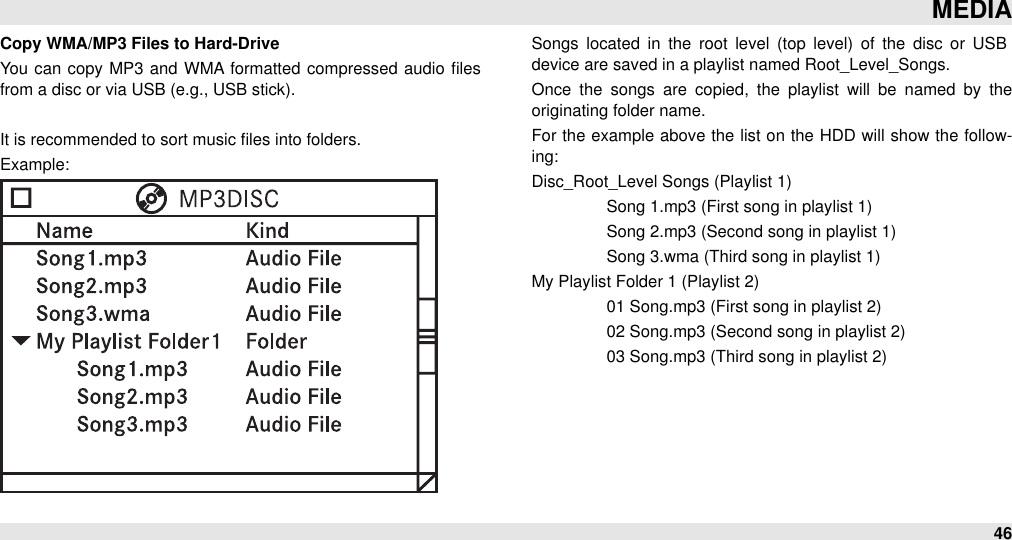
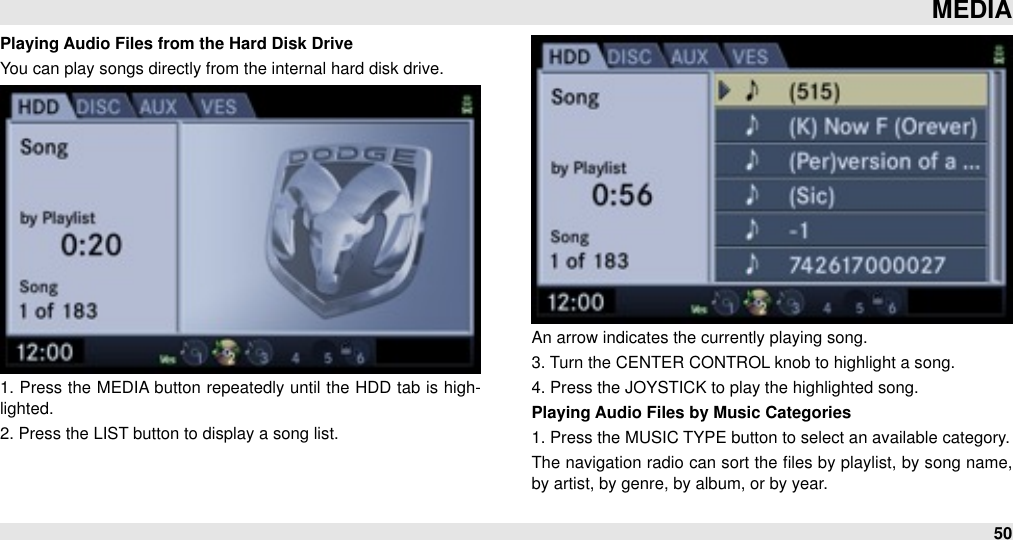
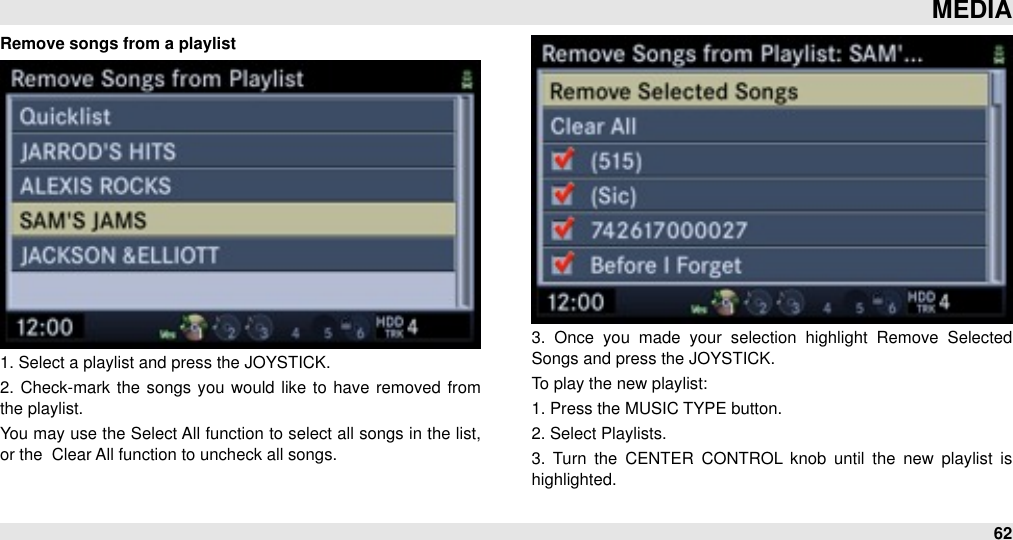
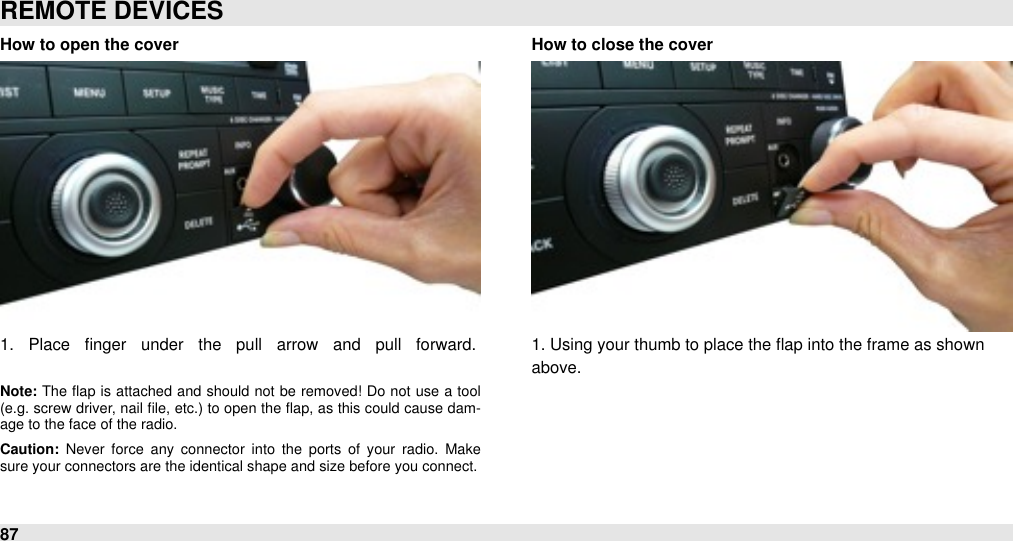
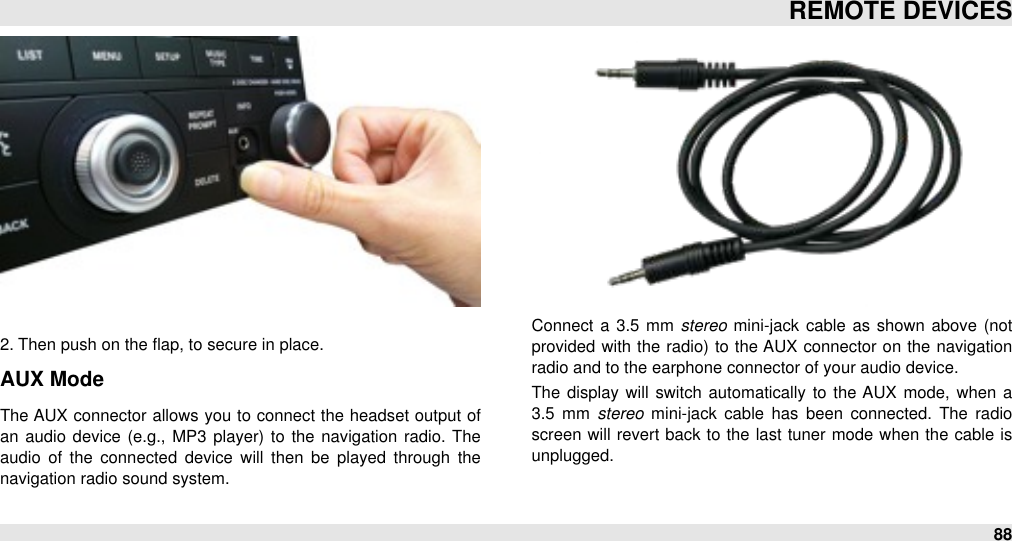
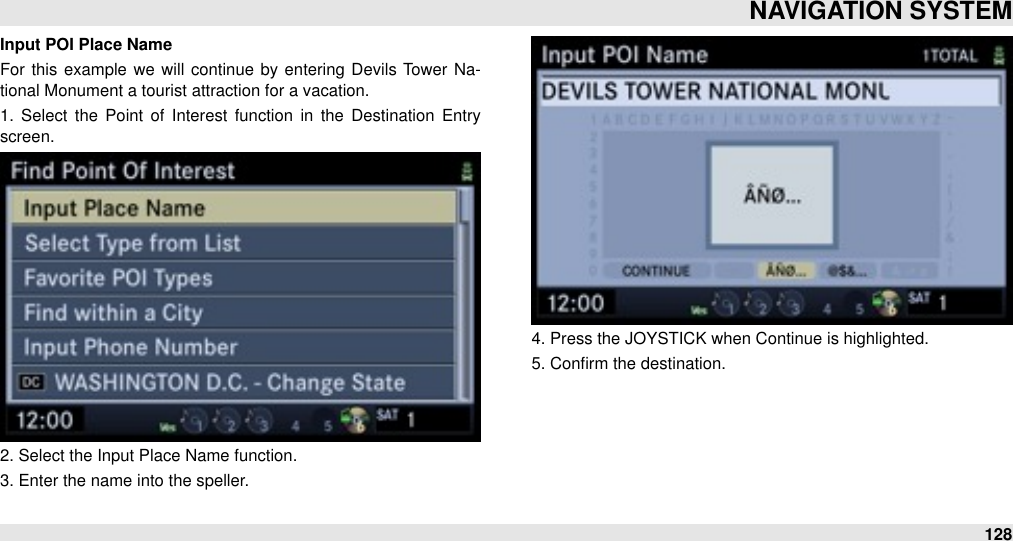
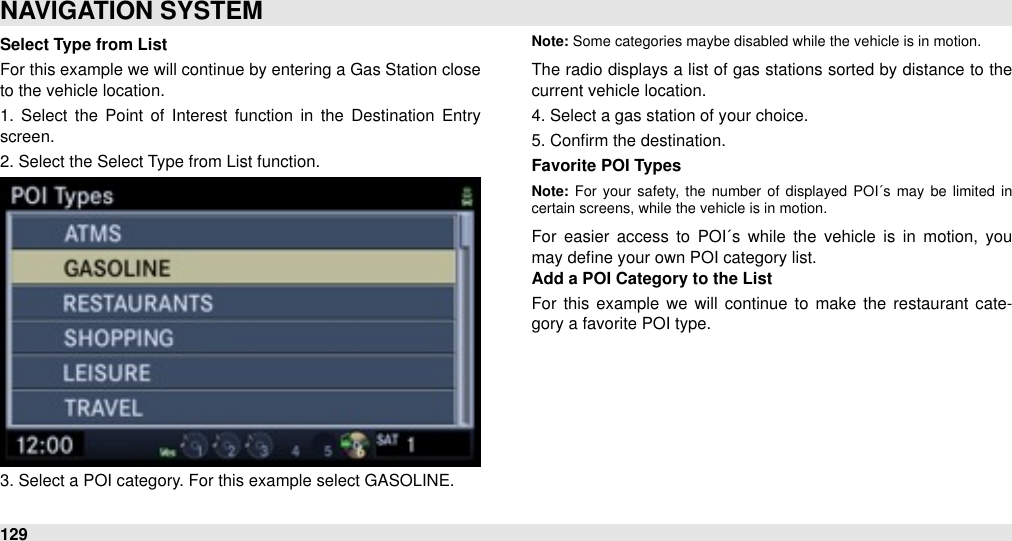
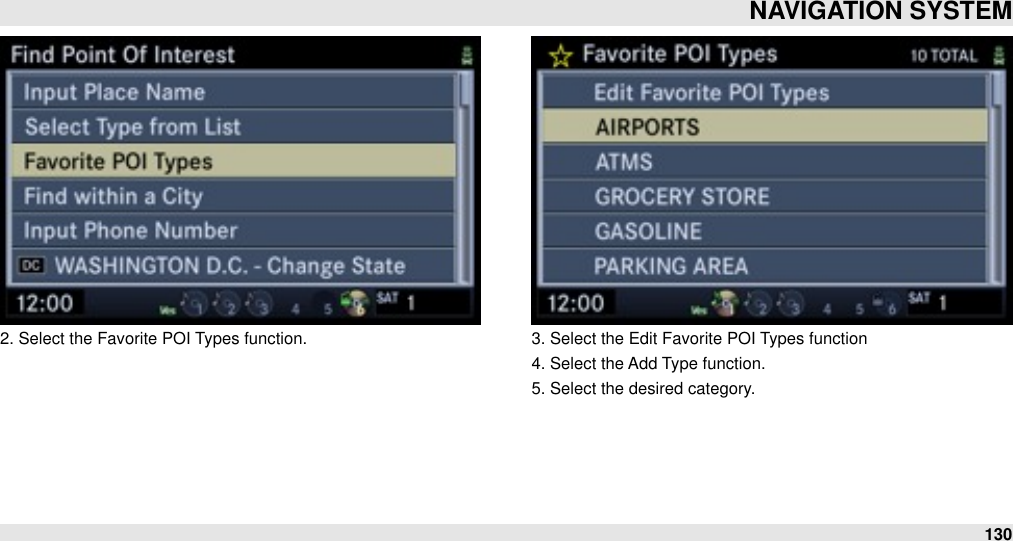
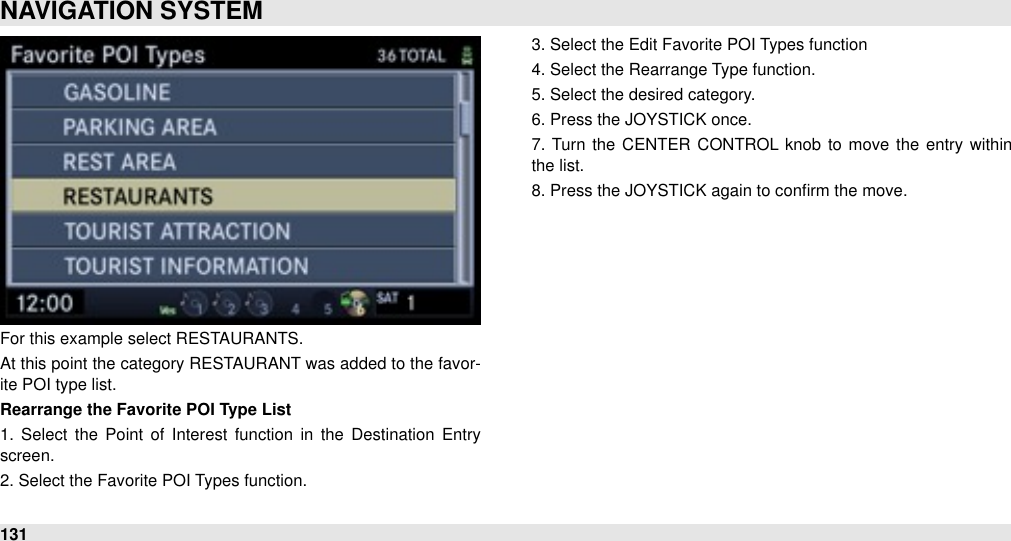
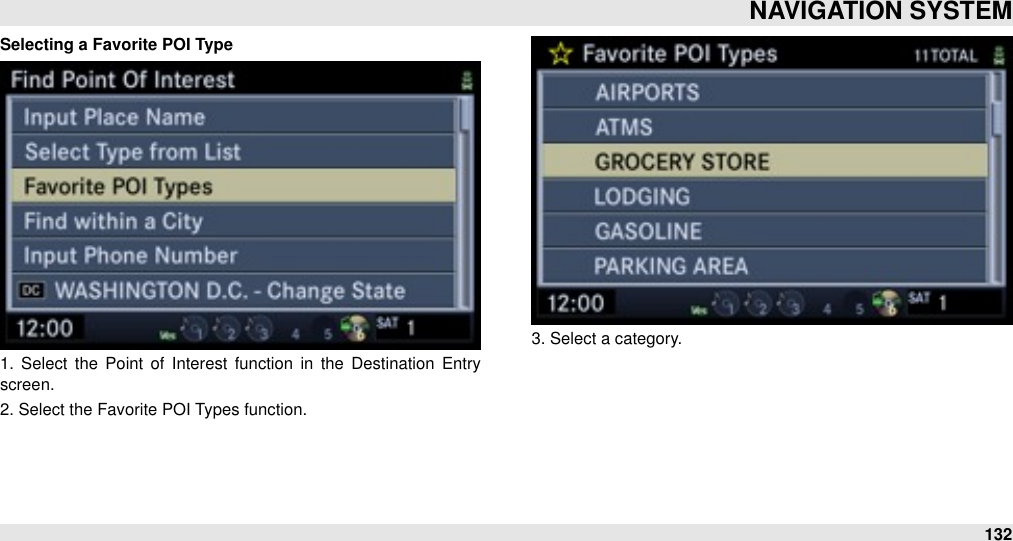
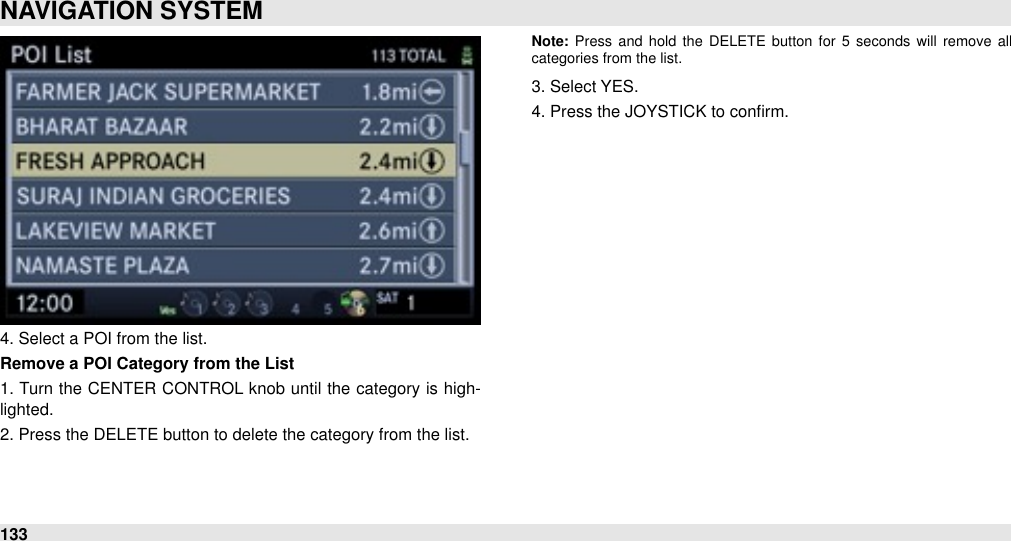
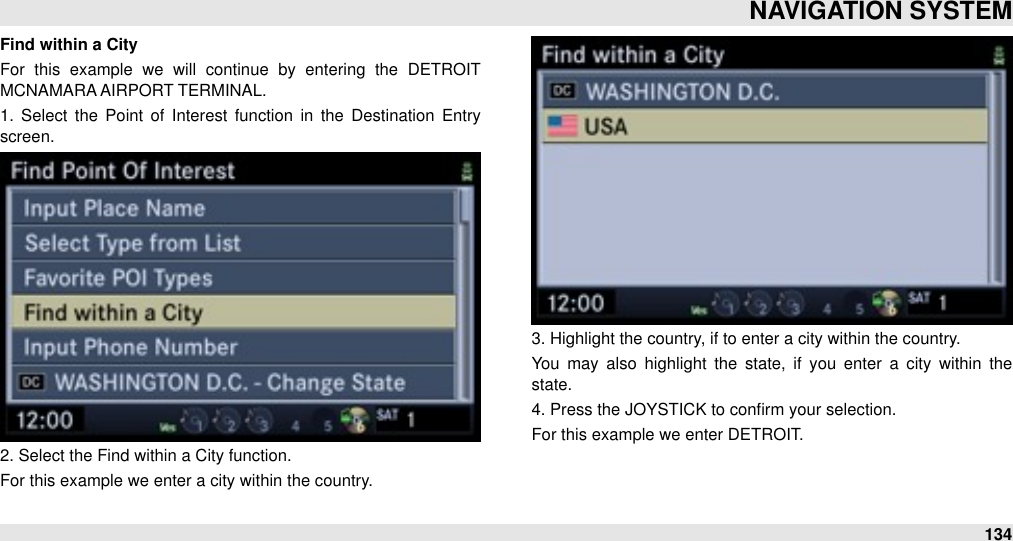
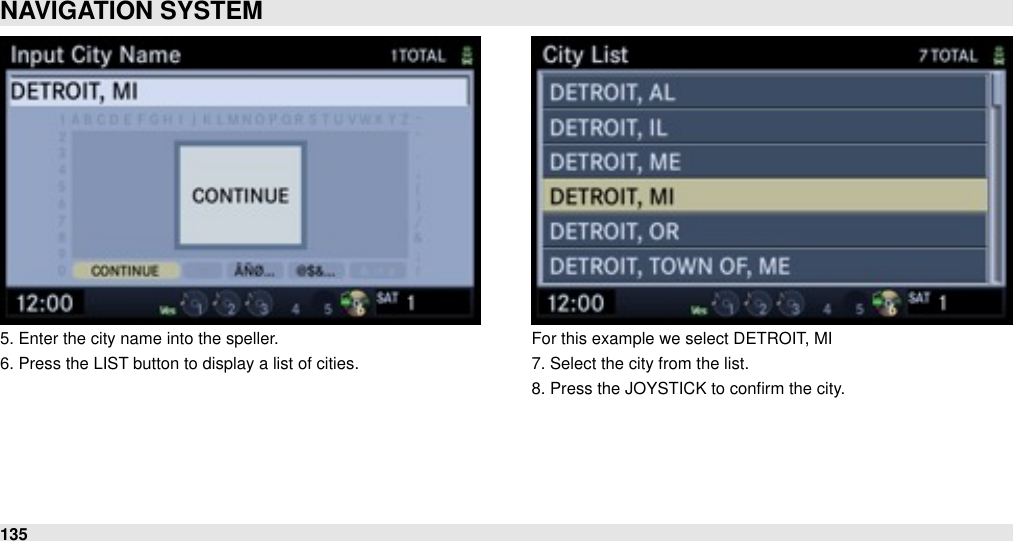
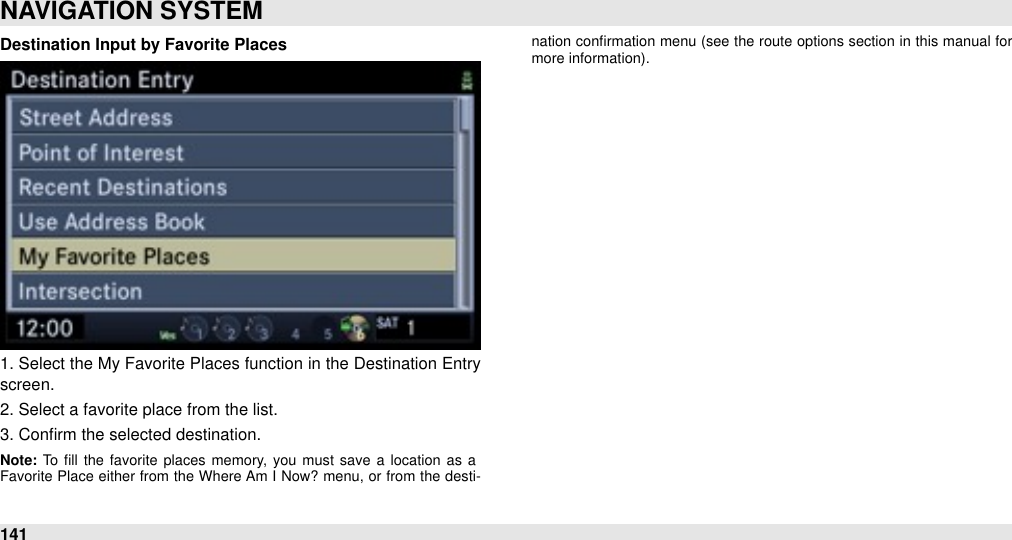
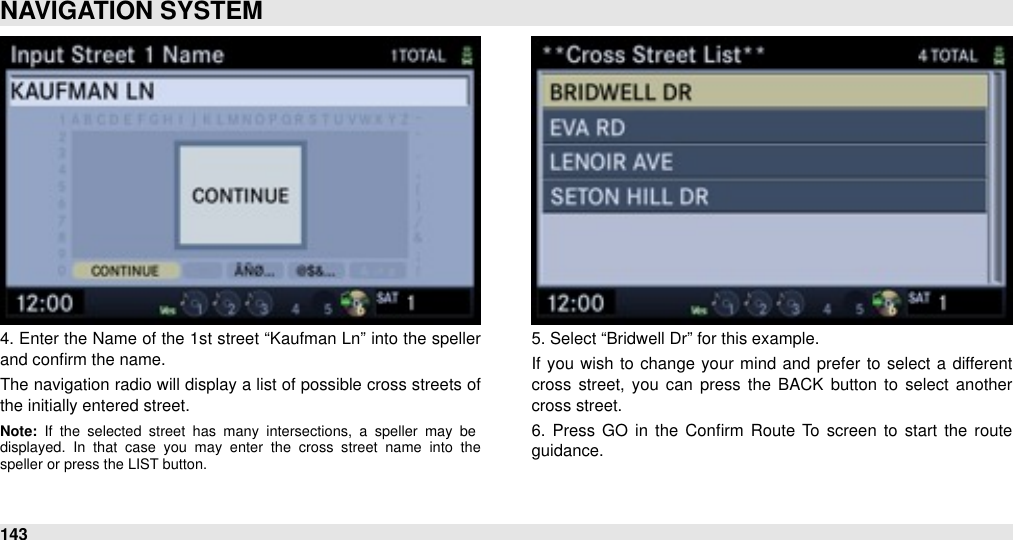
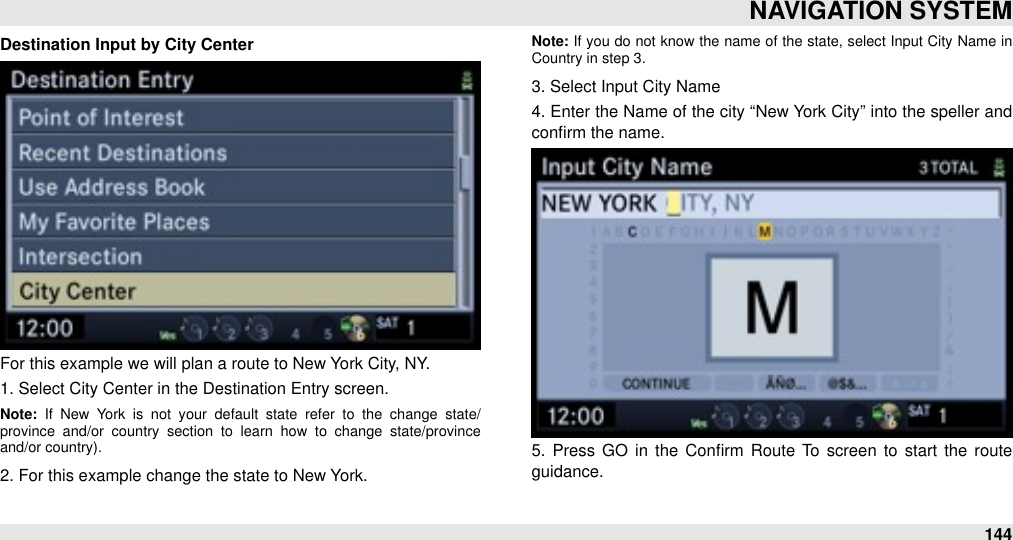
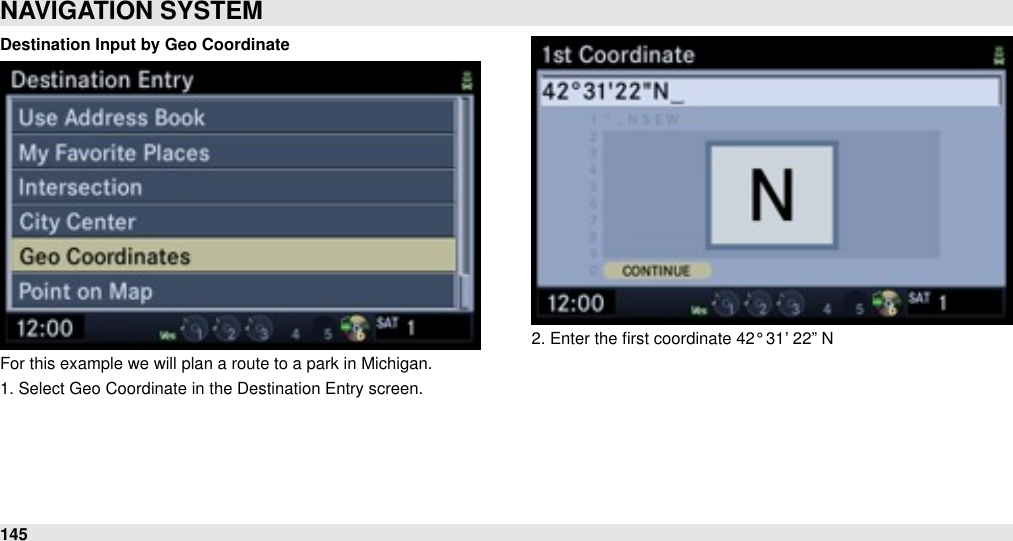
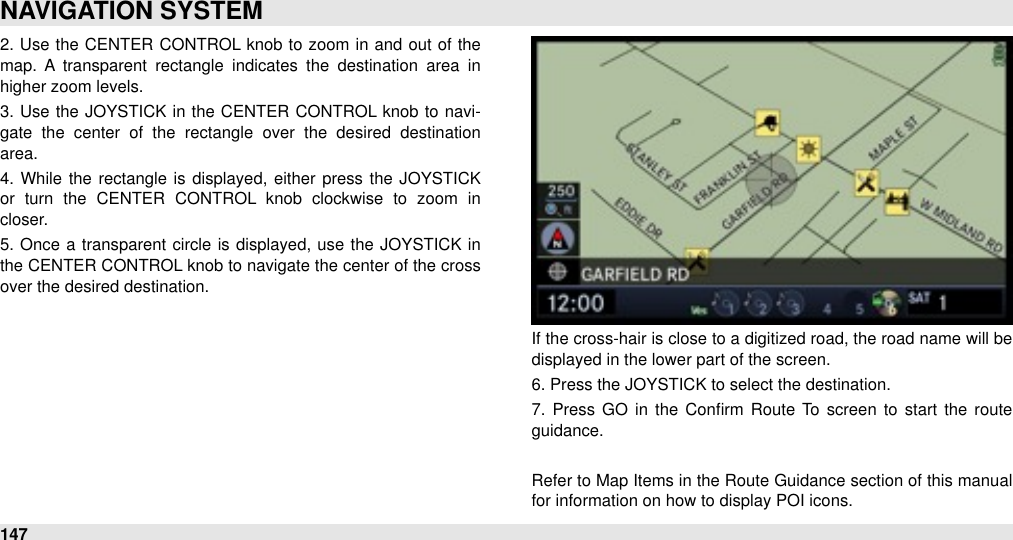
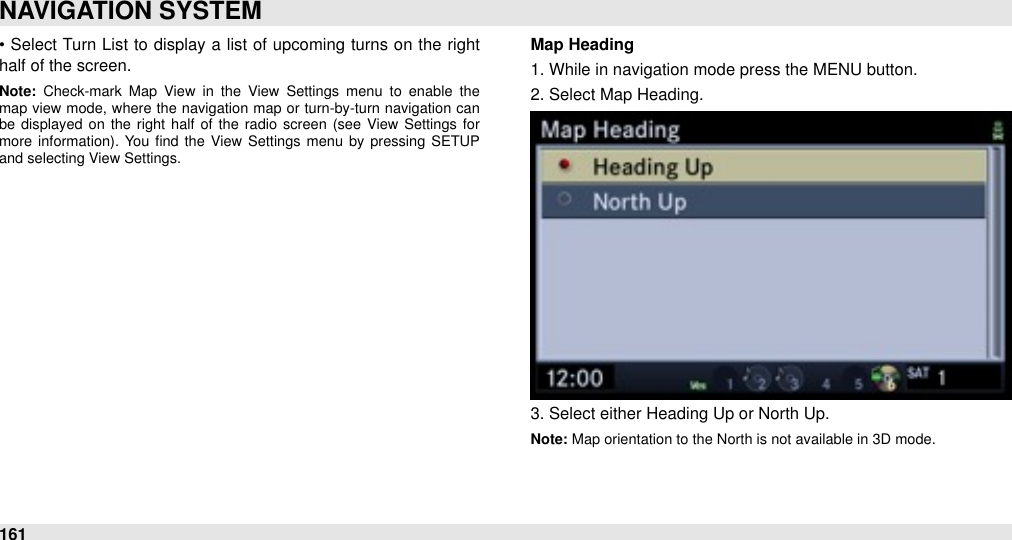
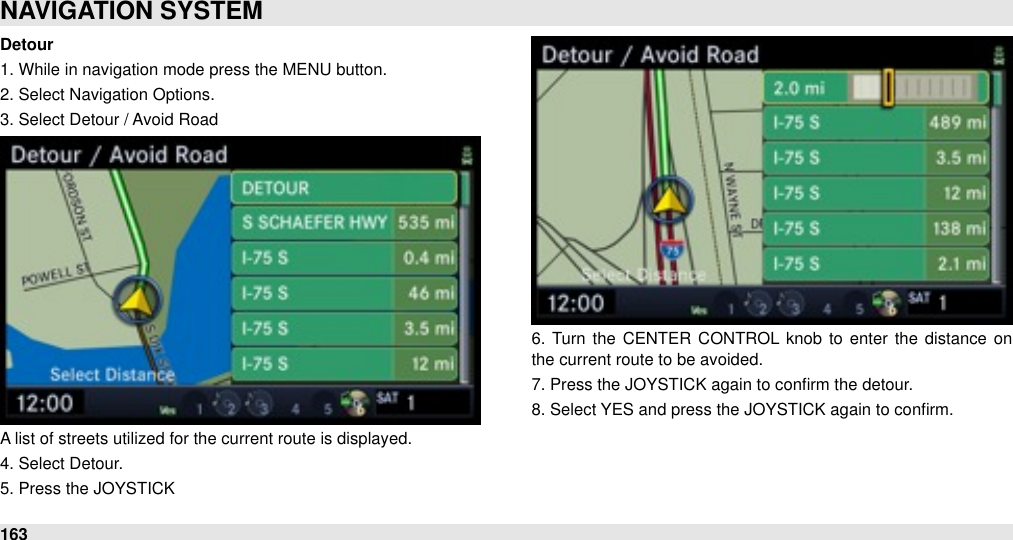
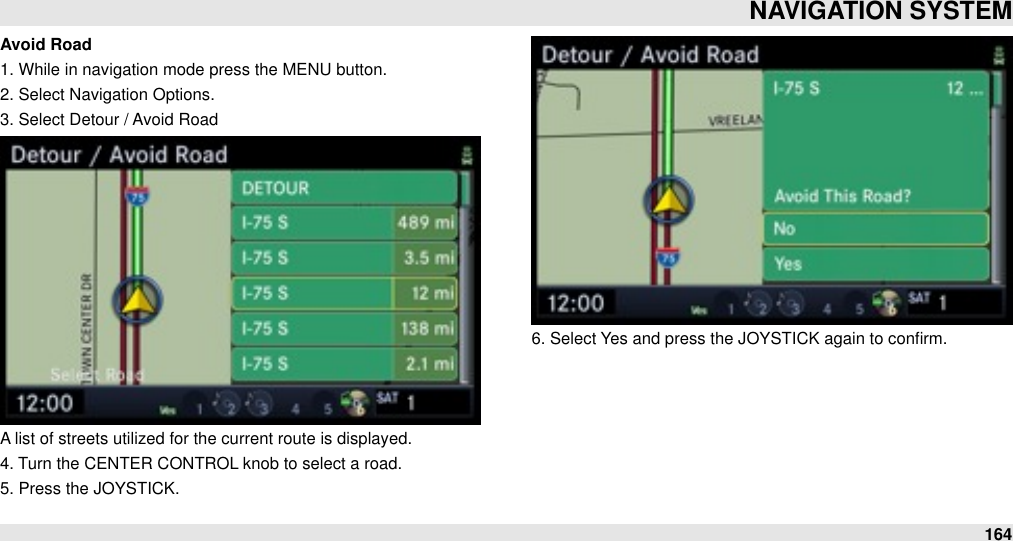
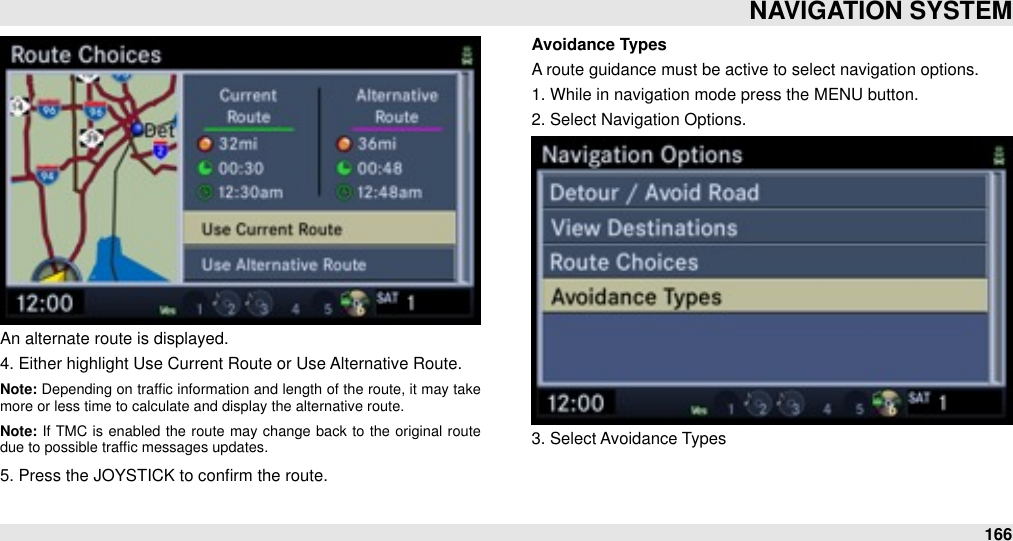
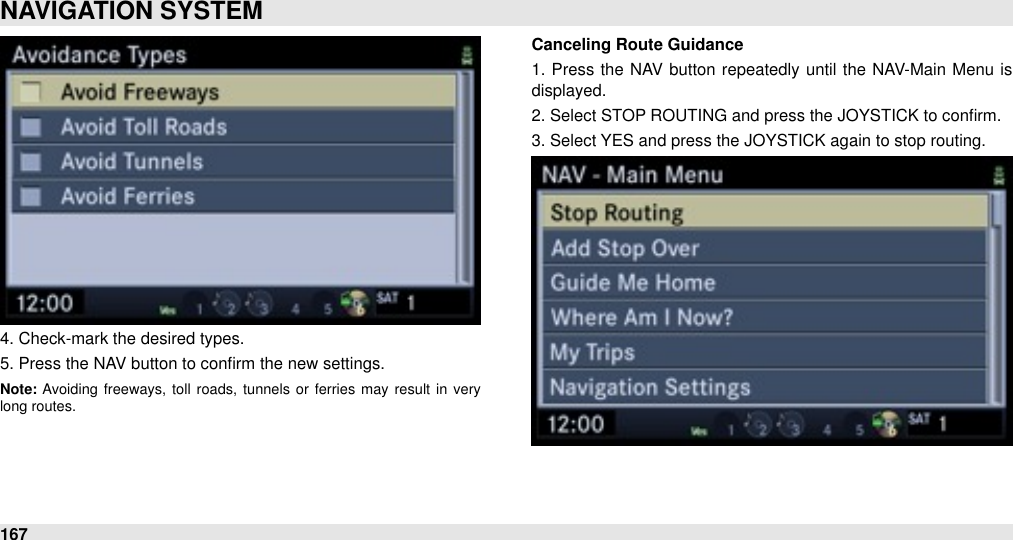
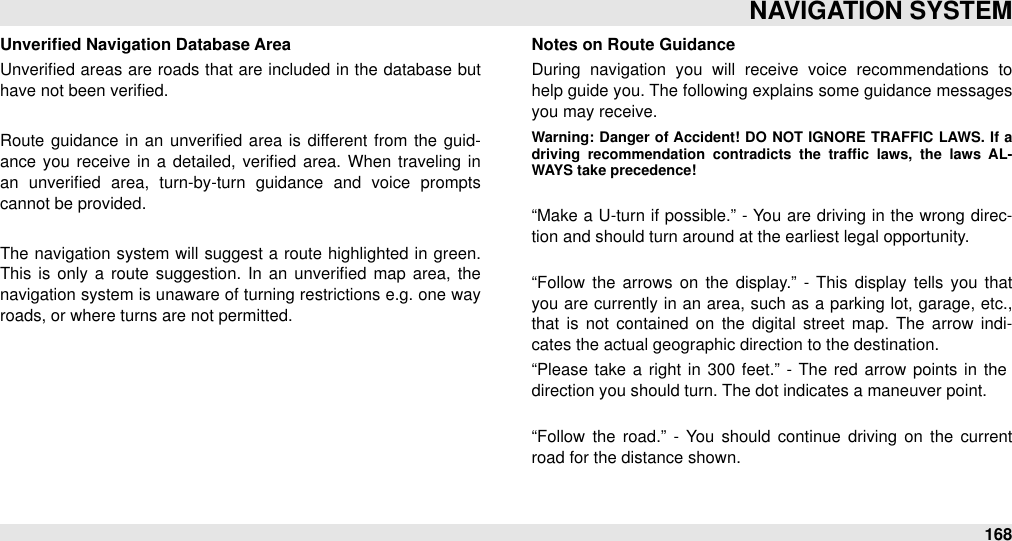
Harman Becker Automotive Systems BE2727 Automotive Infotainment Bluetooth Head Unit User Manual reu08 manual rev13
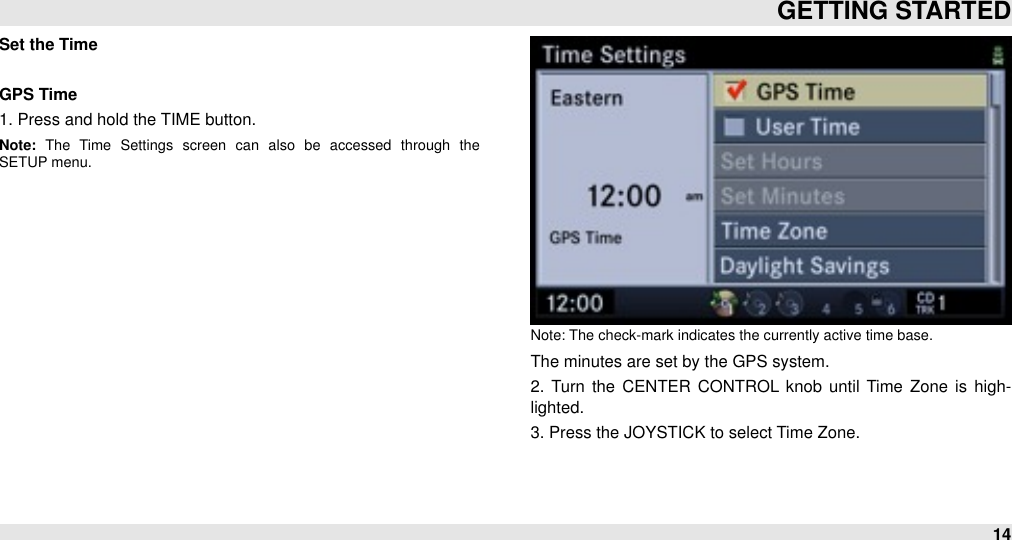
Harman Becker Automotive Systems, Inc. Automotive Infotainment Bluetooth Head Unit reu08 manual rev13
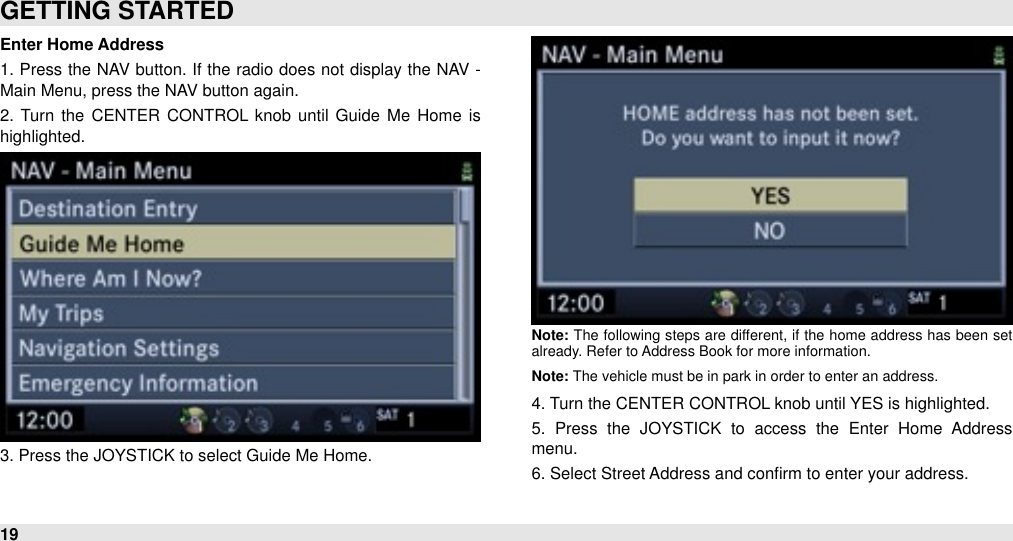
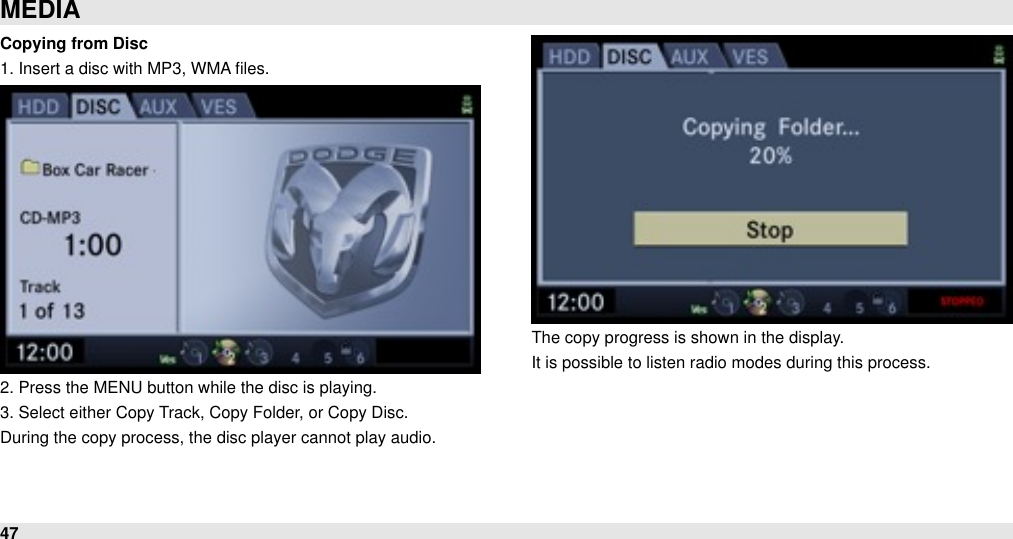
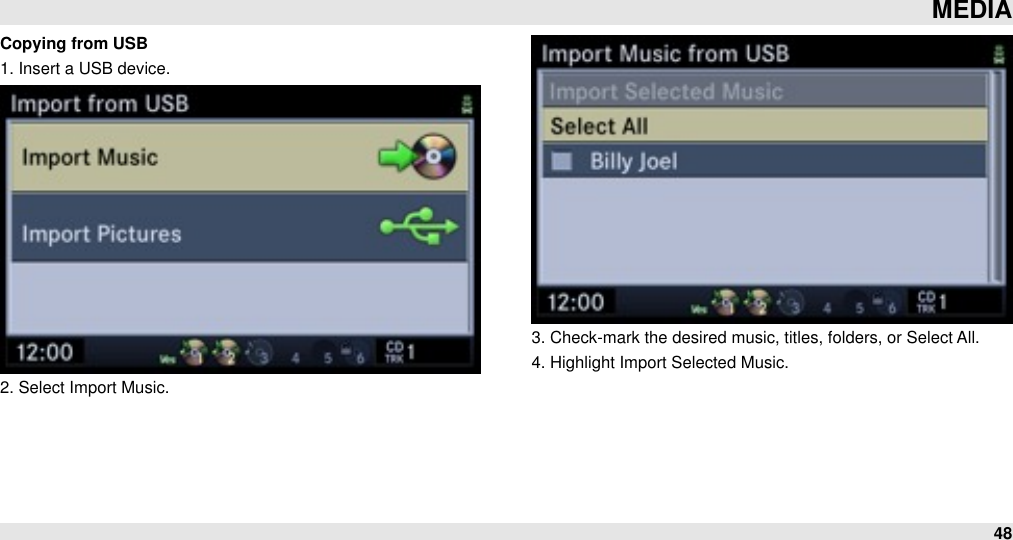
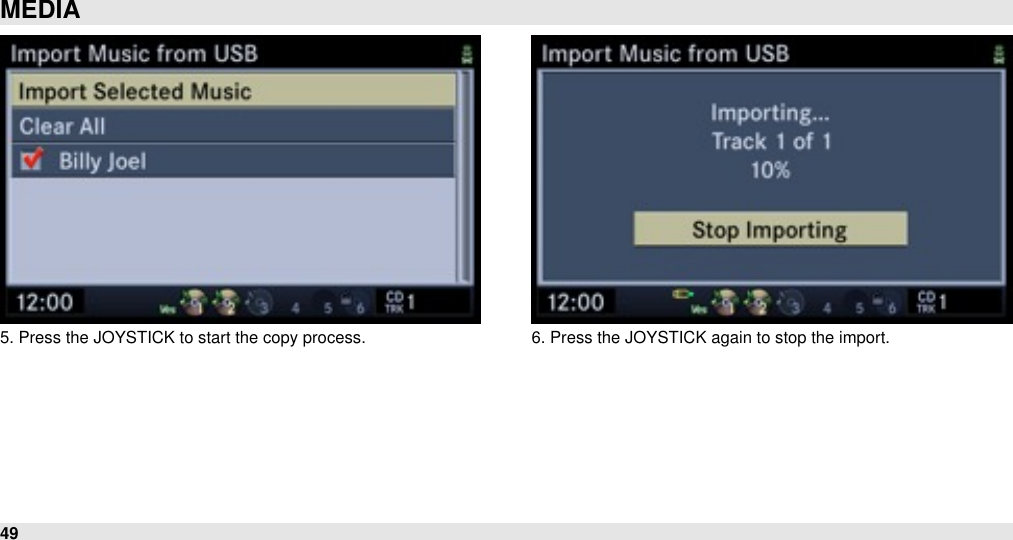
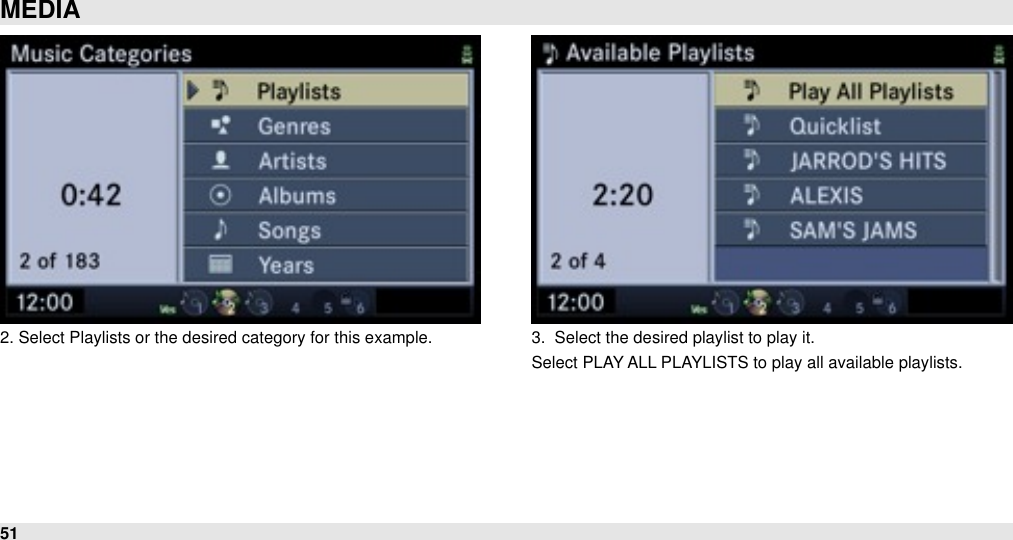
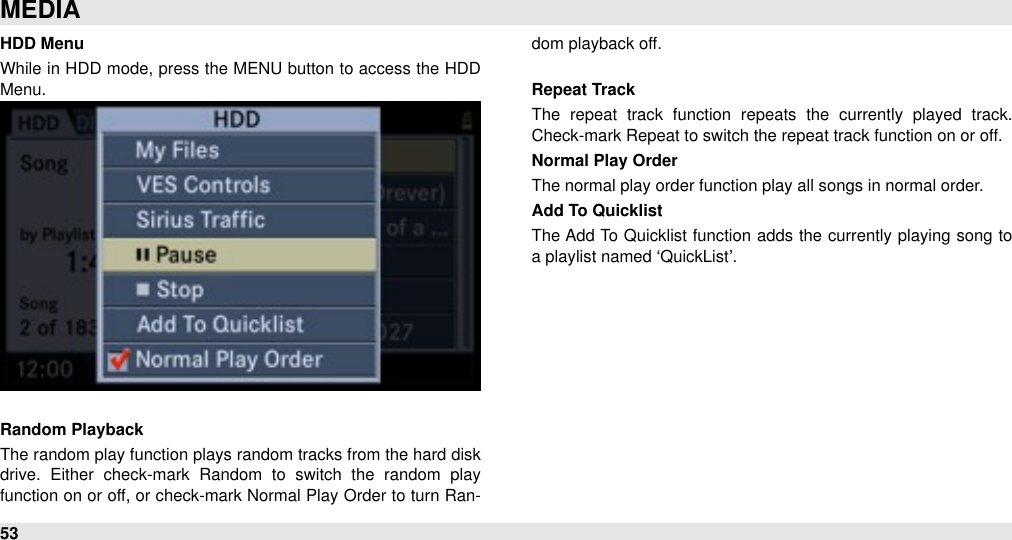
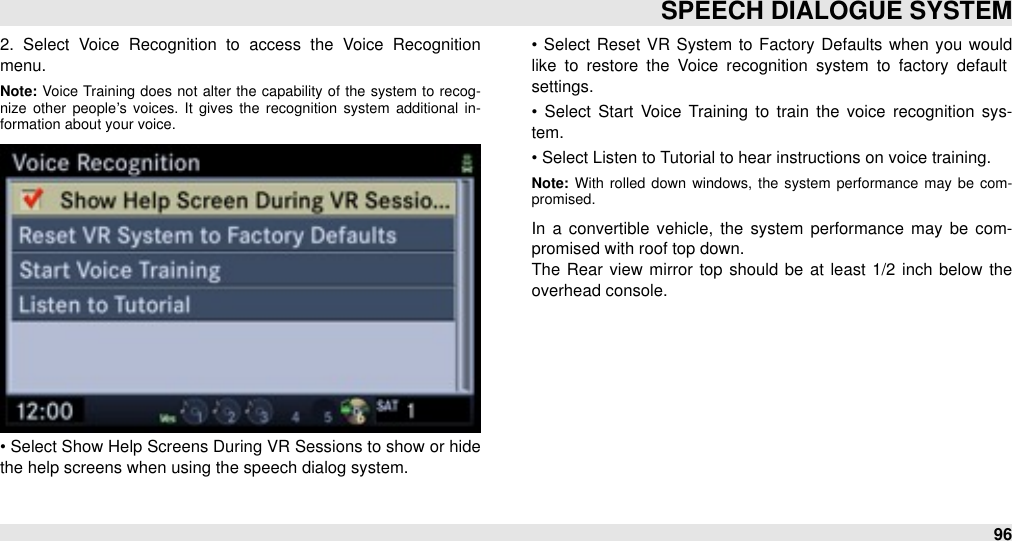
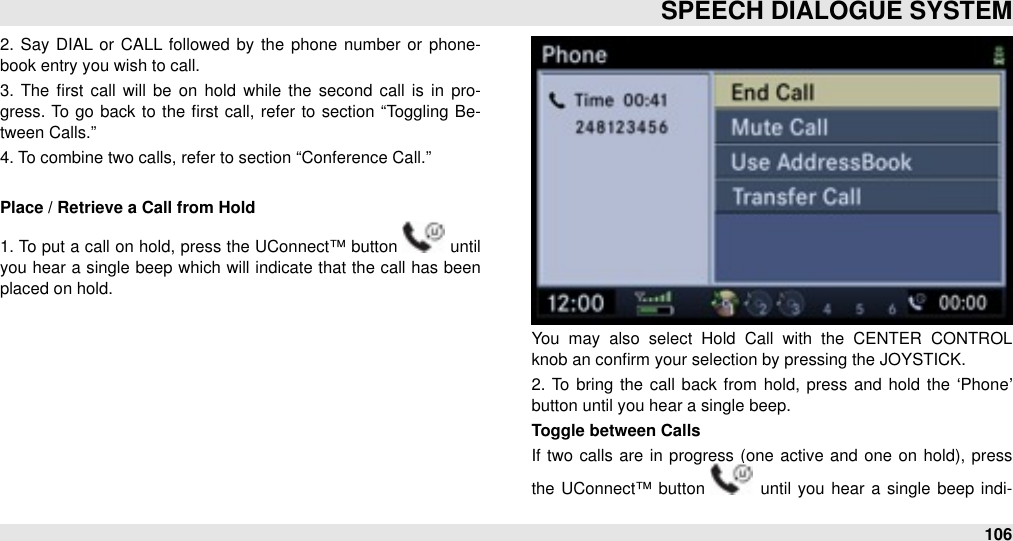
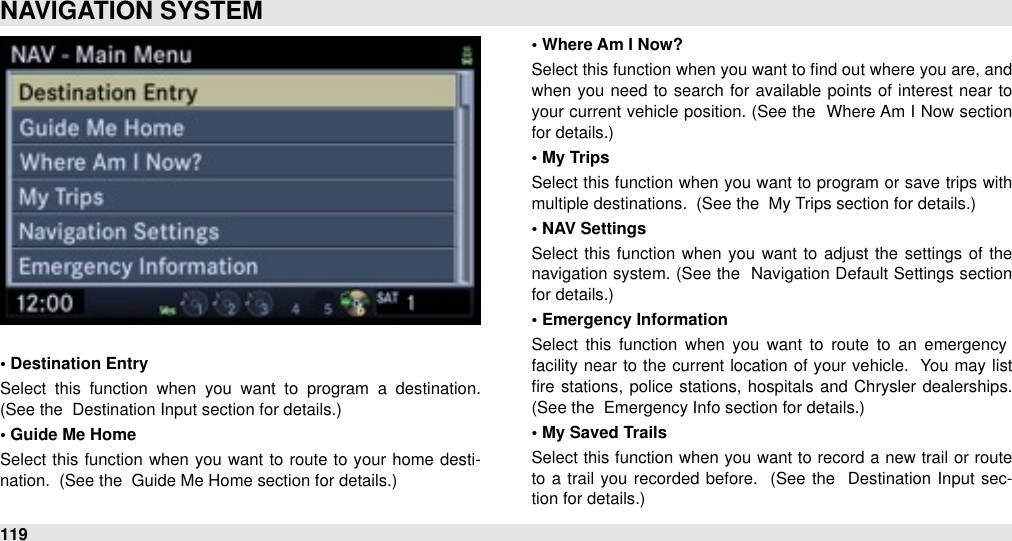
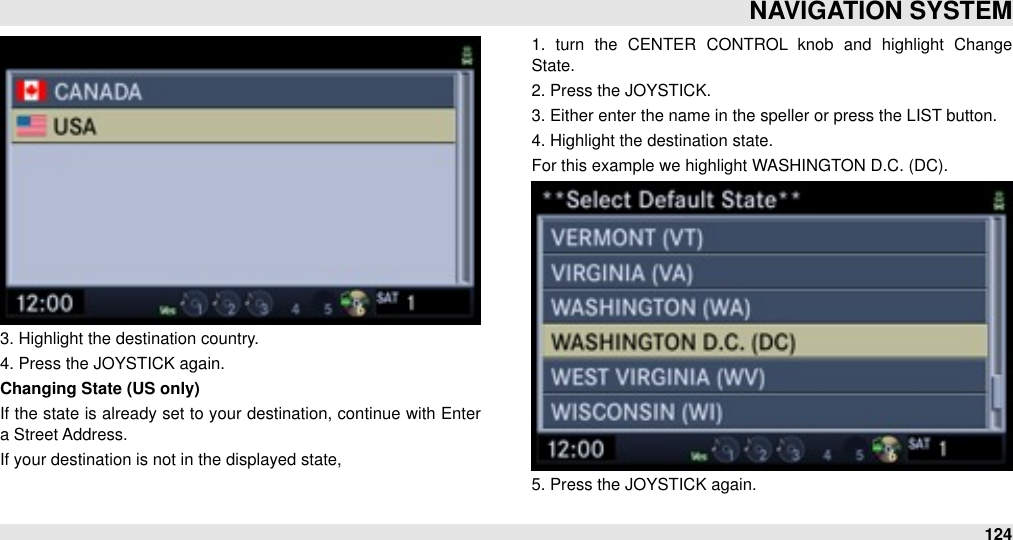
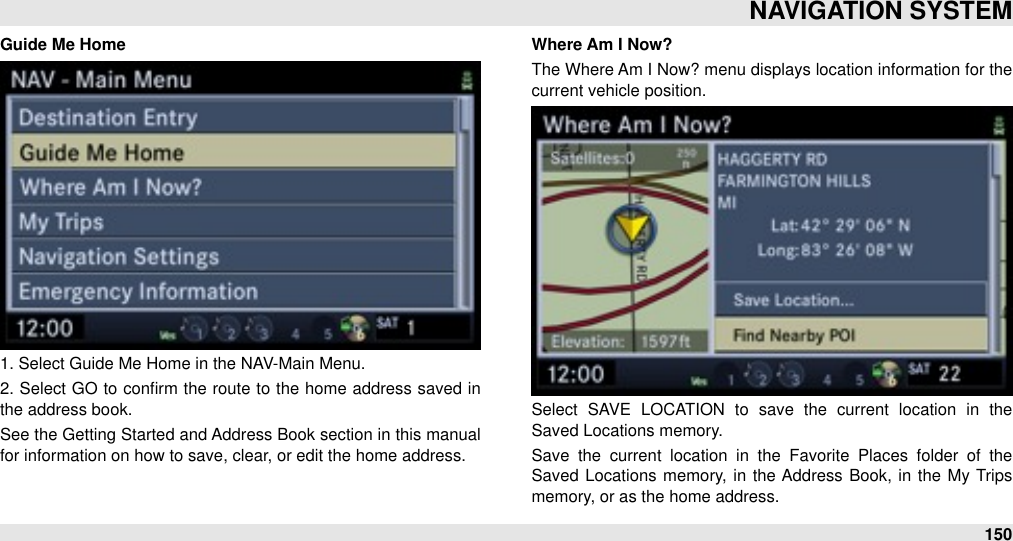
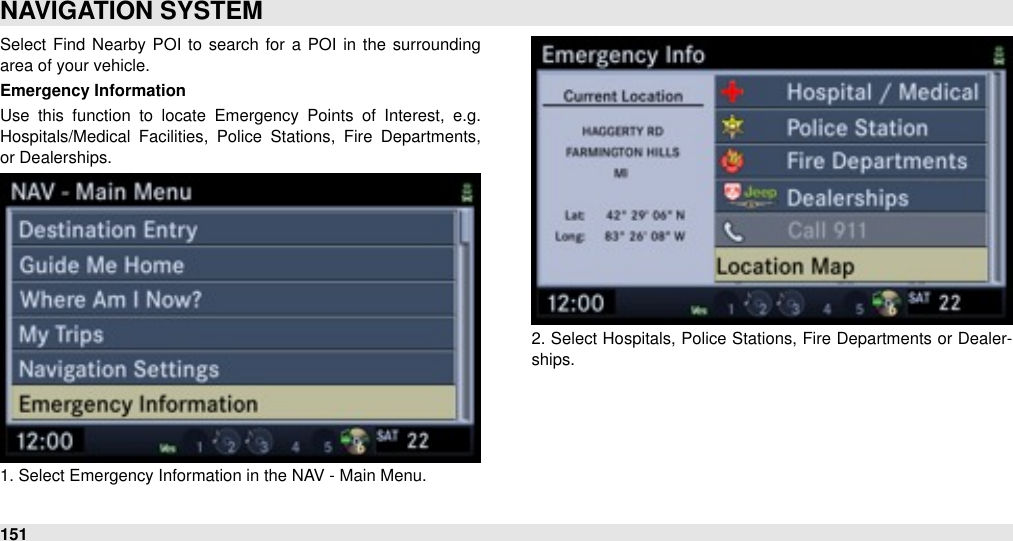
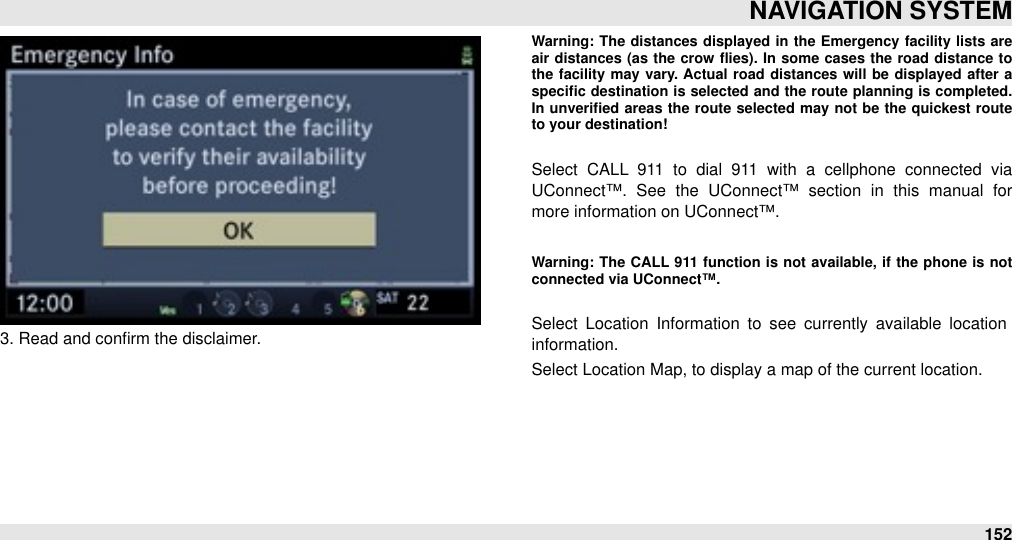
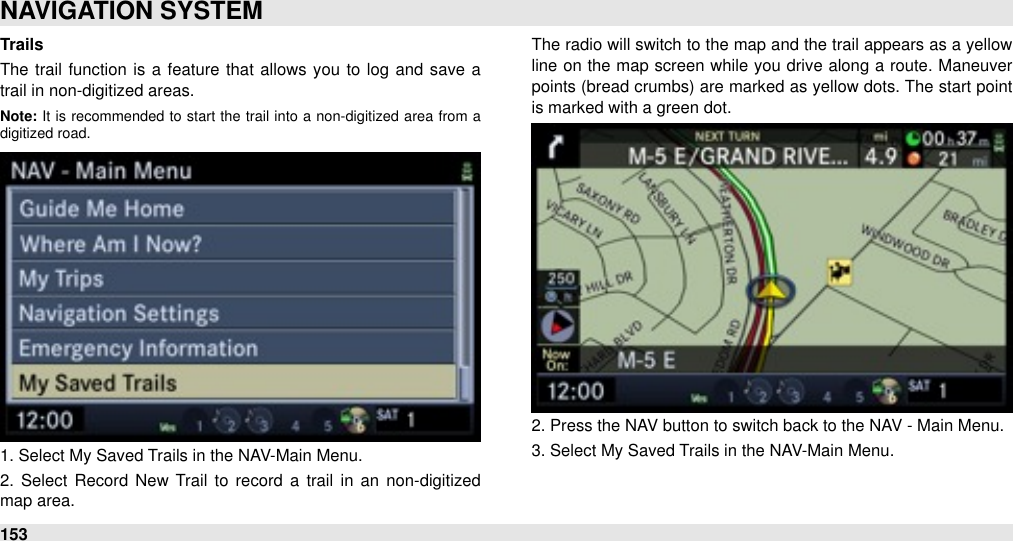
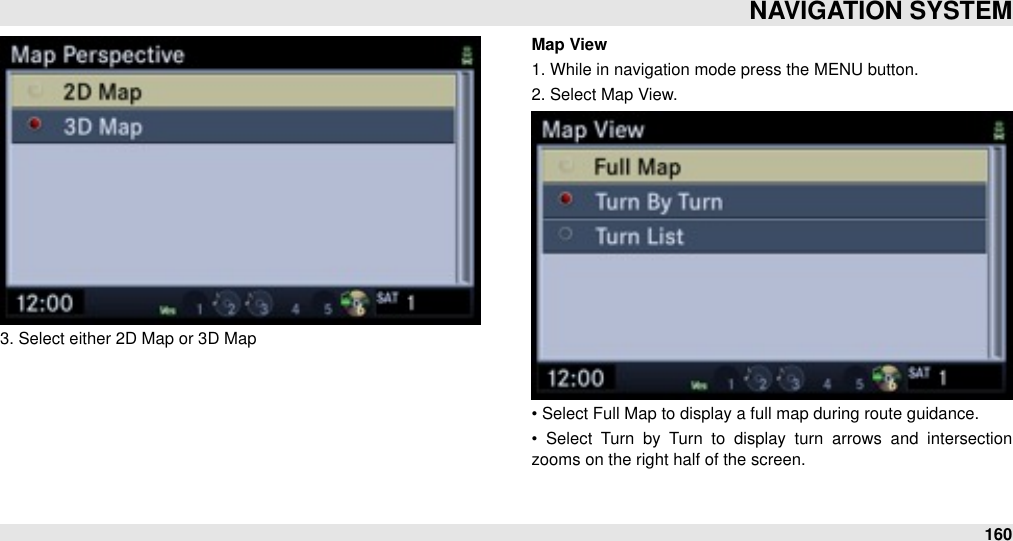
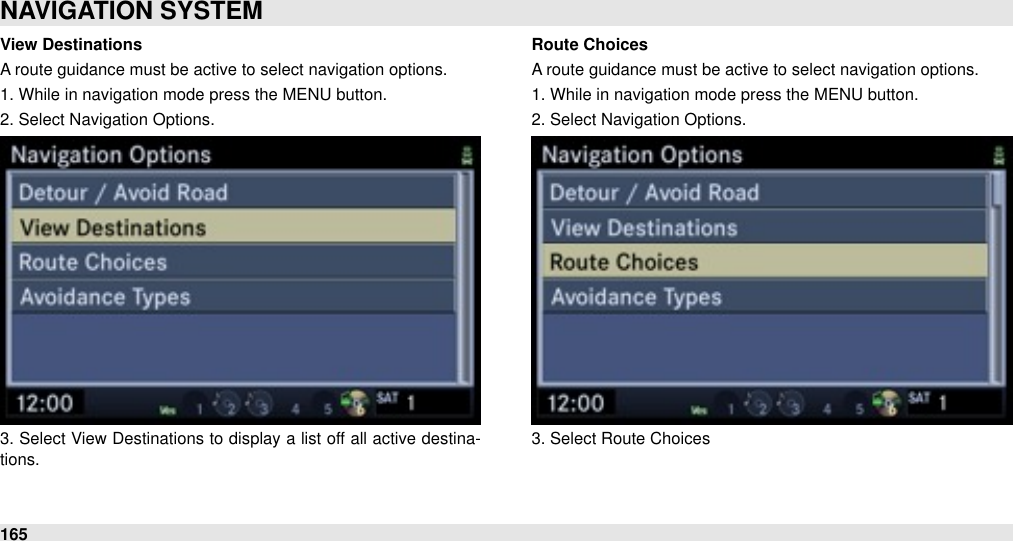
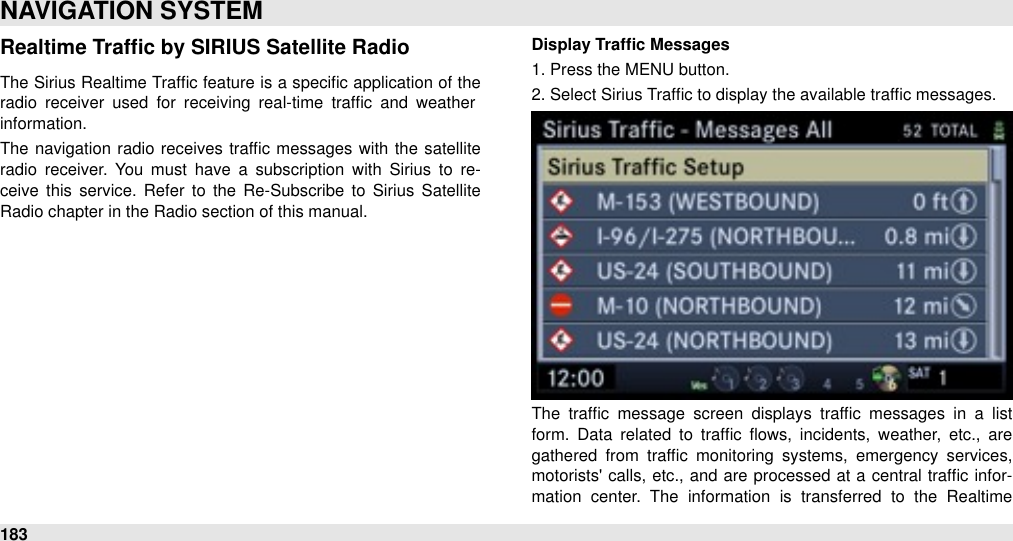
Contents
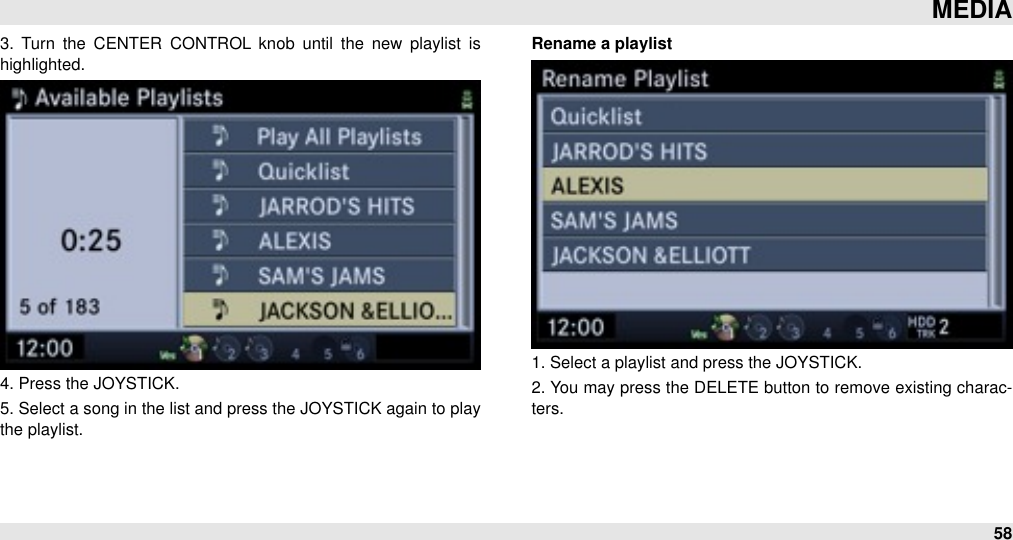
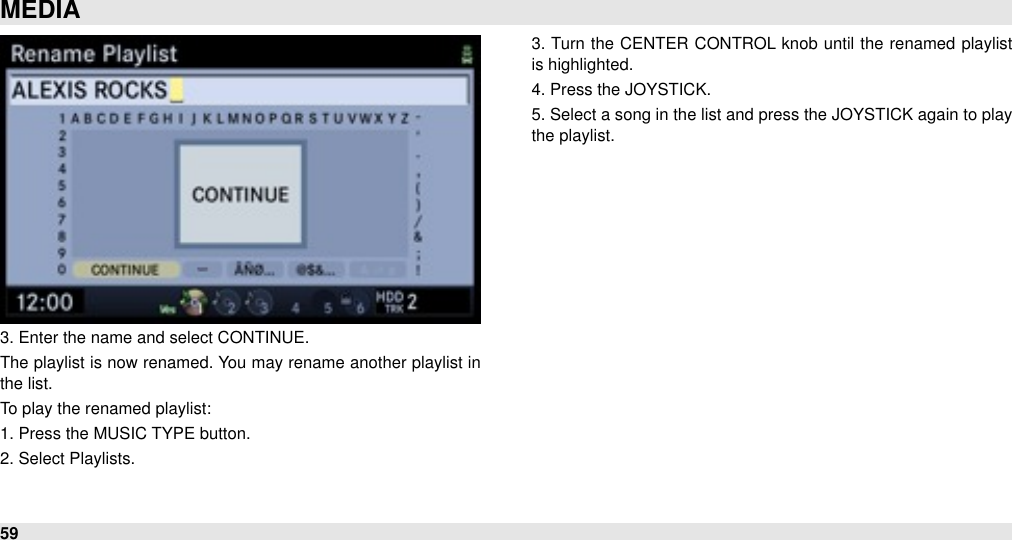
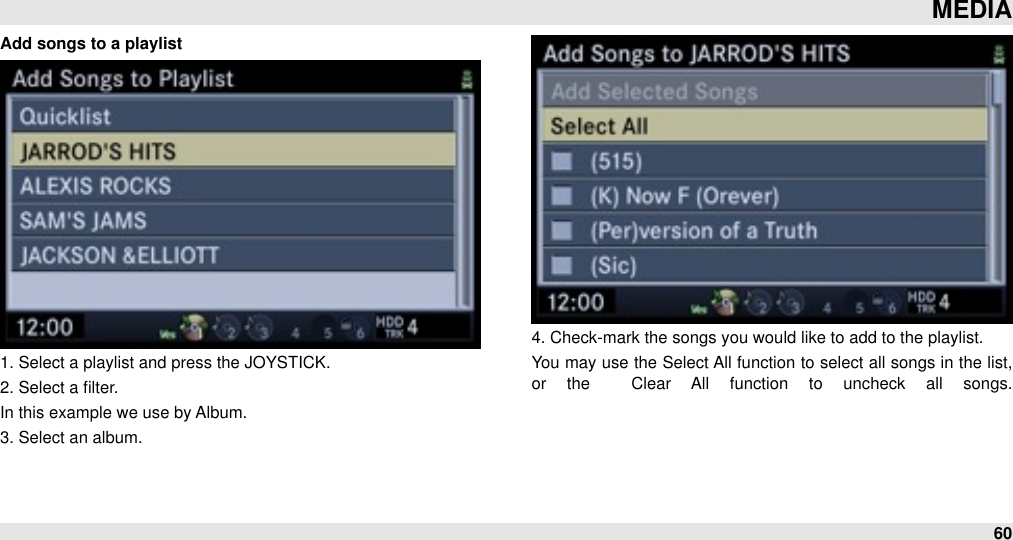
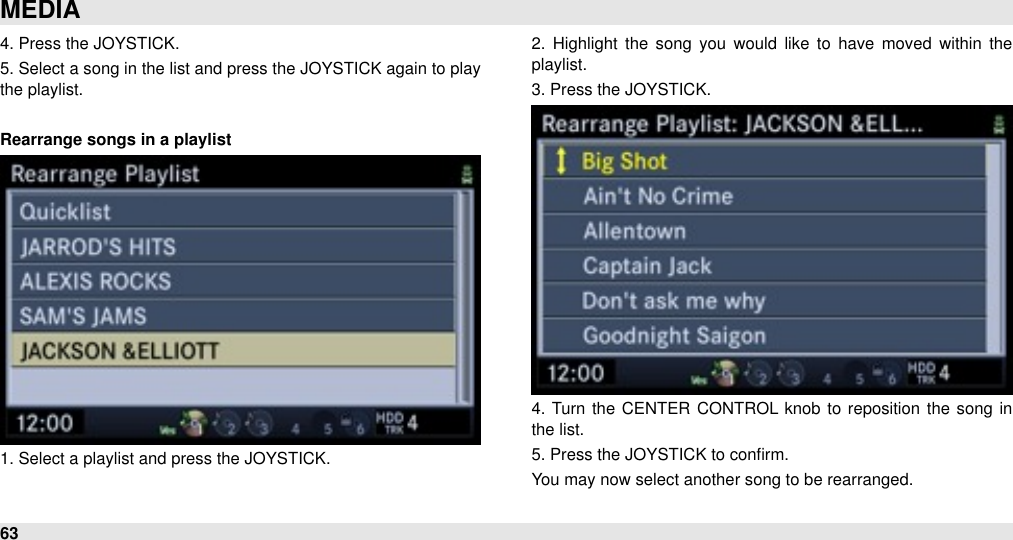
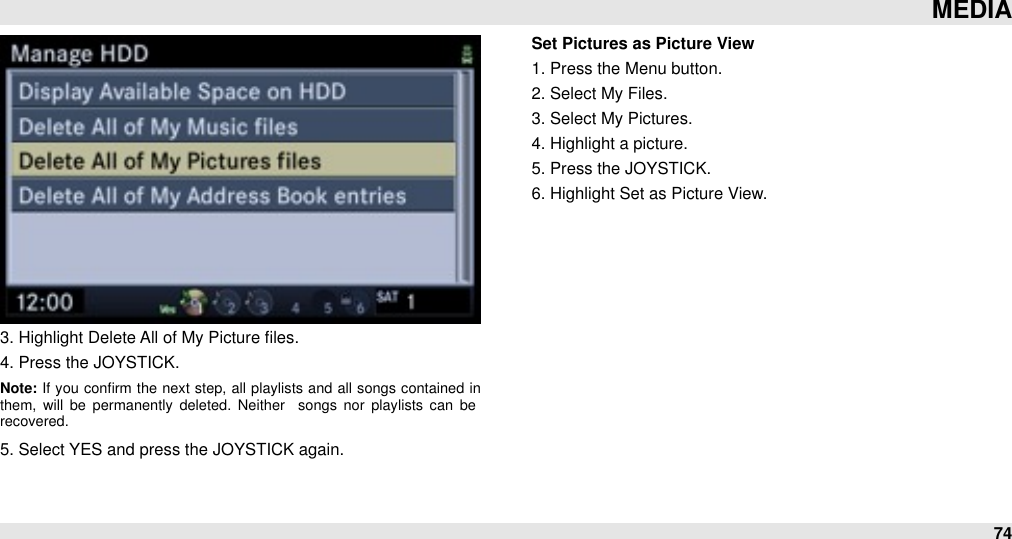
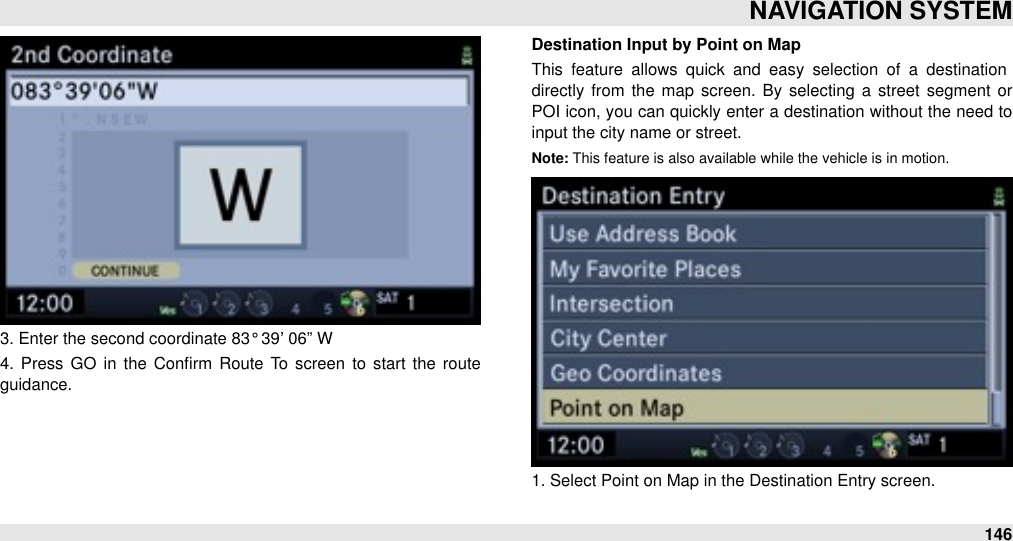
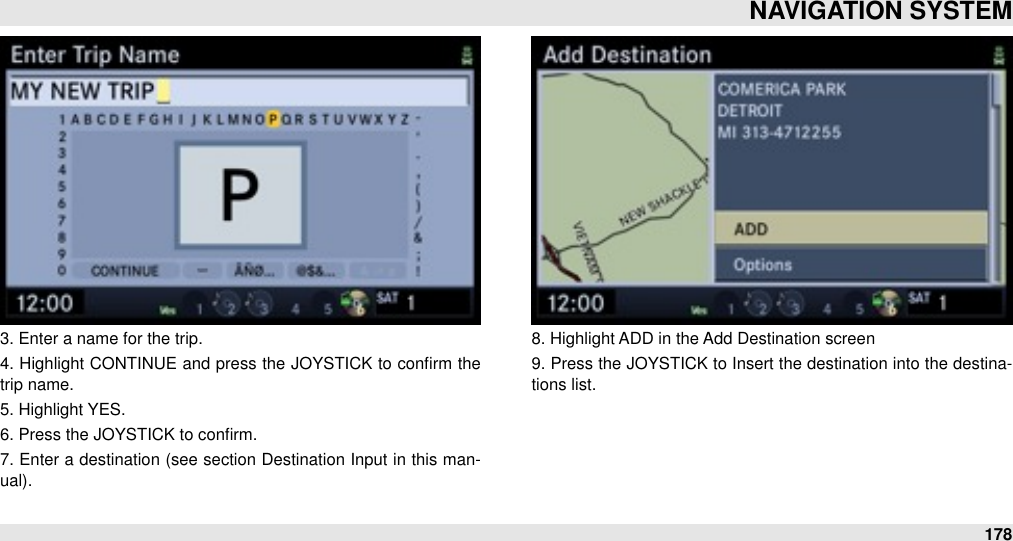
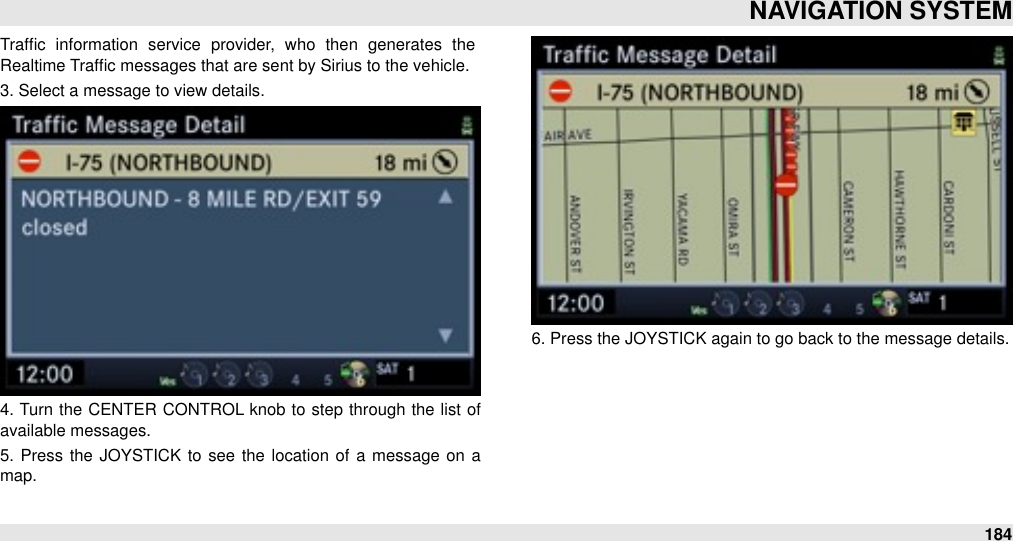
- 1. Regulatory and Safety Statement Manual
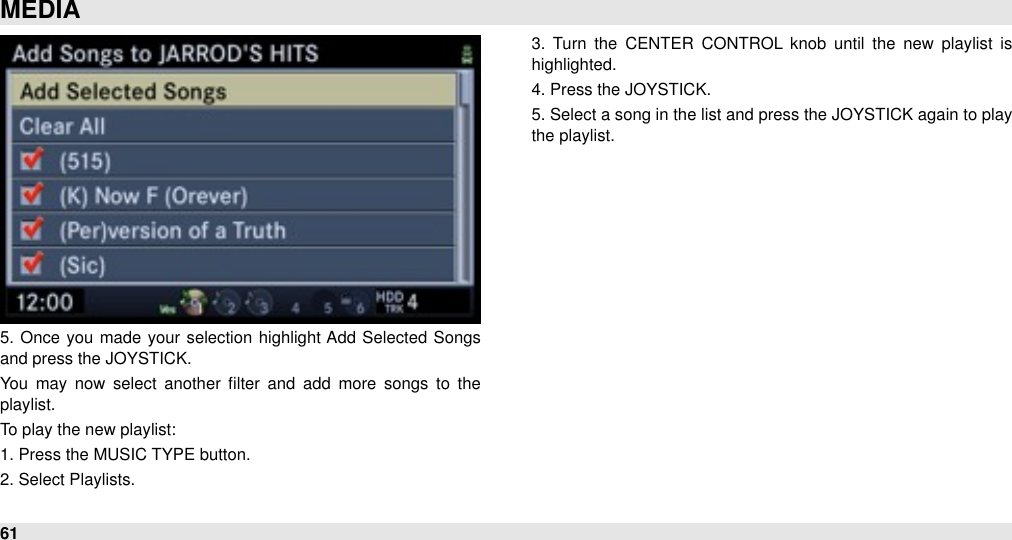
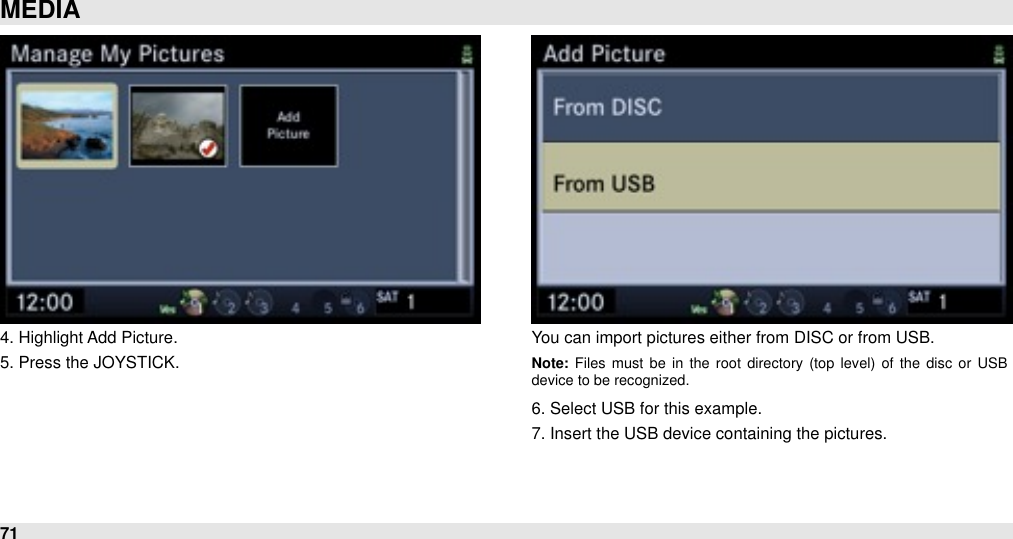
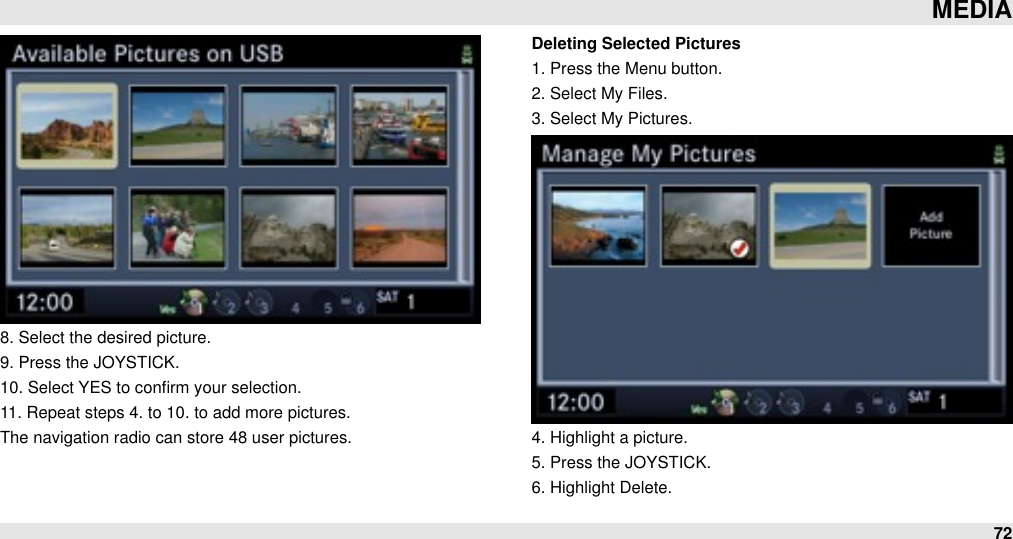
- 2. User Manual
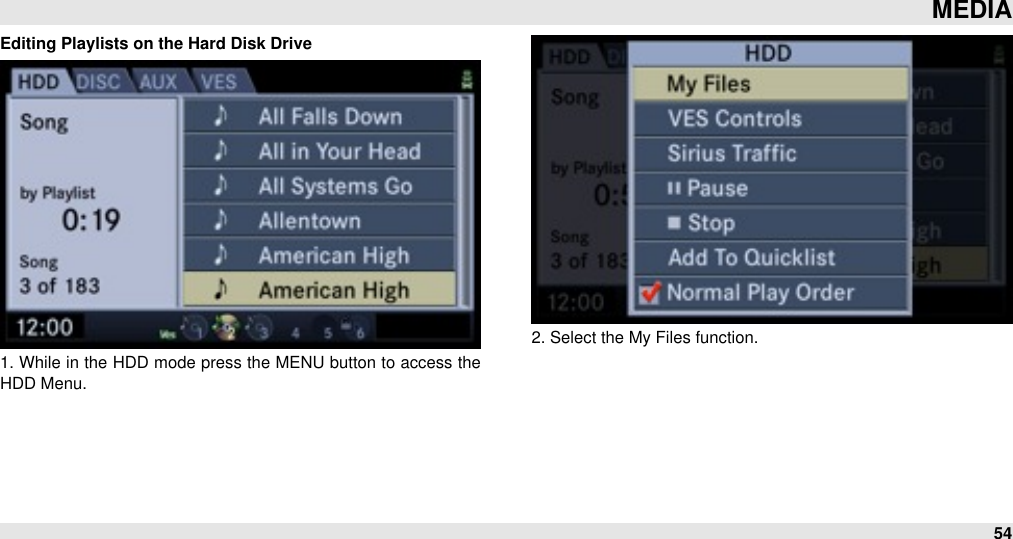
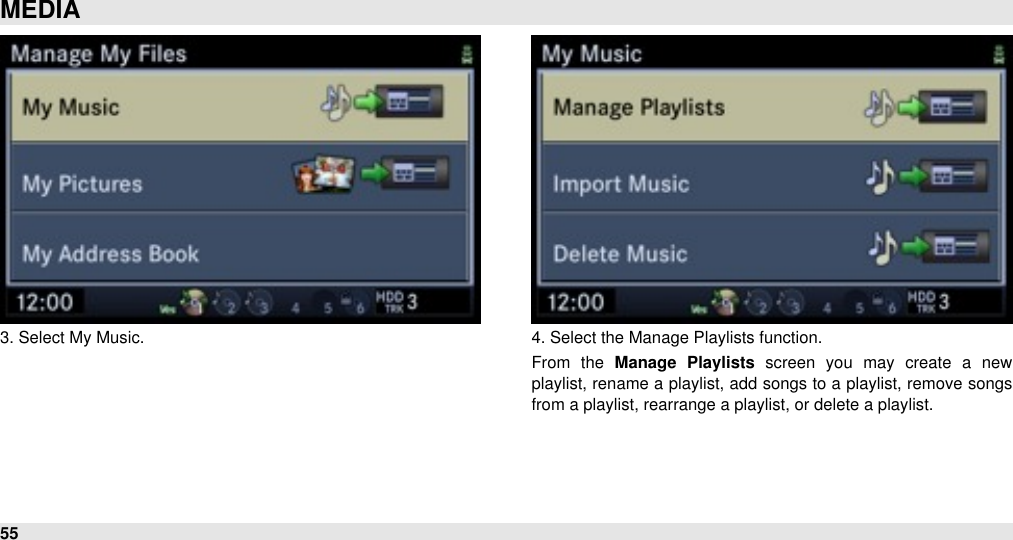
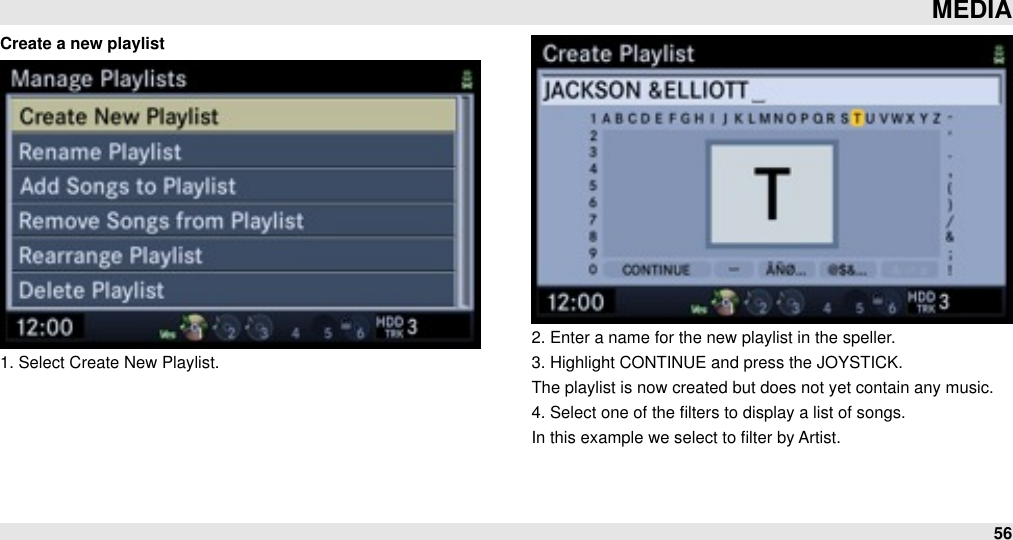
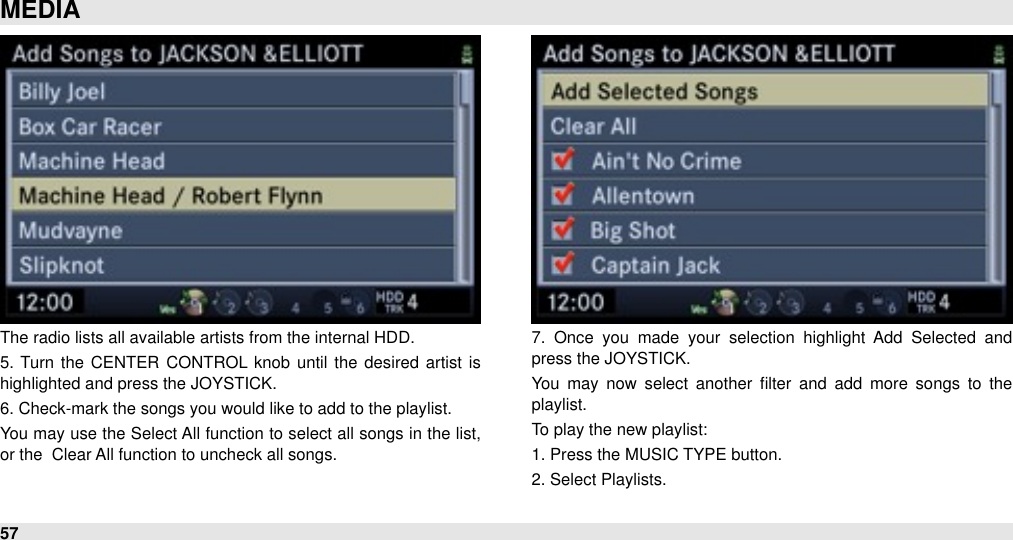
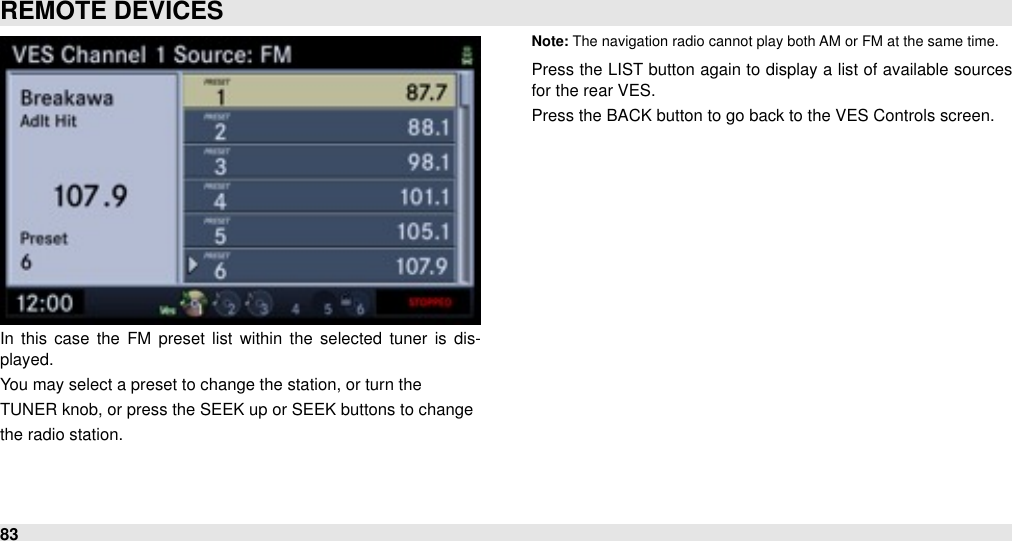
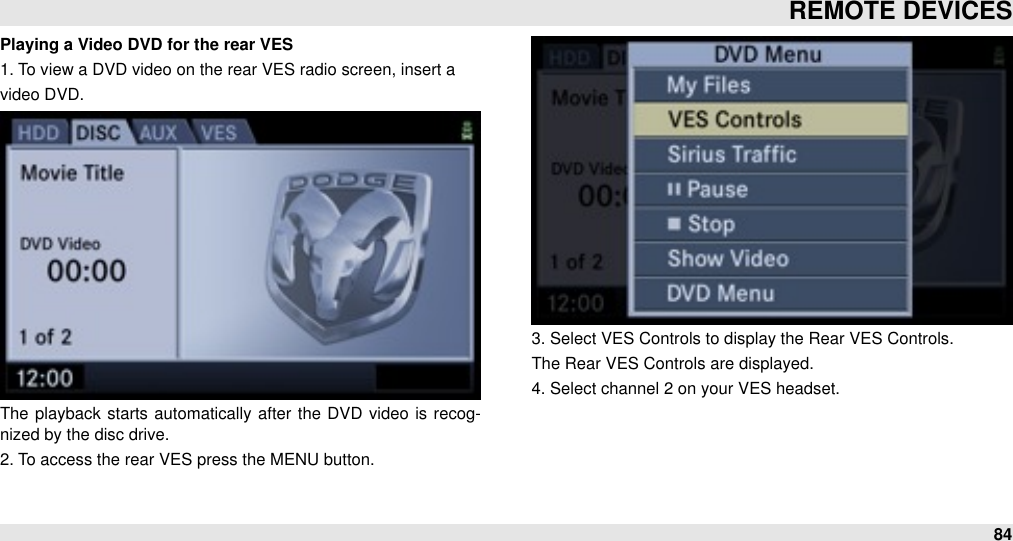
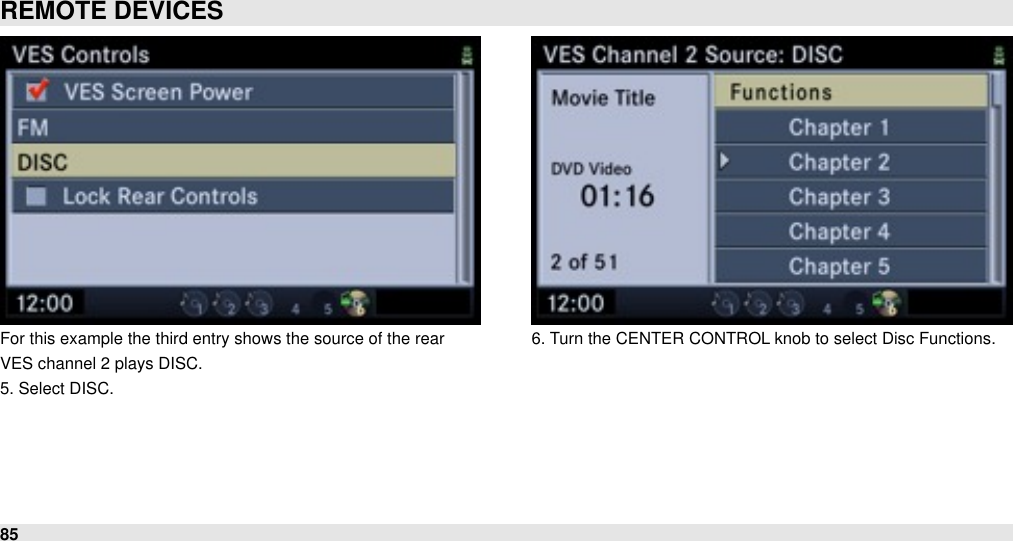
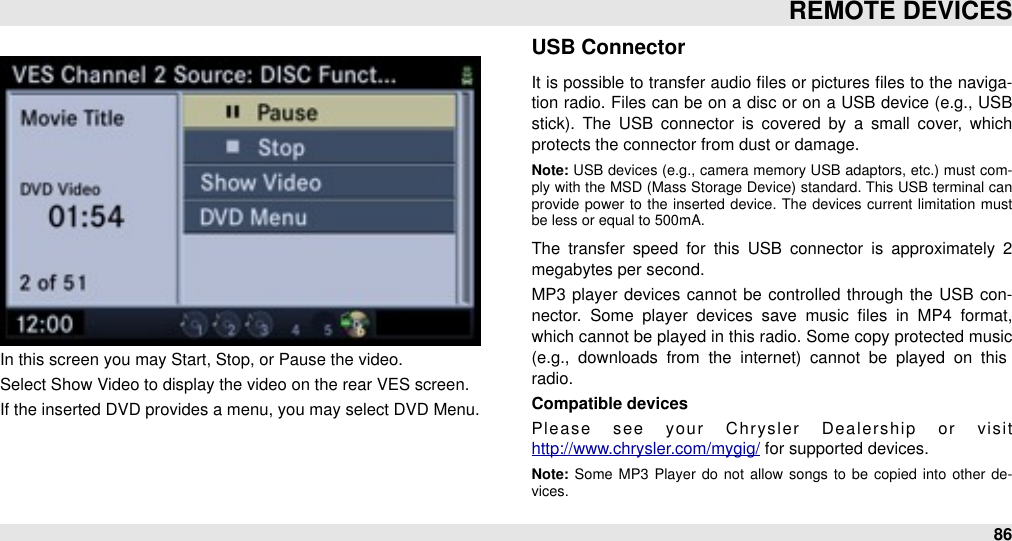
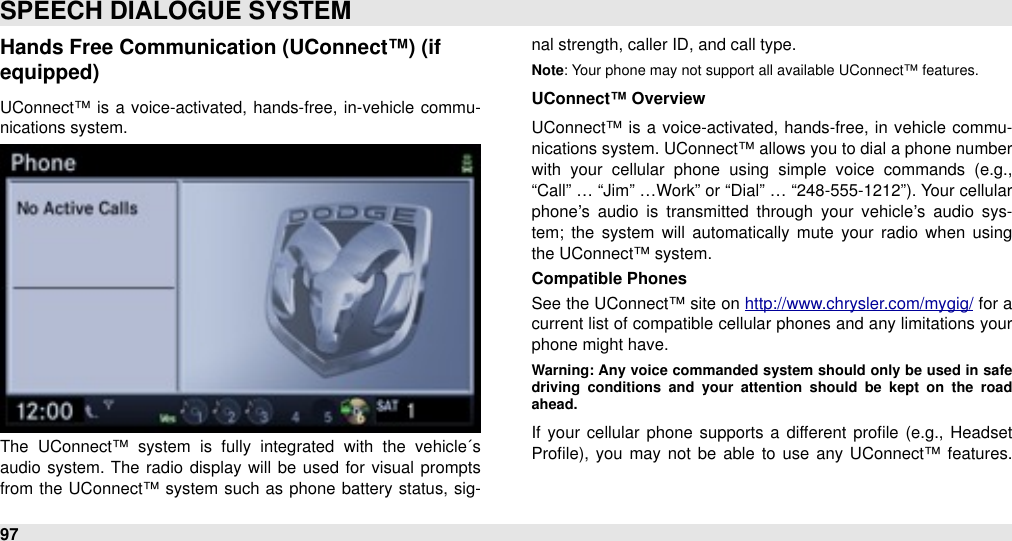
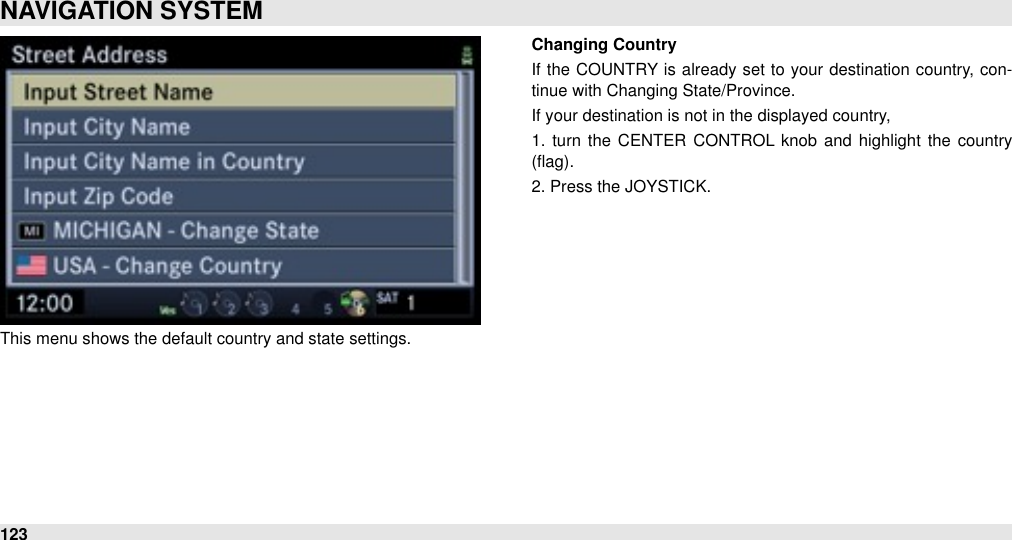
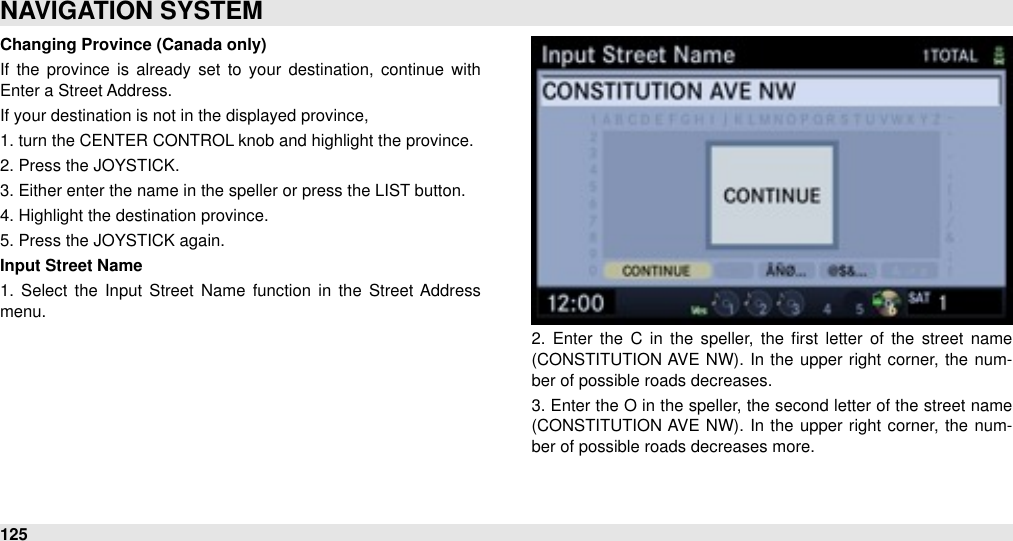
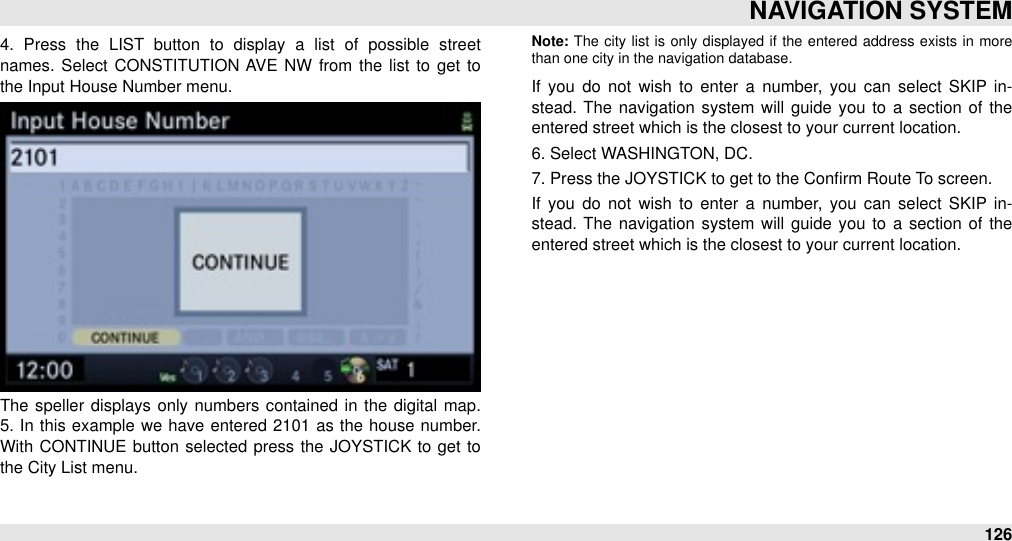
User Manual