Harsper HL-401B LCD TV Monitor User Manual 1
Harsper Co., Ltd. LCD TV Monitor 1
UserManual.wiki
>
Harsper
>
HL 401B User Manual
Users Manual
Navigation menu
Upload a User Manual
Namespaces
Wiki Guide
HTML
PDF
Info
Views
User Manual
Discussion / Help
Navigation

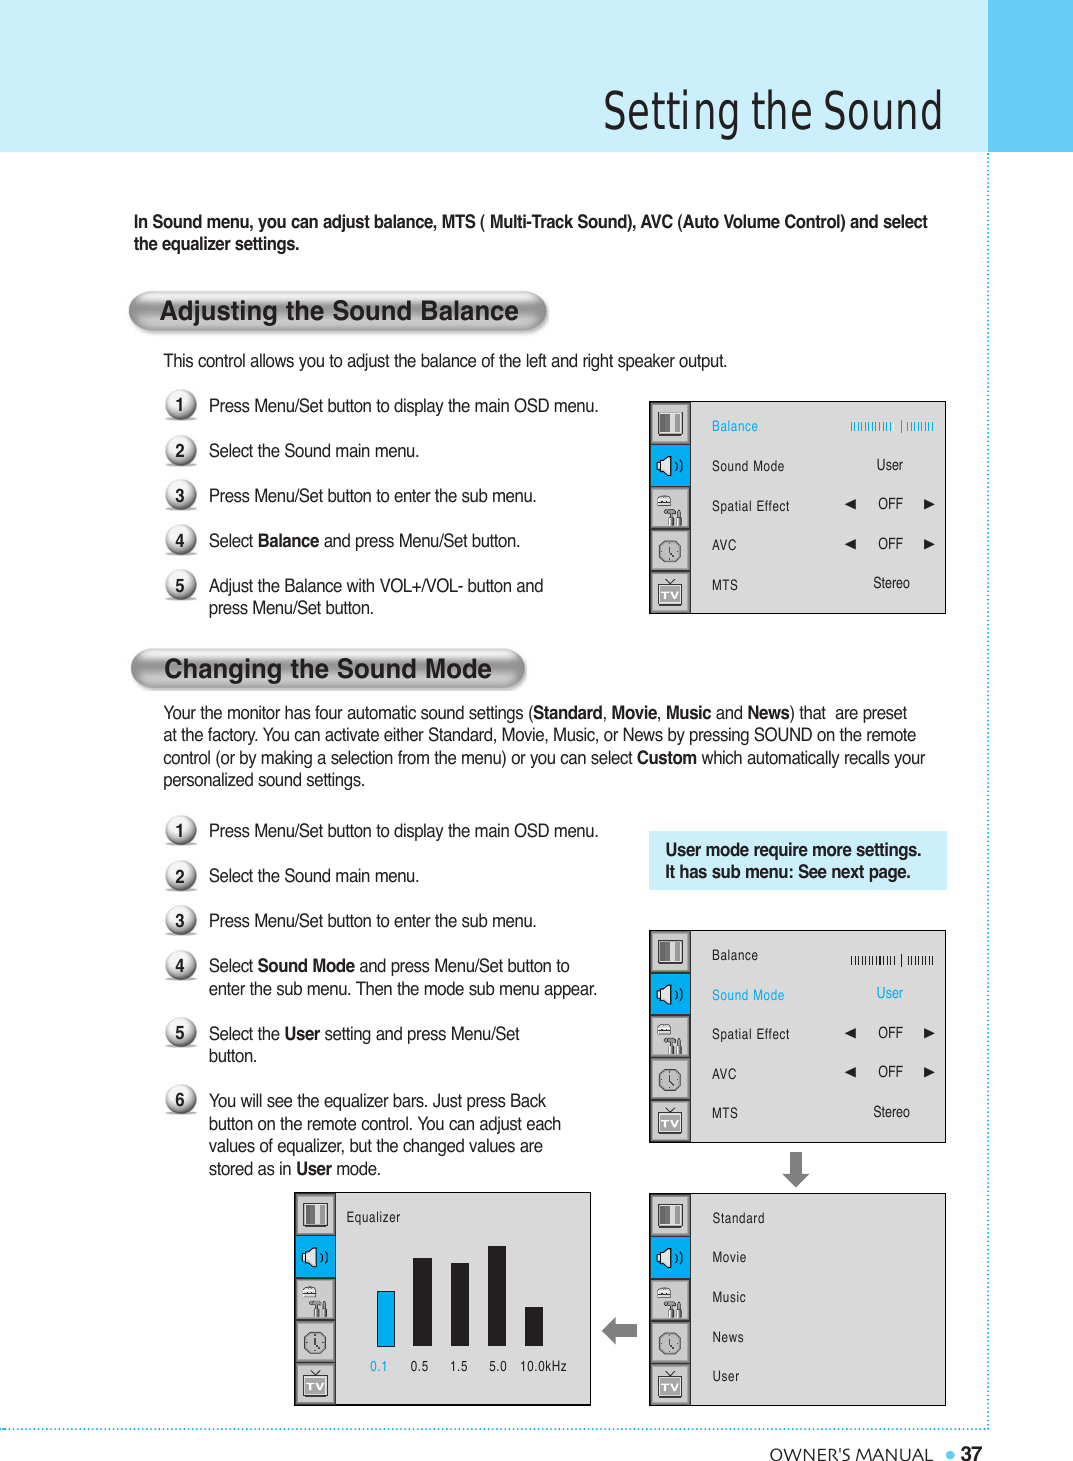
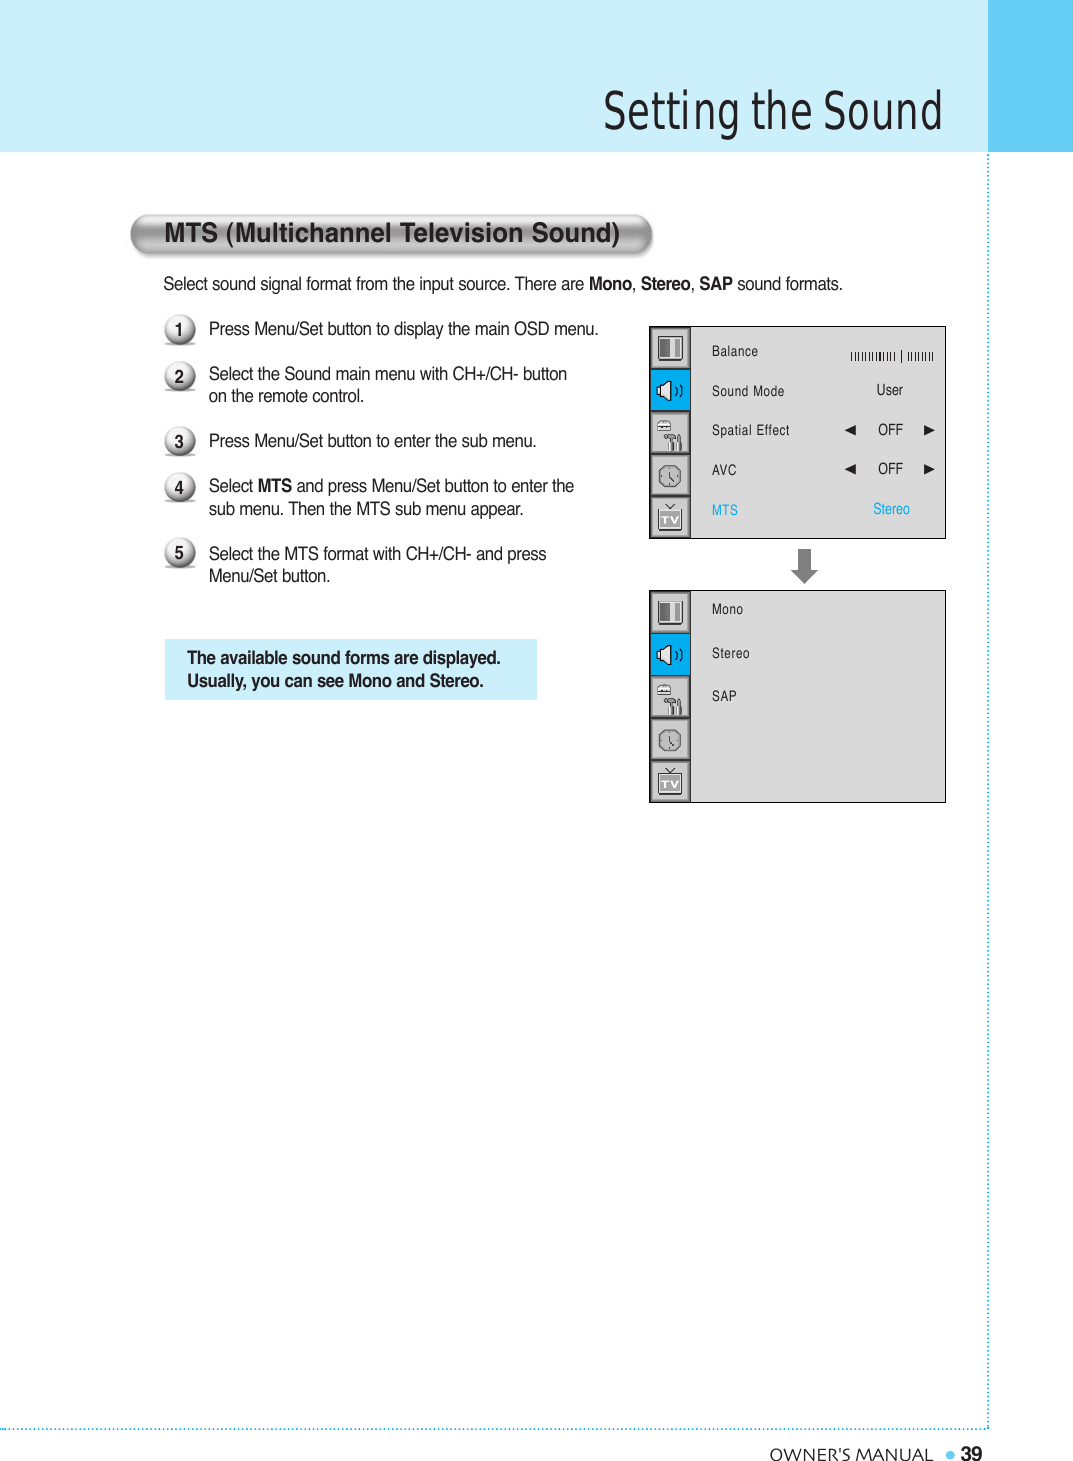
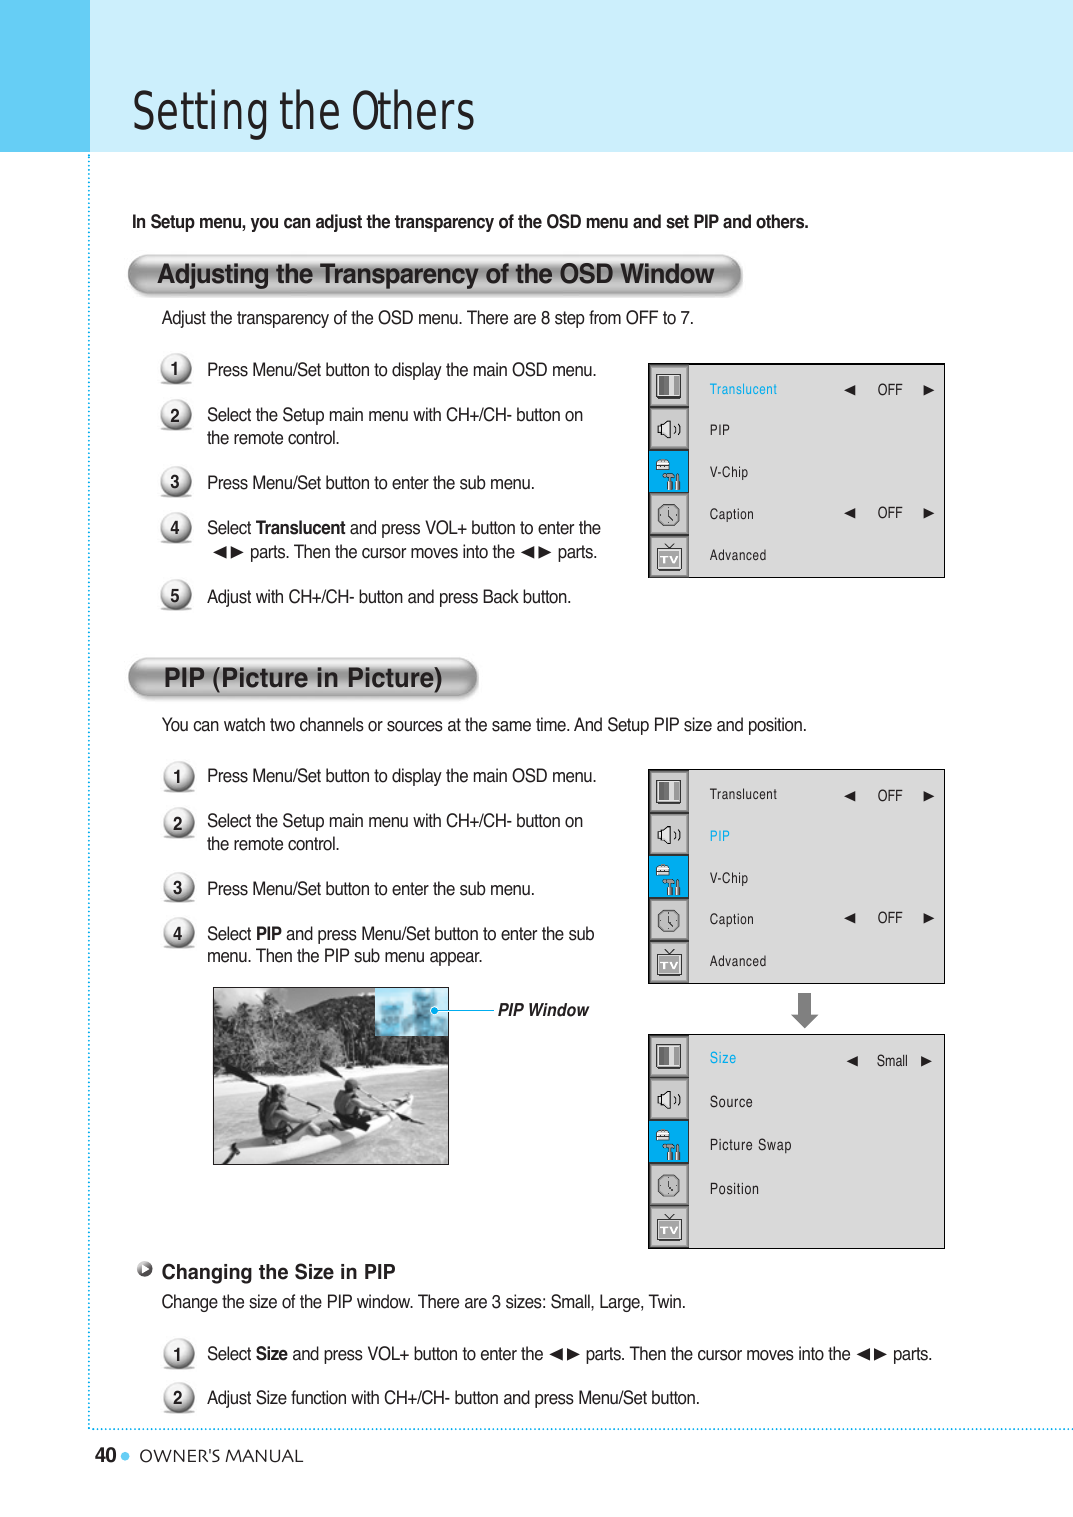
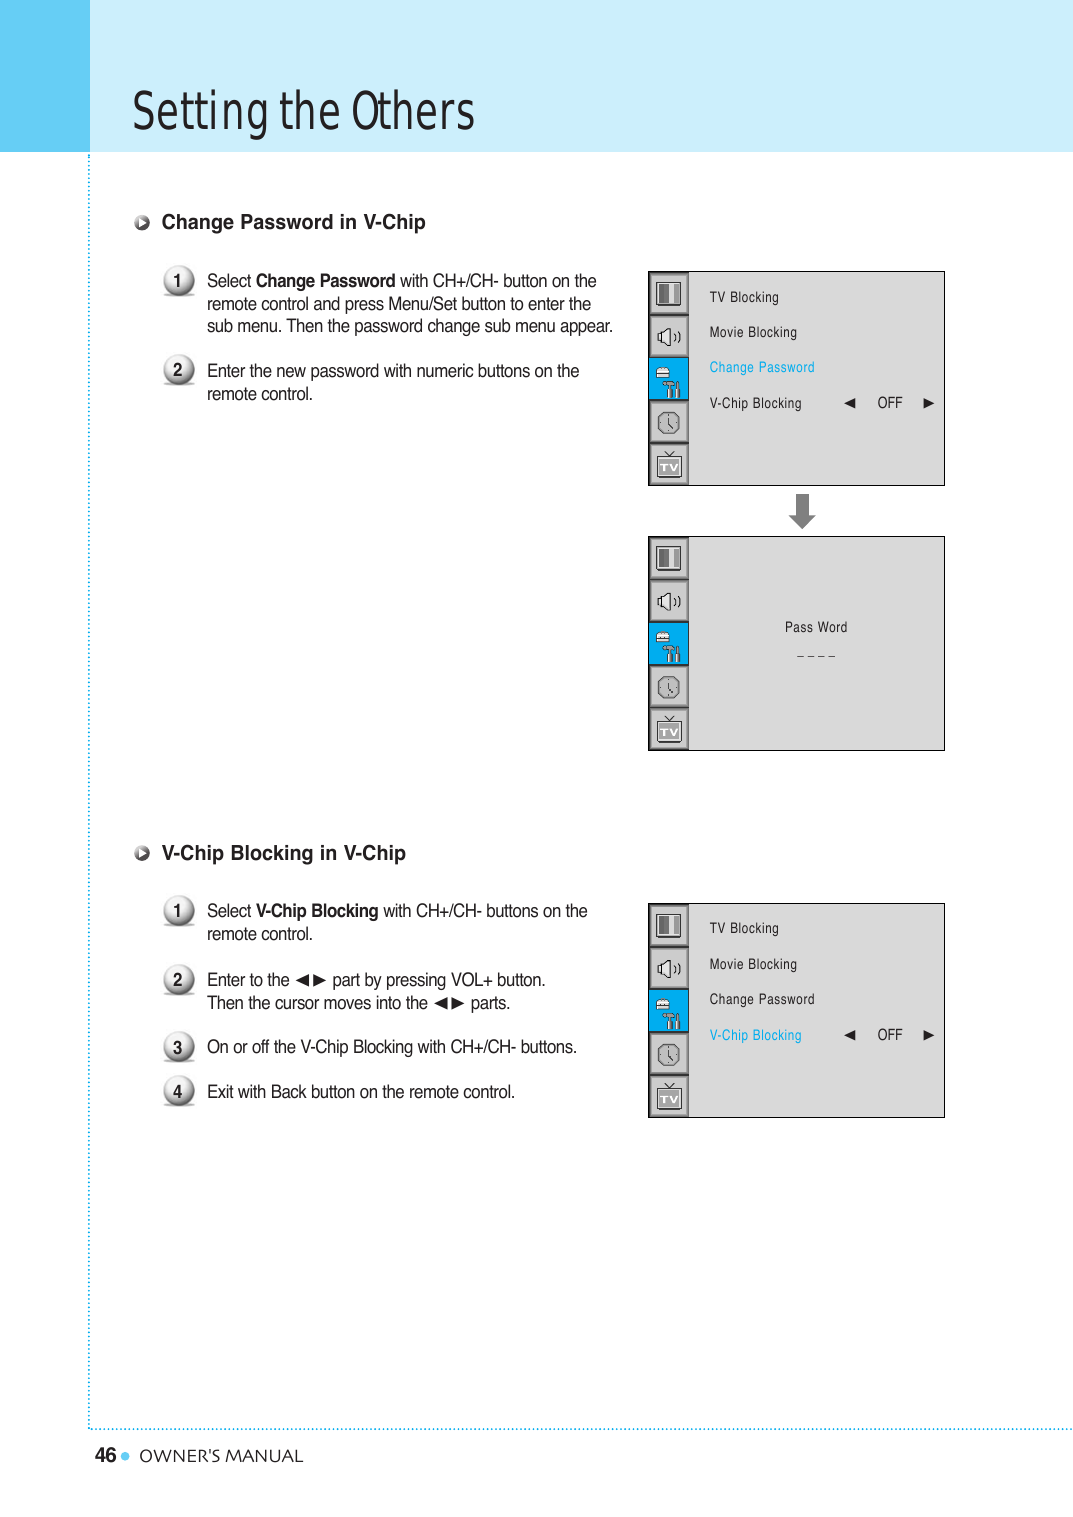
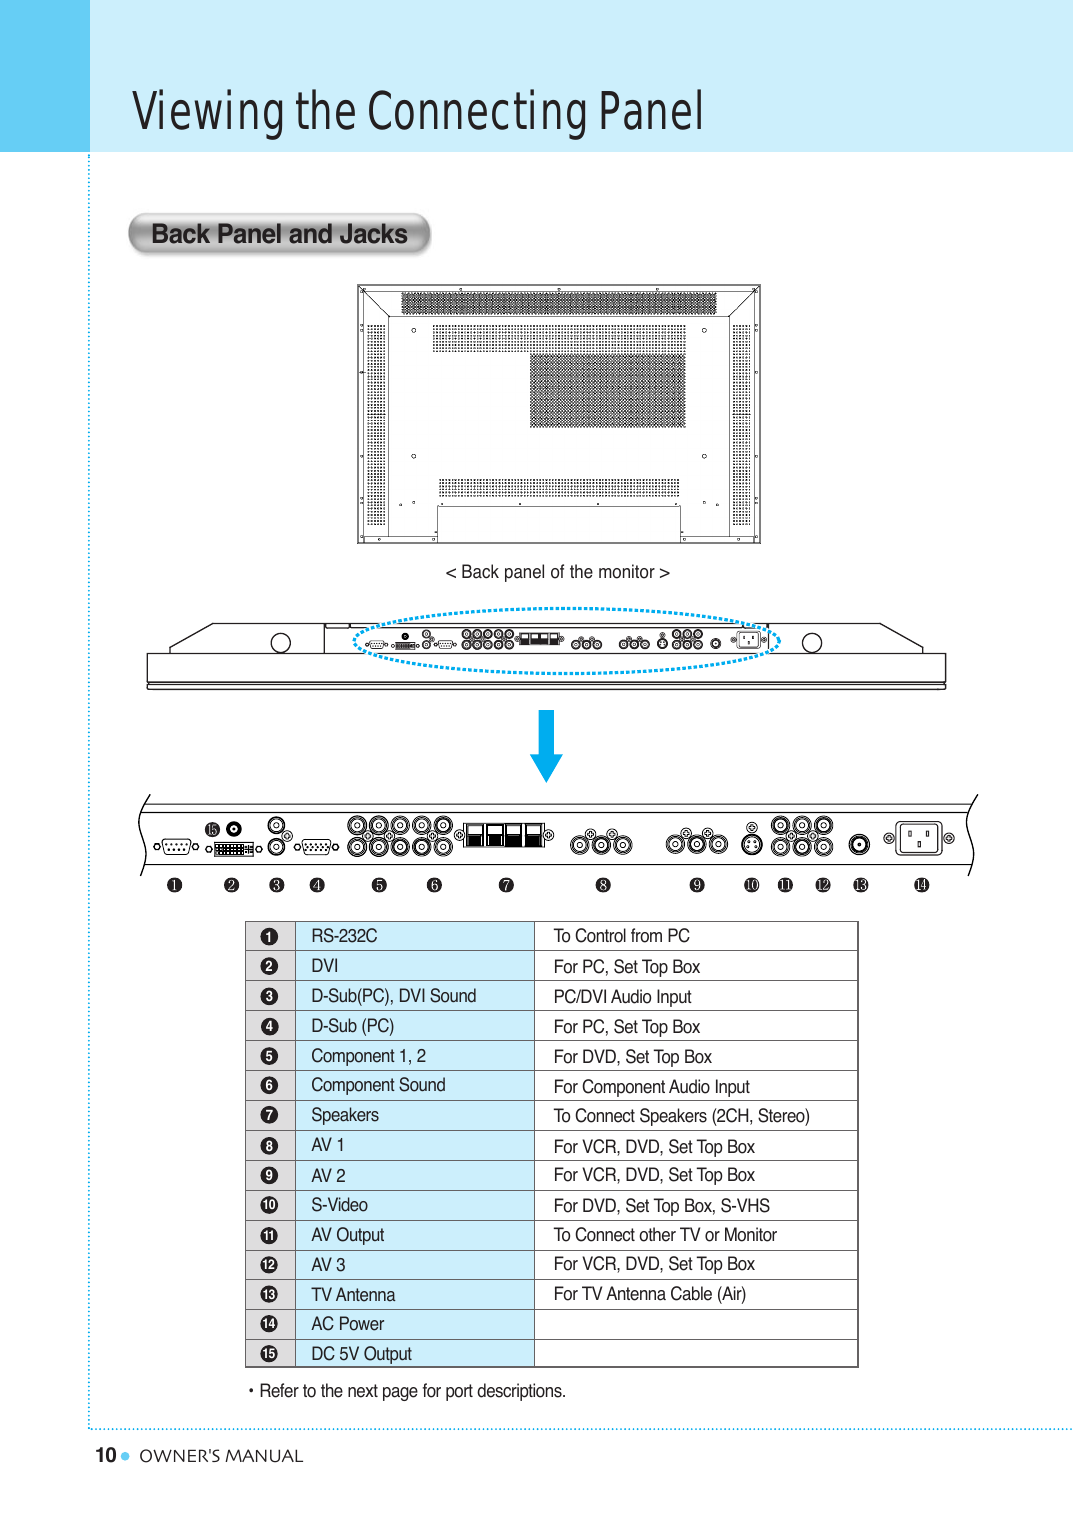
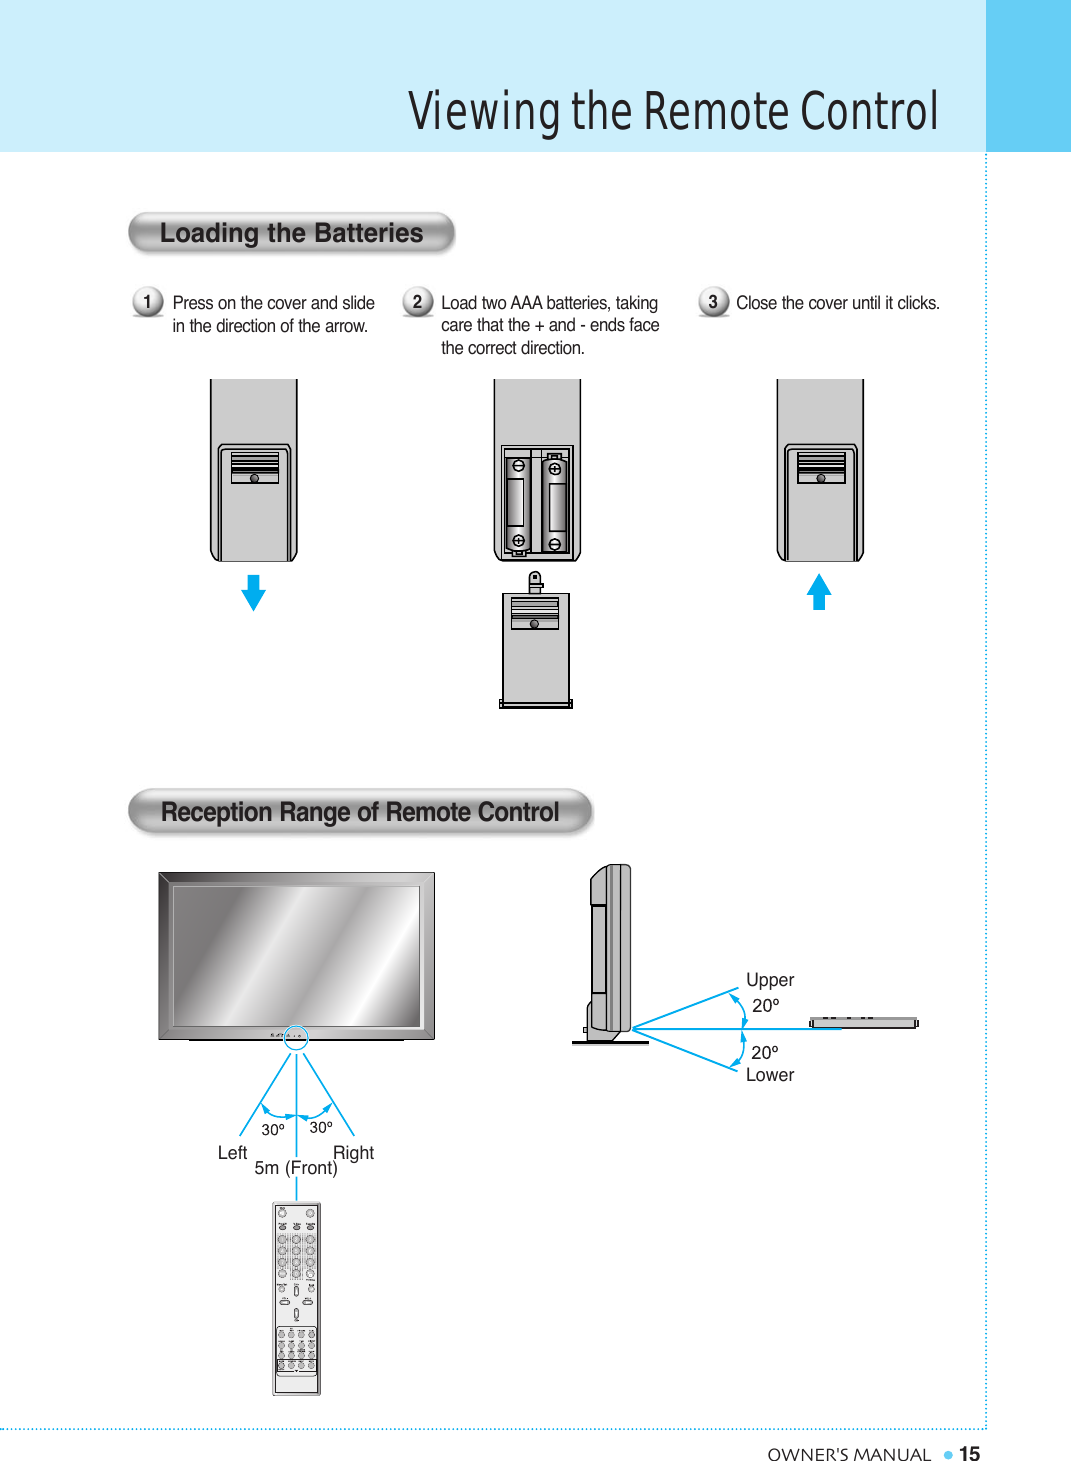
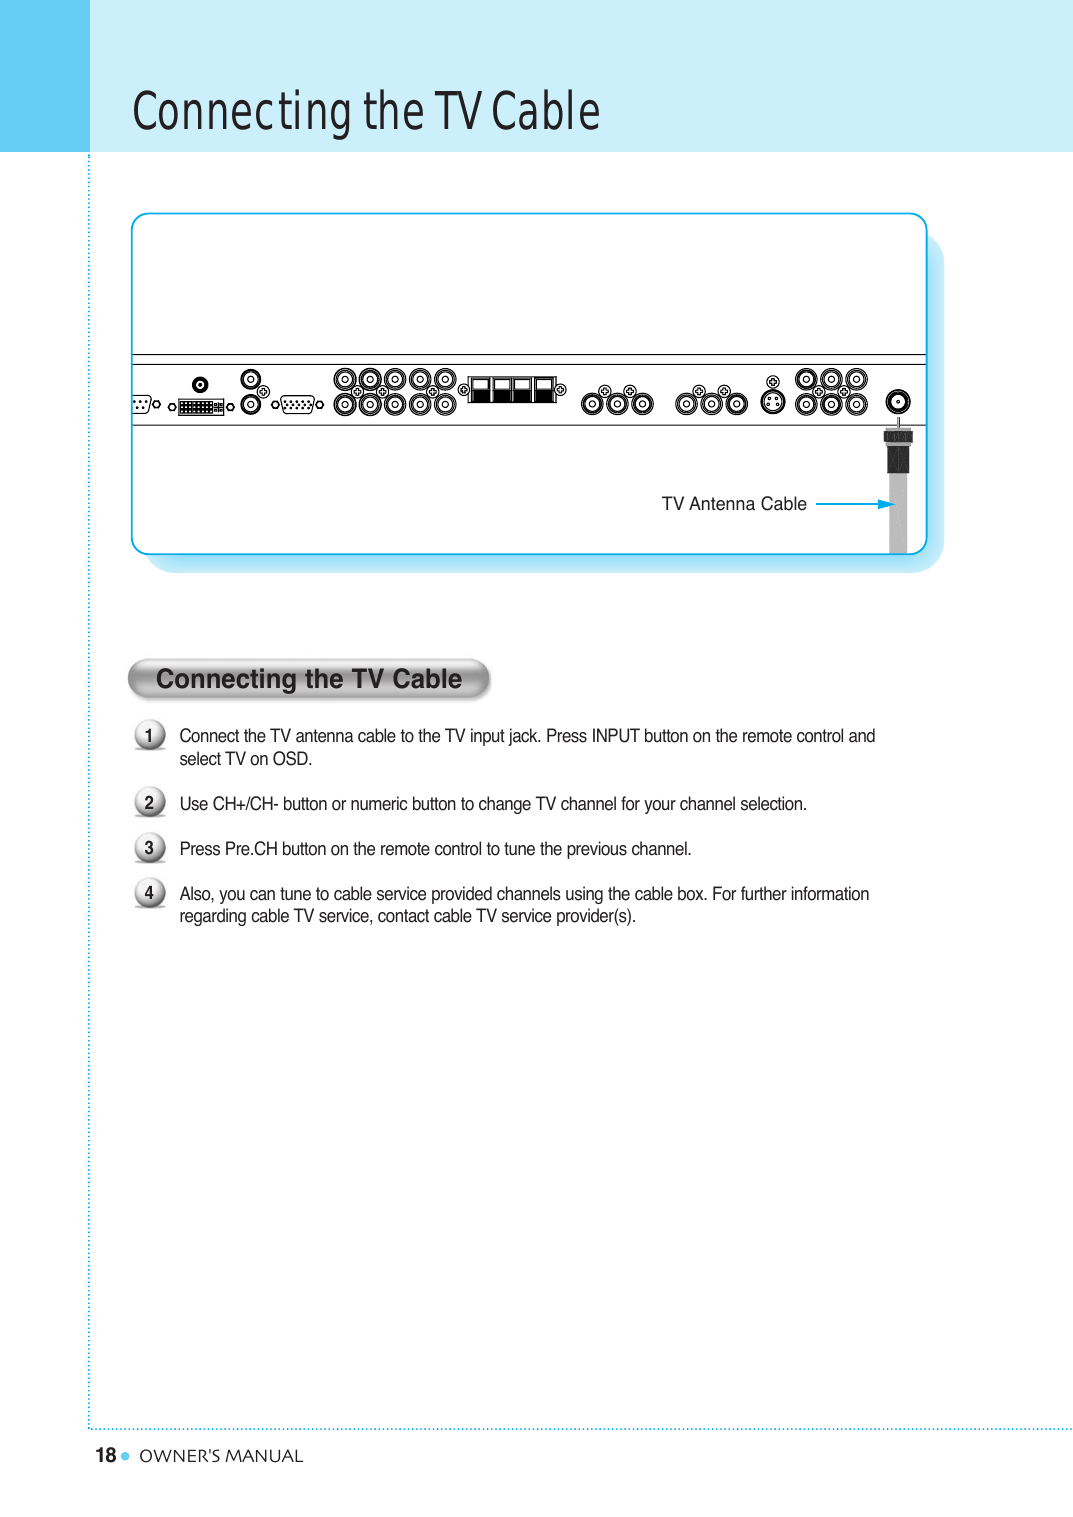
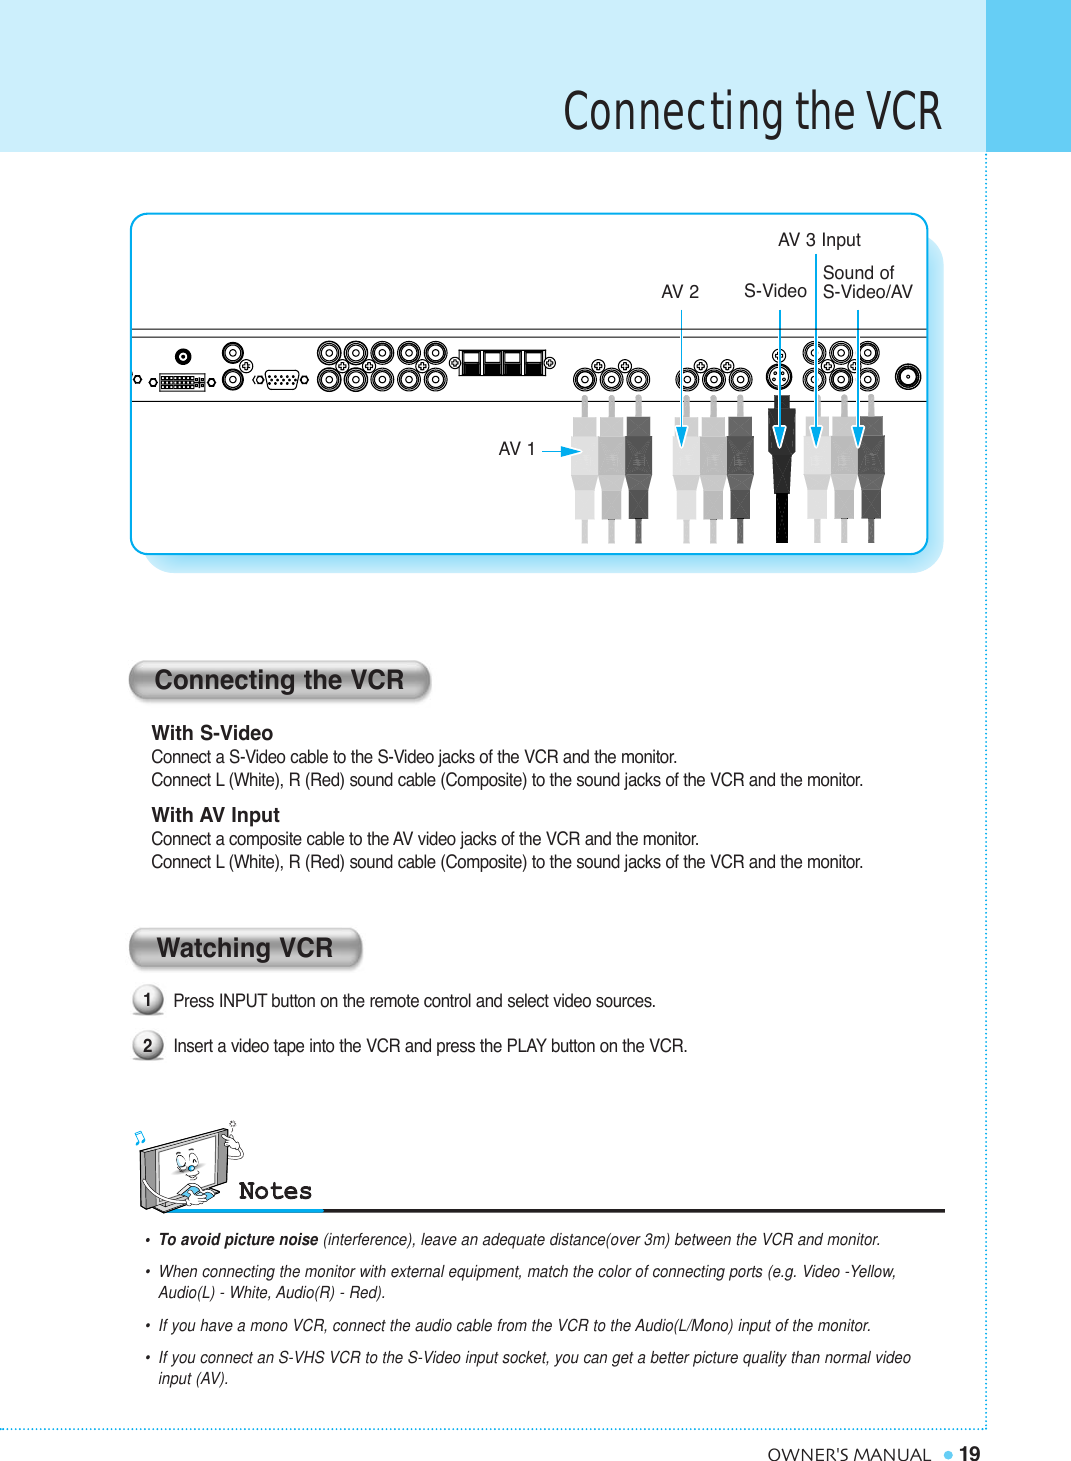
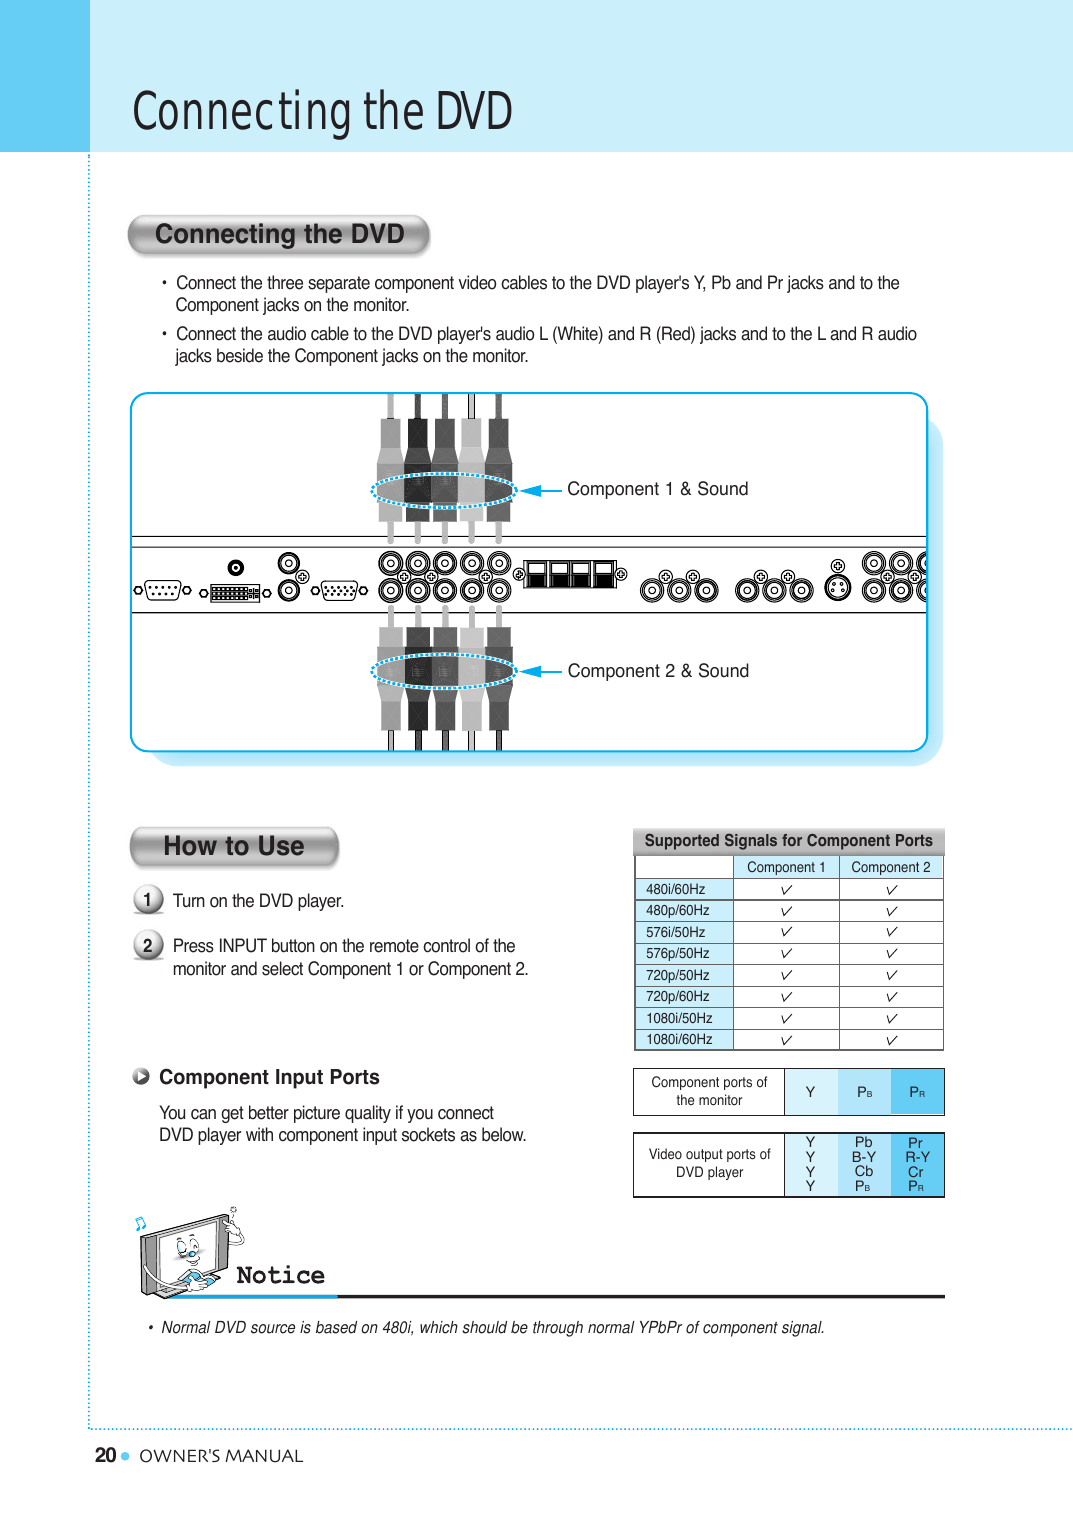
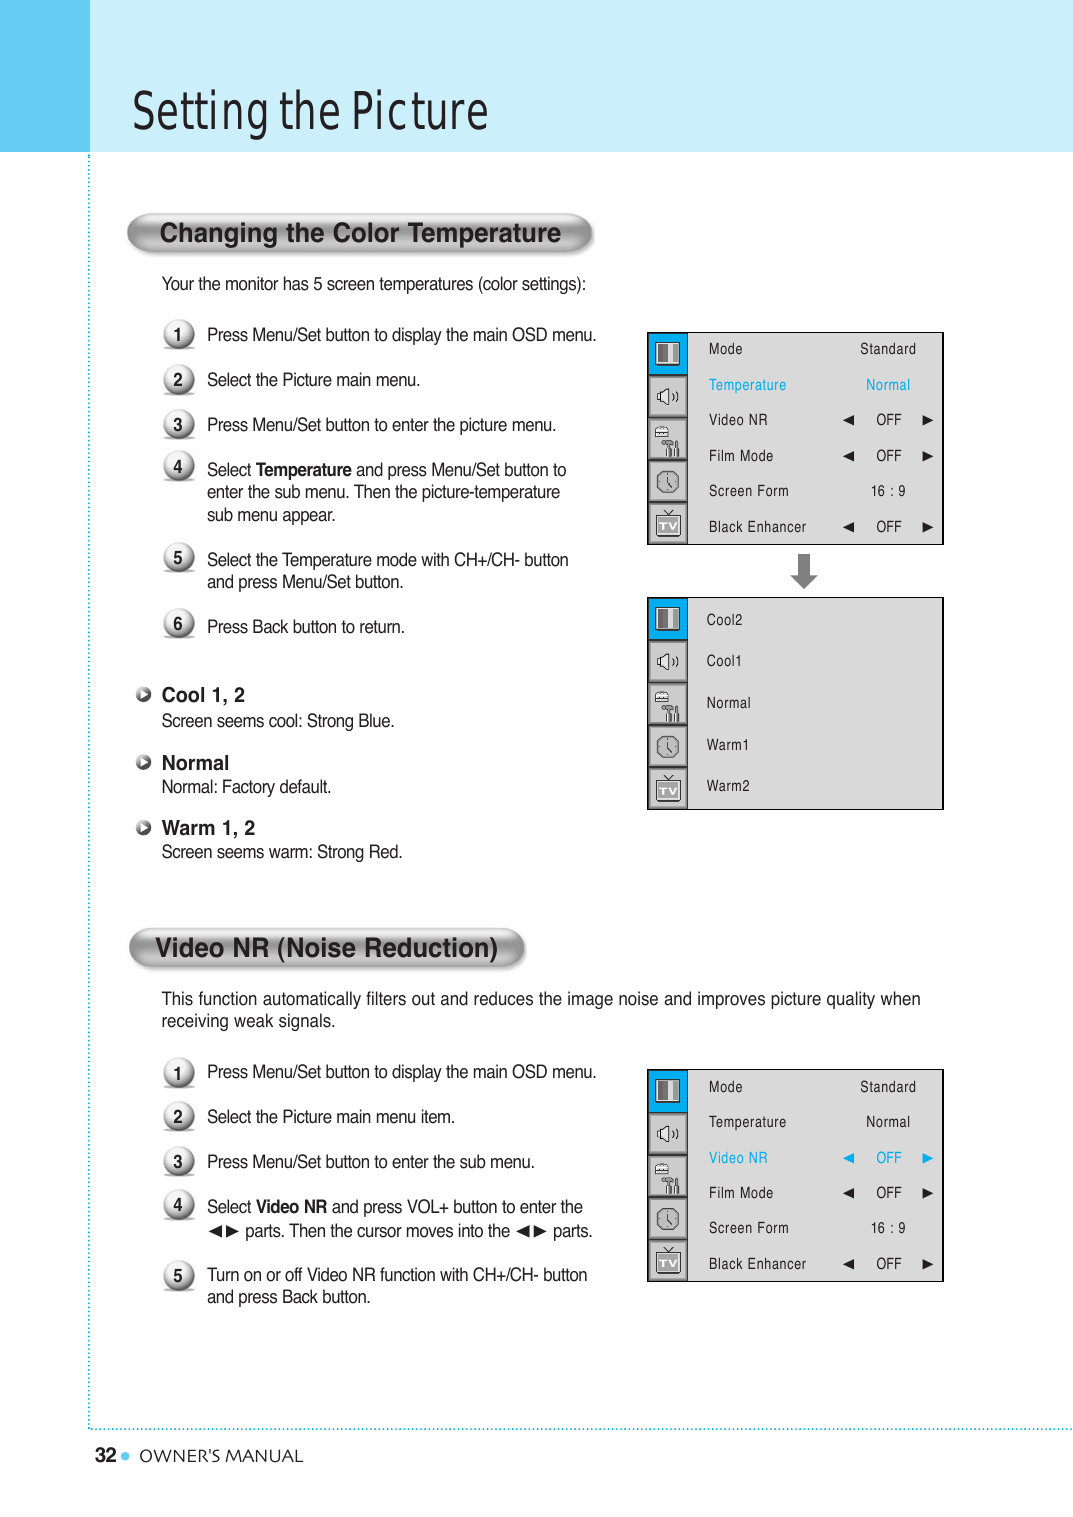
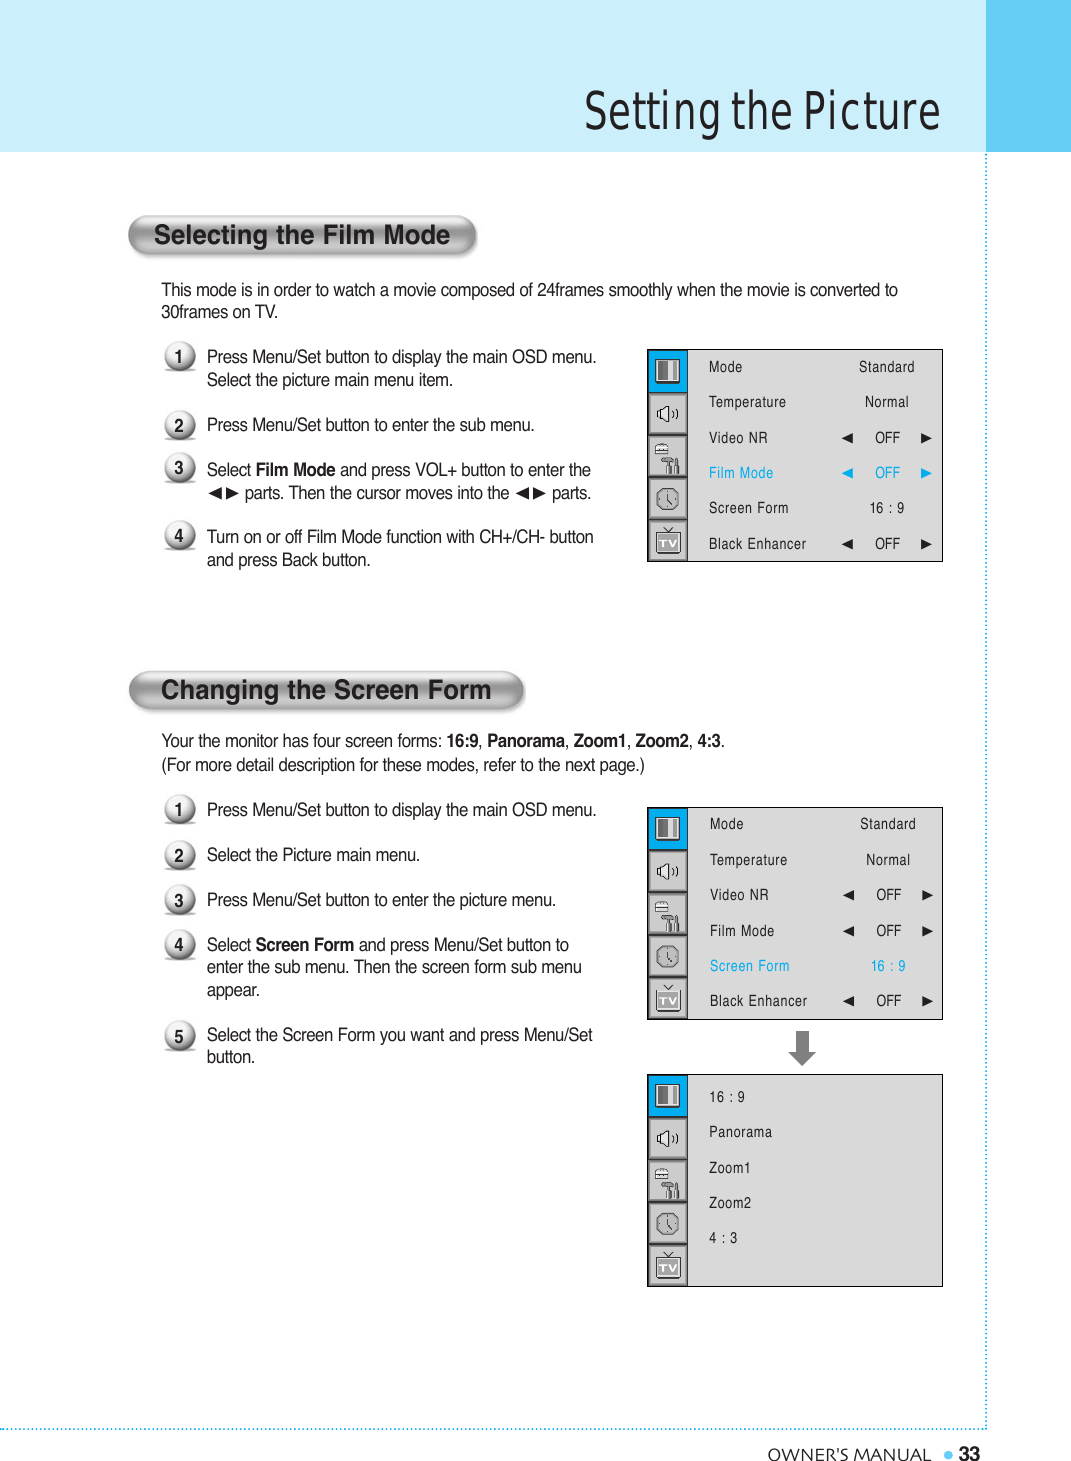
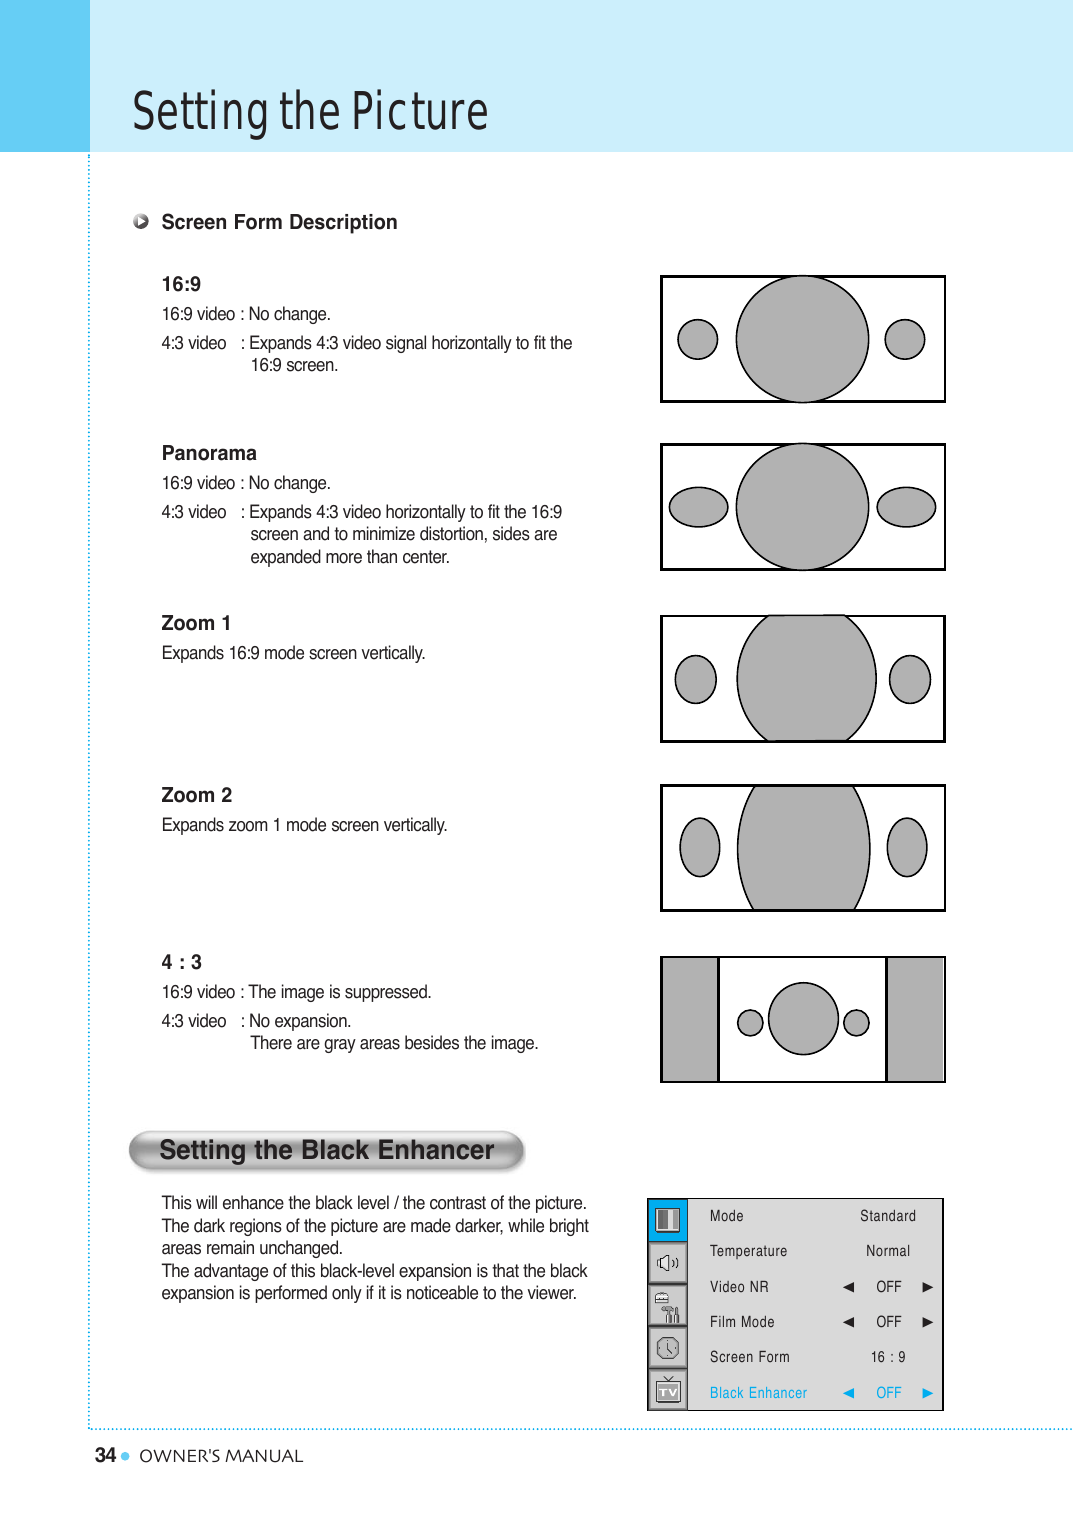
![Contents1OWNER'S MANUALForewordCaution ........................................................................................................................................ 3Important Safety Instructions .................................................................................................. 4Precaution .................................................................................................................................. 5Overviewing the MonitorViewing the Control Panel ........................................................................................................ 9Viewing the Connecting Panel ............................................................................................................ 10Viewing the Remote Control- Button Description ............................................................................................................................ 12- PIP (Picture in Picture) Buttons ...................................................................................................... 13- Loading the Batteries........................................................................................................................ 15InstallationTable Stand Installation ............................................................................................................ 16Speaker Installation .................................................................................................................. 17Connecting the Cable/DevicesConnecting the TV Cable .......................................................................................................... 18Connecting the VCR .................................................................................................................. 19Connecting the DVD .................................................................................................................. 20Connecting the Set Top Box .................................................................................................... 21Connecting the PC [ D-Sub & DVI ].......................................................................................... 22- Displayable Monitor Specification.......................................................................................... 23Setting the ChannelBasic Operation.......................................................................................................................... 24OSD Menu Structure .................................................................................................................. 25Choosing the Channel Type...................................................................................................... 26Storing the Channel Automatically .......................................................................................... 26Fine Tuning the Channel Reception ........................................................................................ 27Setting the Favorite Channel .................................................................................................... 28Setting the PictureChanging the Picture Mode ...................................................................................................... 29- Adjust User Mode ................................................................................................................ 30Changing the Color Temperature ............................................................................................ 32Video NR (Noise Reduction) .................................................................................................... 32Selecting the Film Mode............................................................................................................ 33Changing the Screen Form ...................................................................................................... 33](https://usermanual.wiki/Harsper/HL-401B/User-Guide-516875-Page-2.png)

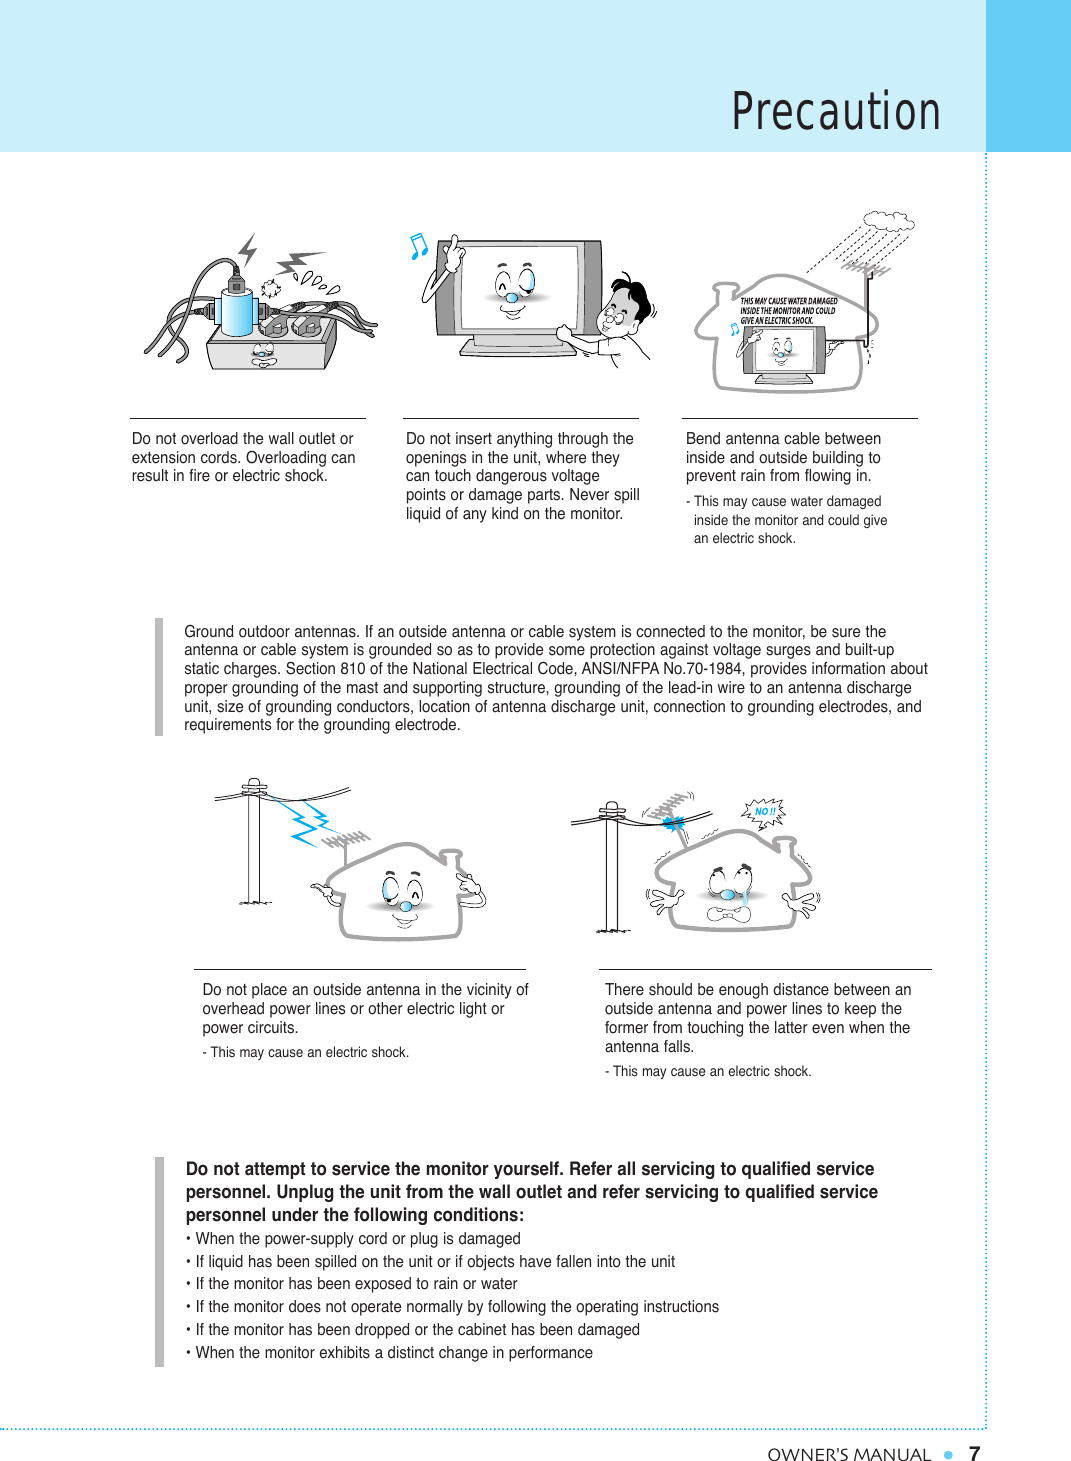


![22Connecting the PC [ D-Sub & DVI ]OWNER'S MANUALPin Configuration15pin signal cable (based on protruded pin)To watch the PC screenTurn on the monitor and press INPUT button to select the PC mode.Turn on the PC and check for the PCrequirements.Adjust the PC screen in Geometry menu. (See 35 page.)Connecting a PC to the monitor• There are two connectors to connect the monitor and PC: D-Sub and DVI.• D-SubConnect a PC (15pin) video cable between the video output port on the PC and the PC port on the monitor. • DVIConnect a DVI-D cable between the DVI output port on the PC and the DVI port on the monitor. 123456789101112131415Red (R)Green (G)Blue (B)GroundingGrounding (DDC)Red (R) GroundingGreen (G) GroundingBlue (B) GroundingReservedSync GroundingGroundingData (DDC)Horizontal sync.Vertical sync.Clock (DDC)Pin No. Description123D-Sub 15pin (VGA) from PCDVI from PC](https://usermanual.wiki/Harsper/HL-401B/User-Guide-516875-Page-23.png)


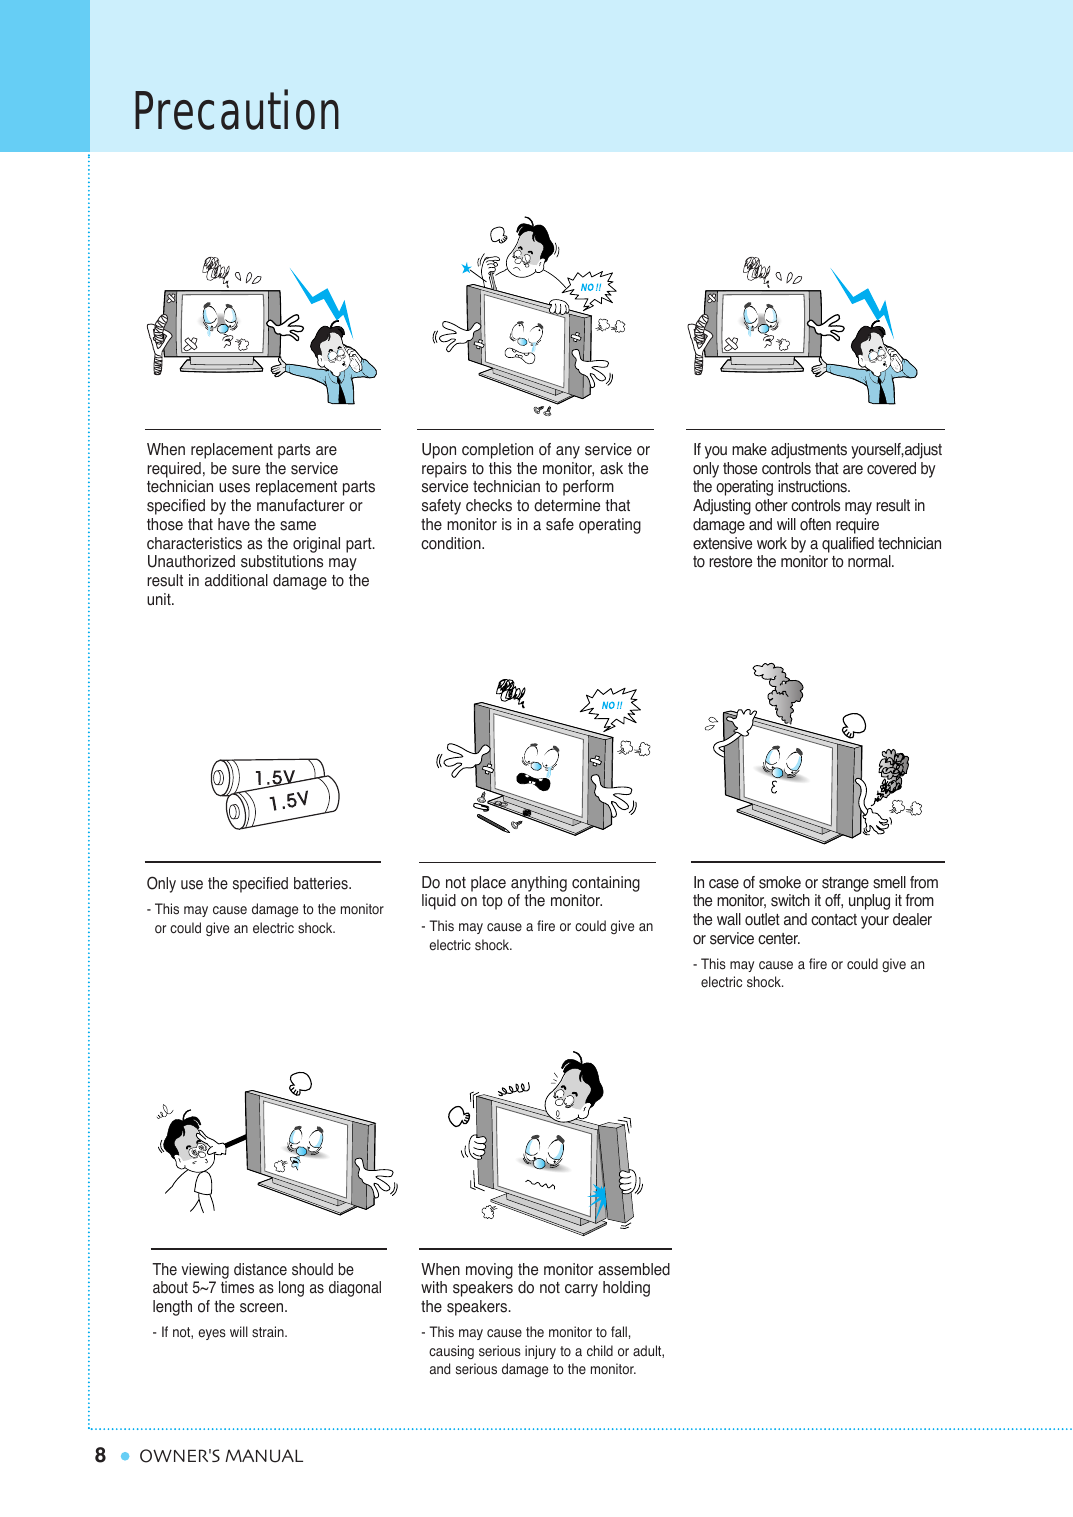
![Setting the Picture [ PC ]35OWNER'S MANUALIn PC mode, you can adjust the H, V-Position, Native Mode, and Phase. Also you can adjust them automatically.You can change H, V-Position, Native Mode, and Phase in PC mode like usual PC monitors. You can also adjust them automatically. (Auto adjust function.)Press Menu/Set button to display the main OSD menu.Select the Picture main menu with CH+/CH- button.Press Menu/Set button to enter the sub menu.Select Geometry and press Menu/Set button to enter the sub menu. Then the picture-geometry sub menuwill appear.Select the item to adjust with CH+/CH- button.Press Menu/Set button. Then the cursor moves on the bar and you can adjust the value with VOL+/VOL- button. To adjust these items, automatically, select Auto Adjust and press Menu/Set button.Adjusting te PC Screen (Geometry)For more detail description refer to the next page.You can select the H-Size of Native Mode depending on the Input timing (1360/1366 selection)12341234ModeTemperatureGeometryScreen FormStandardNormal16 : 9H-Position V-PositionPhaseNative ModeNative H-SizeAuto Adjust¥OFF ¥1360 ](https://usermanual.wiki/Harsper/HL-401B/User-Guide-516875-Page-36.png)
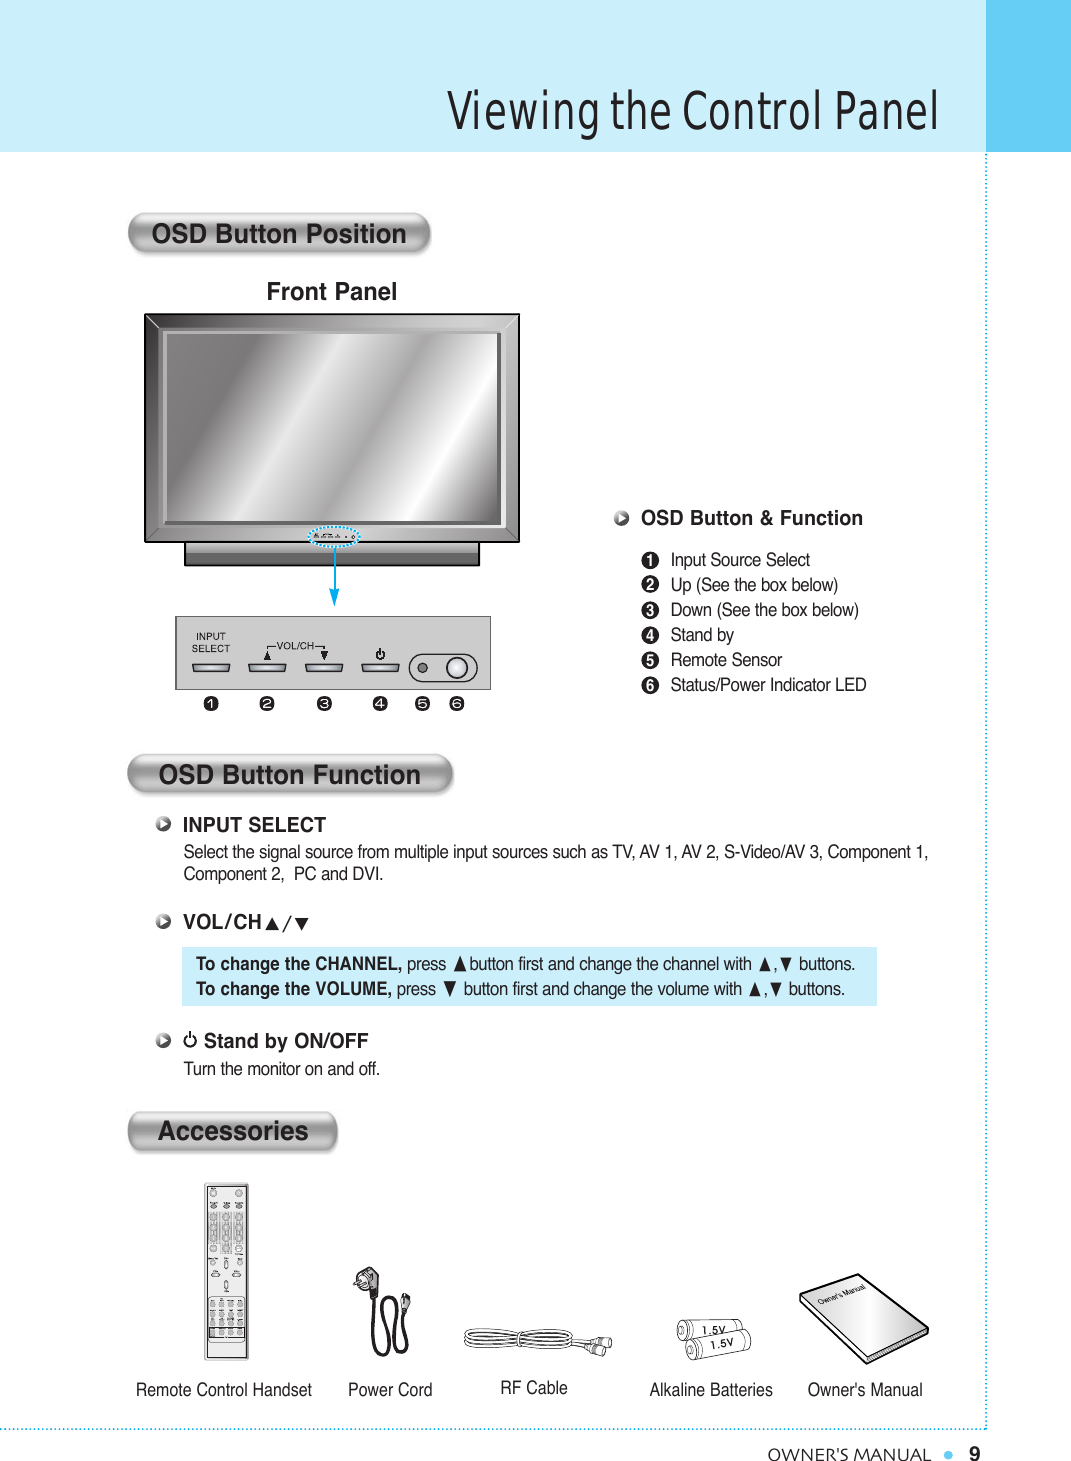
![36Setting the Picture [ PC ]OWNER'S MANUALH-PositionV-PositionPhaseNative ModeWhen you use monitor, native mode display all timing to 1366 x 768 mode.When you off native mode, monitor display 1366 x 768 mode expect 1360 x 768.Select Native Mode menu and press VOL+ button to enter the ¥ parts. Then the cursor moves into the ¥ parts.Turn the function on or off with CH+/CH- button and press Back button.Mismatch Match12H-Position V-PositionPhaseNative ModeNative H-SizeAuto Adjust¥OFF ¥1366 ](https://usermanual.wiki/Harsper/HL-401B/User-Guide-516875-Page-37.png)