HeathCo WLTRX3010 Video Doorbell User Manual 208476 01
HeathCo LLC Video Doorbell 208476 01
HeathCo >
Exhibit D Users Manual per 2 1033 b3
Welcome to Notifi by HeathZenith, the first video doorbell
system that doesn’t require batteries for the camera and
allows you to position the camera to best suit your needs.
This quick start guide will help setup the Notifi system.
For additional support, videos, and to download the full
manual, go to www.heath-zenith.com/notifi.
Important Information
• Minimum system requirement for the Notifi app
• iOS 7.0 or higher
• Android 2.2 or higher.
• The Notifi camera requires constant power to operate.
Whenever the power is turned on to the camera
(either for the first time or after a power outage), the
bulb requires a short 60-second boot-up period before
the camera will be fully operational.
• Not compatible with lights controlled by a:
• photocell (dusk-to-dawn operation)
• motion sensor
• dimmer
• timer
You Will Need
• Password for your home network
• Broadband internet connection with home wi-fi router
• Phillips screwdriver
• Flat-head screwdriver
• Light fixture with medium base bulb
™
134Setup the Notifi App and Camera
• IMPORTANT: Your home password will be required
during this process.
• Allow the bulb to fully boot-up.
• On your mobile device, go to Settings > Wi-Fi.
Select the “Notifi Video Doorbell” from the available
Wi-Fi networks.
• Once connected, open the Notifi app. The app will
detect your new Notifi system.
• Select “YES” to start the setup and the app will guide
you through the remaining steps.
Install the Bulb
• IMPORTANT: Wait until step 5 to mount the camera.
• Turn the power OFF to the light fixture.
• Remove the existing bulb.
• Screw in the new Notifi bulb and camera until fully
seated in the light socket.
• Continue to rotate the bulb until the “Notifi” logo is
facing away from the house. The base of the bulb
will click during installation to allow the bulb to be
aligned properly.
• Turn the power ON to the light fixture – the bulb will
turn ON for 60-seconds and then turn OFF after the
boot-up period.
• Remove the camera lens cap.
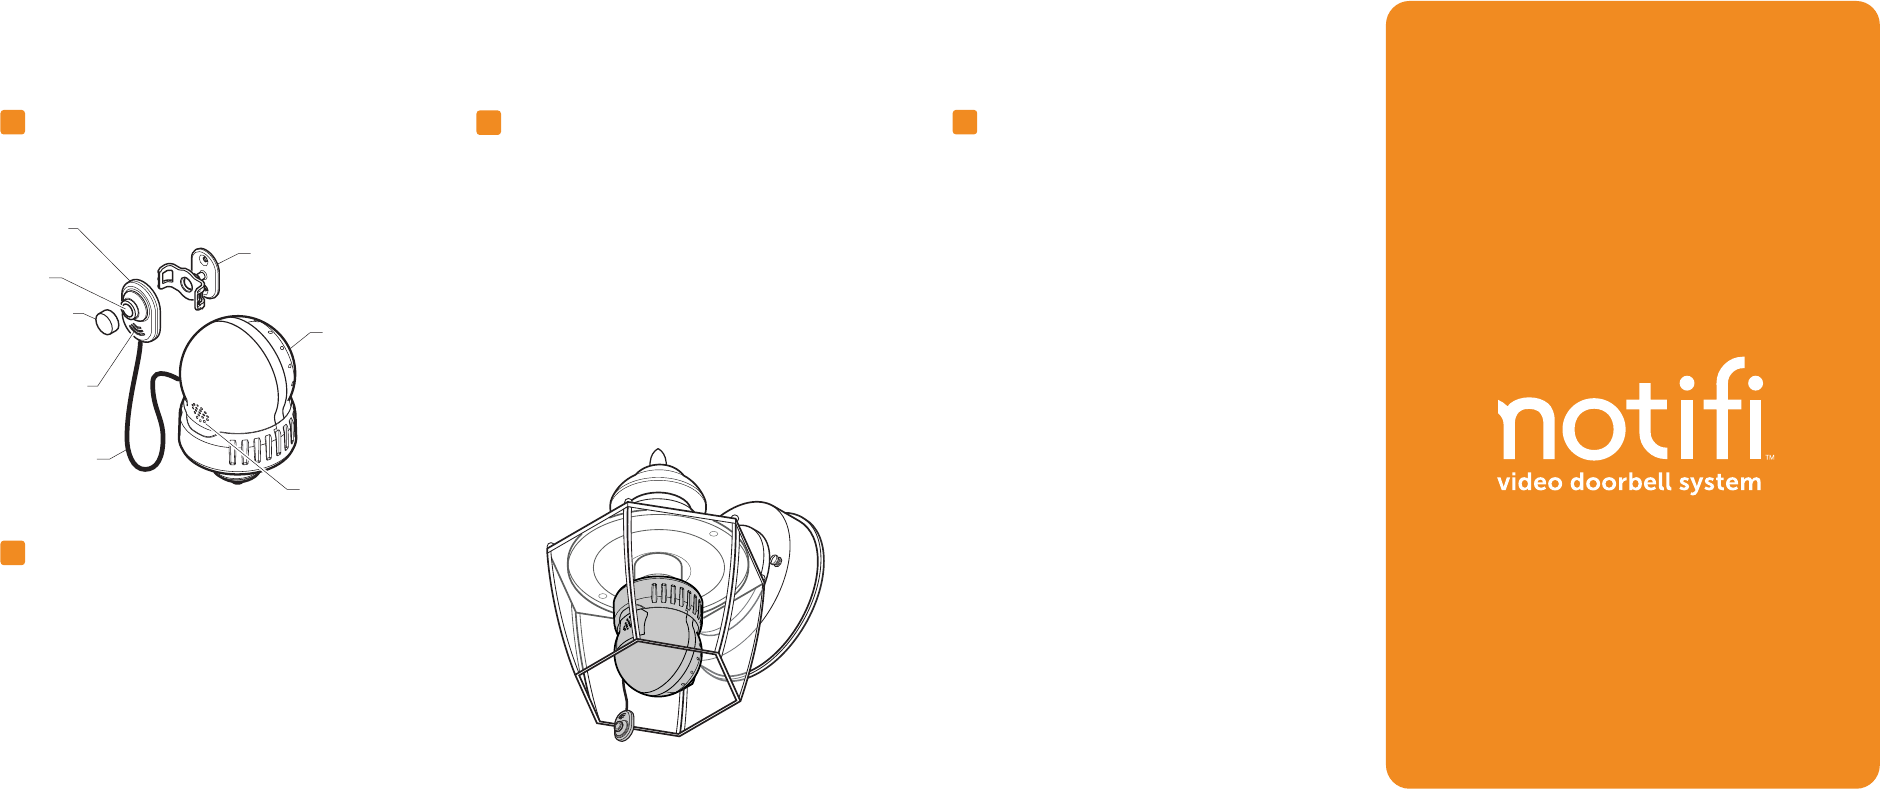
Know Your System
• Use the illustration below to get to know the different
components of your new Notifi system.
2Download the Notifi App
• See the enclosed cover letter for instructions on
how to download the Notifi app onto your device.
Camera mounting bracket
Camera
Camera
lens
Microphone
Lens cap
Camera
cable (22 in.)
LED bulb
Speaker
'RZQORDGDFRPSOHWHPDQXDODWZZZKHDWK]HQLWKFRPQRWL´
5Install the Camera
• Login to your the Notifi account and select the name of
your new Notifi system.
• While watching the phone’s video feed, position the
camera to the area in front of the door.
• Secure the camera using the double-sided tape
or screws.
• Note: The camera's image can be rotated 180°
within the app. This allows you to mount the camera
upside down if needed. You can select this option
after the setup is complete.
Additional Accessories
Additional Light Bulb
Model Number: SL-3008-00
FCC Statement
This device complies with Part 15 of the FCC Rules and RSS-210 of Industry Canada.
Operation is subject to the following two conditions: (1) this device may not cause
harmful interference, and (2) this device must accept any interference received,
including interference that may cause undesired operation.The user is cautioned
that changes or modifications not expressly approved by the party responsible for
regulatory compliance could void the use’s authority to operate the equipment.
Warranty
1 Year Limited Warranty
Many states regulate the use of security cameras and other recording devices.
It is the purchaser's sole responsibility to ensure compliance with all applicable
laws and to provide any legally required notices. Check local laws regarding the
use of any recording devices and cameras prior to installation.
For use when there is more than one light at the
entry area.
Apple and the Apple logos are trademarks of Apple Inc., registered in the U.S., and
other countries. App Store is a service mark of Apple Inc.
Google Play is a trademark of Google Inc.
Android is a trademark of Google Inc.
208476-01
Order accessories and download a complete
Install the Push Button & Chime
• Plug in the chime.
• Open the push button and remove the orange
battery tab.
• Temporarily hold the push button where it will be
mounted and press the button.
• If the chime rings, mount the push button.
• If the chime does not ring, move the chime closer
to the push button and test again.
6