Highway Technologies 1033 Work Zone Alert and Information Radio User Manual rev1
Highway Technologies Inc Work Zone Alert and Information Radio rev1
User manual rev1

IZARD
W
THE
Wizard Messages - Suggested Guidlines
Wizard will accept any message. Each message can be up to 15 sec-
onds long. However, to maximize effectiveness, please follow the
following guidelines as much as possible. Bear in mind that the
Wizard is an FCC-approved device, intended for specific traffic
advice, not generic messages (such as “Drive safely”).
The antenna for this device must be mounted on top of the roof of
the vehicle or on top of the construction site trailer away from near-
by personnel. All personnel must remain at least 8“ from an unob-
structed antenna to avoid extended periods of RF exposure.
1. Minimize background noise Recording in a quiet area (in a vehi-
cle or off site) is best. When recording on site, try to choose a break
in the traffic noise and hold the mic close to the mouth.
2. Keep the message short Most messages can be delivered in less
than 10 seconds. Include only enough information to get the mes-
sage across.
3. Keep the message relevant A pattern of broadcasting outdated or
not at the moment applicable messages will eventually cause them
to be ignored.
4. Include key information If the message only concerns north-
bound traffic or a particular exit or location, say so.
5. Use a higher pitch Female voices are more likely to get every-
one’s attention. Extremely low male voices do not transmit as well.
6. Speak clearly Be sure to enunciate and speak slowly enough to
avoid run-together words
7. Be Pleasant In many situations, the message may be heard sever-
al times. An unpleasant message will be annoying.
8. Identify the authority Messages should first announce the author-
ity giving the message, i.e. “This is the Colorado DOT” or “This is
the Maryland State Police”. This gives credibility to the message
that follows.
Highway Technologies, Inc.
81 Texaco Road, Mechanicsburg, PA 17050
717 691-8007
CASE
Height – 5”
Width – 8”
Depth – 3“
Weight – 5 lbs.
Epoxy Powder Coat
Mounting – Dash or seat
POWER
12v Neg. Grd.
Connector – 2 pin Amphenol
Fuse – 5 amp
TRANSMISSION
5 Watts Output
Transmit Interval - 30 to 90 sec.
Messages - any 1 of 3 user recordable
Transmit Channels - 1 or 2 of any CB
channel (1-40)
ANTENNA
Not Supplied
Connector – Std., PL259
Recommended Antennas:
Wilson 500
American Antenna– K40
RF Safety Warning
STANDARD SPECIFICATIONS
THE W ®
Highway Technologies, Inc
81 Texaco Road • Mechanicsburg, PA 17050 • 717-691-8007
Wizard Field Operations Procedures
A guide for settings and message selection
under varying operating conditions
Work Zone alert
and
Information Radio
IZARD

Elimination of Licensing
The Federal Communications Commission has ruled that Citizens Band
Radio Service operators are no longer required to obtain an FCC license
to operate their CB equipment. In doing so, the FCC also permits CB
stations to operate without station identification.
Elimination of individual station licenses results in no lessening of the
operating privileges or responsibilities of CB users. An operator of a CB
radio station is still required to comply with the Communications Act
and with the rules of CB Radio Service.
Rules You Should Know
In common with all other CB operators, you must comply with the
general rules prohibiting music, profanity, promotion of illegal activities,
selling of merchandise or services, and blasting others off the air with
illegally amplified transmitters.
Although one-way communications are generally not allowed, operation
of the Wizard for its intended purpose is permitted. Rule 18 (d) provides
specific permission to establish one-way communications concerning
highway conditions to assist travelers.
Since Rule 7 (b) reserves Channel 9 for emergency communications or
travelers assistance, channel 9 may be a good choice as channel B.
Why a Wizard?
With trucks logging more than 50 billion vehicle miles on the nation's roads,
more maintenance and more work zones increases the opportunity for more
accidents. Higher speeds, inattentive driving and closer spacing contribute
to rear-end vehicle collisions and hazardous conditions for road construction
workers.
The Wizard® is designed to provide
advanced warning of impending traffic
slowdowns to give all vehicles, especially
heavy trucks, the necessary time to stop.
The Wizard is a completely portable
wireless broadcasting system adaptable to
any work site, sending localized messages
on selected CB channels.
The Wizard counts down the selected
interval for sending, listens for a break in
activity on channels 9 and 19 (or other
user selected and emergency CB chan-
nels), and broadcasts when clear. Care is
taken to not interfere with normal CB
communication between vehicles.
A short message alerts the driver to slow down. The message can be broad-
cast on a second user selected channel if desired. Messages can be changed
at the site, broadcast distances adjusted for traffic backup, and message
frequency modified to compensate for average speeds.
WARNING
The Citizens Band (CB) Radio Service is under the jurisdiction of the
Federal Communications Commission (FCC). Any adjustments or
alterations which alter the performance of the transceiver's original
FCC type acceptance, or change the frequency determining method,
are strictly prohibited. Replacement or substitution of crystals,
transistors, ICs, regulator diodes, or any other part of a unique
nature, with parts other than those recommended by Highway
Technologies, Inc., may cause violation of the technical regulations
of Part 95 of the FCC rules or violation of type acceptance require-
ments of Part 2 of the rules.
This radio has been type accepted and certified by the FCC.
The Wizard is not intended for unattended operation. An
operator should be in control of the system at all times.
Elimination of Licensing
Rules You Should Know

Standard Menu Structure
Although the Wizard is capable of many variations of set-
tings, experience to date has shown that most operators use
only channel 19 with a brief message. If this is your intended
use, the standard menu will allow quick and simplified opera-
tion.
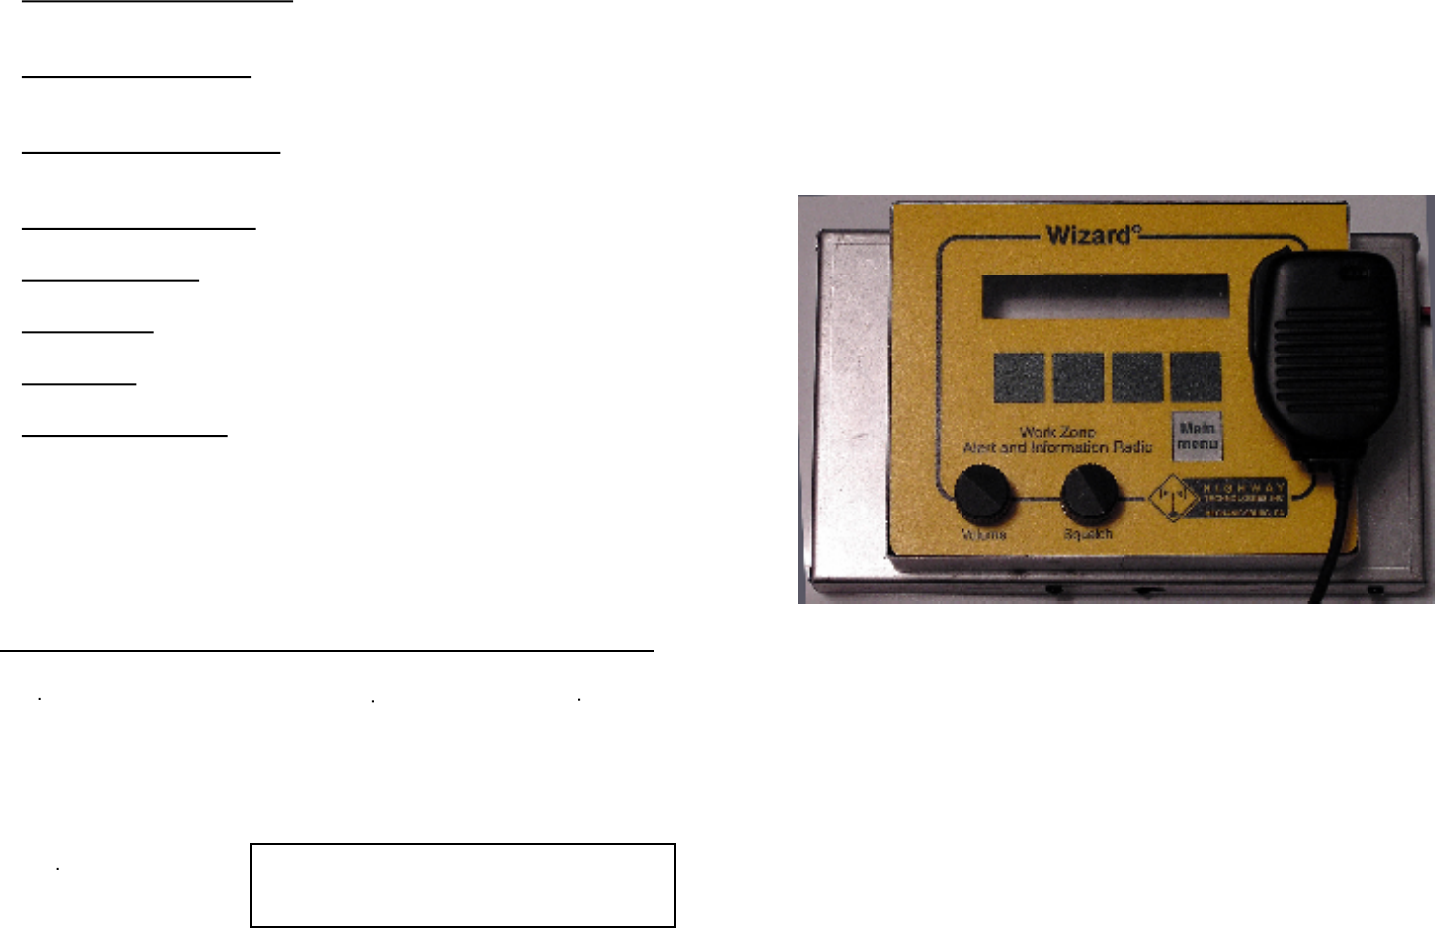
To begin: Press “Main menu”
[This is the only button that is permanently identified.]
Look in the LCD display above each button to learn the
assigned function for that particular menu.
If you are re-starting a previously selected message, simply
press TX, and the Wizard will resume transmission according
to the last selections before shut down.
The LCD display will tell you the number of seconds remaining
before attempting transmission, the message # and the chan-
nel #. If you wish to change anything, press “Main menu” and
go to “Setup”.
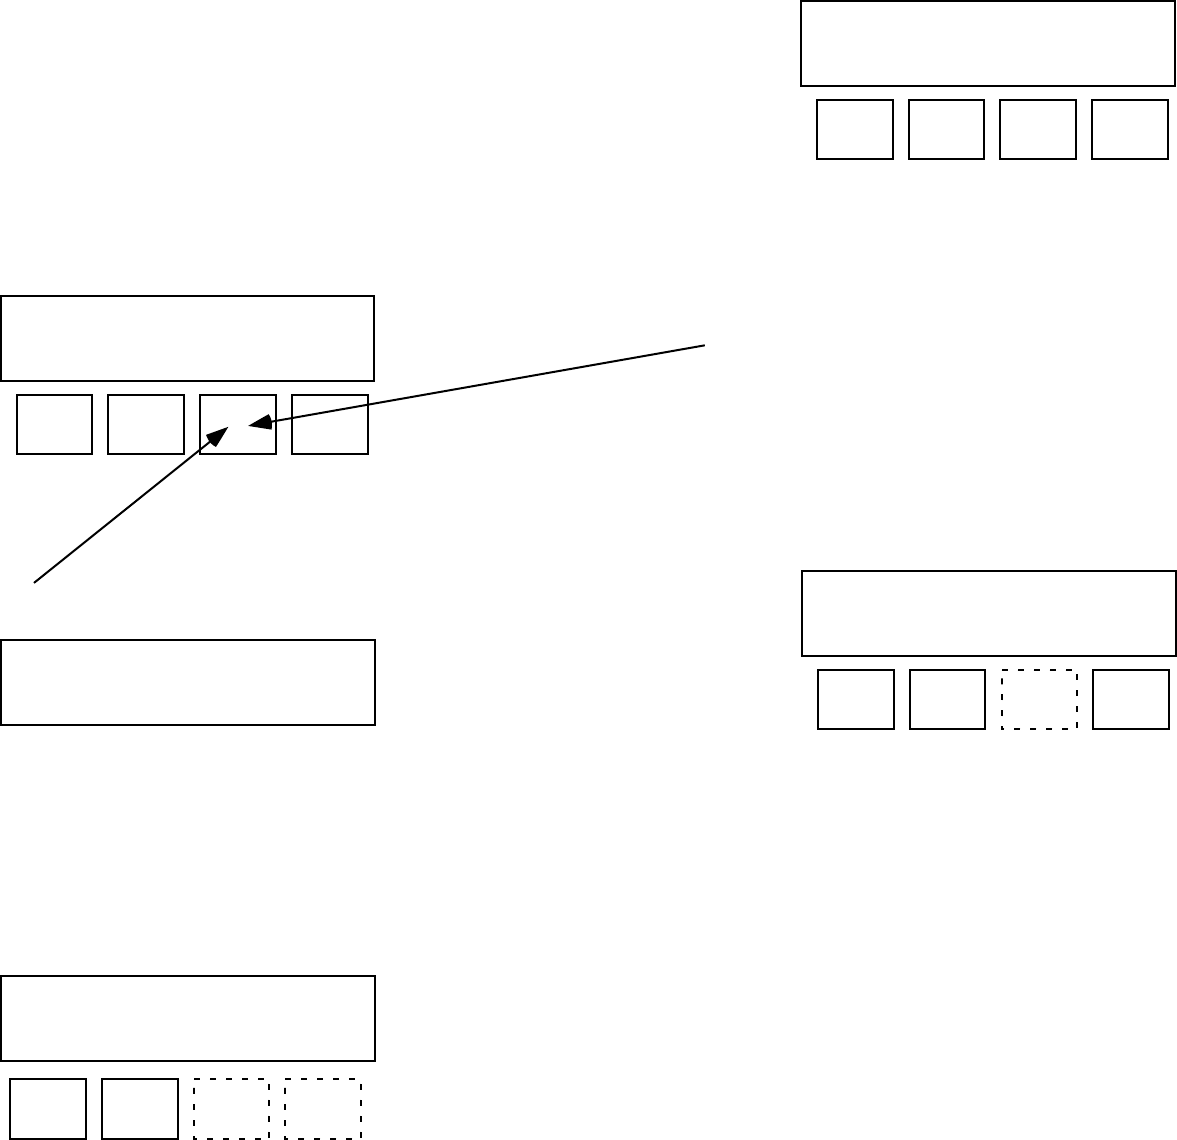
SETUP
In Setup, you can change the message # or the time interval
between transmissions.
Interval seconds: 30
down up setup
TX: countdown 28
Msg #2 on Ch 19
Setup: Select
Msg # Time
Msg #: Select msg 2
down up play setup
Msg # - To choose a different message, press “down” or “up“
to go to message 1 or 2 or 3. To hear each message press
PLAY when the message # appears in the window. If the
message is acceptable, press “Setup” to adjust the time
interval or “Main menu” to get ready to transmit. [Then
press TX when the main menu appears.]
If you wish to record a new message, select the message #
to be replaced, hold the microphone close to your mouth,
squeeze the mike key and speak. The window will indicate
the number of available seconds remaining. Try to keep the
message as short as practical. When finished, release the key
and press PLAY to confirm that it is satisfactory.
Time - When in “Setup”, press “Time” to select a desired
interval. Press “down” or “up” to shorten or lengthen the
time between transmissions. Any interval between 30 and
90 seconds may be chosen (in 10 second increments). When
your selection has been made, press “Setup” to change mes-
sages or “Main menu” to get ready to transmit
Select mode:
Setup Test TX CB [Display after press-
ing “Main menu”]
[Display after press-
ing “TX”]
[Display after press-
ing “Setup”]
[Display after press-
ing “Msg #”]
[Display after press-
ing “Time”]

Standard Menu Structure cont.
TEST
Test allows the operator to check out the system without
actually broadcasting on the selected channel - it only acti-
vates the Wizard speaker - not the transmitter.
The TEST menu displays the number of seconds until the next
attempt to broadcast, the message # and the channel #.
After the countdown, the message will display TX if simulat-
ing a transmission or BUSY if waiting for someone to finish
their sentence. If you wish to change anything, press “Main
menu” and go to “Setup”.
TX
In TX, you are actually broadcasting when the wait time is
over. Otherwise it is the same as TEST.
CB
# - To choose a different channel, press “down” or “up“ to
select any of the normal 40 channels.
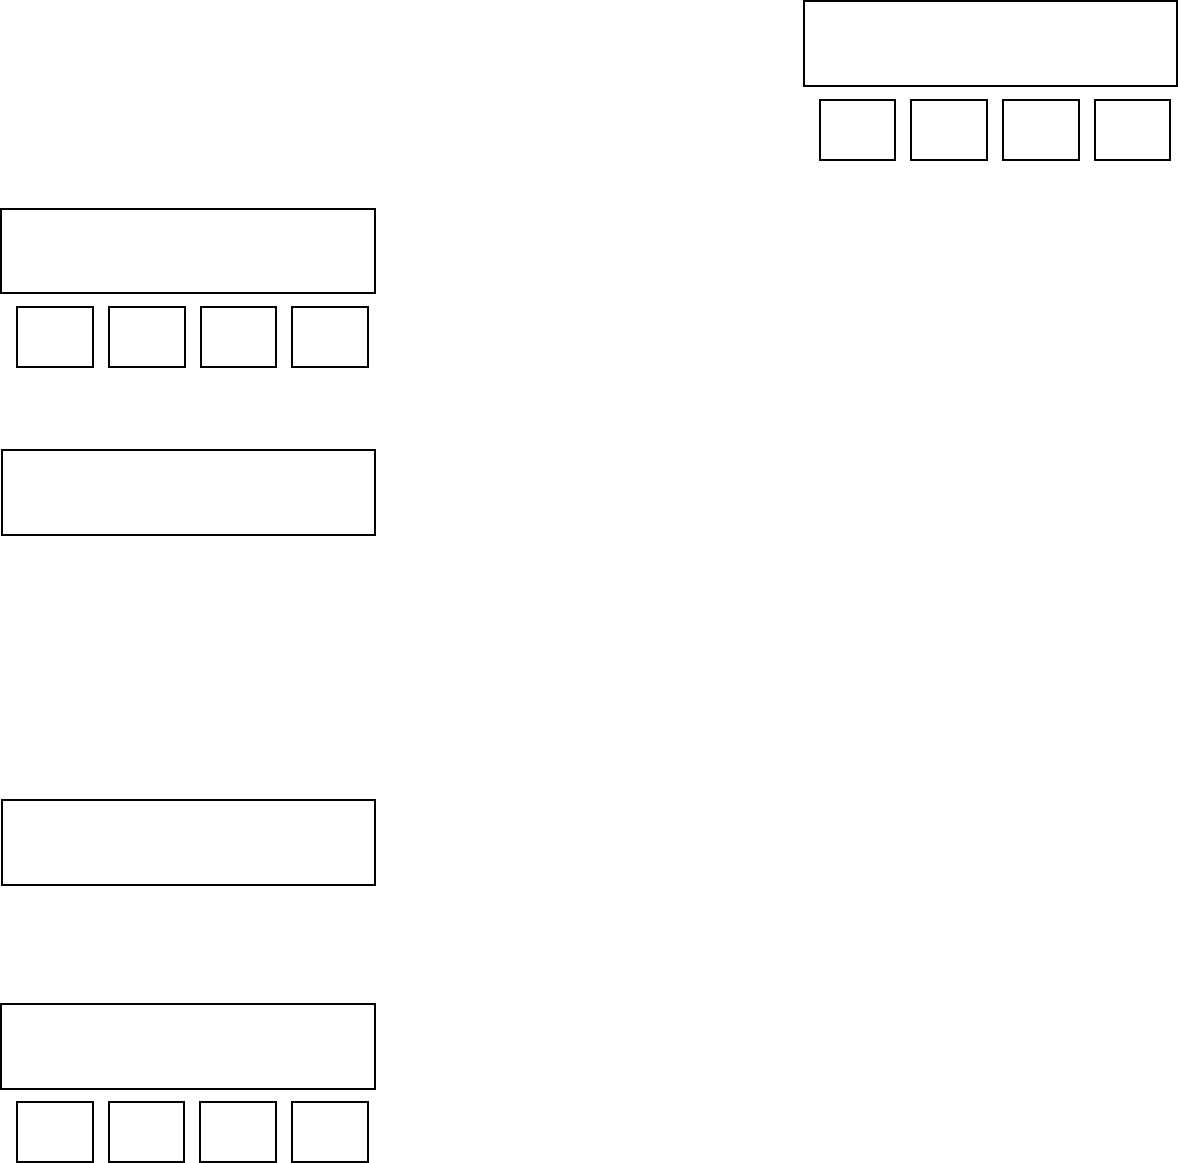
TEST: countdown 28
Msg #2 on Ch 19
When you are ready to talk on your selected channel, simply
squeeze the mike key, bring it close to your mouth and talk
normally. When finished speaking, release the mike. The sys-
tem will then revert back to listen (receive) mode.
Remember that you are governed by the FCC rules just like
any other CB operator. In this mode, the system performs as
if it were a standard CB.
Select mode:
Setup Test TX CB [Display after press-
ing “Main menu”]
[Display after press-
ing “TX”]
TX: countdown 28
Msg #2 on Ch 19
[Display after press-
ing “TEST”]
Channel #: 19 Rcv
down up [Display after press-
ing “CB” and before
pressing mike key]
Channel #: 19 TX
down up [Display after
squeezing mike key]
Note: To stop broad-
casting, press MAIN
MENU and then any
other mode but TX

Extended Menu Structure
To access the extended menu press MAIN MENU and the but-
ton above it (the 4th button) at the same time for at least 2
seconds. The system functions will be the same as the stan-
dard menu except there are greatly expanded setup possibili-
ties
The extended SETUP menu allows the choice of any channel
for Wizard broadcast (not just ch 19 as with the standard
menu). It also allows the option of broadcasting on a second
channel in between broadcasts on the main channel. The
second message may be the same or a different message.
SETUP EX
In SETUP, you can change the message # or the time interval
between transmissions as with the standard menu. However
you can also assign the first channel - channel A and, if
desired, a second channel - channel B. The system will
default to using only channel A unless a channel is assigned
to be channel B. The timing interval is governed by channel
A. You cannot set a different interval for channel B.
To begin establishing the assignments, press channel A.
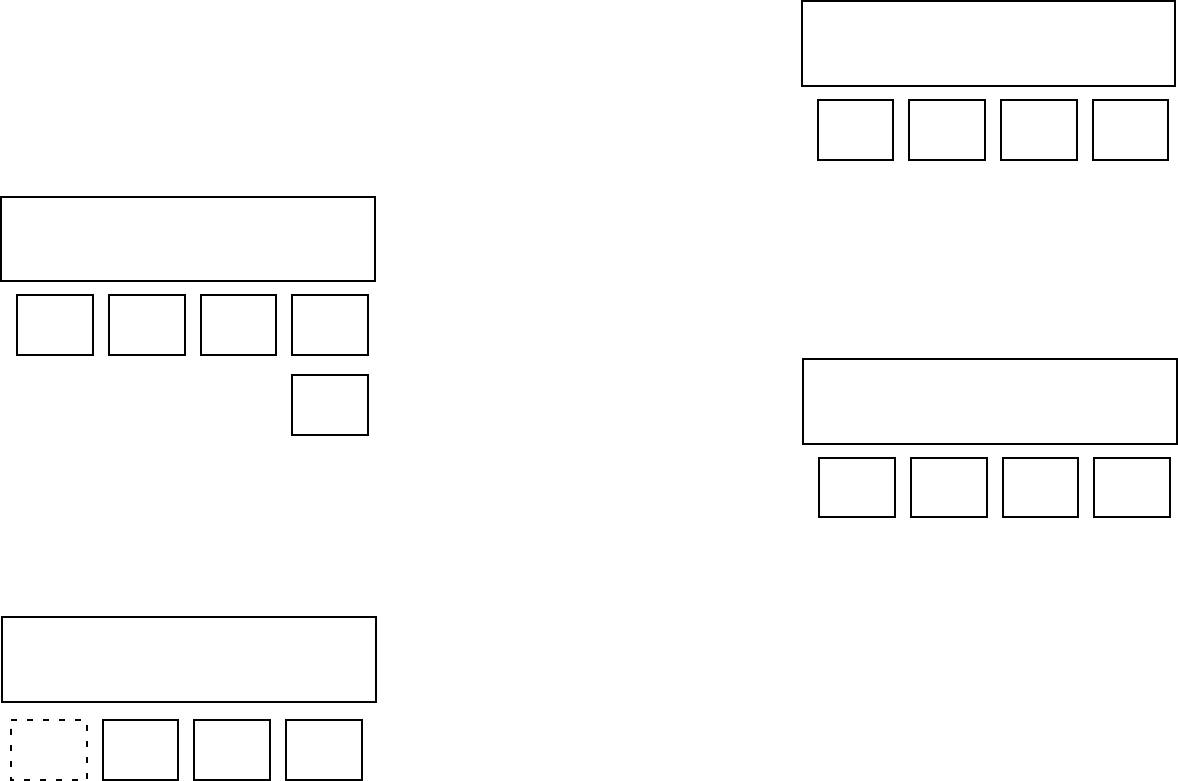
Setup Ex: Select
Time Ch A Ch B
Assign chan Ch A : 17
down up to msg setup
Ch A - To assign a different channel, press “down” or “up“ to
select any of the normal 40 CB channels.
To then select a message, press TO MSG. [if the message
has previously been selected, press SETUP to return to the
setup menu.]
Msg # - To choose a different message, press “down” or “up“
to go to message 1 or 2 or 3. To hear any message press
PLAY when the message # appears in the window. If the
message is acceptable, press “Setup” to return to the setup
menu.
If you wish to record a new message, select the message # to
be replaced, hold the microphone close to your mouth,
squeeze the mike key and speak. The window will indicate
the number of available seconds remaining. Try to keep the
message as short as practical. When finished, release the key
and press PLAY to confirm that it is satisfactory.
If you wish to use channel B, press CH B and repeat as above.
Note: the system will not allow channel A and B to be the
same channel.
For information on TEST, TX and CB, turn to the standard
menu description.
Select EX mode:
Setup Test TX CB [Display after press-
ing “Main menu” and
the 4th button
simultaneously]
[Display after press-
ing “Setup”]
[Display after press-
ing “Ch A ”]
Main
Menu Assign msg Ch A: msg 2
down up play setup [Display after press-
ing “TO MSG”]