Hisense Communication HISENSEC127 CDMA 1X Mobile TelePhone User Manual C127 User Mannul
Hisense Communication Co., Ltd. CDMA 1X Mobile TelePhone C127 User Mannul
User Manual

i
CDMA 1X Mobile TelePhone
HS-C127
User’s Manual

ii
Contents
Safety information…………………………… …….i
Safety information…………………………… …….iii
Part Names and Functions..........................................1
Main LCD ..........................................................3
Installing the card ...............................................4
Installing the Battery ..........................................6
Basic functions ...................................................9
SMS..........................................................................18
1 Write message ...............................................18
2 Inbox .............................................................18
3 Outbox...........................................................19
4 Draft ..............................................................20
5 SMS settings..................................................20
6 Reserved message .........................................21
7 Send report ....................................................21
8 Memory status...............................................22
Profiles .....................................................................23
1 Search by Name ............................................24
2 Add ................................................................24
3 Search by Group............................................25
4 Search by position .........................................25
5 Speed dialing.................................................25
6 Own number..................................................26
7 PhBook management.....................................26

iii
My documents..........................................................28
1 User ...............................................................28
2 My Date.........................................................28
3 Picture ...........................................................28
You can choose to view the picture at phone. ..28
4 Ring ...............................................................28
5 Other..............................................................28
6 Memory Status ..............................................29
System Setting..........................................................30
1 Security Settings............................................30
2 call settings....................................................30
3 Display settings .............................................32
4 keystoke settings ...........................................33
5 Auto power on/off .........................................33
PIM...........................................................................34
1 Alarm.............................................................34
2 Calendar ........................................................35
3 Memo ............................................................35
4 Calculator ......................................................36
5 Stopwatch .....................................................36
6 Timer .............................................................36
7 Converter.......................................................36
8 State number..................................................36
9 World Time....................................................36
Recent calls ..............................................................38

iv
1 Missed calls...................................................38
2 Received calls ...............................................38
3 Outgoing calls ...............................................39
4 Call time ........................................................40
5 Call record.....................................................40
Entertainment ...........................................................41
1 FM .................................................................41
2 Game ............................................................41
U-Net(high speed data service)...........................42
GETTING HELP......................................................44
Customer support .............................................44
SAR INFORMATION..............................................45
FCC Warning Statement...........................................46

1
Part Names and Functions
Name Function
1 Earpiece Hear voices here during a talk
2 LCD Display information
3 Multi-Directio
nal keys
From idle screen, press Up key
to display SMS menu, press
LEFT key to FM, press Right
key to System Setting, press
down key to set profiles.
When in menu operation,
scroll through and highlight
menu item.
4 “OK” Key Enter Uni when in idle screen.
Enter the next items when in

2
menu operations。
5 Left/Right Soft
Keys
Perform the functions
identified by the prompts
displayed at the left and right
bottom of the screen .
When in idle screen, press Left
Soft key to display main menu.
When in idle screen, press
Right Soft key to display
phbook menu, press and hold
to use phbook content . When
you view the main menu,
press the right soft key to view
the calendar press the left soft
key back to the previous
display.
6 Power key Power on/off your phone.
When powered on and in any
other screen, press Power key
to return to idle screen.
7 Send key Send and receive a call from
CDMA. Press to view “Dialed
Numbers” from idle screen.
8 Numeric keys Input numbers and characters.
9 # Key From idle screen, press and
hold to enter Etiquette mode,
in which all ringing alerts are
3
set to vibration only.
10 * Key From idle screen, press and
hold to lock your phone.
11 Accessory
Connector Port
Insert charger and other phone
accessories
12 Speaker Let you hear phone tones and
ringtones.
Note :
The preset code is “0000”.
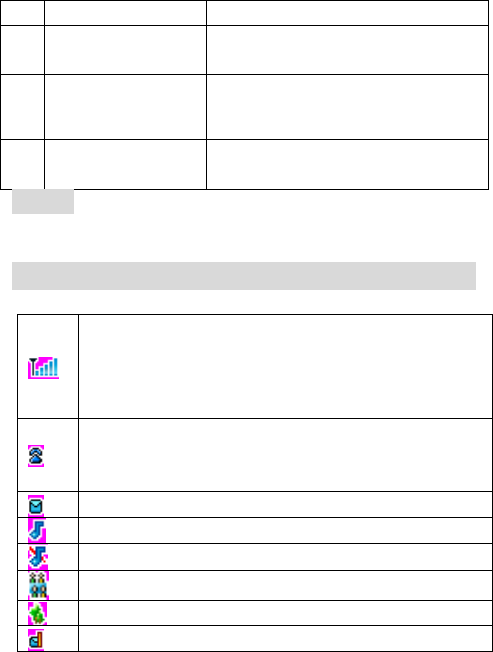
Main LCD
1. Icon area
Display the current CDMA network signal
strength. The more bars show, the stronger the
signal is. When there is no network signal
available, it displays×.
Indicate that the phone is in call or a call is
incoming. Or indicate that data connection is
activated for data services.
Indicate that there are unread messages.
Indicate that your phone is in General mode.
Indicate that your phone is in mut mode.
Indicate that your phone is in meeting mode.
Indicate that your phone is in outdoor mode.
Indicate that message box is full.
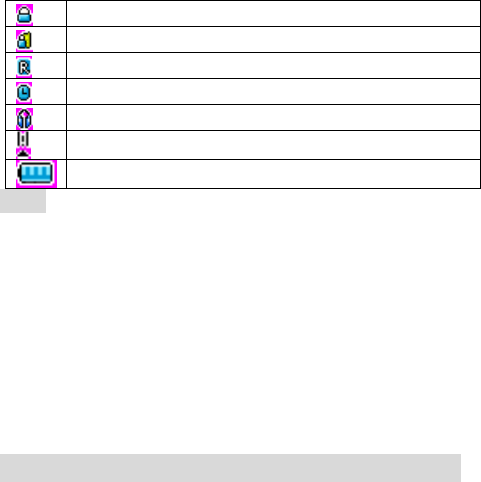
4
Indicate that your phone has been locked.
Indicate that your keyboard has been locked.
Indicate that your phone is in roaming state.
Indicate that alarm clock has been set.
Indicate that earphone has been inserted.
Indicate that the FM has been running.
Indicate the current battery volume level.
Note:
Roam Indicate only displays in international roaming
state.
2. Date and time
Time is setting . You can set Time in System setting
ÆDisplay Settings.
3. Soft Key Labels
Display the corresponding functions for Left/Right Soft
key and OK key.
The Idle Display is the standard display that you see
when you are not on a call or using the menu.
Installing the card
Your phone must work with an card provided by your
service provider. Your card contains all your
subscription information.

5
1. Insert card in with the metal contacts facing down
and the cut corner aligned with that of the
compartment.
2. Install the battery .
Note:
1、 If no card is installed, or there are errors in the
installation, or your card is damaged, then your
phone’s LCD will display “Insert card” when it’s
powered on.
2、 If your card is locked, your phone will display
“unlock PIN”. Please contact your network service
provider.
3、 When installing card, please keep it away from
possible damage caused by static, scratch and bend,
and put it where is not available for children.
6
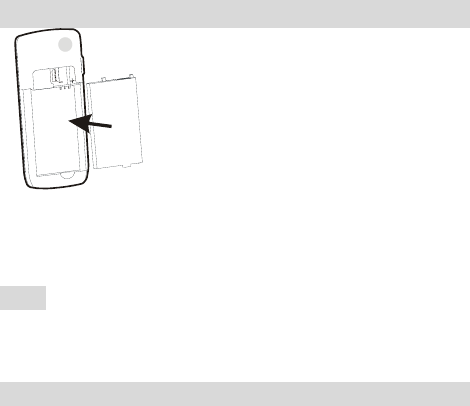
Installing the Battery
You must install and charge the battery to use your
phone. Insert the ridge at the side of the battery into the
base of the phone, then push the battery down and snap
it into place.
Note:
Your phone is designed to be used only with Original
batteries and chargers. Use of other batteries or charger
may cause damage to your phone and void the warranty.
Charging the Battery
New batteries are shipped partially charged. Before you
can use your phone, you need to charge the battery, as
indicated by the following instructions. Some batteries
perform best after several full charge/discharge cycles.
1. Connect charging line and changing bace . Plug
the charger into your phone’s connector port with
the arrow facing up.
2. Plug the other end of the charger into the
appropriate electrical outlet (100~230VAC). The
phone’s status lamp will light red during charge.

7
3. When your phone indicates that the battery is fully
charged, press the release tab and remove the travel
charger.
Note:
1. Before charge, make sure the battery is installed in
the phone.
2. The battery can discharge gradually even when
your phone is powered off. If the battery is drained
for a long time, the information stored in the phone
could possibly be lost. So even you don’t need to
use your phone for a long period, you should
charge the battery some times to keep it away from
drained.
3. If the status lamp flashes in red, please remove your
travel charger and insert it again. If this makes no
effect, stop charge and send the charger for repair.
4. If the battery’s charge is extremely low, the sub
LCD may not light even when charge has begun.
After a period of charge then the LCD can light.
Removing the Battery
Make sure your phone is powered off so that you don’t
lose any unsaved information.
Push down the battery release latch and lift the battery
off the phone.
8
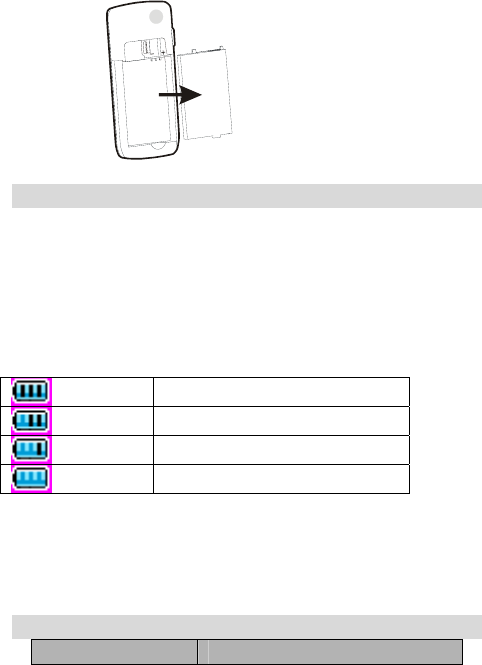
Battery Level Indicator
Your Phone is equipped with a Lithium Ion (Li-Ion)
battery which can be recharged before completely
drained. The battery provides approx 2 hours of
continuous talk time or approx 5 days of continuous
standby time.
Battery Level Indicator changes according to the
battery’s charge volume as below:
Full charge
Partial charge
Low charge
Extremely low charge
If the charge continues to get low, the Indicator begins
flashing. When the charge becomes drained, your phone
gives an alert and the message of “Low battery” is
displayed on the screen. Several minutes later your
phone will alert again and then turn off automatically.
Battery performance
850mAh (standard battery)
9
Standby time* About 220 hours
Talking time* About 180 minutes
z Local network conditions, phone’s settings, game
and music playing, data services and frequent
operations can affect battery’s standby time.
z The battery performance is also affected by charge
state, temperature.
Basic functions
Turning Your Phone On and Off
1. Press and hold Power key for more than 3 seconds
to turn on your phone.
2. If “Pin Code Check” (please refer to page xxx) is set
on, the phone will prompt you to enter password. If
only you input proper password (default as “1234”),
the phone can enter idle display.
3. When a network is found, the phone will enter Idle
Display, from which you can send calls and do other
operations.
4. Press and hold Power Key for more than 2 seconds
to turn off your phone.
Making a Call
Your Phone offers a variety of ways to make a call,
including Speed Dialing and dial from Call Logs and
phonebook.
Making a Call Using the Keypad
To make a call using the keypad from idle display:
10
1. Press Numeric keys to dial the phone number.
If you make a mistake, press right soft key to
delete last digit.
If you want to dial extension number at one time,
press and hold * key to input “P” and follow with
extension number.
You can dial up to 32 digits at one time.
2. Press Send key to make the call.
For the extension number, you need to press Send
key again.
3. To end the call, press Power key.
Making a Call Using Phonebook
To dial directly from a Phonebook record from idle
display:
1. Press Right Soft Key to enter phonebook menu,
select Search.
2. Now search by name. Input the first letter, or letters
of the name you are looking for and press OK, then
a list of records beginning with those letters are
displayed.
Or you can choose to search by group by pressing
Right Soft Key.
Or you can just press OK to view all records list
and scroll through to find the record you want.
3. Enter the record to see detail. Select a phone
number and press Send key to dial it.
If one record has more than one phone number

11
stored and you dial it directly, the first number is
selected and dialed out.
4. To end the call, press or End/Power.
Making a Call with a Speed Dial
If you input one less than 2 digits (including 2)
number and press Send Key, then the entry stored in this
location is selected and dialed out。
Answering a Call
When you receive a call, your phone rings and/or
vibrates and displays an incoming call message. At the
same time it displays the using net service.
Press Send Key to answer the call.
If Any key answer set to On, you can answer the call by
pressing any numeric key.
Press Power key to reject the incoming call.
Note : When you are talking using the phone and
another phone are calling ,you can choose receive or
reject it. If you receive it ,the formerly one will be
auto-rejected.
Read a Message
When a new message is received, your phone will alert
according to your settings and the message unread icon
will be displayed. Press Left Soft key to read it.
Recent Calls
■ Dialed Calls
Press Send key to view dialed calls list from idle display.

12
Select the record you want with Up/Down keys and
press Send key to dial it, or press OK key to view its
detail.
■ Received Calls
Press Left key to view the received calls list from idle
display. Press Right key to view the missed calls list
from idle display. Press left/right key ,you can view
CDMA received, GSM received and all received.
Select the record you want with Up/Down keys and
press Send key to dial it, or press OK key to view its
detail.
When viewing list of incoming/received/missed calls,
press Right Soft key to pop up the submenu. You can
do:
Select You can select the number and view
the particular.
Save You can to save the number to phone
RUIM or existing.
Set as black
list
Add the current phone number to set
call rejection or SMS rejection.
Send SMS Enter message edit menu, and sent
message to the current phone number.
IP dial You can make a IP call.
Edit call You can enter to edit the call.
Delete Delete the current record.
Delete all Delete all of the incoming calls, missed
calls and outgoing calls records.
13
Entering Text
Multiple methods are provided making it easy for you to
enter names, numbers, and messages on your phone.
Choosing a Text-Entry Method.
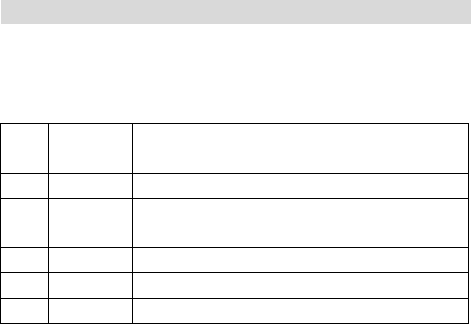
The input methods provided are:
1 pin Enter Chinese characters by their
PingYin.
2
3 En Let the phone predict each word as
you enter it.
4 A Enter capital letters.
5 a Enter lowercase
6 1 Enter numbers only.
Whenever in a text-entry screen, press # key to selecting
input method.
Press 1 key to enter punctuations and symbols in any
text-entry method except number method. Use
Up/Down key to scroll to other page, use Left/Right
key to scroll in one line.
Using Tap Method
Press a number key one or more times to select a letter,
number, or symbol shown in the following “Character
Chart”.
Character Chart
Use this chart as a guide for entering letters, numbers
with the tap method.

14
0 0
1 @, 1
2 a b c (or A B C) 2
3 d e f (or D E F) 3
4 g h i (or G H I) 4
5 j k l (or J K L) 5
6 m n o (or M N O) 6
7 p q r s (or P Q R S) 7
8 t u v (or T U V) 8
9 w x y z (or W X Y Z) 9
After a character is entered, the cursor stays at it. You
can press Right Direction Key to move to the next space
or you can enter a character not on the same key directly.
Press * key to toggle between lowercase and uppercase.
For example, to input “china”, press “2” three times, “4”
twice, Right Key once, “4” three times, “6” twice, “2”
once.
Using Predictive Text Entry Method
Predictive Text Entry lets you enter a word using one
keypress per letter. This software analyzes the
combination of letters you have entered using an
intuitive word database, and creates a suitable word
automatically.
Alternative words and letter combinations are shown at

15
the bottom of the display. The word choices are updated
with each keypress. Press Up/Down key for other
choices.
Press Left/Right key to highlight the word you want.
Press * key to change the words to initial character
capitalized, all uppercase characters, or all lowercase
characters.
Press OK key to enter the word at the cursor location. A
space is automatically inserted after the word.
For example, to enter “Happy New Year!”:
Press 4, 2, 7 twice, 9, then * key to capitalize “h”, and
then OK key to enter “Happy”. Then press 6, 3, 9, * key
and OK key for “New”. Then press 9, 3, 2, 7 * key and
OK for “Year”. Then press Clear key to delete the last
added space. Then press # key, Left key twice and OK
key to enter “!”.
Note:
The database of the predictive input software contains
20,000 most frequently used words. If the word you
desired is not in the word choices, you can enter it by
Tap Method.
Entering Numbers
Press corresponding numeric key to enter the desired
number.
Text Entry Submenu
When entering texts, press Right Soft Key to pop up the
submenu, you can do:

16
Press Right Soft Key to display submenu, press “3” to
enter paste mode. Use Left/Right Direction Keys to
move to the position you want to paste the copied texts
and press OK to paste them.
1.OK Select the Send mode, and you can
choose the Priority.
2. Copy
Use Left/Right Keys to move the
cursor to the start of the texts you
want to copy and press OK key to
confirm it.
Then move the cursor to select the
texts, which are highlighted in gray.
Press OK key at the end of the texts.
The selected texts are copied to
clipboard.
3. Paste
Use Left/Right Keys to move the
cursor to where you want to paste
the copied texts and press OK key.
4. Cut
Use Left/Right Keys to move the
cursor to the start of the texts you
want to copy and press OK key to
confirm it.
Then move the cursor to select the
texts, which are highlighted in
yellow.
Press OK key at the end of the texts.
The selected texts are cut.

17
5. Delete
Use Left/Right Keys to move the
cursor to the start of the texts you
want to copy and press OK key to
confirm it.
Then move the cursor to select the
texts, which are highlighted in
yellow.
Press OK key at the end of the texts.
The selected texts are deleted.
6.Phrase
You can choose to insert Chinese
phrase, English phrase or
Expressions.
7. Insert number Insert numbers from the phone
book.
Note:
1. Press the number key to select the corresponding
function in the submenu directly. E.g.: if the
submenu has pop up, press “7” to select an
expression.
2. Press “C” to exit from the submenu.

18
SMS
Press Left soft key from idle display to view Main
Menu, select to SMS and press OK to display SMS
menu.
1 Write message
Select “Write message”. You can edit the message.
When text is OK, press OK key to enter “Send to”
display. You can enter phone numbers manually with
numeric keys.
Or
Press Left Soft key to select number from the
phonebook.
Note:
1. If the message editing is interrupted by incoming
calls, alarm clock, power keypress or power off, the
entered texts will be saved temporally. Next time
you enter “Create message”, the phone will ask you
if the last edit should be continued. If you select
“no”, the last edit will be discarded.
2. You can edit messages on PC with UITILITIES
software tool (sold separately), and download them
to your phone. Also you can upload the messages
from phone to PC.
2 Inbox
Select and press OK key to enter Inbox.
The messages in the Inbox are displayed. Press right/left
key to view inbox. Use Up/Down key to select the

19
message, and then press OK key to view its detail. Use
Up/Down key to scroll the texts.
When reading the message, you can:
Press Send key to dial the number directly.
Press OK key to reply a message. Please refer to “Create
message” for detail.
Press Right Soft key to pop up the submenu. You can:
1. Reply: replay this message;
2. Forward: edit and forward this message;
3. Save to : save this message to phone or UIM card;
4. Get number: get the message’s phone number out
and then edit it .
5. IP dial: make a IP call for this number.
6. Lock/unlock: lock or unlock the message;
7. Set as blacklist: you can set this number as call
rejection or SMS rejection.
8. Delete: you can delete currently message; select
some messages to delete, delete by number, or
delete all.
3 Outbox
Select and press OK key to enter Outbox.
The messages in the Outbox are listed. Press Left/Right
key to view CDMA outbox, GSM outbox, all outbox.
Use Up/Down key to select the message, and then press
OK key to view its detail. Use Up/Down key to scroll
the texts. Press Left/Right key to view border upon
messages.

20
When reading the message, you can:
Press OK key to send this message.
Press Right Soft key to pop up the submenu.
4 Draft
Select and press OK key to enter Draft.
The messages in the Inbox are displayed. Use Up/Down
key to select the message, and then press OK key to
view its detail. Use Up/Down key to scroll the texts.
Press Left/Right key can view border upon message.
Press Right Soft key to pop up the submenu. You can:
1. Forward: edit and forward this message;
2. Save to : save this message to phone or UIM card.
3. Lock/unlock: lock or unlock the message;
4. Delete: you can delete currently message; select
some messages to delete, delete by number, or
delete all.
5 SMS settings
Select to enter SMS settings.
1.Prior memory area
You can select place the message in phone or UIM
card.
2. Message validity
Let you select from One hour/12 hours/1 day/1
week/Maximum as the validity period for your sent
message.
Your message is sent to the network first, and then
forwarded to the recipient if his phone can be accessed.

21
Validity period is a time period, after which the network
will delete the message automatically without sending it
when the recipient’s phone keeps inaccessible, for
example powered off or with Inbox fulfilled.
3. Delivery report
Let you enable/disable Delivery report.
Delivery report is a confirming notification from the
network when your message is sent to the recipient
successfully.
Note:
This function depends on your local network and the
functionality of your recipient’s phone.
You can set enable or disable to display the delivery
report.
4.Set reply number
You can set reply number.
6 Reserved message
Select and enter reserved message.
You can create messages, edit reserved SMS, or view
failed reserved message.
When the reserved time has arrived, the phone will
register to send the message .
7 Send report
Let you view the report of last multisend.
If one number is failed, □ will be displayed before it.
Press OK key to pop up a dialogue window to ask
whether send it again.

22
Select “yes”, and press OK key to send it again.
8 Memory status
Select “Memory status” and press OK key to enter.
The current message quantities and remaining capacity
of Phone, Inbox, Draft, Outbox and card are listed.
23
Profiles
Select and enter profiles.
The profiles include four types: General, Meeting,
Outdoors, Mute.
Press left soft key to pop up the submenu. You can:
1. Start: You can choose one type and start the
profile.
2. Personalize: You can set Call ringtone, Message
tone, Reserved SMS tone, Alert tone and others
according to you like.
3. Default: Resume the current profile to the default
patter. Press “yes” to save the settings.

24
Phook
From Idle screen, press right soft key to view Main
menu, select Phonebook and press OK to view
Phonebook menu.
You can search by Name or by Group. Toggle between
these two methods by Right Soft key.
1 Search by Name
Input the name you want to search, press OK key to look
up in your phonebook. When some matched records are
displayed, select the desired one and press OK key to
view detail. Select a number with Up/Down key. Dial
the number with Send key.Press OK key with no name
input will display all records in your phonebook, which
are in alphabetic order.
When viewing one record, press Right Soft key to call
out Sub Menu, you can do some detail content.
Note:
If the record places the card, you can not set group and
ringtone.
2 Add
Let you add records to your phonebook. You can enter
“Add” menu list. Select Name and press OK to input the
name for your record.
You can choose to save to phone or card.
When stored to phone, one record can have up to 4
numbers:2 mobile number, home number and office
number, being able to have up to 32 digits each. If you

25
don’t want to take use of one/two of them, just press OK
to skip.
When inputting phone numbers, you can input P (pause)
with Right Soft key.
e.g.:123456P213
e.g.: 123456P213
After finishing input of numbers, you can group your
record under up to 21 categories.
Then you can select one ringtone for this record.
You can record it’s email/URL/Memo.
3 Search by Group
Press Right Soft key to search by Group. The groups
with records in will be displayed.
Select one group and press OK key to view its detail.
Select one record and press OK key to view its detail.
4 Search by position
Input the number and press Left Soft key, then you can
fine the phone number quickly. And view the detail
content.
5 Speed dialing
Up to 9 numbers can be stored in the speed dials list.
Then you just need to dial the position number, which is
1 to 9, to dial out the whole number stored in that
position. Select one position and call out sub menu to
edit it. When one position already has number stored,
you can press OK key to edit it directly.
Note:

26
When select Delete all from Sub menu, all numbers in
the speed dial list will be deleted!
6 Own number
Let you view and edit the number of your card .
Note:
The number is memoried in your card, so if you have
inserted two cards, it will display two one numbers.
7 PhBook management
Select and enter to PhBook management.
Copy entries
You can copy your entries from phone to card, or from
card to phone.
Press OK, you could view all phone book list, select
entries you want to copy ,press right soft key and select
‘yes’, you will finish it.
You can do the copy from phone to card, from card to
phone, from card to card.
Note:
You can copy 10 list at most every time,.
When you copy from card to phone ,some data may be
lost.
Delete entries
In Phonebook menu, select “Delete entries”. After
you’ve input correct password, the delete menu is
displayed.
Select “Delete Phone’s” to delete all records stored in
phone.

27
Select “Delete Card 1” or “Delete Card 2” to delete all
entries in cards.
Select “Delete Selected” to delete what you select.
When selecting records, you can press Left Soft key to
select all six records currently displayed. Up to 10
records can be selected one time.
Note:
When you select “delete selected”, press left soft key to
select all currently displayed 9 entries.
You can select 10 entries at most every time ,if exceed
10 entries ,the phone will alarm sound.
Memory status
Let you check the memory status, capacity and which
have been used, of your phone or card 1,card 2.

28
My documents
From idle screen, press left soft key to view main menu
and select my documents.
1 User
Select and enter to user ,you can see the files list.
The folder can place files in any format.
2 My Date
Select and enter to My Date ,you can see the files list.
Select some folder, and press left soft key to pop out
submenu.
3 Picture
From Explorer menu, select “Picture” to view picture
files concluded. Press right soft key you can view the
Folder attribute:
You can view the file total and the space used on the
phone or on the TF card.
You can choose to view the picture at phone.
4 Ring
From Explorer menu, select “Ring” to view ringtone
files concluded. Press right soft key you can view the
Folder attribute:
You can view the file total and the space used on the
phone or on the TF card.
You can choose to view the Ring.
5 Other
From Explorer menu, select “Others” to view other

29
files concluded. Press right soft key you can view the
Folder attribute:
6 Memory Status
From Explorer menu, select “Memory Status” to view
some detailed information about the memory.

30
System Setting
From Idle screen, press right soft key to view Main
Menu, select System Setting and press OK key to view
Setting menu.
1 Security Settings
Security item
You can select and set Message, Phbook, or Resent
calls as security items.
Phone lock
You can set the phone lock as on or off.
Change password
Input your old password first, then input new password,
then input new one again to confirm it.
PIN check
You can set the PIN check as on or off.
Change PIN
You can change the PIN code .
Restore factory settings
Reset all settings to be those of coming out of factory.
The phone’s password will be needed.
After resetting, the phone will power off automatically.
When the phone is powered on again, all settings has
been reset.
2 call settings
IP number
You can set 5 IP number, when you are calling using IP
call.
31
Call rejections
You can set 10 reject number, you can reject these
number calling.
SMS rejections
You can set 10 reject number, you can reject these
number messages.
Supply services
Let you enable/disable some supplement services
provided by your network operator. Consult your local
network service provider for more information about
these services.
Call Waiting
When Call Waiting is activated, if you are in a call and
another call is incoming, there will be an alert and the
new calling number will be displayed on the screen. You
can choose to answer it or reject it. If the new call is
answered, the former one will be hold and you can
toggle between the two calls by Send key.
Forwarding Unconditionally
When activated, all calls to your number will be
forwarded to a designated number unconditionally.
Select off and input a number to which all your calls will
be forwarded. Select Cancel to disable it.
Forward if busy
When activated, all calls to your number will be
forwarded to a designated number if you are in call.
Select off and input a number to which all your calls will

32
be forwarded. Select Cancel to disable it.
Forward if no answer
When activated, all calls to your number will be
forwarded to a designated number if they are not
answered.
Select off and input a number to which all your calls will
be forwarded.
Forward if unreachable
When activated, all calls to your number will be
forwarded to a designated number if they are
unreachable.
Select off and input a number to which all your calls will
be forwarded.
Other
Select and enter to other.
You can set Answer mode, Alert on call, Auto redial,
Auto answer on or off.
3 Display settings
Language /Style
You can choose the language as English or Chinese.
And set the Style of the interface.
Lightness /contrast
You can set the lightness as low ,Custom or High. And
set the time .Set the backlight time as 10,20,30 sec.
At the same interface, you can set Contrast.

33
Idle screen
You can set the wallpaper.
And setting the carrier infomation and time display as
on or off.
4 keystoke settings
Shortcut
You can set that From idle screen, press the
Multi-Directional keys to enter some menu.
Backlight
You can set the backlight on or off, and set the start and
end time.
Auto key lock
You can set auto key lock on or off.
5 Auto power on/off
Let you Set auto power on / off. And set the time.

34
PIM
Press left soft key from idle display to view “2 PIM”
and press OK to select it.
1 Alarm
When in PIM menu, scroll to Alarm and press OK to
select it.
The alarm list is displayed. Up to 6 alarms can be set.
The set alarms can still function when the phone is
powered off.
Scroll to one alarm and press OK to edit it.
Set alarm time
Move the prompt to the item (hour/minute) you want to
edit with Left/Right keys and input alarm time directly
with Numeric keys, press OK key to save the edit.
Set alarm mode
You can set the alarm to function daily, weekly or on
Specify date. When setting designated alarm date, use
Multi Directional keys.
Select ringtone
You can select the ringtone.
Press OK key to confirm it. Choose one alarm state and
press OK key to confirm it.
The alarm is set and saved.
Note:
1. The alarm volume is the same as the current
ringtone volume. If the phone is set to vibration only,
35
the alarm vibrates only.
2. When in alarm list display, scroll to one alarm and
press Right Soft key to clear its settings directly. Or
you can press OK key to select it and then press
Right Soft key to clear its settings.
2 Calendar
When in PIM menu, scroll to calendar and press OK to
display Schedule menu.
Press the Multi-Directional keys, the cursor will move
towards the corresponding direction. Press *key and #
key enter to last month and next month.
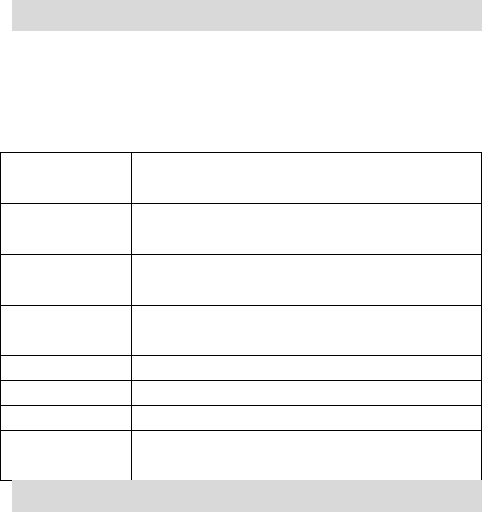
Press Right Soft key to pop up the submenu. You can:
1.view View the arrangement this day.
2.Add event Add new event for this day.
3.Reserve
msg
Edit reserve message.
4.Delete Delete the calendar this day ,this
month or all.
5.Memory
status
Display all calendar arrangement.
6.Settings Can set the start and end time, and set
auto delete.
3 Memo
You can set Text memo and Voice memo.
Select and enter text memo.
The non-blank note appears with the beginning of

36
contents, or only “note” appears. You can press Right
Soft key to delete one selected note directly.
Select one note and press OK to view it. Press OK again
to edit it. Press Right soft key to delete it.
4 Calculator
When in PIM menu, scroll to Calculator and press OK
to do arithmetic.
Multi-directional keys are responding to “+”, “-“, “*”,
“/” respectively. Use Right Soft key to set number
positive or negative. Use “*” key to input decimal. Press
OK key to generate result. Use “#” key to clear all. Press
Left soft key to return to PIM menu.
5 Stopwatch
From PIM menu, select Stopwatch and press OK key to
display the stopwatch interface.
Press OK key to start the watch, press OK key again to
stop it, press Right Soft key to clear.
6 Timer
You can set time to awake some things.
7 Converter
You can conversion some unites.
8 State number
You can search by number or search by City.
9 World Time
From PIM menu, select World Time and press OK key
to view local time for some cities around the world.
37
A world map is displayed. Press Left/Right key to move
the square icon which represents the city’s location. The
city’s name and local time are displayed below.
38
Recent calls
From Idle display, press Left Soft key to view Main
Menu, select R-Calls and press OK key to view Recent
Calls menu.
1 Missed calls
Select Missed Calls and press OK key to view detail
information, including Time/Date of call, Duration, and
others. Press Left/Right key to view CDMA, All and
GSM missed calls one by one.
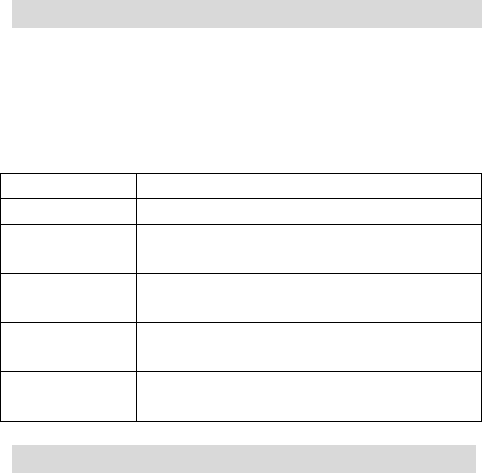
Call out Sub Menu with Right Soft key, you can do:
Select You can select the number and view
the particular.
Save You can to save the number to phone
RUIM or existing.
Set as black
list
Add the current phone number to set
call rejection or SMS rejection.
Send SMS Enter message edit menu, and sent
message to the current phone number.
IP dial You can make a IP call.
Edit call You can enter to edit the call.
Delete Delete the current record.
Delete all Delete all of the incoming calls, missed
calls and outgoing calls records.
2 Received calls
Select Received Calls and press OK key to view detail
information, including Time/Date of call, Duration, and
39
others. Press Left/Right key to view CDMA, All and
GSM received calls one by one.
Call out Sub Menu with Right Soft key, you can do:
Select You can select the number and view
the particular.
Save You can to save the number to phone
RUIM or existing.
Set as black
list
Add the current phone number to set
call rejection or SMS rejection.
Send SMS Enter message edit menu, and sent
message to the current phone number.
IP dial You can make a IP call.
Edit call You can enter to edit the call.
Delete Delete the current record.
Delete all Delete all of the incoming calls, missed
calls and outgoing calls records.
3 Outgoing calls
Select Dialed Numbers and press OK key to view
detail information, including Time/Date of call,
Duration, and others. Press Left/Right key to view
CDMA, All and GSM dialed calls one by one.
Call out Sub Menu with Right Soft key, you can do:
Select You can select the number and view
the particular.
Save You can to save the number to phone
RUIM or existing.

40
Set as black
list
Add the current phone number to set
call rejection or SMS rejection.
Send SMS Enter message edit menu, and sent
message to the current phone number.
IP dial You can make a IP call.
Edit call You can enter to edit the call.
Delete Delete the current record.
Delete all Delete all of the incoming calls, missed
calls and outgoing calls records.
4 Call time
Select Call time and press OK key to view it. When the
time is displayed, press OK key to clear it. The phone’s
password will be needed.
5 Call record
You can view the call record.

41
Entertainment
1 FM
Select and enter to FM.
Press left and right Directional keys to accommodate
the channel.
Call out Sub Menu with Right Soft key, you can do
something about the FM.
2 Game
You can play Dice and Gobang.
The detail you can view the game help.
42
U-Net(high speed data service)
This mobile phone supports UNICOM high-speed data
service. Connecting the phone to the PC by dedicated
data line,users can realize surf in internet anytime and
anywhere.
Operation step:
1、 First, connect the dedicated data line. The USB
end is connected to PC and another end is
connected to mobile phone, then confirm this
connection is successful.
2、 After connection, PC will find this hardware
device and search the driver for
installing.(Notice: because USB interface is
used, users need the specific USB driver, which
is needed to buy with the data line)
3、 Open the “control panel” of PC, and select
“phone and modem”, from which users can
see “Hisense USB CDC Modem” has been set
up successfully,which denotes the connection
is success.
4、 Open the “control panel” of PC, and select
“network and dial”,and then select “network
connection” to create the new connection.
( setting mode is different according to the
operation system).
43
requirement:: ,
dial #777
user:card
password:card
5、 Dial up,(
the highest speed is 153.6kbps the
data speed is different according to the local
network).
Notice:
1、 Because a big amount of users are centralized in one
cell, the dial connection will be effected, please try
more.
2、 During connection, because the change of the
wireless environment, the connection perhaps be
interrupted, please connect again.
3、 After interrupt, please confirm the setting of the
phone to the “PC connection” state.
4、 In some specific instance, if the mobile phone can
not be connected to PC, please reboot PC or phone.
5、 The user name and password perhaps be different
according to the local network, please refer to the
local operator for details.
44
GETTING HELP
Customer support
Your service provider’s customer support department
may be accessible directly from your phone when you
dial a number (check with your service provider). They
can answer questions about your phone, phone bill, call
coverage area, and specific features available to you,
such as call forwarding.
Before requesting support, please try to reproduce and
isolate the problem. When you contact the Customer
Care Center, be ready to provide the following
information:
z The name of your service provider.
z The actual error message or problem you are
experiencing.
z The steps you took to reproduce the problem.
z The phone’s electronic serial number (ESN).
z To find the ESN:
a) Remove the battery.
b) Locate the white label on the back of the phone.
Your phone’s ESN is located on the label.
45
SAR INFORMATION
THIS MODEL PHONE MEETS THE
GOVERNMENT’S REQUIREMENTS FOR
EXPOSURE TO RADIO WAVES.
The SAR limit of USA (FCC) is 1.6 W/kg averaged over
one gram of tissue. Device types C127 (FCC ID:
SARHISENSEC127) has also been tested against this
SAR limit. The highest SAR value reported under this
standard during product certification for use at the ear is
1.16W/kg and when properly worn on the body is
0.66 W/kg. This device was tested for typical body-worn
operations with the back of the handset kept 1.5cm from
the body. To maintain compliance with FCC RF
exposure requirements, use accessories that maintain a
1.5cm separation distance between the user's body and
the back of the handset. The use of belt clips, holsters
and similar accessories should not contain metallic
components in its assembly. The use of accessories that
do not satisfy these requirements may not comply with
FCC RF exposure requirements, and should be avoided.
46
FCC Warning Statement
This equipment has been tested and found to comply
with the limits for a Class B digital device, pursuant to
part 15 of the FCC Rules. These limits are designed to
provide reasonable protection against harmful
interference in a residential installation. This equipment
generates, uses and can radiate radio frequency energy
and, if not installed and used in accordance with the
instructions, may cause harmful interference to radio
communications. However, there is no guarantee that
interference will not occur in a particular installation.
This device complies with Part 15 of the FCC Rules.
Operation is subject to the following two conditions: (1)
this device may not cause harmful
interference, and (2) this device must accept any
interference received, including interference that may
cause undesired operation.
Any changes or modifications to this device that are not
expressly approved by the manufacturer may void the
user’s authority to operate the equipment.