Hisense Electric LCDD0029 Part15 Subpart B-LED LCD TV User Manual ES G130802
Hisense Electric Co., Ltd. Part15 Subpart B-LED LCD TV ES G130802
Contents
- 1. User Manual1
- 2. User Manual2
- 3. W9HLCDD0029_User Manual1
- 4. W9HLCDD0029_User Manual2
W9HLCDD0029_User Manual1
MODE
4-Screws
4.7inch
(120mm)
stand
12inch(304mm)
INPUT
MENU
CH
CH
VOL
VOL
+-
LTDN39K366MH LTDN42A300MH
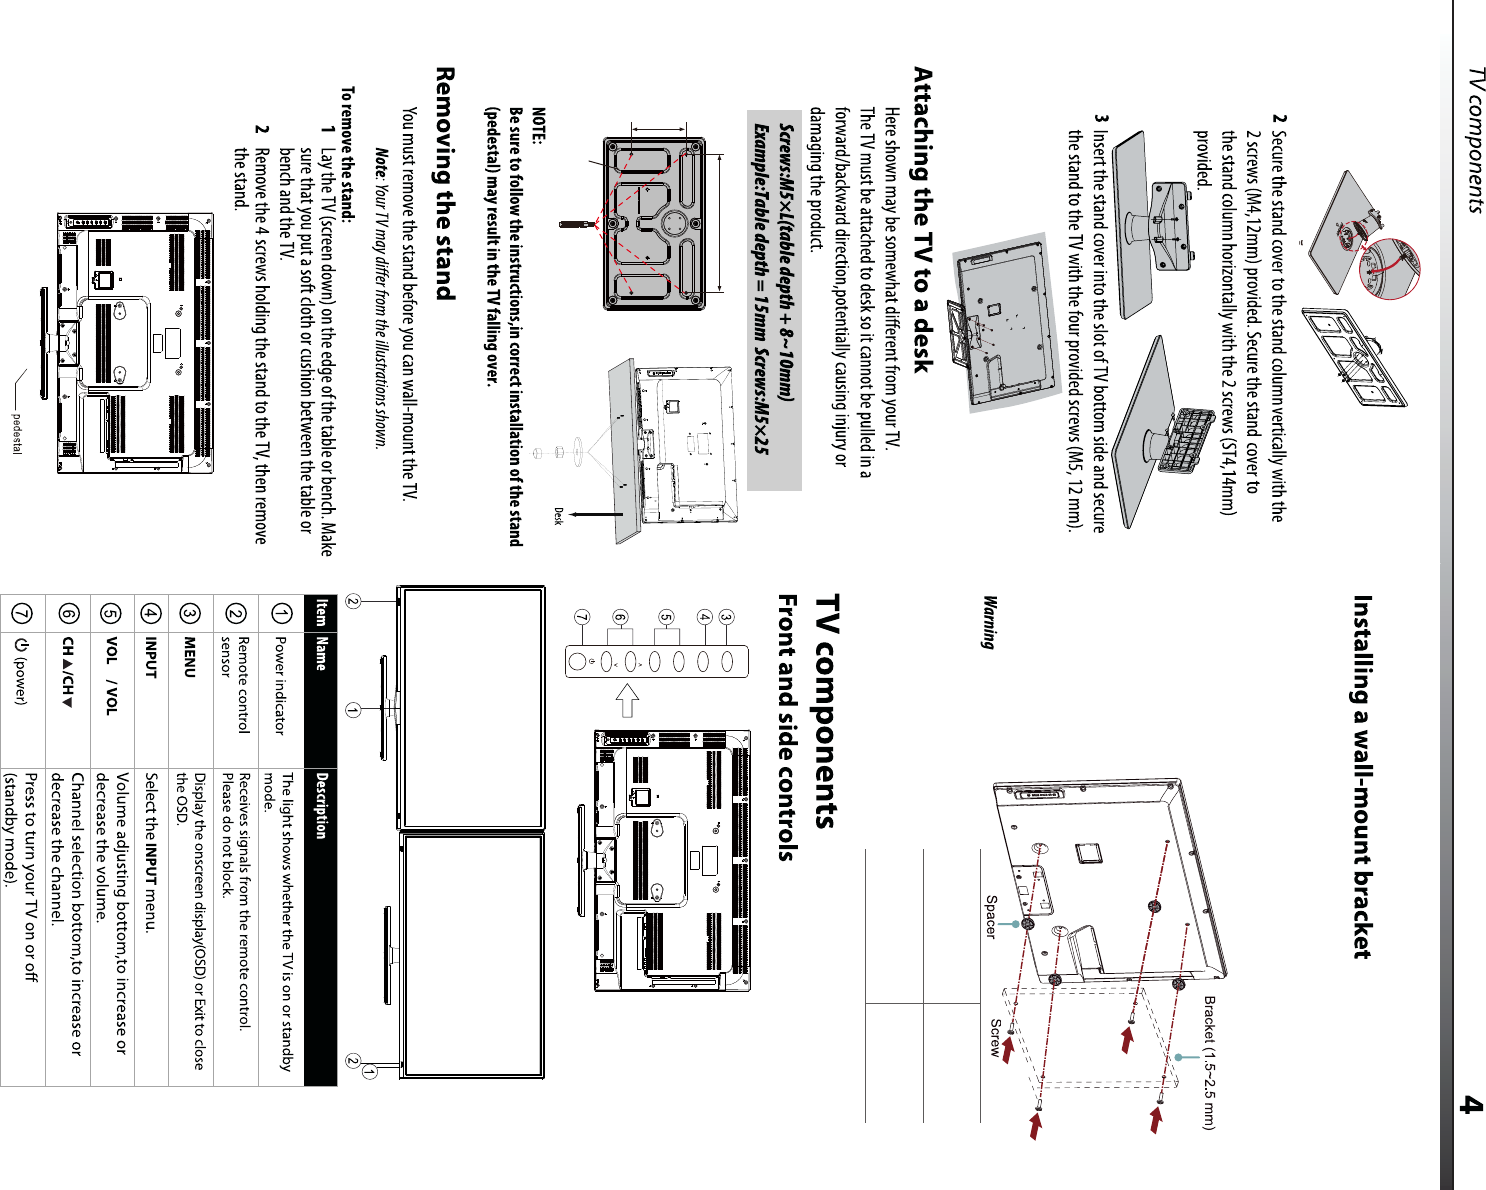
If you want to attach the TV to a wall-mount bracket, you should first
remove the stand if it is pre-attached. Carefully place your TV screen face-down
on a cushioned, clean surface to protect the screen from damages and scratches.
Insert four spacers (provided) into the corresponding bracket screw holes on the
back of your TV, then attach the wall-mount bracket to your TV using four M6 x 30
screws (provided) or the screws/spacers provided with the wall-mount bracket.
See the instructions that came with the wall-mount
bracket for screw/washer configurations
and information on how to
correctly hang your TV.
Wall-mount hole
pattern VESA
(mm)
200 × 200
Wall-mount screw
size (mm)
M6
custom,dynamic
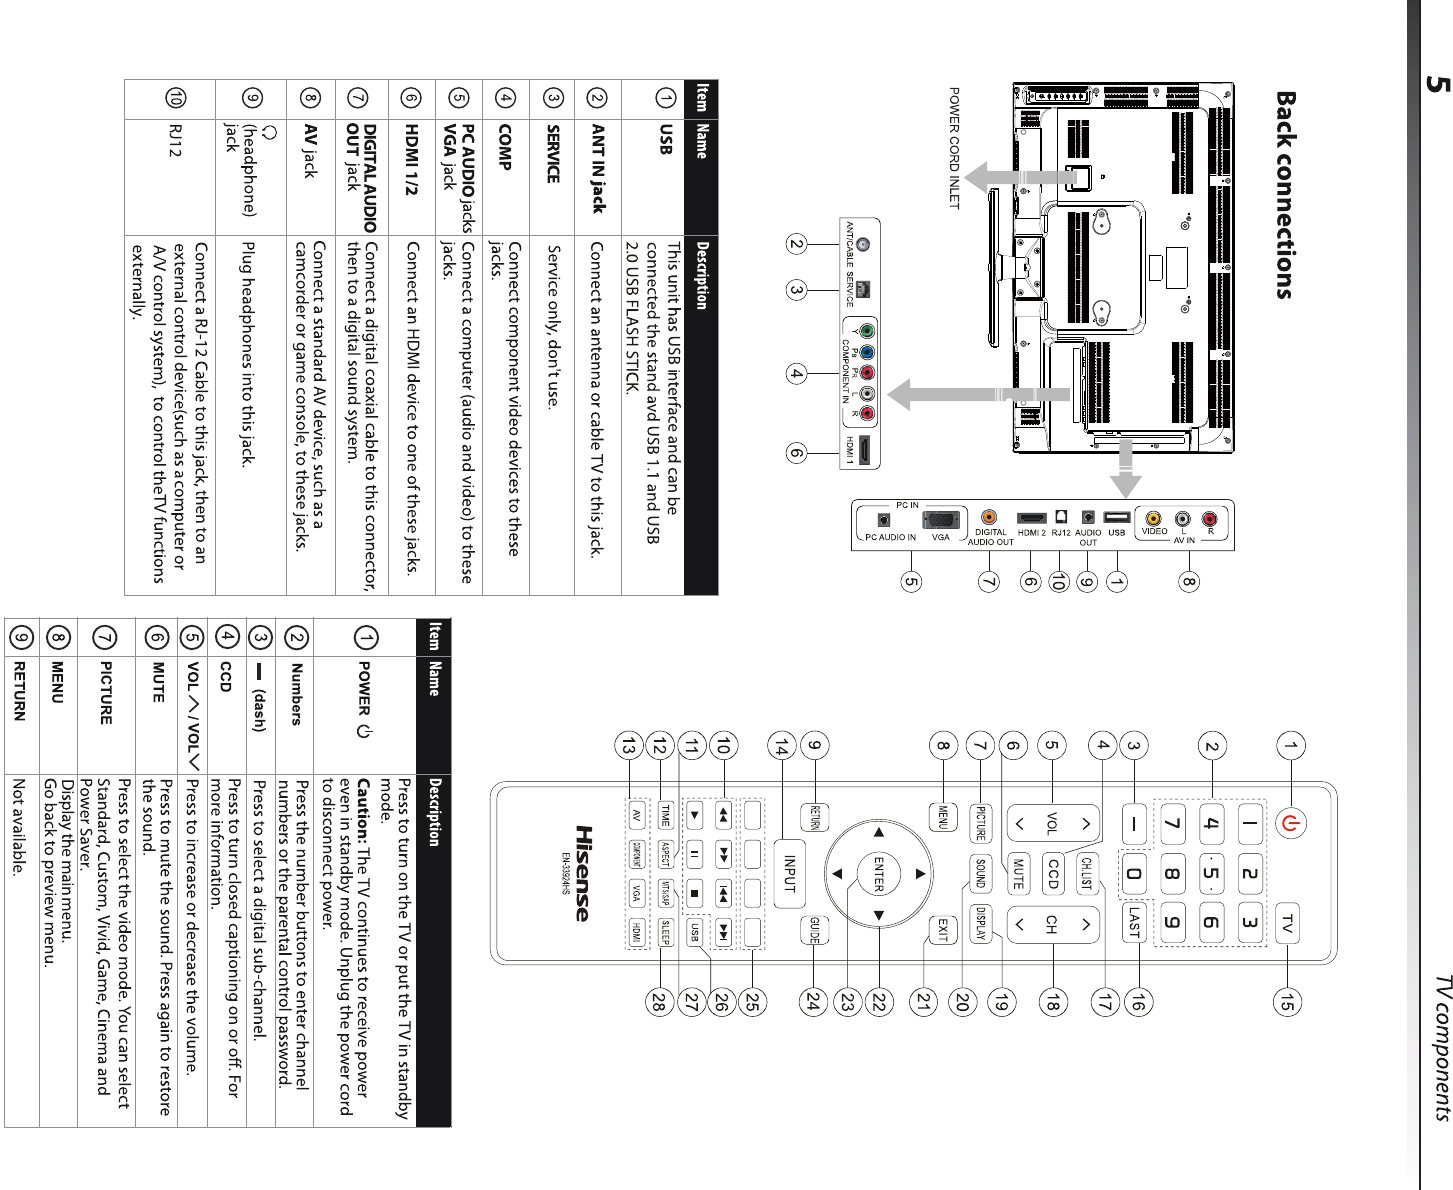
Not available.
Not available.
LTDN39K366MHLTDN42A300MH