Hisense Electric LCDF0037 Part15 Subpart B-LED LCD TV User Manual
Hisense Electric Co., Ltd. Part15 Subpart B-LED LCD TV
UserManual.wiki
>
Hisense Electric
>
LCDF0037 User Manual
>
W9HLCDF0037_User Manual 1
Contents
1.
W9HLCDF0037_User Manual 1
2.
W9HLCDF0037_User Manual 2
W9HLCDF0037_User Manual 1
Navigation menu
Upload a User Manual
Namespaces
Wiki Guide
HTML
PDF
Info
Views
User Manual
Discussion / Help
Navigation


![9Basic FeaturesTurning the TV On for the First TimeThe Setup Wizard menu appears the first time you turn on the TV. It will assist you to specify the menu language, country setting, Use Mode, Network Setting and Channel Installation.IMPORTANT: Make sure that the antenna or cable is connected and a wired or wireless Internet connection is available.1. Make sure that you have:Installed the remote control batteries.Connected the power cord.Connected to an antenna or cable TV signal.NOTEThe customer will be prompted to connect a Network cable in the Select Network wizard screen.2. Connect your TV’s power cord to a power outlet, then press power. The Initial Setup screen opens.3. Please press [ENTER] to start the wizard, then press >ŸŸ] button to select your language: English, Spanish or French, select [Next] to confirm and move to the Welcome screen. Next1. Language setting Next: Country SettingLanguage settingsEnglishEspañolFrançaisThe Welcome screen displays the available input devices and interfaces.4. Select the country where you will operate the TV.Previous Next2.Country setting Next: Time Zone SettingCountry settingUSACanadaMexico5. Select the local time zone according to your region.Previous Next3.Time zone setting Next: Use ModeTime Zone settings3DFL¿F7LPHMountain TimeCentral TimeEastern TimeHawaii Daylight Saving TimeDaylight Saving: Set the Daylight Saving time for your area.6. Select Use Mode Setting: Home Mode or Retail Mode. Home Mode is the recommended setting which offers full functionality of the television.Previous Next4.Use Mode Next: Network SettingUse ModeHome modeRetail modeHome mode default settings are recommended IRULQKRPHXVH(1(5*<67$5TXDOL¿HGIf you select Retail Mode, a message appears “Are you sure to change to retail mode?” Select “OK” to continue, or select “Cancel” to change your selection.Home Mode is the recommended setting which offers full functionality of the television. If you selected Retail Mode, Energy Savings are not realized.To turn your TV on or off (standby mode):1. Plug the power cord into an AC power outlet.2. Press [POWER] button. Your TV turns on. 3. Press [POWER] button again to turn off your TV. When you turn off your TV, it goes into standby mode.Turning your TV on or offWARNINGWhen your TV is in standby mode, it is still receiving power. To completely disconnect power, unplug the power cord.NOTEIf your TV does not receive an input signal for several minutes, it automatically goes into standby mode.](https://usermanual.wiki/Hisense-Electric/LCDF0037.W9HLCDF0037-User-Manual-1/User-Guide-2217696-Page-18.png)
![108. The Channel Search.Press [Ÿ/Ÿ] to select your Tuner Mode: Antenna or Cable, press [ENTER] button to confirm.Channel SearchPlease allow 30 minutes to complete.30%Stop6. Channel SearchATV Channels added:0DTV Channels added:0Press [Ÿ/Ÿ] to set the Channel Installation: Scan or Skip Scan, press [ENTER] button to confirm.If you select “Scan”, your TV automatically starts Channel Installation available in your viewing area.If you select “Skip Scan”, your TV does not scan for channels.1. Press the [CHV/V] (or [CH +/-]) on the TV/remote control to change the channel.2. Press the [VOLV/V] (or [VOL +/-]) on the TV/remote control to adjust the volume.3. Press the numeric buttons on the remote control to display the corresponding channels.Changing Channels / VolumeThe first time you turn on your TV, you must select the TV signal source. Your TV stores this information, so you do not need to change the TV signal source unless it changes. For example, you change from an outside antenna to cable TV.To select the video input source:1. Turn on your TV, then press [INPUT] button on the remote or on the TV. The Input Source menu opens.2. Press [ŸŸ] button to highlight the input source, then press [ENTER] button.Selecting the Input SourceNOTEChanging the channels can also be achieved by directly entering the channel number using the numeric keys on the remote control. If you are entering a two or three digit channel number, the time between key presses should be less than 3 seconds.7. Select Network : Connect your TV to access the network.5.Select Network Next: Channel SearchEND USER TERMS AND CONDITIONS AND PRIVACY POLICY FOR HISMART SERVICES. The product/device you have purchased from Hisense 86$&RUS RULWV3DUHQW &RPSDQ\DI¿OLDWHV DQGRU6XEVLGLDU\&RPSDQ\ LWVsuccessors and/or assigns (hereinafter referred to as “Hisense”) provides direct access to the internet through one or more internet provider services (hereinafter referred “Web Service(s)”).All content and services accessible through this device belong to Hisense USA Corp., “Hisense” is sometimes also referred to herein as “we” or “us”) or third parties and are protected by copyright, patent, trademark and/or other intellectual property laws. Such content and services are provided solely for your personal non-commercial use. You may not useSelect Network AgreeDisagreeWhen the Network Setting menu opens, Hisense Service 7HUPVDQG&RQGLWLRQVZLOODSSHDU3UHVV>ŻŹ@WRVFUROOthrough the pages. Please read it carefully.If you want to access the internet, press the [Agree]button to set your TV’s network connections. Otherwise, press the [Disagree] button to enter the Channel search menu.Previous Next5.Select Network Next: Channel SearchSelect Network Wired NetworkWireless NetworkConnect a wireless network with Wi-FiSkip<RXFDQVHOHFWWKHQHWZRUNFRQ¿JXUDWLRQLQWKLVPHQXRUFKRRVHWRVNLSQHWZRUNFRQ¿JXUDWLRQ)RUPRUHLQIRUPDWLRQRUWRVHWXSWKHQHWZRUNFRQ¿JXUDWLRQODWHUVHH“Network Connection” and “Network Setup”.Depending on the reception condition, it may take up to 30 minutes or more to complete memorizing channels. Please allow the process to complete without interruption.After the Channel Search, a summary of the current settings will be displayed. Select “go” to exit the wizard.](https://usermanual.wiki/Hisense-Electric/LCDF0037.W9HLCDF0037-User-Manual-1/User-Guide-2217696-Page-19.png)
![11Aspect - Select the screen aspect ratio from Normal, Wide, Zoom, Cinema , 1:1 Pixel Map, and Auto.Normal: The original 4:3 aspect ratio (1.33:1 signal) is preserved, so black bars are added to the left and right of the image. Standard TV broadcasts are displayed with a 4:3 aspect ratio.Wide: When watching a standard broadcast or full-frame movie in this mode, the display image is stretched proportionately to fill the TV screen. When watching a widescreen (1.78:1 signal) program or movie, the display image fills the TV screen.Auto: Automatically adjusts the image based on the screen size and the TV program.Zoom: Stretch the 4:3 aspect ratio image vertically and horizontally to fill the screen at 1:1.78 aspect ratio.Cinema: Stretch the 4:3 aspect ratio image vertically and horizontally to fill the screen at 1:2.35 aspect ratio. 1:1 Pixel Map: Displays the native signal format pixel-by-pixel without any video processing or scaling. In this mode, 1920 x 1080 resolution sources fill the screen while all other resolutions are centered and surrounded by black bars. Picture - Press this button to set the picture mode. It can be set as Vivid, Standard, Energy Savings, Game, Theater or Custom. This mode achieves a certain image display effect by setting the brightness, contrast and Speech.Sound - Press this button to set the sound mode. It can be set as Standard, Speech, Music and Custom.Mute - Press this button to turn the sound off, press this button again to turn the sound back on. This function is used to switch off sound temporarily.Shortcuts Instructions Sleep - It can set the TV to let it enter into the Standby state automatically. Press this button repeatedly to select the proper sleeping clock mode, and the clock tells you the remaining time before the TV enters Standby state. Display - Press this button to display the information including channel number, channel name, current system time, tuner mode, audio stream, video format, audio language, closed caption mode, parental lock rating, program details, etc.CCD - Press the [CCD] button to the Closed Caption mode: CC Off, CC On or CC On When Mute.MTS - Press the [MTS] button to selec the default audio stream: Mono, Stereo or SAP.](https://usermanual.wiki/Hisense-Electric/LCDF0037.W9HLCDF0037-User-Manual-1/User-Guide-2217696-Page-20.png)
![12Using the Picture MenuYou can adjust:Picture Mode - Adjust the Picture Mode. You can select Vivid, Standard, Energy Savings, Theater, Custom or Game mode.NOTEThe option of the Picture Mode is different in different inputs. (For more information, see “Shortcuts Instructions”)Brightness - Increase or decrease the brightness of the picture. Increasing the brightness can add more light to dark areas of the picture, while decreasing the brightness can add more darkness to light areas of the picture.Contrast - Increase or decrease the contrast of the picture. Increase the contrast to adjust the white areas of the picture or decrease the contrast to adjust the black areas of the picture.Color - Adjust the level of color in the picture.Tint - Adjust the hue of the picture.Sharpness - You can increase the sharpness level for clearer images or decrease the sharpness level for smoother images.Basic FeaturesTo Use the Menu1Press the [MENU] button to open the main menu.23UHVV>ŸŸ] to select a menu option, then press [Ÿ/ENTER] button to enter the menu.3In each menu, you can: 3UHVV>ŸŸ] to select an item, Press [Ÿ/Ÿ] to adjust the value, orPress [Ÿ/ENTER] to enter the submenu, Press [MENU] to back the previous menu. 4Press [EXIT] to exit the menu.NOTEThe menus in the user manual may vary slightly from the actual screen.Advanced Video - Access advanced video settings such as Color Temperature, Noise Reduction, Dynamic Backlight Control (DCR) and Adaptive Contrast.Color Temperature: Change the color temperature. You can select a preset color temperature: Cool, Normal and Warm (when set to cool, whites are bluer; when set to warm, whites are yellower)UltraSMR or True 120Hz Refresh Rate: Inserts frames to reduce judder in fast action scenes. You can select High, Low or Off. (May not be accessible, depend on your TV series and size.)Noise Reduction: Optimize the picture quality by filtering signal interference. You can select Off, Low, Auto, Medium or High.Dynamic Backlight Control (DCR): Enhances the contrast ratio between light and dark areas of the picture. You can select Off, Low or High.Backlight: Adjust the backlight level to select the optimum levels of illumination.(May not be accessible, depend on you TV series and size. )Adaptive Contrast: Automatically adjusts the contrast level of the selected input source.Aspect Ratio: To choose the screen aspect ration from Normal, Wide, Zoom, Cinema , Auto and 1:1 Pixel Map.NOTEThe option of the screen Aspect Ration is different in different inputs.Overscan: In DTV mode, Select ON to extend the image beyong the display so the picture edges are not visible.NOTEOnly available in DTV, HDMI (Except Game mode) and Component source.Reset Picture Settings - Resets all Picture settings to the factory defaults.PicturePersonalize the picture to suit your preferences and viewing conditions.Picture ModeBrightnessContrastColorTintSharpnessAdvanced VideoReset Picture Settings505050010>>Energy SavingsPicturePersonalize the picture to suit your preferences and viewing conditions.Picture ModeBrightnessContrastColorTintSharpnessAdvanced VideoReset Picture Settings505050010>>Energy Savings](https://usermanual.wiki/Hisense-Electric/LCDF0037.W9HLCDF0037-User-Manual-1/User-Guide-2217696-Page-21.png)
![14You can adjust:Tuner Mode - Select the TV signal source. You can select Antenna or Cable.Auto Channel Search - Scans for channels that have signals and stores the channels information in memory.Digital Channels: The scanned TV program in digital signals.Analog Channels: The scanned TV program in analog signals.Channel Skip - You can cancel a channel stored in memory.NOTEWhen you press [CH V/V] (or [CH +/-]) button, your TV skips the channel you cancelled. You can still tune to the channel using the number buttons on the remote control.Favorite List - Display your Favorite List. You can add or delete channels to create your favorite list.NOTEWhen you press [CH V/V] (or [CH +/-]) button, your TV skips the channel you cancelled. You can still tune to the channel using the number buttons on the remote control.Signal Strength - This menu is used to check the signal strength of your antenna system. Usually strengths of above 75% indicates an acceptable signal for your TV to display correct image. Each channel may vary in signal / quality strengths and its common for broadcast strengths to change in your area. The signal strength of the channel on the screen is displayed.NOTEIf lower than 75% we advise to have your antenna system checked by qualified personnel.Audio Only - Listen to the program audio only, when you turn off the picture on your TV. (May not be accessible, depend on your TV series and size.)NOTEAudio Only works only when the input source is TV, and your TV is receiving a broadcast signal.To exit audio only mode, press any button. When you exit audio only mode, the Audio Only option is automatically reset to Off.Using the TV MenuChannelsPersonalize the local television services settings.Tuner ModeAuto Channel SearchChannel SkipFavorite ListSignal StrengthAudio Only >>>5AntennaOffUsing the Setup MenuYou can adjust:Menu Settings - You can set On-screen menu system.Language: You can select the menu’s language to English,Español or Français.Timeout: Select the display time of the menu: 10-20-...-60 seconds.Time Setup - Set the Country, Time Zone, Daylight Savings, Date/Time, Sleep Timer.Country: Select your local Country.Time Zone: Select your local time zone: Eastern, Indiana, Central, Mountain, Arizona, Pacific, Alaska or Hawaii.Daylight Savings: Set the Daylight Saving time for your area.Date/Time: Set the current year/month/day/time.Sleep Timer: Select the amount of time before the TV to turns off automatically.Parental Controls - Prevent unauthorized users, such as children, from watching unsuitable programs.When you first use this function, the default password is [0000]. Once you input this password, you can set options.You can change password in the Lock submenu.Channel Block: Block selected Channels on the TV.Program Block: Block selected Programs on the TV.Rating Enable: Block or unblock TV ratings.U.S. TV Ratings: Restrict TV programs by USA Ratings.U.S. Movie Ratings: Restrict movies by USA Ratings.Canadian English/French Ratings: Restrict movies and TV programs by Canadian Ratings.Open V-Chip: Display an advanced V-Chip ratings table for digital channels (USA only).Block Unrated: Block unrated TV programs.Input Block - Block selected Input source on the TV.Button Lock(On/Off) - Block or unblock use of the remote control.SettingsPersonalize the general TV setting.Menu SettingsTime SetupParental ControlsCaptionCEC FunctionDemo ModePower LEDVersion InfoReset Settings>>>>>>>OffOnBasic Features](https://usermanual.wiki/Hisense-Electric/LCDF0037.W9HLCDF0037-User-Manual-1/User-Guide-2217696-Page-23.png)
![16You can adjust:Configuration - Select On or Off. When On mode is select-ed, the following options are available.Internet Connection: Setting the Internet Connection.Interface: You can set up your TV so that it can access the Internet through your local area network (LAN) with a Ethernet or wireless connection.Wireless Setting: You can set up your TV’s wireless connection.Information: Display network configuration information.IP Setting: Allows you to set IP address, subnet mask, gateway, primary and secondary DNS.Connection Test: Press the [ENTER] button to test network status.Basic FeaturesDevice Auto Power Off: When HDMI-CEC is turned on, Device Auto Power Off turns off HDMI CEC devices when you turn off your TV.TV Auto Power On: When HDMI-CEC is turned on and you turn on an HDMI CEC device, TV Auto Power On turns on your TV automatically.Audio Receiver: When HDMI-CEC is turned on and you have connected an audio receiver to your TV, turning on Audio Receiver lets you use your TV’s remote control to control the volume on the audio receiver.Device Root Menu: You can open an HDMI-CEC compatible device’s root menu, then use your TV’s remote control to control the device.Device Discovery: You can display a list of HDMI-CEC devices that are connected to your TV.NOTESHDMI cables must be used to connect HDMI CEC-compatible devices to your TV.The connected device’s HDMI CEC feature must be turned on.If you connect an HDMI device that is not HDMI CEC-compatible, all the HDMI-CEC Control features do not work.Depending on the connected HDMI device, the HDMI-CEC Control feature may not work.VGA (Only available in VGA mode.) - Access Computer Settings such as H.Position, V.Position, Phase, Clock and Auto Adjust.H.Position: Move the image right or left.V.Position: Move the image up or down.Phase: Adjust the focus of stable images.Clock: Adjust the sample frequency.Auto Adjust: Detects input signal clock, phase and position and adjusts TV display accordingly.Demo Mode - Displays a banner at the top of the screen which describes the key features of the TV.Power LED - Select this feature to turn off or On the Power LED indicator on the front panel on your TV. Version Info - View the software version information.Reset Settings - Restores the TV configuration to factory settings.Using the Network MenuAuto Upgrade - Update the software using the Internet.Configure your network. For detailed procedures on using the Network Setup, refer to the “Connecting to the Internet or a network” instructions. If you want the Network Update to work automatically, please select Auto Updates (On). If you want to do the Network Update manually, please select Auto Updates (Off).If the Internet connection doesn’t operate properly, check the Network Configuration settings and try again. If the problem persists, use the USB method below to update.Network Upgrade - Check the process and it will prompt you to upgrade the software.NOTESSoftware Update can also be performed via downloading the latest software to a USB memory device.(www. hisense-usa.com or www.hisense-canada.com).Please be careful not to disconnect the power or remove the USB drive until updates are complete. The TV will be turned on automatically after completing the software update. When software is updated, video and audio settings you made will return to their default settings andyour personal settings will be deleted. We advise you to write down your settings so that you can easily reset them after the update.Applications - Network application.NetworkPersonalize the network connection settings.ConfigurationAuto UpgradeNetwork UpgradeApplications>>>Off](https://usermanual.wiki/Hisense-Electric/LCDF0037.W9HLCDF0037-User-Manual-1/User-Guide-2217696-Page-25.png)
![17Basic FeaturesConnecting to a Wired NetworkNetwork Setup (Auto)Use the Automatic Network Setup to connect the TV to a network that supports DHCP. To set up your TV’s network connection automatically, follow these steps:How to set up automatically 1. Connect your TV to your LAN as described in the previous section. 2. Turn on your TV, operate according to the description in the Settings menu until the Network screen appears.3. On the Network screen, select Configuration and press [ENTER] button to enter the submenu.4. Set Internet Connection to On and Interface to Ethernet.5. Select IP Setting and press [ENTER] button to enter it.6. Set Address Type to Auto.7. Auto acquires and enters the necessary connection values automatically.8. If the connection values are not automatically entered, please check your modem and router manuals for directions to enable automatic IP addressing by DHCP. Or, follow the steps listed in the following section, Network Setup (Manual), to manually configure the network connection.Network Setup (Manual)Use the Manual Network Setup when connecting your TV to a network that requires a Static IP address.Getting the Network Connection ValuesTo get the network connection values on most windows computers, follow these steps:1. Right click the Network icon in the bottom right of the screen.2. In the pop-up menu that appears, click Status.3. On the dialog that appears, click the Support tab.4. On the Support tab, click the Details button. The network connection values are displayed.How to manually setup the network connectionTo set up your TV’s network connection manually, follow these steps:1. Follow Steps 1 through 5 in the “How to set up automatically” procedure.2. Set Address Type to Manual.3. 3UHVV>Ÿź@EXWWRQWRVHOHFW,3$GGUHVVDQGSUHVV>ŻŹ@button to move the cursor to the entry field. Then press 0~9 buttons to enter the numbers.4. Press [MENU@EXWWRQWRH[LW,3$GGUHVVDQGSUHVV>Ÿź@button to select the next options to enter the numbers. 5 When done, press [MENU] button to return to the previous menu.6. Select Connection Test to check the internet connectivity. Wireless SettingHow to set up1. Turn on your TV, press Menu and select Settings Network.2. On the Network screen, select Configuration and press the [ENTER] button to enter the submenu.3. Set Internet Connection to On and Interface to Wireless.4. Select Wireless Setting and press the [ENTER] button you can select: Scan / Manual / Auto.5. If you select Scan, a screen will appear listing all of the ZLUHOHVVQHWZRUNVZLWKLQUDQJHRIWKH798VHWKH>Ÿź@button to select the wireless network with your router SSID and press the [ENTER] to confirm. Proceed to Step 7.6. If you select Manual, a screen will appear prompting you to enter the SSID of your wireless network. Press [ENTER] and an on-screen keyboard will pop up. Enter the SSID and select OK. Press [ENTER] and a screen will appear prompting you select the security mode for \RXUZLUHOHVVQHWZRUN8VHWKH>Ÿź@EXWWRQWRVHOHFWthe proper security mode and press [ENTER] to confirm. If you selected None for the security mode, proceed to step 9.7. A screen will appear prompting you to enter the password for the selected security mode. Press [ENTER] and an on-screen keyboard will pop up. Enter the password and select OK. Press [ENTER] to confirm. Proceed to Step 9.DLNA: Digital Media Player (HiMedia) feature of Digital /LYLQJ1HWZRUN$OOLDQFH3UHVVWKH>ŻŹ@EXWWRQVWRVHWDLNA to On.Netflix: Deactivate Netflix and display the exclusive Netflix ESN.VUDU: Deactivate VUDU. (If available.)PANDORA: Deactivate Pandora. (If available.)My Shared Devices: Allow or deny content sharing from other devices on your network.NOTESSoftware Update can also be performed via downloading the latest software to a USB memory device.Please be careful not to disconnect the power or remove the USB drive until updates are complete. The TV will be turned on automatically after completing the software update. When software is updated, video and audio settings you made will return to their default settings and your personal settings will be deleted. We advise you to write down your settings so that you can easily reset them after the update.NetworkPersonalize the network connection settings.ConfigurationAuto UpgradeFirmware UpgradeApplications>>>Off](https://usermanual.wiki/Hisense-Electric/LCDF0037.W9HLCDF0037-User-Manual-1/User-Guide-2217696-Page-26.png)
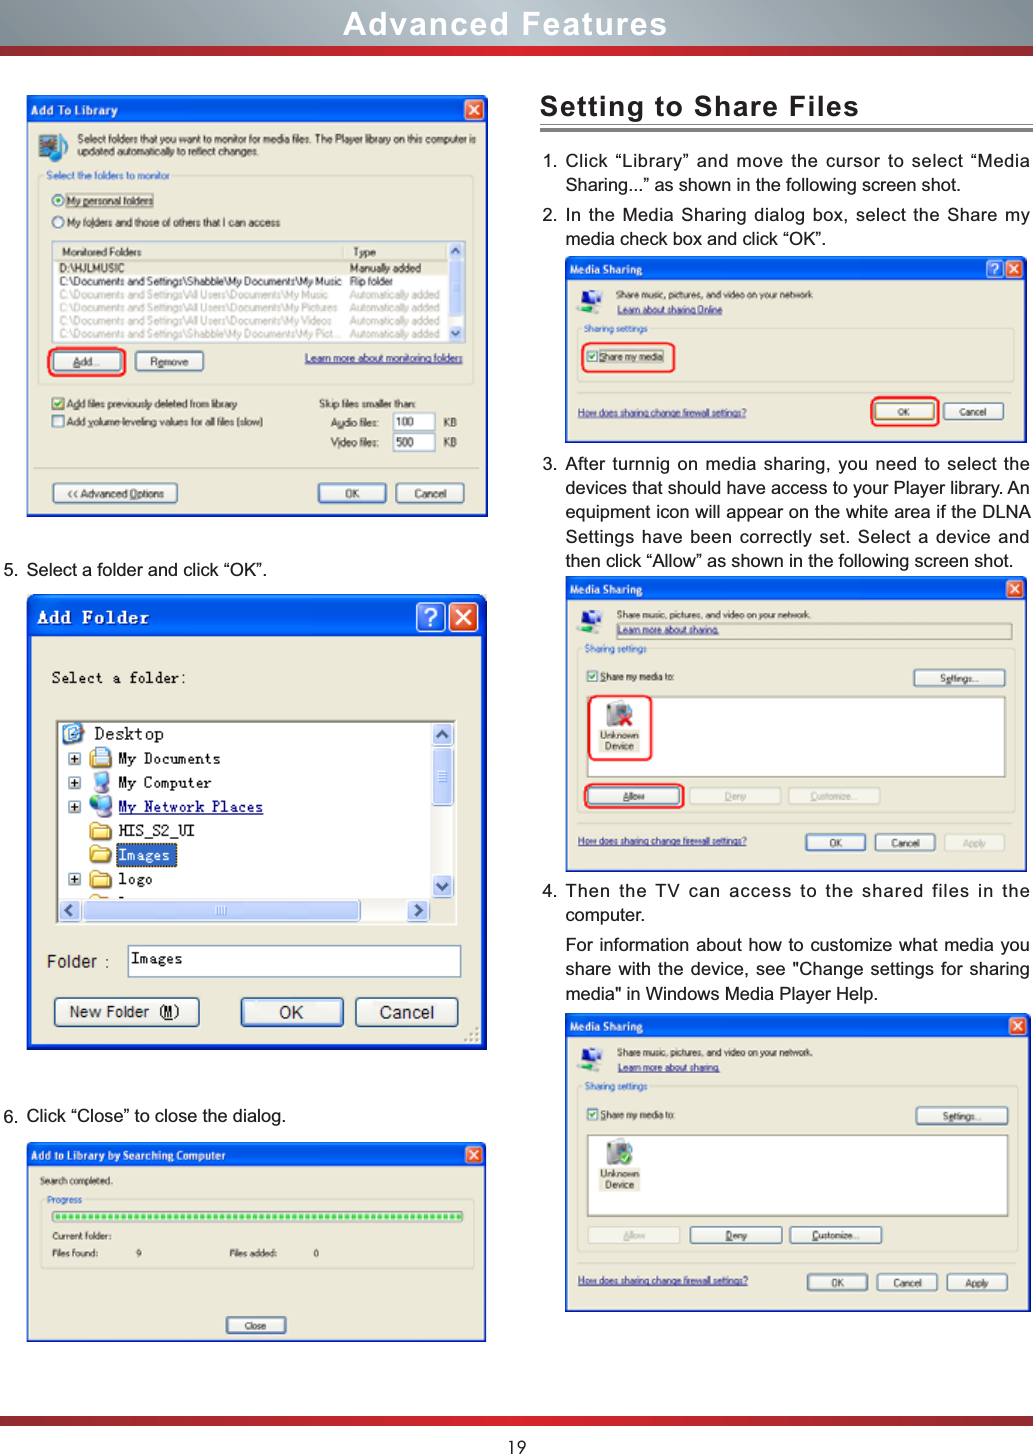
![18Advanced FeaturesYou can use DLNA Certified computers, TVs, and other devices to play or transfer the videos, pictures, and music stored on your phone , tablet or other devices connected to your network. For more about DLNA (Digital Living Network Alliance), visit www.dlna.org. Make sure your phone and TV are both connected to the same Wi-Fi network. Set DLNA to On:1. On the Network screen, select Applications and press the [ENTER] button to enter the submenu. 2. 3UHVVWKH>ŻŹ@EXWWRQVWRVHW'/1$WR2QDLNA SettingIf your computer does not support DLNA, you may install software that supports DLNA such as TVersity or Windows Media Player (Version V11 or higher). We recommend Windows Media Player as the installation and setup is easier.1. On the PC taskbar, click Start.2. Point to All Programs, and then click Windows Media Player.3. Click “Library” tab and then “Add to Library...” as shown in the following screen shot.4. In the Add To Library dialog box, click “Add” as shown in the following screen shot.Media Share Settings in Computer8. If you select Auto, a screen will appear prompting you to select PIN (personal identification number) or PBC (push button configuration) setup. Choose the method supported by your wireless access point. If you choose PIN, an identification number will appear on the screen for you to enter into the access SRLQW$IWHUHQWHULQJWKH3,1SUHVVWKH>Ź@EXWWRQ,Ithe PIN is in use by another device, select [REFRESH]to obtain a new PIN and enter it into the access point. $IWHUHQWHULQJWKH3,1SUHVVWKH>Ź@EXWWRQIf you choose PBC, a screen will appear prompting WRSUHVV>Ź@EXWWRQ$IWHUSUHVVLQJWKH>Ź@EXWWRQ\RXhave two minutes to locate and press the Push Button on your access point to connect to the TV.9. Press the [MENU] button to return to the previous menu.10. Select Connection Test to check the Internet connectivity.](https://usermanual.wiki/Hisense-Electric/LCDF0037.W9HLCDF0037-User-Manual-1/User-Guide-2217696-Page-27.png)
![21Advanced Features1. Press the [HiSmart] button to display Home menu.2. 3UHVV>ŻŹŸź@EXWWRQWRVHOHFWWKHLQWHUIDFH\RXwant to view and press [ENTER] to enter the following description.No Interface descriptionŚLauncher Bar (Movies/Apps/HiMedia)śFunctional applicationŜAdvertisingŝNetwork (Display or set the network status.) 3. Press [EXIT] button exit the home mode.Using the Home Menu1243Display VUDU recommend newest movies information.3UHVVWKH>ŻŹ@EXWWRQVHOHFWWKHPRYLHDQGSUHVVHQWHUWRconfirm. Brief introductionApps contains all pre-loaded applications of the TV.Operation introduction3UHVVWKH>ŸźŻŹ@EXWWRQ VHOHFWWKHDSSDQGSUHVV[ENTER] to confirm.Movies Brief introduction Operation introductionBrief introductionThis application provides local and international weather forecasts, world class weather radar plus up-to-date weather reports and current conditions.Operation instructionsAccuWeather.com®10/1021đSydneyMostly Cloudy5 24MPH2:28 PM UpdatedToday1/29/201320/28đ20/27đ20/27đ20/29đ20/29đ20/26đ1/30/2013 1/31/2013 2/1/2013 2/2/2013 2/3/2013WednesdayDel this city Add a city Û&Û) City List Change Set defaultSaturday SundayThursday Friday1. 3UHVVWKH>ŻŹ@EXWWRQVWRPRYHWKHFXUVRUWRVHOHFWservice items in AccuWeather screen and the [ENTER]button to confirm.2. To use other features, press the button shown in the help bar.3. Press the [RETURN] button to return to the upper menu, or the [EXIT] button to close the App.YouTubeBrief introductionThe YouTube app allows you to watch original videos, music videos, feature length movies, previews and trailers on your TV screen. Search or browse recommendations with the TV remote.Operation instructionsTo activate your YouTube account for your TV:Select "Sign in" and "Settings" from the toolbar on the left side of the application, then go to www.youtube.com/activate and enter the code you see on the TV screen. While you enter the code the screen should remain open, otherwise the code will no longer be valid. Once completed your account will be activated and you will be signed in.To control YouTube from your tablet or smartphone:Please first check if your mobile device supports YouTube TV and use the same network connection. To pair your device to the YouTube screen, you will be prompted to go to www.youtube.com/pair on your mobile device. The screen guide to "Pair with TV" will appear. Enter the pairing code or enter the value of the scanned QR code on the SmartTV. While you enter the code the screen should remain open, otherwise the code will no longer be valid. Select a name for your device then click "Add TV". Once complete, the YouTube app will show that your mobile device has been paired. You can now select a video to watch on YouTube TV using your mobile device.NOTEFor U.S. only.NOTEIn Canada and Mexico, VUDU Movies/ VUDU Apps/ Pandora may not all available.AppsAccuWeather](https://usermanual.wiki/Hisense-Electric/LCDF0037.W9HLCDF0037-User-Manual-1/User-Guide-2217696-Page-30.png)
![22Advanced FeaturesVUDU MoviesVUDU is an on-demand service that offers high-definition movies via the web.To enjoy movies, please register and log in to your account.To access Vudu HD Movies: You can access the VUDU HD Movies by the following method:1. Press the [HiSmart] button to display home menu.2. 3UHVV>ŻŹ@EXWWRQWRVHOHFWWKH98'8+'0RYLHVLFRQand press [ENTER] to enter it, or press [VUDU] button to enter directly. 3. Select the Sign Up Now icon on the VUDU HD Movies interface, and press [ENTER] to enter.4. Enter your email address to start your VUDU experience. (Refer to “How to Input the Email Address” on page 23.”)53UHVV>ŸźŻŹ@EXWWRQWRPRYHWKHFXUVRUWRVHOHFWservice items in the VUDU HD Movies home page, and press [ENTER] button to confirm.6. While watching a movie, press [ENTER] button to display/H[LWWKHWRROEDUSUHVV>ŻŹ@EXWWRQWRVHOHFWWKHIXQFWLRQicon, and press [ENTER] button to confirm. 7 Press [RETURN] button to return the upper menu, or press [EXIT] button to close the menu.Brief introductionOperation instructionsHow to Input the Email AddressTool Bar1Press [ENTER@EXWWRQWRHQWHUDQGSUHVV>ŻŹ@EXWWRQWRselect the chapter. 2Stop playback.3Fast backward. Press [ENTER] to select the backward speed. You can press [ ] button to achieve the function.43OD\3DXVH<RXFDQSUHVV>Ź,,@EXWWRQWRSOD\SDXVHdirectly when there is no control bar on the screen.5Fast forward. Press [ENTER] button to select the forward speed. You can press [ ] button to achieve the function.6Progress bar. The progress bar when playing.7Press [ENTER] button to select the movies quality HDX, HD or SD.1. 3UHVV>ŸźŻŹ@EXWWRQWRPRYHWKHFXUVRUWRWKHaddress bar and press [ENTER] button to confirm.abcde f gh i j k lmnopq r s t uvwxyz0123456789@.comSymbols Space ShiftEnter email addressBack DoneEnter email addressEnter email address to begin enjoying VUDU!3. 3UHVV>ŸźŻŹ@EXWWRQWRPRYHWKHFXUVRUWRWKHcharacters you want to select and then press [ENTER]button to confirm. If you want to delete one character, move the cursor to Back key and press [ENTER] button to confirm.4. Move the cursor to Done key and press [ENTER] button to confirm if you have completed the address input. Then the new address will appear on the address bar.2. Press [ENTER] button to display the keyboard.There are some shortcuts on the bottom of the keyboard so that you can input part of the address often used directly.Other keys are used as the keyboard of your computer. Brief introductionVUDU AppsThe applications platform for connected TVs.VUDU Apps provides customers with access to a wide range of Internet services and applications including streaming video, music on demand, photo browsing, social networking and more.VUDU Apps supports the development of responsive apps designed specifically for use on home HD televisions.VUDU Apps uses a unique, cloud-based architecture optimized for consumer electronics devices, including delivering the latest applications to consumers without the need for software downloads or frequent firmware updates.Operation instructionsYou can access the VUDU Apps by the following methods:1. Press the [HiSmart] button to display home menu.2. 3UHVV>ŻŹ@EXWWRQWRVHOHFWWKH98'8$SSVLFRQDQGpress [ENTER] to enter it.3. 3UHVV>ŻŹŸź@EXWWRQWRVHOHFWWKHZLGJHW\RXZDQWWRaccess, and press [ENTER] to enter it. 4. You can press [RETURN] to return the upper menu or press [EXIT] button to close the Widgets display.0:00:56 0:02:321 2 3 4 5 67HDX](https://usermanual.wiki/Hisense-Electric/LCDF0037.W9HLCDF0037-User-Manual-1/User-Guide-2217696-Page-31.png)
![23Advanced FeaturesNetflix1HWÀL[XQOLPLWHGPHPEHUVKLSUHTXLUHGInstantly watch thousands of TV episodes & movies streaming over the Internet from Netflix. Unlimited membership required.NOTESFor more information on Netflix visit http://www.netflix.com/help or login to your Netflix account and click “Help” at the top of the page.Picture quality depends on the network speed and original bit rate.Illustrations are examples and may differ from the actual Netflix screens. The display and operations may change as a result of a software update. Use Netflix without configuring a proxy server. Part or all of Netflix may not be available when connecting to the Internet via a proxy server.Operation instructions1. Press the [HiSmart] button to display home menu.2. 3UHVV>ŻŹ@EXWWRQWRVHOHFWWKH1HWIOL[LFRQDQGSUHVV[ENTER] to enter it, or press [NETFLIX] button to enter Netflix website directly. 3. Input Email and Password in following window to sign in. (Refer to “How to Input the Email Address” on page 23)4. 3UHVV>ŸźŻŹ@EXWWRQWRPRYHWKHFXUVRUWRVHOHFWservice items in the Netflix home page, and [ENTER]button to confirm.5. While watching a movie, press operational buttons to control the movie. 6. Press [RETURN] button to return the upper menu, or press [EXIT] button to close the menu.Brief introductionVimeoVimeo App provides a variety of HD video. All these video are mainly divided into two parts: Featured Video and Categories Video which includes Activism & Non Profits, Animation &Motion Graphics, Art, Comedy, Education & DIY, Everyday Life, Experimental, Films, HD, Music, Products & Equipment, Science & Tech, Sports and others.When you sign in this App , you can bookmark you favorite movie and watch the movie last watched.1. You can choose the movie you like to watch in Featured and Categories in home page.2. If you want to sign in vimeo , please choose Setting.3. After signing in vimeo, you can save your favorite video to My Stuff or Watch Later.4. Choose Search to search the name of movie or music you love.5To use other features, press the button showed in the help bar.6Press [RETURN] button to return to the upper menu, or [EXIT] button to close the App.Brief introductionOperation introduction](https://usermanual.wiki/Hisense-Electric/LCDF0037.W9HLCDF0037-User-Manual-1/User-Guide-2217696-Page-32.png)
![24Advanced FeaturesFacebook BrowserViewster Operation introduction1. Press the [HiSmart] button enter the apps menu.2. 3UHVV>ŻŹ@EXWWRQWR VHOHFWWKH)DFHERRNLFRQDQGpress [ENTER] to enter it.3. Input Email and password in following window to sign in.4. 3UHVV>ŸźŻŹ@EXWWRQWRPRYHWKHFXUVRUWRVHOHFWservice items in the Facebook home page, and [ENTER]button to confirm.5. Press [RETURN] button to return the upper menu, or press [EXIT] button to close the menu.The browser allows you to browse any URL, add bookmarks and select websites from the bookmarks.How to enter the Web Browser1. Press the [HiSmart] button to display the home menu.2. 3UHVVWKH>ŻŹŸź@EXWWRQVWRVHOHFWWKHLFRQDQGpress the [ENTER] button to enter it.3. Then the default interface will appears on the screen.There are some function icons on the top of the screen:The function of the buttons on the screen:1. Back to previous page.Move the cursor to the icon and press the [ENTER]button to return to the previous viewed web page.2. Forward to next page.Move the cursor to the icon and press the [ENTER]button to go forward to the previous viewed web pages.3. Main page.Move the cursor to the icon and press the [ENTER]button to show the main page.4. Refresh page.Move the cursor to the icon and press the [ENTER]button to refresh the current page.5. Address bar.Input the website you want to view.6. Go to the website.Move the cursor to the icon and press the [ENTER]button to search the website.7. Stop loading the website.Move the cursor to the icon and press the [ENTER]button to stop loading the website.8. Set up.Open the system settings, settings for browsing data, etc.9. View history website.Move the cursor to the icon and press the [ENTER]button to view the website.10.Add a bookmark.Move the cursor to the icon and press the [ENTER]button to add the website to the favorite folder.11.Bookmark manager.Move the cursor to the icon and press the [ENTER]button to enter the favorite folder. Operation introduction1. Press the [HiSmart] button to display the home menu.2. 3UHVV>ŻŹ@EXWWRQWRVHOHFWWKH9LHZVWHULFRQDQGpress[ENTER] to enter it.3. ,3UHVV>ŸźŻŹ@EXWWRQWRPRYHWKHFXUVRUWRVHOHFWservice items in the Twitter home page, and [ENTER]button to confirm.4. Press [RETURN] button to return the upper menu, or press [EXIT] button to close the menu.Brief introductionOperation introduction](https://usermanual.wiki/Hisense-Electric/LCDF0037.W9HLCDF0037-User-Manual-1/User-Guide-2217696-Page-33.png)
![2512.Exit Browser.Move the cursor to the icon and press the [ENTER]button to close the page.The function of the buttons on the screen:How to Input a New Address1. 3UHVVWKH>ŸźŻŹ@EXWWRQVWRPRYHWKHFXUVRUWRWKHaddress bar.2. Press the [ENTER] / [RETURN] or [MENU] button to display / close the keyboard.There are some shortcuts on the bottom of the keyboard so that you can input part of the address often used directly. Other keys are used as the keyboard of your computer.3. 3UHVVWKH>ŸźŻŹ@EXWWRQVWRPRYHWKHFXUVRUWRWKHcharacters you want to select and then press the [ENTER]button to confirm.If you want to delete one character, move the cursor to the .Key OperationEXIT Exit Web Browser.RETURNBack to previous page or exit current page; Cancel pop dialogue or soft keyboard.ŸźŻŹ Up/Down/Left/Right.&+ȁ&+9 Page Up/Page Down.RED Move the cursor to the left.GREEN Move the cursor to the right.YELLOW YELLOW Clean all the websites.BLUE Go to the website.MENU MENU Open/close soft keyboard.ENTER Enter1Forward to the web page.2Back to previous viewed web page.3Stop loading the current page.4Reload current page.5Open the home page.6Open the system settings.7Open previous viewed web page.8Bookmark this page.9Open the Bookmarks Manager.4. Press the [BLUE] button to confirm to enter the website. Then the new address will appear on the address bar.How to Add /Edit a bookmark1. First, input the address on the address bar and enter it.2. 3UHVVWKH>ŸźŻŹ@EXWWRQVWRPRYHWKHFXUVRUWRWKH and press the [ENTER] button to confirm.The menu will pop up on the screen.3. If you do not want to add the bookmark, move the cursor to the Cancel button to confirm.How to select the Website from the bookmark1. Move the cursor to the icon and press the [ENTER]button to confirm. The menu will appear on the screen.2. Move the cursor to the website you want to view and press the [ENTER] button to confirm.NOTEAdobe Flash is not supported on the Browser.Advanced Features](https://usermanual.wiki/Hisense-Electric/LCDF0037.W9HLCDF0037-User-Manual-1/User-Guide-2217696-Page-34.png)
![26Advanced FeaturesPandora is a personalized radio service that streams music on your TV. Just start with the name of one of your favorite artists, songs, comedians, or composers and Pandora will create a custom station that plays similar tracks. Pandora features hundreds of music and comedy genre stations. Create up to 100 stations so you can easily switch between favorites.For enjoying more movies, please register and log in to your account.1. Press the [HiSmart] button to display home menu.2. 3UHVV>ŻŹ@EXWWRQWRVHOHFWWKH3DQGRUDLFRQDQGSUHVV[ENTER] to enter it. 3. Input Email and Password in following window to sign in. (Refer to “How to Input the Email Address” on page 23)4. 3UHVV>ŸźŻŹ@EXWWRQWRPRYHWKHFXUVRUWRVHOHFWservice items in the Pandora home page, and [ENTER]button to confirm.5. Press [RETURN] button to return the upper menu, or press [EXIT] button to close the menu.PandoraBrief introductionOperation introductionWith Picasa you can explore featured photos in Google Picasa Web Album, also you can search your favorite photos in Google Picasa Web Album. If you have already had a Google Picasa account, you can enjoy your private photos stored in Google Picasa Web Album.1. Press the [HiSmart] button to display home menu.2. 3UHVV>ŻŹ@EXWWRQWRVHOHFWWKH3LFDVDLFRQDQGSUHVV[ENTER] to enter it. 3. 3UHVV>ŸźŻŹ@EXWWRQWRPRYHWKHFXUVRUWRVHOHFWservice items in Picasa screen and [ENTER] button to confirm.4. To use other features, press the button showed in the help bar.5. Press [RETURN] button to return to the upper menu, or [EXIT] button to close the App.PicasaBrief introductionOperation introductionTwitter Operation introduction1. Press the [HiSmart] button to display the home menu.2. 3UHVV>ŻŹ@EXWWRQWRVHOHFWWKH7ZLWWHULFRQDQGSUHVV[ENTER] to enter it.3. Input Email and password in the following window to sign in.4. 3UHVV>ŸźŻŹ@EXWWRQWRPRYHWKHFXUVRUWRVHOHFWservice items in the Twitter home page, and [ENTER]button to confirm.5. Press [RETURN] button to return the upper menu, or press [EXIT] button to close the menu.](https://usermanual.wiki/Hisense-Electric/LCDF0037.W9HLCDF0037-User-Manual-1/User-Guide-2217696-Page-35.png)
![27Advanced FeaturesWith the Digital Media Receiver you do not have to crowd around a small tablet PC or smartphone screen to share video, music or pictures with friends and family. Simply browse, discover and beam media files stored on your Android or iOS device to your TV using the Twonky Beam application. (You can seach Twonky Beam from Google play or the Apple App store).1. TV side:Confirm the TV is connected to a local area network. (Reference the Network Settings section)Set DLNA to On. (Reference the DLNA Settings section)2. Device Setup:Download the Twonky Beam application using the link found on the Hisense website at www.hisense-usa.com or http://hisense-canada.com.Confirm the device is connected to the same local area network as the TV.Launch the Twonky Beam application, select the video, music or picture you want the share and beam it to the TV.You can control the playback using the TV remote or from the device application.Digital Media Receiver (HiBeam)Brief introductionOperation introductionWhen viewing video/photo, you can press these buttons on the remote control to control video/photo.Media content control function buttonsNOTEWhen browsing the photos, only the , and buttons are available.Fast forwardPlay/PauseFast backwardThe previous oneThe next oneStopDigital Media Player (HiMedia)Please note that Hisense does not assume any responsibility for any lost data and cannot guarantee perfect compatibility with all mass storage devices. Be sure to insert the USB disk with standard USB2.0 port or to connect the TV with other digital devices via DLNA ( Menu >Network >Applications >DLNA ) or SugarSync. Press the [INPUT] button to display the Source menu, SUHVVWKH>Ÿź@EXWWRQVWRKLJKOLJKWWKH+L0HGLDVRXUFHthen press the [ENTER] button to confirm. (If you want to exit HiMedia, you can press the [INPUT] button to switch to other sources).Press the [HiMedia] button to enter the HiMedia mode directly. Or press the [HiSmart] button to enter.,QWKH+L0HGLDVFUHHQ\RXFDQSUHVVWKH>ŻŹ@VHOHFWWKHPicture/Video/Music option, then press [ENTER] to enter/play the folder/file.NOTEThe first Play the SugarSync option file ,you need to register http://www.sugarsync.com and login successfully.Press [RETURN] to return to the previous directory.1. Press the [Ÿź] buttons to switch the media type.2. Press the [YELLOW / BLUE] buttons to turn to the previous / next page.3. 3UHVVWKH>ŸźŻŹ@EXWWRQVWRVHOHFWWKHIROGHUILOH\RXwant to open and then press the [ENTER] button to enter/play the folder/file.4. Press the [RETURN] button to return to the previous directory.NOTESYour DMR of TV may not be accessible when there are some prior applications working (such as Skype or firmware updating). You need to close these prior applications or waiting for the firmware updating finished, then the DMR will work.If a mobile device has access TV, you can set the access privileges to Allow or Deny in "Menu-Network-Applications-My Shared Devices"Files Format Playable formatPhoto .jpgMusic .avi (mp3,mpeg,ac3), .mp4, .rmVideo .avi (H.264, MPEG, Divx), .mkv (H.264, MPEG), .flv, .mpeg, .wmv (Divx, XviD) NOTEWe can not promise that this unit will support all the formats listed above, as the programming tools are different. Playable format list](https://usermanual.wiki/Hisense-Electric/LCDF0037.W9HLCDF0037-User-Manual-1/User-Guide-2217696-Page-36.png)
![28Advanced FeaturesBrowse Pictures1. 3UHVVWKH>Ż@EXWWRQWRVZLWFKWR$OORU3LFWXUH2. 3UHVVWKH>ŸźŻŹ@EXWWRQV WRVHOHFWWKHSLFWXUH\RXwant to view.3. Press the [ENTER] button to display picture.4. 3UHVVWKH>ŶRETURN] buttons to exit or return to the previous directory.When browsing the pictures.Press the [DISPLAY] button to display/exit the picture control bar.3UHVVWKH>ŻŹ@EXWWRQVWRVHOHFWWKHIXQFWLRQLFRQDQGthen press the [ENTER] button to confirm.1Browse the previous picture. You can also press the [ ] / >Ż@ buttons in the remote control directly when no control bar displays on the screen.2Browse the next picture. Press the [ @>Ź@ buttonsdirectly in the remote control when no control bar displays on the screen.3Rotate the picture 90 degrees clockwise. 4Rotate the picture 90 degrees anticlockwise. 53OD\SDXVH3UHVVWKH>Ź,,@EXWWRQGLUHFWO\ZKHQQRcontrol bar displays on the screen.66WRSEURZVLQJWKHSLFWXUH<RXFDQSUHVVWKH>Ŷ@EXWWRQdirectly in the remote control when no control bar on the screen.7Zoom in the picture. 8Zoom out the picture. 92SWLRQ6HW3UHVVWKH>Ÿź@EXWWRQVWRVHOHFWWKHRSWLRQVDQGSUHVVWKH>ŻŹ@EXWWRQVWRVHWWKHPOption SetSpeed:Effect:FastBox ineSpeed - Allows you to browse the picture at different speed, such as Fast, Slow, and Medium.eEffect - Select transition effects between images, such as: random, Box in, Box out, Wipe right, Wipe left, Wipe up, Wipe down, Dissolve, and None. 10Picture info. Displays information about the pictures.1 2 3 4 5 6 7 8 910Enjoy Video Files1. 3UHVVWKH>Ż@EXWWRQWRVZLWFKWR$OORU9LGHR2. 3UHVVWKH>ŸźŻŹ@EXWWRQVWRVHOHFWWKHYLGHR\RXwant to view.3. Press the [ENTER] button to play the video.4. 3UHVVWKH>ŶRETURN] buttons to exit and return to the previous directory.5. Press the [DISPLAY] button to display/exit the video control bar.6. 3UHVVWKH>ŻŹ@EXWWRQVWRVHOHFWWKHIXQFWLRQLFRQDQGthen press the [ENTER] button to confirm.Function of icons:2 3 4 5 617 8 910 1100:00:36/00:20:011The progress bar when playing.23OD\3DXVH<RXFDQSUHVVWKH>Ź,,@ EXWWRQGLUHFWO\WRplay/pause when there is no control bar on the screen.3Play the previous video. You can press the [ ] button directly to achieve the function when no control bar displayed on the screen.4Play the next video. You can press the [ ] button to achieve the function when no control bar displayed on the screen.5Fast backward. Then press the [ENTER] button to select WKHEDFNZDUGVSHHG<RXFDQSUHVVWKH>ŻŻ@EXWWRQWRachieve the function.6Fast forward. Then press the [ENTER] button to select WKHIRUZDUGVSHHG<RX FDQSUHVVWKH>ŹŹ@EXWWRQWRachieve the function.7Select time to playe3UHVVWKH>ŻŹ@EXWWRQVWRVHOHFWWKHSRVLWLRQ\RXZDQWto set.ePress the [0~9] buttons to set the time and press the >ŸźŻŹ@EXWWRQVWRDGMXVWLWePress the [ENTER] button to confirm and the video will to play at the time you have set or press the [RETURN]button to exit.8Play listePress the [YELLOW/BLUE] buttons to page up/page GRZQDQGSUHVVWKH>Ÿź@EXWWRQVWRVHOHFWWKHYLGHRePress the [ENTER] button to confirm. 9Options](https://usermanual.wiki/Hisense-Electric/LCDF0037.W9HLCDF0037-User-Manual-1/User-Guide-2217696-Page-37.png)
![29Option SetRepeat:Subtitle Selection:AUDIO1:OnceNo1/1e3UHVVWKH>Ÿź@EXWWRQV WRVHOHFWWKHRSWLRQVLQWKHmenu.e3UHVVWKH>ŻŹ@EXWWRQVWRVHOHFWWKHVHWWLQJVePress the [ENTER] button to confirm.10Program infoeAllows you to view the program information.11Stop playbackEnjoy Music Files1. 3UHVVWKH>Ż@EXWWRQWRVZLWFKWR$OORU0XVLF2. 3UHVVWKH>ŸźŻŹ@EXWWRQVWRVHOHFWWKHPXVLF\RXwant to view.3. Press the [ENTER] button to play the music.4. $OOWKHPXVLFLVOLVWHGRQWKHOHIW3UHVVWKH>Ÿź@EXWWRQVWRVHOHFWWKHPXVLF DQGSUHVVWKH>Ź@EXWWRQWRPDUNLWYou can press the [YELLOW/BLUE] buttons to turn to the previous /next page. Press the [GREEN] button to select the Mode: Mark / All / Single.5. Press the [RETURN] button to exit the music playback interface.NOTEYou can press the [ASPECT] button to change the aspect ratio (Normal, Full Screen, Original Size) while playing the video.Advanced Features](https://usermanual.wiki/Hisense-Electric/LCDF0037.W9HLCDF0037-User-Manual-1/User-Guide-2217696-Page-38.png)
![30Other Information,I\RXH[SHULHQFHGLI¿FXOWLHVZKLOHXVLQJWKH79SOHDVHFKHFNWKHWDEOHEHORZIRUSRVVLEOHVROXWLRQVSYMPTOMS POSSIBLE SOLUTIONSNo sound or picture.Check if the power cord is in the AC outlet and if it has electricity.Check if you have pressed [POWER] button on the TV or [POWER] button on the remote control.I have connected an external source to my TV and I get no picture and/or sound.Check for the correct output connection on the external source and for the correct input connection on the TV.Make sure you have made the correct selection for the input mode for the incoming signal.When I turn on my television, there is a few second delay before the picture appears. Is this normal?Yes, this is normal. That is the TV searching for previous setting information and initializing the TV.Picture is normal, but no sound. Check the volume settings.Check if Mute mode is set “on”.Sound but no picture or black and white picture.If black and white picture first unplug TV from AC outlet and replug after 60 seconds.Check Color Setting if picture is black and white.Sound and picture distorted or appear wavy.An electrical appliance may be affecting TV set. Turn off any appliances, if interference goes away, move appliance farther away from TV.Insert the power plug of the TV set into another power outlet.Sound and picture is blurry or cuts out momentarily.If using an external antenna, check the direction, position and connection of the antenna.Adjust the direction of your antenna or reset or fine tune the channel.Horizontal/vertical stripe on picture or picture is shaking. Check if there is interfering source nearby, such as appliance or electric tool.The plastic cabinet makes a “clicking” type of sound.“Click” sound can be caused when the room temperature changes. This change causes the television cabinet to inflate or contract, which makes the sound. This is normal and TV is OK.Black square appears in the center of my television screen?The Closed Caption function is set in the text mode. To remove it, access Closed Caption from the menu screen and change the Mode setting from text to either CC1 or off .On some channels getting another language or sometimes no sound at all.That would indicate that the MTS mode on your unit is set to SAP mode. We suggest setting the MTS mode to either Stereo or Mono . For further instruction, please see Audio Adjust or MTS/SAP in your user manual.SAP is Second Audio Program. It’s a second audio channel that is usually used for a second language or descriptive audio for the visually impaired.MTS stands for Multichannel Television Sound, a standard that allows the encoding of 3 channels of audio within a standard NTSC (analog) video signal to a television. A television that is able to receive MTS Stereo allows you to watch television with stereo sound.Troubleshooting](https://usermanual.wiki/Hisense-Electric/LCDF0037.W9HLCDF0037-User-Manual-1/User-Guide-2217696-Page-39.png)
![31SYMPTOMS POSSIBLE SOLUTIONSNot getting all of my cable channels on the television or I’m only getting 13 channels.Check the cable connection for an incoming signal. Make sure the signal is coming OK. Best way to confirm signal is to use another TV and/or contact your cable company.Reprogram your channels. Press [MENU] button on your TV remote control, change Input Source setting to “Cable”, then use “Auto Channels Search” to reprogram your channels.[CHV/ V] don’t work when I set the Channel to Cable? They work with the Air setting?After switching to Cable, please auto program the channels. The TV will “remember” all the channels then the TV will allow you to surf the channels with [CH V/V] buttons.Remote control does not work.Confirm that TV still has power and is operational.Change the batteries in the remote control.Check if the batteries are correctly installed.Clean the front of the remote control (LED window).If using a universal remote, be sure to select the TV mode on the remote.If the remote still does not work:5HPRYHDQGUHLQVWDOOWKHEDWWHULHVFRUUHFWO\WRUHVHWWKHUHPRWHRULQVWDOOQHZbatteries.3UHVVWKH3RZHUEXWWRQWRWXUQRQWKH79:LWKDXQLYHUVDOUHPRWHLI\RXKDYHUHVHWor changed the batteries you will need to reprogram the remote for the other units.Check if there is obstruction between the remote control and the TV.TIP: If you have a digital camera / camera phone, you can aim the front of the remote at camera lenses (at this time, the camera should set on camera mode, not play mode). Observe the camera screen while pressing a button on the remote control; you should see flashing light on the screen. If there is no light observed, the remote control is not working. You need to repair or replace the remote control.Other Information](https://usermanual.wiki/Hisense-Electric/LCDF0037.W9HLCDF0037-User-Manual-1/User-Guide-2217696-Page-40.png)