Hisense Electric LCDF0045 Part15 Subpart B-LED LCD TV User Manual Roku TV User Guide
Hisense Electric Co., Ltd. Part15 Subpart B-LED LCD TV Roku TV User Guide
Contents
- 1. W9HLCDF0045_User Manual 1
- 2. W9HLCDF0045_User Manual 2
W9HLCDF0045_User Manual 1

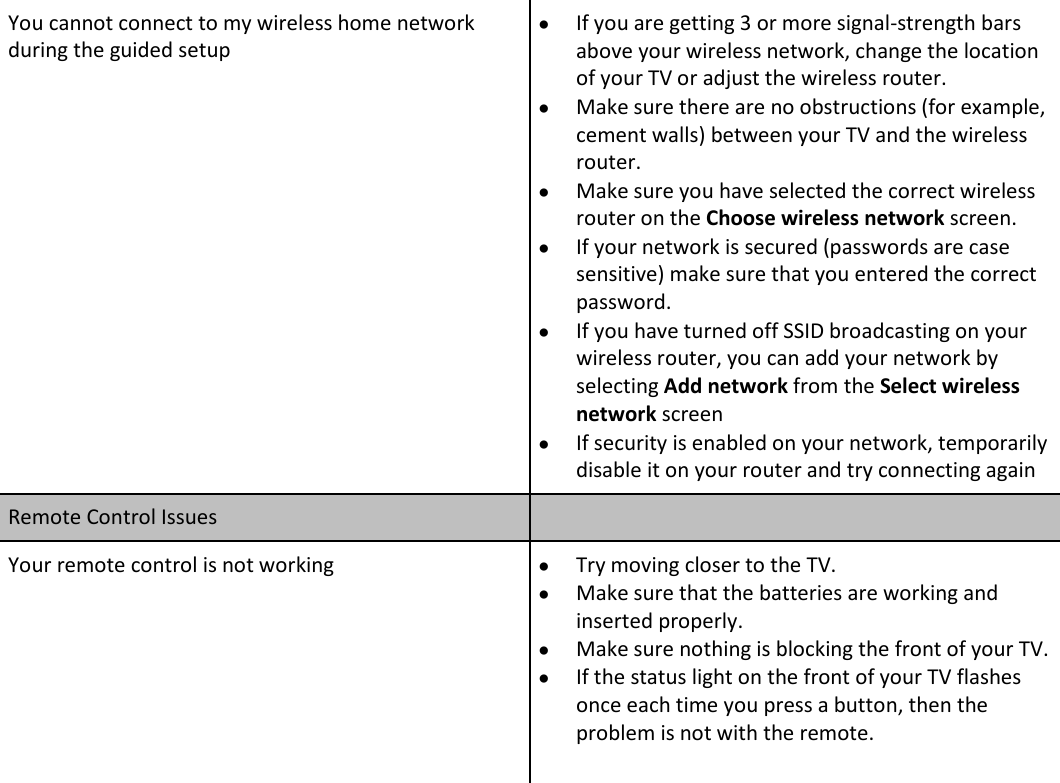
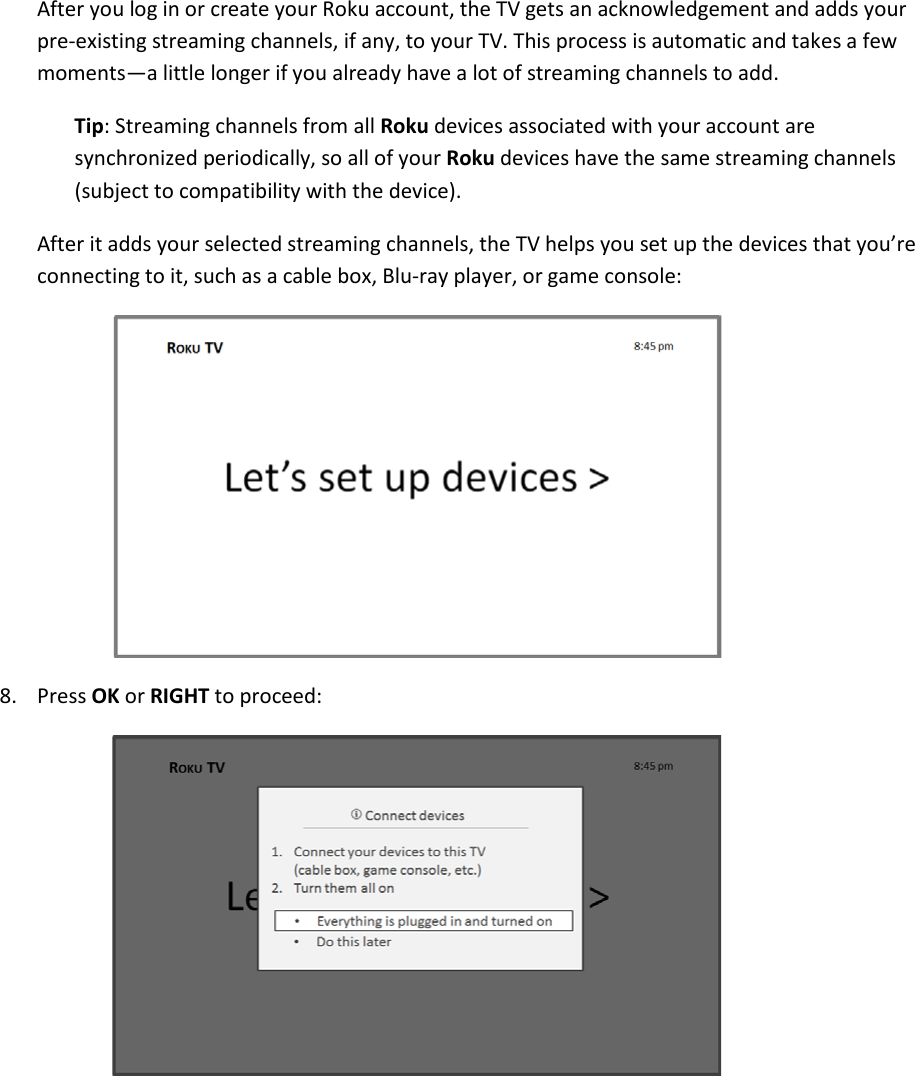
![8 Connecting Devices to Your TV This section provides the steps to connect various types of devices to the TV. Connecting an antenna, cable or satellite box 1. Connect one end of a coaxial cable (not included) to the [RF OUT] jack on the antenna, cable or satellite box. If you are using an antenna with twin-lead cable, you may need a 300-75 Ohm adapter (not provided) to connect it to the back of your TV. Likewise, if you are using several antennas, you may need a combiner (not provided). 2. Connect the other end of the cable to the [ANT/CABLE IN ] jack on the side of the back panel. 3. Select TV as the input source using the [INPUT] button. Connecting an Audio Visual (AV) device with a composite cable 1. Use the audio and video cables to connect the composite video/audio jacks (of the external AV device) to the AV IN jacks of the TV. (Video = yellow, Audio Left = white, and Audio Right = red). 2. Plug the connected devices into the main socket before switching on the TV. 3. Select AV as the input source using the [INPUT] button. Connecting an AV device with an HDMI cable This type of connection supports digital connections between HDMI-enabled AV devices such as a Personal Video Recorder (PVR), DVD, Blu-Ray, AV receiver and digital devices. In addition, some devices (such as a PVR or DVD player) require an HDMI signal to be set to Output in the settings of the device. DVD Player/RecorderVideo CameraEXTERNAL DEVICESSet-top boxSatellite ReceiverSatellite antenna cableVCRA/V OUTVideoLRWhite(L)White(L)Yellow(Video)Yellow(Video)Red(R)Red(R)TV JACKVIDEOAV INL RAV Cable (not included)or ANT OUTCableVHF/UHF AntennaEXTERNAL DEVICESTV JACKANT/CABLE(not included)(not included)](https://usermanual.wiki/Hisense-Electric/LCDF0045.W9HLCDF0045-User-Manual-1/User-Guide-2339676-Page-10.png)
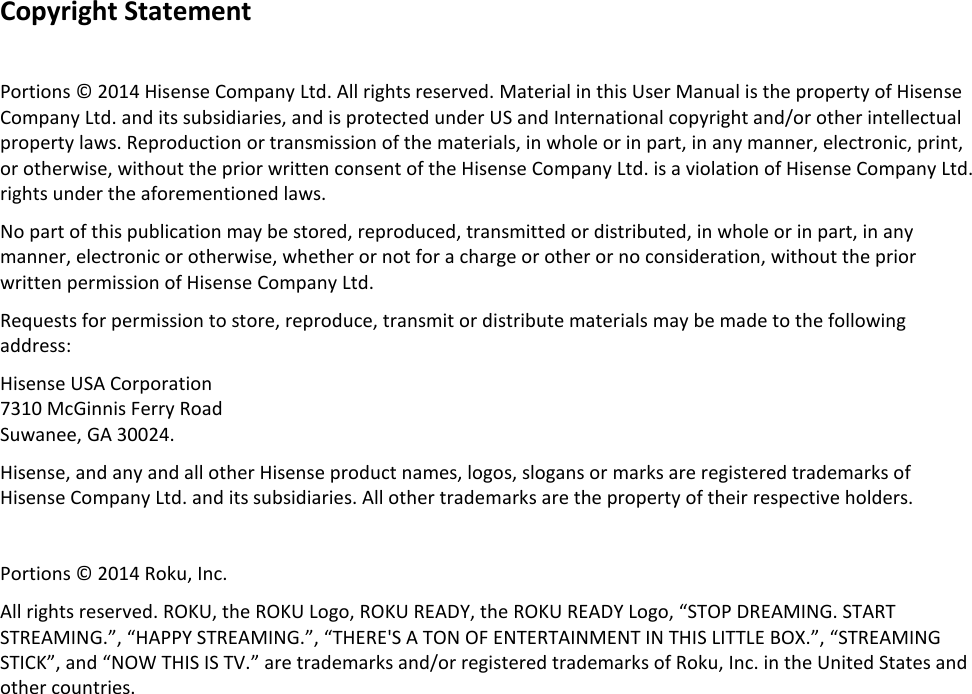
![9 For instructions, please refer to the User Manual for the device. 1. Use an HDMI cable to connect the [HDMI] output jack of the AV device to the [HDMI] jack on the TV. 2. Plug the connected devices into the main socket before switching on the TV. 3. Select one of the HDMI sources as the input source using the [INPUT] button. Note: The HDMI connector provides video and audio signals. It is not necessary to connect an audio cable. Connecting a Headphone You can connect headphones or an analog sound bar to the [AUDIO OUT] jack on your set. While the headphone is connected, the sound from the built-in speakers will be disabled. Connecting an Audio Receiver with a digital audio cable 1. Use an audio cable to connect the digital [AUDIO IN] jack of the AV device to the [DIGITAL AUDIO OUT ] jack of the TV. Another option is to use an RCA Y-cable (1/8”-stereo mini to L/R phono - not provided) to connect analog sound system to the [AUDIO OUT] jack of the TV. 2. Plug the connected devices into the main socket before switching on the TV. 3. Select the corresponding source on the audio receiver. Connecting a USB device to the USB port 1. Browse photos, music and movies by inserting your USB device into the [USB] port. 2. Select the Roku Media Player tile from the Home screen TV JACKS EXTERNAL DEVICESPowerless Bass SpeakerSpeakerAudio AmplierDIGITALAUDIO OUT/AUDIO OUTWhite(L)Red(R)Audio Cable (not included)TV JACKAudio Cable (not included)HDMIHDMITV JACKEXTERNAL DEVICESDVDSet-top BoxHDMI Cable (not included)](https://usermanual.wiki/Hisense-Electric/LCDF0045.W9HLCDF0045-User-Manual-1/User-Guide-2339676-Page-11.png)
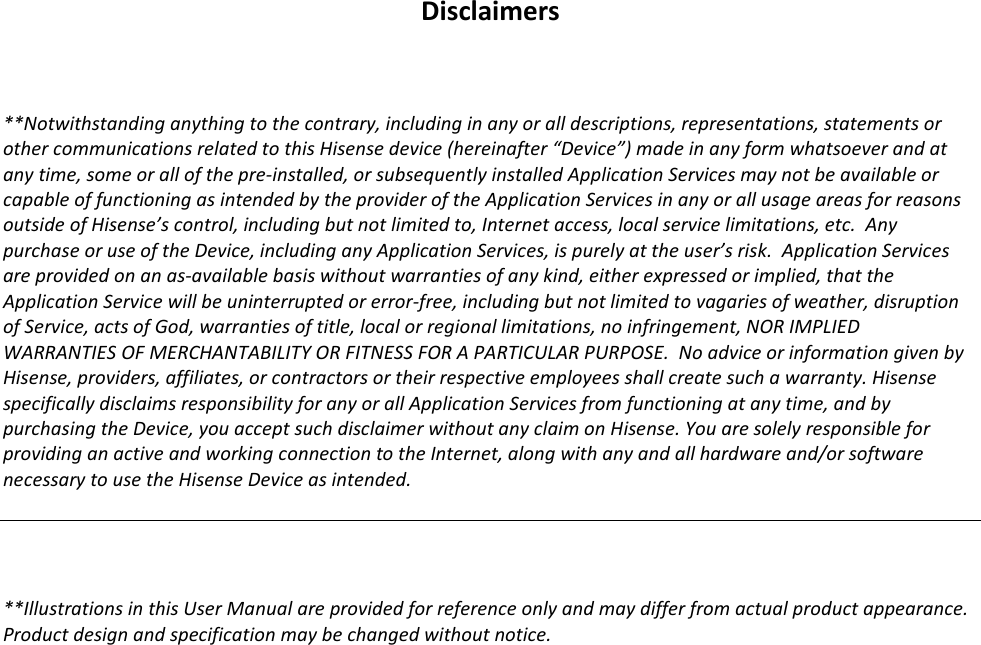
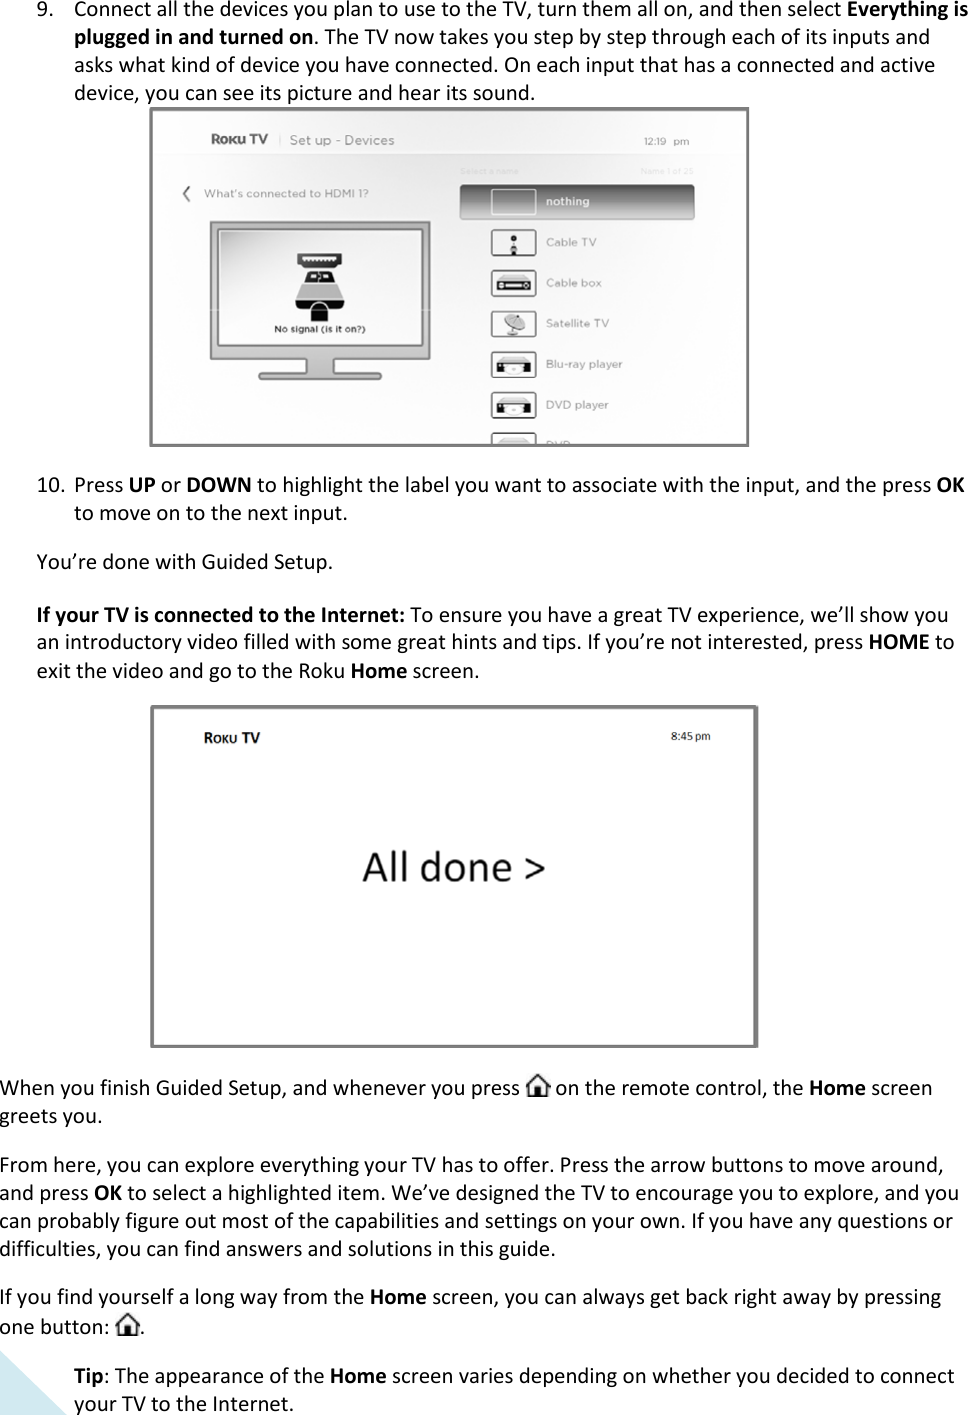
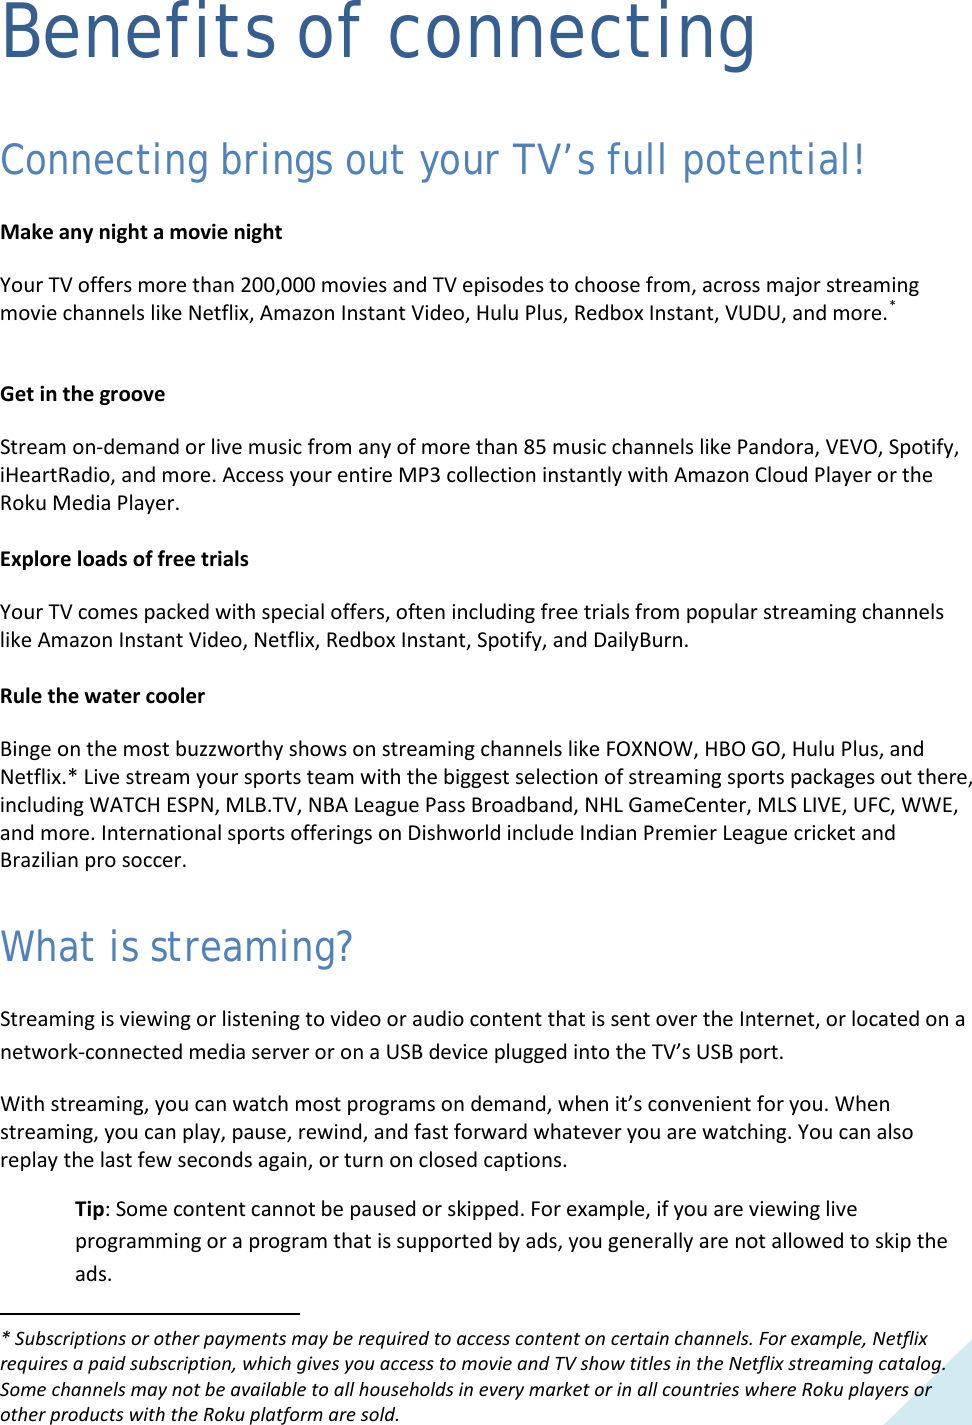
![11 Guided Setup With the preliminaries out of the way, it’s time to turn on your TV. As the TV starts for the first time, it leads you through Guided Setup, which configures the TV before you start to use it. During Guided Setup, you’ll: • Answer a few questions • Provide network connection information • Get a software update • Link the TV to your Roku account • Connect devices such as a DVD player, game console, or cable box Note: Guided Setup only runs the first time you turn on your TV. If you need to run Guided Setup again, you’ll have to perform a factory reset, as explained in “Factory reset everything” on page 54. Starting Guided Setup To start Guided Setup, press the red [POWER] button on the remote control to turn on your TV. When you first turn on your TV, it will take a few seconds to get itself ready. You’ll notice the following things happening: • The status light blinks every time the TV is busy doing something; in this case it’s powering up and getting ready for you. • The Power-on screen appears and the status light blinks slowly for a few more seconds. The Power-on screen displays a TV logo while the TV starts up. • After a few seconds, the Guided Setup starts.](https://usermanual.wiki/Hisense-Electric/LCDF0045.W9HLCDF0045-User-Manual-1/User-Guide-2339676-Page-13.png)
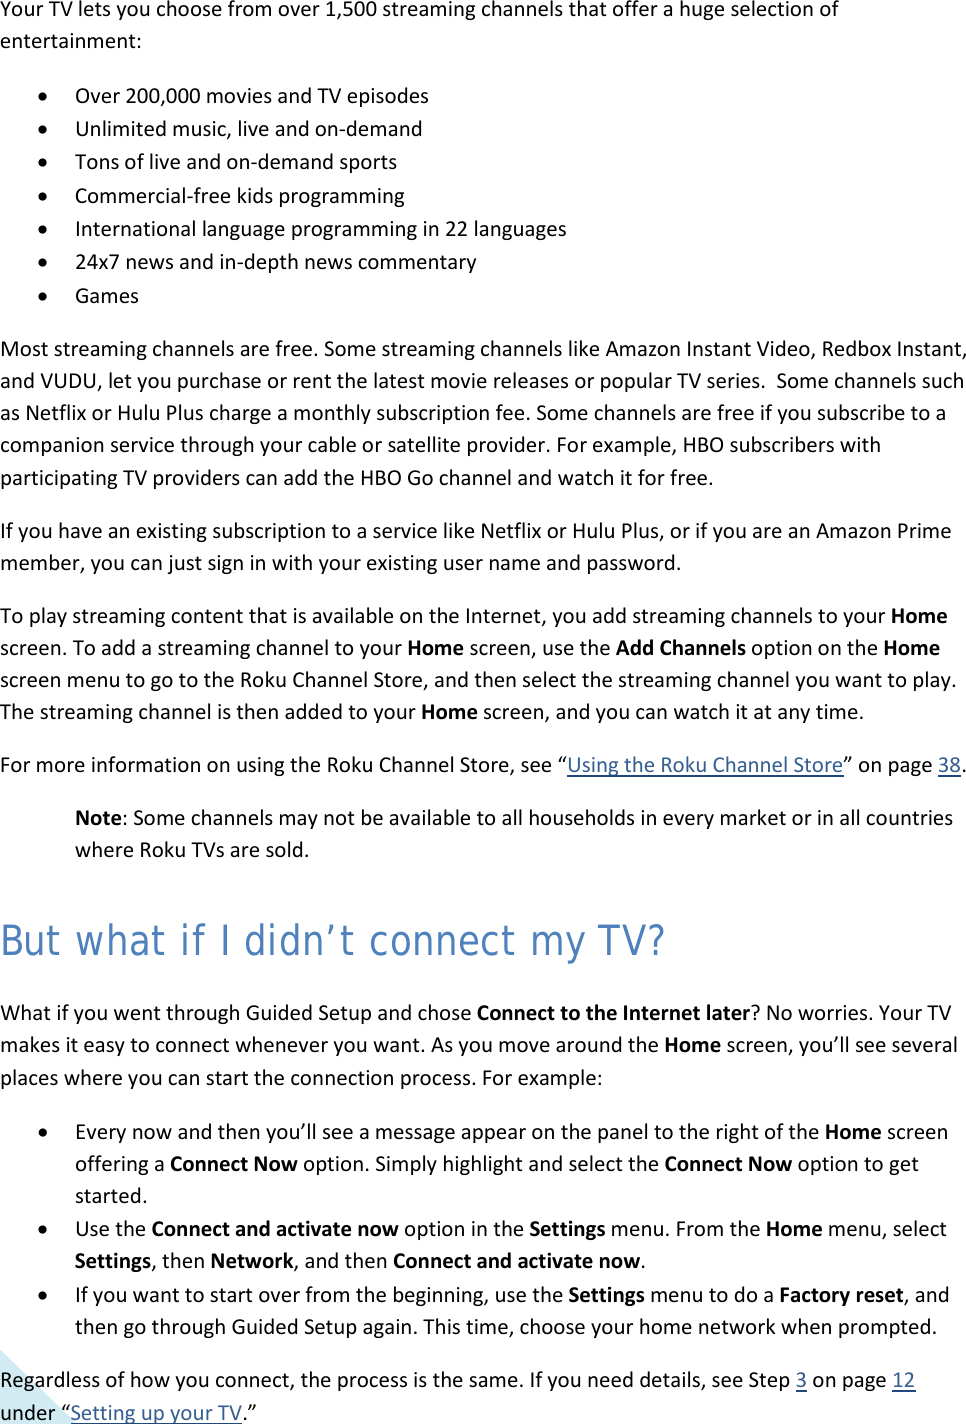
![12 Setting up your TV With the first Guided Setup screen on your TV, follow these steps to set up your TV: 1. Press the [OK] or [RIGHT] buttons on the remote control to go to the next screen: 2. Press OK to select Set up for home use. Home mode is the right choice for enjoying your TV. It provides energy- saving options as well as access to all features of the TV. Note: ‘Store’ mode configures the TV for retail display and is not recommended for any other use. In store mode, some features of the TV are missing or limited. To switch from one mode to the other, you have to perform a factory reset as explained in “Factory reset everything” on page 54, and then repeat Guided Setup. After you select Set up for home use, the TV scans for the wireless networks within range and displays them in order, with the strongest signals first. In addition to your own wireless signal, the TV might pick up signals from your neighbors. 3. Press [UP] or [DOWN] to highlight the name of your wireless network, and then press [OK] to select it. Other options: • Connect to the Internet later – If you’re unable to connect to the Internet, that’s OK. You can skip this step and use the TV to watch broadcasts, play games, and](https://usermanual.wiki/Hisense-Electric/LCDF0045.W9HLCDF0045-User-Manual-1/User-Guide-2339676-Page-14.png)
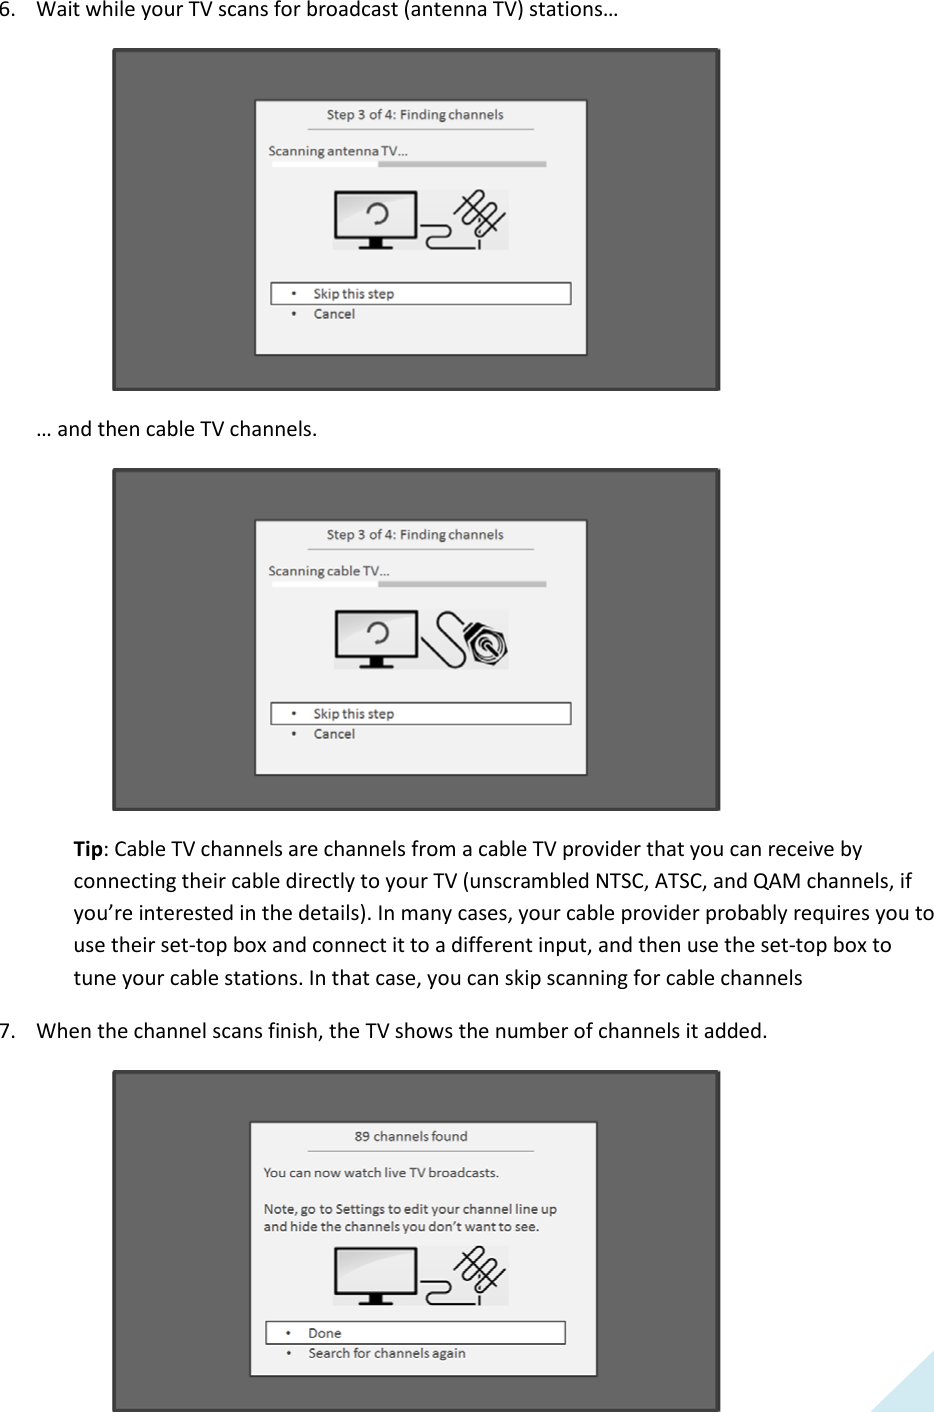
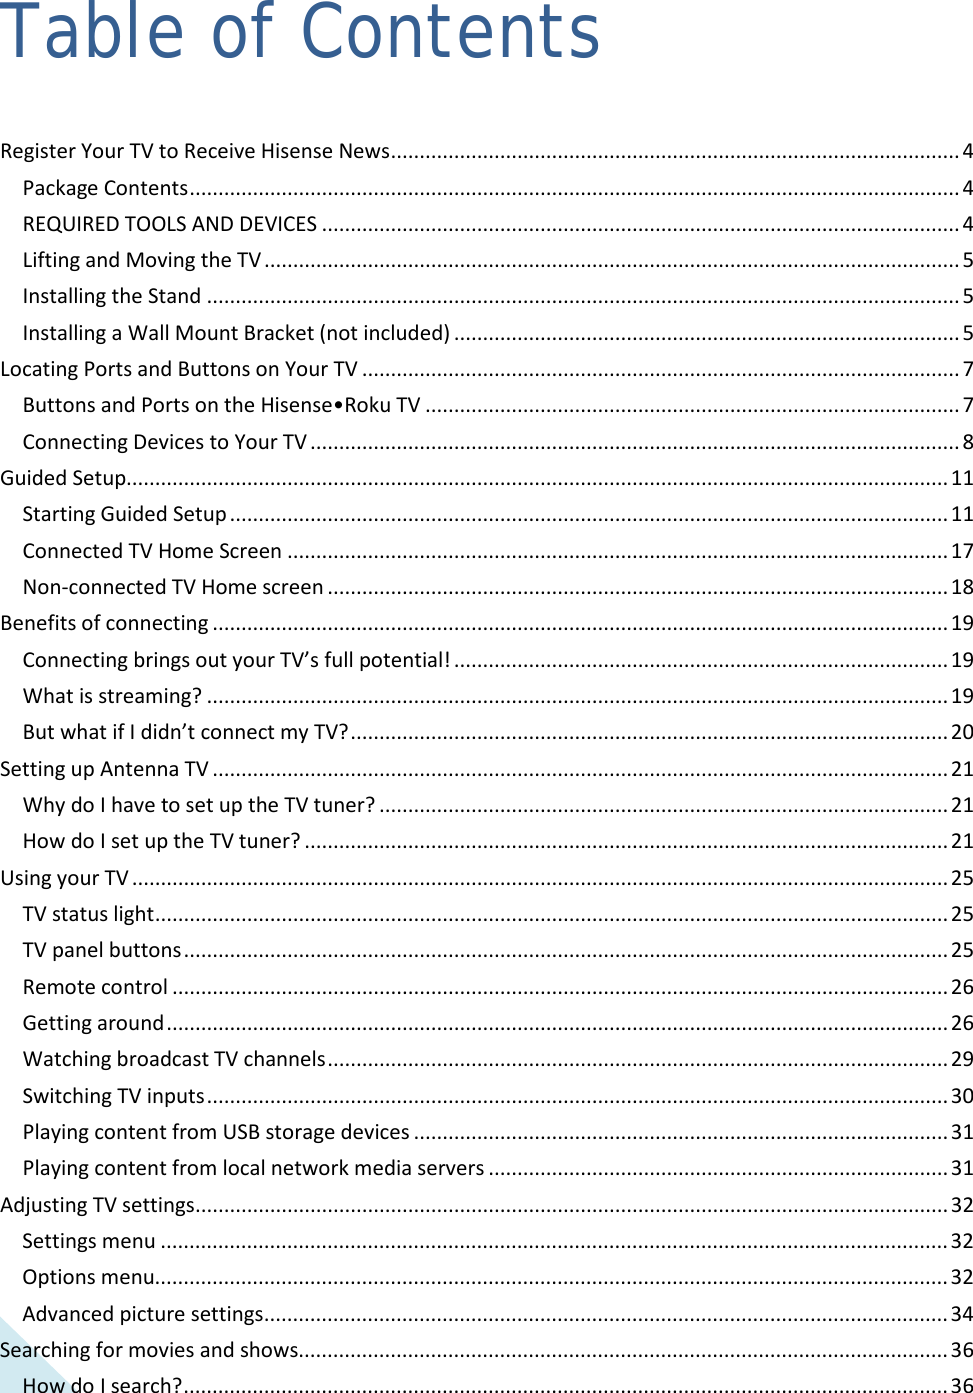
![24 Scanning for channels can take several minutes. Note: You should plan to repeat the channel scan periodically to make sure you are receiving all of the latest channels. Broadcasters add and remove channels, move channels to different parts of the spectrum, and change the power levels of their channels periodically. You’ll also have to repeat the channel scan if you remove the Antenna TV tile from the Home screen or perform a factory reset. To repeat the channel scan at any time, go to Settings > Antenna TV > Scan again for channels. Now, you’re ready to watch broadcast TV! While you’re watching, try the following: • Press [UP] or [DOWN] to change channels. • Press [LEFT] to display the channel list and then use UP and DOWN to select a channel to watch. Or press [REVERSE] or [FORWARD] to jump a page at a time. • Press [OK] to display information about the current program. • Press [ ] to switch to the previously tuned channel. • Press [] to see options for picture and sound settings. “Remote control” on page 26 has more information on using the remote control buttons while watching TV.](https://usermanual.wiki/Hisense-Electric/LCDF0045.W9HLCDF0045-User-Manual-1/User-Guide-2339676-Page-26.png)
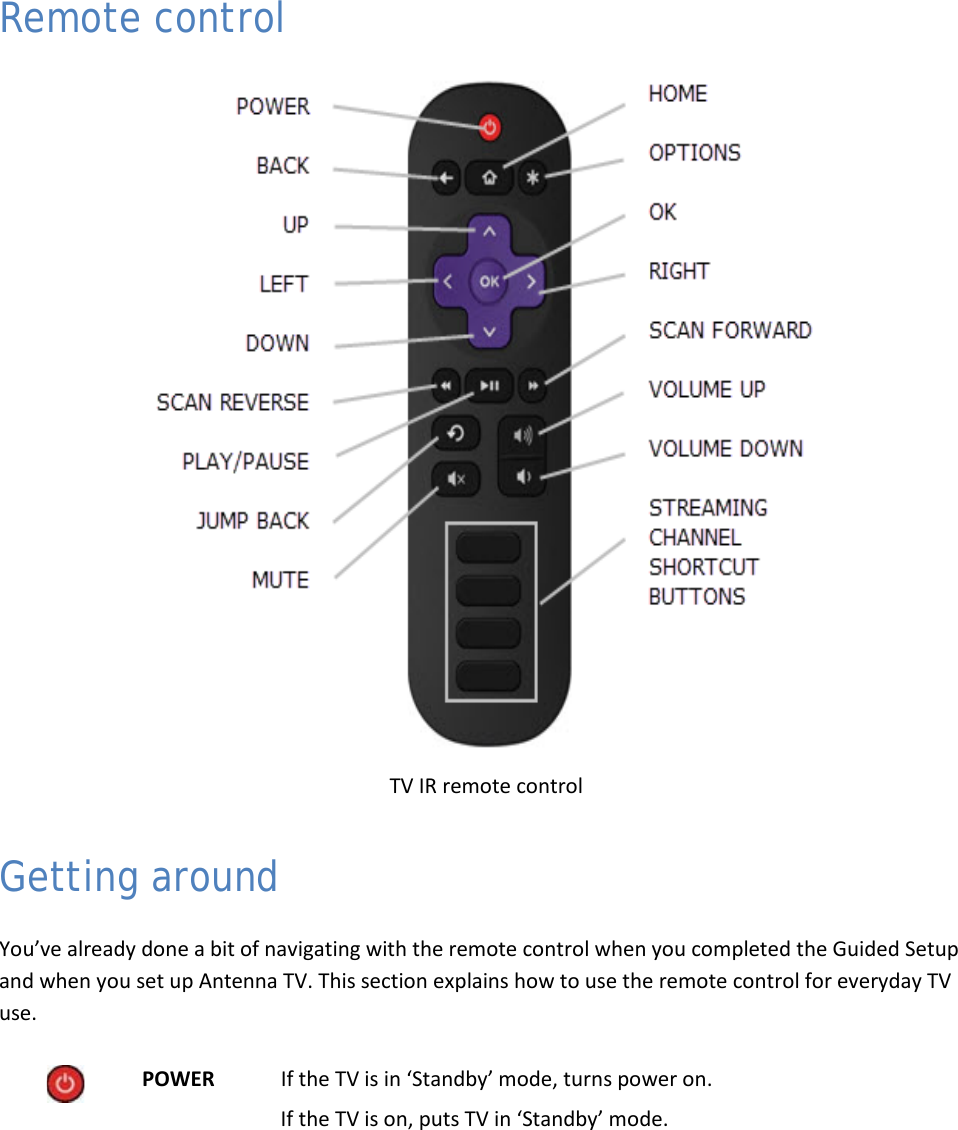
![29 VOLUME DOWN Turns volume down one setting with each press. Press and hold to turn volume down rapidly. A volume indicator shows the volume level while you are adjusting the volume and for a few seconds afterward. Note: If the TV is muted, pressing VOUME DOWN does not unmute the sound. MUTE Mutes the TV sound. A volume indicator shows the current volume level and a mute icon when you press MUTE and for a few seconds afterward. If Closed captioning is set to When Mute, captions are displayed while the TV is muted. STREAMING CHANNEL SHORTCUT Dedicated buttons show the logo of a featured streaming content provider. Pressing a button turns on the TV, and if the TV is connected to the Internet, performs one of the first two following actions: • Displays the main page of the streaming channel if you have already added the channel to your Home screen. • Displays the sign-up page for the streaming channel if you have not already added the channel so that you can agree to any terms and fees for the service. • If the TV is in ‘Standby’ mode (off), turns the TV on. And, if it is connected to the Internet, the TV performs one of the first two actions listed above. Note: For information about using a Universal Remote, refer to the ‘Other Devices’ section on page 57. Watching broadcast TV channels To watch broadcast TV, select the Antenna TV tile in the Home screen. Your TV remembers the last channel you watched and starts with that channel playing. Tip: You also can use the buttons on the TV panel to select Antenna TV, as explained in "TV panel buttons” on page 25. Changing channels To change channels, you can do any of the following: • Press [UP] to change to the next higher channel. • Press [DOWN] to change to the next lower channel. • Press [LEFT] to display the channel list, and then press [UP] and [DOWN] to move the highlight through the list one channel at a time. Or press [REVERSE SCAN] and [FORWARD SCAN] to move the highlight through the list one page at a time. When you’ve highlighted the channel you want to watch, press [OK]. (If you decide you don’t want to change channels, press RIGHT or BACK). • Press [ ] to jump to the previous channel. Press again to return to the channel you were watching before you pressed [ ].](https://usermanual.wiki/Hisense-Electric/LCDF0045.W9HLCDF0045-User-Manual-1/User-Guide-2339676-Page-31.png)
![30 Viewing program information To view information about the current program, press OK. The TV displays a banner at the bottom of the screen with as much information as is available in the program data stream. Program information banner Program information, subject to availability, includes: • Channel number • Channel call sign • Signal strength • Program title • Start time, end time, and graph of program length showing current position • Content rating • Video resolution (480i, 480p, 720p, 1080i, 1080p) • Audio quality (Mono Dolby Digital, Stereo Dolby Digital, 5.1 Dolby Digital, Dolby Digital+) • Audio features (SAP/MTS) • Closed captioning (CC) • Current time • Program description. If the entire description does not fit, press OK to expand the size of the banner and see the entire description. Adjusting settings Press [] to display the Options menu. Press UP and DOWN to highlight an option, and then press LEFT and RIGHT to change the setting. “Adjusting TV settings” on page 32 explains each of the settings in detail. Switching TV inputs Switch to a TV input to access the device connected to that input (for example, a Blu-ray player). Switching inputs is as simple as highlighting the input’s tile in the Home screen, and pressing OK. The video signal on the input, if any, appears on the screen. Tip: You also can use the buttons on the TV panel to select a TV input, as explained in "TV panel buttons” on page 25. “Customizing your TV” on page 39 explains how to rename and remove inputs.](https://usermanual.wiki/Hisense-Electric/LCDF0045.W9HLCDF0045-User-Manual-1/User-Guide-2339676-Page-32.png)
![31 Auto-detecting devices Your TV automatically detects when you connect a new device to an HDMI input and turn on its power. The input is automatically added to the Home screen if it isn’t already present. Adjusting audio/video settings While watching video content on any input, press[ ] to display the Options menu. Press UP and DOWN to highlight an option, and then press LEFT and RIGHT to change the setting. “Adjusting TV settings” on page 32 explains each of the settings in detail. Playing content from USB storage devices Your TV has a USB port that can be used to play personal music, video, and photo files from a USB flash drive or hard disk. If your TV is connected to the Internet, your Home screen has the Roku Media Player tile. If your TV has not been connected to the Internet, the Home screen has the USB Media Player tile. To use this feature, first make sure your media files are compatible with the Roku/USB Media Player. As of the publication date of this guide, the following media file formats are supported: • Video –MKV (H.264), MP4, MOV (H.264), TS (H.264) • Music – AAC, MP3, WMA, WAV (PCM), AIFF, FLAC, AC3, and DTS* • Photo – JPG, PNG, GIF To see the latest list of supported formats, view Help in the Media Player. The Roku/USB Media Player displays supported file types only, and hides file types it knows it cannot play. Playing content from local network media servers If you have connected your TV to a network, it can play personal video, music, and photo files from a media server on your local network. Media servers include personal computers running media server software such as Plex or Windows Media Player, network file storage systems that have built-in media server software, and other devices that implement the specifications of the Digital Living Network Alliance. Some servers do not fully implement the DLNA specification but are UPNP (Universal Plug and Play) compatible. The Roku Media Player will connect to them as well. Some media servers can convert files into Roku compatible formats. DRM-protected content is not supported. * DTS audio, whether in music or video files, is supported only by pass-through, meaning that the TV cannot directly output the sound of a DTS file, but can pass it through to a DTS-compatible receiver that is connected to the HDMI ARC or S/PDIF connector on the TV.](https://usermanual.wiki/Hisense-Electric/LCDF0045.W9HLCDF0045-User-Manual-1/User-Guide-2339676-Page-33.png)
![32 Adjusting TV settings You can adjust most picture and sound settings while you are watching a program by pressing []. If you don’t find what you need, there are additional picture and sound settings in the Settings menu. In most cases, the setting changes you make apply only to the input you are using. Antenna TV, each separate HDMI input, and the AV input each has its own settings that the TV remembers when you return to that input. The TV also remembers the settings that you specify while viewing streaming content. Settings menu Use the Settings menu to adjust overall TV settings. Press to go to the Home screen, and then navigate to Settings > TV picture settings. You can adjust the following overall TV picture settings from the Settings screen: • TV brightness – If the lighting level in your TV room changes, use this setting to help provide a better viewing experience; set to darker for a darker room, and brighter for a brighter room. Choose among Normal and four other settings to make the overall picture brighter or darker. So that you don’t have to make this type of change for each TV input one at a time, this setting increases or decreases the TV’s general brightness across all TV inputs. This setting is identical to the TV brightness setting you can access in the Options menu while watching a program. • 120 Hz – Available in certain models. Enables a higher picture refresh rate. o On – the TV uses a higher refresh rate, which produces less motion blur. o Off – the TV uses a standard 60Hz refresh rate, which produces more motion blur. Note: The 120 Hz setting is also available in each input’s Options menu, but is not an input-specific setting. The current setting of the control applies to all inputs. • Settings per input – This section of options lists each TV input. Select an input to switch to that input. Then press [] to display the Options menu, where you can adjust the input’s settings while watching a live picture and listening to the sound from that input. Tip: You don’t have to go to the Settings menu first—you can display an input’s Options menu and adjust its settings whenever you are watching the input by pressing []. Options menu The Options menu for each TV input provides settings for controlling the appearance of the picture and the quality of the audio.](https://usermanual.wiki/Hisense-Electric/LCDF0045.W9HLCDF0045-User-Manual-1/User-Guide-2339676-Page-34.png)
![33 To view the Options menu, press [] whenever you are watching a TV input or streaming a video. The Options menu is a panel that appears over the left side of the screen: To adjust the settings on the Options menu, press UP or DOWN to highlight a setting, and then press LEFT or RIGHT to change the setting. You’ll notice the changes you make right away in picture appearance or audio quality. Tip: When you highlight a setting, the header text explains the effect of its current value. When you begin to adjust a setting, the other options are hidden so you can see more of the screen. Even though the other settings are hidden, you can move the highlight up or down to adjust the other settings. Options menu settings • TV brightness – Affects the overall brightness of the picture. This setting applies across the entire TV; that is, to all TV inputs and is identical to the TV brightness setting in the TV picture settings menu. • Picture mode – Provides picture presets for various viewing preferences. This setting applies to the currently-selected input only. • Audio mode – Adjusts the sound quality output from the TV speakers. This setting applies across the entire TV; that is, to all TV inputs. It does not affect the sound quality from the HDMI (ARC) or SPDIF (TOSLINK) connector. • Sleep timer – Sets a timer that turns off the TV after the specific amount of time. This setting remains in effect even if you stop watching the current input. • Closed captioning – Controls when you see captions. This setting is only offered for Antenna TV, the AV input, and streaming videos. Any set value remains in effect across only these inputs. o Antenna TV – Turn captions on or off, or set them to appear only when the TV sound is muted. o AV input – Turn captions on or off, or set them to appear only when the TV sound is muted. o Streaming video channel – Turn captions on or off, set them to appear only when the TV sound is muted, or only during instant replay (for streaming content that supports instant replay).](https://usermanual.wiki/Hisense-Electric/LCDF0045.W9HLCDF0045-User-Manual-1/User-Guide-2339676-Page-35.png)
![34 Note: Additional captioning options are provided in the Captions screen in Settings. • Captioning track – Selects which caption track to display when Closed Captioning is on. This setting remains in effect on all inputs that provide captions. • SAP – Selects whether to play a secondary audio program or multichannel television sound, and which choice to play. This setting applies only to Antenna TV on digital channels. • 120 Hz – Available in certain models. Enables a higher picture refresh rate that reduces motion blur. If Off, refresh rate is 60 Hz. This setting applies across the entire TV; that is, to all TV inputs. Note: The 120 Hz setting is also available in the main Settings menu on the TV picture settings screen. The current setting of the control is identical in both places. Tip: To dismiss the Options menu, just wait a few seconds without pressing any buttons. Or press again to dismiss the menu immediately. Advanced picture settings The Advanced picture settings menu for each TV input provides settings for fine tuning the appearance of the picture. All of the settings in this menu apply only to the currently-selected input. To use the Advanced picture settings menu, first press [] to display the Options menu. Then select Advanced picture settings. To adjust the settings on the Advanced picture settings menu, press UP or DOWN to highlight a setting, and then press LEFT or RIGHT to change the setting. You’ll notice the changes you make right away in picture appearance. Tip: When you highlight a setting, the header text explains the effect of its current value. When you begin to adjust a setting, the other options are hidden so you can see more of the screen. Even though the other settings are hidden, you can move the highlight up or down to adjust the other settings.](https://usermanual.wiki/Hisense-Electric/LCDF0045.W9HLCDF0045-User-Manual-1/User-Guide-2339676-Page-36.png)
![35 Advanced picture settings menu options • Picture mode – Provides picture presets for various viewing preferences. This setting duplicates the one on the Options menu. When you change the Picture mode, other picture settings adjust accordingly. For example, setting the Picture mode to Vivid sets Brightness, Contrast, Sharpness, and other values to produce a very vibrant picture. Setting Picture mode to Movie changes these same settings to produce a picture suitable for enjoying movies in a darkened room. If you make changes to the individual picture settings—for example, Contrast, or Sharpness—these settings are saved for the current input and the current picture mode. In this way, the HDMI 1 input’s Movie picture mode can be different than the HDMI 2 input’s Movie picture mode and Antenna TV’s Movie picture mode. Use Reset picture settings, described below, to return the input’s current picture mode to its original values. • Backlight - Adjusts the overall brightness of the screen. • Brightness – Adjusts the dark level of the black areas of the picture. • Contrast – Adjusts the white level of the light areas of the picture. • Sharpness – Adjusts the sharpness of the edges of objects in the picture. • Color – Adjusts the intensity of colors in the picture. A setting of 0 removes all color and displays a black and white picture. • Tint – Adjusts the color balance from green to red to obtain accurate colors in the picture. • Color temperature – Adjusts the overall colors in the picture from Normal to slightly more bluish (Cool) to slightly more reddish (Warm). • Picture size – Adjusts the aspect ratio of the picture, enabling you to view a picture in its original format, or zoom or stretch it to fill the screen. The Auto setting produces the best picture in most cases. • Game mode – Controls whether ‘Game’ mode is on or off. When On, the TV performs less image processing and has less input lag. When Off, the TV performs more image processing and has more input lag, which is less desirable for action games. Available only for HDMI inputs. • Reset picture settings – Returns all picture settings for the input’s currently-selected Picture mode to their original values. Tip: To dismiss the Advanced picture settings menu, just wait a few seconds without pressing any buttons; or, press [ ] again to dismiss the menu immediately.](https://usermanual.wiki/Hisense-Electric/LCDF0045.W9HLCDF0045-User-Manual-1/User-Guide-2339676-Page-37.png)
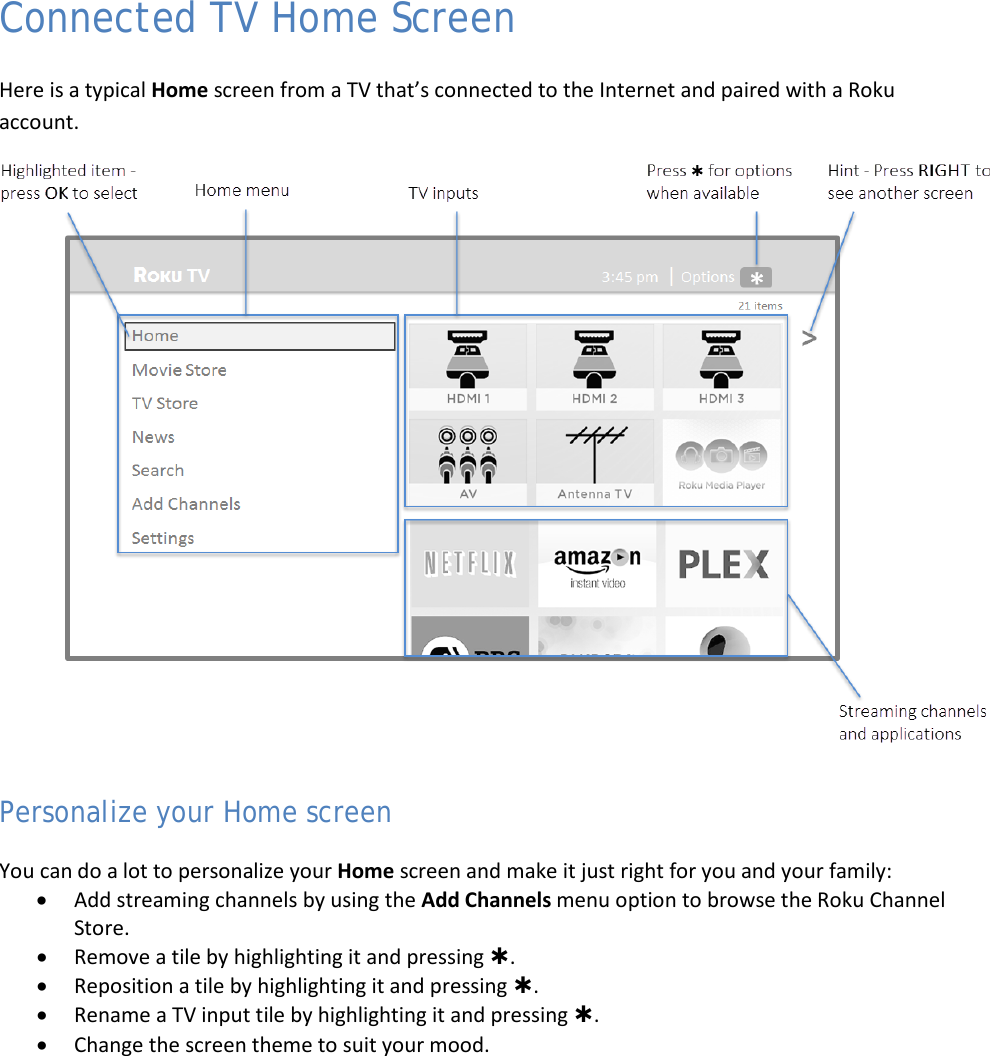
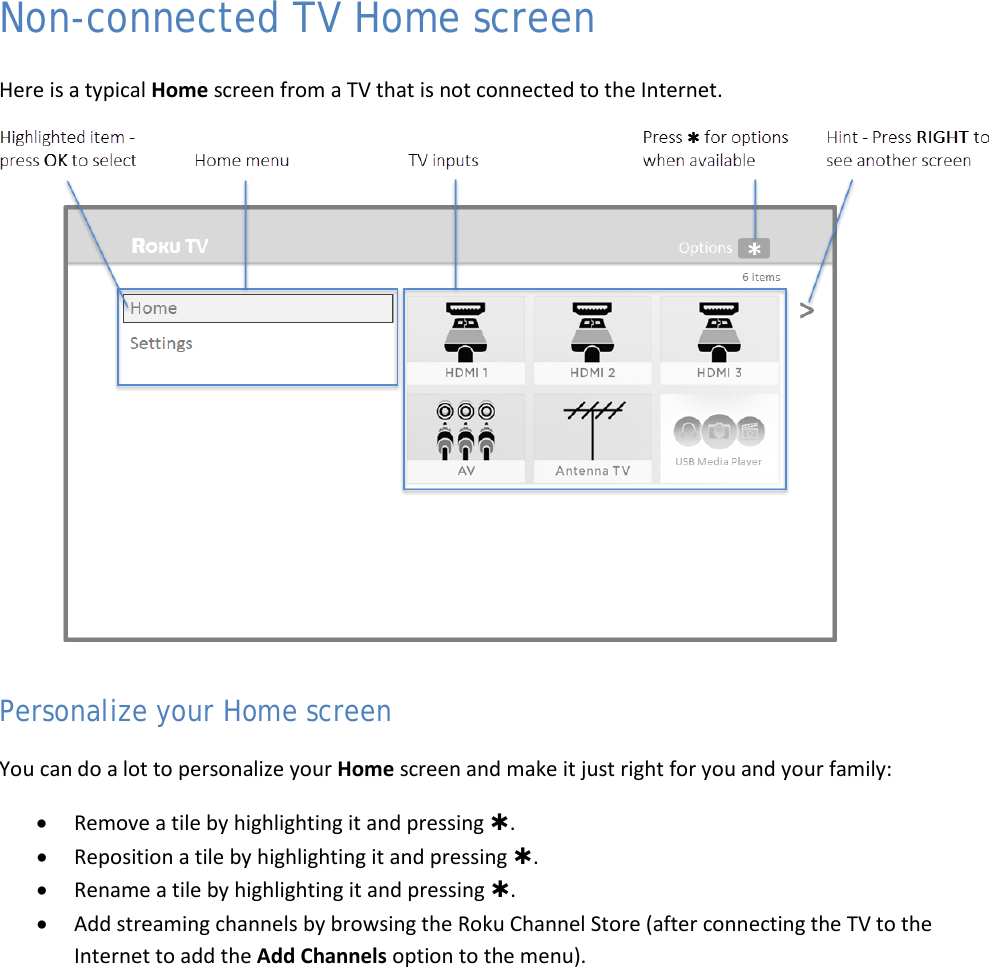
![38 Using the Roku Channel Store The Add Channels menu option takes you to the Roku Channel Store, where you can add new streaming channels and applications to your TV. Tip: The Add Channels menu option is available only if your TV is connected to the Internet. Tip: You also can search for streaming channels by using the Search option, as explained in “Searching for movies & shows” on page 36. To make it easier to find what you want, the streaming channels in the Roku Channel Store are categorized by topic. Press UP and DOWN to highlight the category you want, and then press RIGHT to move the highlight into the grid of streaming channel tiles. When you find a streaming channel you want to add or learn more about, highlight it and press [OK] to display more details. • If the streaming channel you are adding is free, you can start watching it immediately. • If there is a one-time or recurring fee associated with using the streaming channel, you must agree to the terms and conditions, accept the fee, and—if you created one when you activated your TV— enter your Roku PIN code to authorize the charges. • If you already have a subscription to the streaming channel—for example, you already subscribe to Netflix or you receive HBO through your cable TV provider—you must complete a different, simple authorization step to add the streaming channel. You only have to complete the authorization or activation step one time, when you initially add the streaming channel. After that, you simply select the streaming channel tile from your Home screen to start watching. Tip: New streaming channels and apps are being added weekly, so be sure to check back every now and then.](https://usermanual.wiki/Hisense-Electric/LCDF0045.W9HLCDF0045-User-Manual-1/User-Guide-2339676-Page-40.png)
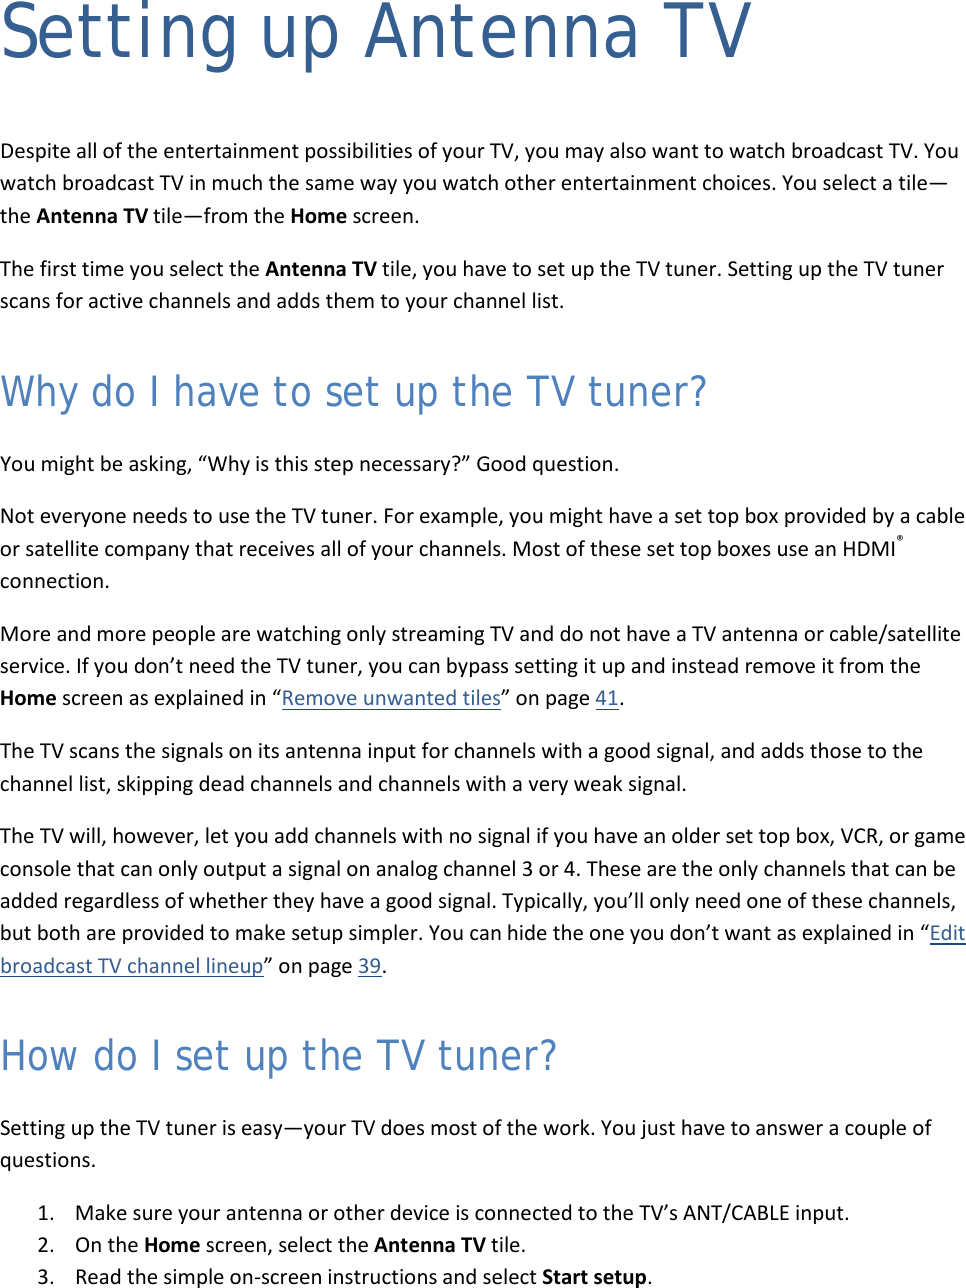
![39 Customizing your TV There are several things you can do to personalize your TV. Rearrange tiles Whenever you add a TV input tile, it’s added at the top of your Home screen. Whenever you add a new streaming channel from the Roku Channel Store, it’s added at the bottom of your Home screen. You can easily rearrange the order of the tiles on the Home screen to suit your viewing preferences. For example, you might want Antenna TV to be the first tile in your Home screen. But, if you mostly watch one streaming channel, you might want its tile to be the first one on your Home screen. Rearranging tiles is easy: 1. From the Home screen, highlight one of the tiles you want to move. 2. Press [] to display a list of options for the type of tile you selected. 3. Select Move input. The list of options disappears and the highlighted tile shows arrows indicating how it can be moved 4. Use the arrow buttons to move the highlighted tile to its new position. As you move the tile, it pushes other tiles out of its way. 5. Press OK to lock the tile into its new position. 6. Repeat these steps to move other tiles until you have arranged your Home screen to your liking. Edit broadcast TV channel lineup When you set up the TV tuner as described in “Setting up Antenna TV” on page 21, the TV adds all the channels with good signals that it could detect in your area. It’s likely that you now have more channels than you want in your channel list.](https://usermanual.wiki/Hisense-Electric/LCDF0045.W9HLCDF0045-User-Manual-1/User-Guide-2339676-Page-41.png)
![40 To edit the channel lineup, from the Home screen, navigate to Settings > TV inputs > Antenna TV > Edit channel lineup. You’ll see a screen listing all of your channels. Adjacent to the list of channels is a miniature TV screen playing the highlighted channel’s picture and sound. Highlight each channel you want to hide, and then press OK to hide the channel. Tip: If you need to see or hear the highlighted channel, wait a couple of seconds for the TV to start playing the channel’s picture and sound. Also note that if you’ve enabled Parental Controls and the program on the current channel is blocked, you won’t see a picture or hear sound while editing the channel lineup. Rename inputs Rather than trying to remember that your Blu-ray player is connected to HDMI1 and your game console is connected to HDMI 3, you can rename the TV inputs to match the connected component. Note: Renaming an input also changes the icon associated with it. To rename an input, you can either: • Highlight the input tile in the Home screen, and then press [] to display a list of options. From the list of options, select Rename input. Then select a new name and icon. or • From the Home screen, navigate to Settings > TV inputs. On the TV inputs screen, select the input you want to rename, select Rename, then choose a new name and icon from the provided list. Press [ ] to return to the Home screen. The new name and icon are now in effect.](https://usermanual.wiki/Hisense-Electric/LCDF0045.W9HLCDF0045-User-Manual-1/User-Guide-2339676-Page-42.png)
![41 Remove unwanted tiles It’s easy to remove unused TV inputs and unwanted channel or app tiles. For example, if you never use the HDMI 3 input, or if you don’t like the weather app you added from the Roku Channel Store, you can remove them from your Home screen. You also can remove the Antenna TV tile if you never use the TV tuner. However, be aware that removing the Antenna TV tile also deletes the broadcast TV channel list. You’ll have to set up the TV tuner again next time you add Antenna TV. Instructions for setting up the TV tuner can be found in “Setting up Antenna TV” on page 21. • To remove any tile, highlight the input tile in the Home screen, and then press [] to display a list of options. From the list of options, select Remove input. In the screen that follows, confirm you want to remove the input. • Alternatively, to remove a TV input tile from the Home screen, navigate to Settings > TV inputs. On the TV inputs screen, select the input you want to remove, and then select Remove > Confirm. Then, press [ ] to return to the Home screen. Change themes Another way to customize your TV is to change its theme. The theme establishes the look and feel of the TV through colors, designs, and fonts. Tip: Themes are available only when your TV is connected to the Internet. To change the theme, in the Home screen menu navigate to Settings > Themes. In the Themes screen, choose from the following options: • My themes – Highlight a theme, and then press [OK] to switch to that theme. • Custom settings – Turn Featured themes on or off. When Featured themes is on, the TV automatically switches to featured themes—like 4th of July or Holidays—for a limited time whenever Roku makes them available, and then switches back to your selected theme when the featured theme expires. When off, the TV always uses your selected theme. Tip: You can get new themes by using the Roku Channel Store. Change sound effects volume Sound effects are the noises the TV makes to let you know it received your command. You can change the volume of sound effects or turn them off. To adjust the sound effects volume, in the Home screen menu, navigate to Audio > Menu volume. Navigate to the right and then change the setting to High, Medium, Low, or Off.](https://usermanual.wiki/Hisense-Electric/LCDF0045.W9HLCDF0045-User-Manual-1/User-Guide-2339676-Page-43.png)


![59 Quick Problem-Solving Tips When you experience an issue with your TV, turn it off and on again. If this does not resolve the problem, then refer to the tips below. If the problem is still not resolved, then contact our Hisense Electronics Consumer Care Center at 1-888-935-8880 Monday through Friday from 8 A.M. to 8 P.M. EST and Saturday through Sunday from 9 A.M. to 6 P.M. EST. Customers that are located in Canada should call 1-855-344-7367. SOUND OR PICTURE ISSUES POSSIBLE SOLUTIONS You do not hear any sound or see a picture • Check if the power cord is plugged into a powered AC outlet. • A power switch on the TV must be turned on. Press the [Power] button on the remote control to activate the unit from Standby. • Check to see if the LED light is either red or blue. If it is on, then there is power to the TV. You have connected an external source to your TV and do not see a picture and/or hear sound • Check for the correct output connection on the external source and for the correct input connection on the TV. • Make sure you have made the correct selection for the input mode for the incoming signal When you turn on your TV, there is a delay for a few seconds before the picture appears • This is normal. If you have already set up your TV, it is initializing and searching for previous setting information. You see a normal picture but do not hear any sound • Check the volume settings. • Check if ‘Mute’ mode is set to “On You hear sound but do not see a picture or it is in black and white • If the picture is black and white, first unplug the TV from the AC outlet and replug it after 60 seconds. • Check that the Color is set to 50 or higher. • Try different TV channels. Your sound and picture is distorted or appears wavy • An electric appliance may be affecting the TV. Turn off any appliances that are nearby and move them farther away from the TV. • Insert the power plug of the TV set into another power outlet. Your sound and picture is blurry or cuts out • If you are using an external antenna, check the direction, position and connection of it. • Adjust the direction of your antenna or reset or fine tune the channel. CONNECTIVITY ISSUES POSSIBLE SOLUTIONS](https://usermanual.wiki/Hisense-Electric/LCDF0045.W9HLCDF0045-User-Manual-1/User-Guide-2339676-Page-61.png)