Hisense Electric LCDX0003 LCD TV User Manual manual front cover nx47013L120
Hisense Electric Co., Ltd. LCD TV manual front cover nx47013L120
UserManual.wiki
>
Hisense Electric
>
LCDX0003 User Manual
Users Manual
Navigation menu
Upload a User Manual
Namespaces
Wiki Guide
HTML
PDF
Info
Views
User Manual
Discussion / Help
Navigation


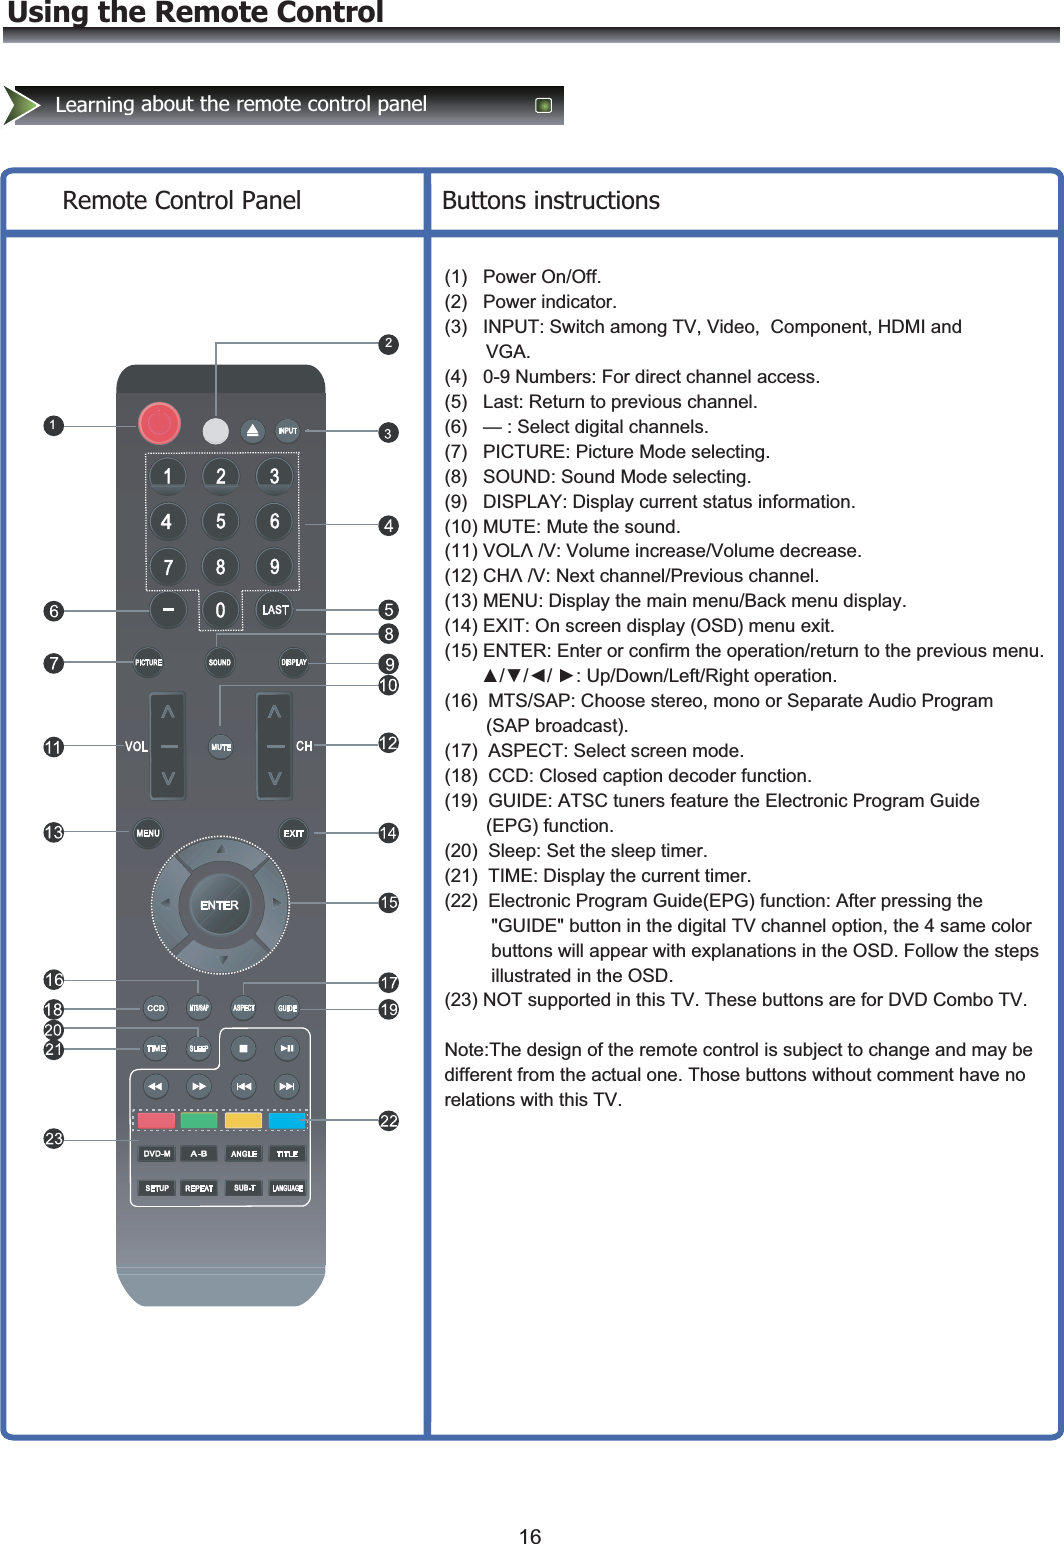
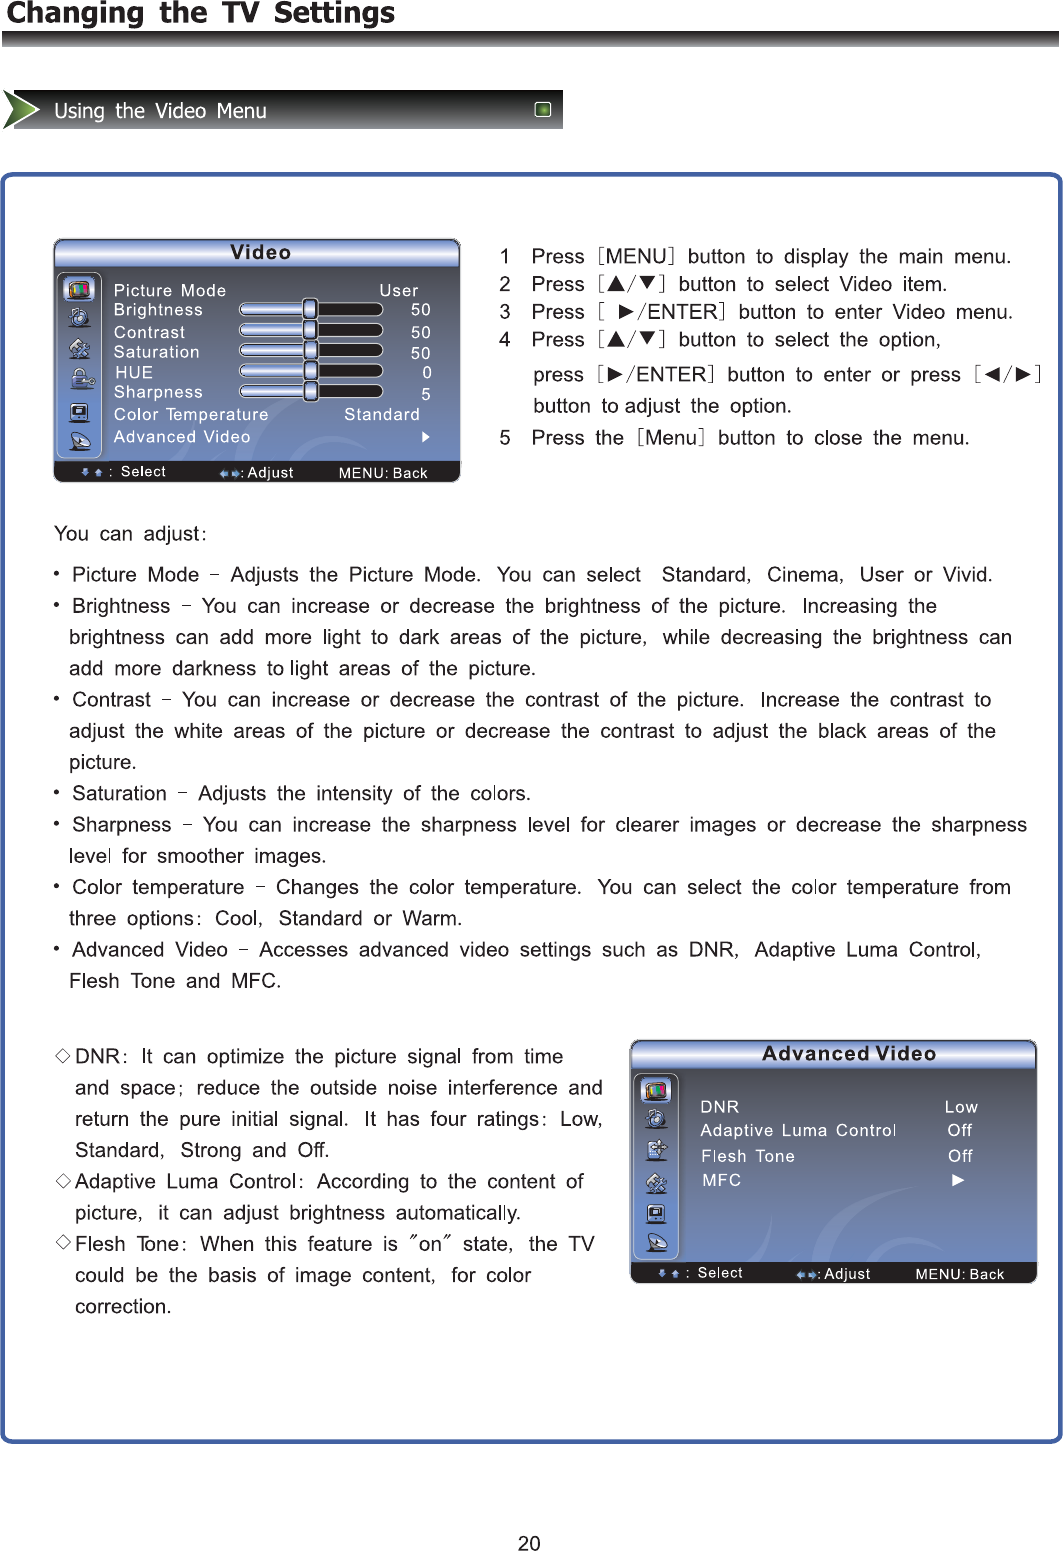
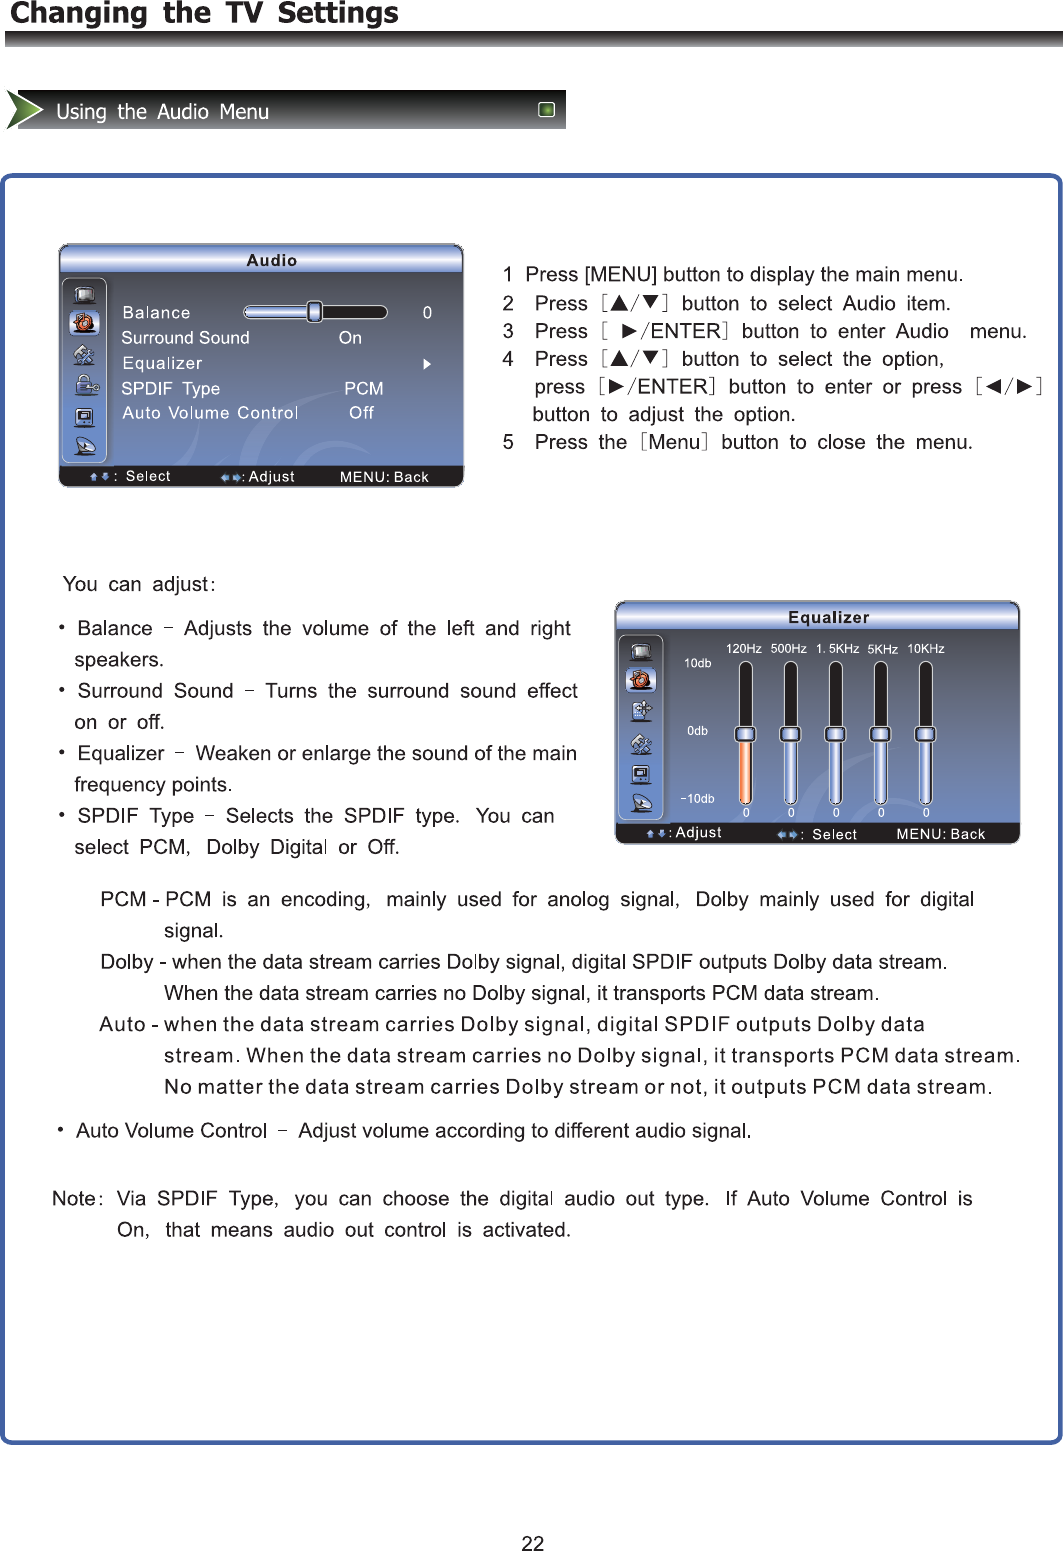
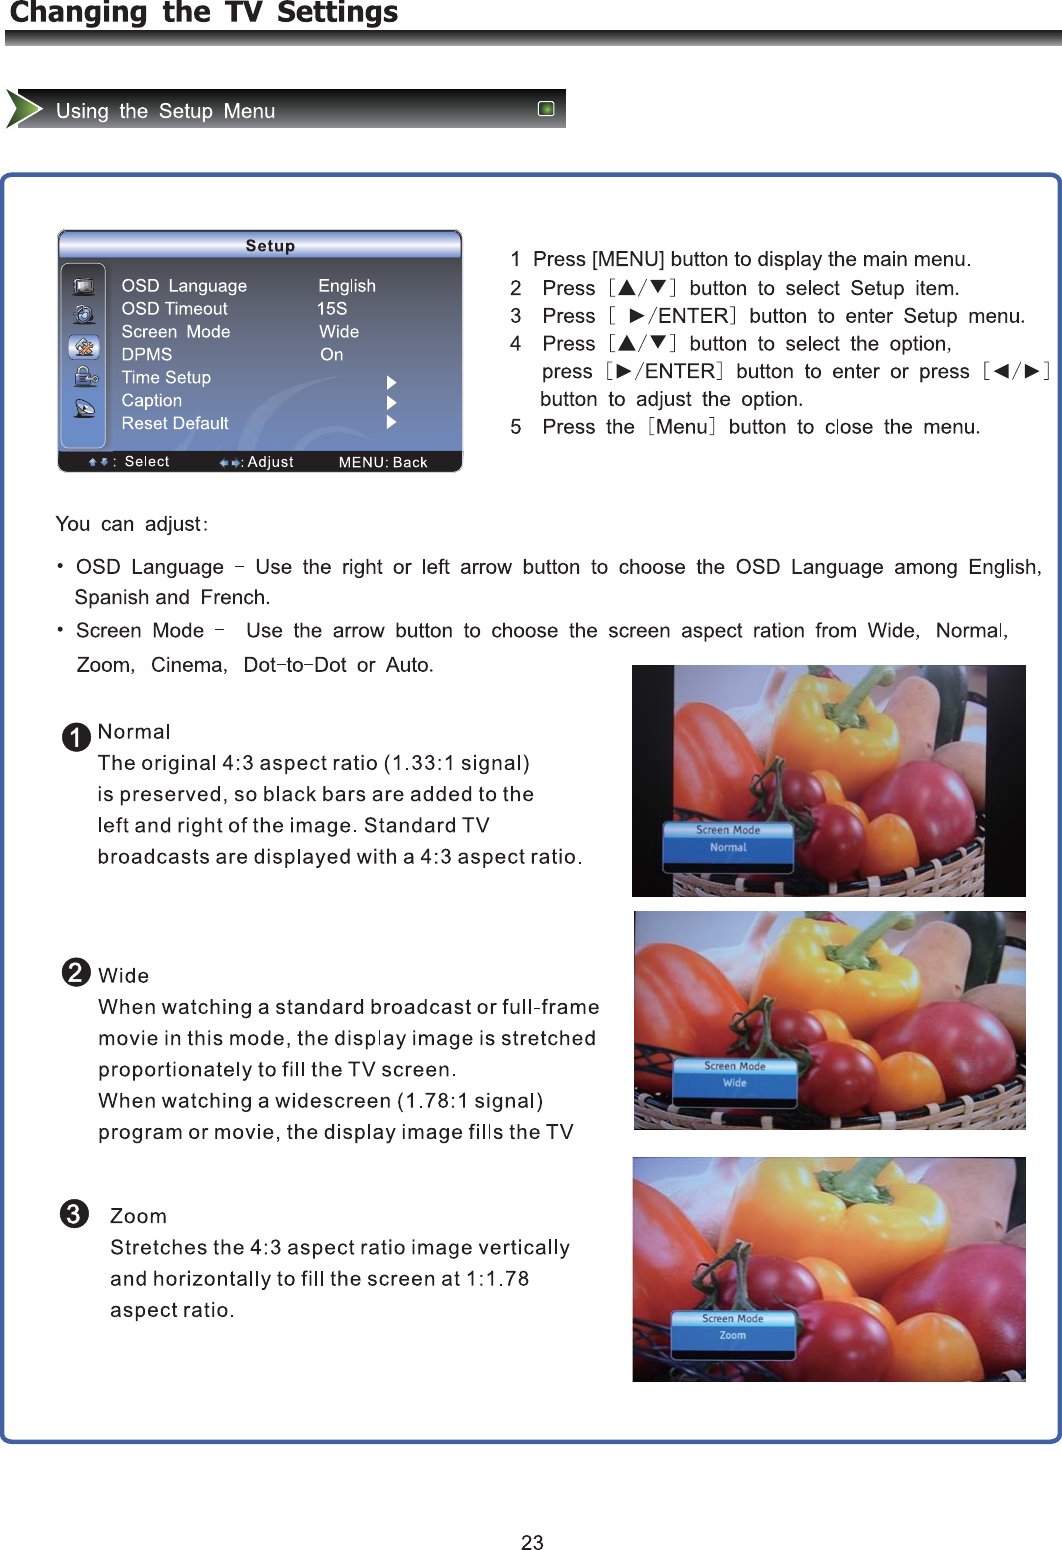
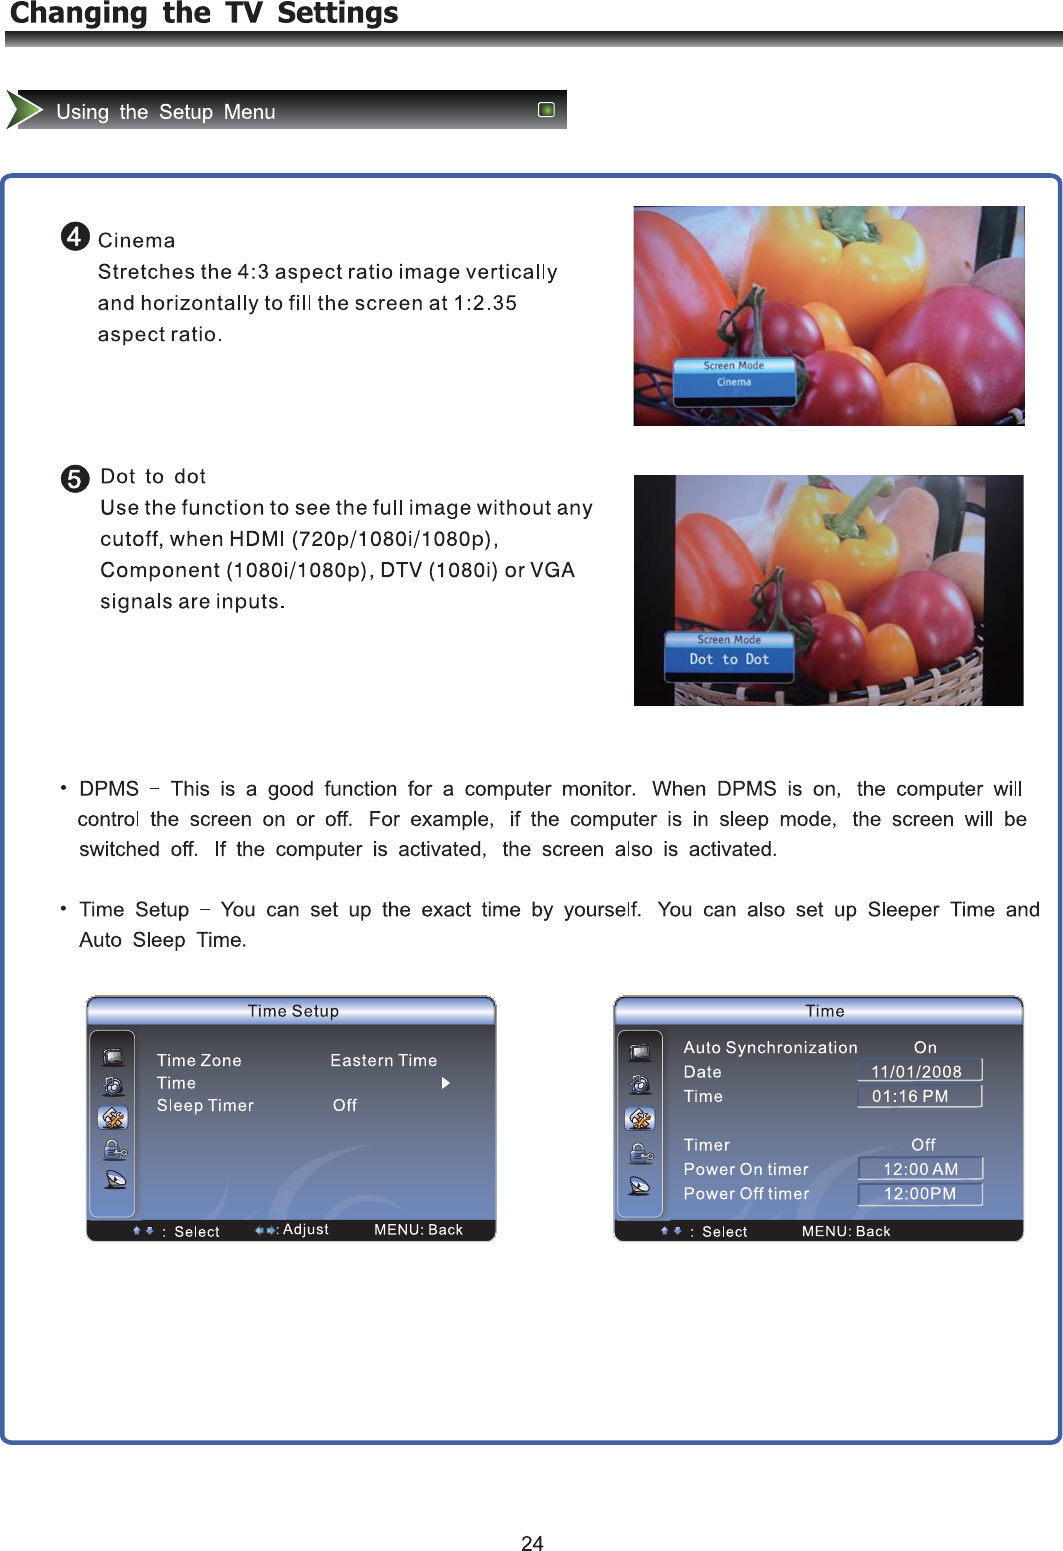
![Quick startsBasic Operation Power ON/OFF 1. Connect the TV to a power outlet. If the power indicator is blue, it means that the TV is STANDBY. Press the Standby button on the front control or on the remote control to turn the TV on. Once the TV is turn on, the power indicator will be turned off. Several seconds later, the TV picture will be displayed on the screen. 2. Press the Standby button on the front control or on the remote control to turn the TV off temporarily. 3. Always remove the AC power plug from the outlet when not using this TV for a long period of time. Signal source selection Press the [INPUT] button to select TV, AV, Component, VGA and HDMI inputs. There are two ways to select the source: One is to press the [INPUT] button continuously, while the other is to use the ARROW and [ENTER] buttons to confirm the source. Select channels Please use [CHΛ / CHV] button on the remote panel to select channels. [CHΛ] indicates channel number up; [CHV] indicates channel number down. Press [CHΛ / ChV] button on the side panel of the TV to select the channels. If you want to choose any of the skipped channels, press the number directly. Use [Mute] button Press the [Mute] button to mute the sound. Press the [Mute] button again to resume the sound. Select picture modes Press the [PICTURE] button to select the picture mode from four options: Standard, Cinema, User or Vivid. You can adjust the picture mode based upon your personal preference. Select sound modes Press the [AUDIO] button to select sound modes from Standard, Speech, User or Music. Select screen modes Press the [ASPECT] button to select from six zoom modes: Wide, Normal, Zoom, Cinema , Dot-to-Dot or Auto. Use [GUIDE] button Press the [GUIDE] button to display features of the ATSC program and the EPG function. Use [DISPLAY] button Press the [DISPLAY] button to view current source information. Using the Remote ControlConnecting power cord to the TV1. Connect the power cord to the connector on the back of the TV, if the power cord in accessories. Note:When connecting the power cord to the connector of the TV, make sure the power cord is fully inserted in the place. Bad contact may cause high temperature of the connector and the risk of fire or other damages. 2. Connect the power cord to the AC power outlet.](https://usermanual.wiki/Hisense-Electric/LCDX0003/User-Guide-1223174-Page-18.png)
![Using the Remote ControlQuick startsSelect channels by numbers To select a channel: Press the channel number you would like to go to. For example, to select channel number 120, press buttons 1, 2 and 0, respectively and then press [ENTER] to confirm. Use [MENU] button Press the [MENU] button to display the TV OSD menu. Use [LAST] button Press the [LAST] button to return to the previous channel. Use [ENTER] button Press the [ENTER] button to select a particular item. Adjust Volume Press [VOLΛ / VOLV] button to adjust the volume. Use [CCD] button Press the [CCD] button to change the CCD mode. Using this button will set the Closed Caption mode when viewing a DTV or TV channel. Note: Set the default Closed Caption setting for all channels in the Menu. For ATV the options are CC1, CC2, CC3, CC4, TEXT1, TEXT2, TEXT3, TEXT4 or Off. For DTV, the options are from Service1 to Service6 or Off. Use [MTS/SAP] button Press the [MTS/SAP] button to change the sound mode (Mono, Stereo, SAP). This button will select the MTS options of Stereo, SAP, or Mono in TV mode, alternate audio channels, and when available, in DTV mode. Use [SLEEP] button Press the [SLEEP] button repeatedly to set the sleep time, which can be set to: 10 Mins, 20 Mins, 30 Mins, 40 Mins, 50 Mins, 60 Mins, 90 Mins, 120 Mins or Off. Use [TIME] button Press the [TIME] button to display the current time. Use [EXIT] button Press the [EXIT] button to exit the OSD menu. ](https://usermanual.wiki/Hisense-Electric/LCDX0003/User-Guide-1223174-Page-19.png)