Hitachi Kokusai Electric America AT71300 1300W UHF ATSC Transmitter User Manual AT71K0 1 Owner s Manual
Hitachi Kokusai Electric America LTD 1300W UHF ATSC Transmitter AT71K0 1 Owner s Manual
Exhibit D Users Manual per 2 1033 c3
Linear Industries, Inc.
AT71K0-1
Owner’s Manual
July 2009

AT71K0-1 Transmitter Owner’s Manual
© Linear Industries, Inc. All Rights Reserved 2/34
User Notices and WARNINGS
USER NOTICES
IT IS VERY IMPORTANT TO READ THIS MANUAL PRIOR TO OPERATION OF
THIS TRANSMITTER!
Notice 1
The transmitter main operating voltage setting is marked on the rear of the AT71K0-1
chassis.
Notice 2
The transmitter operating frequency is set from the factory.
Notice 3
For adjusting the RF output power setting a qualified technician should always employ
the use of an RF Wattmeter and a calibrated dummy load.
Notice 4
Should accident or injury occur to the personnel engaged in the installation, operation,
or service of the equipment, they should seek proper medical attention. It is advisable
that such personnel have familiarity with first-aid practices.
Notice 5
For technical support please call the Linear technical support customer service line at
847/428-5793 ext. 105.
Notice 6
The technical information presented on this manual is sole intellectual propriety of
Linear Industries, Inc. Reproduction of this document in full or partial is prohibited
without written authorization. This document is legally protected by the copyright laws.

AT71K0-1 Transmitter Owner’s Manual
© Linear Industries, Inc. All Rights Reserved 3/34
WARNING!
THE VOLTAGES AND CURRENTS IN THIS EQUIPMENT ARE DANGEROUS.
PERSONNEL MUST, AT ALL TIMES, OBSERVE SAFETY WARNINGS,
INSTRUCTIONS, AND ANY LOCAL REGULATIONS.
THIS OWNER’S MANUAL IS INTENDED AS A GENERAL GUIDE FOR TRAINED
AND QUALIFIED PERSONNEL WHO ARE AWARE OF THE DANGERS THAT ARE
INHERENT IN THE HANDLING AND OPERATION OF POTENTIALLY HAZARDOUS
ELECTRICAL AND ELECTRONIC CIRCUITS. IT IS NOT THE INTENT OF THIS
MANUAL TO PROVIDE A COMPLETE SET OF SAFETY INSTRUCTIONS OR
PRECAUTIONS THAT SHOULD ALREADY BE UNDERSTOOD BY TRAINED OR
EXPERIENCED PERSONNEL IN USING THIS OR OTHER TYPES AND FORMS OF
ELECTRONIC EQUIPMENT.
THE INSTALLATION, OPERATION, AND MAINTENANCE OF THIS EQUIPMENT
INVOLVE RISKS TO PERSONNEL AND ALSO TO THE EQUIPMENT. LINEAR, INC.
SHALL NOT BE RESPONSIBLE FOR INJURY OR DAMAGE THAT IS THE RESULT
OF IMPROPER PROCEDURES OR USE BY INDIVIDUALS IMPROPERLY TRAINED
OR LACKING THE KNOWLEDGE TO PERFORM ASSOCIATED TASKS.
ALL LOCAL CODES FOR BUILDING, SAFETY, FIRE, OR RELATED STANDARDS
MUST BE OBSERVED. CONSULT LOCAL AUTHORITIES FOR THE STANDARDS
FOR THE AREA OR REGION WHERE THE EQUIPMENT WILL BE INSTALLED
AND PUT IN USE.
WARNING!
AT ALL TIMES DISCONNECT AC/MAIN POWER BEFORE OPENING COVERS,
DOORS, ENCLOSURES, PANELS, OR PROTECTIVE SHIELDS THAT EXPOSE
LIVE CIRCUITS. NEVER PERFORM MAINTENANCE, MAKE ADJUSTMENTS, OR
SERVICE THE EQUIPMENT WHEN ALONE OR FATIGUED.
WARNING!
IF ELECTROLYTIC OR OIL FILLED CAPACITORS ARE UTILIZED IN THE
EQUIPMENT AND THE COMPONENT APPEARS LEAKY, OR IS BULGING, OR IF
THE CASE OR COVERING OF THE COMPONENT APPEARS DAMAGED OR
DISTRESSED, ALLOW SUFFICIENT TIME FOR THE UNIT TO COOL OR FULLY
DISCHARGE BEFORE SERVICING. SERVICING HOT OR LEAKY CAPACITORS
CAN CAUSE A RUPTURE OF THE CASE AND POSSIBLE INJURY.

AT71K0-1 Transmitter Owner’s Manual
© Linear Industries, Inc. All Rights Reserved 4/34
Returns and Exchanges
Equipment (Damaged or undamaged) should not be returned unless written approval
and a Merchandise Return Authorization (MRA Number) is received from your Linear
Sales representative or Linear Customer Service. Special shipping instruction will be
provided which will assure proper handling. The circumstances and reasons for the
return must be included in the request for return. Equipment that is special or
“custom” ordered may be not returnable. In situations where return or exchange is at
the request of the customer a restocking fee may be charged. All returns must be
sent freight prepaid and properly insured by customer. When communicating with
Linear please refer to your Order or Invoice Number.
Unpacking
Use care when unpacking the equipment. First perform a visual inspection of the
item(s) to determine if any damage occurred during shipment. Be sure to retain all the
shipping materials (crates and boxes or cartons) until such time that it has been
determined that the received equipment arrived undamaged. Find all PACKING
LISTS and keep them to assist in locating and identifying any components or
assemblies that may have been removed for shipping and might need to be
reinstalled in the equipment. Make sure that all shipping straps, supports and packing
materials are completely removed from the equipment prior to initialization and use.
AT71K0-1 Transmitter Owner’s Manual
© Linear Industries, Inc. All Rights Reserved 5/34
AT71K0-1 General Description
1. INTRODUCTION
AT71K0-1 is a 1000W UHF ATSC Digital Broadcast Transmitter. It uses state-of-the-art
technology of transmission of the digital signal for TV broadcast. It carries an intelligent digital
control using microcontrollers, which allows for remote supervision in real time of all
transmitter functionality. The 4 built-in wheels provide mobility of the cabinet; the wheels can
be mechanically locked when the transmitter is set in a desired position.
All operations of the AT71K0-1 is carried-out through a keypad and digital display, located on
the front panel, including access to all the readings, alarms and configurations.
The RF amplification system constitutes three drawers of up to 400W rms each connected in
parallel, each one comes with an independent power supply and supervision function. The
FCC Mask filter is installed on the top of the cabinet (not shown on the pictures below).
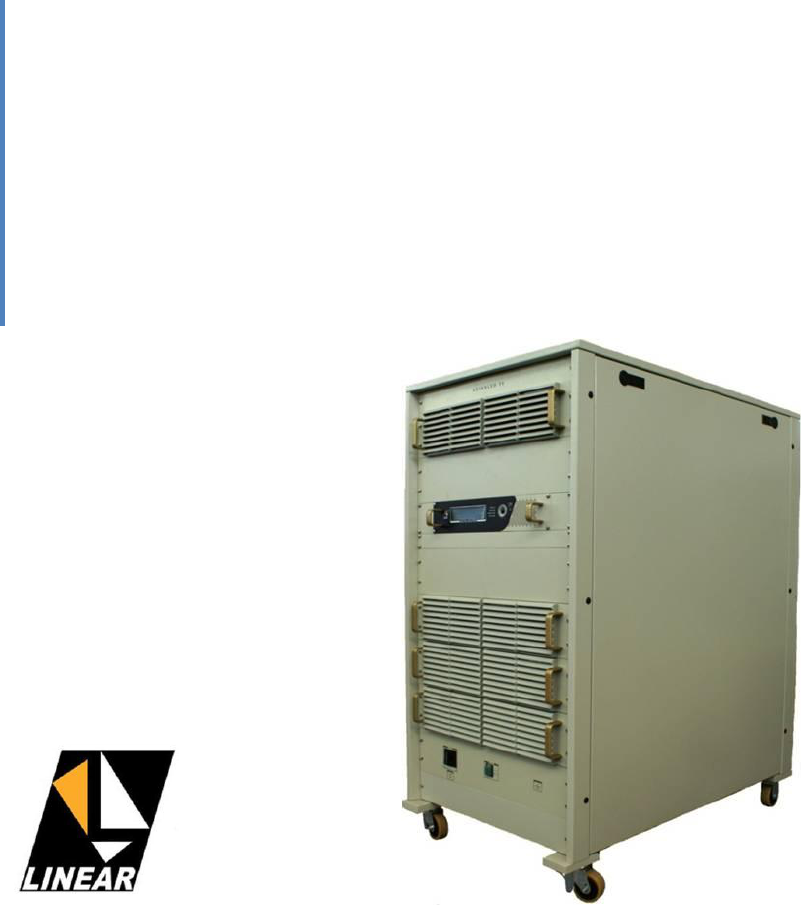
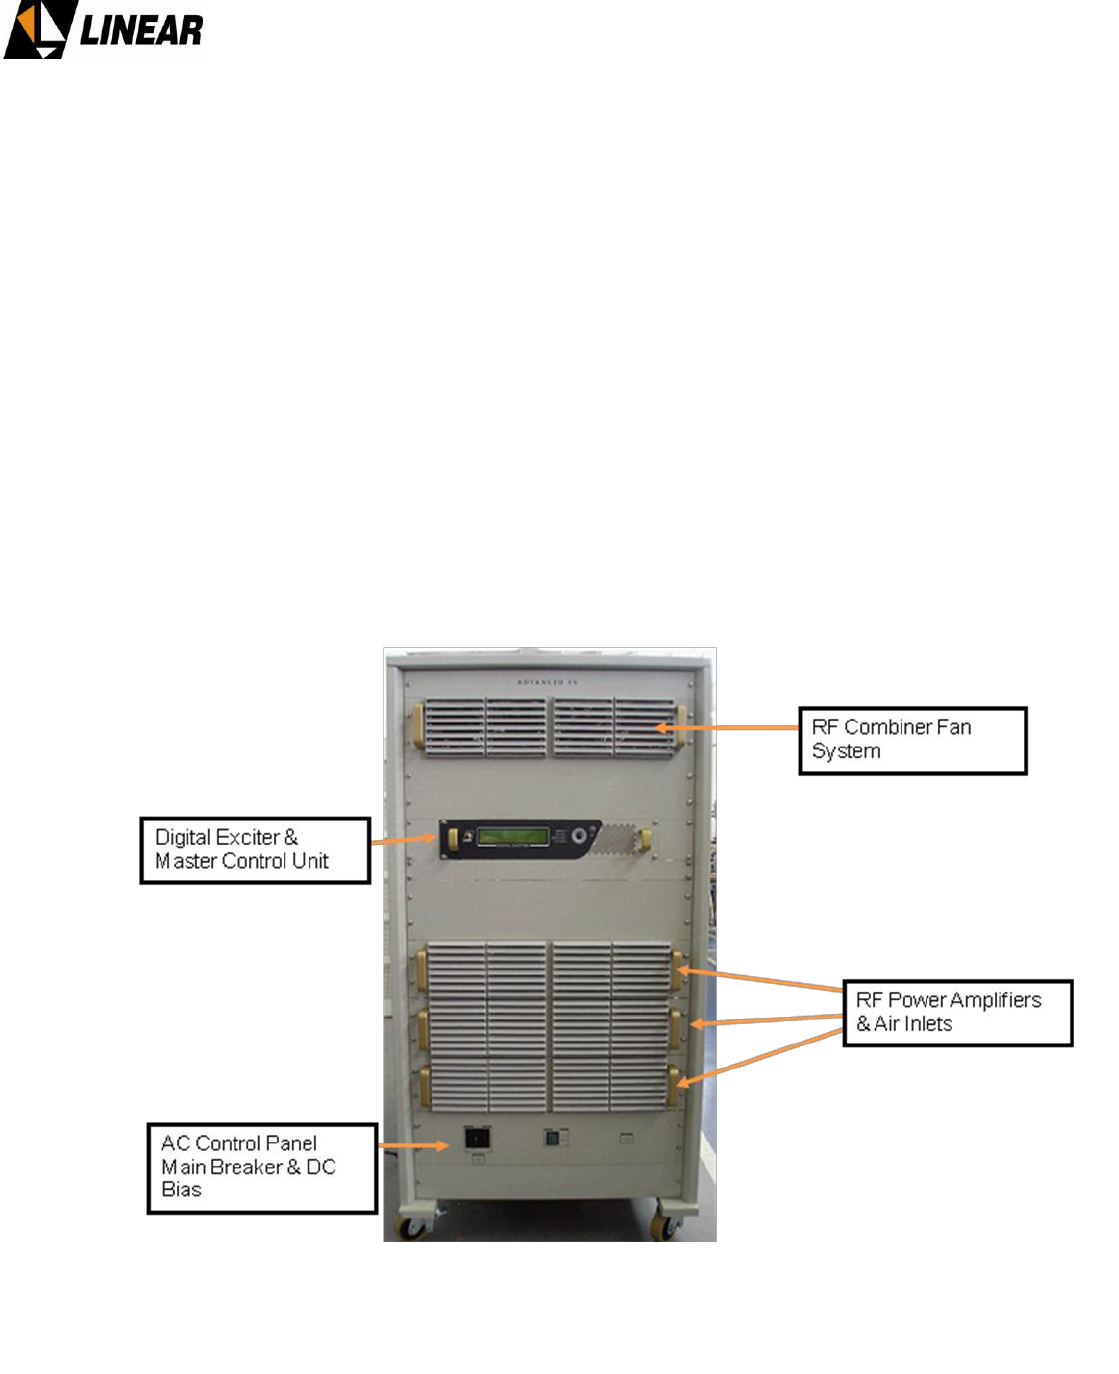
Figure 1: AT71K0-1 - Front View
AT71K0-1 Transmitter Owner’s Manual
© Linear Industries, Inc. All Rights Reserved 6/34
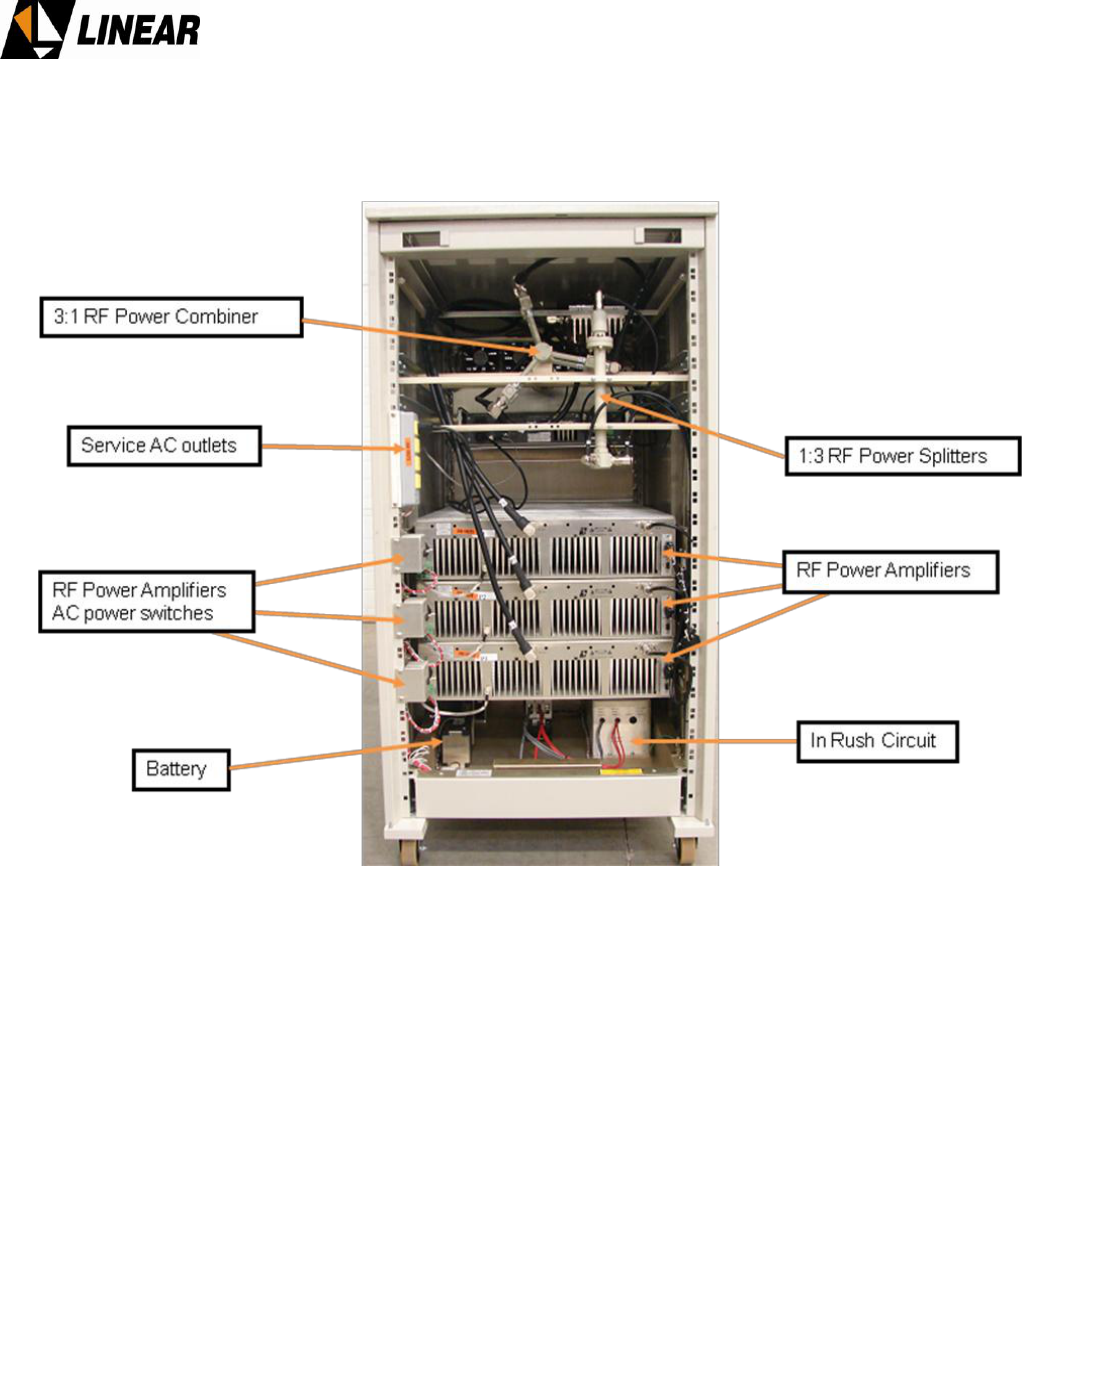
Figure 2: AT71K0-1 - Rear View, back cover panel removed
AT71K0-1 Transmitter Owner’s Manual
© Linear Industries, Inc. All Rights Reserved 7/34
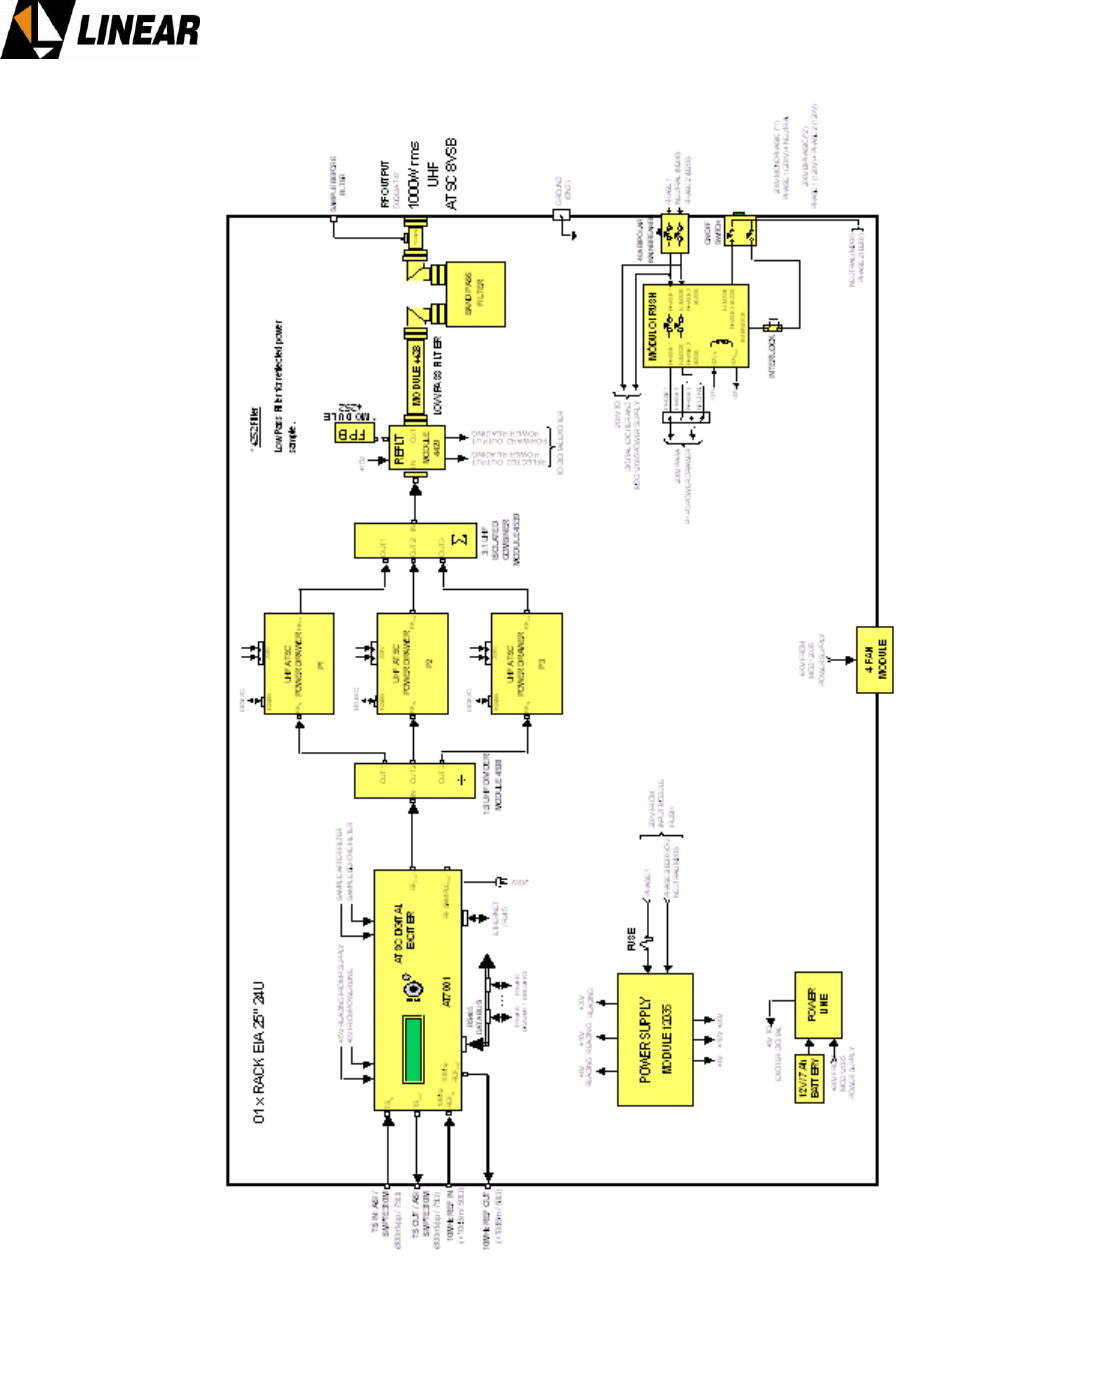
Figure 3 - AT71K0-1 - Block Diagram

AT71K0-1 Transmitter Owner’s Manual
© Linear Industries, Inc. All Rights Reserved 8/34
2. Main Features
Via the 4 lines x 40 columns display keypad located at the front panel it is possible to
manage, configure all functions of the equipment and each one of the RF power
drawers.
Via the hyper-terminal it is also possible to manage, configure all of the functions of
the transmitter and each one of the RF power drawers.
Digital Filter, type Finite Impulse Power (FIR) built-in at the 8VSB Modulator.
Automatic non linear pre-correction.
Automatic linear equalization.
Built in oscillators synthesized via serial-PLL, locked at a 10MHz OCXO reference or
external equivalent reference, e.g. GPS signal.
The UHF RF power amplifiers were implemented with LDMOS transistors, operating
highly linearly at higher gain under high efficiency and absolute controlled thermal
conditions.
Automatic control over the quiescent operational electrical current value on the RF
main power transistors, under temperature variations.
Self-protection against over-current on the RF main power amplifiers.
Each RF power module carries its own +32volts full bridge type switching power
supply.
Automatic Level Control (ALC) control, which keeps the RF on-channel output level
constant, even with a +3 dB overall system gain variation.
System fault indication shown on the front panel, including current and past alarms log.
Low noise fans for the air cooling system.
Modular design, built with SMD (Surface Mounted Devices), easing the maintenance
and service.
Outstanding overall field system performance.
25” rack cabinet.

AT71K0-1 Transmitter Owner’s Manual
© Linear Industries, Inc. All Rights Reserved 9/34
3. AT71K0-1 stage-by-stage
1. Digital Exciter
2. RF Power Splitter, 1:3
3. 3 RF power drawers
4. RF Power combiner, 3:1
5. RF Sampler
6. Output FCC mask filter.
7. Energy system
8. Cooling system
4 General Description by stage
4
4.
.1
1
D
Di
ig
gi
it
ta
al
l
E
Ex
xc
ci
it
te
er
r,
,
m
mo
od
de
el
l
A
AT
T7
70
00
01
1.
.
The digital exciter unit is also the control and monitoring system for the entire transmitter.
8VSB Modulador
IF/UHF Up Converter
Power Supply
RF Amplifier
Master Control Unit
The AT7001 input is a single BNC connector that may receive either an ASI or SMPTE310M
transport stream. The modulation process follows ATSC A/53E recommendation, and is a
complex modulation process generating identical phase-modulated orthogonal IF carriers, (I)
and (Q) at frequency of 18.833916 MHz.
Both (I) and (Q) modulated carriers are routed into the IF/UHF up-converter. The local
oscillator is a synthesized time-based PLL via an internal OCXO (Oven Controlled Crystal
Oscillator) at 10MHz reference, or an equivalent one external reference, e.g. a GPS signal.
The on-channel modulated signal is routed to the RF amplifier, a class A highly linear
amplifier with enough head room to accommodate future signal amplitude expansion during
the non-linear pre-correction process.
The AT7001 output delivers a variable 100mW max RF output level, (+20dBm) at the desired
UHF channel, driving the RF power amplifiers line-up.
The Master Control Unit (MCU) of the unit is embedded in the AT7001. The MCU interacts
with all functionality present within the equipment. It further interfaces externally via a keypad
and an LCD display.

AT71K0-1 Transmitter Owner’s Manual
© Linear Industries, Inc. All Rights Reserved 10/34
The MCU receives information proceeding from several modules, as the DTV modulator, Up-
Converter, RF amplifiers, RF samples and the administration of passwords. Via keypad it is
possible to read and program the power level delivered by the transmitter. Major changes on
the transmitter configuration are possible with factory assistance.
The AT7001 is factory-set in one of four (4) optional versions. Depending upon the version it
is possible set the operation with 2 types of non-linear pre-correction, mask filter equalization
and/or ATSC set of 13 measurements on the RF signal demodulated.
4
4.
.2
2
R
RF
F
P
Po
ow
we
er
r
S
Sp
pl
li
it
tt
te
er
r
The power splitter is a passive non-isolated component. It equally splits the exciter’s on-
channel RF signal to the ratio of 1:3. The resultant split signal is then routed to the 3 RF
power amplifier drawers.
4
4.
.3
3
1
1,
,0
00
00
0+
+
w
wa
at
tt
ts
s
R
RF
F
p
po
ow
we
er
r
s
st
tr
ru
uc
ct
tu
ur
re
e
The main power amplification system is built with 3 RF power drawers in parallel. Each
drawer carries a set of 12 fans, switching power supply, 3 RF pallets, an intermediate power
amplifier, a removable (plug-in) control system based on microcontrollers and includes a
hyper-terminal interface.
The use of the hyper-terminal interface allows the operator to adjust the quiescent RF
transistor’s current via software. It is also possible to retrieve data information regarding RF
transistor current variations as a function of the temperature variation. Further, it is possible to
collect valuable system information related with the RF drawer serial number, embedded
software name and version, direct and reverse RF power readings, one-by-one RF transistor
current readings, and detailed descriptions about current and past alarms.
4
4.
.4
4
R
RF
F
P
Po
ow
we
er
r
C
Co
om
mb
bi
in
ne
er
r
The RF power combiner is a 3:1 isolated passive component. Being isolated, it includes
associated unbalanced loads attached to a fin heat sink. The 3 inputs of this combiner are the
output of each RF power drawer.
4
4.
.5
5
R
RF
F
P
Po
ow
we
er
r
S
Se
en
ns
so
or
r.
.
R
RF
F
s
sa
am
mp
pl
le
e.
.
RF samples associated with the direct and reverse RF power are detected with this unit, and
converted to proportional DC readings. These 2 DC levels are routed to the MCU located in
the exciter where they are processed and displayed on the LCD screen. The processing of
this analog information manages the RF power delivered by the transmitter, increasing or
reducing it as part of the automatic level control (ALC) and is a part of the automatic
linearization/equalization of the transmitter. The RF samples are available in two points in the

AT71K0-1 Transmitter Owner’s Manual
© Linear Industries, Inc. All Rights Reserved 11/34
RF path (line-up), BEFORE and AFTER the RF output filter. The second set of RF samples is
the last element on the transmitter line-up, directly connected to the output transmission and
antenna system.
4
4.
.5
5
O
Ou
ut
tp
pu
ut
t
M
Ma
as
sk
k
F
Fi
il
lt
te
er
r
The UHF RF channel output filter is a tunable band-pass six pole elliptical synthesis type filter.
This filter reduces the unwanted spurious and harmonics signals inherent in the RF
amplification process. The filter bandwidth and attenuation specifications are two important
components that help the transmitter to meet the FCC an ATSC A/53E specification
recommendation.
4
4.
.7
7
P
Po
ow
we
er
r
S
Su
up
pp
pl
li
ie
es
s
All power transmitter supplies are full bridge switching power supplies. Each amplifier drawer,
total of 3, carries its own power supply, with individual shut-down commands. These power
supplies are in constant communication with its respective drawer control unit. The
communication collects and distributes the voltage value (+32V nominal) and the electrical
instantaneous current values in Ampere. The normal main value for all power supplies is
208Vac. The three different models present on this transmitter are:
Module 4571 – At the digital exciter, AT7001
Module 4568 – RF Power amplifiers drawers
Module 12035 – General Power Supply
4
4.
.8
8
E
En
ne
er
rg
gy
y
D
Di
is
st
tr
ri
ib
bu
ut
ti
io
on
n
The transmitter configuration is either:
208VAC Mono-phase.
208VAC Bi-phase.
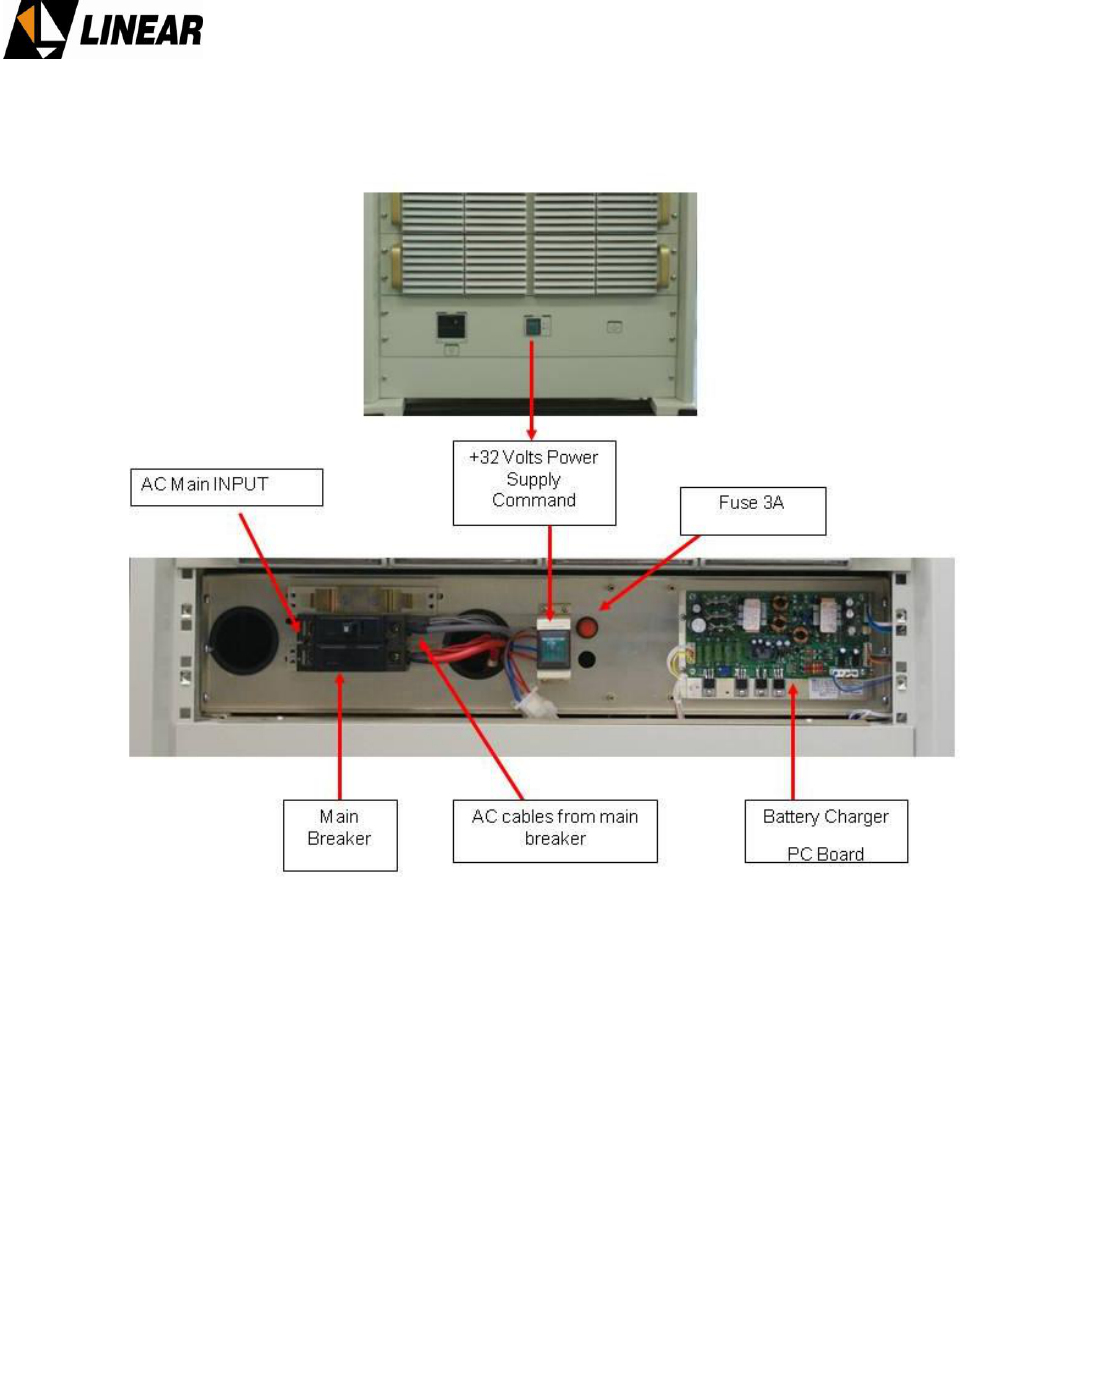
The In-Rush circuit is part of the electrical distribution system. This circuit drastically reduces
any spikes of current generated by the switching power supplies at the moment the
transmitter is turned ON. There is also a DC/DC converter circuit. This circuitry recharges the
12V@7Ah battery. In an event of lack of AC input power, the battery feeds the MCU circuit
keeping for a prolonged period of time the set of parameters previously programmed.
AT71K0-1 Transmitter Owner’s Manual
© Linear Industries, Inc. All Rights Reserved 12/34
4.5.1 AC control panel & battery charger
Figure 4 – AT71K0-1 AC Front Panel (panel cover removed)
4
4.
.6
6
C
Co
oo
ol
li
in
ng
g
S
Sy
ys
st
te
em
m
The cooling system is based on a set of fans that force air into the transmitter drawer’s heat
sinks. The fans are mixed, located on the front panel and internally within the units. The air
outlet holes on the top cover and the rear panel of the transmitter facilitate the air flow.
AT71K0-1 Transmitter Owner’s Manual
© Linear Industries, Inc. All Rights Reserved 13/34
5. AT71K0-1 - 1000W UHF ATSC/8VSB Transmitter - Technical Specifications
Electrical
Main
180 ~ 240 VAC, bi phase, 50-60 Hz.
Consumption
11,500 W
Power Factor Correction, FPC.
Included
Signal Input
Transport Stream Input
ATSC/MPEG2, compliant to SMPTE310M or
ASI
Input Data Rate
19.39 Mbps (SMPTE / 310M) / 270Mbps (ASI)
External Reference Signal
10MHz. (0 to +10 dBm).
Input Connector
75Ω (BNC),
Reference Input Connector
50Ω (BNC),
RF
Modulation Mode
8VSB.
IF
18.833916 MHz.
Channel Bandwidth
6MHz.
Test Signal
PRBS
Frequency Range
UHF. C14 to Ch59, (4 bands).
Frequency Step
1 Hz. ± 220kHz
Symbol Rate
10.76 MSymbol/sec.
Digital/Analog Converter
16 bit
Both Linear and Non-Linear Pre-Correction at factory
Included
Pilot frequency stability overall
±0.3 ppm
Peak to peak frequency response
≤ 0.2 dB
Peak to peak group delay response
≤ 20 ns.
Phase noise
≤ -104 dBc/Hz @ 20kHz offset.
Conducted spurious and harmonics
< -60 dBc, FCC 47 Part 74.
Radiated spurious and harmonics
< -80 dBc, FCC 47 Part 74.
MER (Modulation Error Rate)
≥ 33 dB (transmitter output) typical.
RF output connector
EIA 1 5/8” flanged
Output sample connector
N
Communication
Hyper-terminal
RS232 (DB-9)
Mechanical
Dimensions
49.7”(H), 27,7”(W), 45,67”(D)
Weight
NET: 340 Kg
AT71K0-1 Transmitter Owner’s Manual
© Linear Industries, Inc. All Rights Reserved 14/34
Annex A – AT71K0-1 Operational Software
1. Introduction
The DTV transmitter AT71K0-1 provisions: (a) measurements, (b) configurations, (c) alarms,
and (d) remote control via microcontrollers.
Below is a detailed description about the operational software (configuration and operation)
system installed in the AT71K0-1, located within the AT7001 exciter.
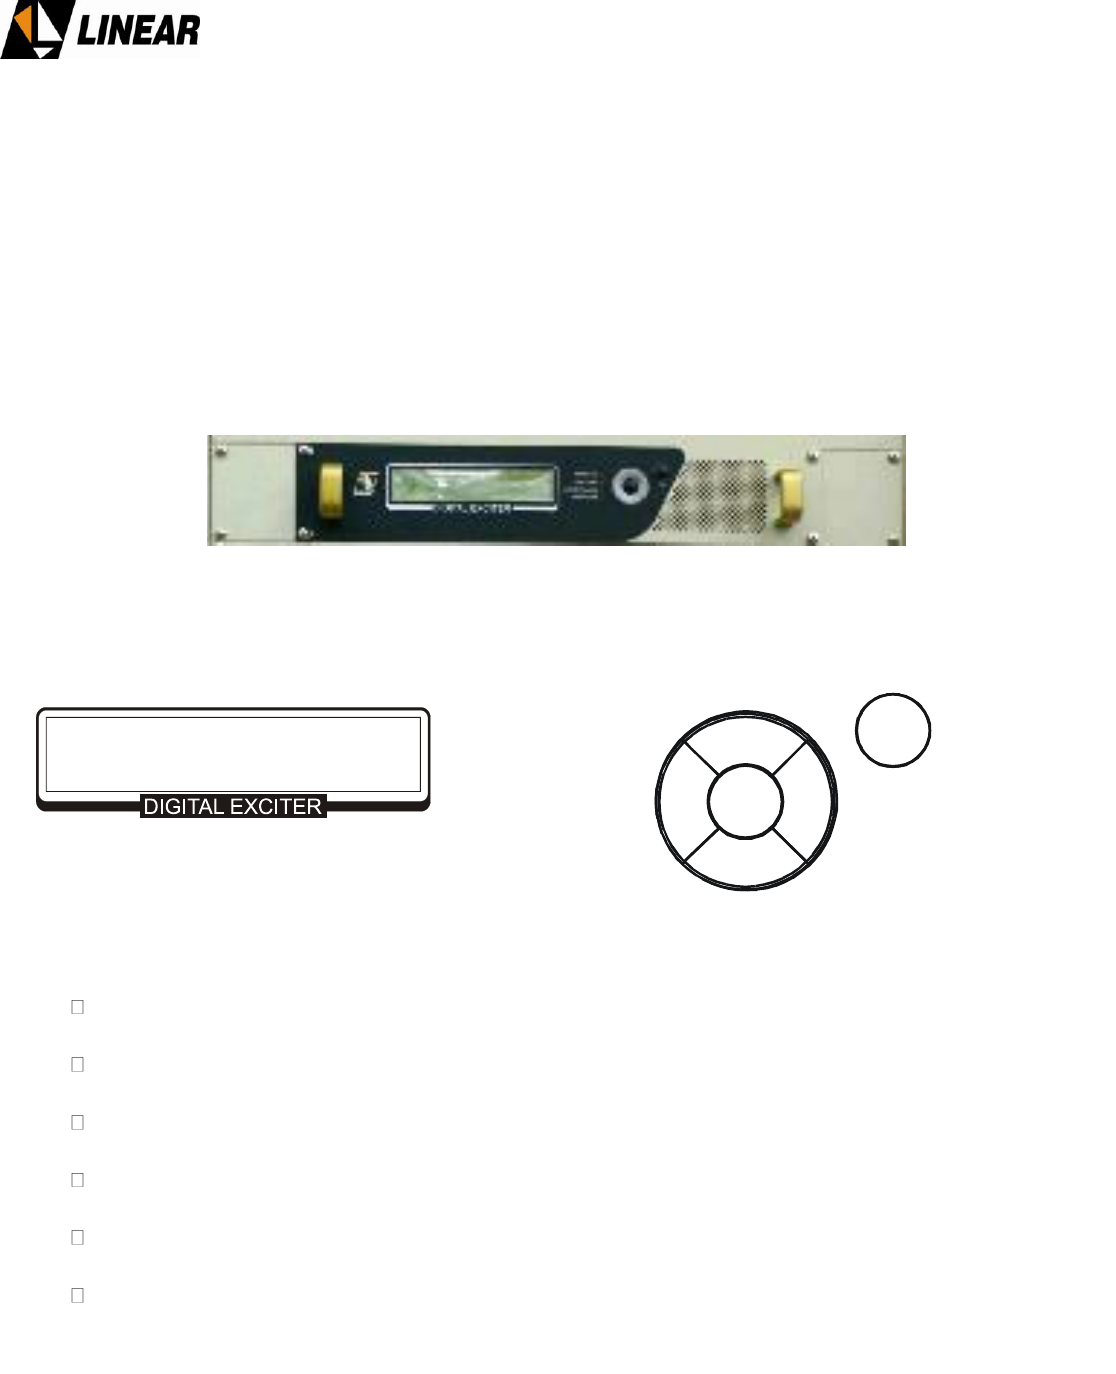
Figure 5 AT7001 – Front Panel
2. Digital Exciter – The Master Control Unit
2.1 Keypad
(1) Moves the arrow UP to the next function shown on LCD screen
(2) Moves the arrow to the next RIGHT position
(3) Moves the arrow DOWN to the next function shown on LCD screen
(4) Moves the arrow to the next LEFT position
(5) ENTER – Confirms the chosen selection
(6) ESC – Cancel the selection and return to the previous screen.
1
2
3
4
5
6
AT71K0-1 Transmitter Owner’s Manual
© Linear Industries, Inc. All Rights Reserved 15/34
2.2. LCD Display
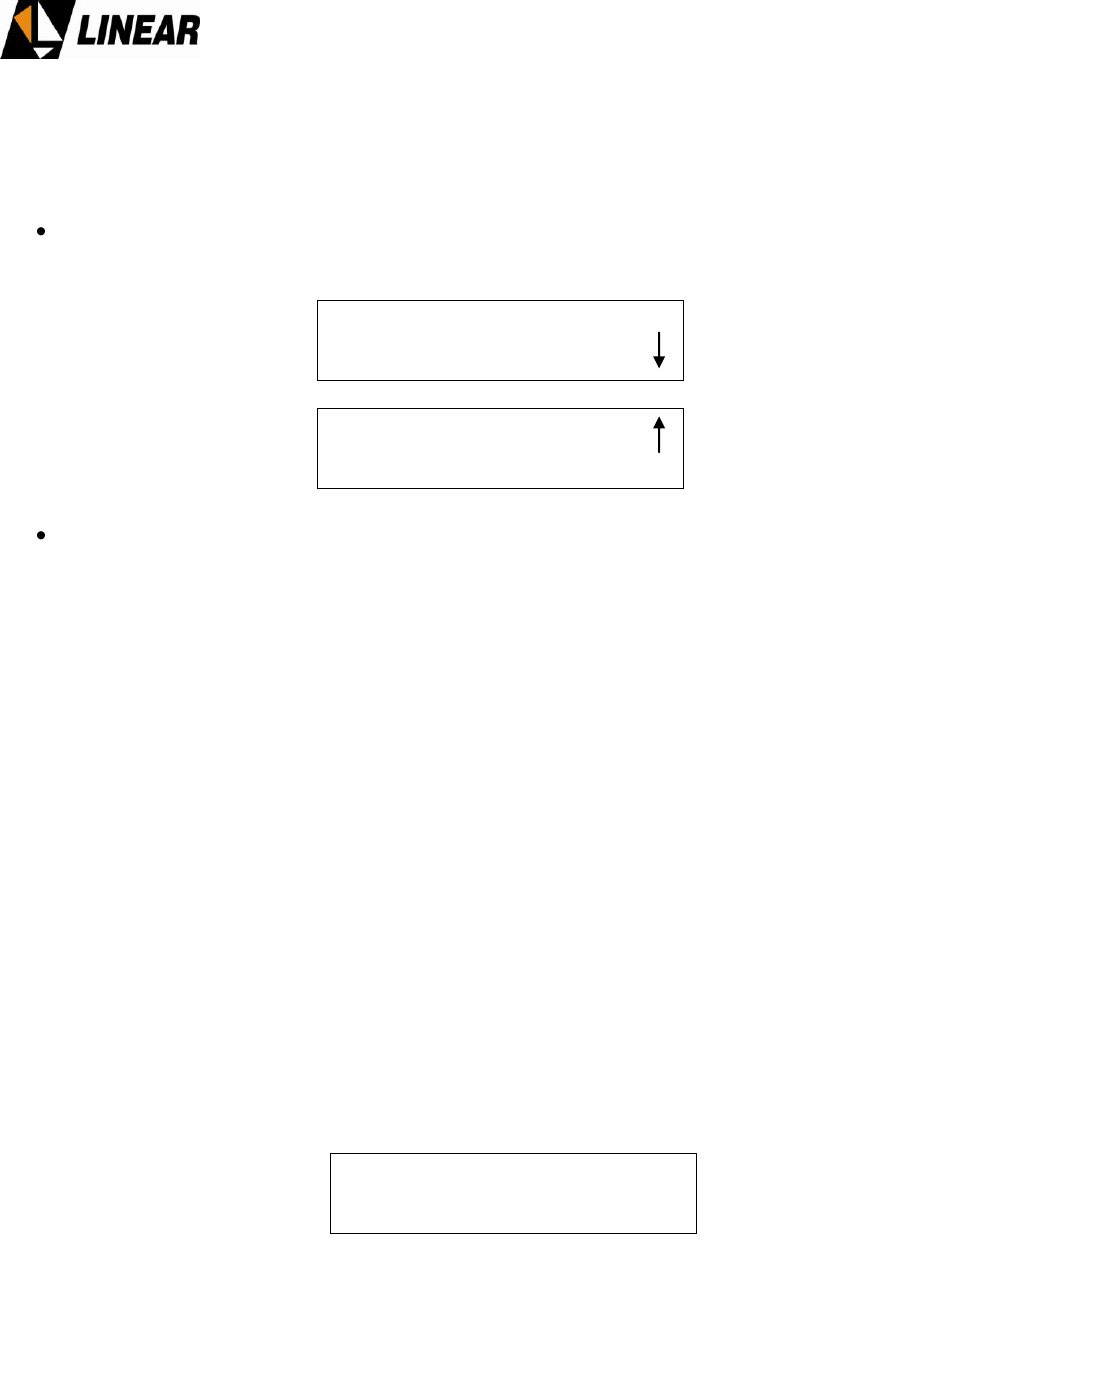
To browse over the LCD screen follow the instructions below:
Move the arrow Up or Down to the item listed by pressing the (1) or (3) buttons.
Hit ENTER.
Remarks:
Please note that all screens are assigned a 4 digit number on the top-right of the LCD screen.
These numbers, represents the screen position on the command menu.
2.3. Signaling
Besides the LCD screen and the command keypad, the front panel of AT7001 also shows a
set of 4 LED’s. These LED’s when ON indicate:
POWER ON – Energy is present.
SYNC. LOSS – The INPUT transport stream is not present.
CURRENT ALARM – One or more alarm situations are occurring.
PAST ALARM – Alarm log screen.
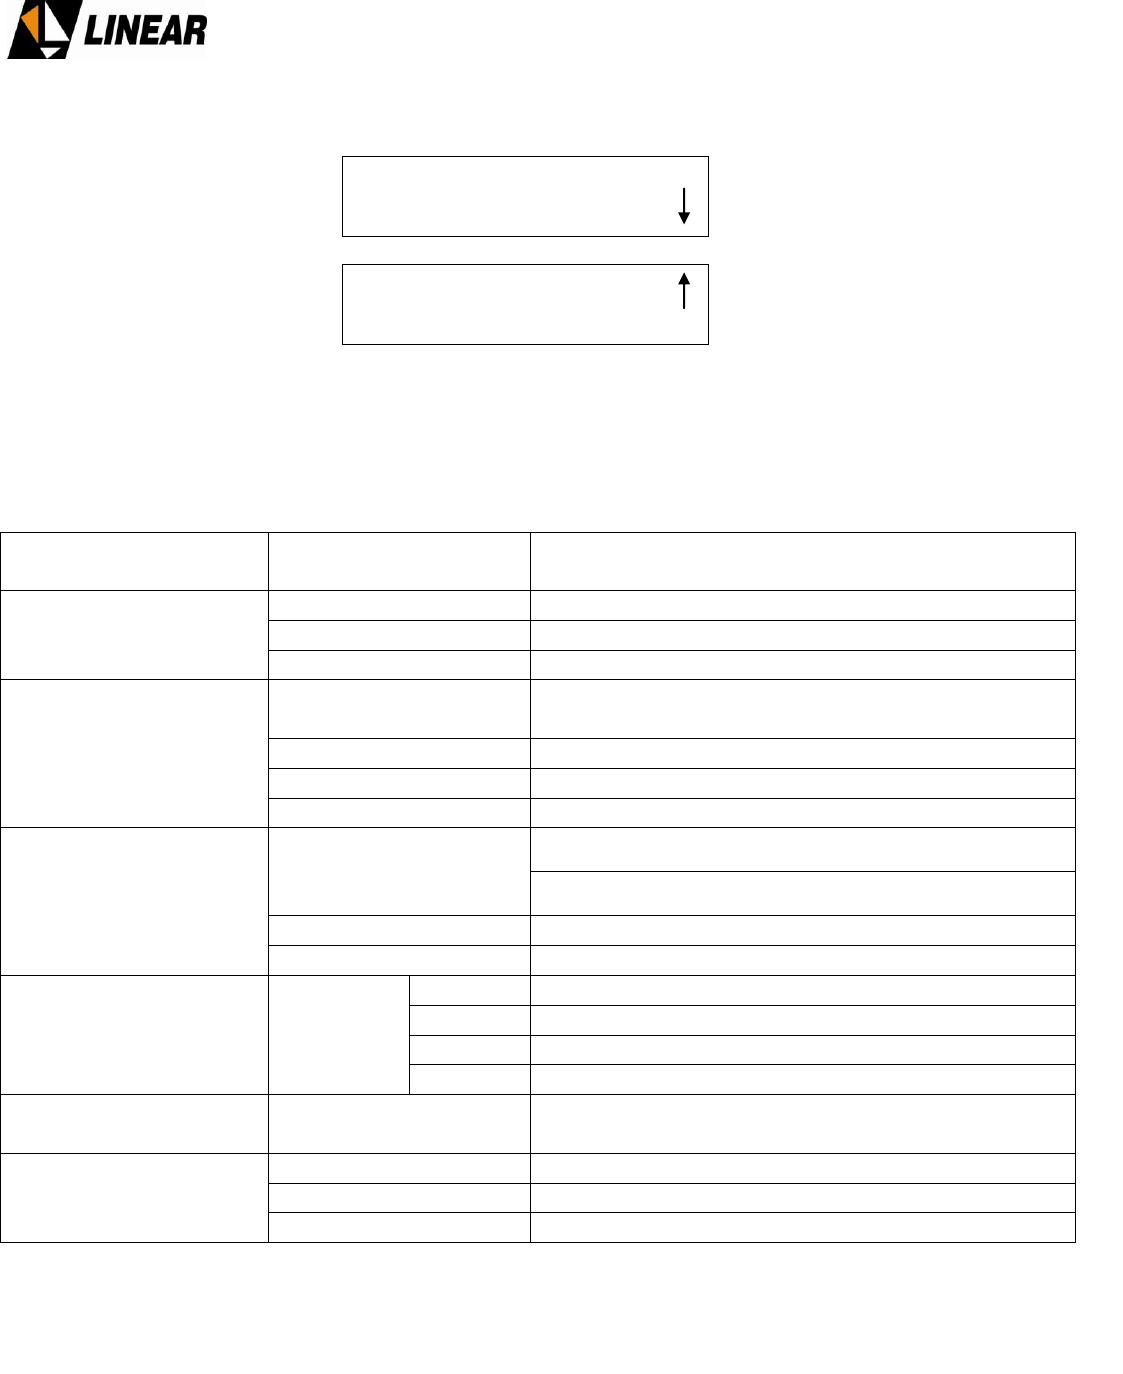
3. Initialization:
The first screen that appears when powering ON the transmitter is:
Main Menu : [0000]
-> Setup Menu
System Alarms/Log
Measurements
Remote Access
Linear Industries Inc.
AT7001 – ATSC 8VSB Digital Exciter
Channel: ___
Output Power: _ __._ [W]
DD/MM/YY HH:MM:SS
AT71K0-1 Transmitter Owner’s Manual
© Linear Industries, Inc. All Rights Reserved 16/34
After pressing any key on the keypad, the next screen that appears is:
(Note: It is always possible to return to the initial LCD screen by pressing the ESC key)
After 5 minutes the initial LCD screen menu is displayed.
4. Measurement System Table
Measurements Menu
Indications
Measurements Sub-
Set Indications
Description
POWER
Forward
Measure the Direct Power
Reflected
Measure the Reverse Power
Voltage ALC
Measure the ALC control voltage
TRANSPORT
STREAM
Transport Stream
Shows the INPUT transport stream protocol, or
none.
Data Packets Rate
Measure the input Data Rate: 0 ~ 19,39Mbps
Null Packets Rate
Measure Nulls packages: 0 ~ 19,39Mbps
FIFO Occupation (%)
0 ~ 100%
RF AMPLIFIER
DRAWERS
POWER
+32V Power Supply for the RF power drawers.
RF Forward Power per each drawer.
CURRENT
Measure the electrical current at the drawers
TEMPERATURE
Ttemperature measurements
EXCITER POWER
SUPPLY
Voltage
+15V
+15V voltage power supply measurement
+8V
+8V voltage power supply measurement
+3V
+3V voltage power supply measurement
+27V
+27V voltage power supply measurement
COMMUNICATION
STATUS
COMMUNICATION
Indicate the communication status among the RF
drawers and the MASTER Control Unit.
POWER SUPPLY
MEASUREMENTS
15V
+15V voltage power supply measurement
8V
+ 8V voltage power supply measurement
Battery
+15V voltage battery measurement
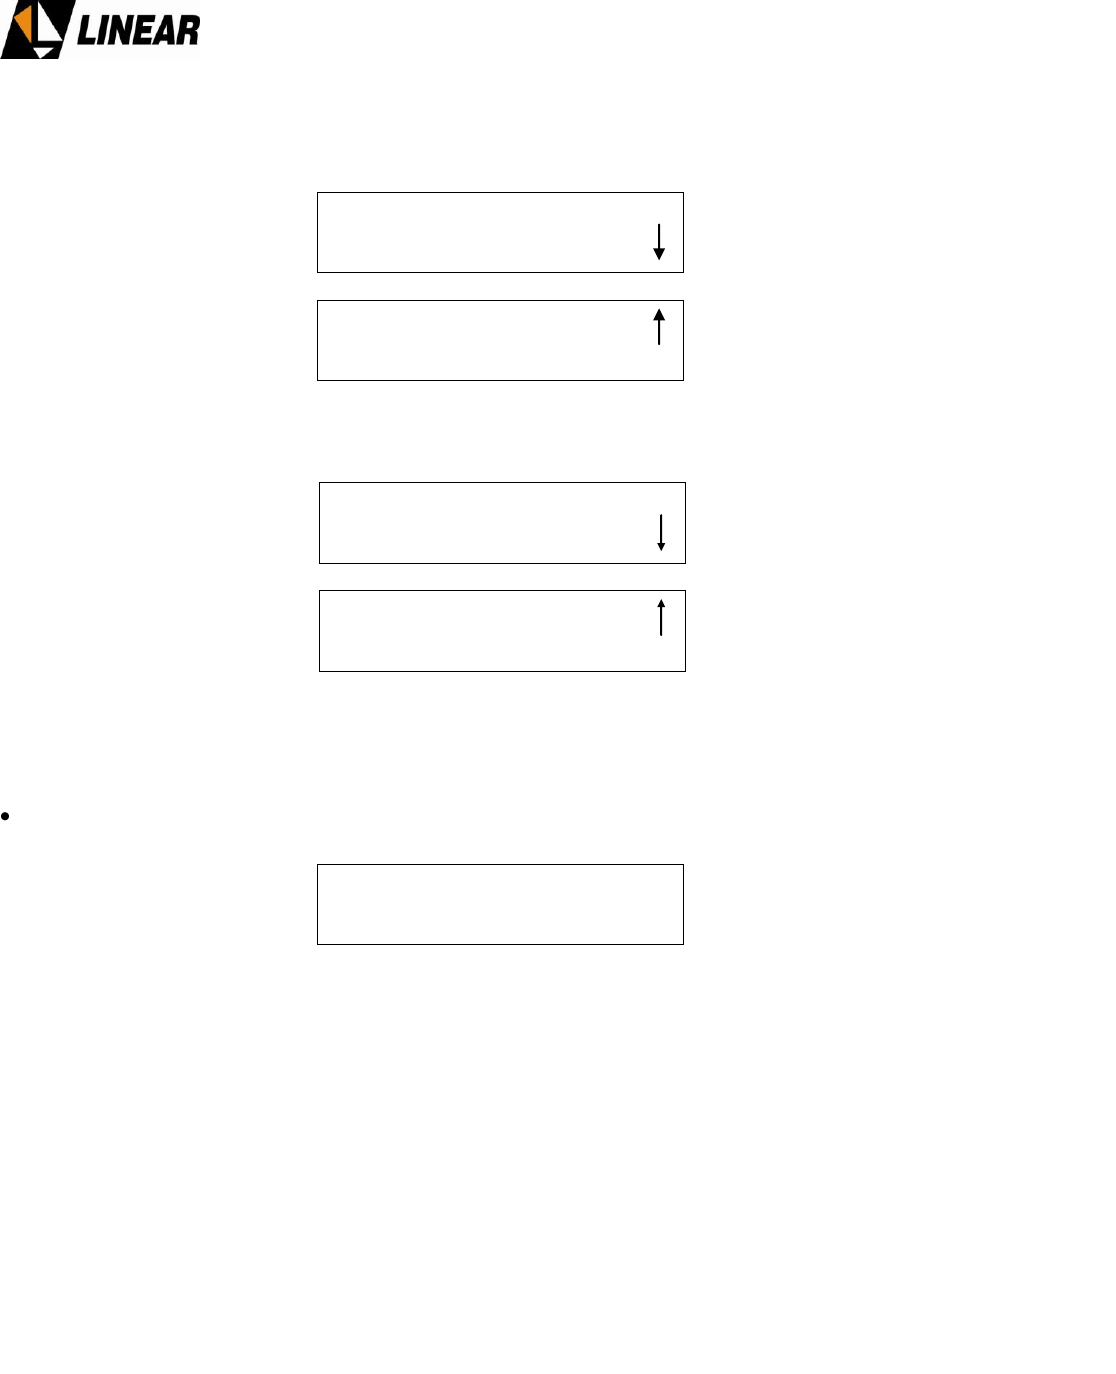
To access the menu above, see item 4.1 below:
Main Menu : [0000]
Setup Menu
-> System Alarms/Log
Measurements
Remote Access
AT71K0-1 Transmitter Owner’s Manual
© Linear Industries, Inc. All Rights Reserved 17/34
4.1. Transmitter Power Measurements
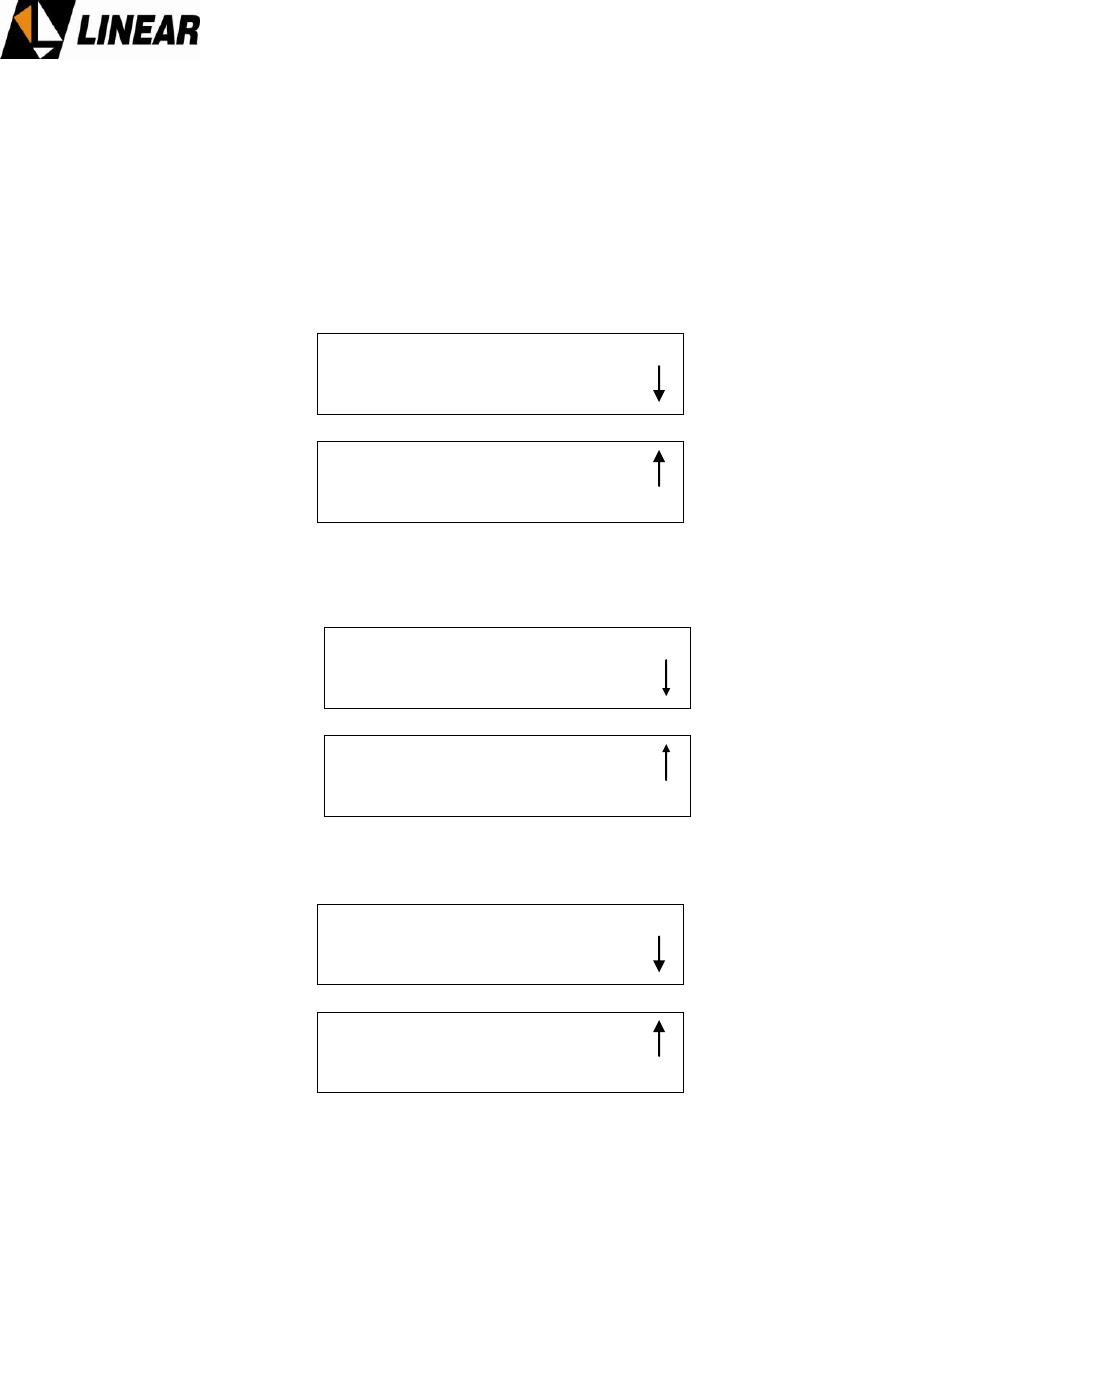
Access Measurements
Access Power and hit ENTER
Hit key “3” to view the other screens that are part of this menu.
Hit ESC key to return to the prior screen.
Main Menu : [0000]
Setup Menu
System Alarms/Log
-> Measurements
Remote Access
-> Power
Transport Stream
Drawers
Measurements : [2000]
Exciter Power Supply
Communication Status
Power Supply
Transmitter Power Measurements : [2100]
Programmed:
Forward: ____ [W] Reflected: ____ [W]
ALC Reference Voltage : __.____ [V]
AT71K0-1 Transmitter Owner’s Manual
© Linear Industries, Inc. All Rights Reserved 18/34
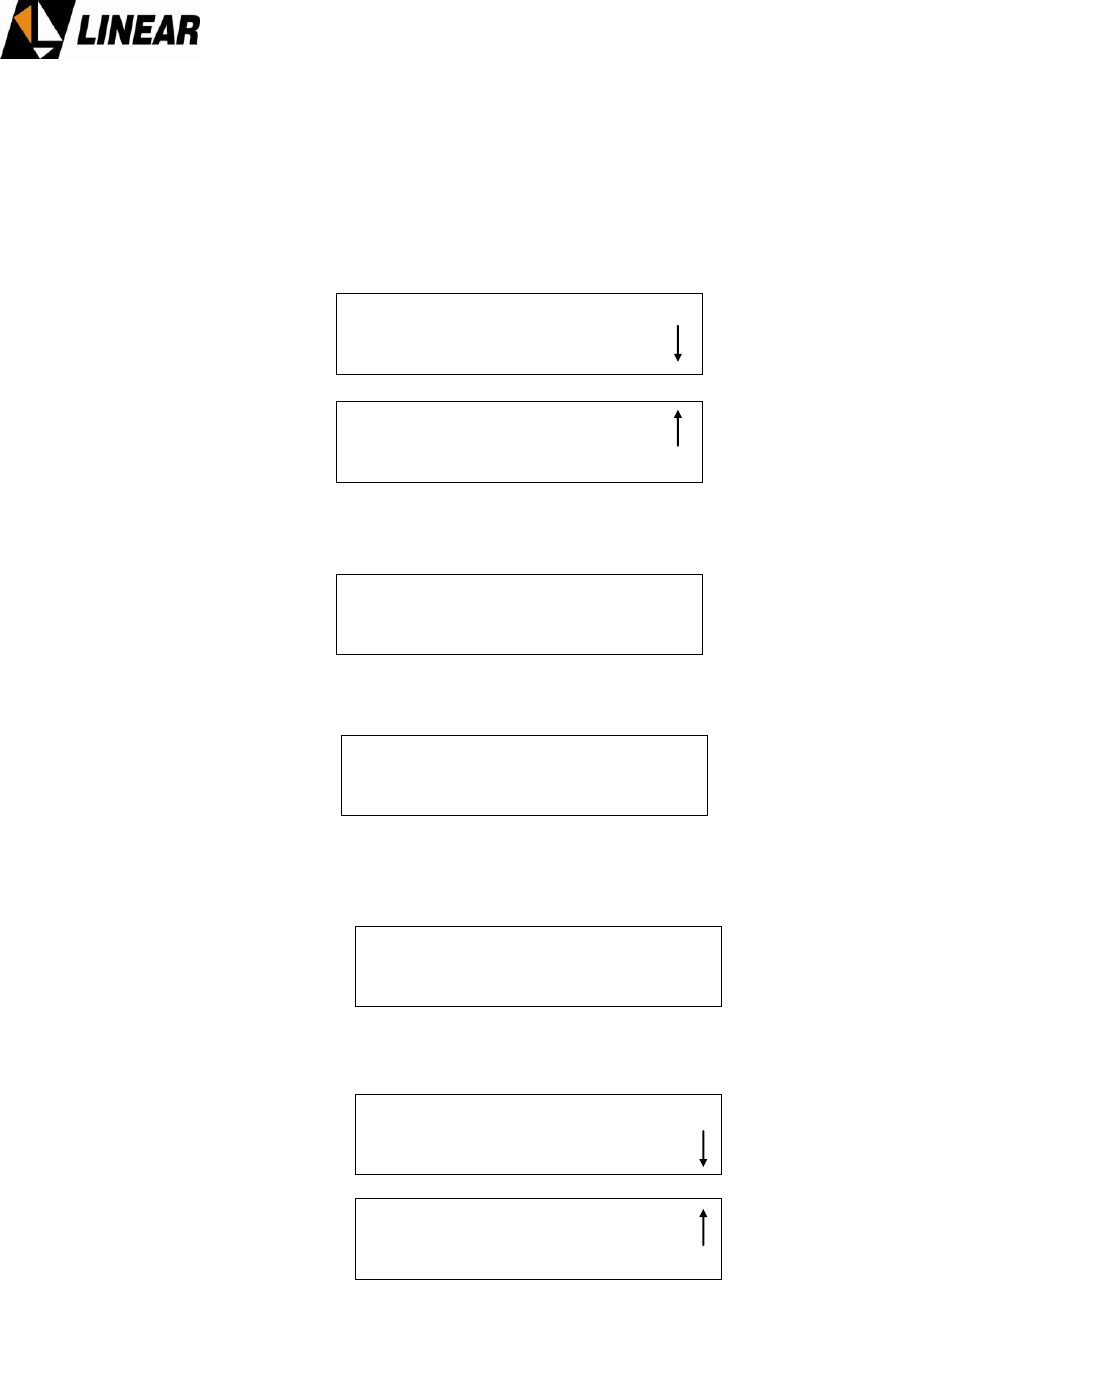
4.2. Transport Stream related measurements
To gather information about the status of the incoming transport stream, follow the
instructions below, starting on the main menu screen:
Access Measurements
Select Transport Stream and hit ENTER
Hit ESC key to return to the prior screen.
Main Menu : [0000]
Setup Menu
System Alarms/Log
-> Measurements
Remote Access
Power
-> Transport Stream
Drawers
Measurements : [2000]
Exciter Power Supply
Communication Status
Power Supply
Transport Stream Measurements: [2200]
Transport Stream :
Data Packets Rate :
Null Packets Rate :
FIFO Occupation (%):
AT71K0-1 Transmitter Owner’s Manual
© Linear Industries, Inc. All Rights Reserved 19/34
4.3. RF Power Drawers Measurements
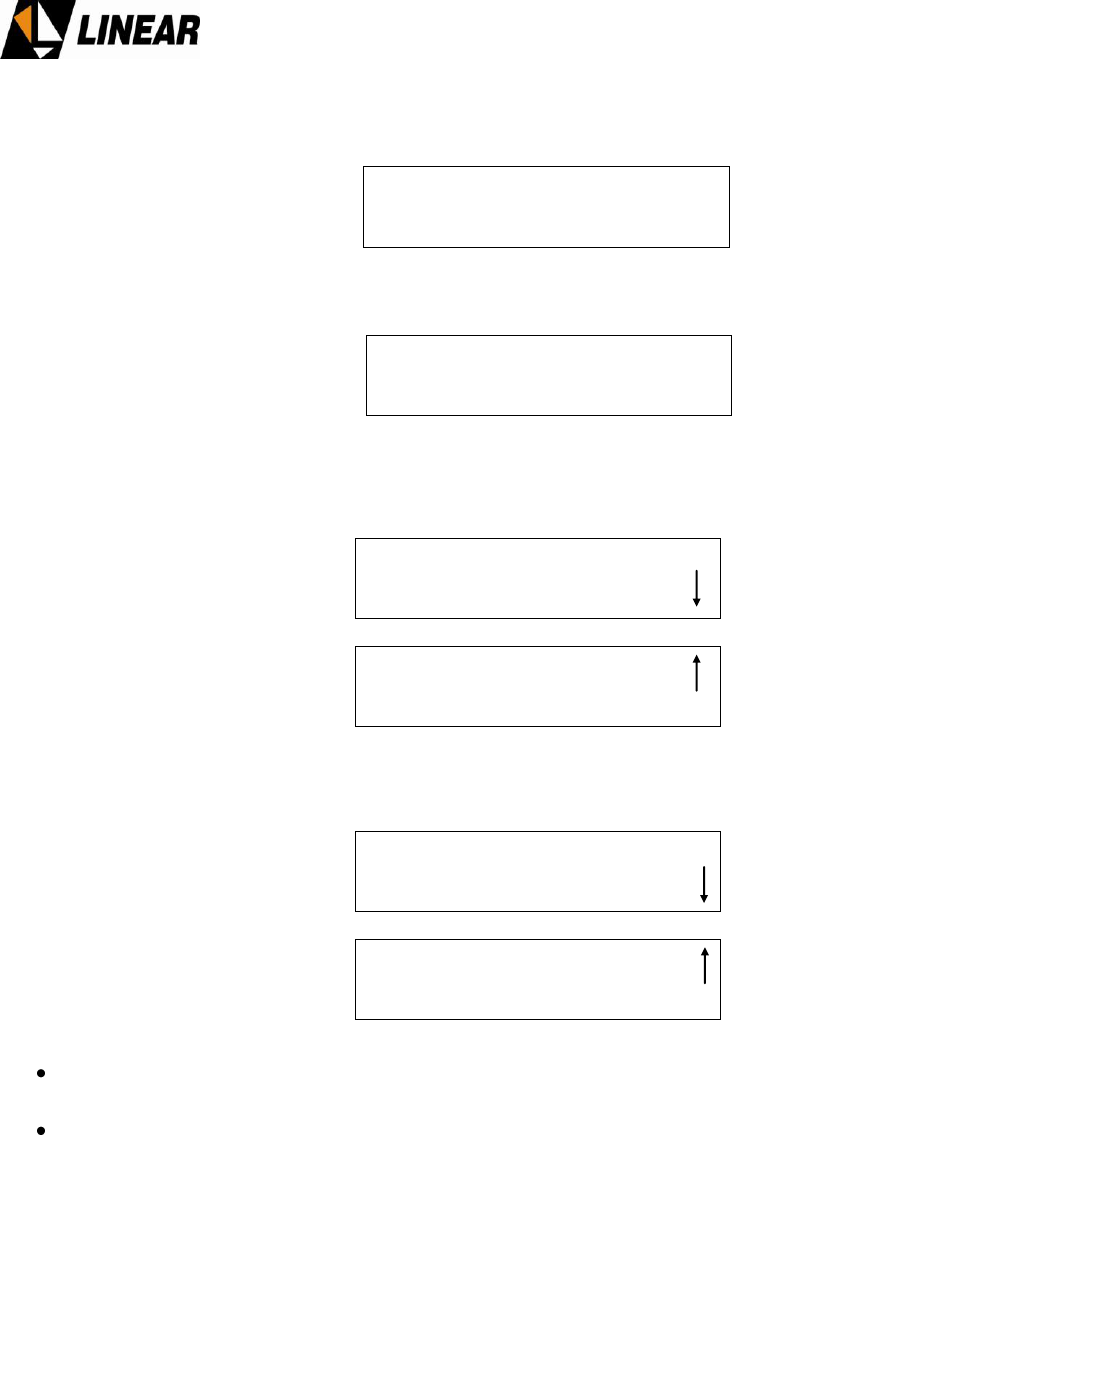
For each RF Power Module it is possible to measure: (a) electrical current, (b) RF delivery
power, (c) temperature. Hit the ESC key to return to the measurements screen menu, or
return to the main menu screen and select measurements.
Select Drawers and presses ENTER.
Select Power and presses ENTER
To select a specific drawer, press the keys “2” or “4”.
Select Current and press ENTER.
Power
Transport Stream
-> Drawers
Measurements : [2000]
Exciter Power Supply
Communication Status
Power Supply
Drawer Measurements : [2300]
-> Power
Current
Temperature
Drawer Power Measurements : [2310]
Drawer : <__/__>
32V Power Supply: ___.__ [V]
Forward Power: ___.__ [W]
Drawer Measurements : [2300]
Power
-> Current
Temperature
Drawer Current Measurements : [2320]
Drawer : <__/__> ^More Modules^
-> Mod. 1 I1: __._ A Mod. 1 I2: __._ A
Mod. 2 I1: __._ A Mod. 2 I2: __._ A
Mod. 3 I1: __._ A Mod. 3 I2: __._ A
Mod. 4 I1: __._ A Mod. 4 I2: __._ A
Excit. I1: __._ A Excit. I2: __._ A
AT71K0-1 Transmitter Owner’s Manual
© Linear Industries, Inc. All Rights Reserved 20/34
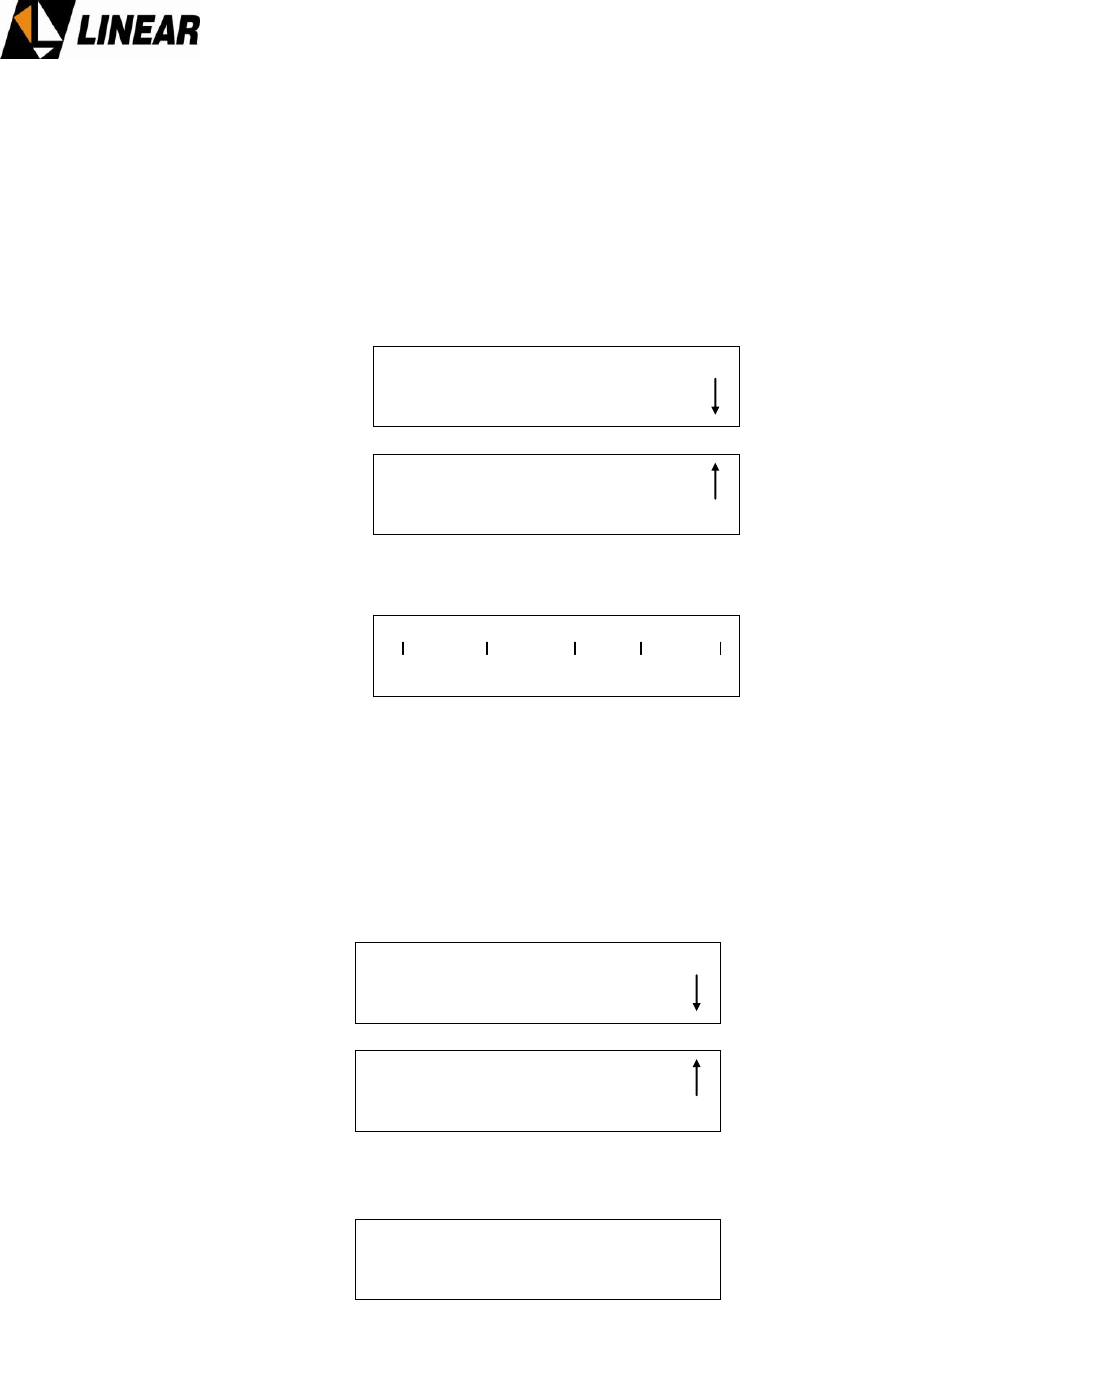
Press ESC to return to the Drawers Measurements screen.
Select Temperature and press ENTER
Press ESC to return to the Measurements screen.
Select Exciter Power Supply and press ENTER
Use the Up and Down keys, 1 and 3, to check the voltage status on the DTV exciter.
To return to the Main Menu press ESC key.
Drawer Measurements : [2300]
Power
Current
-> Temperature
Drawer Temperature Measurements : [2330]
Drawer : <__/__> Exciter: 0.0 °C ^°F^
Mod.1: 0.0 °C Mod.3: 0.0 °C
Mod.2: 0.0 °C Mod.4: 0.0 °C
Power
Transport Stream
Drawers
Measurements : [2000]
-> Exciter Power Supply
Communication Status
Power Supply
Exciter Power Supply : [2400]
-> +15V : OK
+3V : OK
+8V : Fail
+27V : Fail
AT71K0-1 Transmitter Owner’s Manual
© Linear Industries, Inc. All Rights Reserved 21/34
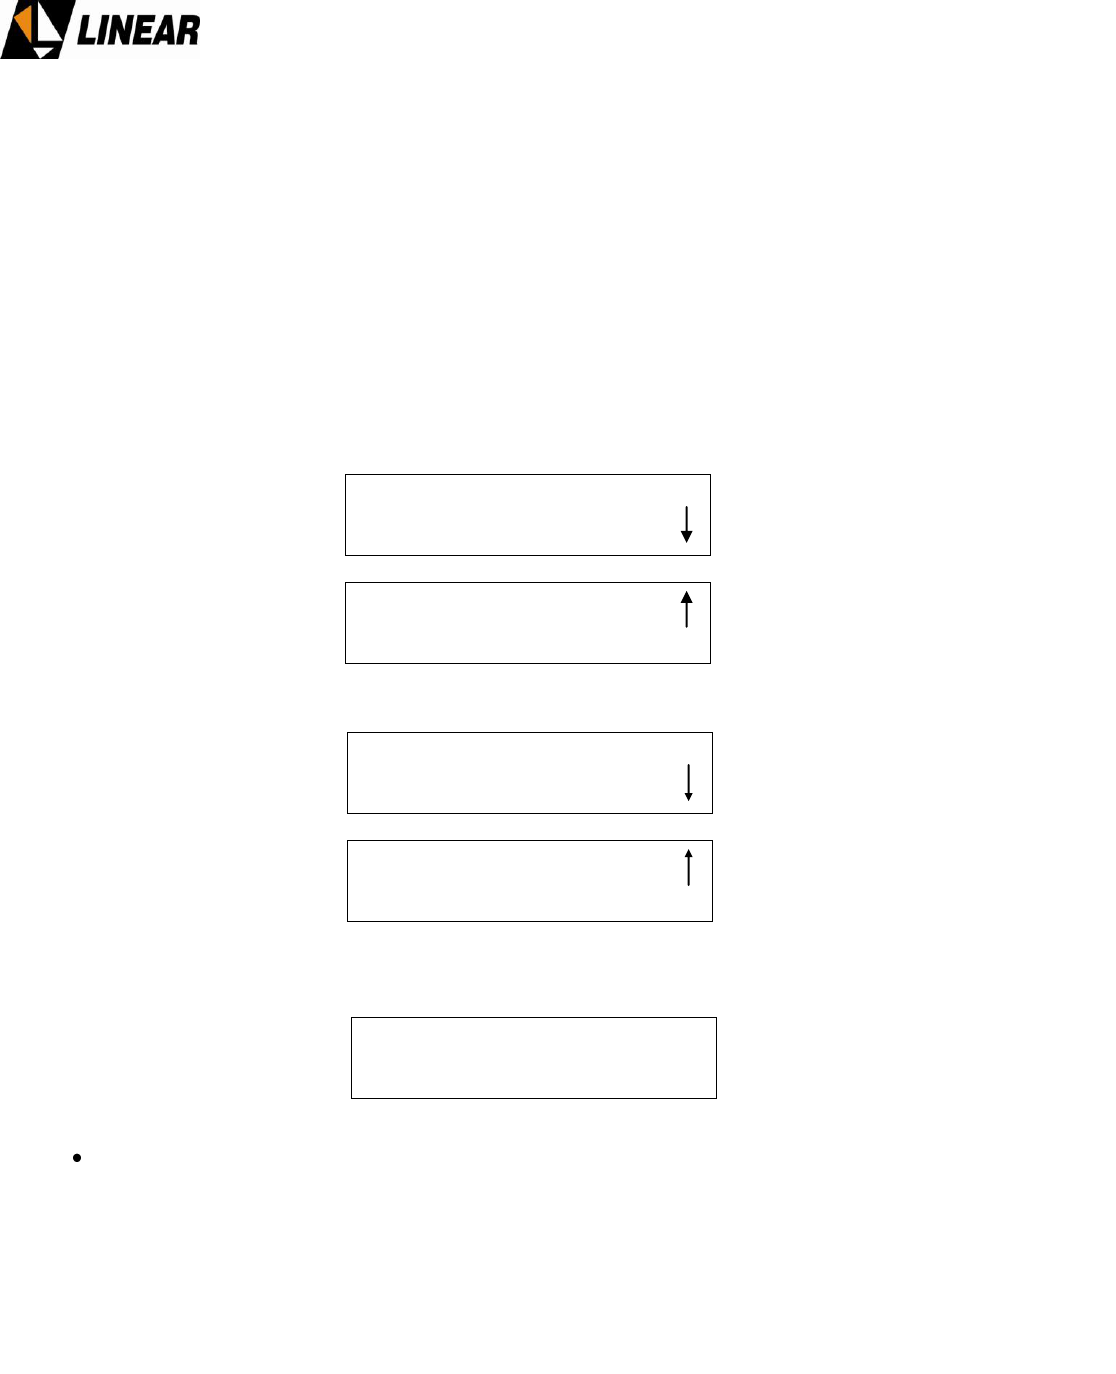
4.4 Communication among RF drawers
From the LCD screen it is possible to conduct and view a diagnostic check of the
communication link between the master control unit and each one of the RF power amplifier
drawers.
Press ESC, to the Main Menu screen, and then to the screen [2000] is reached, as below:
Select Communication Status and press ENTER.
Press the ESC key to return to the Main Menu.
4.5 Voltages from the Power Supplies
To check the status of the value and presence of the power supplies, start from the Main
Menu and select the Measurement [2000] screen.
Select Power Supply and press ENTER
Press the ESC key as many times as necessary to return to the main menu.
Power
Transport Stream
Drawers
Measurements : [2000]
Exciter Power Supply
-> Communication Status
Power Supply
Communication Status : [2500]
P01: OK P02: OK P03 OK P04: OK
Power
Transport Stream
Drawers
Measurements : [2000]
Exciter Power Supply
Communication Status
-> Power Supply
Power Supply Measurements :
[2600]
15V : OK
8V: OK
Battery: 12.5 [V]
AT71K0-1 Transmitter Owner’s Manual
© Linear Industries, Inc. All Rights Reserved 22/34
5. The alarm system
An alarm is indicated by one of the 3 red LEDs located on the front panel of the digital exciter.
The first LED alarm is for transport stream (TS) absence (SYNC. LOSS). The next LED alarm
is for a current malfunction present on the equipment, and requires investigation, (see
CURRENT ALARM). The third LED indicates a past alarm (see PAST ALARM). This situation
that past alarm, is no longer present. On normal operation, just a green LED is ON, which
confirms that the AC input power is present. Once a CURRENT ALARM LED is ON, the origin
of the alarm should be investigated.
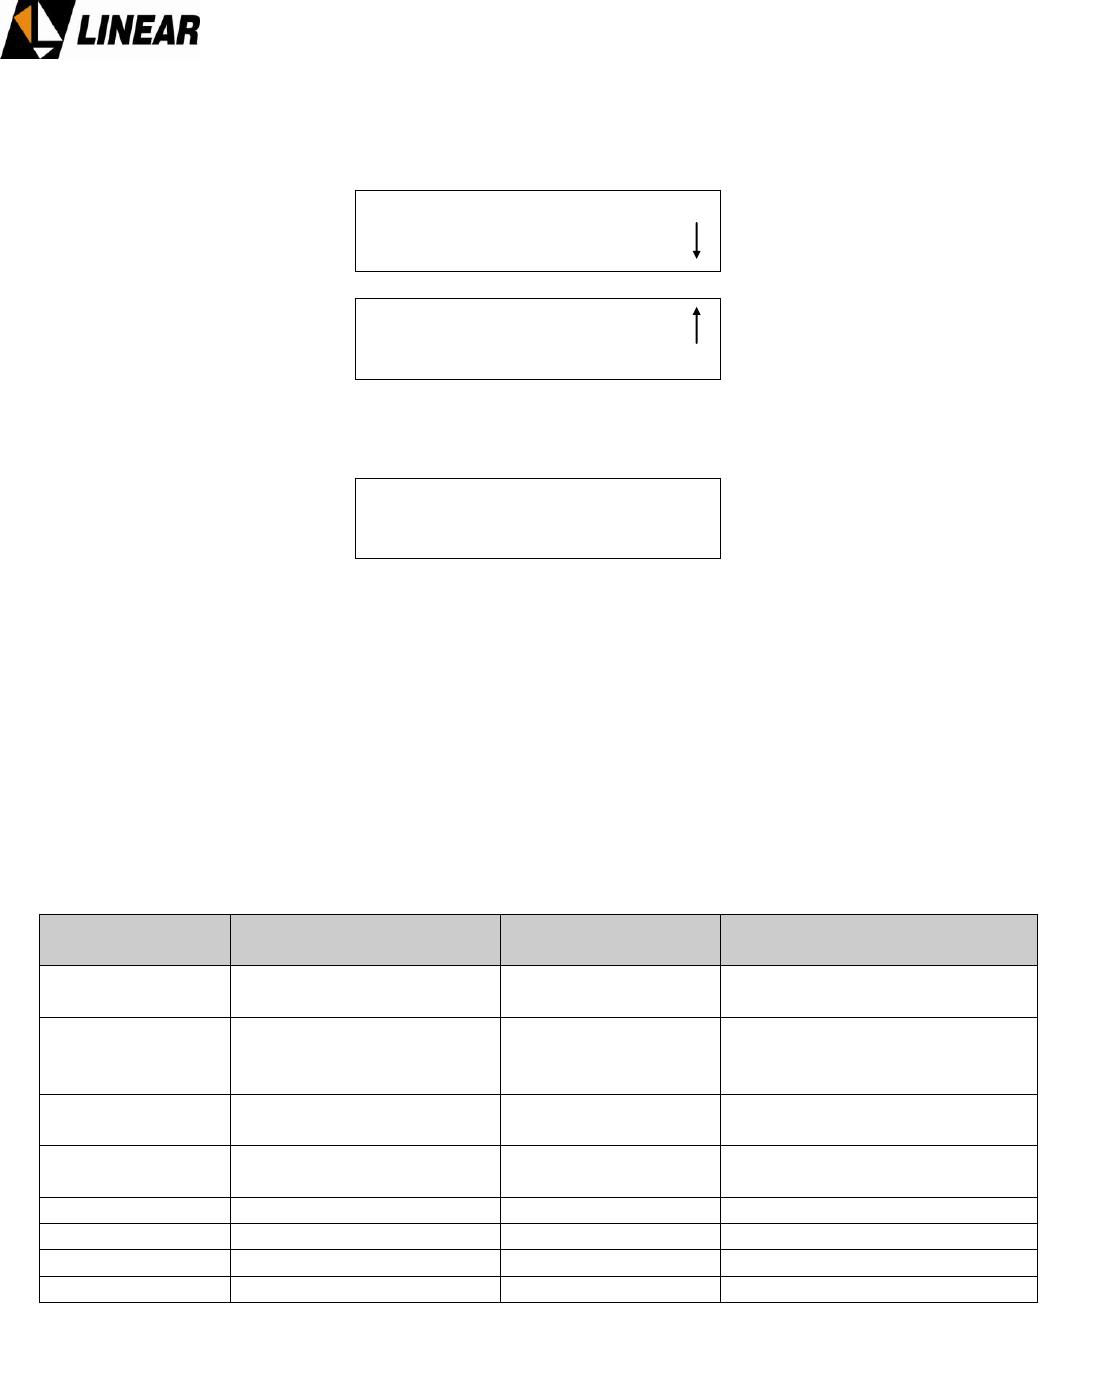
From the Main Menu screen, access the System Alarm/Log.
Access System Alarms/Log
Select Current Alarms and press ENTER
The “Alarm List Empty!” means the alarm is no longer present.
Main Menu : [0000]
Setup Menu
-> System Alarms/Log
Measurements
Remote Access
-> Current Alarms
Alarm Log
Drawers Alarms
System Alarm/Log [3000]
Clear Alarm Log
Current Alarms: [3100]
Alarm List Empty!
AT71K0-1 Transmitter Owner’s Manual
© Linear Industries, Inc. All Rights Reserved 23/34
Press ESC to return to the System Alarms/ Log menu
Access the Alarm Log and press ENTER to view all alarms, current and past alarms.
The symbol '!' is an indication that the alarm is current, (LED ON for alarms) with date and
time of its occurrence. The symbol '#' is an indication that any alarms are no longer present,
(LED ON for past alarm, LED OFF for current alarms), and the date and time mark when it
ceased to occur. The alarm log keeps up to 100 registers.
The Clear Alarm Log, if selected, erases the alarm log registers and then registers the date
and time when the alarms were erased.
The table below shows all possible alarms generated on the Digital Exciter and the associated
suggested action to cease its occurrence.
Alarm
Message
Alarm Description
Action Required
After Alarm Ceases
Sync Loss!
Sync loss on the
transport stream
Alarm LED ON
Alarm LED OFF
Past alarm LED ON
LO Lock Fail!
Up-Converter LO
PLL unlocked
Shut down RF
Re-program the
PLL
Returns to the last RF level
Clock Lock
Fail!
Clock at Modulator
unlocked
Alarm LED ON
-------------------------
Fifo Overflow!
Overflow on FIFO at
the modulator
Alarm LED ON
-------------------------
+15V Fail!
Lack of +15V.
Alarm LED ON
-------------------------
+8V Fail!
Lack of +8V.
Alarm LED ON
-------------------------
+3V Fail!
Lack of +3V.
Alarm LED ON
-------------------------
+27V Fail!
Lack of +27V.
Alarm LED ON
-------------------------
Current Alarms
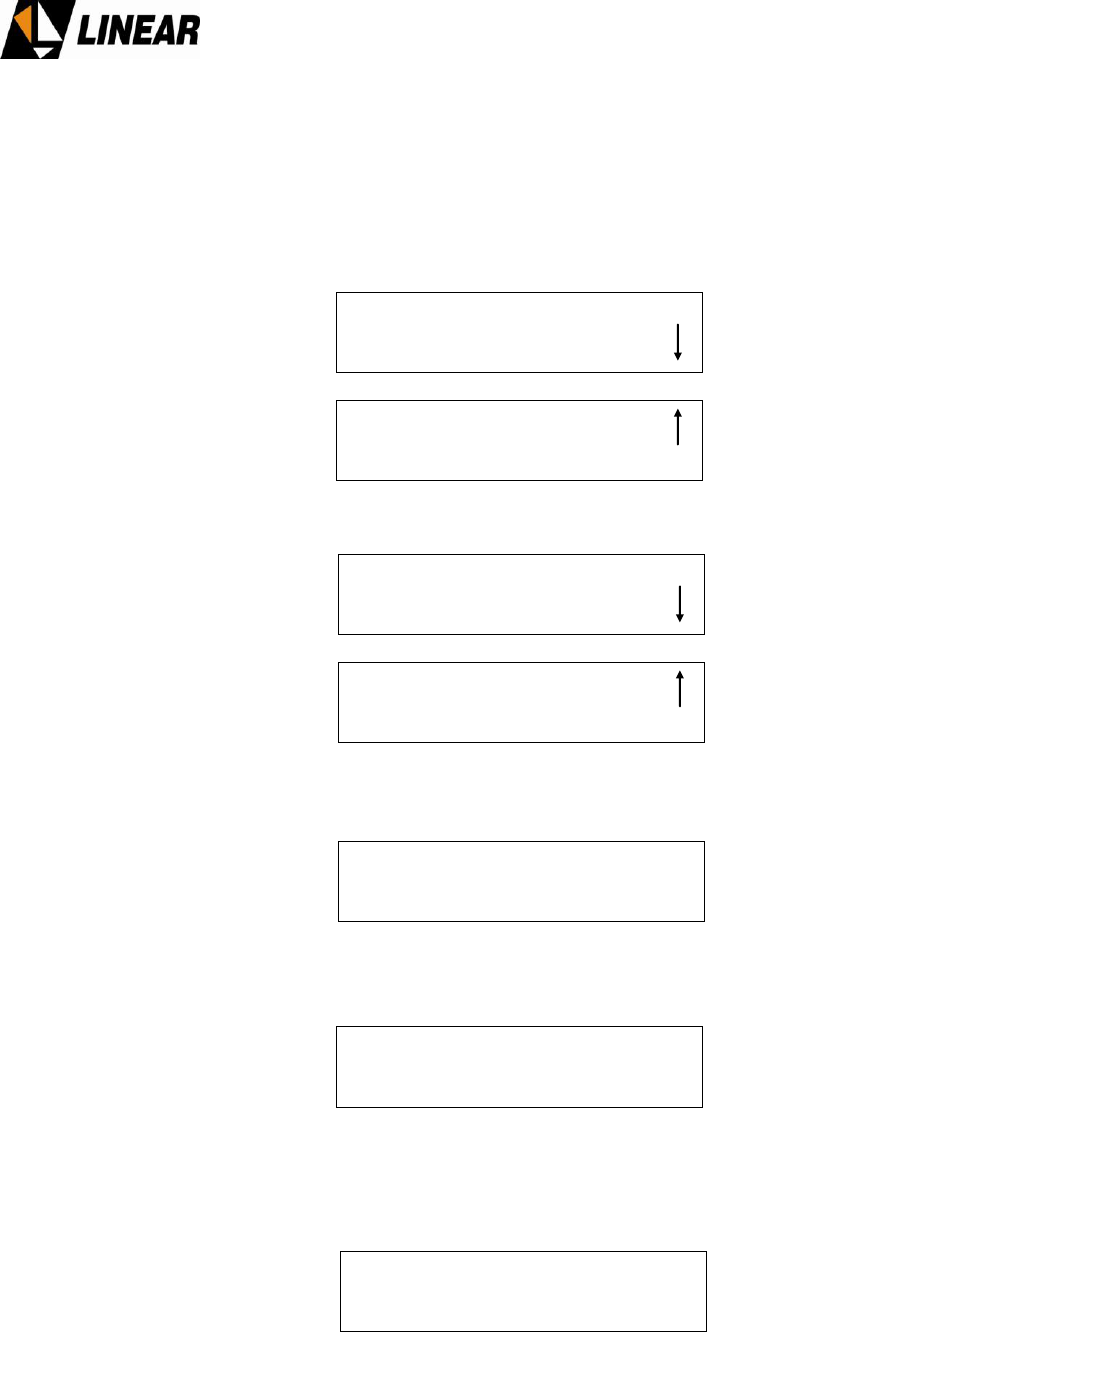
-> Alarm Log
Drawers Alarms
System Alarm/Log [3000]
Clear Alarm Log
Alarm Log: [3200]
-> ! 25/03/08 10:55:29 Log Cleared
-> ! 28/03/08 20:19:05 LO Lock Fail
-> # 28/03/08 20:22:43 LO Lock Fail
AT71K0-1 Transmitter Owner’s Manual
© Linear Industries, Inc. All Rights Reserved 24/34
5.1 Drawer Alarms
While in the System Alarm/Log screen it is possible to check and review all alarms, current
and past, on each one of RF power drawers. From the Main Menu screen select system
alarm/log, screen [3000].
Select System Alarms/Log and ENTER
Select Drawer Alarms and press ENTER.
Select Current Alarms and press ENTER to check current alarms
Use the keys (4) or (2) to select one among many RF power drawers.
Press key ESC to return to the previous screen, Drawer Alarms. On the screen [3320],
press the keys (4) or (2) to select the drawer.
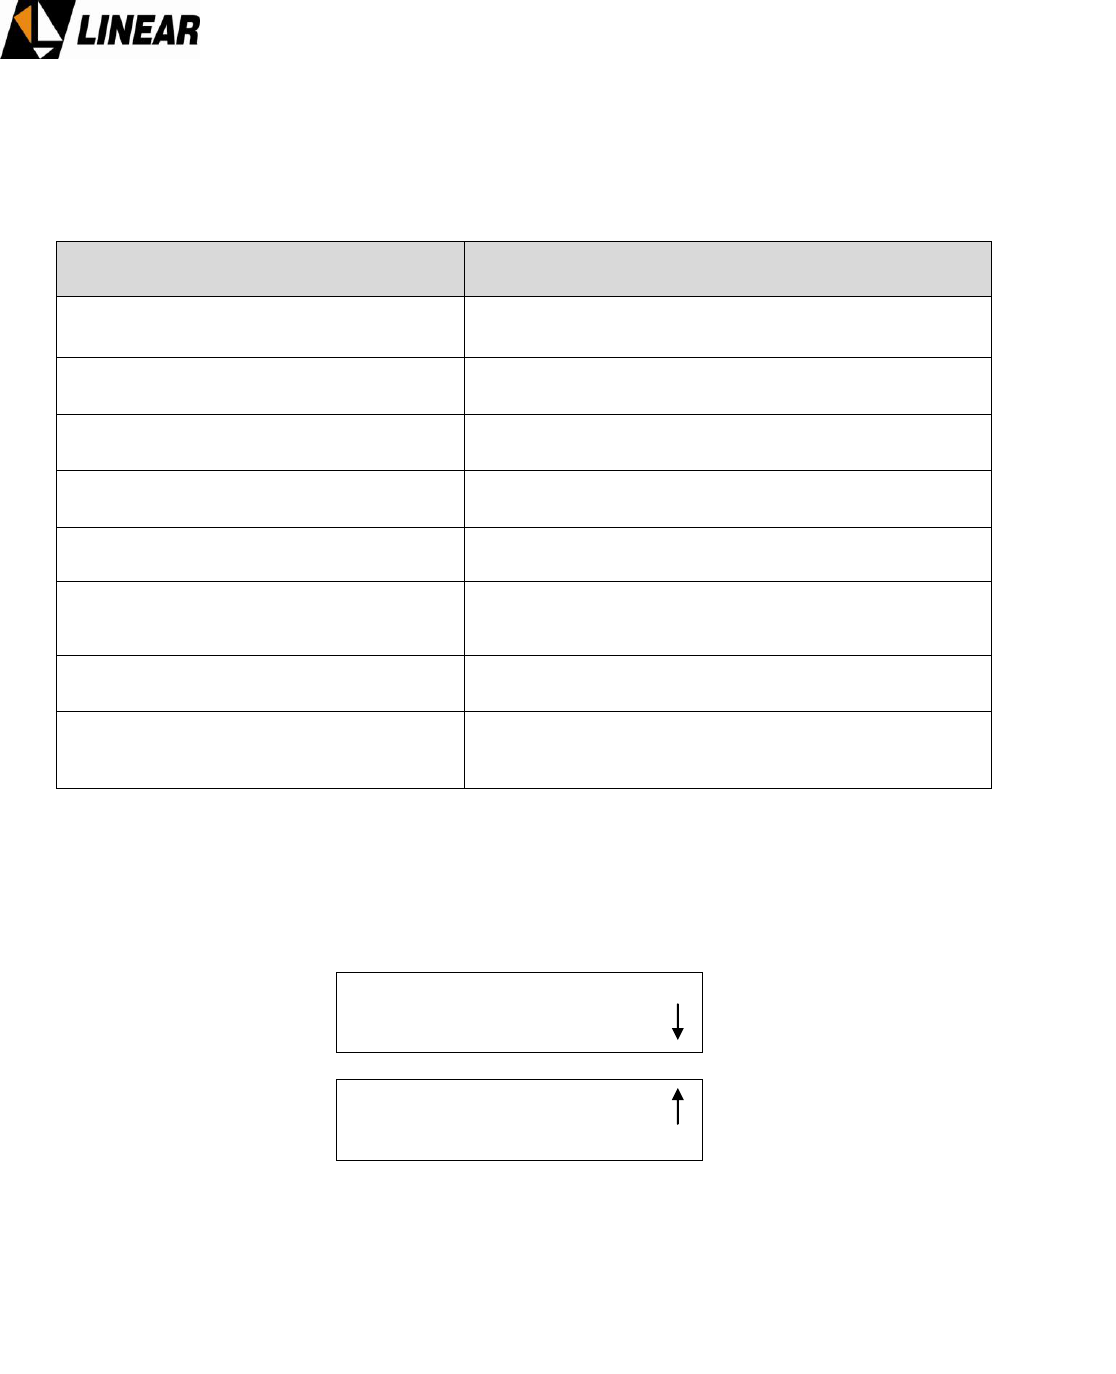
Main Menu : [0000]
Setup Menu
-> System Alarms/Log
Measurements
Remote Access
Current Alarms
Alarm Log
-> Drawers Alarms
System Alarm/Log [3000]
Clear Alarm Log
Drawer Alarms: [3300]
-> Current Alarms
Past Alarms
Drawer : <__/__> Current Alarms: [3310]
Alarm List Empty!
Drawer : <__/__> Past Alarms: [3320]
Alarm List Empty!
AT71K0-1 Transmitter Owner’s Manual
© Linear Industries, Inc. All Rights Reserved 25/34
6. Setup
The SETUP screens permits for selection and changes on the configuration and operational
parameters. The menu below profiles the possible operations under SETUP.
Items on the SETUP menu
Description
Power Setup
Program the RF output power level
Frequency Setup
Program the RF UHF Channel of the transmitter
Image Frequency Suppression
TX Balance, eliminated the image frequencies
band
LO Leakage Suppression
Reduces the LO undesirable spurious
Pre-Correction
Enable and Disable the pre-correction circuitry
Pilot Level
Adjust the pilot level [ -2.048 ~ +511]
Time and Date Setup
Set time and date
Password Setup
Password configuration
6.1 Output Power Setup
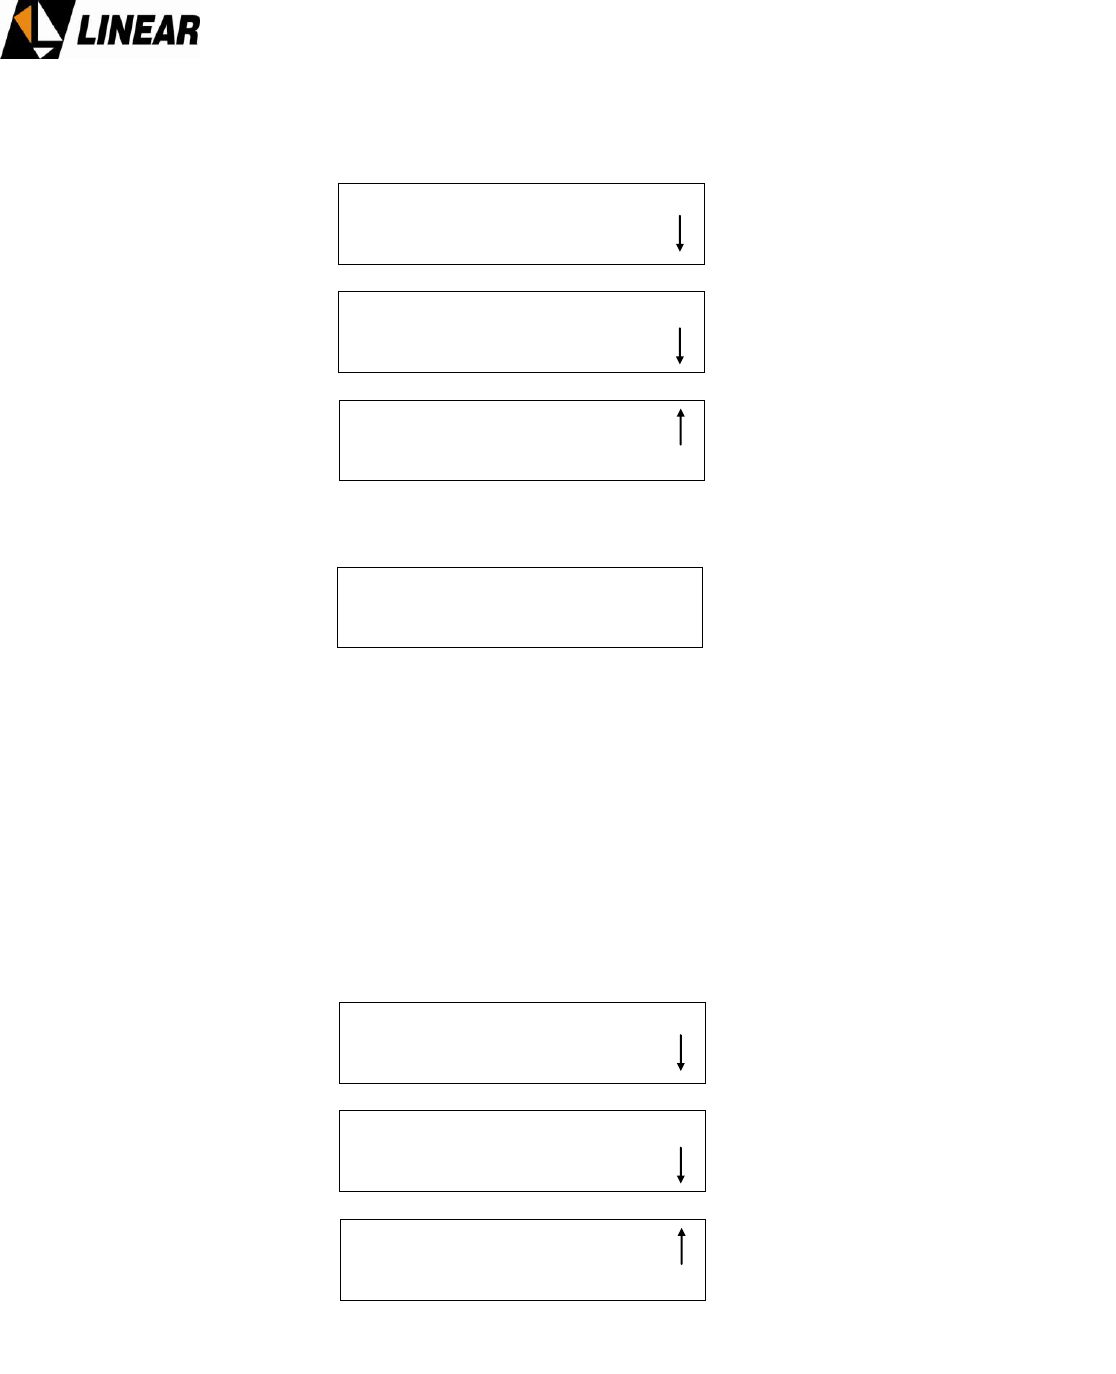
Starting from the Main Menu
Main Menu : [0000]
-> Setup Menu
System Alarms/Log
Measurements
Remote Access
AT71K0-1 Transmitter Owner’s Manual
© Linear Industries, Inc. All Rights Reserved 26/34
Select Setup Menu and press ENTER
Select Power Setup and press ENTER
To reach the desirable output power level, press the key (2), to increase the power or (4)
to decrease the power. Once the desirable power level is adjusted, press ENTER for software
acknowledgement, otherwise the change will not become effective.
6.2 Channel Frequency Setup
The channel frequency change is illustrated here, but it is a parameter that cannot be
changed by the operator in the field. It is factory adjusted only. Starting at the setup menu
screen [1000]:
Select Frequency Setup and press ENTER
Setup Menu : [1000]
-> Power Setup
Image Frequency Suppression
Frequency Setup
LO Leakage Suppression
Pre-Correction
Modulation Settings
Time and Date Setup
Password Setup
Transmitter Setup
Output: 1300 [W]
Program: 1300 [W]
Power Setup :
[1100]
Setup Menu : [1000]
Power Setup
Image Frequency Suppression
-> Frequency Setup
LO Leakage Suppression
Pre-Correction
Modulation Settings
Time and Date Setup
Password Setup
Transmitter Setup

AT71K0-1 Transmitter Owner’s Manual
© Linear Industries, Inc. All Rights Reserved 27/34
Select Channel and press ENTER
Press ESC to return to Frequency Setup.
Select Offset and press ENTER
The offset can be configured within 1Hz steps, in a ± 65536 Hz scale.
Press ESC to return to the Frequency Setup screen.
Select Model and press ENTER
Press ESC to return to the Setup Menu
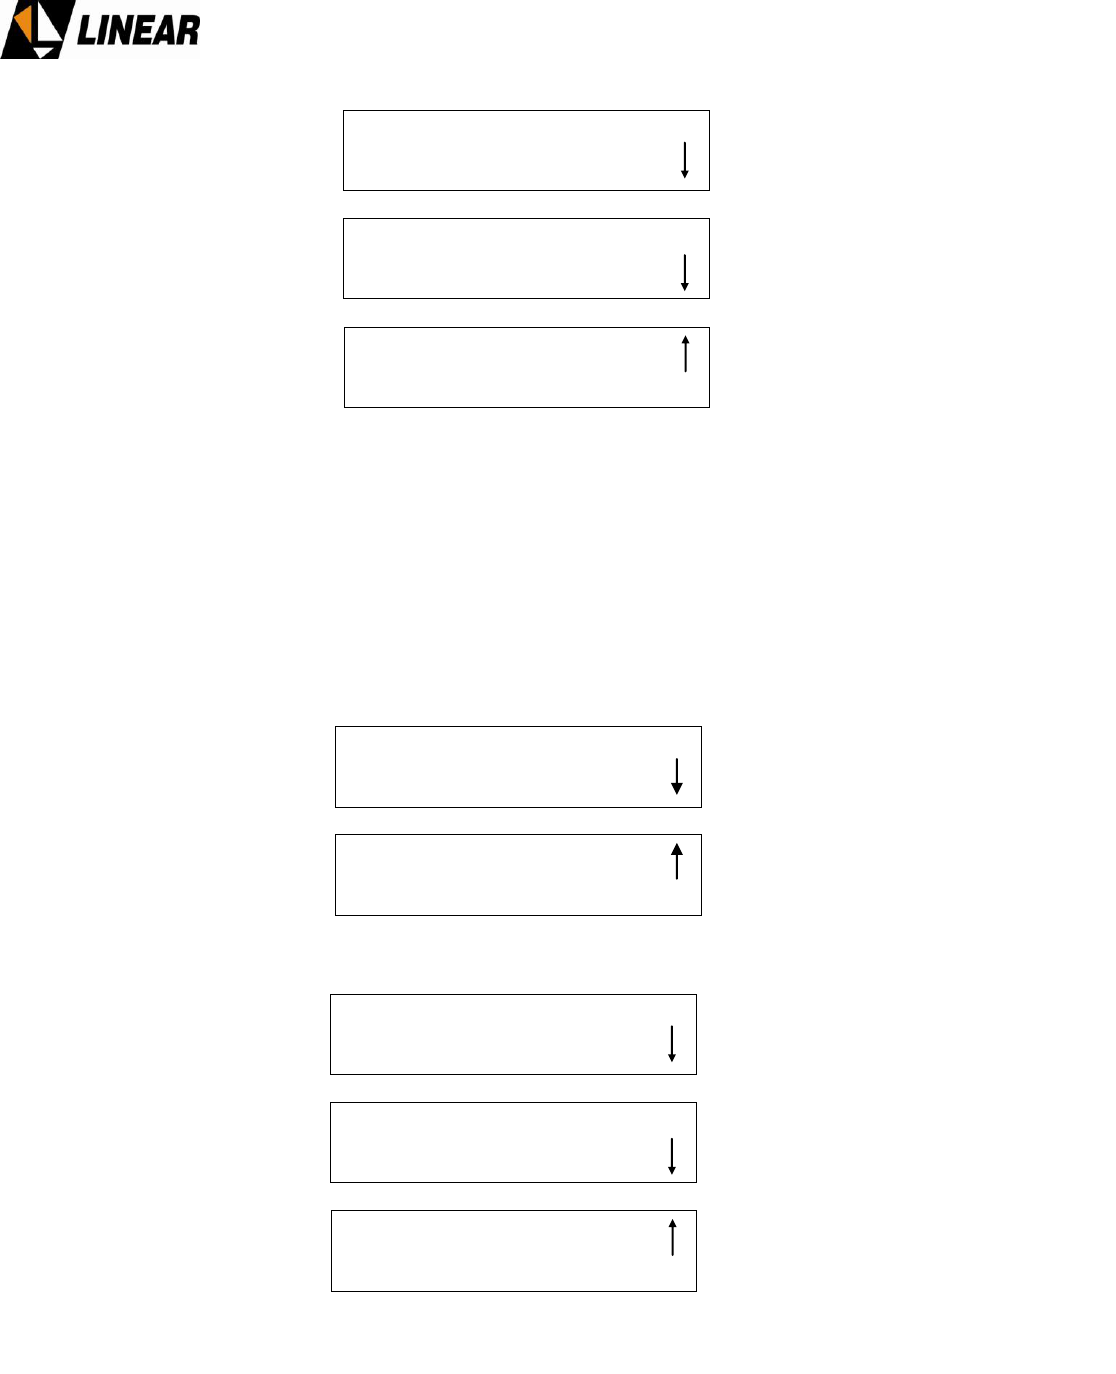
Frequency Setup : [1200]
-> Channel :
Offset
Model
Channel Setup : [1210]
Channel : ___ Offset: + __.___ kHz
Center Frequency: ____ .______ MHz
Pilot Frequency : ____ .______ MHz
Frequency Setup : [1200]
Channel :
-> Offset
Model
Frequency Offset Adjustment: [1220]
Frequency Offset: +__.____kHz
Frequency Setup : [1200]
Channel :
Offset
-> Model
Transmitter Model Selection: [1230]
Transmitter Model: AT7xxx
AT71K0-1 Transmitter Owner’s Manual
© Linear Industries, Inc. All Rights Reserved 28/34
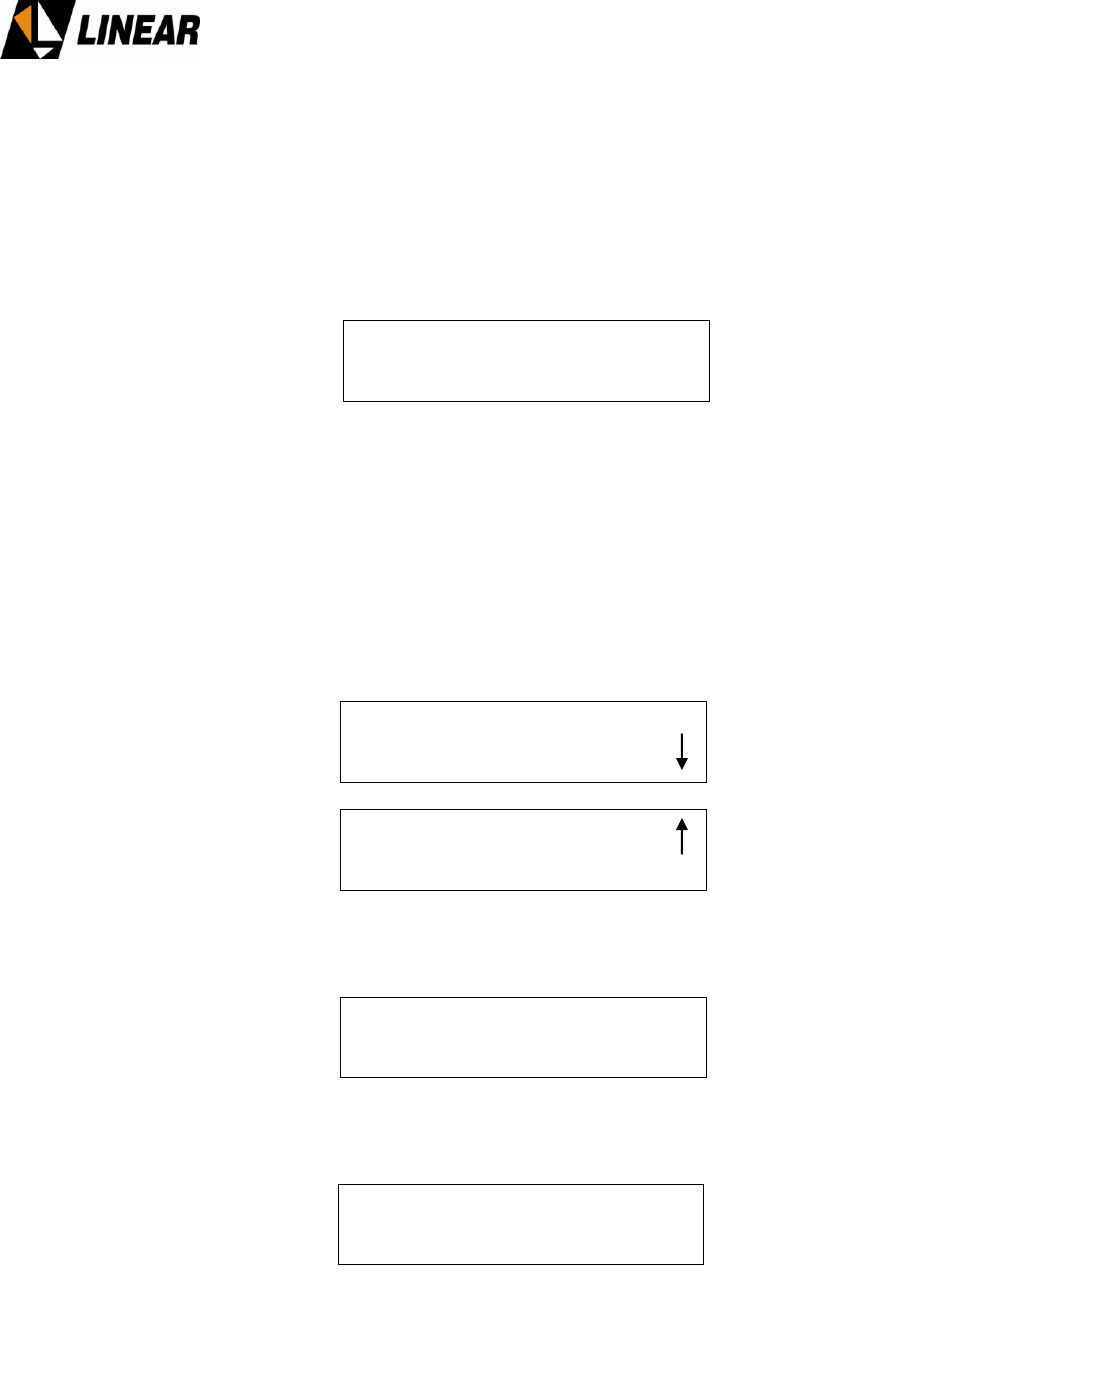
Select Image Frequency Suppression and press ENTER.
6.3 Image Frequency Suppression
This software feature adjusts numerical values related with the amplitude and phase
optimized for maximum image frequency suppression on the superior side band spectrum
region. An RF sample for monitoring purposes must be taken before the output mask filter.
The amplitude values are shown in dB, and the phase related values ar shown in degress.
Press ESC to return to the Setup Menu.
Select LO Leakage Suppression and press ENTER.
Image Frequency Suppression: [1300]
-> I Amplitude : [dB]
I Phase : ◦
Q Amplitude: [dB]
Q Phase : ◦
Setup Menu : [1000]
Power Setup
Image Frequency Suppression
Frequency Setup
-> LO Leakage Suppression
Pre-Correction
Modulation Settings
Time and Date Setup
Password Setup
Transmitter Setup
Setup Menu : [1000]
Power Setup
-> Image Frequency Suppression
Frequency Setup
LO Leakage Suppression
Pre-Correction
Modulation Settings
Time and Date Setup
Password Setup
Transmitter Setup
AT71K0-1 Transmitter Owner’s Manual
© Linear Industries, Inc. All Rights Reserved 29/34
7.4 LO Leakage Suppression
An RF sample for monitoring purposes must be taken before the output mask filter. An ideal
voltage in the range of –60 [mV] and +60 [mV] should be sought, and will cancel the LO
leakage for the main RF amplifiers
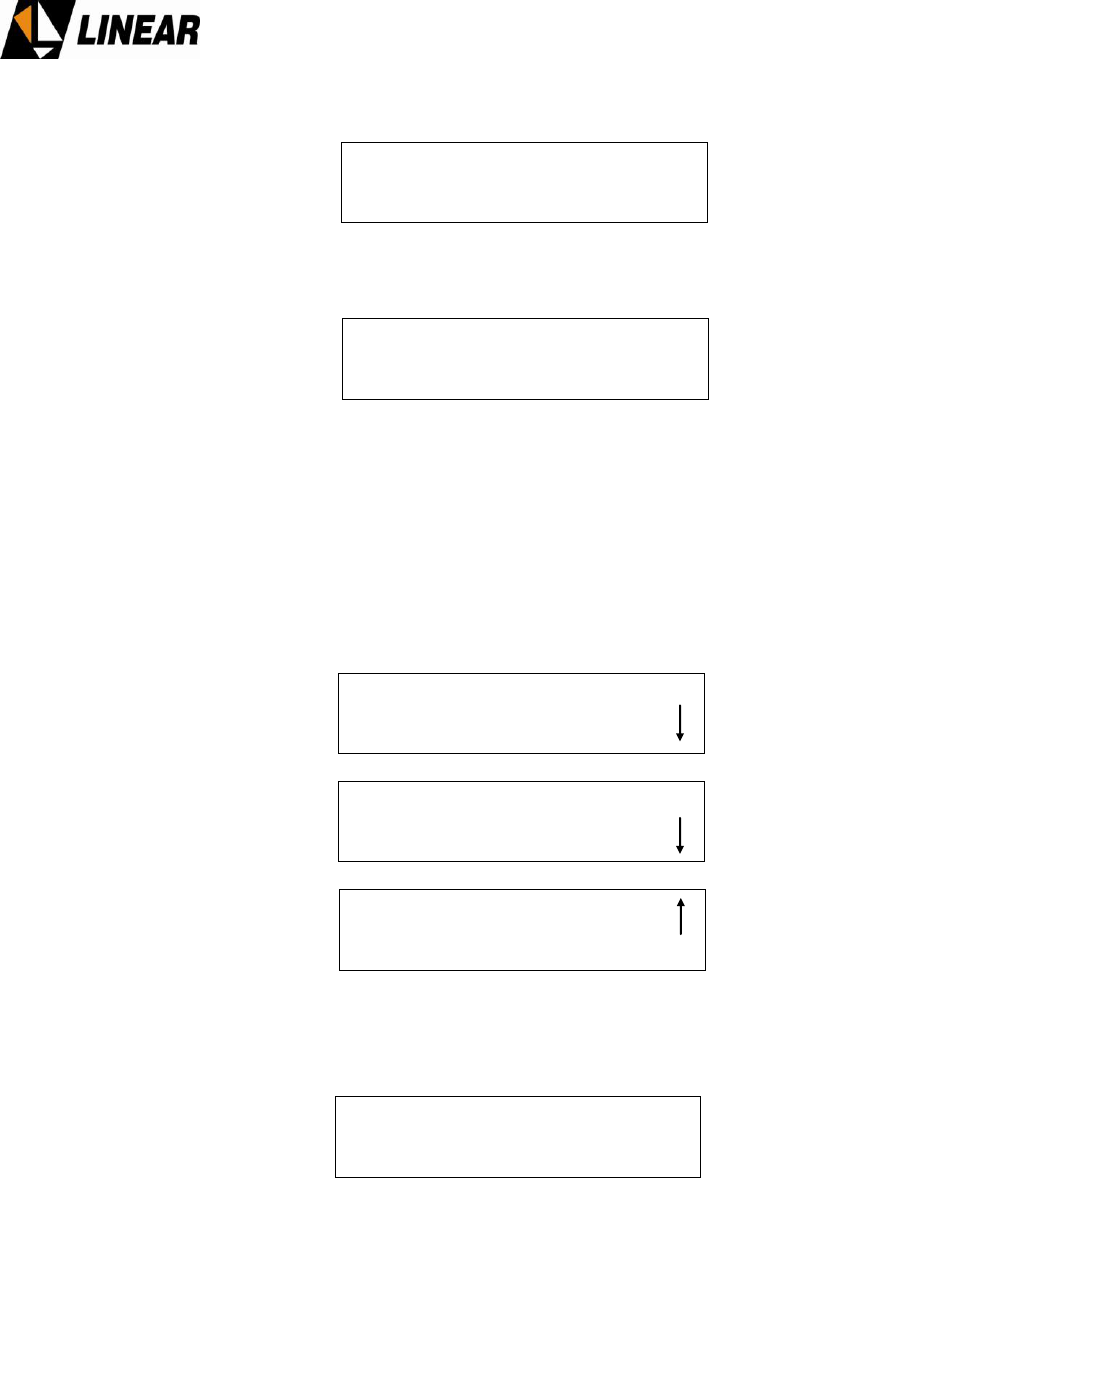
Using the keys, it’s possible to activate or deactivate the linear and non-linear pre-correction.
ON: Activate Pre-correction
OFF: Deactivate Pre-correction
7.5 Pre-correction adjustment
Press ESC to return to the Setup Menu.
Select Pre-Correction and press ENTER
Select Linear and press ENTER
Press ESC to return to Pre-correction Setup.
LO Leakage Suppression: [1400]
-> I Offset : [mV]
Q Offset: [mV]
Setup Menu : [1000]
Power Setup
Image Frequency Suppression
Channel Setup
LO Leakage Suppression
-> Pre-Correction
Pilot Level
Time and Date Setup
Pre-Correction Setup: [1500]
-> Linear
Non-Linear
Linear Pre-Correction: [1510]
Linear Pre-correction: on/off
AT71K0-1 Transmitter Owner’s Manual
© Linear Industries, Inc. All Rights Reserved 30/34
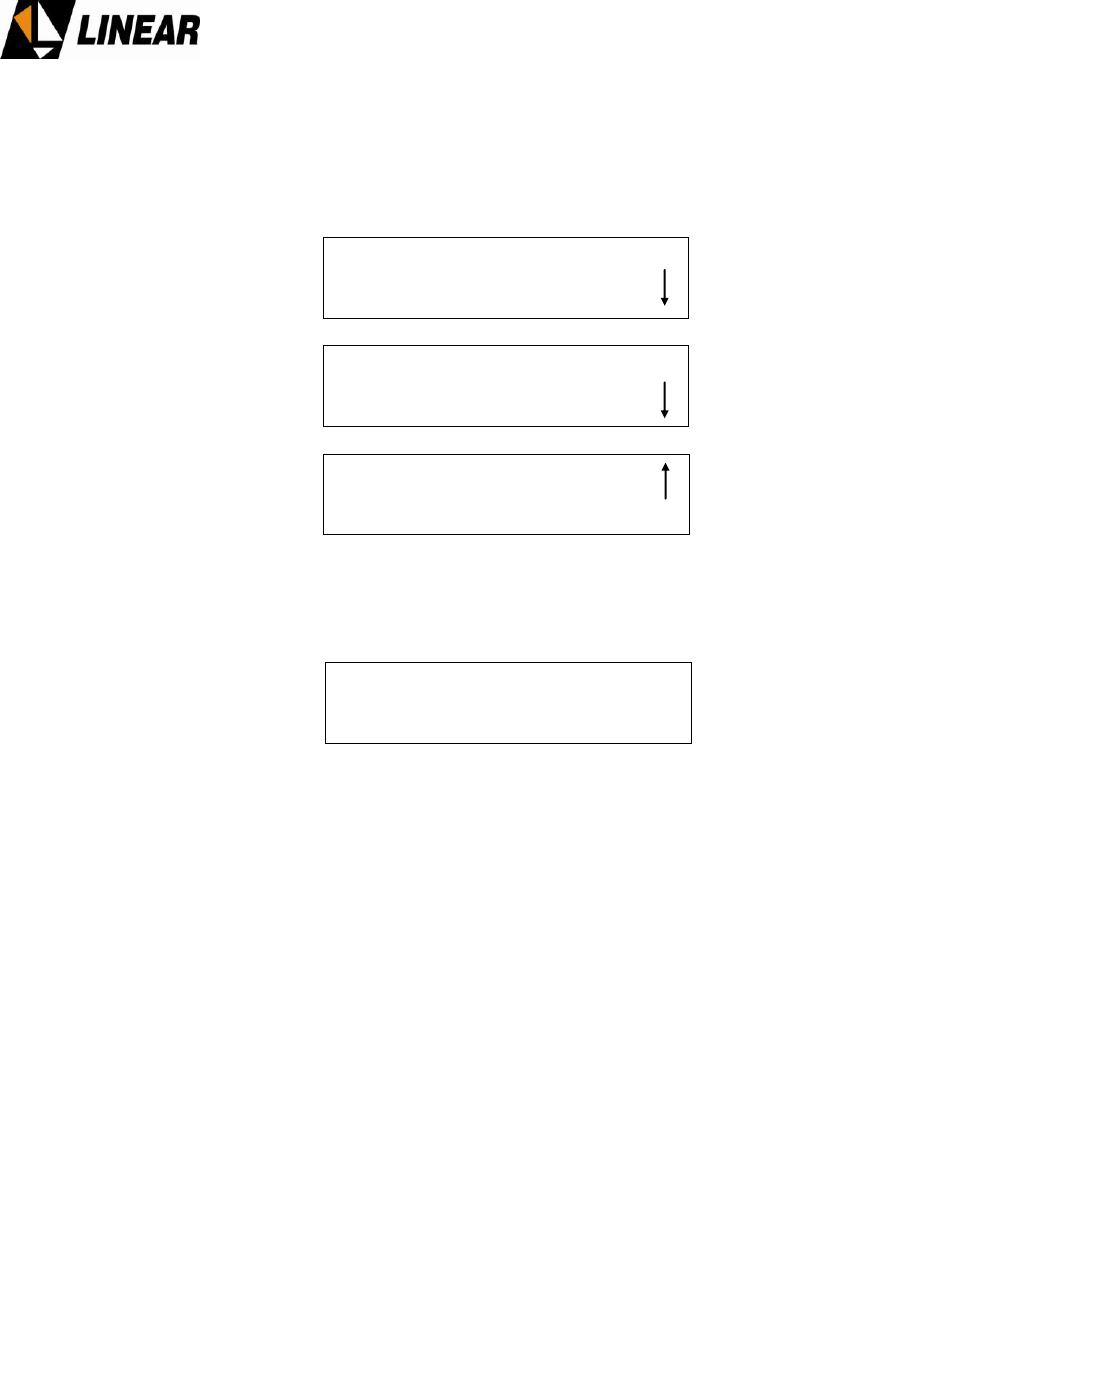
Select Non-Linear and press ENTER
The scale listed on the screen above, is related with how intense the pre-correction will act
over the ATSC signal on the modulator.
7.6 Modulation Settings
On this screen option it’s possible to turn the modulation process on and off. It is also possible
to adjust the pilot level rating from -2048 to +511. Press ESC up to the SETUP MENU screen.
Select Modulation Settings and press ENTER.
Pre-Correction Setup: [1500]
Linear
-> Non-Linear
Non-Linear Pre-Correction: [1520]
-> Non-Linear Pre-correction: on/off
Scale: -300 ~ +300
Setup Menu : [1000]
Power Setup
Image Frequency Suppression
Frequency Setup
LO Leakage Suppression
Pre-Correction
-> Modulation Settings
Time and Date Setup
Password Setup
Transmitter Setup
Modulation Settings : [1600]
Modulation : on/off
Pilot Level offset : +0000
(-2.048 to 511)
AT71K0-1 Transmitter Owner’s Manual
© Linear Industries, Inc. All Rights Reserved 31/34
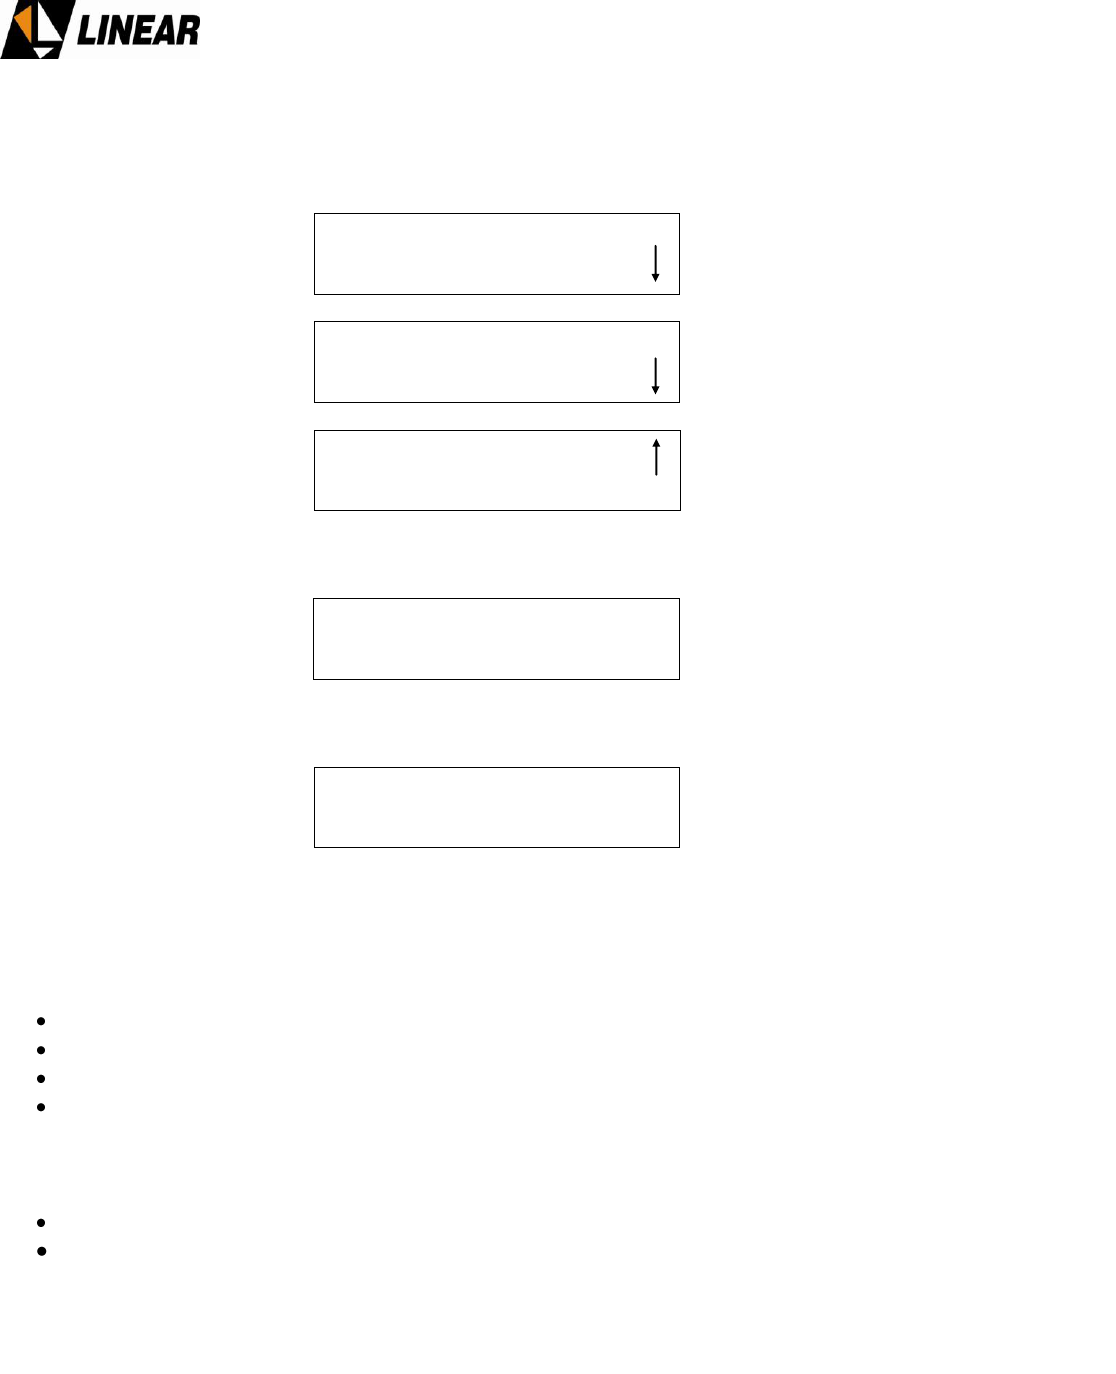
7.7 Time and date configuration
Press ESC up to Setup Menu screen.
Select Time and Date Setup and press ENTER
To program the date and time, use keys 2 and 4.To change between the parameters, use
keys 1 and 3.
7.8 Password Setup
Once a password is composed (by four numbers) it will become the set password for the
equipment. Please be certain to capture and store your password in a safe place.
To set the password, use the keys 2 and 4 to move the arrow head under each one of the 4
password positions. The 1 and 3 keys increase or decrease the numerical value of the each
position. Once a password is selected the screen will return to the main menu screen. Please
follow the sequence below for a complete understanding of the password setup process.
Setup Menu : [1000]
Power Setup
Image Frequency Suppression
Frequency Setup
LO Leakage Suppression
Pre-Correction
Modulation Settings
-> Time and Date Setup
Password Setup
Transmitter Setup
Time and Date Setup: [1700]
Time: HH:MM Date: 25/02/11 DD/MM/YY
AT71K0-1 Transmitter Owner’s Manual
© Linear Industries, Inc. All Rights Reserved 32/34
Press ESC key up to activate the SETUP MENU screen:
Access to the Password Setup
To enable the password or set a new one, select Enable / choose new password.
8. Remote system supervision (Tele-supervision)
Each parameter associated with the transmitter such us:
RF Power Level
Power Supply voltage readings
Alarms, and
Other functional parameters
…can be monitored in two possible ways:
Via Front Panel – Local access via LCD screen and keypad (as profiled in this section).
Using a PC local or remote access via Ethernet.
It is possible to configure, alter and change functions and monitor each of their performances.
Setup Menu : [1000]
Power Setup
Image Frequency Suppression
Frequency Setup
LO Leakage Suppression
Pre-Correction
Modulation Settings
Time and Date Setup
-> Password Setup
Transmitter Setup
Password Setup: [1800]
-> Enable / choose new password
Disable password
New Password: [1810]
0 0 0 0
Write new password
AT71K0-1 Transmitter Owner’s Manual
© Linear Industries, Inc. All Rights Reserved 33/34
8.1 IP Configuration
Start from the Main Menu
Select Remote Access and press ENTER
Select IP Address and press ENTER.
Navigate and configure the IP by using the keys 1 or 3 and 2 or 4.
8.2 Mask Configuration
Press ESC up to the Remote Access screen
Select Subnetwork Mask and press ENTER
Configure the Mask using the keys 1 or 3 and 2 or 4.
Main Menu: [0000]
Setup Menu
System Alarms/Log
Measurements
-> Remote Access
Remote Access: [4000]
-> IP Address
Subnetwork Mask
Gateway
IP Address: [4100]
192.168.100.018
Remote Access: 4000]
IP Address
-> Subnetwork Mask
Gateway
Subnetwork Mask: [4200]
192.168.100.018

AT71K0-1 Transmitter Owner’s Manual
© Linear Industries, Inc. All Rights Reserved 34/34
8.3 Gateway Configuration
Press ESC up to the Remote Access screen
Access the Gateway and press ENTER
Configure the gateway address using 1 or 3 and 2 or 4.
Remote Access: [4000]
IP Address
Subnetwork Mask
-> Gateway
Gateway: [4300]
[4300]
192.168.100.018