Hobbico CH22-27 MICRO ULTRIX BIPLANE User Manual
Hobbico Inc MICRO ULTRIX BIPLANE Users Manual
Hobbico >
Users Manual

Your MICRO ULTRIX™Biplane is not a toy, but
rather a sophisticated, working model that functions
very much like an actual airplane. Because of its
realistic performance, the model, if not assembled
and operated correctly, could possibly cause injury
to yourself and spectators or damage property.
We highly recommend that you get experienced,
knowledgeable help with assembly and during your
first flights, to make your R/C modeling experience
totally enjoyable. You’ll learn faster and avoid risking
your model before you’re truly ready to solo. Your
local hobby shop has information about flying clubs
in your area whose membership includes qualified
instructors. You can also contact the national
Academy of Model Aeronautics (AMA), which has
more than 2,500 chartered clubs across the country.
Instructor training programs and insured newcomer
training are available through any one of these clubs.
Contact the AMA at the address or toll-free phone
number below.
Academy of Model Aeronautics
5151 East Memorial Drive
Muncie, IN 47302
(800) 435-9262
Fax: (765) 741-0057
or via the internet at: www.modelaircraft.org
1. Do not alter or modify the model. If you make any
modifications, you will void your warranty.
2. Test the operation of the model before each flight
to ensure that all equipment is operating properly
and that the model remains structurally sound.
3. Fly only on calm days (with wind speeds less
than 3 mph) and in large open areas free of trees,
people, buildings or any other obstacles.
The R/C model hobby becomes more and more
enjoyable as your experience grows. Your chances
for success and graduation to higher levels are very
good if you take your time and follow the flying
instructions carefully and completely. We hope you
enjoy flying your MICRO ULTRIX Biplane.
Electronic Control Unit: This unit controls the
motors. Also, it monitors the battery voltage and
turns off the motors when the voltage gets low. That
way there will be enough battery power to operate
the motors for steering during the landing.
Motors: The motors rotate the props to provide thrust.
NiMH Battery: Rechargeable batteries which are
used to power the airplane.
Transmitter (TX): This is the hand-held unit that
sends the signal to the receiver. As you move the
sticks on the transmitter, the motors in the airplane
will react accordingly.
GLOSSARY
PRECAUTIONS
PROTECT YOUR MODEL, YOURSELF
AND OTHERS.
FOLLOW THIS IMPORTANT
SAFETY PRECAUTION
2
Welcome to the world of R/C aero modeling.You
will find your new hobby to be exciting, very
interesting and most of all, a lot of fun. You have
purchased, quite possibly, the best flying, the
most reliable and the easiest flying R/C airplane
available today. Be sure to follow the written
instructions completely and in detail. Doing this
will assure you of a successful first flight and
many continued hours of enjoyment from your
new R/C hobby.
Caution: Do not use rechargeable (NiCd) batteries
.
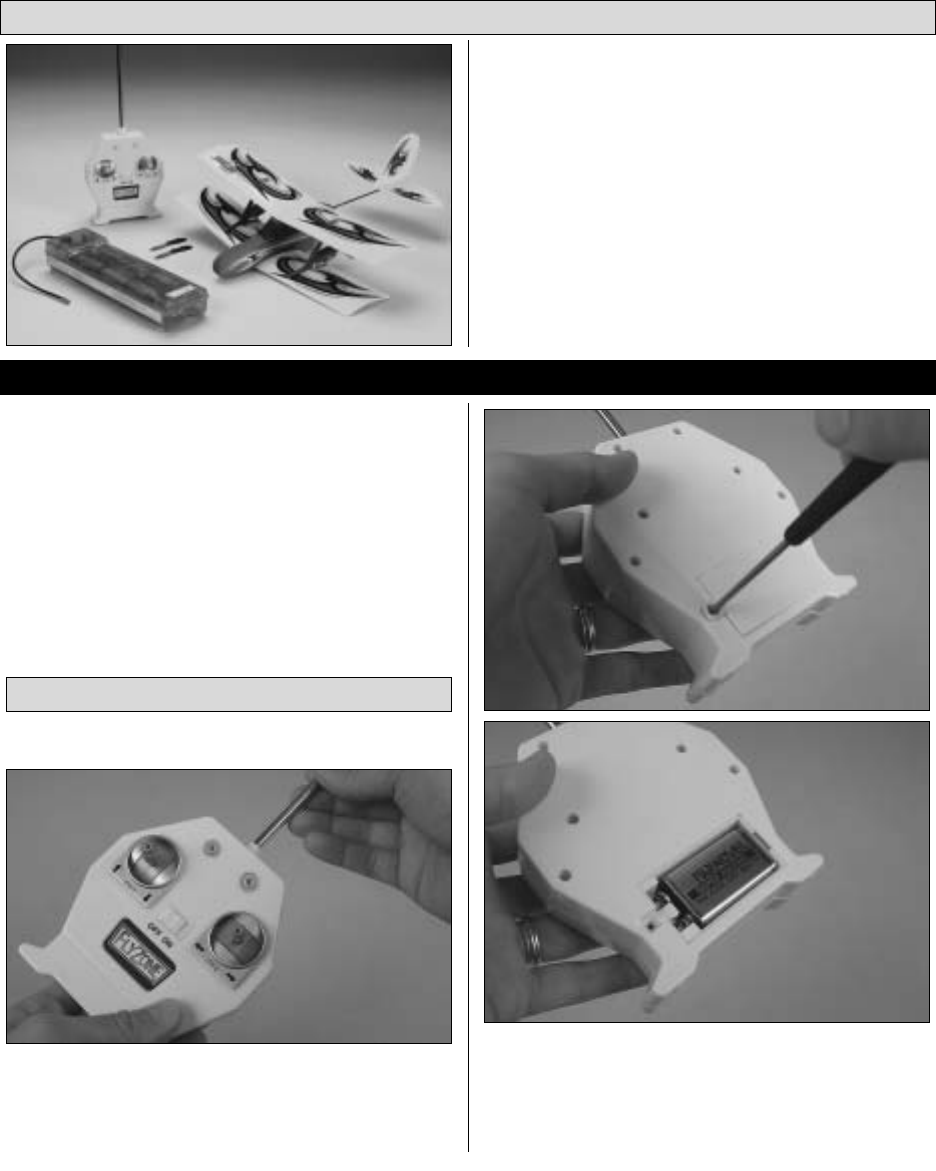
❏
1. Place the transmitter antenna into the top of
the transmitter case as shown above. Tighten it
down “clockwise” until it has a snug fit. Do not
overtighten the antenna.
❏
2.The transmitter that controls your airplane requires
one alkaline “9V” battery. To install the battery, turn over
the transmitter, remove the battery hatch using a
Phillips screwdriver and install the battery. Be sure to
follow the diagram inside the battery compartment.
PREPARE THE TRANSMITTER
3
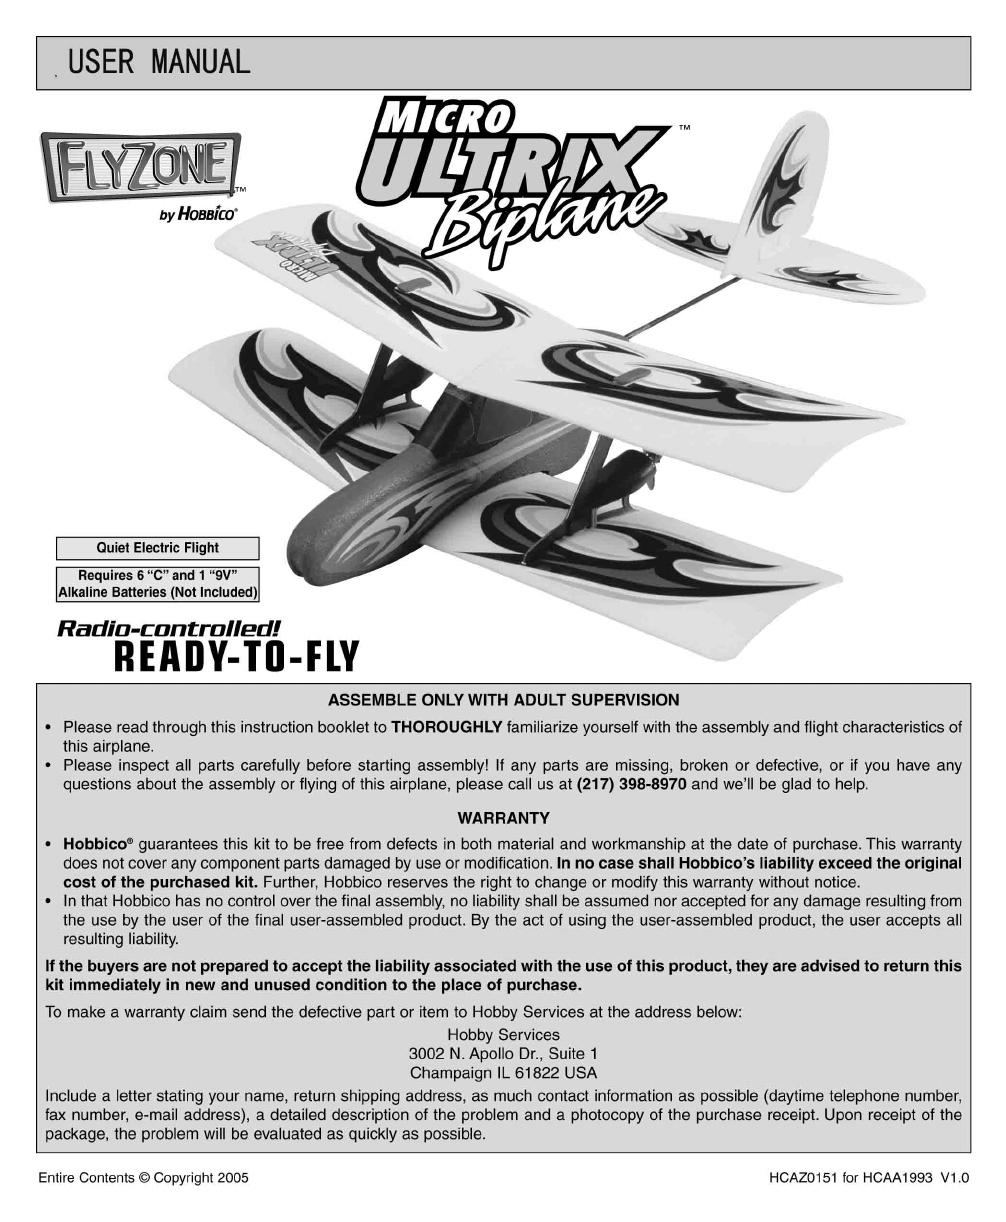
UNPACKING THE BOX
Check the parts against the list below. If any parts are
damaged or missing, please call us at: (217) 398-8970.
Transmitter Antenna (1)
Items not shown:
Transmitter (1) Instruction Manual (1)
Airplane (1)
Charger (1)
Extra Propellers (2)
PARTS AND HARDWARE
LET’S GET STARTED
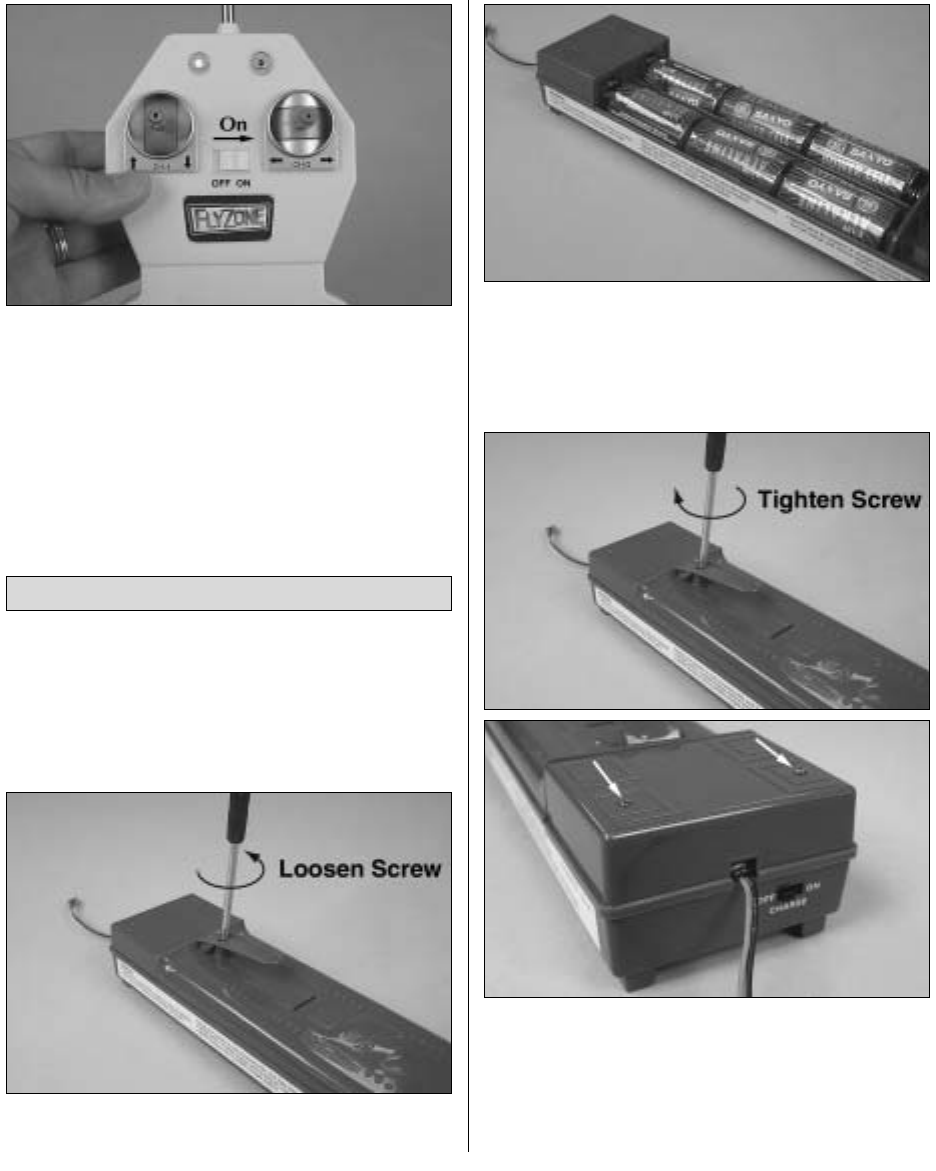
❏
3. Reinstall the battery hatch, switch on the
transmitter and check the LEDs on the front of the
transmitter. If the green light is on, it is safe to fly. If
not, you need to install fresh batteries. Also check to
make sure that the batteries are installed correctly.
CAUTION:
Do not use rechargeable (NiCd) batteries.
Do not mix old and new batteries.
Do not mix alkaline, standard (carbon-zinc) or
rechargeable (NiCd) batteries.
❏
1. Remove the battery hatch from the charger by
removing the hatch screw with a Phillips screwdriver.
❏
2. Following the diagram in the charger, install six
“C” size batteries. Make sure the positive (+) and
negative (–) poles match up correctly with the
diagram molded inside the battery compartment.
❏
3. Reinstall the battery hatch by replacing the
screw and switch on the charger. If the red light is
flashing, the charger is ready to be used. If no lights
come on, check to make sure that the batteries are
installed correctly. If they are, you need to install
fresh batteries.
INSTALL BATTERIES IN THE CHARGER
4
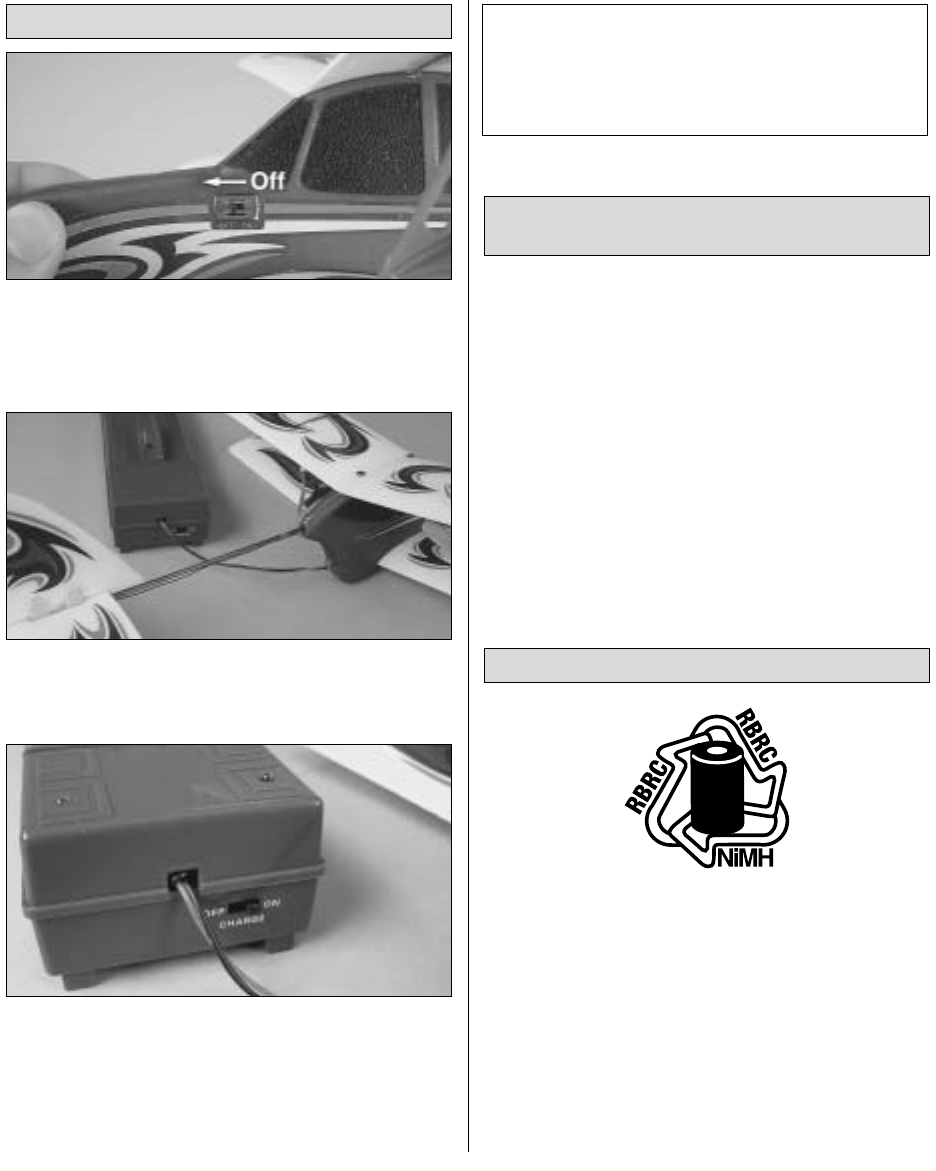
❏
1. Before operating your MICRO ULTRIX Biplane
you will need to charge the NiMH battery pack in the
airplane.To do so, make sure the airplane is switched
off (OFF is toward the front of the airplane).
❏
2. Turn on the charger. Plug the charger cable
into the charge socket on the airplane. The charger
will plug in only one way.
❏
3. Switch on the charger to begin charging. The
red LED will flash as long as the battery is charging.
Once the battery is charged, the red LED will turn
off and the green LED will turn solid. Be aware that
during the charging, the green LED will turn on
momentarily. Charging should take 5 to 10 minutes.
• Make sure the battery is fully discharged
before charging.
• Never leave a charging battery unattended.
• Never let the battery charge until it feels hot. A hot
battery is an overcharged battery. Only let the
battery get warm to the touch.
• A properly cared for battery pack will last a long
time. If the battery pack is continually overcharged
or charged at too high of a rate, the life of the
battery pack will be shortened.
ATTENTION: The product you have purchased is
powered by a rechargeable battery. At the end of its
useful life, under various state and local laws, it may
be illegal to dispose of this battery into the municipal
waste system. Check with your local solid waste
officials for details in your area for recycling options
or proper disposal.
This product contains a chemical known to the
State of California to cause cancer and birth
defects or other reproductive harm.
BATTERY RECYCLING
SAFETY PRECAUTIONS FOR
CHARGING BATTERIES
NOTE: DO NOT CHARGE THE AIRPLANE’S
BATTERY UNLESS IT HAS BEEN FULLY
DISCHARGED. To discharge the battery, turn
on the airplane and the radio and apply full
power until the propellers stop turning.
CHARGE THE MOTOR BATTERY
5

Before attempting to operate or fly your MICRO
ULTRIX Biplane, please make sure you fully
understand its operation outlined in this section.
Note: The following is a detailed description of
how you will control your MICRO ULTRIX
Biplane in flight. Please study it carefully so you
will become familiar with the operation of the
transmitter before you head for the flying site.
Your transmitter controls the height of the airplane
by operating both motors and the direction of the
plane by slowing down either the left or right motor.
❏
1. First extend the transmitter antenna. Then
switch on the transmitter and make sure the green
light is on.
❏
2. Make sure the airplane’s battery is charged.
❏
3. Move the switch located on the left side of the
fuselage backward to the “ON” position.
CAUTION: Stay clear of the propellers once the
airplane’s switch is turned on.
❏
4. Moving the left stick forward will cause both
motors to run at full power. At this setting, the plane
should climb at a 10-15° angle. NOTE: For most of
the flight, you will be pushing the stick forward.
❏
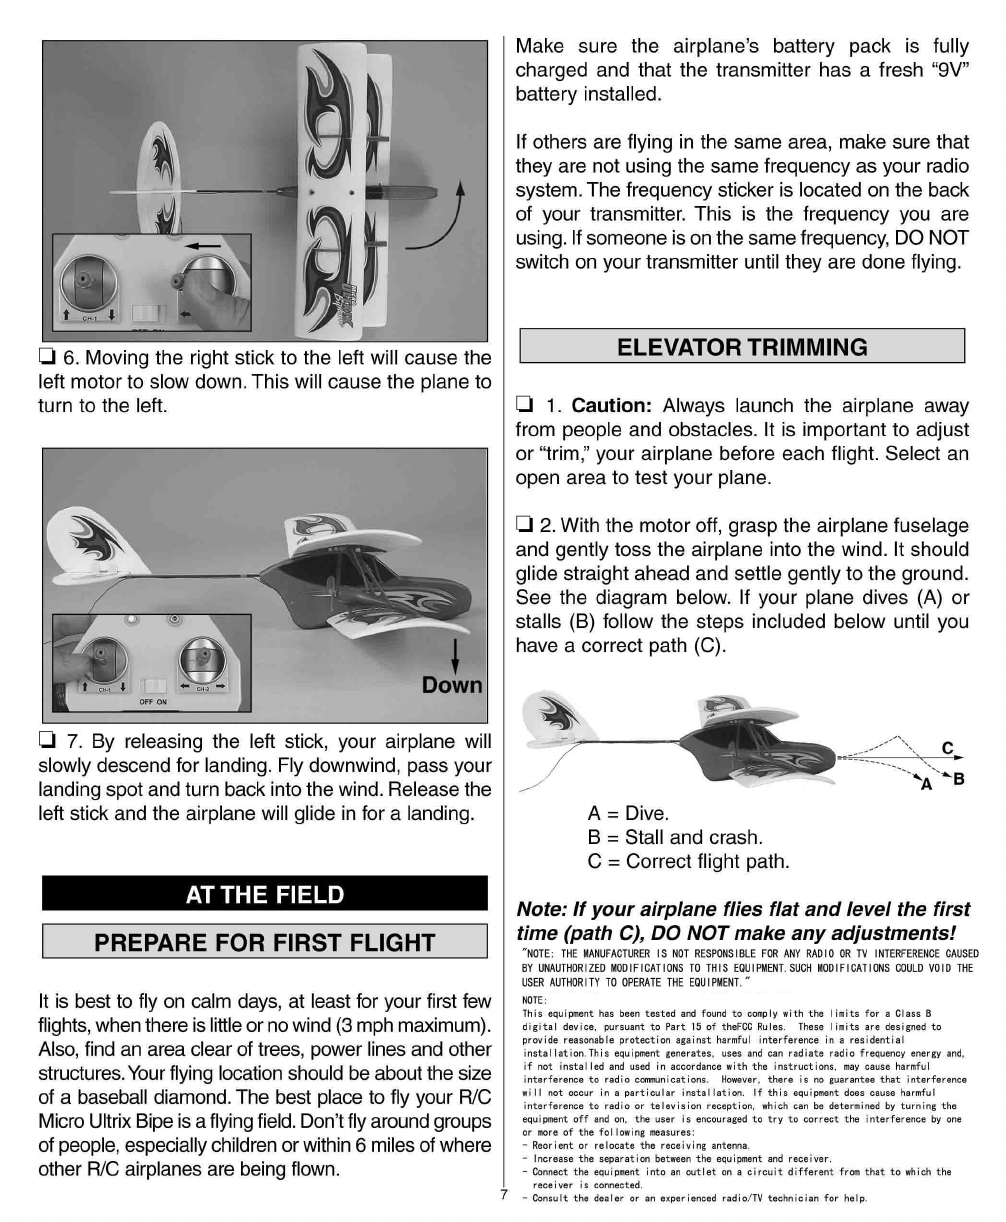
5. Moving the right stick to the right will cause the
right motor to slow down. This will cause the plane
to turn to the right.
HOW DOES THE MICRO ULTRIX
BIPLANE WORK?
BEFORE GOING TO THE FIELD
6
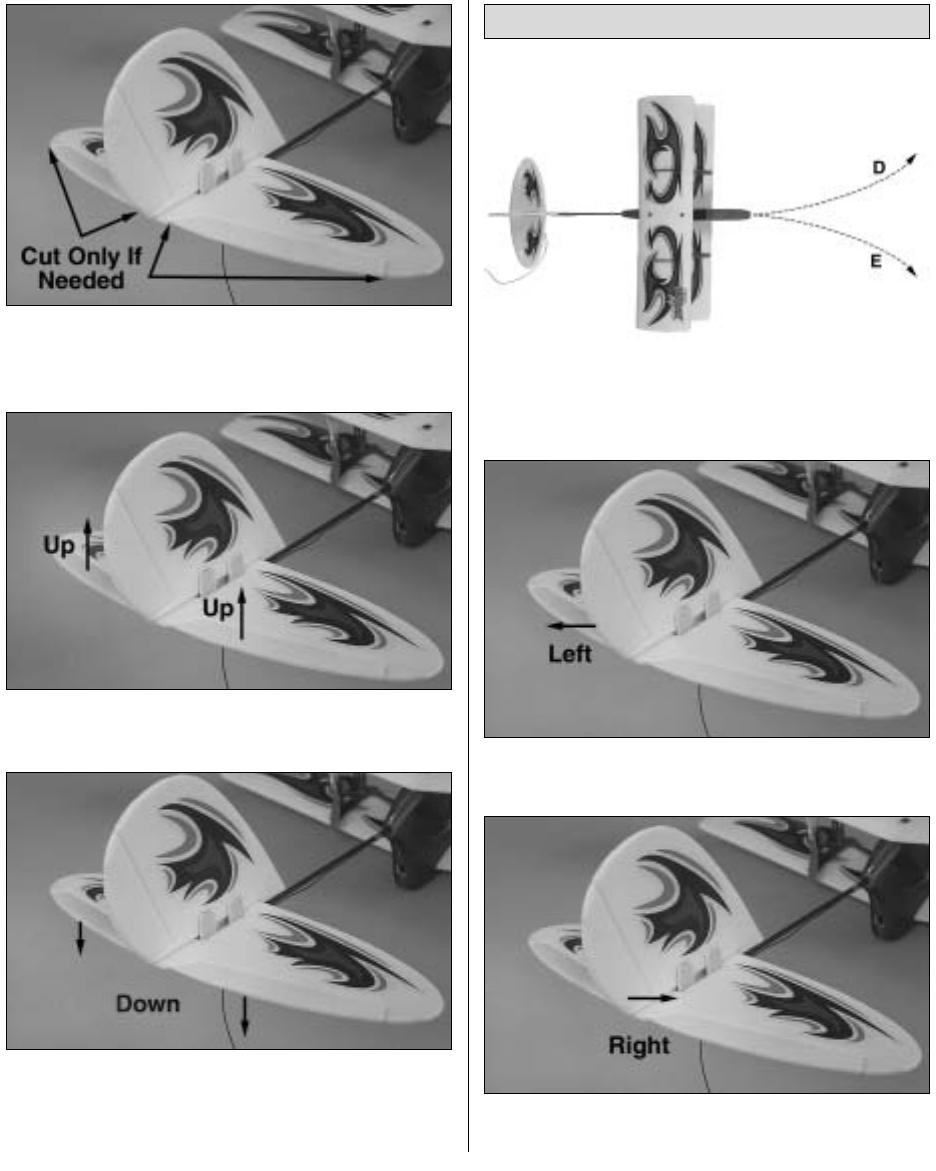
If you have an airplane that follows either path (A)
or (B), cut the sides of the elevators as shown in the
photo above.
If your airplane follows path (A), bend the elevator
tabs up.
If your airplane follows path (B), bend the elevator
tabs down.
❏
3. Repeat step 2 until your airplane follows path C.
D = Airplane turns left.
E = Airplane turns right.
If your airplane turns to the right (E) during glide
tests, bend the rudder to the left.
If your airplane turns to the left (D) during glide
tests, bend the rudder to the right.
RUDDER TRIMMING
8

Range check your radio before each flight. Switch
on the transmitter first and then the airplane. Have
a helper hold the airplane. With the transmitter
antenna collapsed, walk 50 feet away from the
airplane. Move both control sticks, checking that the
motors run and turn off following the control stick
movement. If you still have control over the airplane,
it is safe to extend the antenna and fly the airplane.
If you do not have control of the plane, make sure
the batteries in the transmitter are fresh and the
battery in the plane is charged. Also, make sure the
wire antenna is extending out the back of the plane.
Do not cut the antenna wire on the plane.
If you have never flown an R/C airplane before, we
recommend that you get help from an experienced
R/C pilot. Most R/C clubs have training programs
that will help you learn to fly quickly. If you cannot
find an experienced pilot to help you learn, the
following will help you get your airplane into the air.
1. First, turn your transmitter power switch “ON.”
This immediately puts you in control. Be sure to
extend your antenna completely.
2. Move the airplane’s switch to the “ON” position.
Caution: Stay clear of the propellers.
3. Have an assistant help with the launch. Move the
throttle stick (left) forward so that both motors are
running. Have your assistant launch the plane into
the wind.
4. Allow the airplane to climb at a 10-15° angle for a
few seconds before turning it. This will allow the
plane to gain altitude and air speed.
5. To turn the MICRO ULTRIX Biplane, move the
right stick to the left or right until the plane has
turned. When the MICRO ULTRIX Biplane is moving
away from you, moving the right stick to the left will
make your plane turn to the left. Moving the right
stick to the right will make the plane turn to the right.
6. When the plane is coming toward you, moving the
right stick left still causes the plane to turn left, but it
appears to turn to your right. In short, you have to
reverse the way you control the right stick. A good way
to familiarize yourself with the controls is when the
plane is coming toward you, turn your body so that you
are facing the same direction the plane is going,
looking over your shoulder at the plane. Now when you
move the right stick left the plane will go to your left.
7. Don’t let the airplane get too far away from you.
The farther away it is, the harder it is to see what the
plane is doing.
8. When learning to fly, it is best to keep the plane
high so that if you make a mistake, you have
enough altitude to correct the mistake.
It’s a known fact among fellow R/C pilots that your
airplane will land. It is up to you as to where and
how it lands.
1. The MICRO ULTRIX Biplane will fly for
approximately 3 to 5 minutes at full throttle on a fully
charged battery. For your first couple of flights we
recommend that you attempt to land before the
motors stop. This will allow enough power to abort
the landing and try again if you miss your landing
area. When the transmitter battery power is getting
low, the green light will turn OFF. Once the green light
is off, it is time to land your MICRO ULTRIX Biplane.
2. During your first flight, while at a high altitude,
turn the motors off and notice how the MICRO
ULTRIX Biplane reacts. This will give you an idea
how the plane will react during landing.
3. To land the MICRO ULTRIX Biplane, fly downwind
and a few feet past the landing area. Gently turn into
the wind and turn the motors off. The plane will start to
come down. If it appears that the MICRO ULTRIX
LANDING
FLYING THE MICRO ULTRIX BIPLANE
RANGE CHECK
9