Hobie Twist N Stow Rudder Users Manual And Replacement
Twist-n-Stow Rudder to the manual 93f55b47-b5c4-4364-bd21-af8d70b7d2ed
2015-02-09
: Hobie Hobie-Twist-N-Stow-Rudder-Users-Manual-565330 hobie-twist-n-stow-rudder-users-manual-565330 hobie pdf
Open the PDF directly: View PDF ![]() .
.
Page Count: 4
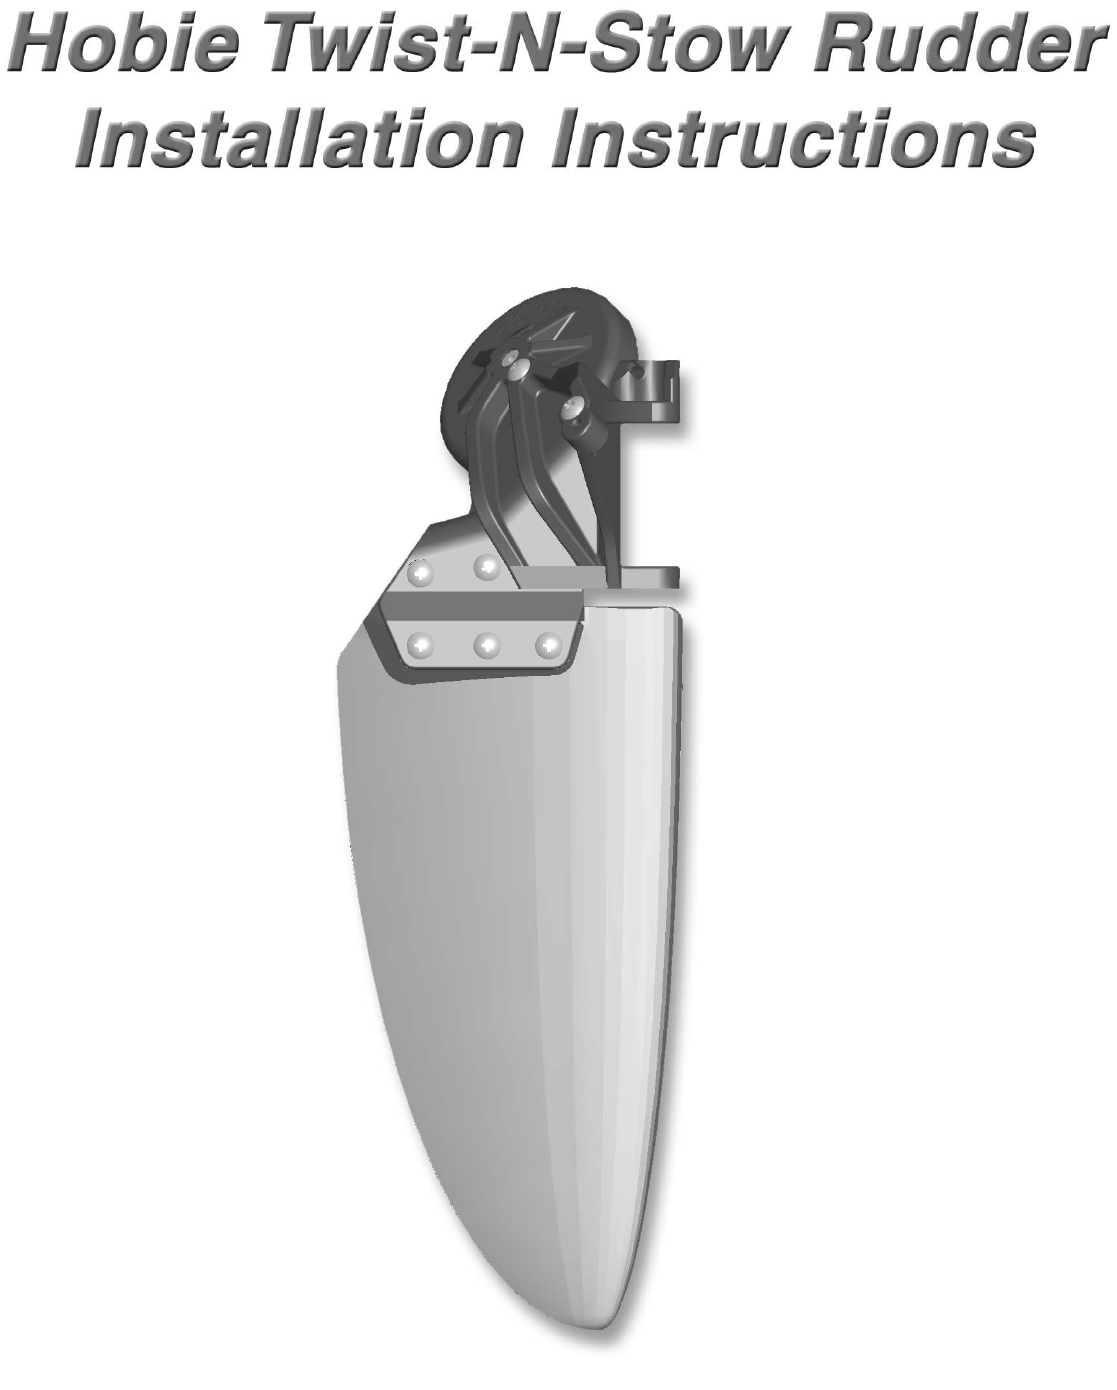
Twist and Stow Rudder Replacement
Use the following instructions to replace your twist and stow rudder. To remove the rudder that is cur-
rently on the boat, bend and pull the cotter pins that are at the bottom of the rudder pin and push the
pin out of the top. There are 4 Phillips head screws which are clamping down the steering and up/down
lines. Partially unscrew them to release the line. Once the lines are free from the rudder, tie a loose
knot at the ends to prevent them from getting pulled into the hull.
Rudder Installation
1. Place the new rudder over the mount at the end of the boat and slide
the rudder pin through to hold it in place. Slide the cotter pins through the
hole and twist them around the pin with a pair of needle nose pliers.
Up/Down Control Line Installation
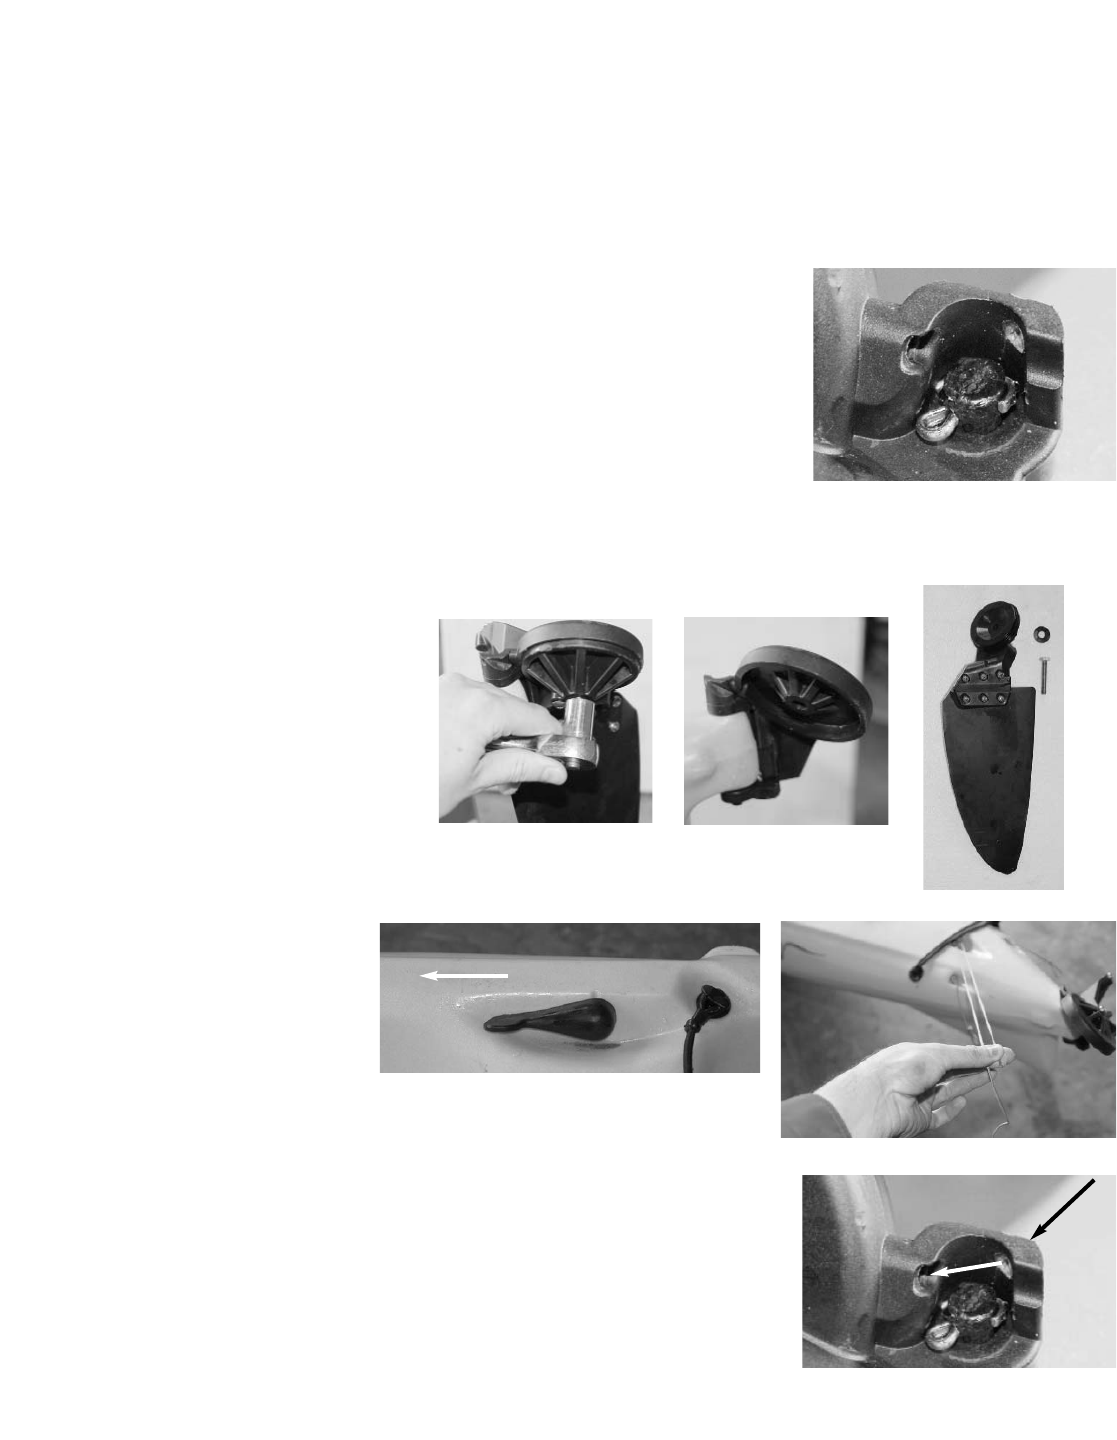
1. Now that the rudder is on the boat,
you need to disassemble the rudder
blade from the rudder housing. Using a
socket or wrench, unscrew the bolt that
is on the bottom of the rudder. When
the bolt is unthreaded, the rudder with
come off with the bolt and a small plas-
tic washer.
2. To make sure that you can tell
the difference between the up and
down line, put the up down control
handle in the forward position.
Grab a hold of the two up and
down control lines and pull them
taught. You will notice that one line is longer than the other. Start with
the shorter line which is for the down control.
3. Feed the end of the down control line through the two holes at the top
of the rudder housing.
FORWARD

4. WIth the line already passed though the housing, pick up
the rudder section and feed the line though the upper most
hole located along the circular drum. You will notice two
Phillips heads screws very close to one another. Loosen the
screws a few turns and pull the line up and around the forward
most Phillips head screw and tighten it down.
5. Now take the up control line (the longer line of the
two that you previously compared) and feed it through
the two holes at the top of the rudder housing.
6. To fasten this line to the rudder drum, you will pass
the line around the top of the drum and insert the end
through the hole just below where you inserted the
down control line. Wrap the end of the line around the
rear most Phillips head screw and tighten down.
7. The next step is to put the two rudder
parts back together. Slide the bolt through
the rudder portion of the assembly and
place the plastic washer over the threaded
end.
As you insert the rudder half into the housing, you have to be
careful to not allow the rudder lines fall off the track around the
circular rudder drum. To prevent this, pull up on the up/down con-
trol lines that are exposed on the deck to remove the slack and
keep the lines tight around the drum.
Thread in the bolt to hold the two halves together. IMPORTANT
NOTE: DO NOT SCREW DOWN THE BOLT SO THAT IT IS TIGHT.
YOU ACTUALLY WANT IT TO BE A FAIRLY LOOSE CONNECTION
ALLOWING AN 1/8”-1/4” OF MOVEMENT. IF IT IS TOO TIGHT, THE
RUDDER WILL NOT GO UP PROPERLY.
LOWER HOLE
UPPER HOLE
Pull up on these
lines here.

Steering Control Lines
1. The two lines that exit the sides of the boat are for the steering. Before running the lines to the rud-
der, place the steering handle in the close to center position. On the Mirage Adventure, keep the steer-
ing handle turned slightly to the right.
2. Run the right steering line up to the right
side of the rudder. Pass the line through the
hole and pull the slack out of the (make sure
that you don’t pull too hard and move the
steering handle). Wrap the line around the
Phillips head screw and tighten down to hold
the line.
3. The left side steering line will be insert-
ed into the hole at the bottom of the bolt that
connect the two halves of the rudder.
Continue to the pass the line up through the
bolt and pull the line taught. Wrap the end
around the Phillips head screw and tighten
down.
4. Go ahead and try the left and right steering. If you
notice that the rudder is turning more or less to one
direction, you may need to adjust the steering lines a
little bit to get the steering balanced.
8. Now you are ready to trim the up/down control. With the
rudder in the down position, loosed the forward most screw
to free up the down control line. By pulling on this line, you
will stretch the Bungee cord in the hull (you may need to pull
a little on the down control line exposed on the deck to help
you stretch the Bungee). What you want to do is pull some
more of the line and wrap it around the Phillips head screw
and tighten it down. This stretch that you are getting will
give you down tension on the rudder.
9. At this point you want to try the up down handle to see how the up down control works. You may
need to adjust the lines further to get them adjusted just way you want them. If you need to get more
up control, follow the same adjustment procedure with the up control line. If it is difficult for the rudder
to disengage and go up, try to loosen up the bolt that connects the two halves of the rudder together.
