Holzberg Communications KY405 Two-Way Portable Radio Transmitter User Manual Ky105 405 Use s Manual
Holzberg Communications, Inc. Two-Way Portable Radio Transmitter Ky105 405 Use s Manual
KY 405 Users Manual
K
Ky
yo
os
se
ey
y
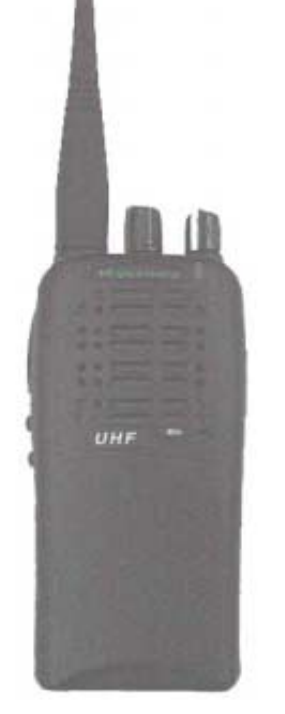
Ky105/405 Portable Transceiver
User’s Manual
Ky105/405 Quick Reference
2
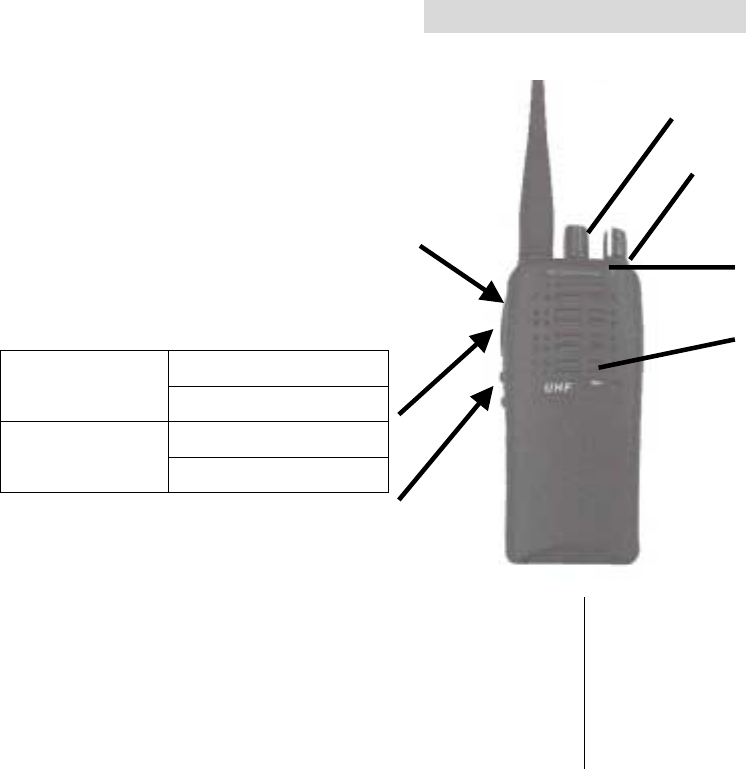
Channel Selector
Power/Volume Knob
PTT Button
Status LED
Microphone
SHORT:
Side Button 1 LONG:
SHORT:
Side Button 2 LONG:
Note: Fill in blank with the Button’s Function
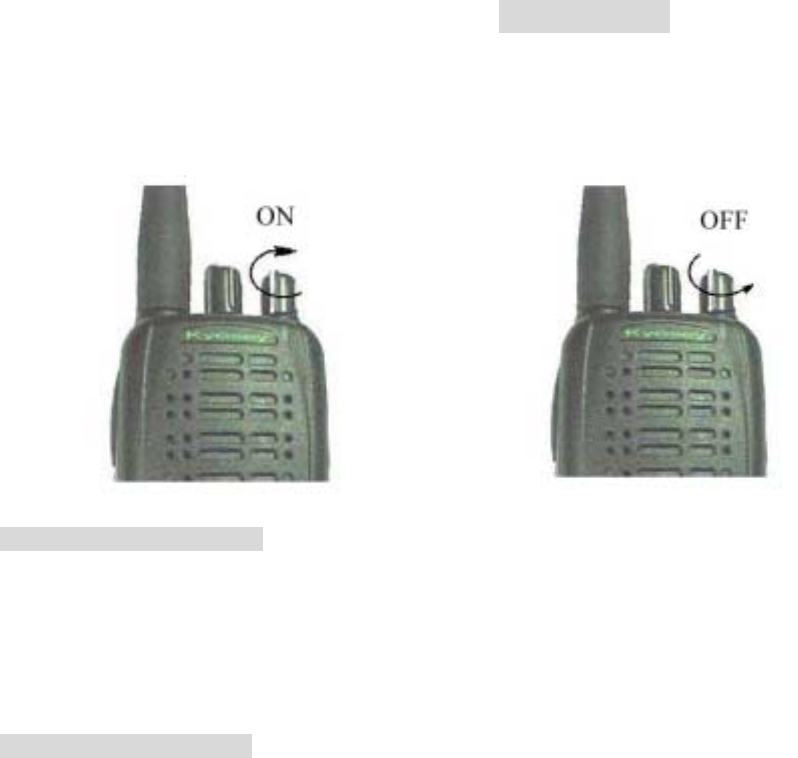
Turning Power On
Rotate the Power/Volume Knob clockwise to turn on the
transceiver. If the LED Indicator light GREEN to RED then
OFF, and a high voice beep means that the transceiver is ok,
otherwise, a low long beep means that Self-Tests failure.
Turning Power Off
Rotate the Power/Volume Knob anti-clockwise until a click
is hears to turn the transceiver off.
Adjusting Volume
1. If there is no receive audio, you need hold down the

Ky105/405 Quick Reference
3
Monitor button to open the squelch, so you can hear
background noise.
2. Continue to hold the Monitor Button and rotary the
Power/Volume Knob to desired volume level, turn
clockwise to increase or anti-clockwise to reduce the
volume.
3. Release the Monitor Button.
To Select a Channel
Rotate the Channel Selector Knob to select the channel
number.
To Transmit
1. Rotate the Channel Selector Knob to select a desired
channel.
2. Press and hold down PTT button, hold the transceiver
about 2.5 ~ 5cm (1 to 2 inches) from your lips to
microphone and speak in your normal speaking voice.
3. Release the PTT button to return to the receive mode.
To Receive
1. Turn on power.
2. Adjust the volume
3. Select a desired channel
4. When a signal with proper or matching sub-tones is
received, you will hear the transmissions from other
transceivers. You may need to adjust the volume more
precisely.
Deleting Nuisance Channel
1. While transceiver locked onto unwanted channel in the
SCAN Mode, press the “Nuisance Delete” Button until
you hear two beeps.
2. Release the “Nuisance Delete” Button.
Note:
“Nuisance Delete” can only be used if your dealer has
programmed one function button for it.
Ky105/405 Quick Reference
4
LED Indicator
LED indicate / color Explain
Light “RED” continuously Transmitting a message
Light “GREEN” continuously Receiving a signal
“GREEN” flash Scanning
Light “ORANGE” continuously A sub-tone code is received that is matching the code
programmed in your radio. The code may be a CTCSS
code or DCS code.
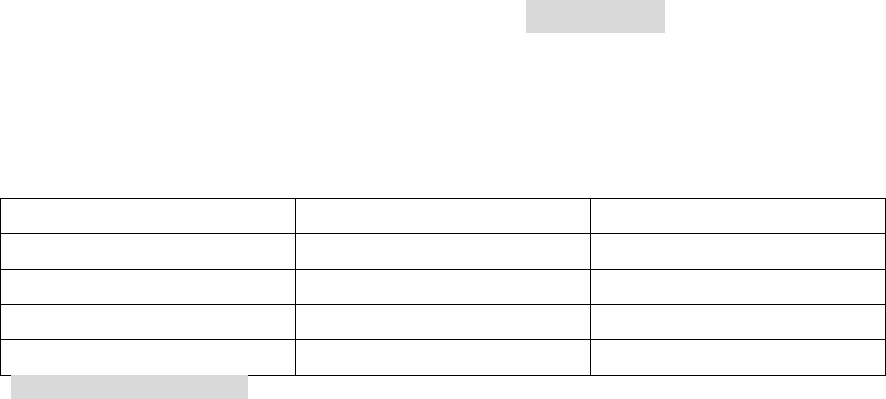
Beep for Side Button Operating
Button Function Positive Beep Negative Beep
Scan Scan ON Scan OFF
Power High Power Low Power
Squelch Tight squelch Normal squelch
Repeater/Talk-around Without using a repeater Using a repeater

CONTENTS
5
INTRODUCTION
TRANSCEIVER DETAILS
LED INDICATOR
PROGRAMMABLE BUTTON
BEEPS
GETTING STARTS
BATTERY INFORMATION
INSTALLING BATTERY PACK
REMOVAL OF BATTERY
INSTALLING THE ANTENNA
REMOVING THE ANTENNA
ATTACHING THE BELT CLIP
REMOVING THE BELT CLIP
BASIC OPERATION
SWITCHING POWER ON/OFF
ADJUSTING THE VOLUME
SELECTING A CHANNEL
TRANSMITTING A MESSAGE
RECEIVING A MESSAGE

CONTENTS
6
ADVANCED OPERATION
REPEATER/TALK-AROUND
SETTING SQUELCH LEVEL FOR TIGHT OR NORMAL
SELECTING OUTPUT POWER
HANDSFREE TRANSMISSION (VOX)
SCAN
SCAN MODEL
SCAN OPERATION
TALKBACK
DELETE A NUISANCE CHANNEL
TO RESTORE THE DELETED CHANNEL TO THE SCAN LIST
PRIORITY FUNCTION
Introduction
7
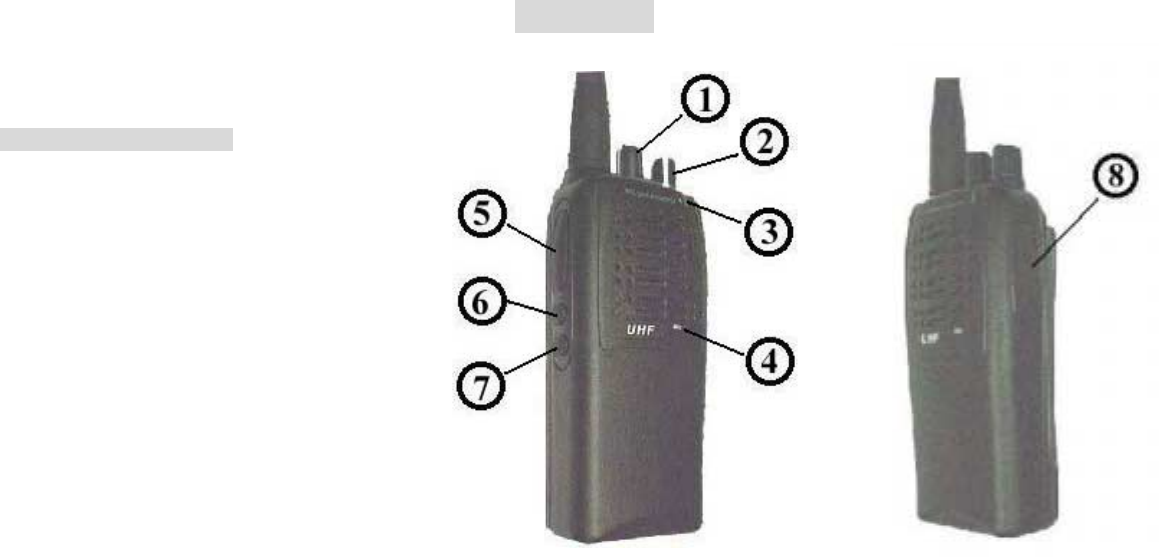
TRANSCEIVER DETAILS
①
①①
①Channel Selector Knob
Selects operating channels.
②
②②
② Power/Volume Knob
Switches the transceiver ON or OFF. Also increases or decreases the transceiver volume.

Introduction
8
③
③③
③ LED Indicator
Indicate radio’s status
LED indicate / color Explain
Light “RED” continuously Transmitting a message
Light “GREEN” continuously Receiving a signal
“GREEN” flash Scanning
Light “ORANGE” continuously A matching sub-tones code is received. It can be a
CTCSS code or DCS code.
④
④④
④ Microphone
Hold radio upright while speaking clearly into the microphone.
⑤
⑤⑤
⑤ PTT (Push-to-Talk) Button
This button is used to switch between transmission and reception. To transmit, hold in this button. To receive, just release this
button.
⑥
⑥⑥
⑥ Side Button 1 (Programmable)
⑦
⑦⑦
⑦ Side Button 2 (Programmable)
There are two Side Button in your radio and they can be programmed with different function by your dealer.
Please contact your dealer to know what function programmed for your side button.

Introduction
9
Press the side button as one of three methods of operation:
z SHORT means click the button then release it, or
z LONG means press the button for the long time then release it, your dealer may programmed the long time different, or
z HOLD down the button, while you need check the status of radio or adjust the radio’s parameter, just hold down the button.
You may operate the side button as SHORT or LONG to activate one of its functions, but not two for once pressing.
Button Function SHORT/LONG HOLD
Monitor - Monitor activity on your
selected channel
-
Scan To starts scanning from current
channel or quit scanning -
Nuisance Delete When radio is scanning, you can
temporary remove the unwanted
channel from the scan list.
-
Power The output power is toggled between
low and high. -
Repeater/Talk-around Using a repeater or allow
communication direct with other
transceivers without using a repeater.
-
Squelch To toggle the squelch level between
normal and tight. -
⑧
⑧⑧
⑧ Accessory Connector Cap

Introduction
10
BEEP
1. Power ON Self Tests Success Beep
2. Power ON Self Tests Failure Beep
3. VOX Power ON Beep ( High Sensitivity )
4. VOX Power ON Beep ( Low Sensitivity )
5. Positive Beep
6. Negative Beep
Note:
Mark means high voice beep.
Mark means low voice beep
Introduction
11
Beep for Side Button
Some beeps of the programmed Side Button are exchangeable, it means the function are exchangeable.
Side Button Function Positive Beep Negative Beep
Scan Start scanning Quit scan mode
Power High output power Low output power
Squelch Tight squelch Normal squelch
Repeater/Talk-around Without using a repeater Using a repeater
BATTERY INFORMATION
FOR LONGEST BATTERY LIFE AND USING KNACKS
Three types rechargeable batteries can be used as the supply power, Nickel Cadmium (Ni-Cd), Nickel Metal Hydride (Ni-MH) and
Lithium Ion (Li-ion).
To assure the highest performance and longest cycle life, should you properly use the battery pack comply with following simple
rules:
z To enable you to obtain maximum battery capacity, a new battery must be fully charged for at least 14 to 16 hours
continuously.
z Using a non- Kyosey brand charger may damage your battery, also will expire its warrant.
z You can charge the battery that is connected to a transceiver, but please turn the radio off to fully charge it.
z If possible, store and charge the battery at a room temperature (25℃). Do not charge a cold battery that is at 10℃ or

Getting Started
12
below, if so may cause the battery to leak and become an inefficacious battery.
z Don’t charge a hot battery that is at above 35℃. This will decrease cycle life.
Note: The Kyosey brand Quick Charger built-in a temperature sensor to ensure your battery charged within above
temperature range.
z New batteries can be stored up to two years without significant cycle loss. Store new / unused batteries at room
temperature in a cool, dry area.
z A battery that has been in storage should be recharged at least 14 to 16 hours continuously before being put into
service.
z Don’t return fully charged batteries to the charger for an "extra boost." This will significantly reduce cycle life.
z Don’t leave your transceiver and battery in the charger when not charging. Continuous charging will shorten battery life
(Don't use your charger as a transceiver stand).
z For optimum battery life and operation, use Kyosey brand chargers only. Our batteries and chargers have been
designed to operate as an integrated energy system.
Getting Started
13
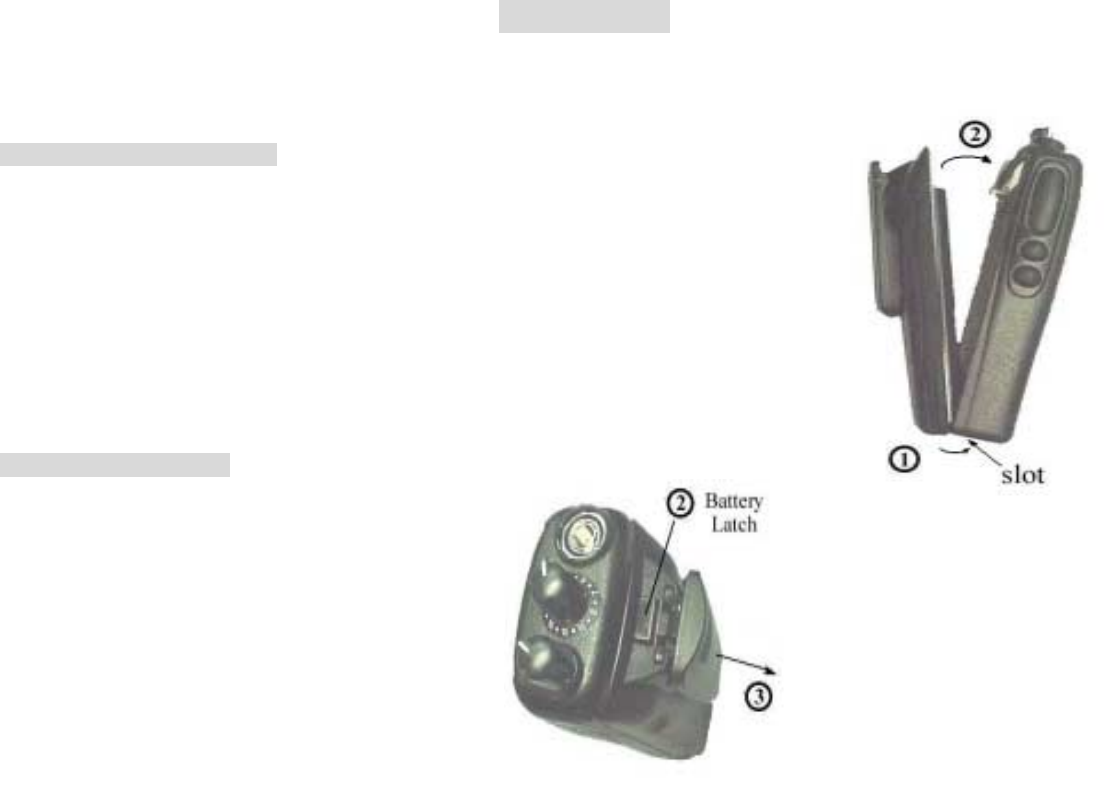
INSTALLING BATTERY PACK
1. Put the battery pack onto the bottom of the transceiver.
2. Gently push the battery pack toward the transceiver back edge until you hear a
click.
REMOVAL OF BATTERY
1. Before removing the battery, you must
turn the radio off.
2. Press down the battery release button
located in the back of the battery pack.
3. Remove the upside of the battery pack
separate from the transceiver body and
take away then.
Getting Started
14
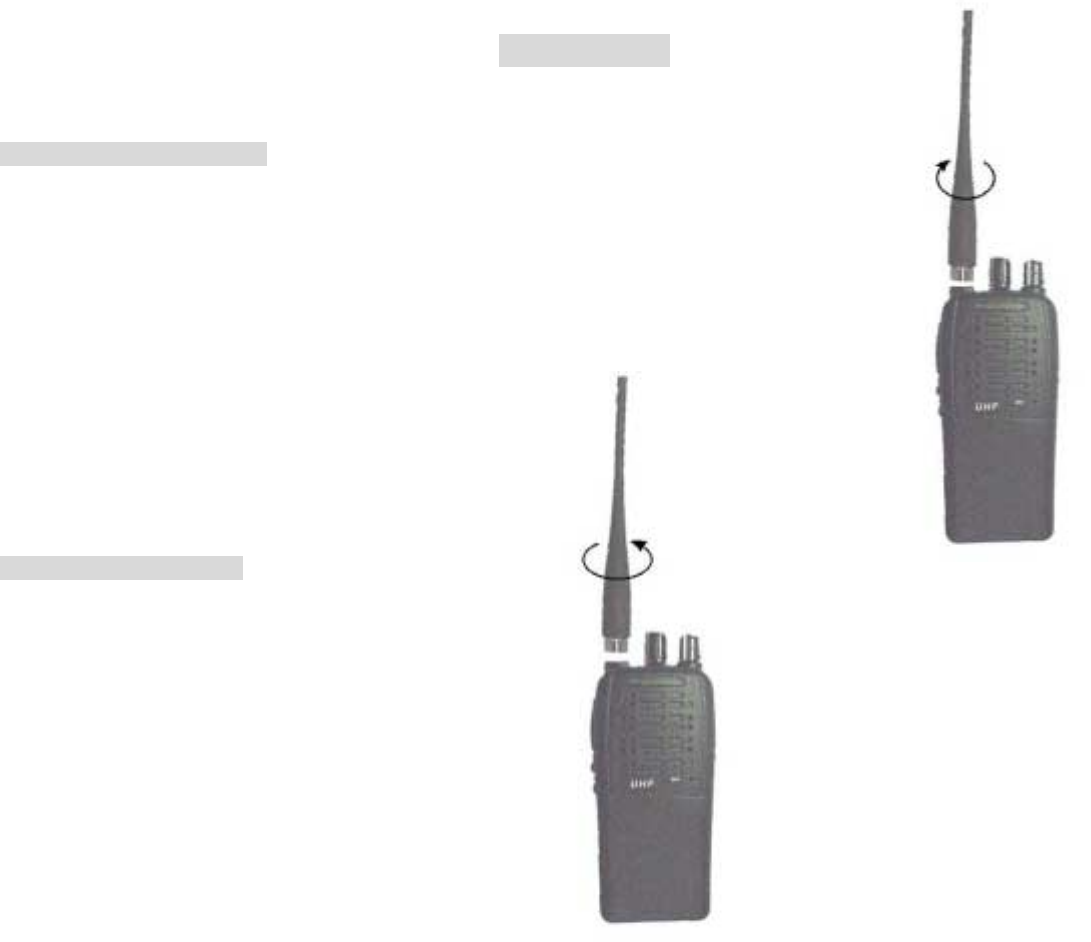
INSTALLING THE ANTENNA
Fasten the antenna to the radio by placing the threaded end of the antenna into the
antenna connector. Rotate the antenna clockwise until tight.
EMOVING THE ANTENNA
Turn the antenna in an anti-clockwise
direction until it disengages from the transceiver.
Getting Started
15
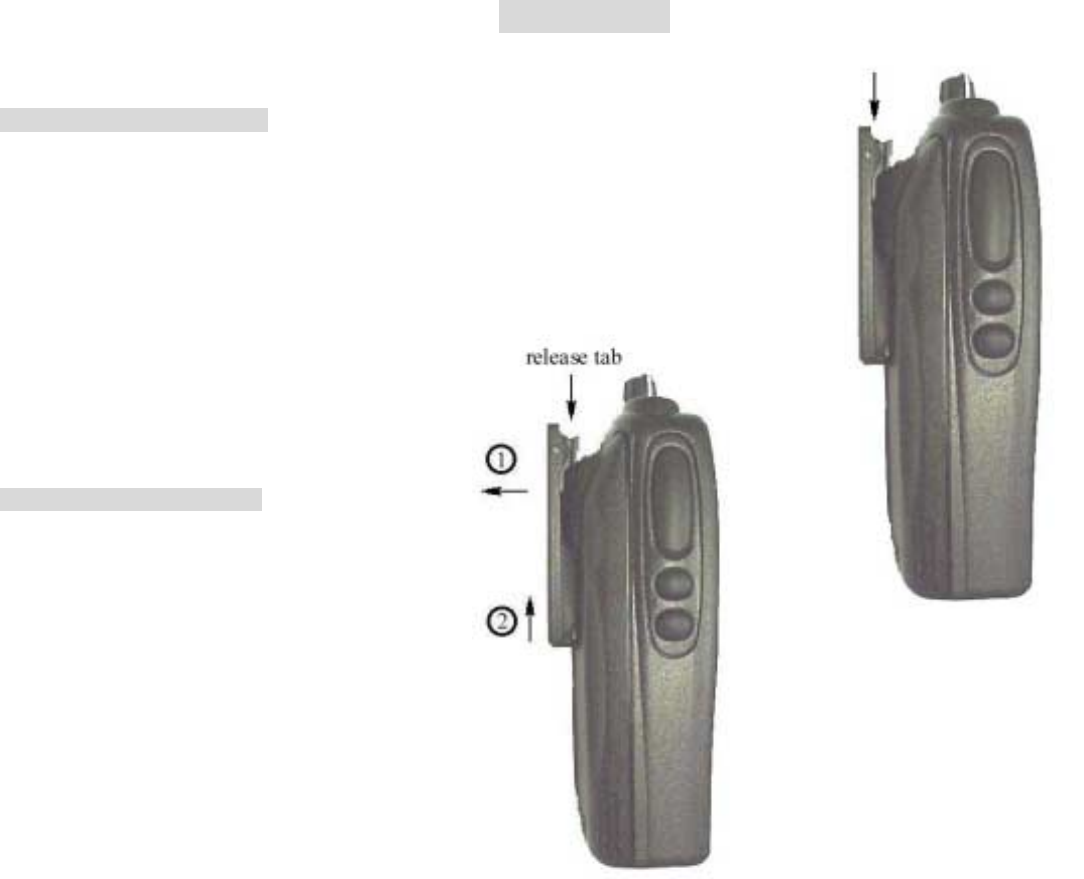
ATTACHING THE BELT CLIP
1. Align mounting rails of the radio with the grooves of belt clip.
2. Slide the belt clip downwards until it clicks into place.
REMOVING THE BELT CLIP
1. Insert the end of a key to push the
release tab of radio away.
2. Slide the belt clip upwards.
Getting Started
16
WITCHING POWER ON/OFF
z To switch ON your transceiver, rotate the Power/Volume Knob clockwise. If the transceiver works proper, LED Indicator
will light GREEN, then RED and finally OFF, and you can hear the Self-Tests success beep, otherwise the Self-Tests failure
beep may be heard.
z To switch OFF the transceiver, turn the Power/Volume Knob fully anti-clockwise until a “click” is heard.
ADJUSTING THE VOLUME

Basic Operations
17
z If there is no receive audio, you need hold down the Monitor button to open the squelch, so you can hear background noise.
z Continue to hold the Monitor Button and rotary the Power/Volume Knob to desired volume level, turn clockwise to increase
or anti-clockwise to reduce the volume.
z Release the Monitor Button.
SELECTING A CHANNEL
The 16-channel provide for regular operating channel. Use the Channel Selector Knob to choose your desired channel.
You should not select a channel unless it is programmed in the transceiver. Your dealer can best explain how channel had
programmed.
z Rotate the Channel Selector Knob to select your desired channel number.
TRANSMITTING A MESSAGE
1. Turn ON your transceiver.
2. Rotate the Channel Selector Knob to select a desired channel.
3. Press and hold down PTT, hold the transceiver about 2.5 ~ 5cm (1 to 2 inches) from your lips to microphone and speak in
your normal speaking voice.
4. Release the PTT button to return to the receive mode.

Basic Operations
18
RECEIVING A MESSAGE
1. Turn your transceiver ON.
2. Adjust the volume
3. Select a desired channel
4. When a signal with proper or matching sub-tones is received, you will hear the transmissions from other transceivers; you
may need to adjust the volume more precisely.

Advanced Operations
19
REPEATER/TALK-AROUND
At following condition, the Talk-around function will make you can talk directly to other transceiver without using a repeater:
z If the repeater is deactivate, or
z You are out of the repeater range, but you can directly talk to other transceiver.
To toggle Talk-around ON or OFF, your dealer must program a Side Button for the “Repeater/Talk-around” function.
Pressing the Repeater/Talk-around button, if you hear the Positive Beep, your transceiver is without using a repeater.
Others, for the Negative Beep, your transceiver is using a repeater.
SETTING SQUELCH LEVEL
Squelch acts as a kind of filtering system, which control the amount of signals the transceiver receives. Setting the
transceiver to the Tight Squelch, you can avoid some unwanted signals or noise. But you may not receive a weak signal far from
you. So you should select the Normal Squelch for it.
Pressing the Squelch button to select the squelch level between Tight and Normal.
z The Positive Beep means your transceiver is Normal Squelch.
z The Negative Beep means your transceiver is Tight Squelch.
SELECTING OUTPUT POWER
Each channel independently programmed for either low power or high output power. However, you can change the output
power by yourself.
z With high output power, your signal may transmit farther.
z Selecting low power conserves the battery if you can reliably communicate with others.

Advanced Operations
20
Each time you pressing the Power Button, the output power is toggle between LOW and HIGH.
z The Positive Beep means output power is HIGH.
z The Negative Beep means output power is LOW.
HANDSFREE TRANSMISSION (VOX)
VOX (Voice Operated eXchange) is an automatic system witch allows you to automatically switch the transmission in hands
free mode just by speaking in the built-in microphone of a headset.
VOX OPERATIONS
To set your transceiver to VOX model, you have to:
1. Turn OFF your radio, then
2. Switch on the radio keeping pressed the Side Button 1.
3. Connect the optional headset with built-in microphone to the microphone connector located on the transceiver’s side.
4. Ensure that the headset’s built-in microphone is located close to the side of your mouth.
None: PTT button is disabled during VOX.
SELECTING VOX SENSITIVITY
To change the VOX sensitivity between low and high, you should
1. Turn OFF your radio, then
2. Switch on the radio keeping pressed the Side Button 2.

Advanced Operations
21
SCAN
Scan operation tells the radio to monitor a number of channels where are some activities. Your dealer can program more
than 16 channels on the scan list.
When scanning, the transceiver checks each channel for activity and only stops on a channel if a signal is present.
SCAN OPERATION
To toggle scan ON/OFF by using the Side Button which programmed for “SCAN”.
1. Press the “SCAN” button to begin scanning.
2. Press the “SCAN” button to stop scanning while the radio works at scan model.
Note: The LED Indicator flashes the GREEN when scanning.
TALKBACK
If the “Talkback” function is active, direct you can communicate with others who call you just before the scan resume time
finish. Your dealer may tell you more detail about this function.
DELETE A NUISANCE CHANNEL
When the transceiver scans to a channel that you do not wish to hear, you can temporarily remove the channel from the scan
list using the Nuisance Channel Delete feature.
Advanced Operations
22
While the transceiver locked onto unwanted channel, press the “Nuisance Delete” Button until you hear two beeps.
Note: If the priority function is active by your dealer, you cannot remove the priority channel from the scan list. The last
channel cannot delete from the scan list too.
Note: To add a deleted nuisance channel back into the scan list, you must restart the radio.
PRIORITY FUNCTION
The priority function would spend more time to monitor the priority channel during scanning. Your dealer can program the
priority function using the CPS software.
PRIORITY FUNCTION SCAN SEQUENCE
Activity ch1 ➠ ch2 ➠ ch3 ➠ ch4 … ch1
Inactivity ch1 ➠ ch2 ➠ ch1 ➠ ch3 ➠ ch1 ➠ ch4 ➠ ch1