Honey Bee HB-1305 PAE BLUETOOTH DONGLE User Manual PAE BT Dongle V01B
Honey Bee (Hong Kong) Ltd. PAE BLUETOOTH DONGLE PAE BT Dongle V01B
User Manual
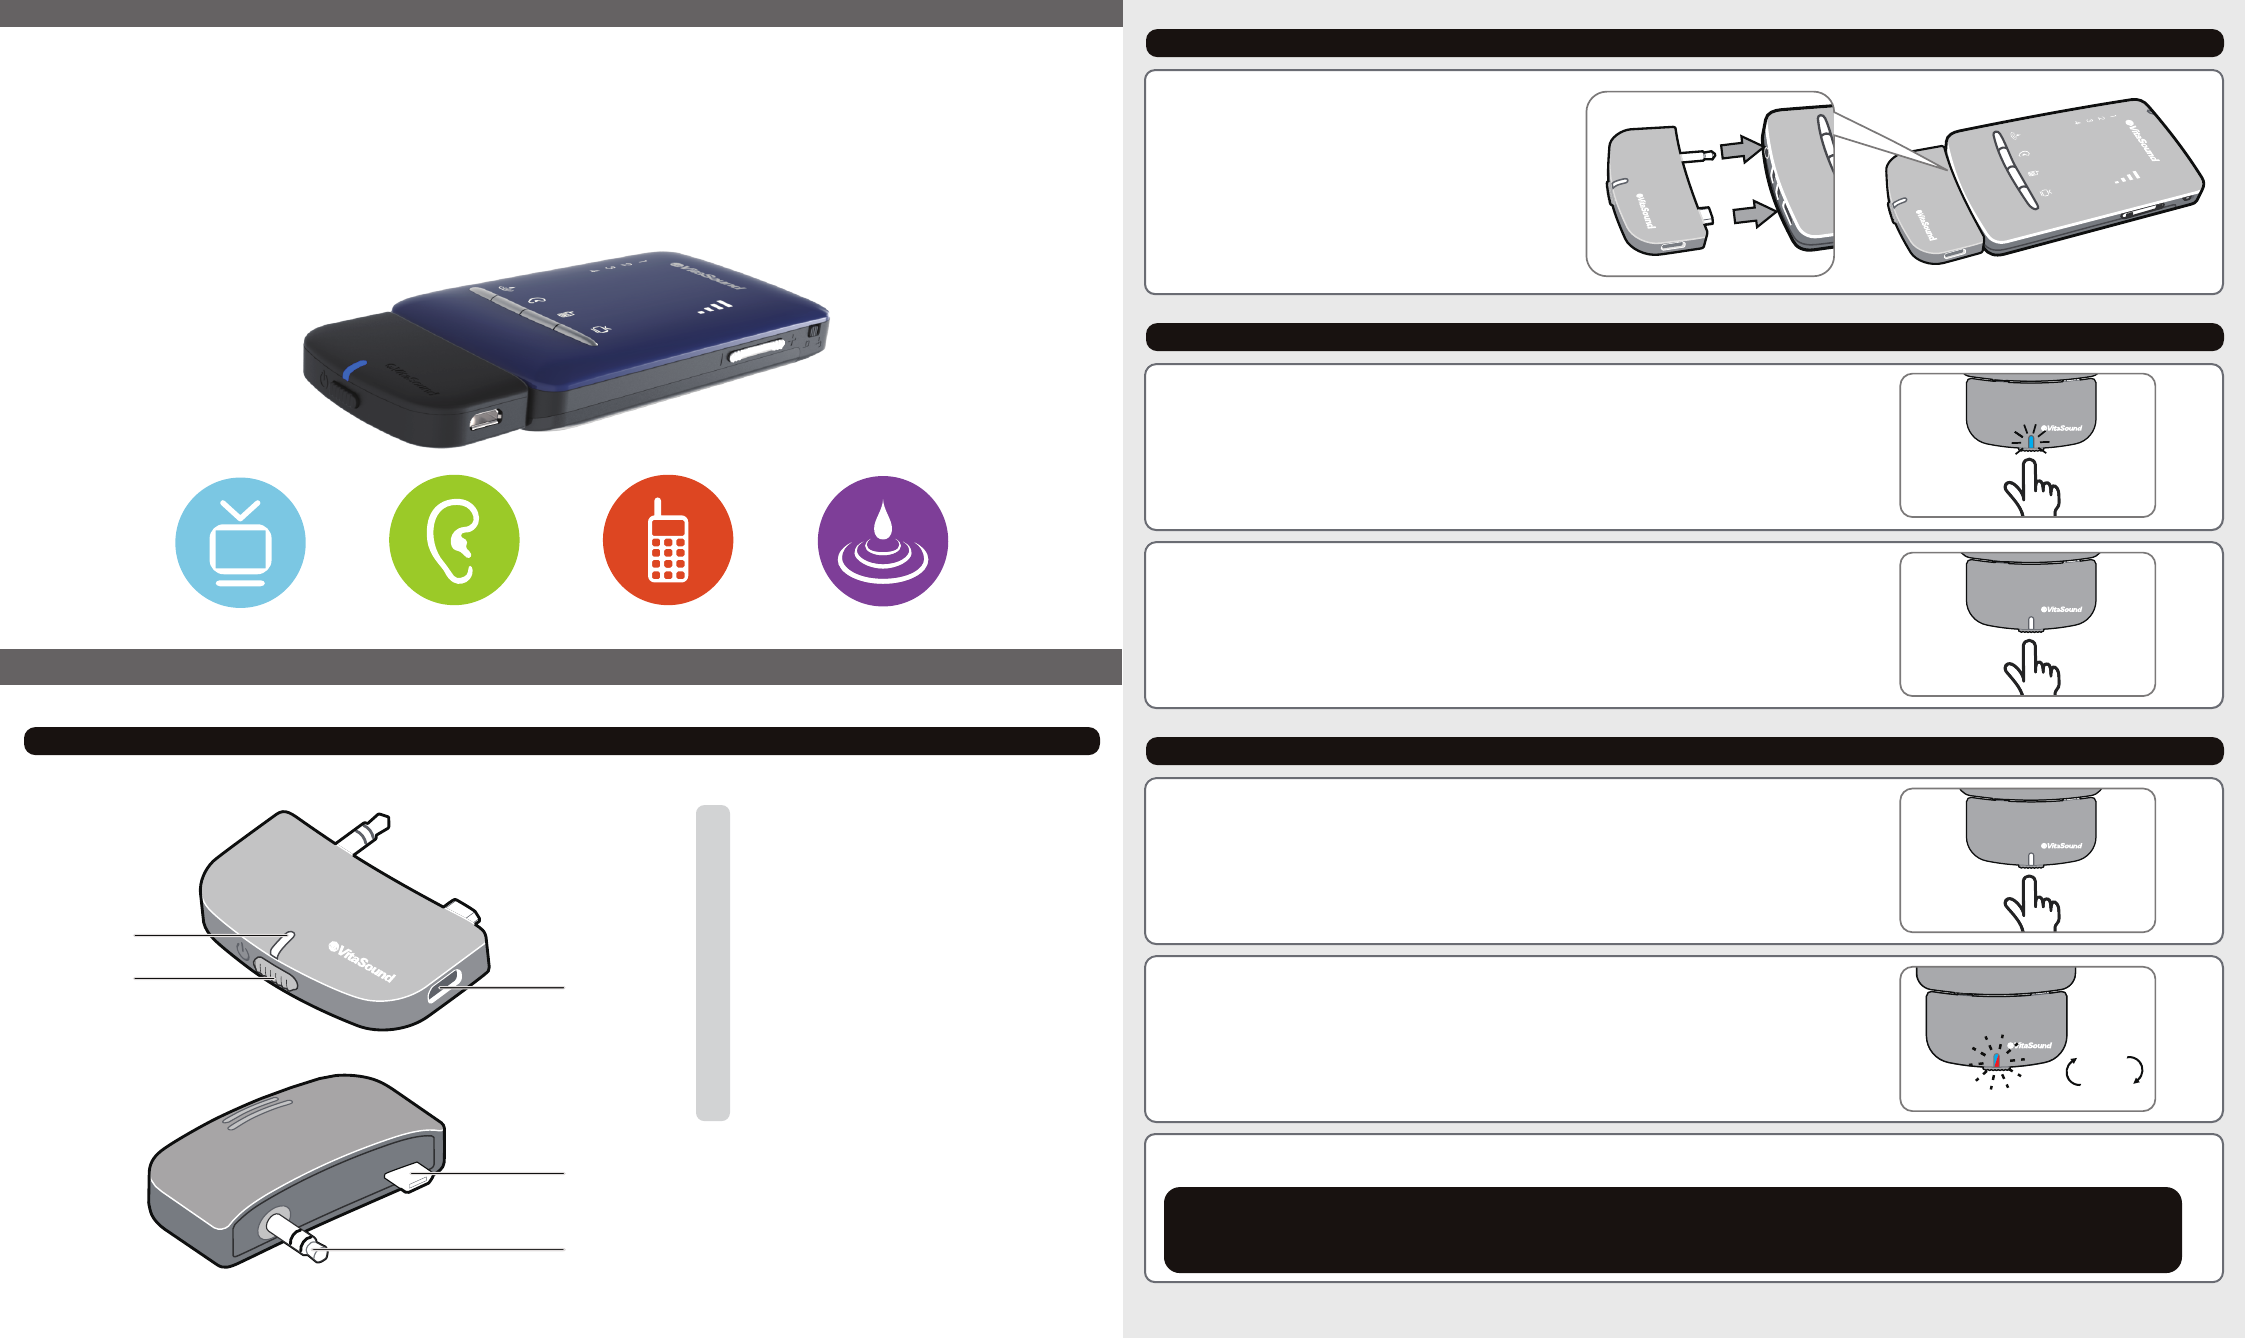
Identifying the part
1
2
3
4
5
1. Power / Pairing Button
2. LED Indicator (Blue / Red)
3. Charging port
4. Micro-USB plug (No function)
5. Stereo plug
Pairing with cell phone
1. Make sure that the PAE Bluetooth Dongle is powered off first.
3. Only release the Power/Pairing button when the LED is in Red/Blue alternate flashing.
Note:
Note: The LED lights up and ashes in Blue before the Red/Blue alternate ashing, so please DO NOT release the
Power/Pairing Button in this status during pairing process until the Red/Blue alternate ashing occurs.
Connecting with PAE-300
Plug the Stereo plug and the Micro-USB
plug on the PAE Bluetooth Dongle all the
way into the Stereo port and Micro-USB
charger port on the PAE-300 respectively.
Red
Blue
2. Press and hold the Power/Pairing Button for approximate 8 seconds
until the LED flashes in Red and Blue alternately. This means the PAE
Bluetooth Dongle is searching a device to pair.
1. Power On
When the PAE Bluetooth Dongle is off, press and hold the
Power/Pairing Button until Blue LED lights up and flash
(approximate 5 seconds).
5sec.
2. Power Off
When the PAE Bluetooth Dongle is on, press and hold
the Power/Pairing Button until Red LED is on
(approximate 5 seconds) and then off.
5sec.
Basic operation
Bluetooth Dongle
User Manual
Personal Audio Enhancer
PAE-300
4. From the cell phone setting menu, seek a Bluetooth device in pairing mode.
Once “PAE Bluetooth Dongle” name is displayed, select it.
5. If password is required by the cell phone, enter “0000” for the password.
6. Once the pairing succeeds, the LED will flash in Blue in every 8
seconds.
Blue
8sec.
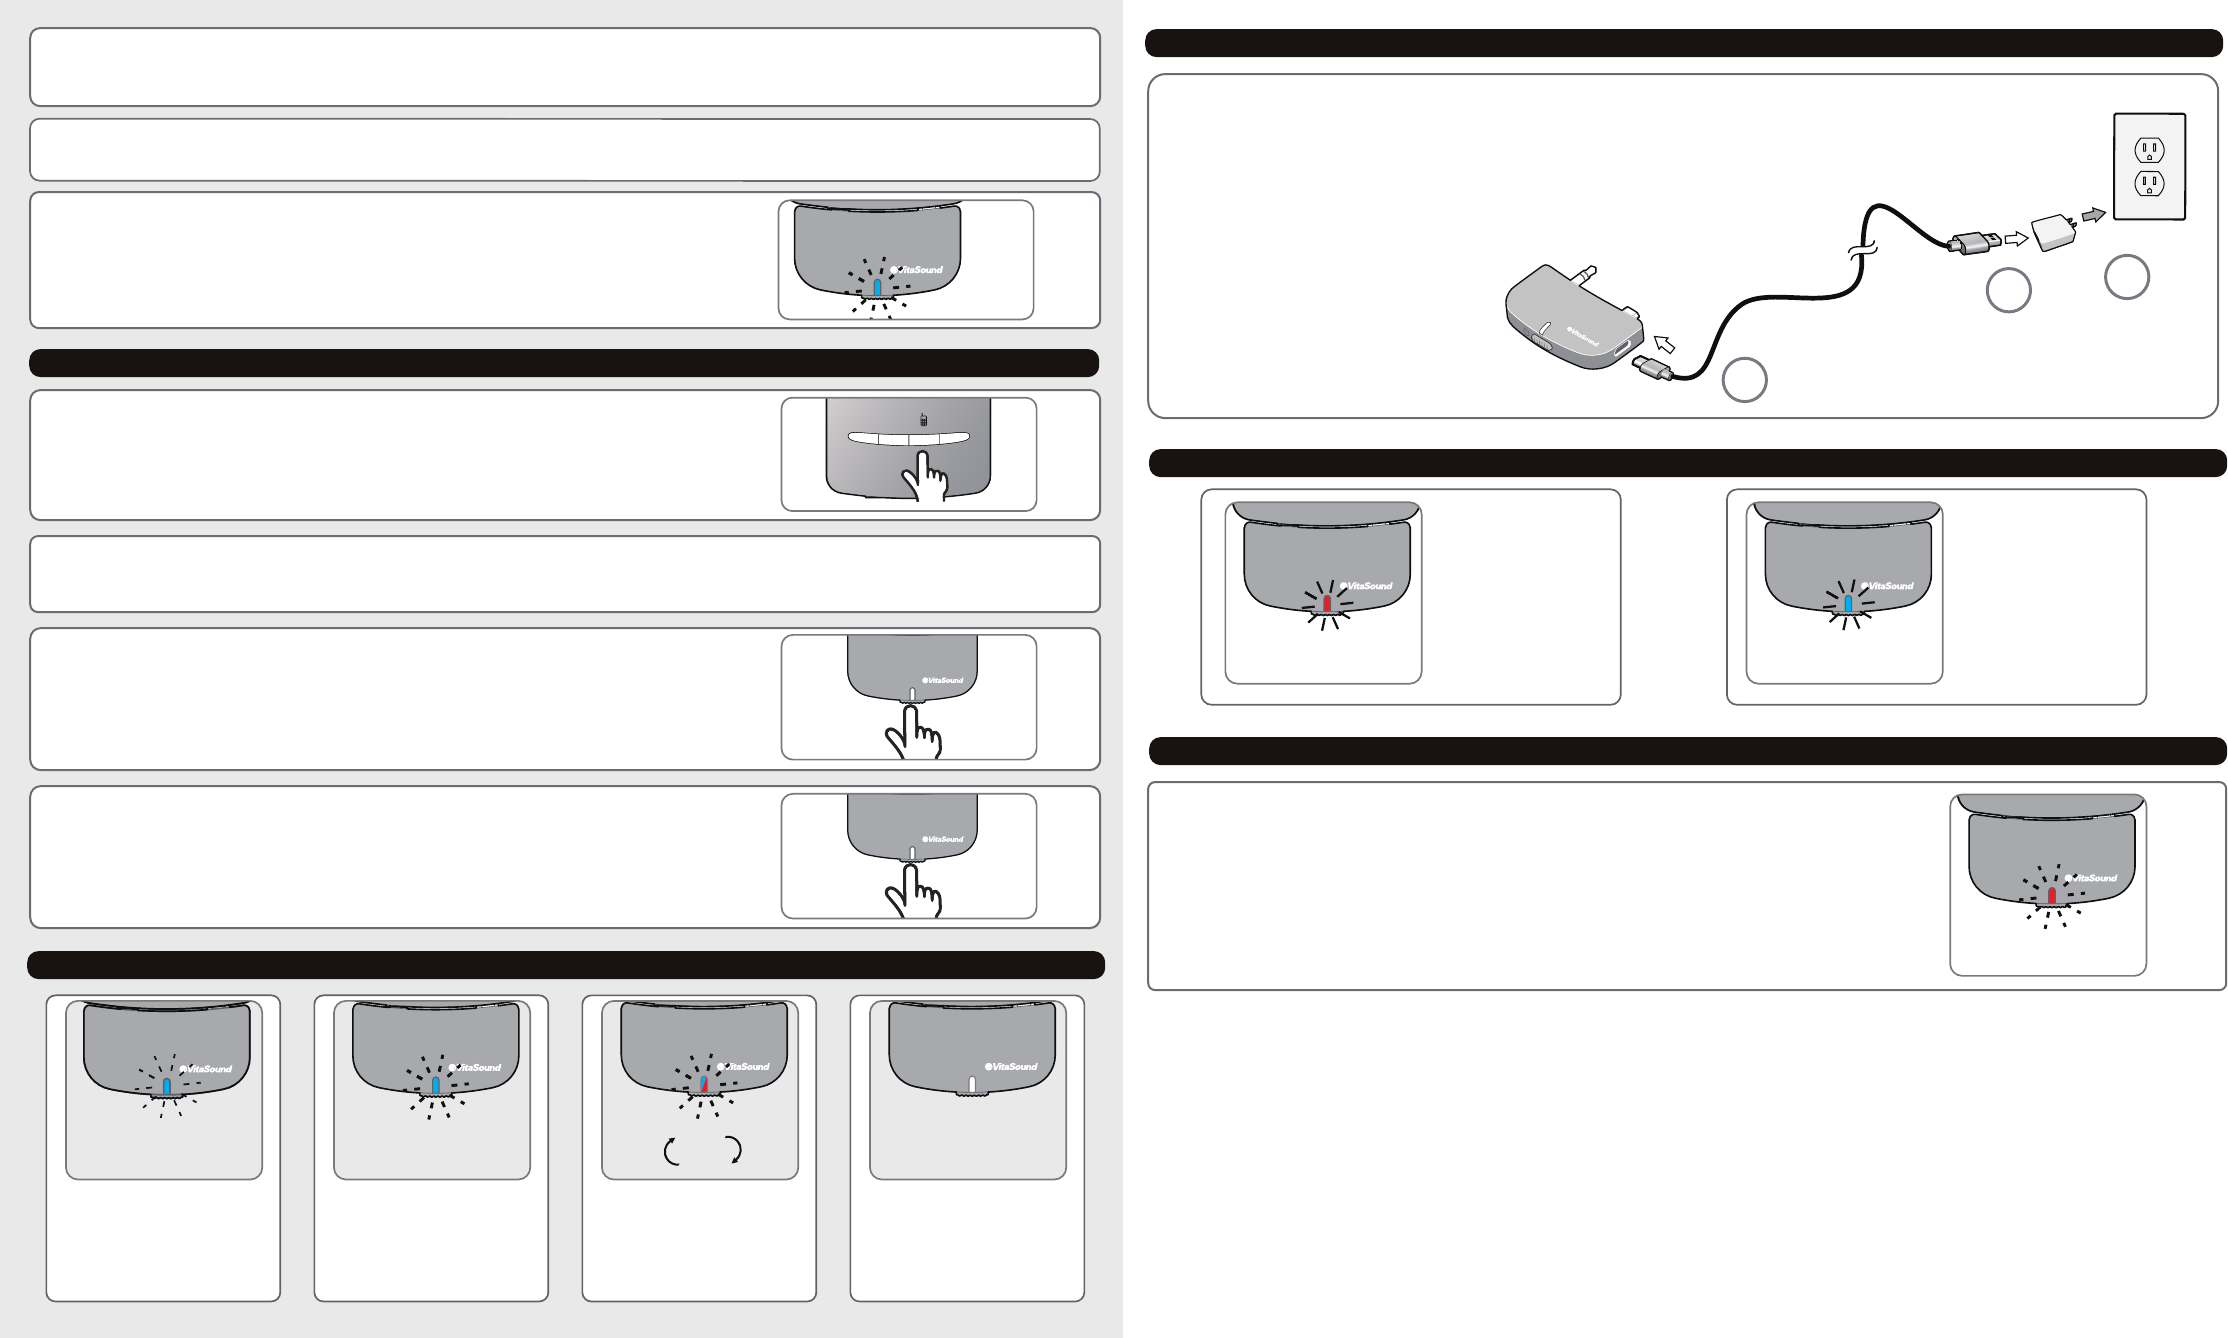
Battery charge
1
23
1. Plug a micro-USB cable (Optional) into the charging port on the PAE
Bluetooth Dongle.
2. Connect the other side of micro-USB cable with a charger adaptor
(Optional) with the output of 5V==1A (or 1000 mA)
3. Plug the charger adaptor into the wall socket to start charging.
LED Indicator Status - Operation
Flash in Blue in
every 2 seconds:
No connection with
any device.
Blue
2sec.
Flash in Blue in every
8 seconds:
Connected with a
device successfully.
Blue
8sec.
Red
Blue
Red / Blue alternate
flashing:
PAE Bluetooth Dongle
In pairing mode.
No light up:
PAE Bluetooth Dongle
is powered off.
Solid Red:
Charging
Red
Solid Blue:
Charging completed
Blue
LED Indicator Status - Charging
Low Battery
• The LED Indicator will flash in Red when battery level is low. Please turn
off and charge immediately.
• A short Beep sound will be generated through the headset while battery
level is low.
Using PAE Bluetooth Dongle to make or receive a call
1. Make sure the PAE-300 is in Phone Mode before using the PAE
Bluetooth Dongle to make or receive a call
(Press and release the Phone Mode button on the PAE-300.)
2. To make a call, dial a phone number on your cell phone. You will hear ringing tone on the PAE-300 headset
when your cell phone is calling.
3. To receive a call, press and release the Power/Pairing Button on
the PAE Bluetooth Dongle
(or press the relevant button on your cell phone directly.)
4. To hang up the call, press and release the Power/Pairing Button to
finish the call
(or press the relevant button on your cell phone directly.)
Red

Certication and Compliance
FCC Statement:
This device complies with Part 15 of the FCC Rules. Operation is subject to the following two conditions: (1) this device may not cause
harmful interference, and (2) this device must accept any interference received, including interference that may cause undesired
operation.
- - - - -
Changes or modications not expressly approved by the party responsible for compliance could void the user’s authority to operate the
equipment.
This equipment has been tested and found to comply with the limits for a Class B digital device, pursuant to Part 15 of the FCC Rules.
These limits are designed to provide reasonable protection against harmful interference in a residential installation. This equipment
generates, uses and can radiate radio frequency energy and, if not installed and used in accordance with the instructions, may cause
harmful interference to radio communications. However, there is no guarantee that interference will not occur in a particular
installation.
If this equipment does cause harmful interference to radio or television reception, which can be determined by turning the equipment
o and on, the user is encouraged to try to correct the interference by one or more of the following measures:
- Reorient or relocate the receiving antenna.
- Increase the separation between the equipment and receiver.
- Connect the equipment into an outlet on a circuit dierent from that to which the receiver is connected.
- Consult the dealer or an experienced radio/TV technician for help.